

Page 1

Model MT5634ZPX-PCI
Internal Data /Fax Modem
Owner’s Manual
Page 2

Owner’s Manual
MT5634ZPX -PCI
82092100, Revision A
This publication may not be reproduced, in whole or in part, without prior
expressed written permission from Multi-Tech Systems, Inc. All rights
reserved.
Copyright © 1998 by Multi-Tech Systems, Inc.
Multi-Tech Systems, Inc. makes no representations or warranties with
respect to the contents hereof and specifically disclaims any implied
warranties of merchantability or fitness for any particular purpose.
Furthermore, Multi-Tech Systems, Inc. reserves the right to revise this
publication and to make changes from time to time in the content hereof
without obligation of Multi-Tech Systems, Inc. to notify any person or
organization of such revisions or changes.
Record of Revisions
Revision Description
A Manual released.
(12/15/98)
Trademarks of Multi-Tech Systems, Inc. are as follows: MultiModem,
MultiModemII, MultiModem, Multi-Tech, and the Multi-Tech logo.
MNP, Microcom Network Protocol is a trademark of Microcom Inc.
Macintosh is a trademark of Apple Computer Inc.
PC-DOS: International Business Machines Corporation
Pentium: Intel Corporation
AT&T is a trademark of American Telephone and Telegraph Co.
Windows® and Windows® 95 are registered trademarks of Microsoft
Multi-Tec Systems, Inc.
2205 Woodale Drive
Mounds View, Minnesota 55112 U.S.A.
(612) 785-3500 or (800) 328-9717
U. S. FAX 612-785-9874
Fax-Back Service 612-717-5888
Technical Support (800) 972-2439
BBS (612) 785-3702 or (800) 392-2432
Internet Address: http://www.multitech.com
Page 3

Contents
Chapter 1—Introduction and Description
Congratulations ..................................................................................... 6
Features ................................................................................................. 7
Peripiheral Component Interconnect (PCI) .......................................... 8
V.90 Support/Functions ......................................................................... 9
What is in Your Modem Package? ...................................................... 10
How to Use This Manual ..................................................................... 11
Typographic Conventions ................................................................... 12
Chapter 2—Installation
Introduction ......................................................................................... 14
What Youll Need ................................................................................ 14
Safety Warnings .................................................................................. 15
Installation Overview .......................................................................... 15
Configuring the MultiModem ZPX-PCI ............................................. 16
Installing the MultiModemZPX-PCI .................................................. 17
External Connections .......................................................................... 18
Installing Drivers ................................................................................. 19
Verifying Configuration ............................................................... 19
To Remove Previous Modem from Windows 95 ........................ 21
Is Your MultiModemZPX-PCI Ready for Use? ................................. 21
Operating Your MultiModemZPX-PCI .............................................. 22
Simple Operation ......................................................................... 22
Software Configuration ................................................................ 23
Testing Data Functions ................................................................ 23
Testing FAX Functions ................................................................ 25
Testing Voice Function................................................................. 26
MultiModemZPX-PCIs Speakerphone Test ............................... 27
Configuring Communications Software.............................................. 28
Chapter 3—AT Commands, S-Registers, and Result Codes
Introduction ......................................................................................... 34
AT Commands ..................................................................................... 34
S-Registers .......................................................................................... 45
Result Codes........................................................................................ 49
Page 4

Chapter 4—Troubleshooting
Introduction ......................................................................................... 52
Initial Checklist ............................................................................ 52
Common Problems....................................................................... 53
The modem does not respond to commands ............................... 53
The modem dials but cannot make a connection ......................... 55
The modem disconnects while online .......................................... 56
The modem cannot connect when answering .............................. 57
File transfer appears slower than it should .................................. 57
Data is being lost.......................................................................... 58
There are garbage characters on the monitor .............................. 58
Fax and data software wont run at the same time....................... 58
Chapter 5—Warranty, Service, and T ech Support/BBS
Introduction ......................................................................................... 60
Limited Warranty ......................................................................... 60
Online Warranty Registration ...................................................... 61
Technical Support ............................................................................... 62
Recording Modem Information ................................................... 62
Service ................................................................................................. 63
The Multi-Tech BBS ........................................................................... 64
About CompuServe ............................................................................. 66
About the Internet ............................................................................... 66
About the Multi-Tech Fax-Back Service ............................................ 66
Appendix
Appendix A: Regulatory Compliance ................................................. 68
Appendix B: Technical Specifications ................................................ 76
Appendix C: ASCII Conversion Chart................................................ 80
Appendix D: FLASHWINFlash Upgrade ........................................... 81
Index
............................................................................................................. 84
Page 5

Chapter 1—Introduction
and Description
Page 6

Owner’s Manual
ongratulations
C
data/fax/voice modems available todaythe MultiModemZPX-PCI
from Multi-Tech Systems.
The MultiModemZPX-PCI is an internal, half-length, fax modem card
that can be plugged into any PCI slot. Your MultiModemZDX-PCI
incorporates V.90/K56flex
Internet connections at data rates up to 56 Kbps over standard
telephone lines. V.90/K56flex technology is able to propel data
downstream from the Internet to your computer at speeds of up to 56
Kbps because data is digitally encoded instead of modulated. Upstream
transmission, mostly keystroke and mouse commands from your
computer to the central site, continues to flow at the conventional data
rate of 33.6 Kbps.
Note: Though this modem is capable of 56 Kbps download
performance, line impairments, public telephone infrastructure, and
other external technological factors currently prevent maximum
56 Kbps connections.
Your MultiModemZPX-PCI offers interactive automatic dialing, as
well as command mode option configuration. You can store two
command line/telephone numbers, of up to 40 characters each, in the
modems nonvolatile memory. The modem pulse or tone dials and
recognizes dial tones and busy signals for reliable call-progress
detection. The modem can detect AT&T calling card tones. It is FCCRegistered for connection to telephone networks without any Data
Access Arrangements (DAAs).
on your purchase of one of the finest internal
TM
modem technology, which enables
The MultiModemZPX-PCI is a full-featured internal data/fax/voice
modem designed for Pentium computers in Windows Plug and Play
environments.
This owners manual will help you to install, configure, use, and
troubleshoot your modem.
6 MT5634ZPX-PCI
TM
Page 7

1 Introduction and Description
Features
Compliance with major ITU-T, TIA, and EIA international standards
to ensure compatibility with other modems
Distinguishes data, fax, and voice calls
Easy Windows 95 Plug and Play (PnP)
Compliance with the V.80 standard, allowing video conferencing
over analog telephone lines with any H.324 video phone system
Data
Supports V.90/K56flexTM for data transmission speeds up to
56 Kbps while maintaining compatibility with lower-speed modems
Note: The V.90/K56flex standard asymmetrically transfers data
client downloads at speeds up to 56 Kbps; client uploads at speeds
up to 33.6 Kbps.
Supports the enhanced ITU-T V.34 standard with data transmission
speeds to 33.6 Kbps while also maintaining compatibility with
lower-speed modems
Supports V.90/K56flex speeds plus 33.6K, 31.2K, 28.8K, 26.4K,
24K, 21.6K, 19.2K, 16.8K, 14.4K, 12K, 9.6K, 7.2K, 4.8K, 2.4K,
1.2K, and 0300 bps.
Automatic fallback to slower speeds in noisy line conditions and
fall-forward to faster speeds as conditions improve (line quality
monitoring)
ITU V.42 LAP-M and MNP Class 3 and 4 error correction
ITU V.42bis (4-to-1) and MNP 5 (2-to-1) data compression
H.324 compliant (videophone ready)
Automatic disabling of compression when transferring already
compressed files
Autodial, redial, pulse (rotary), and touch-tone dial
Dial tone and busy signal detection for reliable call-progress
detection
Distinctive ring support to route voice, data, or fax calls on a single
phone line
Plug and Play (PnP) serial support
MT5634ZPX-PCI 7
Page 8

Owner’s Manual
FlashROM upgradable
Compatibility with the standard AT command set used by most
communication programs
Stores up to two telephone numbers
Fax
Supports V.17, Group 3 fax communication standards, allowing it to
communicate with other fax modems as well as with fax machines
Responds to Class 1 and Class 2 fax commands, enabling it to
exchange editable and encrypted faxes with other Windows 95
computers
Sends and receives faxes from your computer at 14,400 bps, 9600
bps, 7200 bps, 4800 bps, 2400 bps, or 300 bps
Voice
Full duplex speakerphone support with adjustable speaker volume
control; can record and play back answering machine messages
using optional microphone and speaker
Remote/local telephone answering machine (TAM) capabilities
include voice mail control, record/playback, and call screening
Supports the TIA/EIA IS-101 AT+V voice command set.
Peripiheral Component Interconnect (PCI)
First developed by companies such as IntelTM, AT&TTM and Digital
Equipment CorporationTM, the Peripheral Component Interconnect
(PCI) bus used by your MT5634ZPX-PCI provides high performance
and is easy to use. Because PCI devices contain registers with the
device information required for configuration, full auto configuration
of PCI Local Bus add-in boards and components is supported.
Performance factors include a bus data path of 64 bits, clock speeds of
66 MHz, and bandwidth of 264 Mbs.
8 MT5634ZPX-PCI
Page 9

1 Introduction and Description
V.90 Support/Functions
V.90 is the ITU designation for what formerly was called V.pcm. V.90
replaces K56flex and other proprietary solutions for PCM connections.
Dual-mode client modem code will be important until all central-site
digital modems are upgraded to V.90 and all interoperability problems
are resolved. Until that time, the Dual-mode client code provides
reliable connections in K56flex mode to the central-site modems
currently deployed. V.90 functions/features include:
V.90/K56flex A-law and µ-law support
New downstream data rates (S-Register S38)
Optional V.8bis sequence
V.90 Mode Selection (S-Register S109) support
Auto-rate speeds to 50,666 (downstream) support
Automatic adapting to digital loss and robbed-bit signaling
New V.90 rate result codes
Downstream Rates
Where K56flex provided rates of 32,000 to 56,000 in 2,000 bps
increments, V.90 provides rates of 28,000 to 56,000 bps in increments
of 1,333 bps.
Upstream Data Rates
Upstream V.90 data rates are 4800 to 33600 bps in 2400 bps
increments.
Optional V.8bis Sequence
The V.8bis sequence that precedes K56flex connections is optional for
V.90. Dual-mode servers indicate this capability using V.8bis. Dualmode clients complete the V.8bis exchange and then proceed to either
the K56flex mode or V.90 mode. V.90-only clients can skip the V.8bis
exchange as a way to shorten the startup time.
Auto-rate Speeds
Auto-rate speeds to 50,666 Kbps are supported for downstream
transfers.
MT5634ZPX-PCI 9
Page 10

Owner’s Manual
Digital Loss and Robbed-bit Signaling Auto Adapt
Version 4.09 code supports the modems ability to automatically adapt
to digital loss and robbed-bit signaling on a PSTN connection.
What is in Your Modem Package?
Your MultiModemZPX-PCI package should contain:
One MultiModemZPX-PCI internal fax modem card
One MultiModemZPX-PCI drivers disk
One telephone cable
Communications software
One brochure with a warranty card
This MultiModemZPX-PCI Owners Manual
If any one of these items is missing, please contact Multi-Tech Systems
or your dealer/distributor.
10 MT5634ZPX-PCI
Page 11

How to Use This Manual
1 Introduction and Description
Chapter 1: Introduction and Description.
MT5634ZPX-PCI, briefly describing features and package contents. It
also details the typographic conventions used in this manual.
Chapter 2: Installing Your Modem.
modem in your computer and connect it to a telephone, telephone line,
microphone, and speaker. It also describes how to install the modems
drivers in Windows 95. In this chapter are several tests to confirm that
your installation is working correctly. The tests, which include step-bystep instructions for downloading a file and sending a fax, also serve as
minitutorials for those new to online communications concepts.
Chapter 3: Controlling Your Modem.
the AT commands that control your modem, S-registers that affect how
the commands work, and result codes that provide you with operational
feedback.
Chapter 4: Troubleshooting.
may have with your modem and how to solve them.
Describes common problems you
Introduces the
Describes how to install the
Contains descriptions of
Chapter 5: Warranty, Service, and Technical Support.
Contains terms of your warranty and describes how to get help from
Multi-Tech Systems for problems you cannot resolve. It includes our
technical support phone number and how to access us through our
BBS, the Internet, CompuServe, and our fax-back service.
Appendix
Appendix A: Regulatory Information
Appendix B: Technical Specifications
Appendix C: ASCII Conversion Chart
Appendix D: FLASHWIN Upgrade Procedures
MT5634ZPX-PCI 11
Page 12

Owner’s Manual
Typographic Conventions
This manual uses the following typographic conventions:
You type this Text entered by you is shown in boldface. Spell the entry
exactly as shown, using upper and/or lower case type.
However, when you see <cr>, press the ENTER key; do
not spell it as shown.
AT command Bold, italicized type is used for an AT or S-register
command but only when we do not intend you to type it.
Screen message Italics are used for screen messages in addition to
conventional uses, such as book and manual titles.
KEYBOARD KEY Names of keyboard keys are shown in all caps (e.g.,
BACKSPACE).
<Function Key> Angle brackets indicate a nonliteral entry. For example,
<cr> represents the carriage return character that is sent
by the key labeled Enter on most keyboards.
D:\PATH\FILENAME File name and/or path. In the following example, a
request for a file path is indicated as:
D:\PATH\FILENAME
D is the drive and PATH is the full directory path where
the file is found.
ENTER, <CR> Instructs you to press the Return, Enter, or Carriage
Return key (depending on how your keyboard is
marked).
ALT+X, CTRL+X Instructs you to hold down the ALT or CTRL key while
you press the key represented by X.
0, O Please note the difference between a zero and the letter
O. This is a zero: 0. This is a capital O : O.
12 MT5634ZPX-PCI
Page 13

Chapter 2—Installation
Page 14

Owner’s Manual
Introduction
This chapter describes how to install the MultiModemZPX-PCI into
your computer and the MultiModemZPX-PCI drivers into Windows 95.
What You’ll Need
Before you start, make sure you have everything you need:
Multi-Tech supplies
One MultiModemZPX-PCI internal fax modem card
One MultiModemZPX-PCI d rivers disk
One telephone cable
Communications software
This MultiModemZPX-PCI Owners Manual
You supply
A 100-MHz or faster Pentium PC. We recommend a 166-MHz or
faster PC for video conferencing.
Windows 95 installed
A 3.5-inch floppy disk drive
An empty PCI expansion slot
Tools to open your computer
The computers manual
A nearby telephone line jack
An external speaker or headphone (optional)
An external microphone (optional)
14 MT5634ZPX-PCI
Page 15
2 Installation
Safety Warnings
Never install telephone wiring during a lightning storm.
Never install telephone jacks in wet locations unless the jack is
specifically designed for wet locations.
This product is to be used with UL and CUL listed computers.
Never touch uninsulated telephone wires or terminals unless the
telephone line has been disconnected at the network interface.
Use caution when installing or modifying telephone lines.
Avoid using a telephone (other than a cordless type) during an
electrical storm. There may be a remote risk of electrical shock from
lightning.
Do not use a telephone in the vicinity of a gas leak.
Installation Overview
Installing the MultiModemZPX-PCI consists of three steps:
1. Installing the modem in the computer
2. Connecting the modem to the telephone line and, optionally, to an
external speaker and microphone
3. Installing the modems drivers
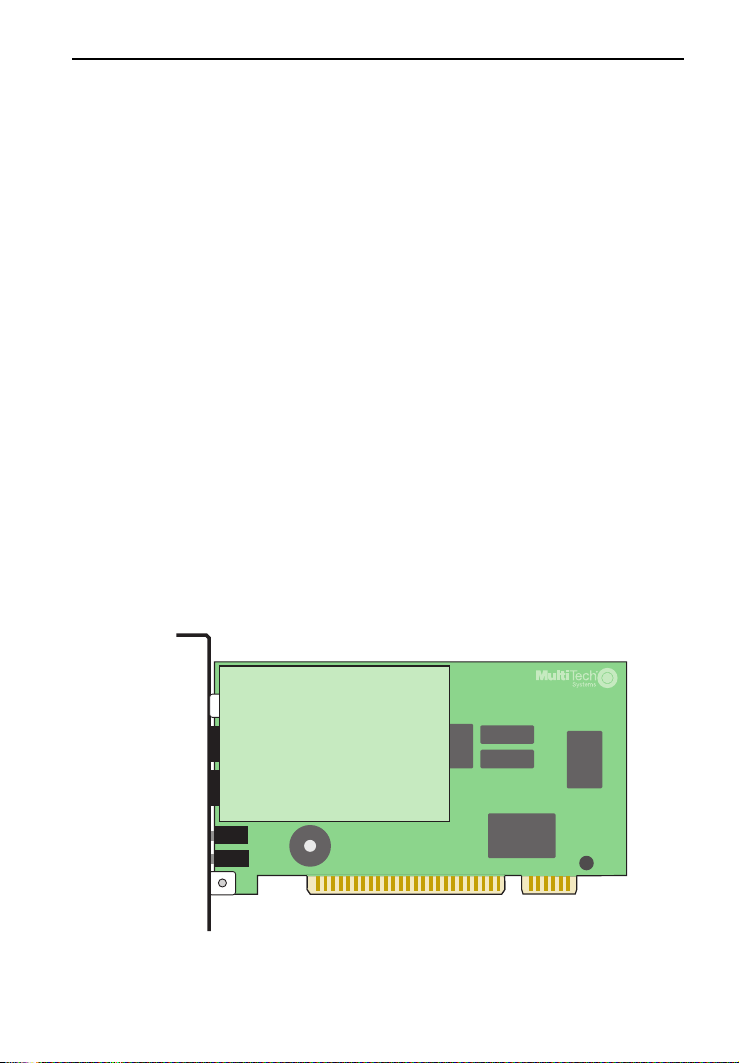
Figure 2-1. MultiModemZPX-PCI
MT5634ZPX-PCI 15
Page 16

Owner’s Manual
Configuring the MultiModem ZPX-PCI
Windows 95 Plug and Play
Unlike an external modem, the MultiModemZPX-PCI contains its own
serial port. When Windows 95 detects the MultiModemZPX-PCI, it
assigns the next available COM port number to it. Since COM1
through COM4 are standard serial ports in Windows computers,
Windows 95 typically assigns COM5 to the modems serial port.
Windows 95 also assigns the a port address and interrupt request (IRQ)
number. Because the number of IRQs is limited, a computer with
several accessories may not have an available IRQ for your new
modem. In that case, you may have to decide which of your other
accessories you can modify or do without.
Sound Card Considerations
If you want speakerphone functions and the ability to record sound or
.WAV files through the sound card at the same time, you need:
Two stereo PC microphones
One stereo male-to-male patch cord
One sound card and optional speakers
To connect a third party sound card:
1. Obtain a stereo male-to-male patch cord (can be purchased at a
local PC retail store).
2. Place one end of a stereo male-to-male patch cord into the LINE
OUT jack of the MultiModemZPX-PCI and the other end into the
LINE IN jack of the sound card. This allows you to hear the
activity of the modem whether it is originating or answering a call
or playing a recorded message using the bundled Trio software.
3. Place the stereo microphones (do not use mono microphones) far
enough apart from each other to eliminate feedback (e.g., one on
each side of the monitor). Feedback occurs if the microphones are
too close to each other. Make sure speakers are amplified with
power source being either a battery or AC outlet.
4. Place microphone and speakers far enough apart from each other
to eliminate feedback. Plug connector of both microphones into
the MIC IN jack of the SoundCard and the MultiModemZPX-PCI.
16 MT5634ZPX-PCI
Page 17

2 Installation
Installing the MultiModemZPX-PCI
Installating the MultiModemZPX-PCI requires you to open your
computer. Please consult your computer manual in addition to the
following instructions:
1. Turn off the computer and unplug it. Failure to do so may result in
damage to both the MultiModemZPX-PCI and the computer. Do
not turn on the computer until the instructions tell you to do so.
2. Remove the cover from the computer as instructed in the computer
manual.
3. Select an empty PCI expansion slot. Remove the expansion slot
cover and save the retaining screw.
4. Before handling the MultiModemZPX-PCI, discharge static in
your body by touching a metal piece of the computer chassis.
Carefully remove the MultiModemZPX-PCI from its antistatic
bag, handling it only by the mounting bracket and edges. Do not
touch the gold-plated connectors along the bottom edge.
5. Place the MultiModemZPX-PCI directly above the expansion slot
and gently, but firmly, push it into the connector until the cards
retaining bracket is flush against the computer chassis.
6. Fasten the retaining bracket to the computer chassis with the screw
saved in step 3.
7. Replace the cover of the computer.
MT5634ZPX-PCI 17
Page 18

Owner’s Manual
External Connections
The MultiModemZPX-PCI communicates over public-switched
telephone network lines. Use the modular telephone cable provided
with the modem to connect the MultiModemZPX-PCI to your
telephone wall jack. If you dont have a standard modular wall jack
near your computer, install one or have one installed for you by your
telephone company. In the U.S., installation kits and adapters are
available wherever telephones are sold.
If you want, you can use a microphone and speaker with the
MultiModemZPX-PCI. The microphone can be used for recording
answering machine messages or for speakerphone use. The speaker can
be used for playing back messages or for speakerphone use.
1. Plug one end of the supplied modular
telephone cable into the LINE jack.
2. Plug the other end of the phone cable
into a working wall jack.
3. To connect a telephone to your modem,
PHONE
LINE
MIC IN
LINE OUT
plug the telephones line cable into the
PHONE jack.
4. To use a microphone and/or speaker
with the modem, insert the microphone
plug into the MIC IN jack.
5. To connect a speaker or headphone,
insert the speaker or headphone plug
into the LINE OUT jack.
18 MT5634ZPX-PCI
Page 19

2 Installation
Installing Drivers
1. Plug in and turn on your computer. As your computer boots, it
automatically detects the MultiModemZPX-PCI, and the New
Hardware Found dialog box appears.
2. In the New Hardware Found dialog box, select Driver from
disk provided by hardware manufacturer (default selection).
Then click OK. The Install from Disk dialog box appears.
3. Insert the MultiModemZPX-PCI Drivers diskette into the
computers drive, select the drive letter (A:\ is the default), and
click OK. The computer installs the software drivers needed to
communicate with your MultiModemZPX-PCI and then displays
the Windows 95 desktop.
4. Installation of the MultiModemZPX-PCI is complete. If you plan
to use the provided communications software, install it now
according to the instructions provided in your corresponding
software manual.
Verifying Configuration
Windows 95 Plug and Play
Use the following procedure to check the assignments Windows has
made for your modem:
1. Click Start, Settings, Control Panel, and then double-click the
System icon.
2. When the System Properties dialog box appears, click the Device
Manager tab. A list of device types appears.
3. Double-click Modem for a list of modems installed in your
computer.
4. Double-click Multi-Tech MT5634ZPX-PCI. The Modem
Properties dialog box for your MultiModemZPX-PCI model
appears.
MT5634ZPX-PCI 19
Page 20

Owner’s Manual
5. Click the Resources tab and note the Conflicting Device list. If
there is a conflict between your modem and another device in your
computer, the information appears here. For help in resolving a
conflict, click Start, Help, and then search the Help index for the
Hardware Conflict Troubleshooter. When finished, click OK to
exit the System Properties dialog box.
6. In Control Panel, double-click the Modems icon.
7. When the Modems Properties dialog box appears, click the
Diagnostics tab. A list of ports and the devices installed on
them appears.
8. Click the COM port where the Multi-Tech MT5634ZPX-PCI is
installed. Then click More Info to make sure Windows 95 can
communicate with the modem. Clicking More Info causes
Windows 95 to send commands to and receive responses from the
modem and to display information about the modems COM port.
9. Write down the modems port, interrupt, address, and highest
speed. You will need this information to set up any legacy
(nonWindows 95) communications software you install.
Port: COM ______ Interrupt:_______ Address:_______
Speed: _______
10. Click the General tab. Select Multi-Tech MT5634ZPX-PCI and
click Properties to review the modems default communications
settings. Do not change any settings unless you have special
requirements.
11. Click Dialing Properties and review your dialing settings. If you
are required to dial 9 to get an outside line, type 9 in the local and
long distance boxes. If you have call waiting service, disable it to
prevent it from interrupting a data or fax transmission. When
finished, click OK to exit the Modems Properties dialog box..
20 MT5634ZPX-PCI
Page 21

2 Installation
To Remove Previous Modem from Windows 95
If your MultiModemZPX-PCI replaces another modem, the previous
modem installation remains in Windows even after you install the new
modem, and the old modem is selected in HyperTerminal and other
Windows 95 applications. Although you can change the application
connection descriptions one at a time, it is easier to force Windows 95
applications to use the MultiModemZPX-PCI by removing the
previous modem installation from Windows.
1. Select Start, Settings, and then Control Panel.
2. Double-click the Modems icon to open the Modems Properties
dialog box.
3. In the list box, select the old modem.
4. Click Remove and then click Close.
5. The next time you dial a HyperTerminal connection, it selects
your new modem and asks you to confirm the selection.
Is Your MultiModemZPX-PCI Ready for Use?
If youre an experienced modem user, you may want only to check
your modems settings for data compression, error correction, and so
on. You may find you can get moving quite quickly if you just issue
the AT&V<cr> command. This command lists how your modem
currently is configured, the stored (user) profiles, and the first four
stored telephone numbers. If you come across a setting youre unsure
of, refer to Chapter 3 of this manual for AT command and S-register
explanations and defaults.
If youre a novice, please continue to the next sections of this chapter.
MT5634ZPX-PCI 21
Page 22

Owner’s Manual
Operating Your MultiModemZPX-PCI
You control your MultiModemZPX-PCI by issuing AT commands and
setting S-registers. Since your MultiModemZPX-PCI is set up for
typical user applicationtraditional modem set to make a dial-up call
to a remote installation where the call is answered automaticallyyou
shouldnt need to change the current default configuration. (If you
know your application does not follow this profile, refer to Chapter 3
for AT commands and S-registers.)
In operating your MultiModemZPX-PCI, it is likely that you will use
your data communications software to either:
Enter terminal mode, where you can speak most directly to the
modem by issuing AT commands, or
Launch a data communications session through a set of modem
configurations that you select and then associate with a target
telephone number. Once you create, save, and name this set of
information according to your connection needs and your datacomm
softwares conventions, the software simplifies dialing because you
dont have to reconfigure the modem nor have the risk of typing
incorrect information.
Either way, be aware that an AT command is the method by which
your modem is controlled and must therefore prefix nearly all
commands. AT stands for attention and alerts the modem that a
command follows. You can enter AT commands with uppercase or
lowercase characters. Once youre in terminal mode, enter AT
followed by <cr> to check whether your modem is operational. If
everything is fine, your modem responds OK.
Simple Operation
You can dial by using the ATD command and the phone number of the
modem you want to connect with, e.g., ATD6127853500. Your
modem dials the number and makes a scrambling noise as the modem
negotiates the kind of connection it can make. Once the modems settle
on a common connection, a connect message on your computers video
displays. To hang up, enter +++ATH0<cr>. The modem hangs up and
your video displays OK, signifying it is ready for another command.
22 MT5634ZPX-PCI
Page 23

2 Installation
Software Configuration
Communications software must be configured to work with the
MultiModemZPX-PCI, your computer, and the remote system it is
calling. Fortunately, most communications programs make the process
easy by providing a default initialization string to your modem as well
as defaults for most of the other required parameters. Some software
programs allow you to select your modem type from a menu. With this
method, initialization strings that correspond to a particular modem
type can be selected to operate optimally with the software the modem
is using.
Note: Refer to your respective software manuals for further
information on your communications software.
Other software programs require you to enter an initialization string in
the software modem setup screen. If this is the requirement in your
software application, enter the following command string to initialize
your modem: AT&F<cr>. This setting configures your modem to
operate with defaults set at the facotry. These settings work well with
most software packages.
Testing Data Functions
You can test the MultiModemZPX-PCIs data functions by using
HyperTerminal to call the Multi-Tech Bulletin Board System (BBS)
and to download a file.
1. Select Start, Programs, Accessories, and then HyperTerminal.
2. Start HyperTerminal by double-clicking the Hypertrm icon.
HyperTerminal asks for the name of the connection.
3. Type Multi-Tech BBS in the Name text box and click OK.
4. In North America, type 800 in the Area Code box and 392-2432
in the Phone Number box. Local and international users, type 612
in the Area Code box and 785-3702 in the Phone Number box.
5. Verify that the appropriate model number (e.g., Multi-Tech
MT5634ZPX-PCI) for the modem is selected in the Connect
Using drop-down list box. Then click OK.
MT5634ZPX-PCI 23
Page 24

Owner’s Manual
6. In the Connect dialog box, click Dialing Properties.
7. Make any necessary changes in the Where I Am and the How I
Dial from This Location boxes. If you are required to dial 9 to
access an outside line, type 9 in both the local and the long distance
boxes unless your phone system has a special requirement.
8. Click OK and then click Dial. If you have a speaker connected to
the MultiModemZPX-PCI, you know you have reached another
modem by the harsh sounds of the modem handshake.
9. At the prompts, type your first name, last name, and password.
Then press ENTER. If you are a first time caller, the BBS asks if
your name is spelled correctly. If you answer yes, a questionnaire
appears. You must complete the questionnaire to use the BBS on
your first call.
10. Press ENTER until the Main Menu appears. In the Main Menu
you have access to two areas: the Files Menu and News.
11. Type F to access the Files Menu; then type L twice. (If you dont
type the second L, you list all of the files on the BBS.)
12. To mark the file areas you want to examine, type its list number
and press ENTER.
13. Type L to list all the files in the selected file area. (Type C to go
forward in the file list and P to go back.)
14. To mark files for download: type M and press ENTER. Then type
the list numbers of the files and press ENTER again.
15. Type D. A list of the files you marked appears. Type D again to
start the download process.
16. Select a file transfer protocol by typing the indicated letter, such as
Z for Zmodem (the recommended protocol).
17. If you select Zmodem, the file transfers automatically. If you
select another protocol, you may have to initiate the transfer
yourself. (In most data communications programs, the PAGE
DOWN key initiates the download.)
18. When the download is complete, type ENTER to return to the File
Menu.
19. To exit the BBs, type G and press ENTER.
24 MT5634ZPX-PCI
Page 25

2 Installation
Testing FAX Functions
Test your modems fax capabilities by sending a fax to Multi-Tech or
to a fax machine in your office.
Microsoft Fax is installed in Windows 95 as part of the Microsoft
Exchange option. You can use Microsoft Fax to fax from within an
application, such as a word processor, or to act as a stand-alone fax
program. In the following procedure you run Microsoft Fax as a standalone fax program.
1. Click Start, Programs, Accessories, and then WordPad.
2. Create a message in WordPad, for example: This is a test of the
MultiModemZPX-PCIs fax capabilities.
3. Save the file as ZPXTest.doc and exit WordPad.
4. Click Start, Programs, Accessories, Fax, and then Compose
New Fax.
5. The Compose New Fax wizard appears. Click Next.
6. To send the file to your own fax machine or to another fax modem
in your office, type the destination name and phone number in the
To and Fax # boxes.
7. Click Add to List; then click Next.
8. Select a cover page; then click Next.
9. Type a subject line (e.g., MultiModemZPX-PCI Fax Test) and a
note to go on the cover page; then click Next.
10. Click Add File. In the Open a File to Attach dialog box, select
ZPX Test.doc and click Open. The ZPX Test.doc file is added to
the Files to Send list box.
11. Click Next; then click Finish.
12. Microsoft Fax opens the ZPX Test.doc file in WordPad, prints it
to the Rendering System, dials the recipient, and then sends the
fax.
13. Exit Microsoft Fax when the Status dialog box displays that the
fax was sent successfully.
MT5634ZPX-PCI 25
Page 26

Owner’s Manual
Other Ways to Access Microsoft Fax
In Windows 95, select File, Print and select Microsoft Fax as the
default printer.
In a Windows 95 application, select File and then Send.
In Microsoft Exchange, select Composeand then New Fax.
Testing Voice Function
There are several tests you can perform to verify the MultiModemZPXPCIs voice circuits. Try the answering machine test first. If that
doesnt work and you have a microphone and speaker connected to the
MultiModemZPX-PCI, try the loopback and speakerphone tests, which
can test the modems voice circuits without special software.
MultiModemZPX-PCI’s Answering Machine Test
Test the MultiModemZPX-PCIs voice function by using the included
software to set up the MultiModemZPX-PCI as a telephone answering
machine. Have a friend call and leave a message; then play it back.
Loopback Testing
1. Connect a microphone and speaker to the MultiModemZPX-PCI.
To avoid feedback, make sure the microphone and speaker are not
placed too close to each other. For best results, use a headphone
instead of a speaker. If using a headphone, be sure to reduce the
headphone volume (if available) before starting.
2. Click Start, Programs, Accessories, and then HyperTerminal.
3. Double-click the Multi-Tech BBS. HyperTerminal starts with the
Connect dialog box open.
4. Click Cancel in the Connect dialog box.
26 MT5634ZPX-PCI
Page 27

2 Installation
5. To loop back input from the microphone to the speaker, type
AT&&S and press ENTER in the HyperTerminal terminal
window.
6. Speak into the microphone; you should hear your voice on the
speaker or headphone.
7. To reset the modem, type ATZ and press ENTER .
MultiModemZPX-PCI’s Speakerphone Test
1. Connect a microphone and speaker to the MultiModemZPX-PCI.
2. Click Start, Programs, Accessories, and then HyperTerminal.
3. Double-click the Multi-Tech BBS icon. HyperTerminal starts
with the Connect dialog box open.
4. Click Cancel in the Connect dialog box.
5. In the HyperTerminal terminal window, type
AT+FCLASS=8
AT+VLS=7
ATDTxxxxxxx (dials the phone number xxxxxxx)
6. Speak into the microphone to talk to the person on the other end of
the line and listen over the speaker.
7. To hang up, type ATH and press ENTER.
8. To reset the modem, type ATZ and press ENTER.
MT5634ZPX-PCI 27
Page 28

Owner’s Manual
Configuring Communications Software
Communications software must be customized, or configured, to make
it work with your computers serial port and modem, to meet the
requirements of the system on the other end of a connection, and to
meet your own requirements.
Windows 95 makes configuration easy for Windows 95 compliant
communications software. The modem and port, for the most part, are
configured automatically when the modems drivers are installed in
Windows. The communications software then uses the Windows 95
supplied configuration when it dials out.
However, nonPnP systems as well as legacy programsthose designed
for earlier operating systems(nonPnP)must be configured
individually.
This chapter helps you make configuration choices specific to the
MultiModemZPX-PCI. For help with other configuration choices, refer
to the softwares manual or online Help. Generally, your best course is
to accept the softwares default values.
1. Turn on your computer and run your communications software.
2. Locate the dialog box or menu that allows you to specify your
modem.
In HyperTerminal, select File, Properties, and then Phone
Number.
In ProComm Plus for Windows, select Window, Setup, and
then Advanced.
In MultiExpress Terminal for Windows, select Setup,
Terminal, and then Modem.)
3. If you are using legacy software or if you have more than one
modem installed, choose the appropriate model number for the
modem (e.g., Multi-Tech MT5634ZPX-PCI) from the softwares
modem list. If your model number isnt listed, choose a generic
modem of the same speed as yours, e.g., a generic V.34 or 33600
bps modem and rename it Multi-Tech MT5634ZPX-PCI.
28 MT5634ZPX-PCI
Page 29

2 Installation
4. If your legacy software doesnt have the correct modem
initialization string, you must change it. AT&F^M, which selects
the modems factory default settings, works well for most
connections. (^M is the code for the carriage return character that
sends the string to the modem.)
If you need extra time to make a connection, add S7=60 to the
string like this: AT&FS7=60^M.
For CompuServe, the initialization string is AT&F\N0^M. If you
use CompuServes WinCIM software, change the initialization
string to AT&F\N0\Q1^M for compatibility with WinCIMs
software flow control. Change the error correction string to
\N7%C0 and the data compression string to \N7%C1. If you want
the modem to always answer the phone, add S0=1 to the
initialization string.
Note: To change the modems default initialization string, type
the new commands in the softwares terminal window, adding the
command &W to store the new commands in the modems
nonvolatile memory, e.g., AT&FS0=1&W. You then can simplify
your initialization string to ATZ^M.
5. If you are using legacy software, select the port where the modem
is connected (normally, COM5).
6. For maximum throughput when using data compression, set the
serial port baud rate, or DTE rate, to 115,200 bps. (In Windows
95, select Start, Settings, Control Panel, Modems, and then
Properties.)
7. If your legacy sopftware has an autobaud selection, make sure it is
disabled. Autobaud is for older modems and can cause problems if
enabled.
8. If the software allows you to edit the no-connect messages (NO
CARRIER, BUSY, NO ANSWER, NO DIALTONE), make
sure there is no space between DIAL and TONE in NO
DIALTONE.
MT5634ZPX-PCI 29
Page 30

Owner’s Manual
9. If you are required to dial 9 to get an outside line, edit the dialing
prefix to include a 9 and a comma, e.g., ATDT9, (the comma
inserts a pause before dialing the next digit).
Similarly, to turn off call waiting for the duration of the call, insert
the disabling code used in your area, e.g., ATDT*70,. If you are
using Windows 95-compliant software, make these changes in the
How I dial from this location box of Dialing Properties.
Note: *70 is used only in the United States.
Remote Configuration
Remote configuration is a network management tool that allows you to
configure modems anywhere in your network from one location. With
password-protected remote configuration, you can issue AT commands
to a remote MT5634ZPX-PCI modem for maintenance or
troubleshooting as if you were on-site.
Basic Procedure
Use these steps for connections established by the local or by the
remoteMulti-Tech modem.
1. Establish a data connection with a remote MT5634ZPX-PCI
modem.
2. Send three remote configuration escape characters followed by
AT and the setup password. Then press ENTER. Example:
%%%ATMTSMODEM<cr>. You have four attempts to enter
the password correctly before being disconnected. If the password
is correct, the remote modem responds with OK.
3. You now can send AT commands to configure the remote modem.
4. When you finish configuring the remote modem, save the new
configuration by typing AT&W0<cr>. Then type ATO<cr> to
exit remote configuration. You can then break the connection in
the normal way.
CAUTION: Hanging up while you are in remote configuration
mode can lock up the remote modem.
30 MT5634ZPX-PCI
Page 31

2 Installation
Setup
Multi-Tech modems are shipped with a default setup password
(MTSMODEM). For security measures,you should change the
password and possibly also the remote configuration escape character.
New password: __________________________________________
New remote configuration escape character: ___________________
Changing the Setup Password
1. Open a data communications program such as HyperTerminal.
2. In the terminal window, type AT#SMTSMODEM (or
AT#Syyyyyy if you have replaced the MTSMODEM password
with yyyyyy) and press ENTER. The modem responds with OK if
the setup password is correct and ERROR if it is wrong.
3. To change the password, type AT#S=yyyyyy, where yyyyyy
stands for the password, and press ENTER. The password can
include any keyboard character and must be one to eight
characters long. The modem responds with OK.
4. The new password is saved automatically. You now can enter
more AT commands or exit the data communications program.
The next time you remotely configure the modem you must use the
new setup password.
Note: You can only change the setup password locally; you cannot do
it remotely. Also, passwords are case sensitive. The next time you
enter the password, it must be in the same case as you set it up.
Changing the Remote Escape Character
To increase security, you can change a remote modems remote
configuration escape character. The remote configuration escape
character is stored in register S9. The factory default is 37, which is the
ASCII code for the percent character (%). Setting S9 to 0 (zero)
disables remote configuration entirelybut if you do this remotely,
you wont be able to change it back remotely!
MT5634ZPX-PCI 31
Page 32

Owner’s Manual
1. Establish a remote configuration link with the remote modem as
described in Basic Procedure on the previous page.
2. Type ATS9=n, where n is the ASCII code for the new remote
configuration escape character. Then press ENTER.
3. Save the new value by typing AT&W and pressing ENTER.
4. Type ATO<CR> to exit remote configuration.
Notes:
1. Additional documents are available in Portable Document Format
(PDF) files at http://www.multitech.com/support/manuals/
_IDCfiles/manuals.idc .
You can download the Acrobat Reader to view PDF files (you
may want to bookmark http://www.adobe.com/prodindex/
acrobat/readstep.html
before following the download link).
2. For files with a .ZIP extension, you can download PKUNZIP.EXE
to extract the zipped files from ftp://ftp.multitech.com/Utilities/
PKUNZIP.EXE .
3. Using your favorite Web browser, go to http://
www.multitech.com/support/V.90upgrades.htm for additional
information on ITU V.90 support on other Multi-Tech products.
32 MT5634ZPX-PCI
Page 33

Chapter 3—AT Commands, S-Registers,
and Result Codes
Page 34

Owner’s Manual
Introduction
This chapter lists and summarizes AT commands for the Multi-Techs
MT5634ZPX-PCI. For detailed AT command information, download
ZPXHELP.EXE from the Multi-Tech BBS (see Multi-Tech BBS in
Chapter 5).
AT Commands
Command: +++AT<cr> Escape Sequence
Values: n/a
Description: Puts the modem in command mode while remaining online.
Type +++AT and press ENTER. (Only AT , ATH, and
ATH0 are valid.) The +++ATH<cr> or +++ATH0<cr>
can be used to hang up a modem connection.
Command: AT Attention Code
Values: n/a
Description: The attention code precedes all command lines except A/
and the escape sequence.
Command: ENTER Key
Values: n/a
Description: Press the ENTER key to execute most commands.
Command: $ Detect AT&Ts call card tone
Values: n/a
Description: This symbol placed in dialing string enables the modem to
detect AT&Ts call card tones to access users calling card
when originating an online connection:
ATDT1028806127853500$123456789
(access/phone number) (credit card number)
Command: A Answer
Values: n/a
Description: Answer an incoming call before the final ring.
Command: A/ Repeat Last Command
Values: n/a
Description: Repeat the last command string. Do not precede this
command with AT. Do not press ENTER to execute.
34 MT5634ZPX-PCI
Page 35

3 AT Commands, Result Codes, and S-Registers
Command: Bn Communication Standard Setting
Values: n = 03, 15, 16
Default: 1 and 16
Description: B0 Select ITU-T V.22 mode when modem is at 1200 bps.
B1 Select Bell 212A when modem is at 1200 bps.
B2 Deselect V.23 reverse channel (same as B3).
B3 Deselect V.23 reverse channel (same as B2).
B15 Select V.21 when the modem is at 300 bps.
B16 Select Bell 103J when the modem is at 300 bps.
Command: Cn Carrier Control
Values: n = 1
Default: 1
Description: C0 Transmit carrier always off. (Not supported.)
C1 Normal transmit carrier switching (included for backward
compatibility with some software).
Command: Ds Dial
Values: s = dial string (phone number and dial modifiers)
Default: none
Description: Dial telephone number s, where s may up to 40 characters
long and include the 09, *, #, A, B, C, and D characters,
and the L, P, T, V, W, S, comma (,), semicolon (;), !, @, ^
and $ dial string modifiers.
Dial string modifiers:
L Redial last number. (Must be placed immediately after
ATD.)
P Pulse-dial following numbers in command .
T Tone-dial following numbers in command (default).
V Switch to speakerphone mode and dial the following
number. Use ATH command to hang up.
W Wait for a new dial tone before continuing to dial. (X2,
X4, X5, X6, or X7 must be selected.)
S Dial a telephone number previously stored using the
&Zn=x command (see &Zn=x command for further
information). The range of n is 0-3.
, Pause during dialing for time set in register S8.
; Return to command mode after dialing. (Place at end of
dial string.)
! Hook flash. Causes the modem to go on-hook for one-
half second, then off-hook again.
MT5634ZPX-PCI 35
Page 36

Owner’s Manual
@ Wait for quiet answer. Causes modem to wait for a
ringback, then 5 seconds of silence, before processing
next part of command. If silence is not detected, the
modem returns a NO ANSWER code.
$ AT&Ts call card tones detection.
^ Disable data calling tone transmission.
Command: DS=n Dial Stored Telephone Number
Values: n = 03
Default: none
Description: Dial a number previously stored in directory number n by
the &Zn=x command .
Example: ATDS=3
Command: En Echo Command Mode Characters
Values: n = 0 or 1
Default: 1
Description: E0 Do not echo keyboard input to the terminal.
E1 Do echo keyboard input to the terminal.
Command: Fn Echo Online Data Characters
Values: n = 1
Default: 1
Description: F0 Enable online data character echo. (Not supported.)
F1 Disable online data character echo (included for backward
compatibility with some software).
Command: Hn Hook Control
Values: n = 0 or 1
Default: 0
Description: H0 Go on-hook to hang up.
H1 Go off-hook to make the phone line busy.
Command: In Information Request
Values: n = 04, 9, 11
Default: None
Description: I0 Display default speed and controller firmware version.
I1 Calculate and display ROM checksum (e.g., 12AB).
I2 Check ROM and verify the checksum, displaying OK or
ERROR.
I3 Display default speed and controller firmware version.
36 MT5634ZPX-PCI
Page 37

3 AT Commands, Result Codes, and S-Registers
I4 Display firmware version for data pump (e.g., 94).
I9 Display country code (e.g., NA Ver. 1).
I11 Display Diagnostic Information for the last Modem
Connection (i.e., DSP and Firmware version, Link Type,
Line Speed, Serial Speed, Type of Error Correction/Data
Compression, Number of past Retrains,etc.)
Command: Ln Monitor Speaker Volume
Values: n = 0, 1, 2, or 3
Default: 2
Description: L0 Select low volume.
L1 Select low volume.
L2 Select medium volume.
L3 Select high volume.
Command: Mn Monitor Speaker Mode
Values: n = 0, 1, 2, or 3
Default: 1
Description: M0 Speaker always off.
M1 Speaker on until carrier signal detected.
M2 Speaker always on when modem is off-hook.
M3 Speaker on until carrier is detected, except while dialing.
Command: Nn Modulation Handshake
Values: n = 0 or 1
Default: 1
Description: N0 Modem performs handshake only at communication
standard specified by S37 and the B command.
N1 Modem begins handshake at communication standard
specified by S37 and the B command. During handshake,
fallback to a lower speed can occur.
Command: O Return Online to Data Mode
Values: 0, 1, 3
Default: None
Description: O0 Exit online command mode and return to data mode.
O1 Issue a retrain and return to online data mode.
O3 Issue a rate renegotiation and return to data mode.
MT5634ZPX-PCI 37
Page 38

Owner’s Manual
Command: Qn Result Codes Enable/Disable
Values: n = 0 or 1
Default: 0
Description: Q0 Enable result codes.
Q1 Disable result codes.
Command: Sr=n Set Register Value
Values: r = S-register number; n varies
Default: None
Description: Set value of register Sr to value of n, where n is entered in
decimal format.
Command: Sr? Read Register Value
Values: r = S-register number
Default: None
Description: Read value of register Sr and display value in 3-digit
decimal form.
Command: Vn Result Code Format
Values: n = 0 or 1
Default: 1
Description: V0 Displays result codes as digits (terse response).
V1 Displays result codes as words (verbose response).
Command: Xn Result Code Selection
Values: n = 07
Default: 4
Description: X0 Basic result codes (e.g., CONNECT); does not look for dial
tone or busy signal.
X1 Extended result codes (CONNECT 56000 V42bis,
CONNECT 33600 V42bis, etc.); does not look for dial tone
or busy signal.
X2 Extended result codes with NO DIALTONE; does not look
for busy signal.
X3 Extended result codes with BUSY; does not look for dial
tone.
X4 Extended result codes with NO DIALTONE and BUSY.
X5 Extended result codes with NO DIALTONE and BUSY.
X6 Extended result codes with NO DIALTONE and BUSY.
X7 Basic result codes with NO DIALTONE and BUSY.
38 MT5634ZPX-PCI
Page 39

3 AT Commands, Result Codes, and S-Registers
Command: Yn Long Space Disconnect
Values: n = 0
Default: 0
Description: Y0 Disable sending or responding to long space break signal
on disconnect.
Y1 Enable sending or responding to long space break signal on
disconnect. (Not supported.)
Command: Zn Modem Reset
Values: n = 0 or 1
Default: None
Description: Z0 Reset modem to profile saved by the last &W command.
Z1 Same as Z0.
Command: &Bn V.32 Auto Retrain
Values: n = 1
Default: 1
Description: &B0 Disable V.32 auto retrain. (Not supported.)
&B1 Enable V.32 auto retrain.
Command: &Cn Data Carrier Detect (DCD) Control
Values: n = 0 or 1
Default: 1
Description: &C0 Force Data Carrier Detect signal high.
&C1 Let Data Carrier Detect follow carrier signal.
Command: &Dn Data Terminal Ready (DTR) Control
Values: n = 0, 1, 2, or 3
Default: 2
Description: &D0 Modem ignores DTR signal.
&D1 When DTR drops while in online data mode, the modem
enters command mode, issues an OK, and remains
connected.
&D2 When DTR drops while in online data mode, the modem
hangs up.
&D3 When DTR drops, the modem hangs up and resets as if an
ATZ command were issued.
MT5634ZPX-PCI 39
Page 40

Owner’s Manual
Command: &Fn Load Factory Default Settings
Values: n = 0
Default: None
Description: &F0 Load factory settings as active configuration.
Command: &Gn V.22bis Guard Tone Control
Values: n = 0, 1, or 2
Default: 0
Description: &G0 Disable guard tone.
&G1 Enable 550 Hz guard tone.
&G2 Enable 1800 Hz guard tone.
Note: The &G command is not used in North America.
Command: &Jn Auxiliary Relay Control
Values: n = 0
Default: 0
Description: &J0 The auxiliary relay is never closed.
&J1 Not supportedresponds ERROR.
Command: &Kn Local Flow Control Selection
Values: n = 0, 3, or 4
Defaults: 3
Description: &K0 Flow control disabled.
&K3 Enable CTS/RTS hardware flow control.
&K4 Enable XON/XOFF software flow control.
Command: &Mn Communications Mode
Values: n = 0
Defaults: 0
Description: &M0 Asynchronous mode.
&M1 Reservedresponds ERROR.
Command: &Qn Asynchronous Communications Mode
Values: n = 0, 5, or 6
Defaults: 5
Description: &Q0 Asynchronous with data buffering. Same as \N0.
&Q5 Error control with data buffering. Same as \N3.
&Q6 Asynchronous with data buffering. Same as \N0.
40 MT5634ZPX-PCI
Page 41

3 AT Commands, Result Codes, and S-Registers
Command: &Sn Data Set Ready (DSR) Control
Values: n = 0 or 1
Default: 0
Description: &S0 Force DSR high (on).
&S1 Let DSR follow CD.
Command: &Tn Self-Test Commands
Values: n = 0, 1, 3 or 6
Default: None
Description: &T0 Abort. Stop any test in progress.
&T1 Local analog loop test.
&T3 Local digital loopback test.
&T6 Remote digital loopback test.
Command: &V View Current Configuration
Values: n/a
Description: Displays the active modem settings.
Command: &Wn Store Current Configuration
Values: n = 0
Default: None
Description: &W0 Store active modem settings in NVRAM; load them at
power-on or following the ATZ command instead of
loading the factory defaults from ROM.
Command: &Yn Select Stored Configuration for Hard Reset
Values: n = 0
Default: 0
Description: &Y0 Select stored configuration 0 on power-up.
(For backward compatibility with some software.)
&Y1 Not supportedresponds ERROR.
Command: &Zn=x Store Telephone Number
Values: n = 0, 1, 2, or 3
x = Dialing string
Default: None
Description: Stores telephone dial string x in memory location n. Dial
the stored number using the command ATDS=n.
MT5634ZPX-PCI 41
Page 42

Owner’s Manual
Command: \Gn Modem Port Flow Control
Values: n = 0
Default: 0
Description: \G0 Returns an OK for backward compatibility with some
software.
\G1 Not supportedresponds ERROR.
Command: \Jn Data Buffer Control
Values: n = 0
Default: 0
Description: \J0 Enable data bufferserial port speed is independent of
connect speed.
\J1 Not supportedresponds ERROR.
Command: \Kn Set Break Control
Values: n = 5
Default: 5
Description: \K5 Modem sends break signal received from the DTE to the
remote modem.
Command: \Nn Error Correction Mode Selection
Values: n = 05, or 7
Default: 3
Description: \N0 Non-error correction mode with data buffering
(same as &Q6).
\N1 Direct mode.
\N2 MNP reliable mode.
\N3 V.42/MNP auto-reliable mode.
\N4 V.42 reliable mode.
\N5 V.42, MNP, or non-error correction (same as \N3).
\N7 V.42, MNP, or non-error correction (same as \N3).
Command: \Qn Local Flow Control Selection
Values: n = 0, 1, or 3
Default: 3
Description: \Q0 Disable flow control (same as &K0).
\Q1 XON/XOFF software flow control (same as &K4).
\Q2 CTS-only flow control. Not supportedresponds ERROR.
\Q3 RTS/CTS hardware flow control (same as &K3).
42 MT5634ZPX-PCI
Page 43

3 AT Commands, Result Codes, and S-Registers
Command: \Tn Inactivity Timer
Values: n = 0255
Default: 0
Description: \Tn Inactivity timer setting contingent on either \T value or S-
Register S30 value (e.g., AT\T45&W0<cr> configures in
parallel ATS30=45&W0<cr>) and vice versa.
Command: \Vn Protocol Result Code
Values: n = 0 or 1
Default: 1
Description: \V0 Disable protocol result code appended to DCE speed.
\V1 Enable protocol result code appended to DCE speed.
Command: \Xn XON/XOFF Pass-Through
Values: n = 0 or 1
Defaults: 0
Description: \X0 Respond to and discard XON/XOFF characters.
\X1 Not supportedresponds ERROR.
Command: -Cn Data Calling Tone
Values: n = 0 or 1
Defaults: 0
Description: -C0 Disable V.25 data calling tone.
-C1 Enable V.25 data calling tone.
Command: %B View Numbers in Blacklist
Values: n/a
Description: If blacklisting is in effect, this command displays the
numbers for which the last call attempted in the previous
two hours failed. In countries that do not require
blacklisting, the ERROR result code appears.
Command: %Cn Data Compression Control
Values: n = 0 or 1
Default: 1
Description: %C0 Disable V.42bis/MNP 5 data compression.
%C1 Enable V.42bis/MNP 5 data compression.
MT5634ZPX-PCI 43
Page 44

Owner’s Manual
Command: +ES=6 Enable Synchronous Buffered Mode
Values: n/a
Description: Allows an H.324 video application direct access to the
synchronous data channel. On underflow, the modem sends
HDLC flag idle (0x7E) to the remote modem. This special
error correction mode is overridden by any of the following
commands: &F, &M, &Q, and \N. +ES = ? shows the only
allowed value.
Command: &&S Speaker Codec Loopback
Values: n/a
Description: Provides a loopback from the microphone to the speaker.
For testing and debugging only.
44 MT5634ZPX-PCI
Page 45

3 AT Commands, Result Codes, and S-Registers
S-Registers
S-registers generally affect how the AT commands perform. You can
read or alter the contents of an S-register by using the S command (see
AT Commands).
Register Unit Range Default Description
S0 rings 0, 1255 0 Sets the number of rings before the
modem answers. ATS0=0 disables
auto-answer completely.
S1 rings 0255 0 Counts the number of rings that have
S2 decimal 0127 43 (+) Sets ASCII code for the escape
128255 character. Values greater than 127
S3 decimal 0127 13 (^M) Sets ASCII code for the carriage
S4 decimal 0127 10 (^J) Sets ASCII code for the line feed
S5 decimal 032 8 (^H) Sets ASCII code for the backspace
33127 character. Values greater than 32
S6 seconds 265* 2* Sets the time the modem waits after it
S7 seconds 1255* 50* Sets the time the modem waits for a
S8 seconds 065 2 Sets the length of a pause caused by a
S10 100 ms 1254 20 Sets how long a carrier signal must be
occurred.
disable the escape sequence.
return character.
character.
disable the backspace character.
goes off-hook before it begins to dial
the telephone number.
carrier signal before aborting a call.
Also sets the wait for silence time for
the @ dial modifier.
comma character in a dialing command.
lost before the modem disconnects.
Note: These values may be different outside North America.
MT5634ZPX-PCI 45
Page 46

Owner’s Manual
Register Unit Range Default Description
S11 1 ms 50150* 95* Sets spacing and duration of dialing
tones.
S28 decimal 0, 1255 1 0 disables, 1255 enables V.34
S30 1 minute 0255 0 S30 specifies the length of time (in
S35 decimal 01 0 0 disables, 1 enables the V.25 data
S36 decimal {0,2}, {1,3} N/A This register specifies the action to
{4,6}, {5,7} failure when error control is selected.
S37 decimal 019 0 S37 sets the maximum V.34 upstream
modulation.
minutes) that the modem waits before
disconnecting when no data is sent or
received. This function is applicable
only to buffer mode. (Also see \T
command.)
calling tone, which allows remote
data/fax/voice discrimination.
take in the event of negotiation
(See S48.)
speed that the modem attempts to
connect.
0 = maximum negotiated modem
speed
1 = reserved
2 = 1200/75 bps
3 = 300 bps
4 = reserved
5 = 1200 bps
6 = 2400 bps
7 = 4800 bps
8 = 7200 bps
9 = 9600 bps
10 = 12000 bps
11 = 14400 bps
12 = 16800 bps
13 = 19200 bps
14 = 21600 bps
15 = 24000 bps
16 = 26400 bps
17 = 28800 bps
18 = 31200 bps
19 = 33600 bps
46 MT5634ZPX-PCI
Page 47

3 AT Commands, Result Codes, and S-Registers
Register Unit Range Default Description
S38 decimal 014 1 Sets maximum 56K downstream
speed that the modem attempts to
connect. Where K56flex provided
rates of 32,000 to 56,000 in 2,000 bps
increments. V.90 provides rates of
28,000 to 56,000 bps in increments of
1,333 bps.
0 =V.90/56Kflex disabled
1 = V.90/56Kflex enabled with automatic speed selection maximum
negotiated modem speed enabled
2 = 29,333
3 = 30,666
4 = 32,000
5 = 33,333
6 = 34,666
7 = 36,000
8 = 37,333
9 = 38,666
10 = 40,000
11 = 41,333
12 = 42,666
13 = 44,000
14 = 45,333
15 = 46,666
16 = 48,000
17 = 49,333
18 = 50,666
19 = 52,000
20 = 53,333
21 = 54,666
22 = 56,000
S42 decimal 01 1 Enables/disables the 56K auto rate.
S43 decimal 01 1 For testing and debugging only.
Retrain and fallback are disabled in
data mode.
0 = disable; 1 = enable.
Enables/disables V.32bis start-up
auto mode operation.
0 = disable; 1 = enable.
MT5634ZPX-PCI 47
Page 48

Owner’s Manual
Register Unit Range Default Description
S48 decimal 7 or 128 7 The chart below lists the S36 and S48
S36=0,2 LAPM or Hangup Do not use
S36=1,3 LAPM or Async Async
S35=4,6 LAPM, MNP, or Hangup MNP or Hangup
S36=5,7 LAPM, MNP, or Async MNP or Async
S89 seconds 0, 5255 60 Sets the length of time in the off-line
S108 decimal 0-3, 6,7 6 Selects the digital loss if using the
configuration settings necessary to
negotiate certain types of connections.
S48=7 S28=128
command mode before the modem
goes into standby mode. A value of
zero prevents standby mode; a value
of 14 sets the value to 5.
modem thru a PBX line. Default
value is -6dB loss, the value used
when calling from a typical POTS
line long distance.
S109 0, 1, 2 Sets one of three 56K operating
modes: K56flex mode, V.90 mode, or
Auto-mode.
0 V.90 disabled
1 K56flex or V.90 (Dual-mode
enabled)
2 V.90 only (K56flex disabled).
Forces V.90 connections for
testing purposes, etc.
48 MT5634ZPX-PCI
Page 49

3 AT Commands, Result Codes, and S-Registers
Result Codes
In command mode the MultiModemZPX-PCI sends result codes to
your computer to provide you with ongoing information during dialing
and connection. The following table shows the available result codes.
Terse Verbose Description
0 OK Command executed
1 CONNECT Modem connected to line
2 RING Ring signal detected
3 NO CARRIER Carrier signal lost or not
detected
4 ERROR Invalid command
5 * CONNECT 1200 Connected at 1200 bps
6 NO DIALTONE No dial tone detected
7 BUSY Busy signal detected
8 NO ANSWER No answer at remote end
10* CONNECT 2400 Connected at 2400 bps
11* CONNECT 4800 Connected at 4800 bps
12* CONNECT 9600 Connected at 9600 bps
13* CONNECT 14400 Connected at 14400 bps
14* CONNECT 19200 Connected at 19200 bps
24* CONNECT 7200 Connected at 7200 bps
25* CONNECT 12000 Connected at 12000 bps
26* CONNECT 16800 Connected at 16800 bps
40* CONNECT 300 Connected at 300 bps
55* CONNECT 21600 Connected at 21600 bps
56* CONNECT 24000 Connected at 24000 bps
57* CONNECT 26400 Connected at 26400 bps
58* CONNECT 28800 Connected at 28800 bps
59* CONNECT 31200 Connected at 31200 bps
70* CONNECT 32000 Connected at 32000 bps
60* CONNECT 33600 Connected at 33600 bps
71* CONNECT 34000 Connected at 34000 bps
72* CONNECT 36000 Connected at 36000 bps
73* CONNECT 38000 Connected at 38000 bps
74* CONNECT 40000 Connected at 40000 bps
75* CONNECT 42000 Connected at 42000 bps
76* CONNECT 44000 Connected at 44000 bps
MT5634ZPX-PCI 49
Page 50

Owner’s Manual
Terse Verbose Description
77* CONNECT 46000 Connected at 46000 bps
78* CONNECT 48000 Connected at 48000 bps
79* CONNECT 50000 Connected at 50000 bps
80* CONNECT 52000 Connected at 52000 bps
81* CONNECT 54000 Connected at 54000 bps
82* CONNECT 56000 Connected at 56000 bps
88 DELAYED Delay is in effect for the dialed
number
89 BLACKLISTED Dialed number is blacklisted
90 BLACKLIST FULL Blacklist is full
100 CONNECT 28000 Connected at 28000 bps
101 CONNECT 29333 Connected at 29333 bps
102 CONNECT 30666 Connected at 30666 bps
103 CONNECT 33333 Connected at 33333 bps
104 CONNECT 34666 Connected at 34666 bps
105 CONNECT 37333 Connected at 37333 bps
106 CONNECT 38666 Connected at 38666 bps
107 CONNECT 41333 Connected at 41333 bps
108 CONNECT 42666 Connected at 42666 bps
109 CONNECT 45333 Connected at 45333 bps
110 CONNECT 46666 Connected at 46666 bps
111 CONNECT 49333 Connected at 49333 bps
112 CONNECT 50666 Connected at 50666 bps
113 CONNECT 53333 Connected at 53333 bps
114 CONNECT 54666 Connected at 54666 bps
* EC is added to these Result Codes when the extended Result Codes configuration option
is enabled. EC is replaced by one of the following codes, depending on the type of error
control connection: V42bis (V.42 error control [LAP-M] and V.42bis data compression);
V42 (V.42 error control [LAP-M] only); MNP5 (MNP 4 error control and MNP 5 data
compression); MNP4 (MNP 4 error control only); NoEC (No error control protocol).
50 MT5634ZPX-PCI
Page 51

Chapter 4—Troubleshooting
Page 52

Owner’s Manual
Introduction
This chapter covers common problems you may have with your
modem and how to solve them. Your MultiModemZPX-PCI was
thoroughly tested at the factory before it was shipped. If you are unable
to make a successful connection or if you experience data loss or
garbled characters during your connection, it is possible that the
modem is defective. However, it is more likely that the source of your
problem lies elsewhere. Begin with the checklist (below) to make sure
all hardware is connected properly. Then review the common problems
for recommendations on what to change.
Initial Checklist
Always begin with the following checklist to make sure all hardware is
properly connected and that the modem is set up properly.
Make sure you are running the Microsoft Windows 95 or Windows
98 operating system. This modem will not run properly with other
operating systems.
Make sure the COM port you chose during setup matches the COM
port set in your communications software. See Chapter 2.
Check that the phone cord between the modems LINE jack and the
wall jack is undamaged and firmly connected to both.
If you connected a telephone to your modem, check that the phone
cord between the modems PHONE jack and the telephone is
undamaged and firmly connected to both.
If you connected a microphone to your modem, check the connection
of the microphone plug to the modems MIC IN jack.
If you connected speakers to your modem, check the connection of
the speaker plug to the modems LINE OUT jack.
Retry whatever action was not working.
If it still does not work, check the following section for a description
and possible solution of your problem.
If you dont find your problem listed in this chapter, see Chapter 5 to
learn how to reach our technical support technicians via our toll-free
telephone number, the Internet, or CompuServe. Dont forget to fill
out the information in Recording Modem Information in Chapter 5
before contacting a technical support technician.
52 MT5634ZPX-PCI
Page 53

4 Troubleshooting
Common Problems
You may encounter the following problems:
The modem does not respond to commands.
The modem dials but is unable to make a connection.
The modem disconnects while online.
The modem cannot connect when answering.
File transfer appears slower than it should be.
Data is being lost.
There are garbage characters on the monitor.
Fax and communications software wont run at the same time.
If you experience problems, please check the following possibilities
before calling Technical Support (see Chapter 5).
The modem does not respond to commands
Make sure you are in terminal mode in your data communications
program; then type AT and press ENTER. If you get an OK
response, your connections are good. The problem likely is in the
connection description in your communications software.
Reset your modem by sending it an ATZ or AT&F command in
terminal mode. If using legacy software (software designed for an
older operating system), make sure the initialization string includes
&F as the first command to cancel any leftover commands that could
interfere with the modems operation.
If you dont get an OK, the problem may still be in the
communications software. Make sure you have done whatever
necessary in your software to make a port connection. Most legacy
(prior to Windows 95) communications programs connect to the
COM port when the software loads and remain connected until the
program terminates. Some can disconnect without exiting the
program. If this is the case, try issuing the softwares connection
command. Also, if more than one communications program is open,
they can conflict with each other. Make sure all other
communications programs are closed and then try again.
MT5634ZPX-PCI 53
Page 54

Owner’s Manual
If using legacy software, the COM port setting may not match the
COM port that Windows 95 assigned. Compare the COM port
setting in your software to the COM port reported in the Diagnostics
tab of the Modems Properties sheet. (Select Start, Settings, Control
Panel, Modems, and then Diagnostics.)
Another expansion card such as a bus mouse or sound card may be
using the same COM port, memory address, or interrupt request
(IRQ) as your modem. On the Windows 95 desktop, right-click My
Computer and select Properties, Device Manager, and Ports. Then
double-click the port where your modem is connected.
In the ports Properties sheet, click the Resources tab to view the
ports Input/Output range and Interrupt Request. If another device is
using the same address range or IRQ, it appears in the Conflicting
Device List. Resources are assinged at power up by the computers
BIOS. Windows cannot change these resources. If the resources
assigned to the MultiModemZPX-PCI conflict with the resources of
another device, the resources of the second device have to be
changed.
Select the port the conflicting device is on and change it so othe
conflict is resolved. If you need to change switches or jumpers on
the conflicting device, refer to the devices documentation.
The modem may be defective. If you have another
MultiModemZPX-PCI, try swapping modems. If the problem goes
away, the first modem possibly is defective. Call Technical Support
for assistance (see Chapter 5).
54 MT5634ZPX-PCI
Page 55

4 Troubleshooting
The modem dials but cannot make a connection
Several reasons why the MultiModemZPX-PCI fails to make a
connection include
Lack of a physical connection to the telephone line.
A wrong dial tone.
A busy signal.
A wrong number.
No modem at the other end.
A faulty modem, computer, or software at the other end.
Incompatibility between modems.
Narrow the list of possibilities by using extended result codes. If you
disabled the modems extended result codes, enable them by entering
ATV1X4 in the terminal window and pressing ENTER. When you dial
again, the modem reports the calls progress.
If the modem reports NO DIALTONE, check that the modems
telephone line cable is connected to both the modems LINE jack
(not the PHONE jack) and the telephone wall jack. If the cable looks
secure, try replacing it.
If that doesnt work, the problem may be in your buildings
telephone installation. To test the building installation, plug a
telephone into your modems telephone wall jack and listen for a
dial tone. If you hear a dial tone, your modem may be installed
behind a company phone system (PBX) with an internal dial tone
that sounds different from the normal dial tone. In that case, the
modem may not recognize the dial tone and may treat it as an error.
Check your PBX manual to see if you can change the internal dial
tone. If you cant, change your modems initialization string to
include X3, which makes the modem ignore dial tones.
If the modem reports BUSY, the other number may be busy. Try
again later. BUSY also may indicate that 9 was not added to the
phone number (if required to dial 9 for an outside line).
If you are required to dial 9 to get an outside line, the easiest way to
dial it automatically using legacy software is to include it in the
modems dial prefix, e.g., ATDT9,. Note the comma. It inserts a
pause before the number is dialed. For example, to change the dial
MT5634ZPX-PCI 55
Page 56

Owner’s Manual
prefix in MultiExpress Terminal, select Setup and Modem. Then
select the modem type you are using and type the new prefix in the
Dial Prefix box.
To change it for Windows 95 software, select Start, Settings,
Control Panel, and then Modems. In the Modems Properties sheet,
select the appropriate modem model number (e.g., Multi-Tech
MT5634ZPX-PCI), click Dialing Properties and type 9 in the local
and long distance boxes in the How I dial from this location box.
If the modem reports NO ANSWER, the other system has failed to
answer, or you may have dialed a wrong number. Check the number.
If the modem reports NO CARRIER, the phone was answered at the
other end, but no connection was made, you may have dialed a
wrong number, and a person answered instead of a computer. Or,
you may have dialed the correct number, but the other computer or
software was turned off or faulty. Check the number and try again or
try calling another system to make sure your modem is working.
Also, try calling the number on your telephone. If you hear harsh
sounds, then another modem is answering the call; the modems may
be having problems negotiating due to modem incompatibilities or
line noise. Try connecting at a lower speed by setting register S37 to
a lower rate (e.g., by typing ATS37=11 in the terminal window and
pressing ENTER) and then calling again.
The modem disconnects while online
If you have call waiting on the same phone line as your modem, it
may interrupt your connection when someone tries to call you. If you
have call waiting, disable it before each call. In most telephone areas
in North America, you can disable call waiting by preceding the
telephone number with *70 (check with your local telephone
company).
You can disable call waiting automatically by including the disabling
code in the modems dial prefix (e.g., ATDT*70,note the comma,
which inserts a pause before the telephone number is dialed). For
example, to change the dial prefix in MultiExpress Terminal, select
Setup and Modem. Then select the modem type you are using and
type the new prefix in the Dial Prefix box. To change it for Windows
56 MT5634ZPX-PCI
Page 57

4 Troubleshooting
95 software, select Start, Settings, Control Panel, and then Modems.
In the Modems Properties sheet, select Multi-Tech MT5634ZPX-
PCI, click Dialing Properties. Check This location has call waiting
and select the correct code for your phone service.
Note: *70 is used only in the United States.
If you have extension phones on the same line as your modem, you
or someone else can interrupt the connection by picking up another
phone. If this is a frequent problem, disconnect the extension phones
before using the modem or install another phone line for the modem
only.
Check for loose connections between the modem and the telephone
jack.
You may have a poor connection because of line conditions, or the
problem may have originated on the other end of the line. Try again.
If you were online with a BBS or commercial online service, it may
have hung up because of lack of activity on your part or because you
exceeded your time limit for the day. Try again.
The modem cannot connect when answering
Auto-answer may be disabled. Turn on auto-answer in your data
communications program or send the command ATS0=1 to your
modem in terminal mode.
File transfer appears slower than it should
If you are using a slow transfer protocol, such as Xmodem or
Kermit, try Zmodem or Ymodem/G instead.
Is your line noisy? If there is static on your line, the modem has to
resend many blocks of data to insure accuracy. You must have a
clean line for maximum speed.
Are you downloading a compressed file with MNP 5 hardware
compression enabled? Since hardware data compression cannot
compress a file already compressed by an archiving program, the
transfer can be marginally slower with data compression enabled
than with it disabled.
MT5634ZPX-PCI 57
Page 58

Owner’s Manual
Data is being lost
If you are using data compression, be sure the serial port baud rate is
set to a minimum of four times the data rate.
Make sure the flow control method you selected in software matches
the method selected in the modem. If you are using CompuServes
WinCIM software, you must set the modem for XON/OFF flow
control (see Chapter 2 for the CompuServe initialization string).
Try entering the &V (View Parameters) command, making a screen
print of the diagnostics listing, and checking for parameters that may
be unacceptable.
There are garbage characters on the monitor
Your computer and the remote computer may be set to different
word lengths, stop bits, or parities. If you have connected at 8-N-1,
try changing to 7-E-1, or vice-versa, using your communications
software.
You may be experiencing line noise. Enable error correction if it is
disabled. Or, hang up and call again; you may get a better
connection.
At speeds above 2400 bps, the remote modem may not use the same
transmission or error correction standards as your modem. Try
connecting at a slower speed or disabling error correction. (With no
error correction, however, line noise can cause garbage characters.)
Try entering the &V (View Parameters) command, making a screen
print of the diagnostics listing, and checking for parameters that may
be unacceptable.
Fax and data software won’t run at the same time
You can have Windows 95 compliant data and fax communication
applications open at the same time, but they cannot use the same
modem at the same time. Make sure no other application is online
when you try to dial out. If you are using legacy communications
software with Windows 95, you may get a message that another
application is occupying the device even when no call is in progress.
Close any open legacy communications programs and try again.
58 MT5634ZPX-PCI
Page 59

Chapter 5—Warranty, Service,
and Tech Support/BBS
Page 60

Owner’s Manual
Introduction
This chapter begins with the terms of your modems warranty.
Carefully read the next section, Tech Support, if you have questions or
problems with your modem. It includes technical support telephone
numbers, space for recording your modem information, and an
explanation of how to send in your modem should you require service.
The final sections explain how to use our bulletin board service (BBS)
and get information and support through CompuServe, the Internet,
and our fax-back service.
Limited Warranty
Multi-Tech Systems, Inc. (MTS) warrants that this product will be free
from defects in material or workmanship for a period of ten years from
the date of purchase or, if date of purchase is not provided, ten years
from the date of shipment (limited to customers in the U.S., Canada,
Mexico, and United Kingdom). For customers in all other countries,
due to certain legal restrictions, MTS warrants that this product will be
free from defects in material or workmanship for a period of five years
from the date of purchase or, if date of purchase is not provided, five
years from the date of shipment, unless otherwise limited or prohibited by
law.
MTS MAKES NO OTHER WARRANTY, EXPRESSED OR
IMPLIED, AND ALL IMPLIED WARRANTIES OF
MERCHANTABILITY AND FITNESS FOR A PARTICULAR
PURPOSE ARE HEREBY DISCLAIMED.
This warranty does not apply to any products that have been damaged
by lightning storms, water, or power surges, or that have been
neglected, altered, abused, used for a purpose other than the one for
which they were manufactured, repaired by the customer or any party
without MTSs written authorization, or used in any manner
inconsistent with MTSs instructions.
60 MT5634ZPX-PCI
Page 61

5 Warranty, Service, and Tech Support
MTSs entire obligation under this warranty shall be limited (at MTSs
option) to repair or replacement of any products that prove to be
defective within the warranty period, or, at MTSs option, issuance of
a refund of the purchase price. Defective products must be returned by
Customer to MTSs factory with transportation prepaid.
MTS WILL NOT BE LIABLE FOR CONSEQUENTIAL DAMAGES
AND UNDER NO CIRCUMSTANCES WILL ITS LIABILITY
EXCEED THE PURCHASE PRICE FOR DEFECTIVE PRODUCTS.
Online Warranty Registration
To register your Multi-Tech product online, click the following link:
http://www.multitech.com/register.htm
MT5634ZPX-PCI 61
Page 62

Owner’s Manual
Technical Support
Multi-Tech has an excellent staff of technical support personnel
available to help you get the most out of your Multi-Tech product. If
you have any questions about the operation of this unit, please call
(800) 972-2439 (USA and Canada) or (612) 785-3500 (local and
international). Record modem information in the spaces provided
below and have it available when you call. If your modem requires
service, the tech support specialist will guide you on how to send in
your modem.
Recording Modem Information
Record the following information on your Multi-Tech modem. This
helps Tech Support in answering your questions.
Model no.: _____________________________________________
Serial no.: _____________________________________________
Firmware version:_______________________________________
Software version: _______________________________________
COM port no.: __________________________________________
IRQ setting: ____________________________________________
The modem model and serial numbers are silk-screened on your modem.
The software versions are printed on the diskette labels. Type
ATI1<cr> in terminal mode to display the modem firmware version.
Note the status of your modem in the space provided before calling
tech support. This includes screen messages, diagnostic test results,
problems with a specific application, etc.
_________________________________________________________
_________________________________________________________
_________________________________________________________
_________________________________________________________
_________________________________________________________
62 MT5634ZPX-PCI
Page 63

5 Warranty, Service, and Tech Support
Service
If your technical support specialist decides that service is required and
you are outside the USA, your local distributor of Multi-Tech products
usually offers the quickest and most economical repair option. If
necessary, you can send your modem to our Mounds View factory in
the USA. A modem that is shipped to us from outside the USA must
have a Returned Materials Authorization (RMA) and shipping
instructions. To return a modem for repair from inside the USA, no
RMA is required; simply send it to us freight prepaid. Include a
description of the problem, return billing and shipping addresses,
check or purchase order for out-of-warranty repairs, and name of the
technical support specialist you spoke to, if possible.
Send modems that require repairs to the following address:
Multi-Tech Systems, Inc.
2205 Woodale Drive
Mounds View, MN 55112
Attn: Repair
If you are shipping from outside the USA, please contact our Repair
Department for an RMA prior to your shipment. You can contact us by
telephone at (612) 785-3500 or by fax at
(612) 785-9874.
MT5634ZPX-PCI 63
Page 64

Owner’s Manual
The Multi-Tech BBS
For customers who do not have Internet access, Multi-Tech maintains a
bulletin board system (BBS) that mirrors its FTP site. Information
available from the BBS includes new product information, product
upgrade files, and problem-solving tips. The phone number for the
Multi-Tech BBS is (800) 392-2432 (USA and Canada) or (612) 7853702 (international and local).
The BBS can be accessed by any asynchronous modem operating at
1200 bps to 33,600 bps at a setting of 8 bits, no parity, and 1 stop bit
(8-N-1).
To log on to the Multi-Tech BBS
1. Set your communications program to 8-N-1.
2. Dial our BBS at (800) 392-2432 (USA and Canada) or (612) 7853702 (international and local).
3. At the prompts, type your first name, last name, and password;
then press ENTER. If you are a first time caller, the BBS asks if
your name is spelled correctly. If you answer yes, a questionnaire
appears. You must complete the questionnaire to use the BBS on
your first call.
4. Press ENTER until the Main Menu appears. From the Main Menu
you have access to two areas: the Files Menu and News. For help
on menu commands, type ?.
To Download a file
If you know the file name
1. From the Main Menu, type F to access the Files Menu; then type
D.
2. Enter the name of the file you want to download from the BBS.
3. If a password is required, enter the password.
4. Answer Y or N to the automatic logoff question.
5. Select a file transfer protocol by typing the indicated letter, such as
Z for Zmodem (the recommended protocol).
64 MT5634ZPX-PCI
Page 65

5 Warranty, Service, and Tech Support
6. If you select Zmodem, the transfer begins automatically. If you
select another protocol, you may have to initiate the transfer
yourself. (In most datacomm programs, the PAGE DOWN key
initiates the download.)
7. When the download is complete, press ENTER to return to the
File Menu.
8. To exit the BBS, type G and press ENTER.
If you dont know the file name
1. From the Main Menu, type F to access the Files Menu. For a list
of file areas, type L and press ENTER. Then type L and press
ENTER again. (If you do not type the second L, all of the files on
the BBS list.)
2. Mark each file area you want to examine by typing its list number
and pressing ENTER.
3. Enter L to list all the files in the selected file areas. Enter C to go
forward in the file list and P to go back.
4. To mark one or more files for download, type M, press ENTER,
type the list numbers of the files, and press ENTER again.
5. Enter D. A list of the files you marked appears. Enter E if you
want to edit the list; otherwise, enter D again to start the download
process.
6. Select a file transfer protocol by typing the indicated letter, such as
Z for Zmodem (the recommended protocol).
7. If you select Zmodem, the file transfers automatically. If you
select another protocol, you may have to initiate the transfer
yourself. (In most data communications programs, the PAGE
DOWN key initiates the download.)
8. When the download is complete, press ENTER to return to the
File Menu.
9. To exit the BBS, type G and press ENTER.
MT5634ZPX-PCI 65
Page 66

Owner’s Manual
About CompuServe
In addition to the BBS, Multi-Tech provides support through
CompuServes Modem Vendor Forum (GO MODEMVEN) under GO
MULTITECH. You can also download manuals, Help files, drivers,
Microsoft Mail scripts, and product tips and descriptions from the
forums Multi-Tech library. Refer to your CompuServe documentation
for special operating procedures.
About the Internet
Multi-Tech is a commercial provider on the Internet. We retrieve email
messages from the our customers on a periodic basis. If you refer to
receive technical support via the Internet, contact Tech Support at the
following address:
http://www.multitech.com/_forms/email_tech_support.htm
Multi-Techs web site is located at: http://www.multitech.com
An ftp site is located at: ftp://ftp.multitech.com
The ftp server mirrors the Multi-Tech BBS.
About the Multi-Tech Fax-Back Service
Multi-Techs fax-back system provides 24-hour access to sales,
marketing, and technical literature. Dial (612) 717-5888, follow the
voice prompts, and document number 10 for a catalog of available
documents. For convenience, have your fax number handy:
_________________________________
From the catalog, you can order newsletters, white papers, press
releases, etc. from the sales and marketing index (pages 14)or order
basic modem operation and troubleshooting guides form the technical
support and engineering index. To order, enter the FB Doc. number of
the literature you want to receive.
66 MT5634ZPX-PCI
Page 67

Appendix
Page 68

Owner’s Manual
Appendix A: Regulatory Compliance
FCC Regulations for Telephone Line
Interconnection
1. This equipment complies with Part 68 of the Federal
Communications Commission (FCC) rules. On the outside surface
of this equipment is a label that contains, among other
information, the FCC registration number. This information must
be provided to the telephone company.
2. As indicated below, the suitable jack (Universal Service Order
Code connecting arrangement) for this equipment is shown. If
applicable, the facility interface codes (FIC) and service order
codes (SOC) are shown.
3. An FCC-compliant telephone cord and modular plug is provided
with this equipment. This equipment is designed to be connected
to the telephone network or premises wiring using a compatible
modular jack that is Part 68 compliant. See installation
instructions for details.
4. If this equipment causes harm to the telephone network, the
telephone company will notify you in advance that temporary
discontinuance of service may be required. But if advance notice
isnt practical, the telephone company will notify the customer as
soon as possible. Also, you will be advised of your right to file a
complaint with the FCC if you believe it is necessary.
5. The telephone company may make changes in its facilities,
equipment, operations, or procedures that could affect the
operation of the equipment. If this happens, the telephone
company will provide advance notice in order for you to make
necessary modifications in order to maintain uninterrupted service.
6. If trouble is experienced with this equipment (the model of which
is indicated below), please contact Multi-Tech Systems, Inc., at
the address shown below for details of how to have repairs made.
If the equipment is causing harm to the telephone network, the
telephone company may request you remove the equipment from
the network until the problem is resolved.
68 MT5634ZPX-PCI
Page 69

Appendix
7. No repairs are to be made by you. Repairs are to be made only by
Multi-Tech Systems or its licensees. Unauthorized repairs void
registration and warranty.
8. If so required, this equipment is hearing-aid compatible.
Manufacturer: Multi-Tech Systems, Inc.
Trade name: MultiModemZPX-PCI
Model Number: MT5634ZPX
FCC Registration Number: AU7USA-32234-M5-E
Ringer Equivalence: 0.4B
Modular Jack (USOC): RJ-11C or RJ-11W
(single line)
Service Center in U.S.A.: Multi-Tech Systems Inc.
2205 Woodale Drive
Mounds View, MN 55112
(800) 328-9717
(612) 785-3500
(612) 785-9874 FAX
Fax Branding Statement
The Telephone Consumer Protection Act of 1991 makes it unlawful for
any person to use a computer or other electronic device, including fax
machines, to send any message unless such message clearly contains
the following information:
Date and time the message is sent
Identification of the business, or other entity, or other individual
sending the message
Telephone number of the sending machine or such business, other
entity, or individual
This information is to appear in a margin at the top or bottom of each
transmitted page on the first page of the transmission. (Adding this
information in the margin is referred to as fax branding.)
Since any number of fax software packages can be used with this
product, the user must refer to the fax software manual for setup
details. Typically, the fax branding information must be entered via the
configuration menu of the software.
MT5634ZPX-PCI 69
Page 70

Owner’s Manual
Canadian Limitations Notice
Notice: The ringer equivalence number (REN) assigned to each
terminal device provides an indication of the maximum number of
terminals allowed to be connected to a telephone interface. The
termination of an interface may consist of any combination of devices
subject only to the requirement that the sum of the ringer equivalence
numbers of all the devices does not exceed five.
Notice: The Industry Canada label identifies certificated equipment.
This certification means that the equipment meets certain
telecommunications network protective, operational and safety
requirements. The Department does not guarantee the equipment will
operate to the users satisfaction.
Before installing this equipment, users should ensure that it is
permissible to be connected to the facilities of the local
telecommunications company. The equipment must also be installed
using an acceptable method of connection. The customer should be
aware that compliance with the above conditions may not prevent
degradation of service in some situations.
Repairs to certified equipment should be made by an authorized
Canadian maintenance facility designated by the supplier. Any repairs
or alterations made by the user to this equipment, or equipment
malfunctions, may give the telecommunications company cause to
request the user to disconnect the equipment.
Users should ensure for their own protection that the electrical ground
connections of the power utility, telephone lines and internal metallic
water pipe system, if present, are connected together. This precaution
may be particularly important in rural areas.
Caution: Users should not attempt to make such connections
themselves, but should contact the appropriate electric inspection
authority, or electrician, as appropriate.
Le présent appareil numérique német pas de bruits radioélectriques
dépassant les limites applicables aux appareils numériques de la classe
B prescrites dans le Règlement sur le brouillage radioélectrique édicté
par le ministère des Communications du Canada.
70 MT5634ZPX-PCI
Page 71

Appendix
NOTE: This equipment has been tested and found to comply with the
limits for a Class B digital device, pursuant to Part 15 of the FCC
Rules. These limits are designed to provide reasonable protection
against harmful interference when the equipment is operated in a
residential installation. This equipment generates, uses and can radiate
radio frequency energy, and if not installed and used in accordance
with the instruction manual, may cause harmful interference to radio
communications. However, there is no guarantee that interference will
not occur in a particular installation. If this equipment does cause
harmful interference to radio or television reception, which can be
determined by turning the equipment off and on, the user is encouraged
to try to correct the interference by one or more of the following
measures:
Reorient or relocate the receiving antenna.
Increase the separation between the equipment and receiver.
Connect the equipment into an outlet on a circuit different from that
of which the receiver is connected.
Consult the dealer or an experienced radio/TV technician for help.
This device complies with Part 15 of the FCC rules. Operation is
subject to the following conditions: (1) This device may not cause
harmful interference, and (2) this device must accept any interference
received, including interference that may cause undesired operation.
Warning: Changes or modifications to this unit not expressly
approved by the party responsible for compliance could void the users
authority to operate this equipment.
MT5634ZPX-PCI 71
Page 72

Owner’s Manual
Product Safety Compliance
Approved for connection to telecommunications system specified in
the instructions for use subject to the conditions set out in them.
Warning: Interconnection directly, or by way of other apparatus,
of ports marked SAFETY WARNING see instructions for use with
ports marked or not so marked may produce hazardous conditions
on the network. Advice should be obtained from a competent
engineer before such a connection is made.
It is a condition of approval that the power required by the host and the
total of all adapter cards installed within the host environment, together
with any auxiliary apparatus, does not exceed the power specification
as stated in the Technical Reference Material of the host apparatus.
The power requirements for the ZPX are:
Modem operating voltages: +12 VDC, -12 VDC, +5 VDC
Modem power consumption: 1.2 Watts
In order to maintain the independent approval of this card, it is
essential that when other option cards are introduced which use or
generate a hazardous voltage, the minimum creepages and clearances
specified in the following table are maintained. A hazardous voltage is
one which exceeds 42.4 VAC peak or 50 VDC. If you have any doubt,
seek advice from a competent engineer before installing other adapters
into the host equipment.
The equipment must be installed such that with the exception of
connection to the host, clearance and creepage distances shown in the
following table are maintained between the card and any other
assemblies which use or generate a voltage shown in that table. The
larger the distance shown in brackets applies where the local
environment within the host is subject to conductive pollution or dry
nonconductive pollution, which could become conductive due to
condensation. Failure to maintain these minimum distances would
invalidate approval.
72 MT5634ZPX-PCI
Page 73

Appendix
Figure A-1. Creepage and Clearance Distances.
Except at the edge connector, which plugs into the hosts expansion
slot, clearance distance (Xmm) and creepage distance (Ymm), as given
in the above table, must be maintained between the communication
card and any assemblies which use or generate hazardous voltage.
This apparatus has been approved for the use of the following:
Auto-calling
Loop disconnect and MF dialing
Phone number storage and retrieval by a predetermined code
Operation in the absence of proceed indication
Detection of initial and secondary proceed indication
Automatic storage of last number dialed
Tone detection-busy
Auto clear from the originating end
DTR dialing
Modem
PBX timed break register recall
MT5634ZPX-PCI 73
Page 74

Owner’s Manual
European Low Voltage Directive
When correctly installed and maintained, the modem will present no
hazard to the user. When correctly installed the modem will be
connected to the PSTN or a PW and to a Data Terminal Equipment
(DTE), whose modem connections comply with ITU-T
recommendation V.28. The DTE connections are therefore taken to be
safe voltages (less than ± 30 volts).
Ports which are capable of connecting to other apparatus are defined as
SELV. To ensure conformity with EN41003, ensure that these ports
are only connected to ports of the same type on other apparatus.
Protection Against Contact with TNV Circuit (Internal
PC Cards)
The protective cover is fastened to the modem card by means that will
only allow a tool to remove the cover.
Warning: Removal of the protective cover will affect product safety
and user safety requirements.
EMC, Safety and Terminal Directive Compliance
The CE mark is affixed to this product to confirm compliance with the
following European Community Directives:
Council Directive 89/336/EEC of 3 May 1989 on the approximation
of the laws of Member States relating to electromagnetic
compatibility.
and
Council Directive 73/23/EEC of 19 February 1973 on the
harmonization of the laws of Member States relating to electrical
equipment designed for use within certain voltage limits:
and
Council Directive 98/13/EC of 12 March 1998 on the approximation
of the laws of Member States concerning telecommunications terminal
and Satellite earth station equipment.
74 MT5634ZPX-PCI
Page 75

Appendix
New Zealand Modem Warning Notice
Use of pulse dialing, when this equipment is connected to the same line
as other equipment, may give rise to bell tinkle or noise and may
also cause a false answer condition. Should such problems occur, the
user should NOT contact the Telecom Faults Service.
The preferred method of dialing is to use DTMF tones, as this is faster
than pulse (decadic) dialing and is readily available on almost all New
Zealand telephone exchanges.
WARNING NOTICE: No 111 or other calls can be made from this
device during a mains power failure.
MT5634ZPX-PCI 75
Page 76

Owner’s Manual
Appendix B: Technical Specifications
Trade Name MultiModemZPX-PCI
Model Numbers MT5634ZPX-PCI
Client-to-Server
Data Rates V.90/K56flex* speeds when accessing an ISP-
type V.90/K56flex server (actual speed
depend on server capabilities and line
conditions)
Client-to-Client
Data Rates Enhanced V.34 speeds to 33,600 plus 31,200,
28,800, 26,400, 24,000, 21,600, 19,200,
16,800, 14,400, 12,000, 9600, 7200, 4800,
2400, 1200, 0-300 bps
Fax Rates 14,400, 12,000, 9600, 7200, 4800, 2400, and
300 bps
Data Format Serial, binary, asynchronous
Data Compatibility V.90/K56flex, ITU V.34 extended, V.34, ITU
V.32bis, V.32, V.22bis, V.21, V.22, V.23;
Bell 212 and 103; ITU V.42, V.42bis
Fax Compatibility ITU Group 3, T.4, T.30, V.21, V.27ter, V.29,
V.17, and TIA/EIA 578 Class 1, Class 2
Voice Compatibility TIA/EIA IS-101, H.324 (V.8, V.25ter), V.80
Voice Mode Sampling Up to 44.100 kHz (down-sampled to 11.025
kHz)
Error Correction ITU V.42 (LAP-M and MNP Classes 24)
Data Compression ITU V.42bis (4:1 compression) and MNP 5
(2:1 compression)
Speed Detection Automatic speed detection and switching
between available speeds
*Although V.90/K56flex technology is capable of downloads of up to 56 Kbps, FCC
regulations currently restrict ISP modems to downloads of 53 Kbps.
76 MT5634ZPX-PCI
Page 77

Appendix
Fallback In adverse line conditions, the modem falls
back from its current operating speed to the
next reliable slower speed in 2400 bps
decrements (V.34 mode). If conditions
improve, the modem falls forward to the
fastest reliable speed in 2400 bps increments.
In V.90/K56flex mode, modem falls back and
falls forward in increments of 2000 bps.
Modes of Operation Full-duplex operation over dial-up lines,
automatic dialing, automatic or manual
answer.
Flow Control Software (XON/XOFF), hardware (RTS/CTS)
Intelligent Features Fully AT command compatible, autodial,
redial, pulse or tone dial, dial pauses, call
status display, auto-parity and data rate
selection, keyboard-controlled modem
options, and nonvolatile memory and onscreen displays for modem parameters.
Command Buffer 40 characters
Data Modulations FSK at 300 bps, DPSK at 1200 bps, QAM at
2400, 4800, and 9600 bps (non-trellis), QAM
with trellis-coded modulation (TCM) at 9600,
12,000, 14,400, 16,800, 19,200, 21,600,
24,000, 26,400, 28,800, 31,200, 33,600 and
56,000 bps
Fax Modulations V.21 CH2: FSK at 300 bps
V.27ter: DPSK at 4800 and 2400 bps
V.29: QAM at 9600 and 7200 bps
V.17: TCM at 14400, 12000, 9600, and 7200
bps
Carrier Frequencies: 1600, 1646, 1680, 1800, 1829, 1867,
V.34/V.90/K56flex 1920, 1959, 2000 Hz
Carrier Frequencies: 1800 Hz
MT5634ZPX-PCI 77
Page 78

Owner’s Manual
V.32terbo/V.32bis/V.32
Carrier Frequencies: Transmit Originate: 1200 Hz
ITU-T V.22bis/V.22 or Transmit Answer: 2400 Hz
Bell 212A Standard Receive Originate: 2400 Hz
(2400 & 1200 bps) Receive Answer: 1200 Hz
Carrier Frequencies: Transmit Originate: 1270 Hz mark
Bell 103 1070 Hz space
(300 bps) Transmit Answer: 2225 Hz mark
2025 Hz space
Receive Originate: 2225 Hz mark
2025 Hz space
Receive Answer: 1270 Hz mark
1070 Hz space
Fax Carrier Frequencies V.21 CH2 (half duplex):
1650 Hz mark, 1850 Hz space for Transmit
Originate;
1650 Hz mark, 1850 Hz space for Transmit
Answer
V.27ter: 1800 Hz Originate/Answer
V.29 QAM: 1700 Hz Originate/Answer
V.17 TCM: 1800 Hz Originate/Answer
Diagnostics Power-on self-test (POST) and local analog
loop
Transmit Level -10dB
Frequency Stability ±0.01%
Receiver Sensitivity -43 dB under worst-case conditions
AGC Dynamic Range 43 dB
Serial Interface ITU-T V.24/V.28
Bus Type PCI Local Bus Rev.2.1
78 MT5634ZPX-PCI
Page 79

Appendix
Connectors Two RJ-11 phone jacks and two plugs for
microphone, and speakers
Cables One RJ-11 phone cable
Environmental Temperature range 0° to 50° C (32° to 120° F),
humidity range 2090% (non-condensing)
Power Requirements 150 mA @ 5 VDC; 5 mA @ ±12 VDC
Dimensions 0.7" W × 4.8" H × 5.8" L
1.8 cm × 12.2 cm × 14.7 cm
Limited Warranty 10 years
MT5634ZPX-PCI 79
Page 80

Owner’s Manual
Appendix C: ASCII Conversion Chart
CTRL CODE HEX DEC CODE HEX DEC CODE HEX DEC CODE HEX DEC
@ NUL 00 0 SP 20 32 @ 40 64 ` 60 96
A SOH 01 1 ! 21 33 A 41 65 a 61 97
B STX 02 2 " 22 34 B 42 66 b 62 98
C ETX 03 3 # 23 35 C 43 67 c 63 99
D EOT 04 4 $ 24 36 D 44 68 d 64 100
E ENQ 05 5 % 25 37 E 45 69 e 65 101
F ACK 06 6 & 26 38 F 46 70 f 66 102
G BEL 07 7 ’ 27 39 G 47 71 g 67 103
H BS 08 8 ( 28 40 H 48 72 h 68 104
I HT 09 9 ) 29 41 I 49 73 i 69 105
J LF 0A 10 * 2A 42 J 4A 74 j 6A 106
K VT 0B 11 + 2B 43 K 4B 75 k 6B 107
L FF 0C 12 , 2C 44 L 4C 76 l 6C 108
M CR 0D 13 - 2D 45 M 4D 77 m 6D 109
N SO 0E 14 . 2E 46 N 4E 78 n 6E 110
O SI 0F 15 / 2F 47 O 4F 79 o 6F 111
P DLE 10 16 0 30 48 P 50 80 p 70 112
Q DC1 11 17 1 31 49 Q 51 81 q 71 113
R DC2 12 18 2 32 50 R 52 82 r 72 114
S DC3 13 19 3 33 51 S 53 83 s 73 115
T DC4 14 20 4 34 52 T 54 84 t 74 116
U NAK 15 21 5 35 53 U 55 85 u 75 117
V SYN 16 22 6 36 54 V 56 86 v 76 118
W ETB 17 23 7 37 55 W 57 87 w 77 119
X CAN 18 24 8 38 56 X 58 88 x 78 120
Y EM 19 25 9 39 57 Y 59 89 y 79 121
Z SUB 1A 26 : 3A 58 Z 5A 90 z 7A 122
[ ESC 1B 27 ; 3B 59 [ 5B 91 { 7B 123
\ FS 1C 28 < 3C 60 \ 5C 92 | 7C 124
] GS 1D 29 = 3D 61 ] 5D 93 } 7D 125
^RS1E30>3E62^5E94~7E126
_ US 1F 31 ? 3F 63 _ 5F 95 DEL 7F 127
NUL Null, or all zeros VT Vertical Tab SYN Sync.
SOH Start of Header FF Form Feed ETB End Transmission Block
STX Start of Text CR Carriage Return CAN Cancel
ETX End of Text SO Shift Out EM End of Medium
EOT End of Transmission SI Shift In SUB Substitute
ENQ Enquiry DLE Data Link Escape ESC Escape
ACK Acknowledge DC1 Device Control 1 FS File Separator
BEL Bell or Alarm DC2 Device Control 2 GS Group Separator
BS Backspace DC3 Device Control 3 RS Record Separator
HT Horizontal Tab DC4 Device Control 4 US Unit Separator
LF Line Feed NAK Negative Acknowledge DEL Delete
80 MT5634ZPX-PCI
Page 81

Appendix
Appendix D: FLASHWINFlash Upgrade
Introduction
Your modem is controlled by semi-permanent software, called
firmware, that is stored in flash memory. Firmware is nonvolatile; that
is, it remains stored in memory when the modem is turned off.
However, it can be changed by either the manufacturer or the user as
bugs are fixed or new features are added.
Since the firmware in your modem is stored in flash memory, you can
upgrade it yourself in a few minutes by using the following procedures.
FLASHWIN
1. Copy FLASHWIN.ZIP and the downloaded .HEX file to a
temporary directory.
2. After unzipping FLASHWIN.ZIP, run FLASHWIN by doubleclicking on its icon or file name.
3. Select the COM port your modem is on and the speed at which
you want to program.
4. Enter the name and path of the *.HEX file you want to load into
the modem.
5. After you verify your selections, click Perform Flash to load the
firmware into the modem.
6. When Loading Status reaches 100%, the modem is upgraded and
you can close FLASHWIN.
Your modem is now updated. You can now open your terminal
program to reprogram your modem parameters, if necessary, or to
confirm the update by typing ATI in the terminal window.
MT5634ZPX-PCI 81
Page 82

Owner’s Manual
82 MT5634ZPX-PCI
Page 83

Index
Page 84

Owner’s Manual
Index
A
answering machine
capabilities , 8
test , 26
ASCII codes , 80
AT commands , 8
#S , 31
#S= , 31
%B , 43
%C , 43
&&S , 44
&B , 39
&C , 39
&D , 39
&F , 40
&G , 40
&J , 40
&K , 40
&M , 40
&Q , 40
&S , 41
&T , 41
&V , 41
&W , 30, 32, 41
&Y , 41
&Z= , 41
+++AT<CR> , 34
+ES= , 44
-C , 43
\G , 42
\J , 42
\K , 42
\N , 42
\Q , 42
\V , 43
\X , 43
A , 34
A/ , 34
AT , 34
B , 35
C , 35
E , 36
F , 36
H , 36
I , 62
L , 37
M , 37
N , 37
O , 30, 32, 37
Q , 38
S= , 38
S? , 38
V , 38
X , 38, 55
Y , 39
Z , 39
AT&T
call card tones , 34, 36
attention code , 34
Auto-answer , 45
B
backspace character , 45
BBS
Multi-Tech , 6481
timeout , 57
Bell 212A mode , 35
blacklist , 43
break signal , 42
C
call waiting , 30, 56
carriage return character , 45
COM port installation , 19
comma pause , 45
commands
Answer , 34
Async Communications Mode , 40
Auxiliary Relay Control , 40
Carrier Control , 35
Communication Standard , 35
84 MT5634ZPX-PCI
Page 85

Index
Communications Mode , 40
Data Buffer Control , 42
Data Calling Tone , 43
Data Compression Control , 43
DCD Control , 39
Dial , 35
Dial Stored Telephone Number , 36
DSR Control , 41
DTR Control , 39
Echo Command Mode Characters ,
36
Echo Online Data Characters , 36
Enable Synchronous Buffered Mode ,
44
Error Correction Mode Selection , 42
Hook Control , 36
Information Request , 36
Load Factory Default Settings , 40
Local Flow Control Selection ,
40, 42
Long Space Disconnect , 39
Modem Port Flow Control , 42
Modem Reset , 39
Modulation Handshake , 37
Monitor Speaker Mode , 37
Protocol Result Code , 43
Read Register Value , 38
Result Code Format , 38
Result Code Selection , 38
Result Codes Enable/Disable , 38
Return Online to Data Mode , 37
Select Stored Configuration , 41
Self-Test , 41
Set Break Control , 42
Set Register Value , 38
Speaker Codec Loopback , 44
Store Current Configuration , 41
Store Telephone Number , 41
V.22bis Guard Tone , 40
V.32 Auto Retrain , 39
View Current Configuration , 41
View Numbers in Blacklist , 43
XON/XOFF Pass-Through , 43
CompuServe , 58, 66
configuration
selecting , 41
storing , 41
viewing , 41
configuring
communications software , 2881
conflicting device list , 20
connect messages , 29, 49
connectors
LINE , 18
MIC IN , 18
PHONE , 18
Contents, package , 8
D
data , 7
data buffering , 40
data compression , 7
data features , 7
data mode , 37
data rates (bps) , 76
default settings , 40
detect AT&T call card tone , 34
device conflict
resolving , 54
dialing tones , 46
disconnect delay , 45
E
enable/disable V25 data calling tone
(S35) , 46
ENTER key , 34
error correction , 7
escape character , 45
escape sequence , 34
MT5634ZPX-PCI 85
Page 86

Owner’s Manual
F
fall-forward , 7
fallback , 7, 37
fax , 58
command set , 8
features , 8
transmission speeds , 8
fax-back service , 66
FCC Regulations , 6881
firmware
upgrading , 81
flash memory , 81
FLASHWIN , 81
flow control , 40, 42, 58
G
guard tone , 40
H
H.324 , 44
handshake , 37
hanging up , 36
hangup delay , 45
headphone , 18
I
inactivity timer , 43
inactivity timer (S30) , 46
initialization strings , 29
Installation
requirements , 14
installation , 15
hardware , 1481
Windows 95 drivers , 19
Internet , 66
IRQ , 16
L
line feed character , 45
loopback test , 26
M
manual conventions , 12
maximum dial rate (S37) , 46
Microsoft Fax , 25, 26
accessing , 26
MNP 5 data compression , 7, 43, 57
MNP error correction , 7, 42
Multi-Tech
fax-back service , 66
Multi-Tech BBS , 6481
MultiModemZPX
operation , 22
O
on-hook/off-hook , 36
online command mode , 37
outside line
dialing , 30
P
package contents , 8
pause
dialing , 45
phone line connection , 18
Plug-and-Play , 7
port address , 16
product safety compliance , 7281
R
remote configuration , 30
escape character , 31
removing
previous modem from Windows 95 ,
21
repeat last command , 34
resetting the modem , 39, 40
result codes , 43, 55
table , 49
retrain , 39
rings
number of , 45
86 MT5634ZPX-PCI
Page 87

Index
S
S-registers , 4581
reading , 38
S0 , 45
S1 , 45
S10 , 45
S11 , 46
S2 , 45
S28 , 46
S3 , 45
S37 , 56
S4 , 45
S5 , 45
S6 , 45
S7 , 45
S8 , 45
S9 , 31
setting , 38
safety , 15
safety warnings , 15
serial port baud rate , 29
service , 63
setup password , 31
simple operations , 22
software
configuration , 23, 2881
Software User License Agreement , 61
sound card , 21
speaker
controlling , 37
speakerphone , 8, 26, 27
specifications , 76
speed conversion (data buffer) , 40, 42
speed, transmission
fax , 8
static electricity precautions , 17
storing
current configuration , 29
telephone numbers , 8, 41
synchronous buffered mode , 44
T
technical specifications , 76
technical support , 62, 66
telephone cable , 18
telephone numbers
storing , 8
testing
data functions , 23
fax functions , 25
voice functions , 26
tones
dialing , 46
troubleshooting , 20
typographic conventions , 12
U
upgrading the modem , 81
V
V.22 mode , 35
V.25 , 43
V.34 modulation , 46
V.42 eror correction , 42
V.42 error correction , 7
V.42bis data compression , 7, 43
V.90
support
V.8bis sequence , 9
video , 44
voice
command set , 8
features , 8
W
wait before dialing , 45
wait for carrier , 45
warranty , 60
WinCIM , 58
MT5634ZPX-PCI 87
Page 88

Owner’s Manual
Windows 95 drivers , 19
installing , 19
removing , 21
World Wide Web , 66
X
Xmodem , 57
Y
Ymodem/G , 57
Z
Zmodem , 57
88 MT5634ZPX-PCI
 Loading...