

Page 1

MultiMobile ZLX
MT128ZLX-ST/NT
ISDN PC-Card Modem
User Guide
Page 2

MultiMobile MT128ZLX PC Card Modem User Guide
P/N S0000154, Revision A
Copyright © 2001 by Multi-Tech Systems, Inc.
All rights reserved. This publication may not be reproduced, in whole or in part, without prior expressed
written permission from Multi-Tech Systems, Inc.
Multi-Tech Systems, Inc. makes no representation or warranties with respect to the contents hereof and
specifically disclaims any implied warranties of merchantability or fitness for any particu la r pu rpos e.
Furthermore, Multi-Tech Systems, I nc . res e rv es the right to revise this publication and to ma ke c hanges
from time to time in the content hereof without obligation of Multi-Tech Systems , Inc. , to notify any
person or organization of such revisions or cha ng es .
Revision Date Description
A 2/24/01 Supersedes Owner’s Manual P/N 82068901
Multi-Tech, MultiMobile and the M u lti-Tech logo are trademarks of Multi-Tech Systems , Inc. W ind ow s is
a registered trademarks of Microsoft in the U.S. and other countries. Other trademarks and trade names
mentioned in this publication belong to their respective owners.
Multi-Tech Systems, Inc.
2205 Woodale Drive
Mounds View, Minnesota 55112
(763) 785-3500 or (800) 328-9717
Fax (763) 785-9874
Technical Support (800) 972-2439
Internet Address: http://www.multitech.com
Page 3

Software User License Agreement
The MultiMobile softwa re is licensed by Multi-Tech S ys tems, Inc., to the origi nal end-user purchaser of the
product, hereafter referred to as “Licensee.” The License includes the di stribution disc, other accompanying
programs, and the documentation. The MultiMobile software, hereafter referred to as “Software,” consists of
the computer program files included on the original distribution disc.
Licensee agrees that by purcha s e a n d/or us e of the Software, he hereby accept s and agrees to the terms of t his
License Agreement.
In consideration of mutual covenants contained herein, and other good and valuable considerations, the receipt
and sufficiency of which is acknowledged, Multi-Tech Systems, Inc. does hereby grant to the Licensee a nontransferable and non-exclusive license to use the Software and accompanying documentation on the following
conditions and terms: The software is furnished to the Licensee for execution and use on a single computer system only and may be copied (with the inclusion of the Multi-Tech Systems, Inc . copyright notice) only for use
on that computer system. T h e L i censee hereby agrees not to provide or otherwis e m ake available any portion of
this software in any form to any third party without the prior express written approval of Multi-Tech Systems,
Inc.
Licensee is hereby informed that this Software contains confidential proprietary and valuable trade secrets
developed by or licensed to Multi-Tech Systems, Inc. and agrees that sole ownership shall remain with MultiTech Systems, Inc.
The Software is copyrighted. Except as provided herein, the Software and documentation supplied under this
agreement may not be copied, reproduc ed, published, licensed, sub-licensed, di s tributed, transferred, or made
available in any form, in whole or in part, to others, without expressed written permission of Multi-Tech
Systems, Inc. Copies of th e S o ftware may be made to replace worn or deteriorated copies for archival or backup
procedures.
Licensee agrees to implement sufficient security measures to protect Multi-Tech Systems, Inc. proprietary
interests and not to allow the use, copying or transfer by any means, other than in accordance with this
agreement. Licensee agrees that any breach of this agreement will be dama ging to Multi-Tech S ys tems, Inc.
Licensee agrees that all warranties, implied or otherwise, with regard to this Software, including all warranties
of merchantability and fitness for any particular purpose are expressly waived, and no liability shall extend to
any damages, including consequential damages, whether known to Multi-Tech Systems, Inc. It is hereby expressly agreed that Licensee’s remedy is limited to replacement or refund of t he l i c ense fee, at t he option of
Multi-Tech Systems, Inc., for defective distribution media. There is no warranty for misused materials.
This package contains a compact disc. Neither this software nor the accompanying documentat ion m a y be
modified or translated without the written permission of Multi-Tech Systems, Inc.
This agreement shall be governed by the laws of the St ate of Minnesota. The terms a nd conditions of this
agreement shall prevai l regardless of the terms of a n y other submitted by the Licensee. Th i s agreement
supersedes any proposal or prior agreement. L i censee further agrees that thi s L i cense Agreement is the
complete and exclusive s tatement of Agreement, oral, written, or any other communications between MultiTech Systems, Inc. and Li censee relating to the subject matter of this agreement. This agreement is not a ssignable without written permission of an authorized agent of Multi-Tech Systems, Inc.
iii
Page 4

v
Contents
1 Introduction...................................................................1
Product Description...........................................................................................................................................2
About This Manual............................................................................................................................................2
MT128ZLX-ST/NT & Computer Operating Systems................................................................................2
MT128ZLX-ST/NT & Application Program Interfaces............................................................................3
Safety Warnings.................................................................................................................................................3
Technical Specifications....................................................................................................................................4
Features..............................................................................................................................................................5
2 Installation & Use in Windows 95 ................................6
MT128ZLX-ST/NT: Windows 95 Driver Procedures........................................................................................7
Windows 95 Installation ...........................................................................................................................7
Verifying the Windows 95 Installation...................................................................................................18
Configuring the MT128ZLX in Windows 95...........................................................................................19
Uninstalling MT128ZLX-ST/NT Drivers in Windows 95.......................................................................20
MT128ZLX: Using APIs in Windows 95.........................................................................................................23
About APIs...............................................................................................................................................23
The NDIS API..................................................................................................................................23
The VCOMM API.............................................................................................................................23
The CAPI API..................................................................................................................................24
Intro to API Single-Channel and MultiLink Examples...........................................................................24
Windows 95 NDIS : Single Channel Access Example .............................................................................25
Windows 95 NDIS: Dual Channel Access Example (MultiLink)............................................................29
Windows 95 Vcomm: Single Channel Access Example.........................................................................31
Windows 95 Vcomm: Dual Channel Access Example (MultiLink) .......................................................34
Windows 95 CAPI: Single Channel Access Example..............................................................................39
Windows 95 CAPI: Dual Channel Access Example (MultiLink)............................................................43
3 Installation & Use in Windows 98 ..............................48
MT128ZLX-ST/NT: Windows 98 Driver Procedures......................................................................................49
Windows 98 Installation .........................................................................................................................49
Verifying the Windows 98 Installation...................................................................................................58
Configuring the MT128ZLX-ST/NT in Windows 98...............................................................................59
Uninstalling MT128ZLX-ST/NT Drivers in Windows 98.......................................................................61
MT128ZLX: Using APIs in Windows 98.........................................................................................................64
About APIs...............................................................................................................................................64
The NDIS API..................................................................................................................................64
The VCOMM API.............................................................................................................................64
The CAPI API..................................................................................................................................65
Intro to API Single-Channel and MultiLink Examples...........................................................................65
Windows 98 NDIS : Single Channel Access Example .............................................................................66
Windows 98 NDIS: Dual Channel Access Example (MultiLink)............................................................70
Windows 98 VCOMM: Single Channel Access Example........................................................................72
Windows 98 Vcomm: Dual Channel Access Example (MultiLink) .......................................................76
Windows 98 CAPI: Single Channel Access Example..............................................................................81
Windows 98 CAPI: Dual Channel Access Example (MultiLink)............................................................85
i
Page 5

v
4 Installation & Use in Windows NT..............................90
MT128ZLX-ST/NT: Windows NT4 Driver Procedures...................................................................................91
Windows NT4 Installation......................................................................................................................91
Verifying the Windows NT4 Installation..............................................................................................102
Configuring the MT128ZLX in Windows NT4......................................................................................104
Uninstalling the MT128ZLX-ST/NT Drivers in Windows NT4............................................................106
MT128ZLX: Using APIs in Windows NT......................................................................................................110
About APIs.............................................................................................................................................110
The NDIS API................................................................................................................................110
The CAPI API................................................................................................................................111
Intro to API Single-Channel and MultiLink Examples.........................................................................111
Windows NT4 NDIS: Single Channel Access Example........................................................................112
Windows NT4 NDIS: Dual Channel Access Example (MultiLink)...................................................... 117
Windows NT4 VCOMM: Single Channel Access (not supported)...........................................................120
Windows NT4 VCOMM: Dual Channel Access (not supported)..............................................................120
Windows NT4 CAPI: Single Channel Access Example ........................................................................121
Windows NT4 CAPI: Dual Channel Access Example (MultiLink).......................................................127
5 Installation & Use in Windows 2000 ........................137
MT128ZLX-ST/NT: Windows 2000 Driver Procedures................................................................................138
Windows 2000 Installation.................................................................................................................... 138
Verifying the Windows 2000 Installation.............................................................................................144
Configuring the MT128ZLX-ST/NT in Windows 2000......................................................................... 145
Uninstalling the MT128ZLX-ST/NT Drivers in Windows 2000...........................................................147
MT128ZLX: Using APIs in Windows 2000...................................................................................................151
About APIs.............................................................................................................................................151
The NDIS API................................................................................................................................151
The VCOMM API...........................................................................................................................151
The CAPI API................................................................................................................................152
Intro to API Single-Channel and MultiLink Examples.........................................................................152
Windows 2000 NDIS: Single Channel Access Example.......................................................................153
Windows 2000 NDIS: Dual Channel Access Example (MultiLink).....................................................159
Windows 2000 Vcomm: Single Channel Access Example................................................................... 162
Windows 2000 Vcomm: Dual Channel Access Example (MultiLink).................................................. 167
Windows 2000 CAPI: Single Channel Access Example........................................................................168
Windows 2000 CAPI: Dual Channel Access Example (MultiLink)......................................................174
6 Installation & Use in Windows ME...........................181
MT128ZLX-ST/NT: Windows ME Driver Procedures.................................................................................. 182
Windows ME Installation...................................................................................................................... 182
Verifying the Windows ME Installation...............................................................................................193
Configuring the MT128ZLX-ST/NT in Windows ME...........................................................................194
Uninstalling the MT128ZLX-ST/NT Drivers in Windows ME.............................................................195
MT128ZLX: Using APIs in Windows ME.....................................................................................................198
About APIs.............................................................................................................................................198
The NDIS API................................................................................................................................198
The VCOMM API...........................................................................................................................198
The CAPI API................................................................................................................................199
Intro to API Single-Channel and MultiLink Examples.........................................................................199
Windows ME NDIS: Single Channel Access Example .........................................................................200
Windows ME NDIS: Dual Channel Access Example (MultiLink).......................................................204
Page 6

Windows ME Vcomm: Single Channel Access Example.....................................................................206
Windows ME Vcomm: Dual Channel Access Example (MultiLink)....................................................209
Windows ME CAPI: Single Channel Access Example..........................................................................212
Windows ME CAPI: Dual Channel Access Example (MultiLink)........................................................217
7 Warranty, Service, & Tech Support..........................221
Limited Warranty..........................................................................................................................................222
Upgrades and Tech Support..........................................................................................................................222
Service............................................................................................................................................................222
Appendix A.....................................................................223
Regulatory Agency Information ....................................223
FCC Regulatory Statements...........................................................................................................................224
Consumer Instructions .........................................................................................................................224
Product/Manufacturer Description......................................................................................................225
FCC Part 15 Statement...........................................................................................................................225
Canadian Limitations Notice.........................................................................................................................225
EMC, Safety, and Terminal Directive Compliance........................................................................................226
Appendix B: Technical Specifications.........................227
Appendix C: Troubleshooting......................................230
Problem/Cause/Solution Dialogue................................................................................................................231
COM Port and IRQ Conflicts - General.......................................................................................................... 234
COM Port and IRQ Conflicts - Windows 95..................................................................................................234
Appendix D: Using AT Commands ..............................235
Appendix E: ISDN Primer............................................. 240
Introduction to ISDN.....................................................................................................................................241
BRI ISDN........................................................................................................................................................241
PRI ISDN........................................................................................................................................................ 241
Digital End-to-End.........................................................................................................................................242
ISDN Configuration.......................................................................................................................................242
ISDN Terminal Adapters – Internal or External...........................................................................................243
Interfaces for ISDN Devices: “U” or “S/T” ...................................................................................................243
The Telco/Subscriber Responsibility Boundary...........................................................................................243
ISDN Wiring: Standards & Pitfalls................................................................................................................244
ISDN Lines and Multitple Devices.................................................................................................................244
ISDN Connections..........................................................................................................................................244
Appendix F: Glossary of ISDN-Related Terms.............245
vi
Page 7

v
Appendix G: Phone Jack Pin Assignments.................249
RJ45 pin-outs of U-Interface.........................................................................................................250
RJ45 Pinouts of S/T Interface........................................................................................................250
ii
Page 8

1 Introduction
Page 9

MultiMobile MT128ZLX User Guide 1 Introduction
Product Description
The MT128ZLX-ST/NT is a credit-card-size ISDN terminal adapter. It is plug-and-play compatible. The
MT128ZLX-ST/NT is a Type II PCMCIA (PC-card) device with a thickness of 5 mm. It complies with the
PCMCIA Standard Release 2.1 and JEIDA 4.2. The MT128ZLX-ST works with the “S/T” ISDN interface.
The MT128ZLX-NT works with the “U” ISDN interface. Otherwise the MT128ZLX-ST and the MT128ZLXNT are functionally equiva len t.
The MT128ZLX is compatible with common ISDN telephony switch types, including NI-1, AT&T 5-ESS,
Nortel DMS-100, ETSI, and Japan INS-64. It uses Basic-Rate-Interface (ISDN-BRI) service and operates at
data speeds up to 128Kbps.
The MT128ZLX supports most common communications protocols (including V.110, V.120, PPP, MLP,
MLP+BOD, and HDLC Transparent).
The MT128ZLX supports common Application Program Interfaces like NDIS, CAPI 2.0, and VCOMM (for
Windows 95/98/2000/ME but not for Windows NT).
About This Manual
This User Guide explains how to install, configure, and operate your MT128ZLX-ST or MT128ZLX-NT
terminal adapter in each of five operating systems.
MT128ZLX-ST/NT & Computer Operating Systems
Procedures for installing, verifying, configuring, and un-installing the MT128ZLX are quite different for
each operating system. The use of Application Program Interfac es a lso differs significantly from one
operating system to another. For this reason, this manual contains a separate chapter for each operating
system. The operating systems are:
Windows 95 Windows 2000
Windows 98 Windows ME (Millenium Edition)
Windows NT
Before you can install the MT128ZLX in your computer under any operating system, you will need to
obtain information from your telephone company about your ISDN s ervice. The information needed is
that which is specific to the way ISDN is implemented w ith the s pecific telephony equ ipment tha t you r
telephone company uses in addition to specific information about you r own ind iv idu al ISDN account. You
will need:
SPIDs (North America only)
Switch Type
Voice Encoding scheme
Telephone Number(s)
2
Page 10

MultiMobile MT128ZLX User Guide 1 Introduction
MT128ZLX-ST/NT & Application Program Interfaces
The MT128ZLX-ST/NT operates in conjunction with three Application Program Interface software
packages: NDIS, VCOMM , or CAPI. The full na mes of thes e prog rams are as follows:
NDIS (Network Driver Interface Specification):
VCOMM (Virtual Communica tions D river):
CAPI (Common ISDN Application Program Interface):
Each API contains software components that interact with the operating s ys tem (OS) of the computer in
which the MT128ZLX is installed. The “API Usage” section of each OS-specific chapter will present
examples of how the MT128ZLX can be used with these APIs in that particular OS. (The CAPI-compliant
program used in these examples is RVS-COM Lite.)
Each API adds communications functionality to the system. Ea ch of the three APIs a d d s a d ifferent s et of
features to the system, although the APIs have s u b s ta ntial functionality in common with each other.
Safety Warnings
Never install telephone wiring d u rin g a lightning storm.
Never install telephone jacks in wet locations unless the jacks are specifically designed for wet locations.
Never touch uninsulated telephone wires or terminals unless the telephone line has been disconnected at the netw ork interface.
Use caution when installin g or mod ify ing telephone lines.
Avoid using a telephone (other than cordless type) during an electrical storm. There may be a remote risk of electrical shock from
lightning.
Do not use the telephone to report a gas leak in the vicinity of that lea k.
3
Page 11

MultiMobile MT128ZLX User Guide 1 Introduction
Technical Specifications
Model Number: MT128ZLX-ST or MT128ZLX-NT
Dimensions: 54mm (W) x 85.6mm (L) x 5mm (H)
Weight: 1.225 oz. (35 g)
Power: +5V
Power Consumption: 0.86 W (concurrent mode)
Cable/Connector: RJ-45 (telco end), 15-pin (to laptop PC)
PC Card Interface: PCMCIA Type II
Switch Compatibility: AT&T 5ESS, Nortel DMS-100, NI-1, ETSI
Operating Systems: Windows 95 (OSR2), Windows 98, Win NT,
Term. Adapter Specs:
±5%, @220mA
Windows 2000, Windows ME
• Microsoft Plug-and-Play compatible
• Multiple signaling protocol compatibility with these ISDN protocols
and phone switches: NI-1, AT&T 5ESS, Nortel DMS-100, ETSI
• B-Channel speed support: 56 kbps and 64 kbps
• B-Channel protocols: V.120, X.75, Async-to-Sync PPP Conversion,
Multi-Link PPP (RFC1317) with channel bundling at 112kbps or ,
and HDLC Raw Data.
• Compatible with AT command set
• Windows-based configuration utility inclu d ed
4
Page 12

MultiMobile MT128ZLX User Guide 1 Introduction
Features
• Compatible with most laptop computers
• Compatible with Card and Socket Services
• Easy to install and use
• Card is hot swappable
• Supports popular OSs (e.g., Windows 95/98/NT/2000/ME)
• Windows-based configuration utility inclu d ed
•==Microsoft Plug and Play (PnP) Compatible
•==Multiple signaling protocol compatibility with the following ISDN protocols and switches: NI-1, ETSI,
AT&T 5ESS and Nortel DMS-100
•==B-Channel speed support: 56Kbps and 64Kbps
•==B-Channel Protocol: V.120, X.75, Async-to-Sync PPP Conversion, Multi-Link PPP (RFC1317), and
HDLC raw data, V.110
•==Three Application Program Interfaces (APIs) are supported:
NDIS, CAPI, and VCOMM (VCOMM not supported for WinNT)
•==AT command set compatible
•==Windows-based configuration utility inclu d ed.
5
Page 13

2 Installation & Use in Windows 95
6
Page 14
MultiMobile MT128ZLX User Guide 2: Windows 95 Driver Procedures
MT128ZLX-ST/NT: Windows 95 Driver Procedures
Windows 95 Installation
NOTE: Before beginning the installation, you mu s t ob ta in the follow ing technical information from your
telephone company:
SPIDs (North America only)
Switch Type
Voice Encoding scheme
Telephone Number(s)
NOTE: As you begin this procedure, the MT128ZLX card should not be installed in the computer’s
PCMCIA slot. The setup.exe file must be run before the card is installed. Otherwise problems
will arise as Windows 95 detects the device.
1. For now, leave the MT128ZLX card out of the computer’s PCMCIA slot.
2. Insert the MT128ZLX Installation CD into the computer’s CD-ROM drive.
3. Using Windows Explorer, browse to the win9x directory on the MT128ZLX Installation CD.
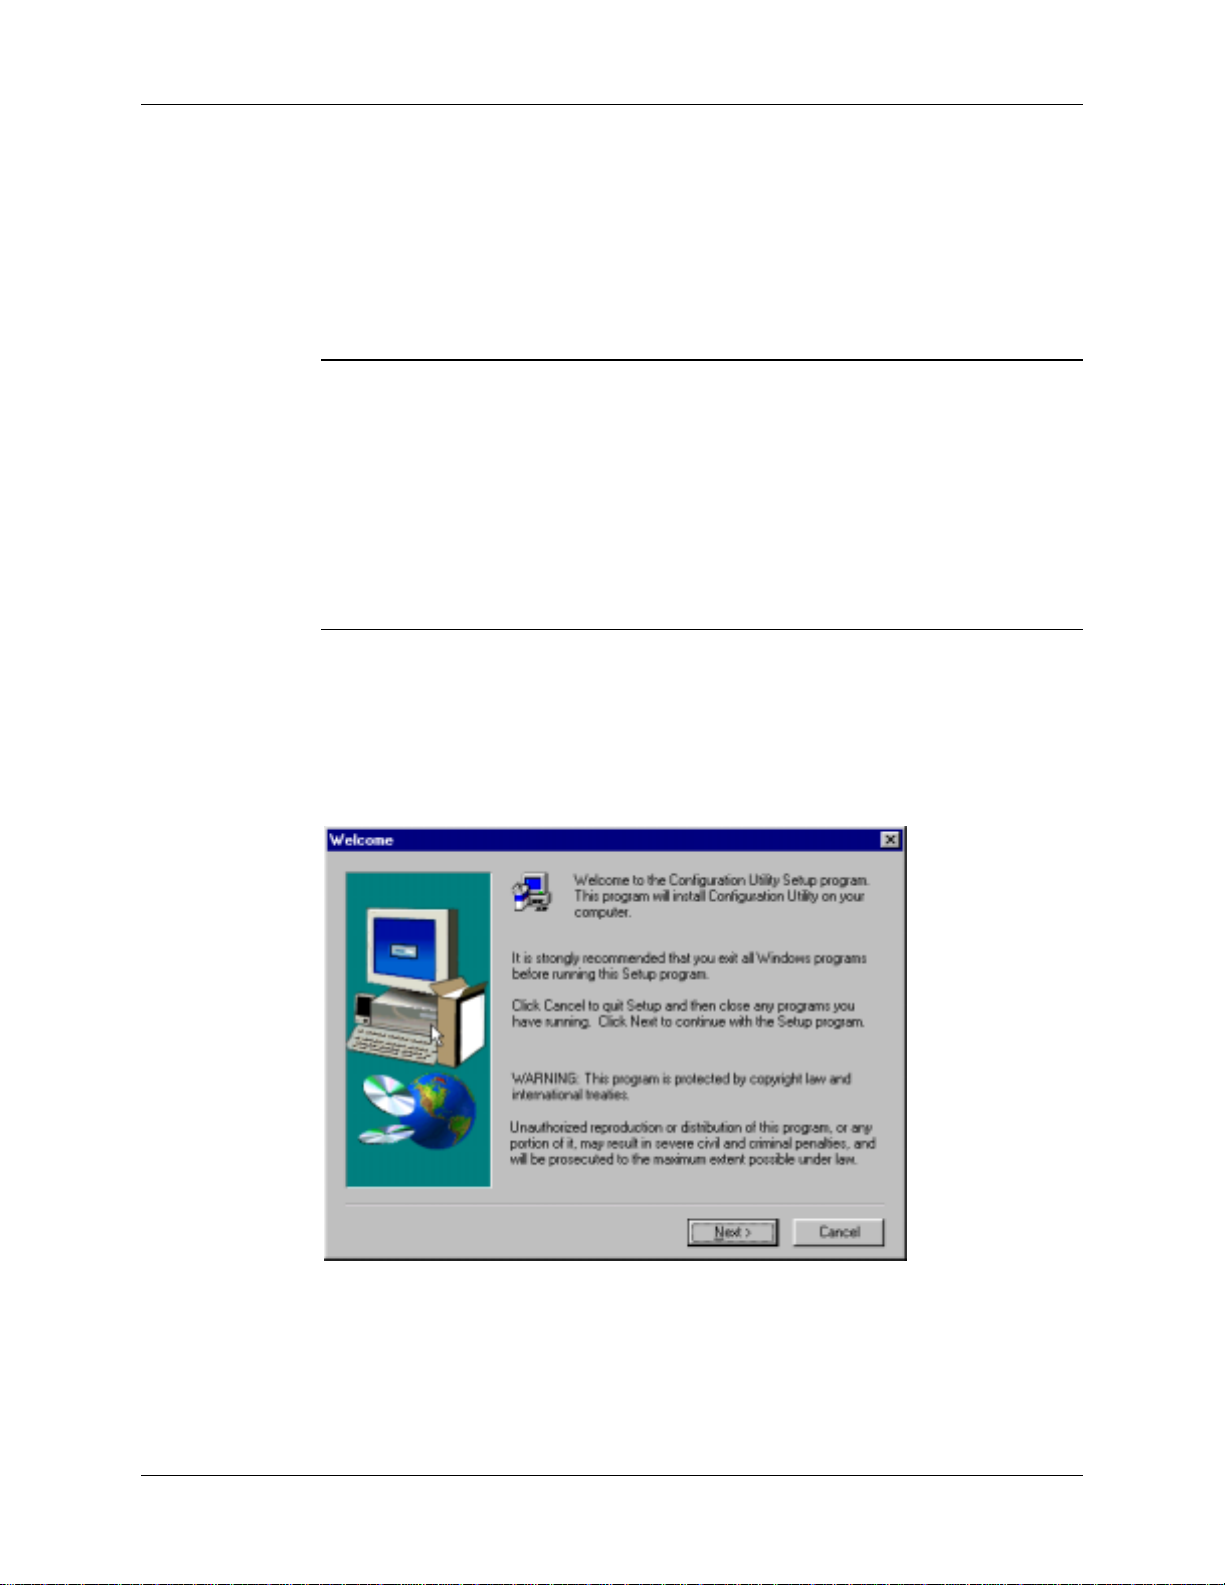
4. Double-click on the Setup.exe file to launch the Configuration Utility Setup program.
At the Welcome screen, click Next>.
7
Page 15
MultiMobile MT128ZLX User Guide 2: Windows 95 Driver Procedures
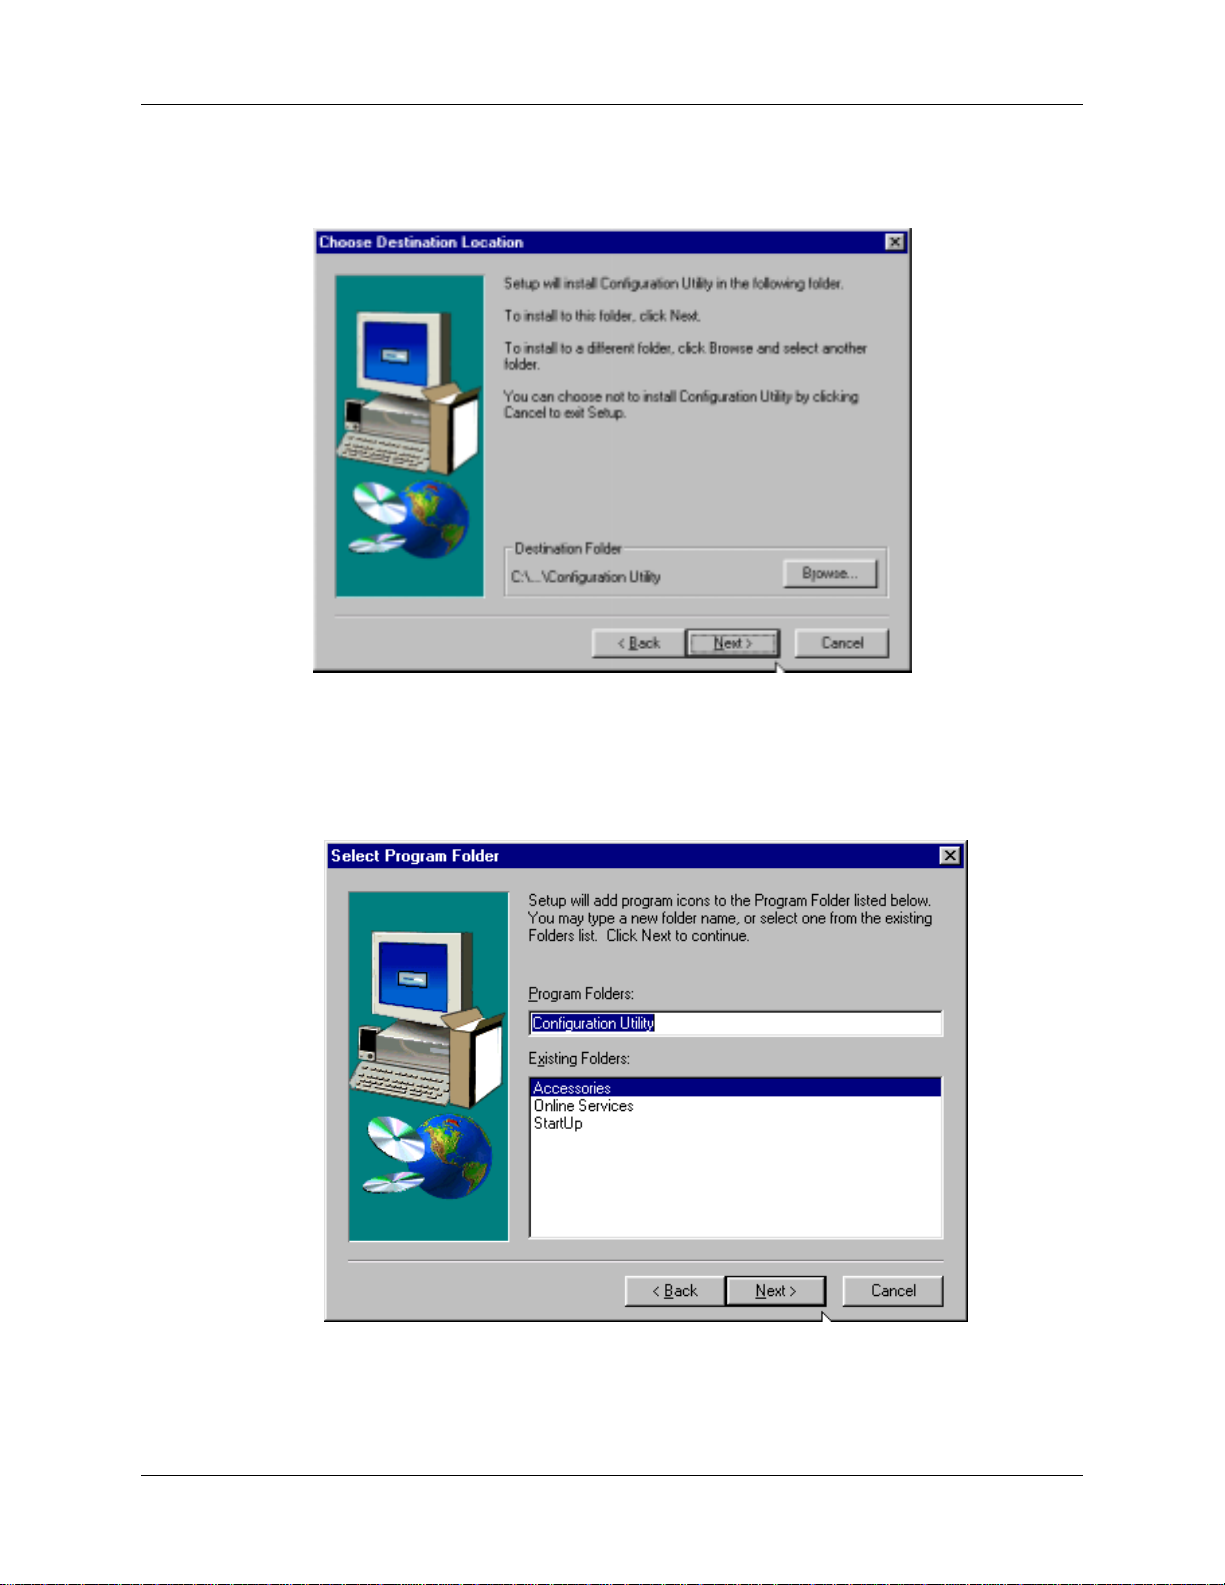
5. At the Choose Destination Location screen, you can accept the default path or enter a different path at
which to install the Configuration Utility files.
Click Next>.
6. At the Select Program Folder screen, you can accept the default folder or select another folder into
which the program icons will be added.
Then click Next>.
8
Page 16
MultiMobile MT128ZLX User Guide 2: Windows 95 Driver Procedures
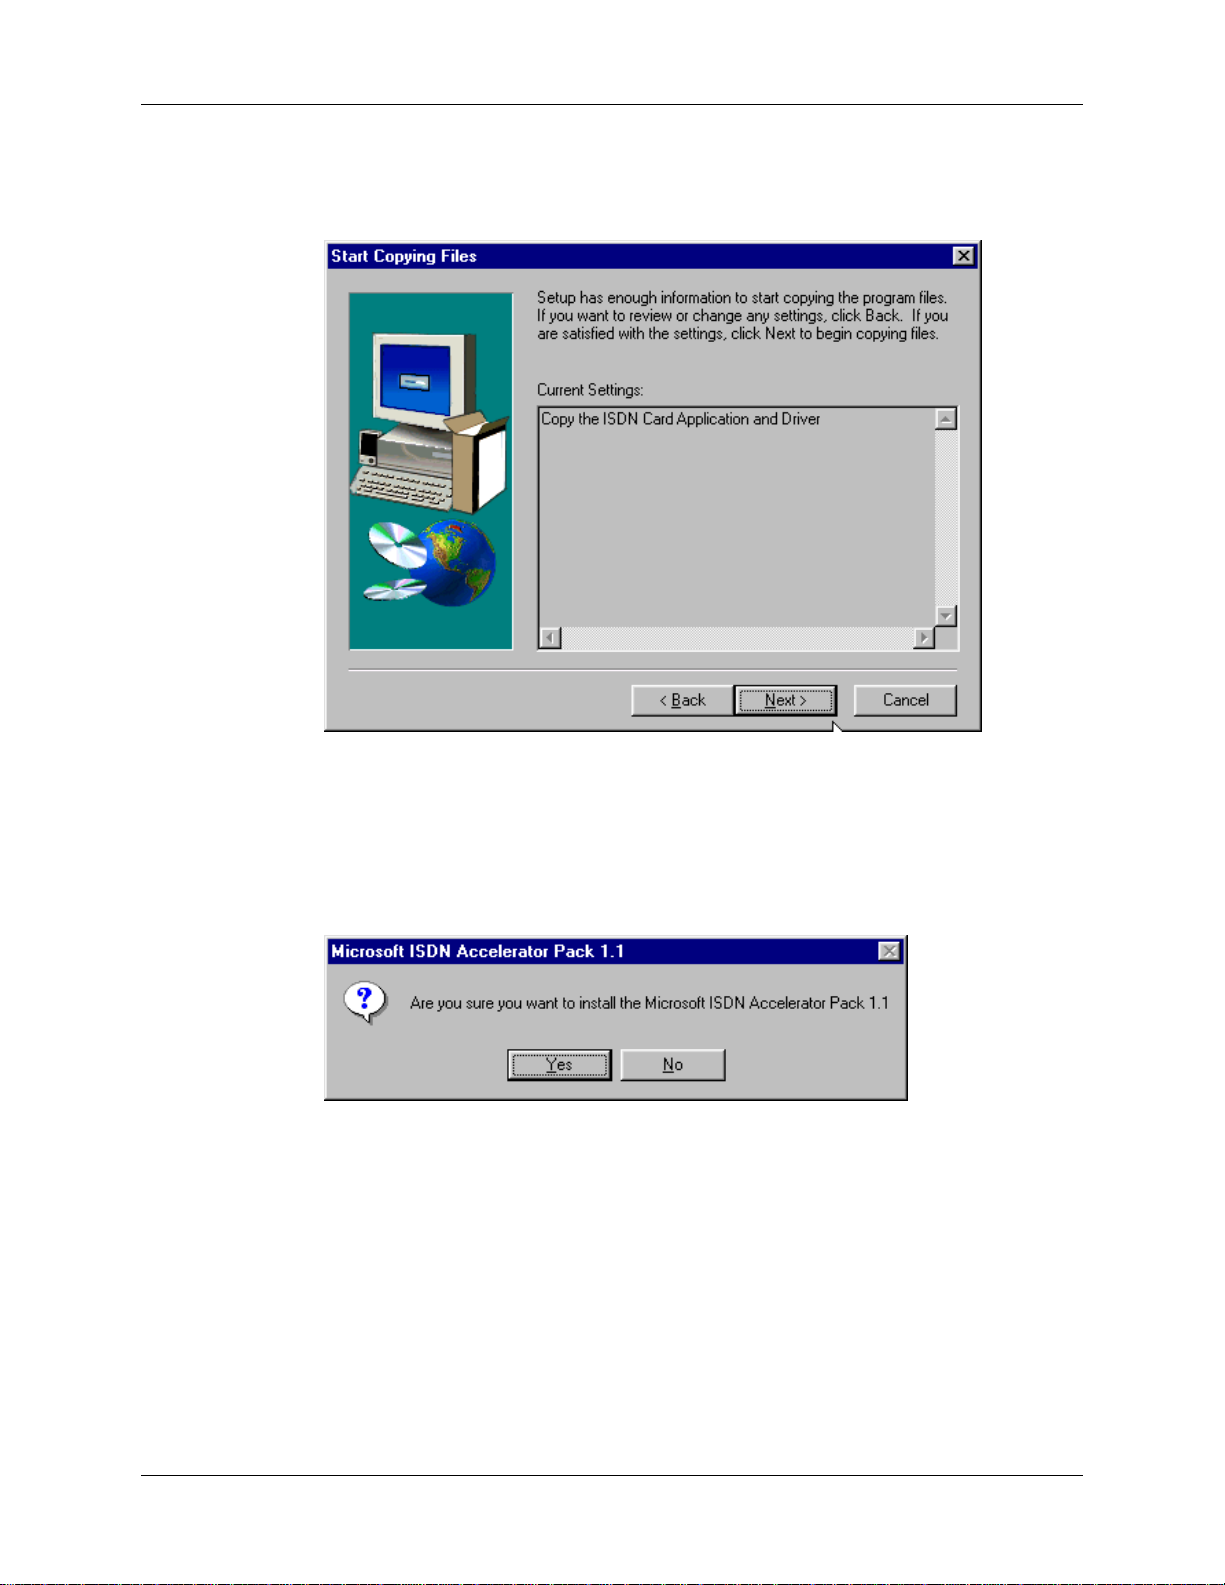
7. The Start Copying Files screen allows you one last chance to go back and change information that you
have provided in previous steps.
When satisfied with your settings, click Next> to begin copying files.
8. Progress screens will appear while files are being copied to your hard disk.
9. When prompted to install the Accelerator Pack, click Yes.
The Accelerator Pack updates the Dial-Up Netw orking s oftw are components to include ISDN
functionality.
9
Page 17
MultiMobile MT128ZLX User Guide 2: Windows 95 Driver Procedures
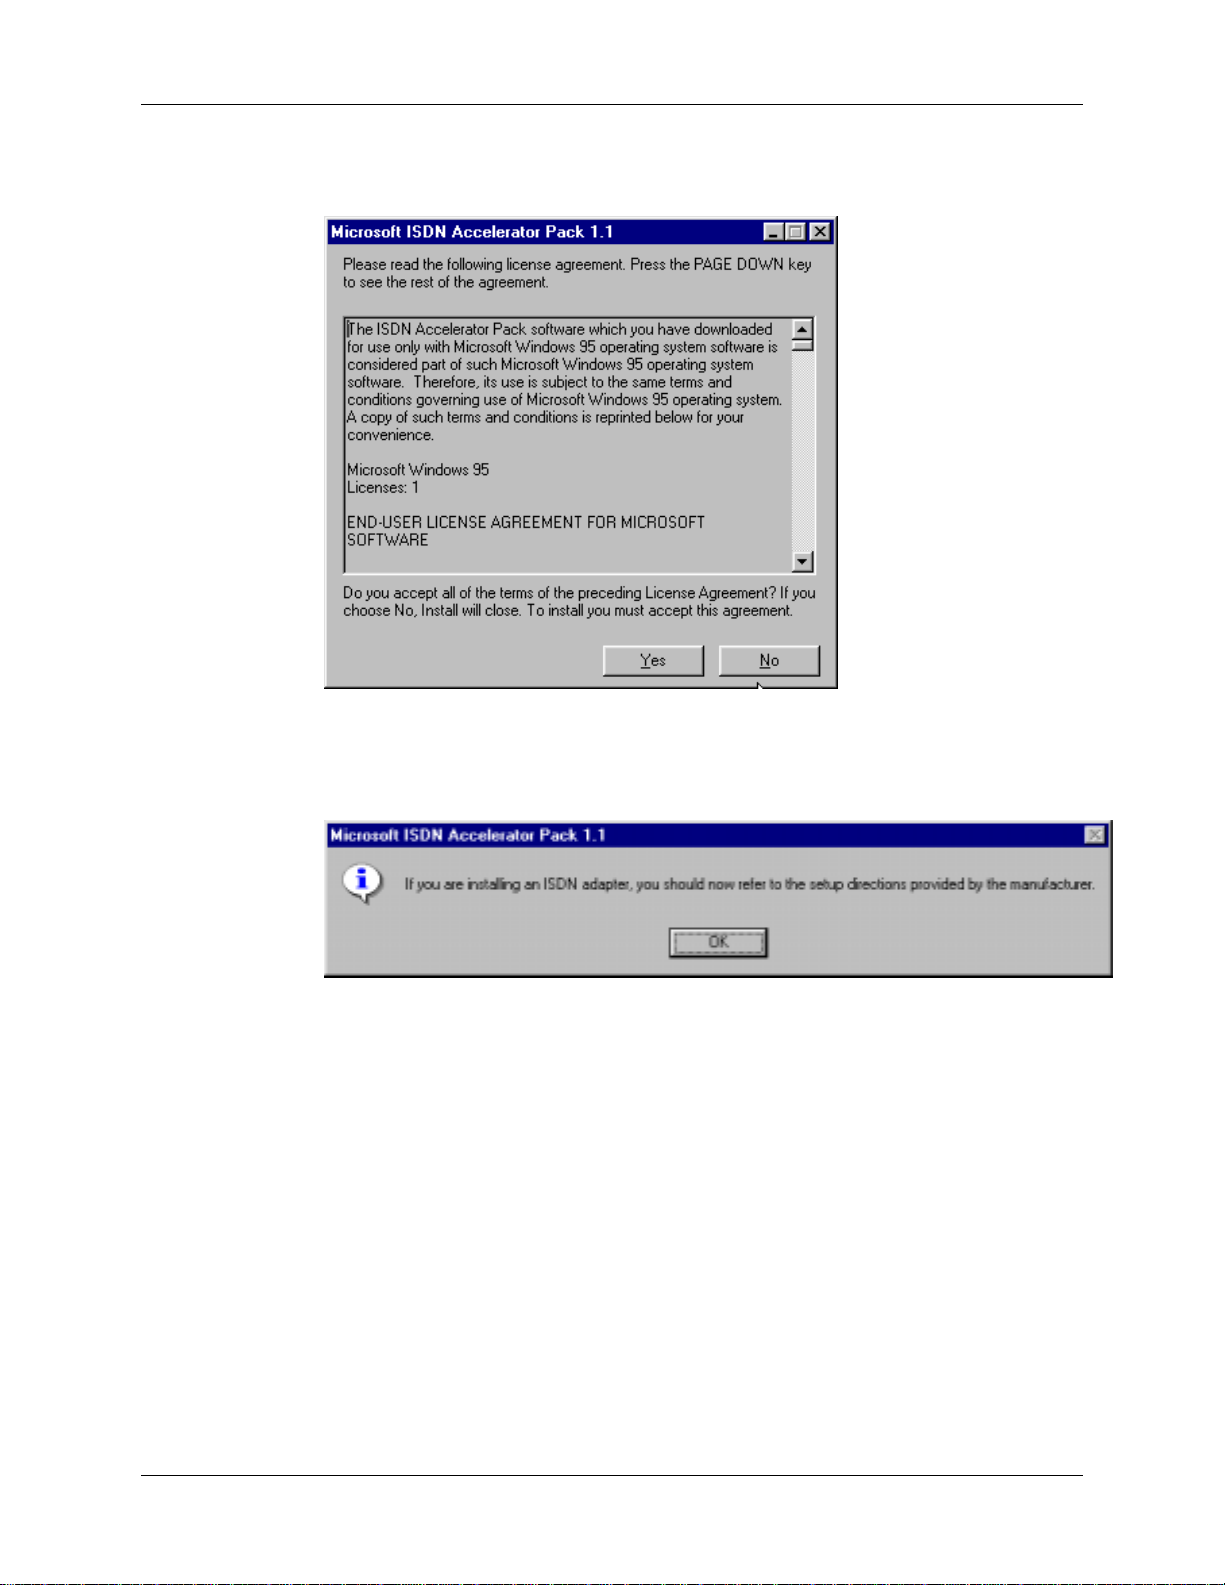
10. Click Yes to accept the license agreement.
11. You will be prompted to read the manufacturer’s documentation.
Click OK.
10
Page 18
MultiMobile MT128ZLX User Guide 2: Windows 95 Driver Procedures
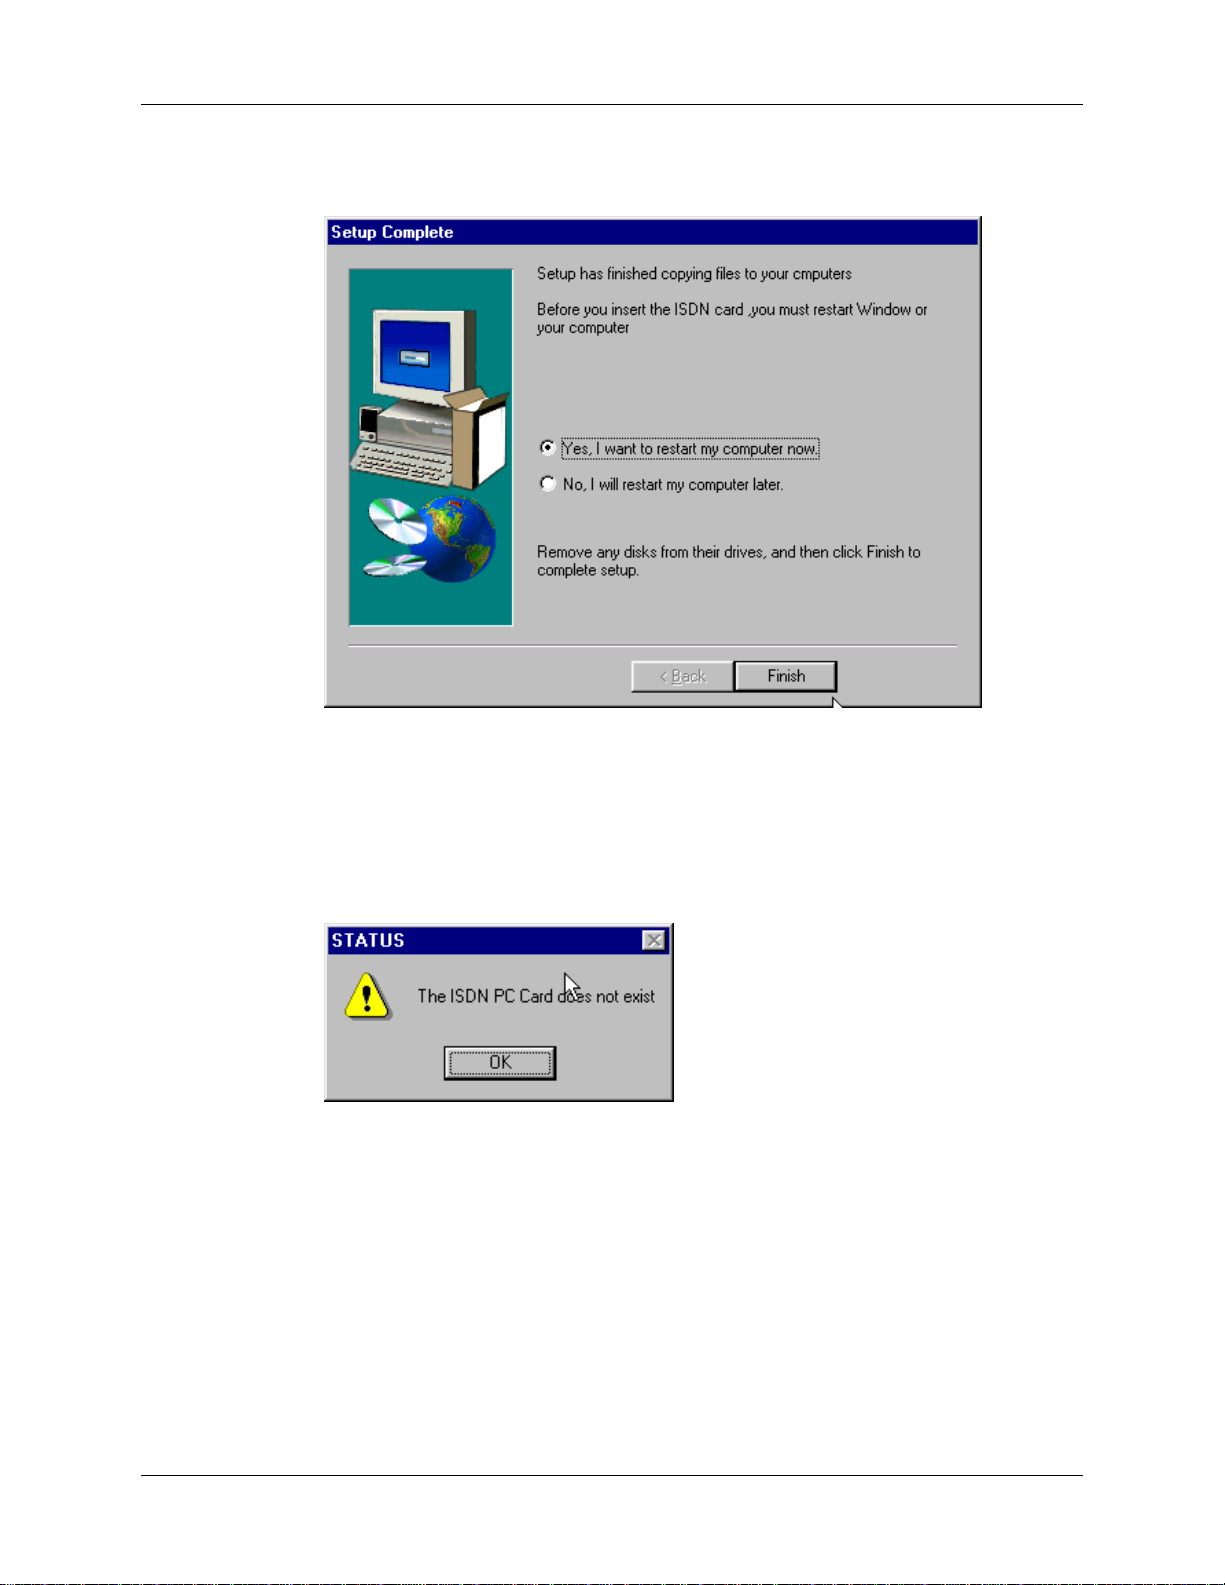
12. At the Setup Complete screen, select Yes, I want to restart my comput er now.
Click Finish.
13. When the restart process is complete, a message will appear indicating that “ISDN PC Card does not
exist,” meaning that the card is not in the computer’s PCMCIA slot. This is normal. After the drivers are
installed, this message will appear upon restart anytime the MT128ZLX card is not installed in its slot.
Click OK.
11
Page 19
MultiMobile MT128ZLX User Guide 2: Windows 95 Driver Procedures
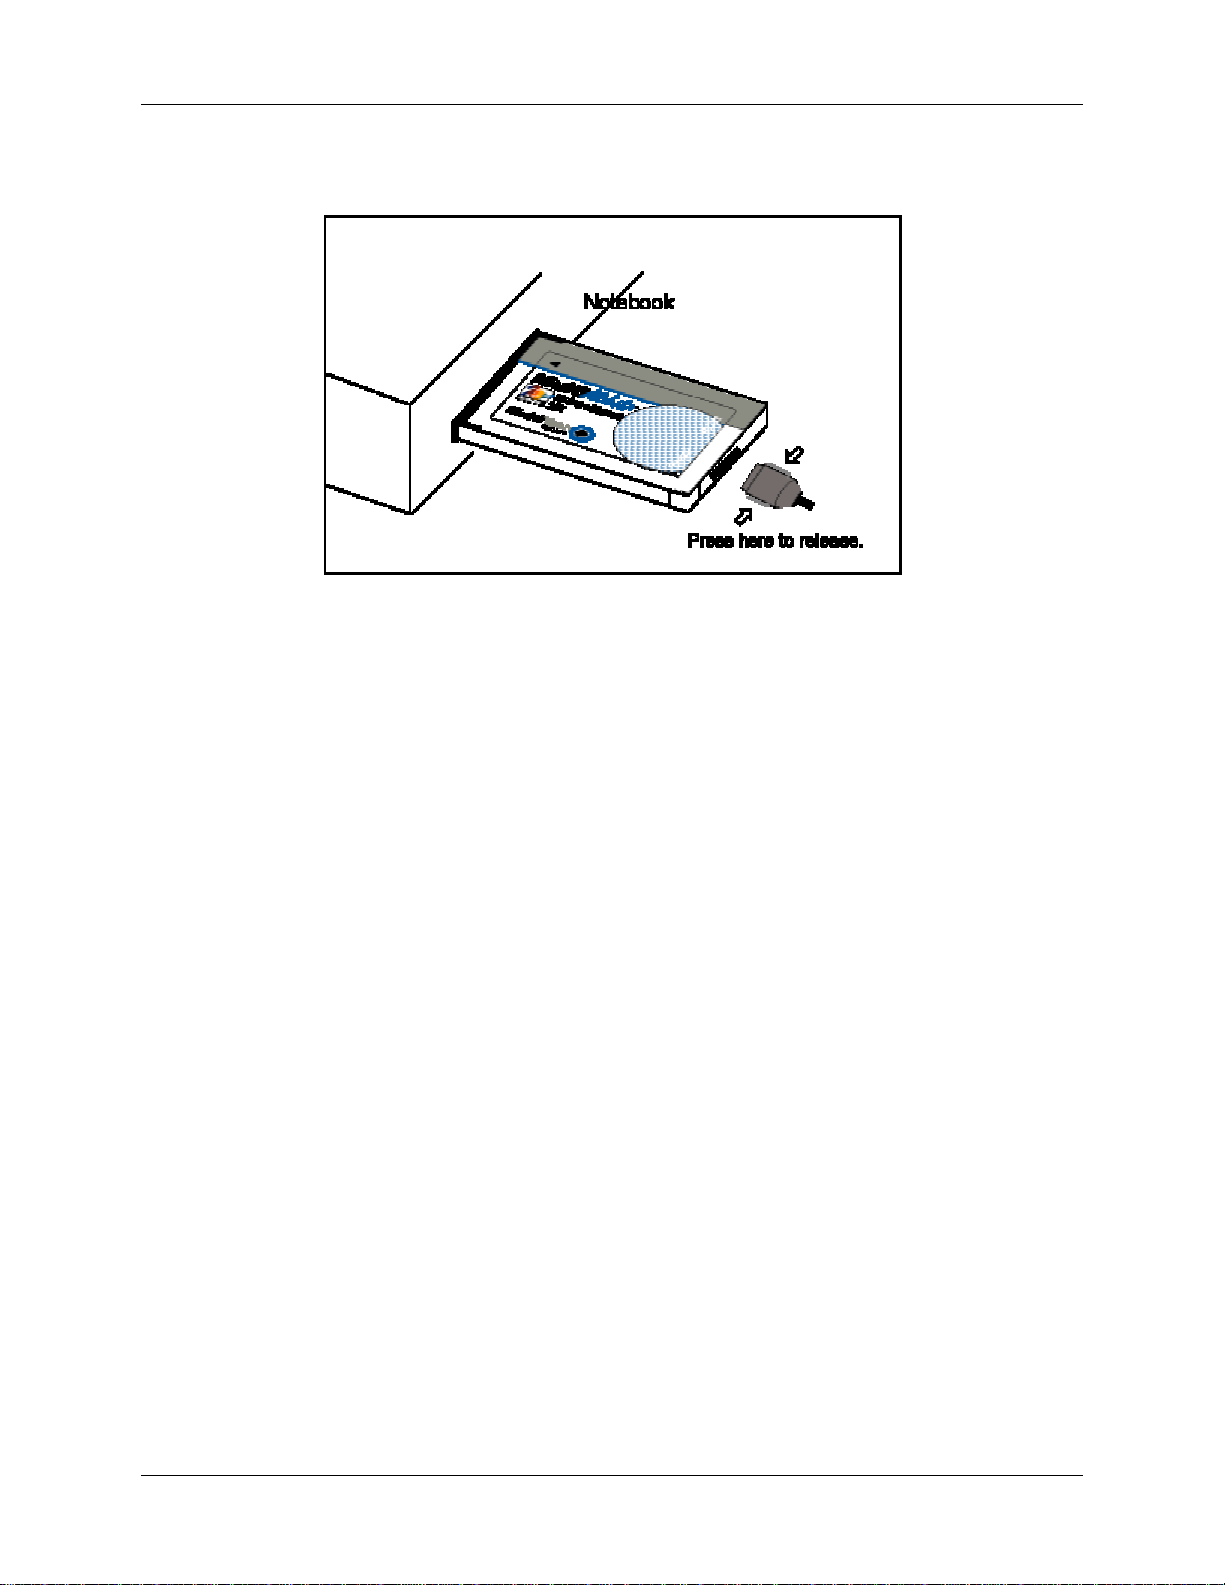
14. Insert the MT128ZLX into the computer’s PCMCIA slot.
15. Windows 95 will detect the MT128ZLX card. The New Hardware Found wizard will display a series of
screens indicating that is has found new hardware and that it is installing the corresponding software.
12
Page 20

MultiMobile MT128ZLX User Guide 2: Windows 95 Driver Procedures
16. Go to Start | Settings | Control Panel. Select the Network icon. Select the Configuration tab.
Click Add.
17. At the Select Network Component Type screen, highlight Adapter and click Add.
13
Page 21
MultiMobile MT128ZLX User Guide 2: Windows 95 Driver Procedures
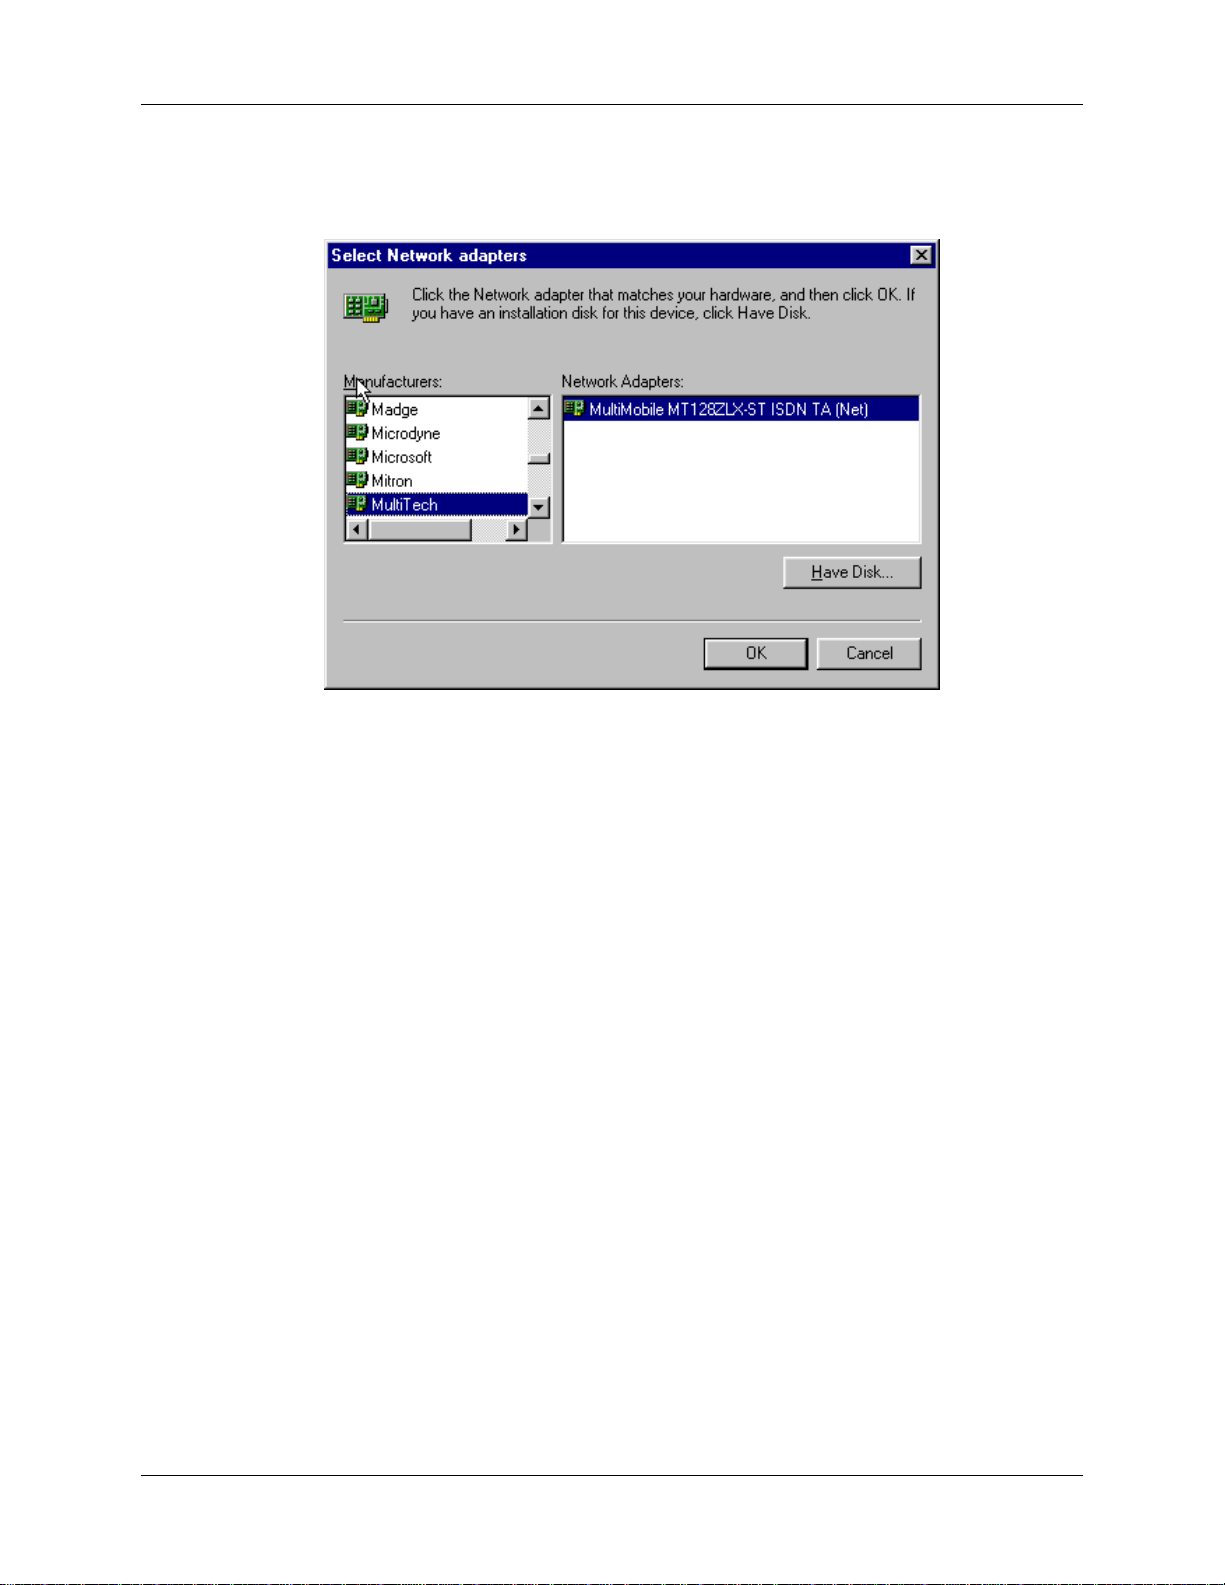
18. At the Select Network Adapters screen, highlight “MultiTech” in the Manufacturers pane. In the
right pane (the Network Adapters pane), the MT128ZLX ISDN Adapter appears in the list.
Click OK. This installs the NDIS Application Program Interface and adds ISDN-LINE0 and ISDN-LINE1
to the list of devices in Dial-Up Networking.
At the Network screen (under the Configuration tab), click OK.
14
Page 22
MultiMobile MT128ZLX User Guide 2: Windows 95 Driver Procedures
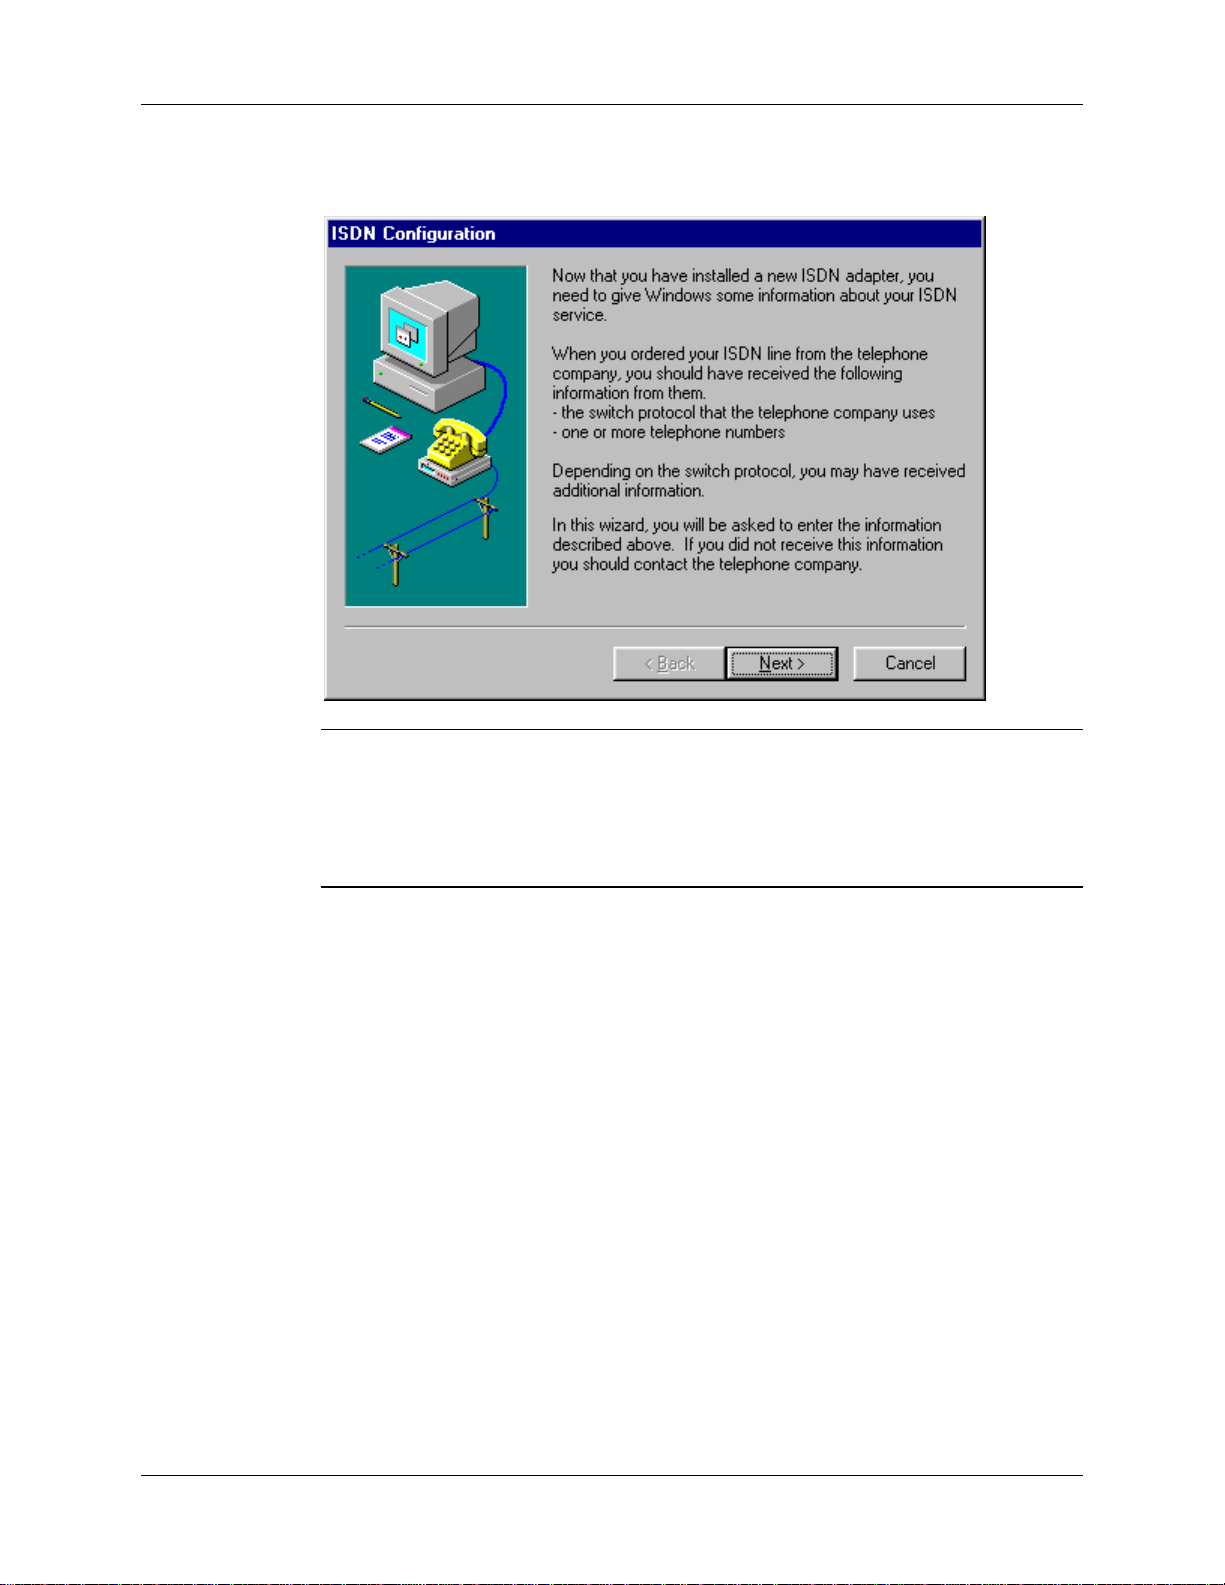
19. The ISDN Configuration wizard begins.
NOTE: The information entered in the Microsoft ISDN Config u ration w iz ard does not affect the operation
of the MT128ZLX. However, completing this wizard is necessary to update certain dial-up
networking software components to add ISDN functionality to Windows 95. The MT128ZLX is
configured for use with the Configuration Utility tha t w a s ins talled during driver installation. In
the section “Configuring the MT128ZLX” (presented later in this chapter), you will supply setup
information for using the Configuration Utility progra m w ith you r pa rticu la r computer.
Click Next>.
15
Page 23
MultiMobile MT128ZLX User Guide 2: Windows 95 Driver Procedures
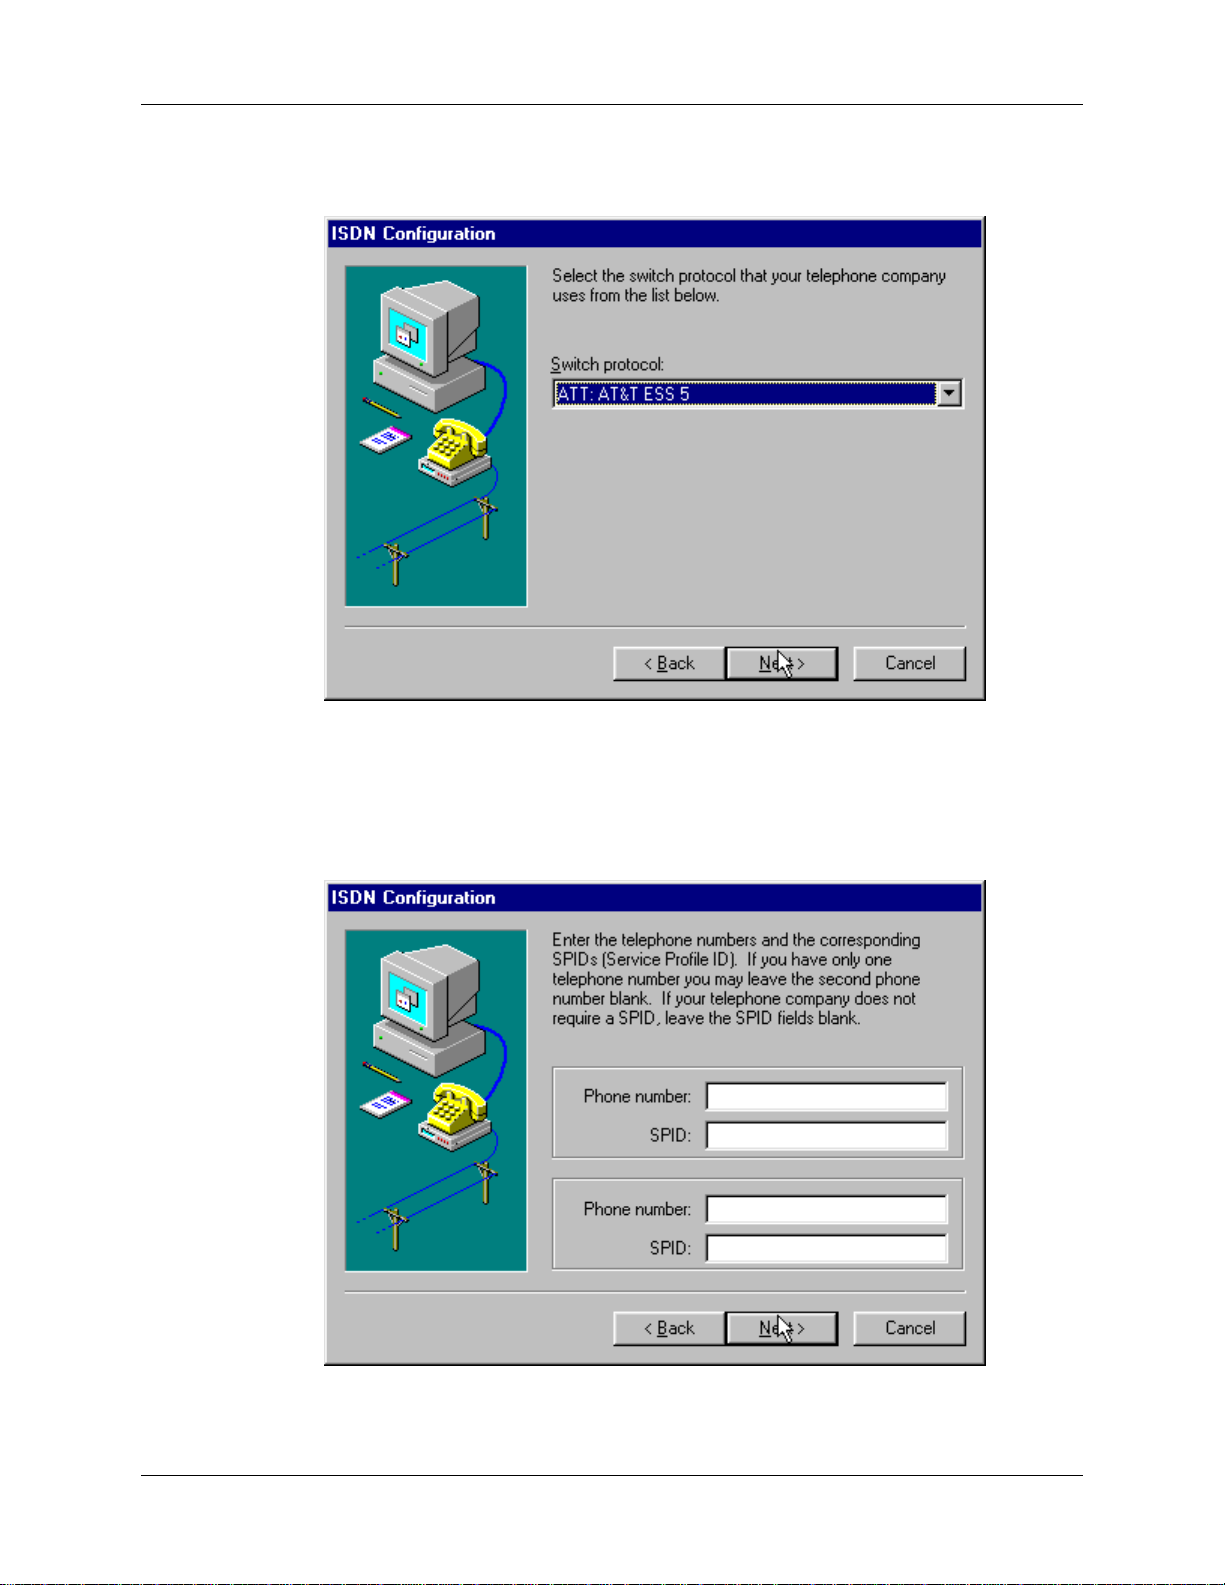
20. Accept the default value for the “Switch Protocol.” Click Next>.
21. The next wizard screen requests Phone Number and SPID information. It is not necessary to enter
this information here. You will be asked to supply this information later (in the Configuration Utility
program).
Leave the fields of this dialog box blank. Click Next>.
16
Page 24
MultiMobile MT128ZLX User Guide 2: Windows 95 Driver Procedures
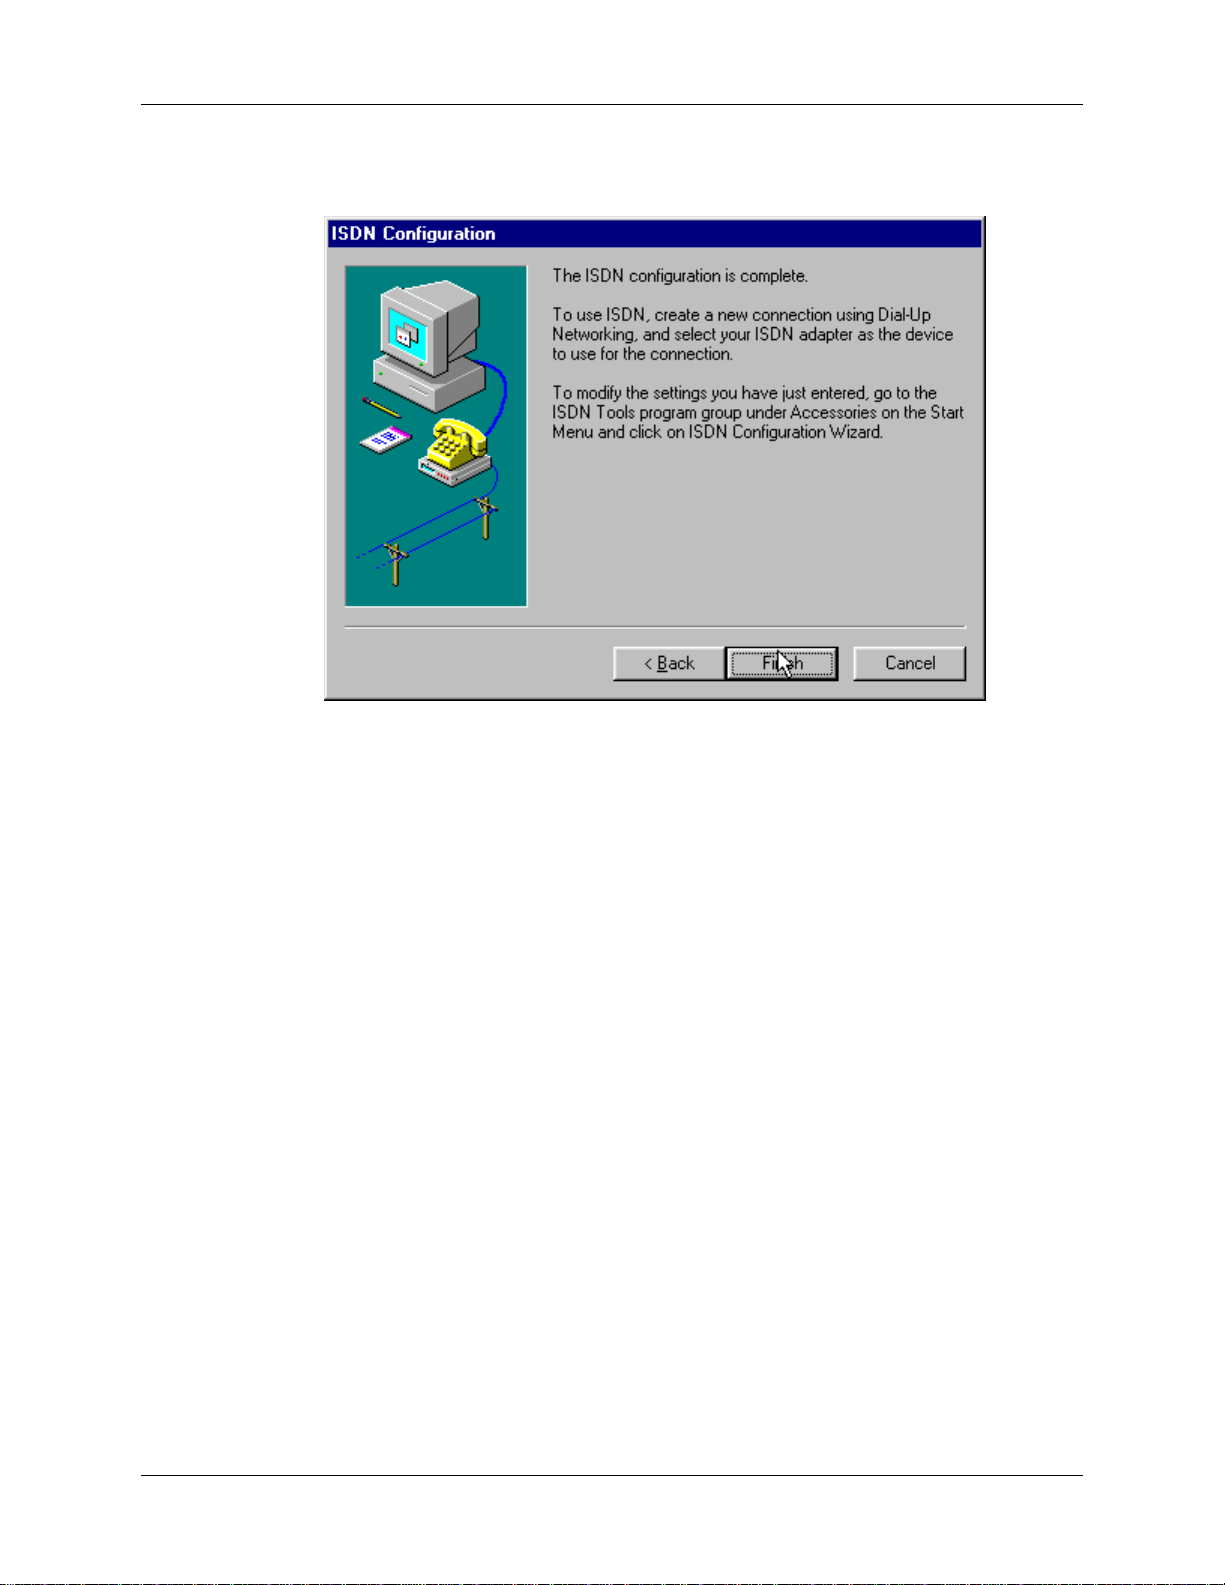
22. At the ‘completion’ screen, click Finish.
23. When prompted to restart your computer, click Yes.
24. Driver installation is now complete. However, before you can use your MT128ZLX in Windows 95, it
must be configured with SPIDs (in the U.S. and Canada), telephone numbers, voice-encoding information,
and switch-type information. (See the procedure “Configuring the MT128ZLX In Windows 95” below.)
17
Page 25
MultiMobile MT128ZLX User Guide 2: Windows 95 Driver Procedures
Verifying the Windows 95 Installation
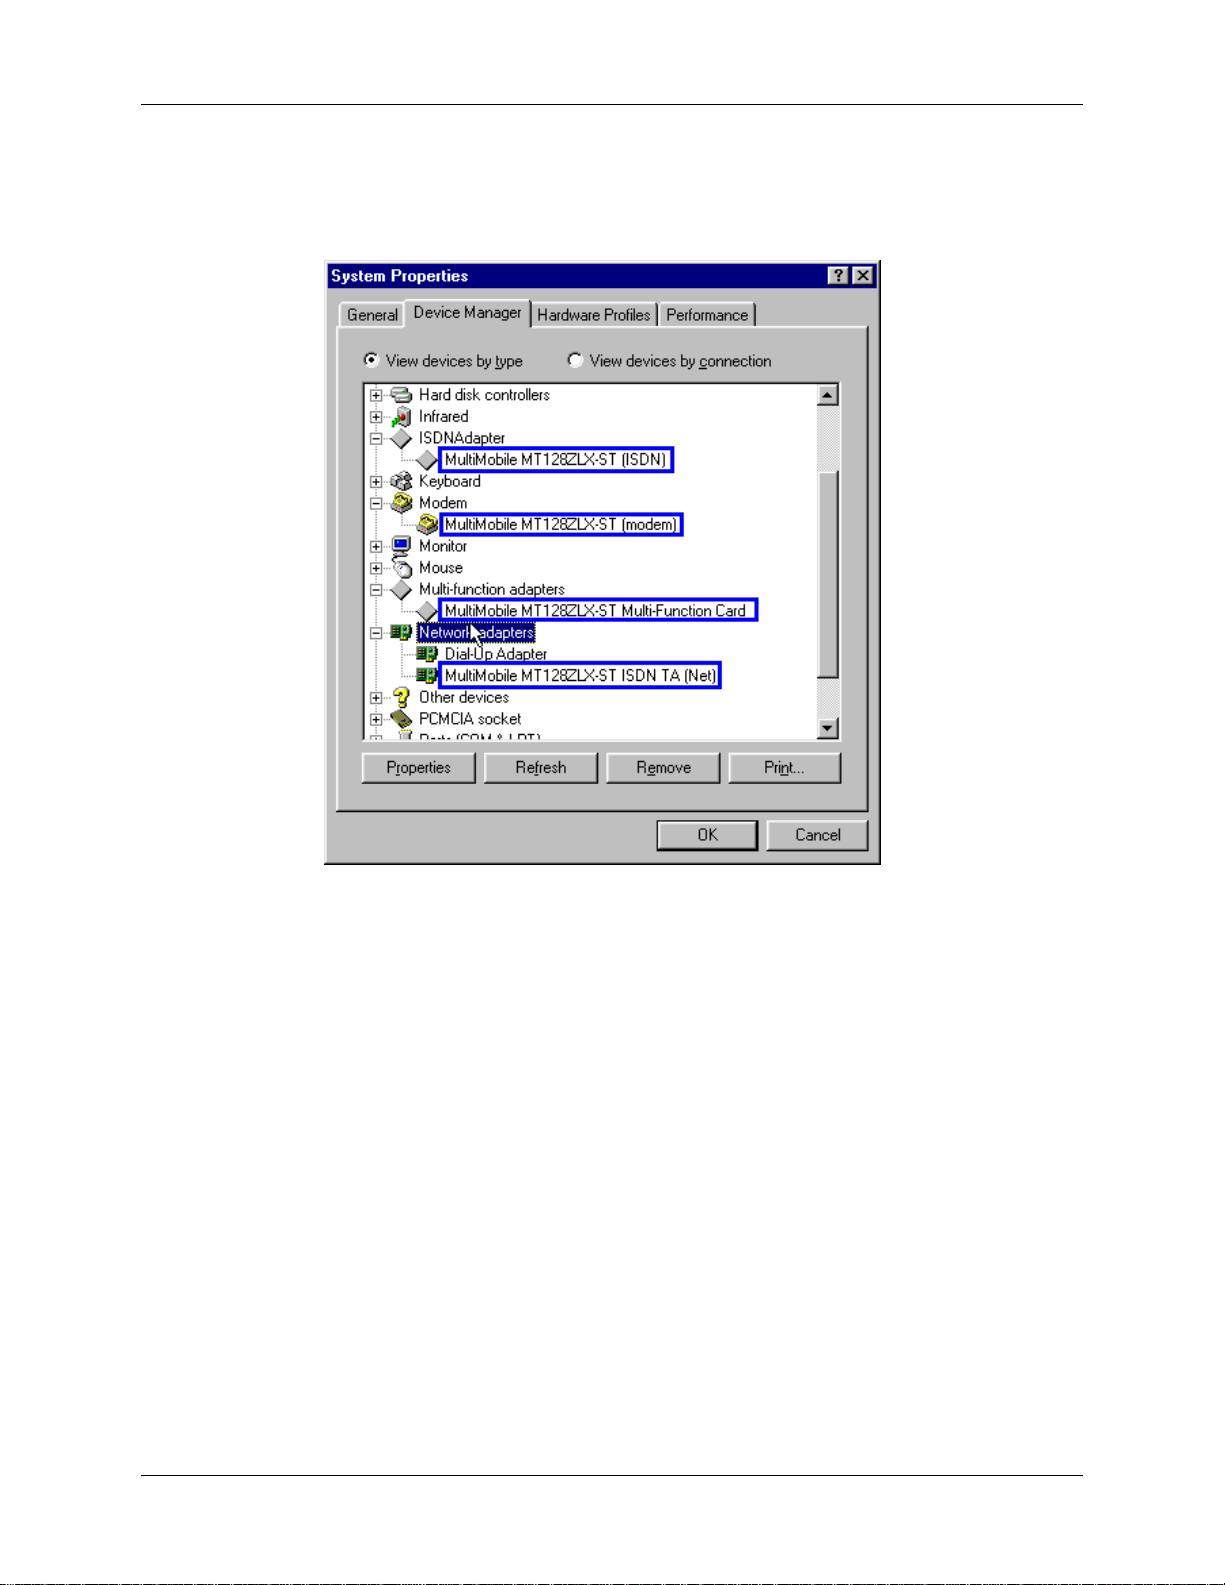
1. Go to Start | Settings | Control Panel. Click on the System icon. When the System Properties screen
appears, select the Device Manager tab.
2. After a successful driver installation, the Device Manager will contain the following entries:
MultiMobile MT128ZLX-ST (ISDN)
MultiMobile MT128ZLX-ST (modem)
MultiMobile MT128ZLX-ST Multi-Function Card
MultiMobile MT128ZLX-ST ISDN TA (Net)
3. If these entries do not appear, re-do the driver installa tion procedure. If the ins tallation fails repeatedly,
call MultiTech Tech Support (800-972-2439).
18
Page 26
MultiMobile MT128ZLX User Guide 2: Windows 95 Driver Procedures
Configuring the MT128ZLX in Windows 95
NOTE: In this procedure, you will be asked to enter d eta iled config u ra tion information that relates to the
ISDN equipment being used by your telephone company. Specifically, your telephone company
must provide the following information:
SPIDs,
Phone Numbers,
Switch Type, and
Voice Encoding type.
This information is supplied by your telephone company and you mu s t have it available when
doing this procedure.
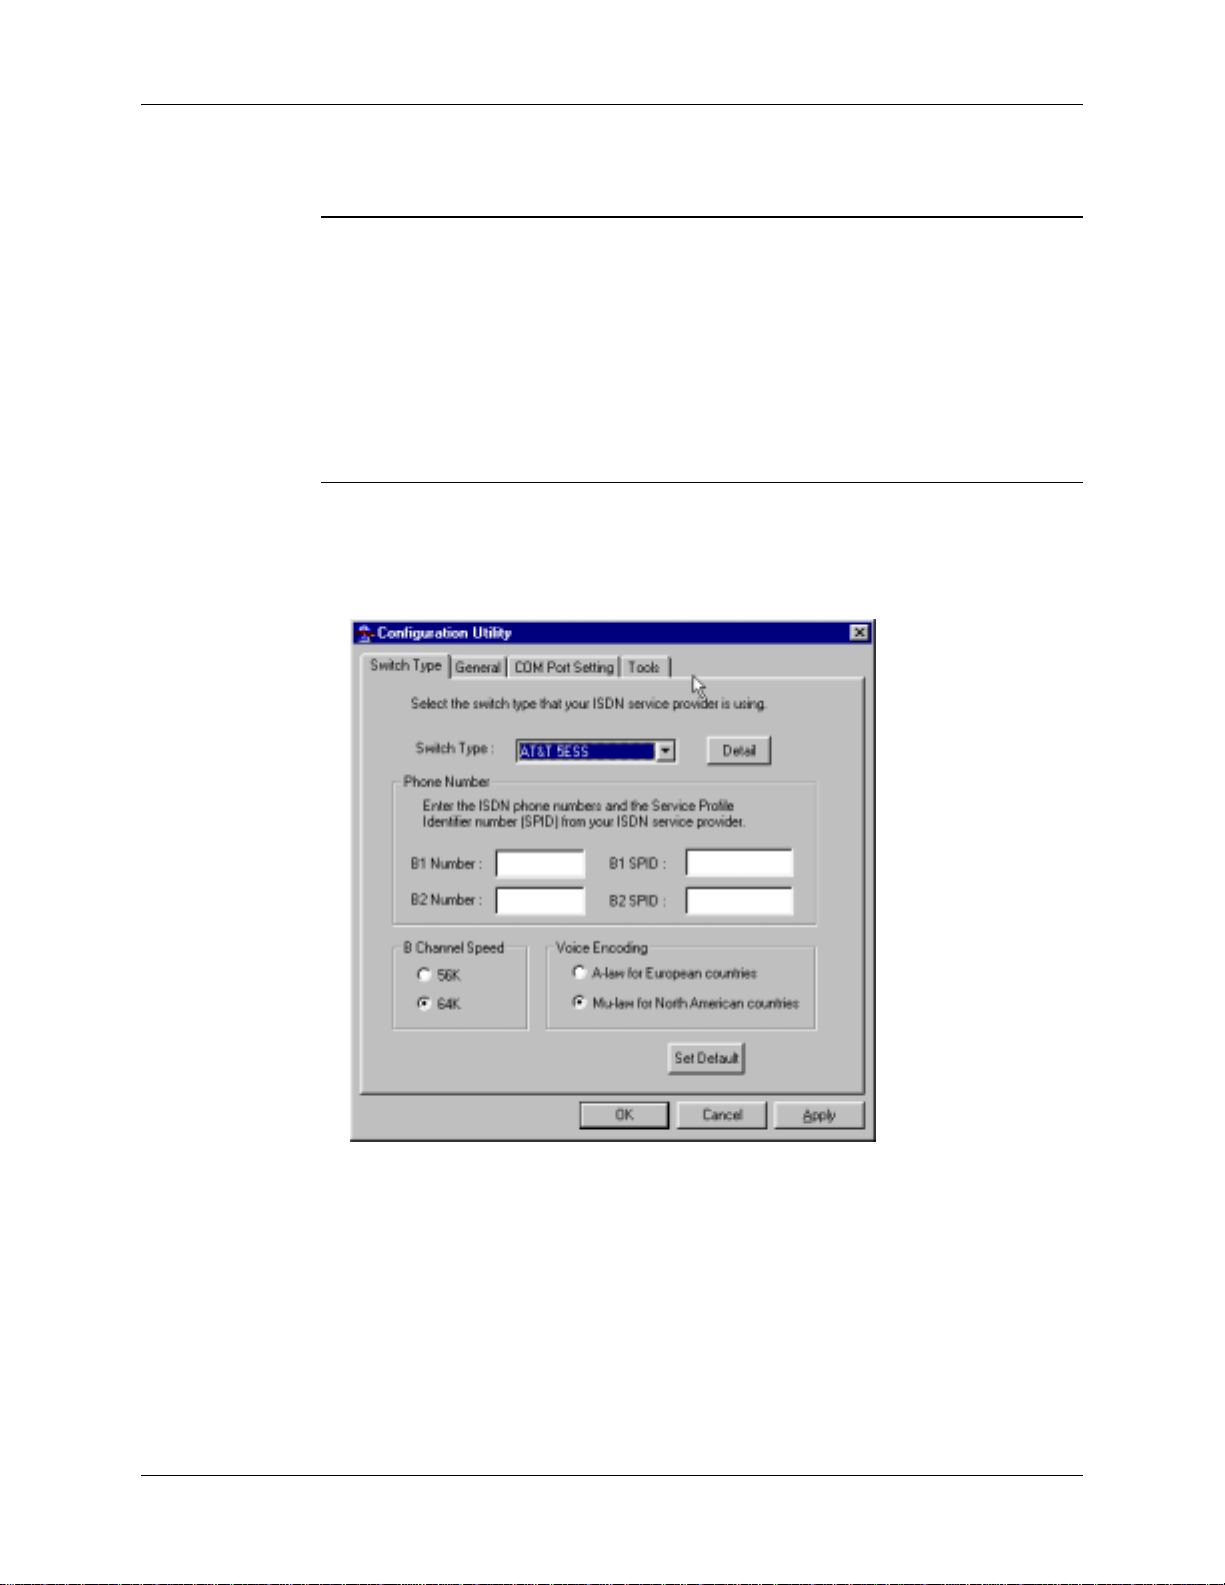
1. Go to Start | Programs | Configuration Utility | Config.
The Configuration Utility dialog box will appear.
2. Enter the information needed in each field of the dialog box.
Switch Type: See listed options.
Phone Numbers: B1 number and B2 number.
SPID Needed only in the U.S. and Canada.
B-Channel Speed 56 kbps or 64 kbps
Voice Encoding: for Net3 or ETSI, use A-law voice encoding
for other switches, use Mu-law voice encoding
Click OK.
19
Page 27
MultiMobile MT128ZLX User Guide 2: Windows 95 Driver Procedures
Uninstalling MT128ZLX-ST/NT Drivers in Windows 95
1. Close the Status program. After the Configuration Utility has been installed, the Status prog ra m’s icon
normally appears at the lower right corner of your screen. Click on this icon and close the Status program.
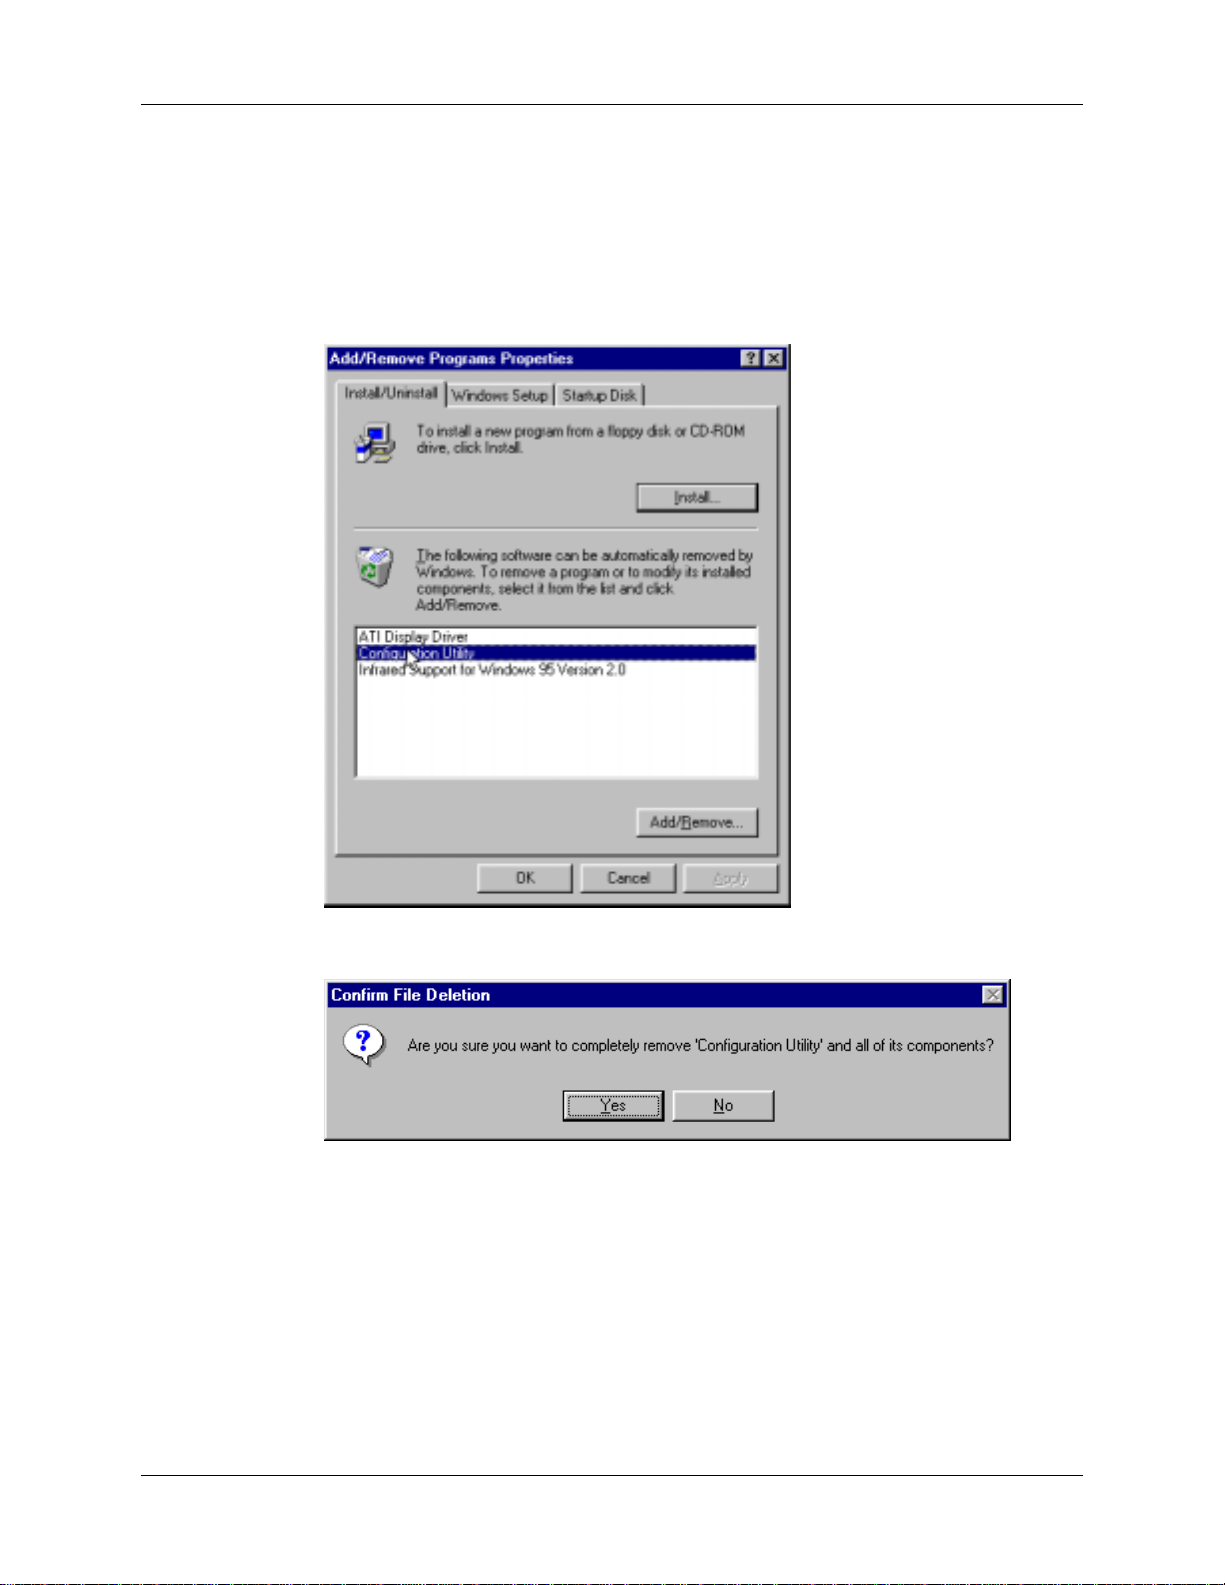
2. Go to Start | Settings | Control Panel. Click on the Add/Remove Programs icon. The Add/Remove
Programs Properties dialog box will appear. At the Install/Uninstall tab, highlight Configuration
Utility. Click on the Add/Remove button.
3. At the Confirm File Deletion screen, click Yes.
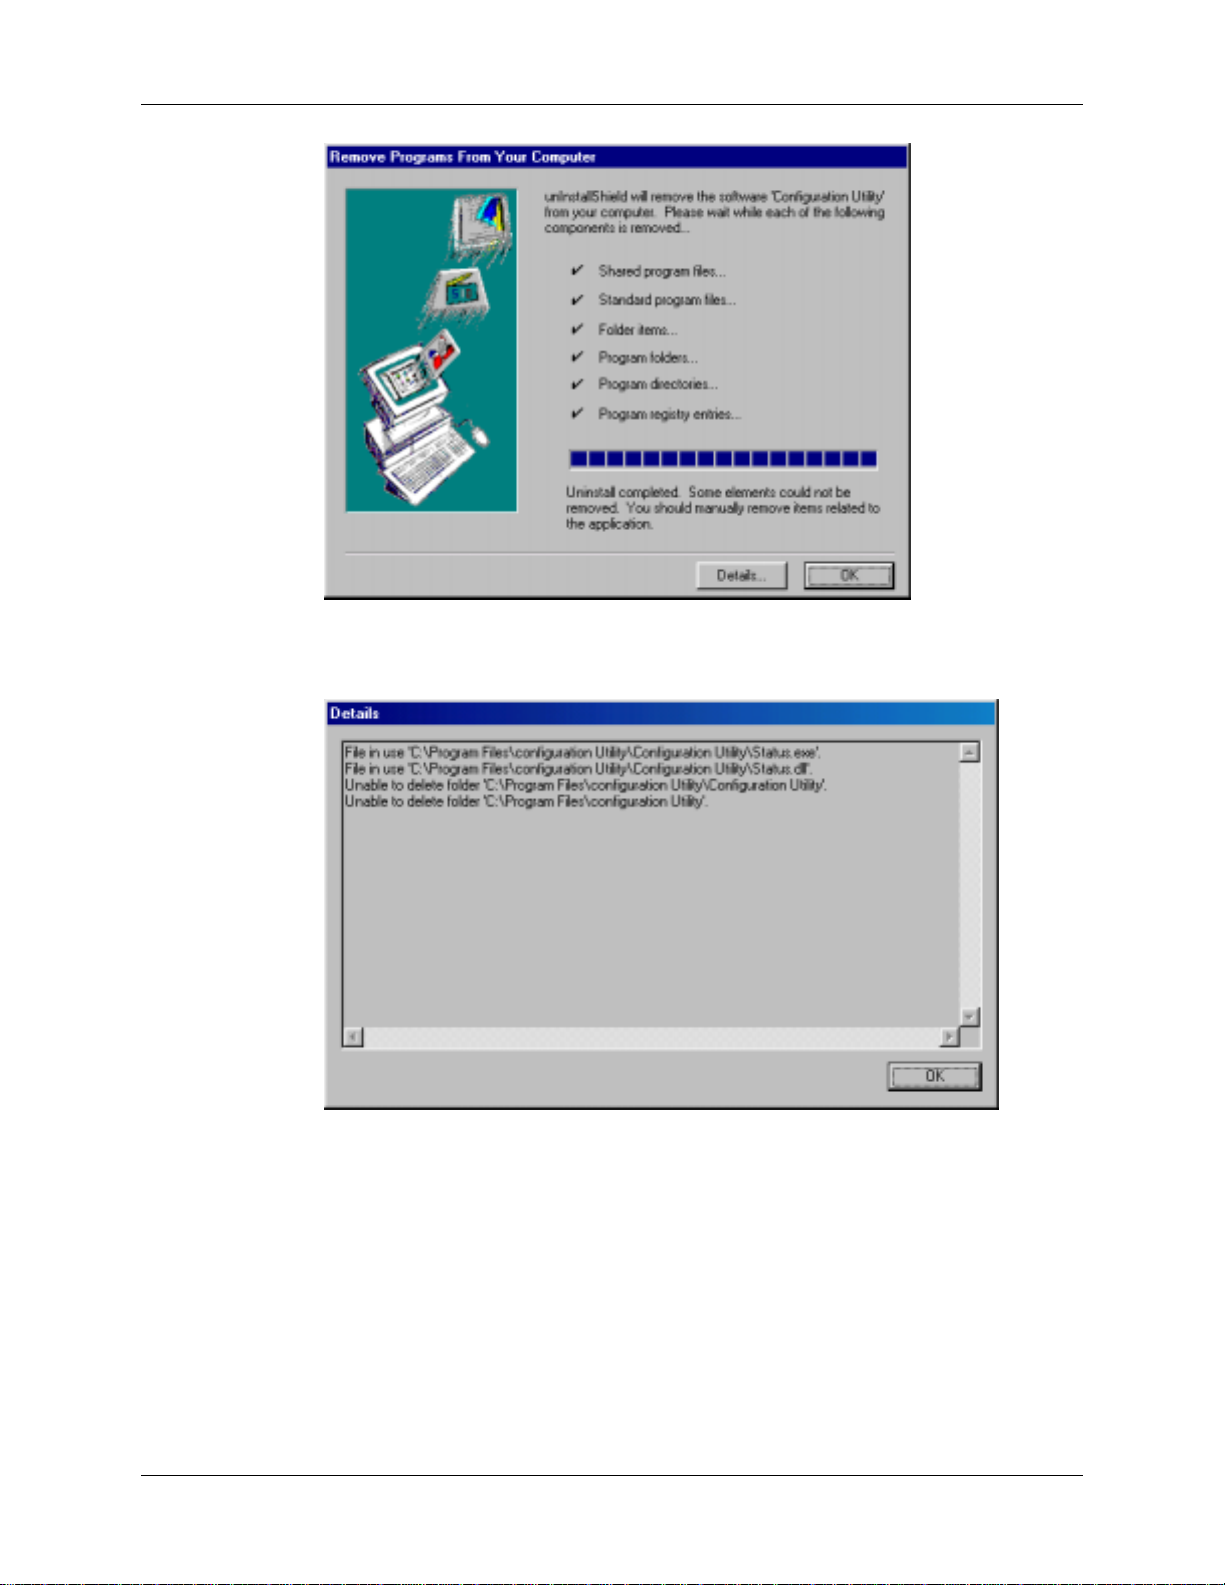
4. The Uninstall Shield program will appear. At the Remove Programs From Your Computer screen,
click OK.
20
Page 28
MultiMobile MT128ZLX User Guide 2: Windows 95 Driver Procedures
Click on Details to see files that must be manually d eleted later. Record file names as needed.
Click OK at both of these screens to proceed.
21
Page 29
MultiMobile MT128ZLX User Guide 2: Windows 95 Driver Procedures
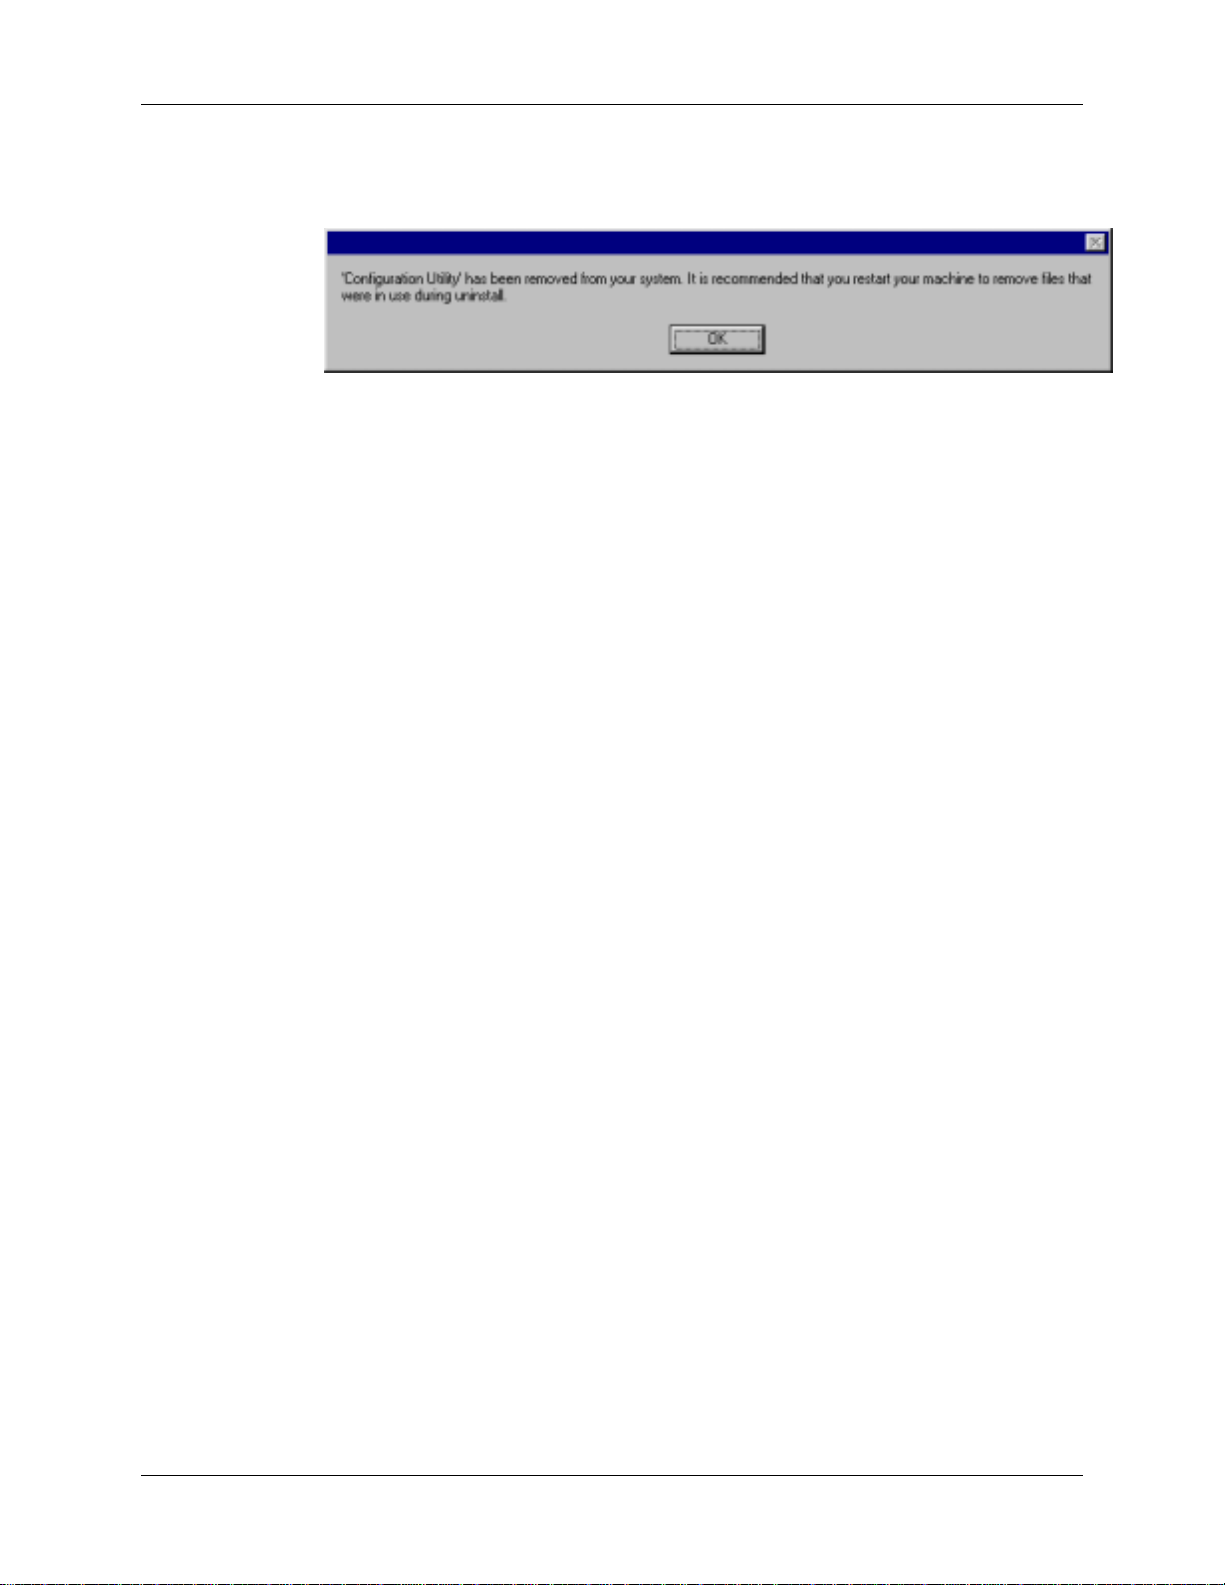
5. A message screen appears recommending that you restart your computer.
Click OK. Then restart your computer.
22
Page 30

MultiMobile MT128ZLX User Guide 2: Windows 95 API Usage
MT128ZLX: Using APIs in Windows 95
About A PIs
The MT128ZLX-ST/NT operates in conjunction with three Application Program Interface software
packages: NDIS, VCOMM, or CAPI. This chapter presents examples of how the MT128ZLX can be used
with these APIs. The CAPI-compliant program used in these examples is RV S -COM Lite.
Each API contains software components that interact with the operating s ys tem of the compu ter in wh ich
the MT128ZLX is installed. Each API adds communications functionality to the system. Each of the three
APIs adds a somewhat different s et of features to the system, as summariz ed in the ta b le be low a n d
described more fully in subsequent sections.
API Full Name Functionality
NDIS Network Driver Interface
Specification
VCOMM Virtual Communications
Driver
CAPI Common ISDN Application
Program Interface
dial-up networking (DUN)connection, network
interface card (NIC) emula tion
dial-up networking (DUN)connection,
modem emulation
dial-up networking (DUN)connection, modem
emulation, G3 and G4 FAX, V.110, V.120, X.75,
HDLC, interface to ISDN features and s erv ices
The NDIS API
NDIS allows Network Interface Cards (NICs) to work with each other, with the operating system, and with
higher order protocol drivers. NDIS is a n interface that facilitates development of NIC driv ers . NDIS
program routines can implement the functions that NIC drivers must perform. Thes e include intera ction
with protocol drivers, the handling of hard ware interrupts, and interface with u n d erlyin g N I C s b y d ea ling
with registers, port I/O, and other functionality. NDIS allows drivers to be developed in high-level
programming languages, su ch tha t their crea tion and implementation are platform-independent.
The VCOMM API
The communications device driver known as “VCOMM” provides protected-mode services. It allows
makes ports and modems available to Windows-based software application programs. VCOMM also uses
plug-and-play functionality to simplify the insta lla tion and configuration of communications devices.
23
Page 31

MultiMobile MT128ZLX User Guide 2: Windows 95 API Usage
The CAPI API
Being a common interface, the ISDN CAPI ( C ommon A pplication Program Interface), allows softw a re
programs to use all ISDN services. Computer programs have access to most services and features of ISDN
when used with CAPI. This access is hardware-independent. CAPI makes call numbers available, as well
as several kinds of service information: caller numb er, c alled number, call charg e s , I SDN service ID. CAPI
also facilitates transmission of data, FAX, or voice, and multiple B-channels can also be used
simultaneously on a s in gle call.
It is the capabilities of the ISDN adapter a n d the type of IS D N connection tha t d etermine w hich s erv ices
and features are actually available. CAPI merely serves as a common interface. ISDN CAPI is a platformindependent standard which can be used in non-Windows operating systems like OS/2 and UNIX, as well
as in Microsoft operating systems.
CAPI 2.0 is the current form of CAPI. ISDN adapters with CAPI 2.0 can be used anywhere in Europe with
the DSS1 Euro-ISDN connection.
Intro to API Single-Channel and Mult i Li nk Exampl es
In the following procedures, you will use Application Program Interfaces (APIs) to set up a n d us e dia l-u p
networking with the MT128ZLX in conjunction with the particular operating system your computer is
using. The APIs are installed as part of the MT128ZLX driver installation, which must be complete before
these procedures can be done. Note that the procedures presented here are examples only. Your use of
APIs will depend on the needs and limitations of your operating environment.
24
Page 32

MultiMobile MT128ZLX User Guide 2: Windows 95 API Usage
Windows 95 NDIS : Single Channel Access Example
NOTE: To complete this procedure, you will need to know several technical details that can be provided
by your ISP or by your network administrator.
1. You will need to know whether or not an encrypted password is needed to access the
network to which you will be connected.
2. If you are connecting to a non-Windows server, you will also need to know in advance
whether or not the server requires you to type in login information or to know TCP/ IP
addresses before dialing.
3. If applicable, you will need to know the domain name of the network to which you will be
connected.
4. You will need to know the dial-out network protocol to be used (NetBEUI, TCP/IP, or IPX).
1. Go to Start | Programs | Accessories | Dial-Up Networking. At the Dial-Up Networking folder,
select Make New Connection.
25
Page 33

MultiMobile MT128ZLX User Guide 2: Windows 95 API Usage
2. The Make New Connection screen appears. Enter a descriptive name for the connection. In the
“Select a Modem” drop-down box, highlight ISDN-Line0.
Click Next>.
3. At the next screen, enter the area code and phone number of your ISP or the remote device you will
be calling using this connection. Select the appropriate Country Code and click Next> to complete the
setup.
26
Page 34

MultiMobile MT128ZLX User Guide 2: Windows 95 API Usage
4. At the completion screen, click Finish.
The new dialup connection is ready to configure.
27
Page 35

MultiMobile MT128ZLX User Guide 2: Windows 95 API Usage
5. From the Dial-Up Networking folder, right-click on your new connection icon. Choose Properties.
6. On the General tab, type in the phone number for the adapter port. You may chan g e the connection
options by clicking Configure.
7. Click on the Server Types tab to configure logon options, encryption, log file information and
network protocol options, including TCP/IP Settings for your remote server and DN S connections. If
necessary, contact your ISP or network adminis tra tor to ob tain the correct TCP/IP addressing
information.
8. Use the Scripting tab to define scripts that will run when this connection is ma d e. C lick OK to
complete the configuration.
To use this new connection, double-click on the New Dial-Up Networking Connection icon. Type in the
user name and password for your remote account and click Connect.
28
Page 36

MultiMobile MT128ZLX User Guide 2: Windows 95 API Usage
Windows 95 NDIS: Dual Channel Access Example (MultiLink)
NOTE: To complete this procedure, you will need to know several technical details that can be provided by
your ISP or by your network administrator.
1. You will need to know whether or not an encrypted password is needed to access the
network to which you will be connected.
2. If you are connecting to a non-Windows server, you will also need to know in advance
whether or not the server requires you to type in login information or to know TCP/ IP
addresses before dialing.
3. If applicable, you will need to know the domain name of the network to which you will be
connected.
4. You will need to know the dial-out network protocol to be used (NetBEUI, TCP/IP, or IPX).
If you would like to use multi-linking with your NDIS connection, first be sure that your ISDN provider
supports a 128kbps MLP option.
1. To begin, you will need to create a new dial-up connection as described above (“Windows 95 NDIS :
Single Channel Acc ess Example”) or modify an existing connection. Right-click on the Dial-Up
Connection icon and select Properties.
Click on Settings.
29
Page 37

MultiMobile MT128ZLX User Guide 2: Windows 95 API Usage
2. The Set Additional Devices screen appears.
3. Select Use Additional Devices. Click Add.
At the Edit Extra Device screen, in the Device Name drop-down box, select ISDN-Line1. Enter the
Phone Number of your ISP or the remote device that you will be calling with this connection.
When complete, continue to click OK to leave the Set Additional Devices configuration screens.
To use this new connection, double-click on the New Dial-Up Networking Connection icon. Type in the
user name and password for your remote account and click Connect.
30
Page 38

MultiMobile MT128ZLX User Guide 2: Windows 95 API Usage
Windows 95 Vcomm: Single Channel Access Example
NOTE: To complete this procedure, you will need to know several technical details that can be provided by
your ISP or by your network administrator.
1. You will need to know whether or not an encrypted password is needed to access the
network to which you will be connected.
2. If you are connecting to a non-Windows server, you will also need to know in advance
whether or not the server requires you to type in login information or to know TCP/ IP
addresses before dialing.
3. If applicable, you will need to know the domain name of the network to which you will be
connected.
4. You will need to know the dial-out network protocol to be used (NetBEUI, TCP/IP, or IPX).
1. Go to Start | Programs | Accessories | Dial-Up Networking. At the Dial-Up Networking folder,
select Make New Connection.
2. The Make New Connection screen appears. Enter a descriptive name for the connection. In the
“Select a Modem” drop-down box, highlight MultiMobile MT128ZLX-ST (modem).
3. At the next screen, enter the area code and phone number of your ISP or of the remote device you will
be calling using this connection. Select the appropriate Country Code and click Next> to complete the
setup.
31
Page 39

MultiMobile MT128ZLX User Guide 2: Windows 95 API Usage
4. At the completion screen, click Finish.
The new dialup connection is ready to configure.
32
Page 40

MultiMobile MT128ZLX User Guide 2: Windows 95 API Usage
5. From the Dial-Up Networking folder, right-click on your new connection icon. Choose Properties.
6. On the General tab, type in the phone number for the adapter port. You may change the connection
options by clicking Configure.
7. Click on the Server Types tab to configure logon options, encryption, log file information and network
protocol options, including TCP/IP Settings for your remote server and DNS connections. If necessary,
contact your ISP or network administrator to obtain the correct TC P/IP addressing information.
8. Use the Scripting tab to define scripts that will run when this connection is ma d e. C lick OK to
complete the configuration.
To use this new connection, double-click on the New Dial-Up Networking Connection icon. Type in the
user name and password for your remote account and click Connect.
33
Page 41

MultiMobile MT128ZLX User Guide 2: Windows 95 API Usage
Windows 95 Vcomm: Dual Channel Access Example (MultiLink)
NOTE: To complete this procedure, you will need to know several technical details that can be provided by
your ISP or by your network administrator.
1. You will need to know whether or not an encrypted password is needed to access the
network to which you will be connected.
2. If you are connecting to a non-Windows server, you will also need to know in advance
whether or not the server requires you to type in login information or to know TCP/ IP
addresses before dialing.
3. If applicable, you will need to know the domain name of the network to which you will be
connected.
4. You will need to know the dial-out network protocol to be used (NetBEUI, TCP/IP, or IPX).
If you would like to use multi-linking with your VCOMM connection, first be sure that your ISDN provider
supports a 128kbps MLP option.
In order to use VCOMM multi-linking , you mu s t ins tall a second ISDN device in the Modems applet in the
Control Panel. The first ISDN device wa s installed automatically during the initial driver installation.
1. Install the virtual modem for your MT128ZLX in Windows 95 by selecting Start | Settings | Control
Panel | Modems | Add. The Install New Modems screen will appear.
Select “Other” and click Next>.
34
Page 42

MultiMobile MT128ZLX User Guide 2: Windows 95 API Usage
2. At the next screen, Windows 95 will prepare to detect your modem.
Click on “Do not detect my modem; I will select it from a list.”
Click Next>.
3. The next screen displays a lis t of mod em manufacturers and modem models. In the Manufacturers
pane, highlight “MultiTech.” In the Models pane, highlight “MultiMobile MT128ZLX-ST (modem).”
Click Next>.
35
Page 43

MultiMobile MT128ZLX User Guide 2: Windows 95 API Usage
4. The next screens allows you to select which COM port to use with the MT128ZLX.
Select “ISDN 2nd COM.” Click Next>.
5. At the completion screen, click Finish. You should now see two ISDN devices in the Modems
Properties window.
Click Close to exit from the Modems Properties window. Then close the Control Panel window.
36
Page 44

MultiMobile MT128ZLX User Guide 2: Windows 95 API Usage
6. For this example, we will use the existing connection that was crea ted in the V C OMM single-channel
procedure above (“Windows 95 Vcomm: Single Channel Access Example”).
Go to Start | Programs | Accessories | Dial-Up Networking. This will open up the Dial-Up Networking
folder.
From the Dial-Up Networking folder, right-click on your new connection icon. Choose Properties.
7. The Connection menu screen appears. Click on Settings.
37
Page 45

MultiMobile MT128ZLX User Guide 2: Windows 95 API Usage
8. The Set Additional Devices screen appears.
9. Select Use Additional Devices. Click Add.
At the Edit Extra Device screen, in the Device Name drop-down box, select MultiMobile MT128ZLX-ST
(modem) #2. Enter the Phone Number of your ISP or of the remote device that you will be calling with
this connection.
When complete, continue to click OK to leave the Set Additional Devices configuration screens.
To use this new connection, double-click on the New Dial-Up Networking Connection icon. Type in the
user name and password for your remote account and click Connect.
38
Page 46

MultiMobile MT128ZLX User Guide 2: Windows 95 API Usage
Windows 95 CAPI: Single Channel Access Example
NOTE: To complete this procedure, you will need to know several technical details that can be provided by
your ISP or by your network administrator.
1. You will need to know whether or not an encrypted password is needed to access the
network to which you will be connected.
2. If you are connecting to a non-Windows server, you will also need to know in advance
whether or not the server requires you to type in login information or to know TCP/ IP
addresses before dialing.
3. If applicable, you will need to know the domain name of the network to which you will be
connected.
4. You will need to know the dial-out network protocol to be used (NetBEUI, TCP/IP, or IPX).
To use the Common ISDN Application Interface (CAPI), you mu s t ins ta ll a CAPI-compliant
telecommunications application, such as the RV S-COM Lite program, which will be u s ed for this
example.
After installing RVS-C O M Lite, several new virtual mod ems b e c ome available to configure. The followin g
example uses the RVS ISDN V.120 modem. Before beginning, be sure that the RVS-COM Center is running
(the icon will appear in the Windows 95 Task Bar).
1. Go to Start | Programs | Accessories | Dial-Up Networking. At the Dial-Up Networking folder,
select Make New Connection.
39
Page 47

MultiMobile MT128ZLX User Guide 2: Windows 95 API Usage
2. The Make New Connection screen appears. Enter a descriptive name for the connection. In the
“Select a Modem” drop-down box, highlight RVS ISDN V.120.
Click Next>.
3. At the next screen, enter the area code and phone number of your ISP or of the remote device you will
be calling using this connection. Select the appropriate Country Code and click Next> to complete the
setup.
40
Page 48

MultiMobile MT128ZLX User Guide 2: Windows 95 API Usage
4. At the completion screen, click Finish.
The new dialup connection is ready to configure.
5. From the Dial-Up Networking folder, right-click on your new connection icon. Choose Properties.
41
Page 49

MultiMobile MT128ZLX User Guide 2: Windows 95 API Usage
6. On the General tab, type in the phone number for the adapter port. You can chang e the connection
options by clicking Configure.
7. Click on the Server Types tab to configure logon options, encryption, log file information and network
protocol options, including TCP/IP Settings for your remote server and DNS connections. If necessary,
contact your ISP or network administrator to obtain the correct TC P/IP addressing information.
8. Use the Scripting tab to define scripts that will run when this connection is made. Click OK to
complete the configuration.
To use this new connection, double-click on the New Dial-Up Networking Connection icon. Type in the
user name and password for your remote account and click Connect.
42
Page 50

MultiMobile MT128ZLX User Guide 2: Windows 95 API Usage
Windows 95 CAPI: Dual Channel Access Example (MultiLink)
NOTE: To complete this procedure, you will need to know several technical details that can be provided by
your ISP or by your network administrator.
1. You will need to know whether or not an encrypted password is needed to access the
network to which you will be connected.
2. If you are connecting to a non-Windows server, you will also need to know in advance
whether or not the server requires you to type in login information or to know TCP/ IP
addresses before dialing.
3. If applicable, you will need to know the domain name of the network to which you will be
connected.
4. You will need to know the dial-out network protocol to be used (NetBEUI, TCP/IP, or IPX).
If you would like to use multi-linking with your CAPI connection, first be sure that your ISDN provider
supports a 128kbps MLP option.
The ports you link must first be enabled through RVS-Com. In this example, the RVS ISDN V.120
modems are used.
1. To enable the ports in RVS-Com, open the RVS-Com Comm Center.
2. Click the Services tab. In the Virtual Com Ports section of the window, place a check mark in front of
both ports. Associate each port with a unique COM port number (the two devices must use different COM
ports).
Click Apply, and then OK.
Next you will need to identify the two modems to be linked or installed.
3. In the example, if two RVS ISDN V.120 modems do not exist, you will need to create a new definition for
each of them. To create a new definition, go to Start | Settings | Control Panel | Modems | Add. The
Install New Modems screen will appear.
Select “Other” and click Next>.
43
Page 51

MultiMobile MT128ZLX User Guide 2: Windows 95 API Usage
2. At the next screen, Windows 95 will prepare to detect your modem.
Click on “Do not detect my modem; I will select it from a list.”
Click Next>.
3. The next screen displays a list of modem manufacturers and modem mod els. In the Manufacturers
pane, highlight “RVS Datentechnik.” In the Models pane, highlight “RVS ISDN V.120.”
Click Next>.
44
Page 52

MultiMobile MT128ZLX User Guide 2: Windows 95 API Usage
4. The next screens allows you to select which COM port to use with the “RVS ISDN V.120 modem.”
Select “RVS Port (COM 4).” Click Next>.
5. At the completion screen, click Finish. You should now see two “RVS ISDN V.120” devices in the
Modems Properties window.
Click Close to exit from the Modems Properties window. Then close the Control Panel window.
45
Page 53

MultiMobile MT128ZLX User Guide 2: Windows 95 API Usage
6. For this example, we will use the existing connection that was crea ted in the CAPI s ing le- channel
procedure above (“Windows 95 CAPI: Single Channel Access Example”).
Go to Start | Programs | Accessories | Dial-Up Networking. This will open up the Dial-Up Networking
folder.
From the Dial-Up Networking folder, right-click on your new connection icon. Choose Properties.
7. The Connection menu screen appears. Click on Settings.
8. The Set Additional Devices screen appears.
46
Page 54

MultiMobile MT128ZLX User Guide 2: Windows 95 API Usage
9. Select Use Additional Devices. Click Add.
At the Edit Extra Device screen, in the Device Name drop-down box, select RVS ISDN V.120 #2. Enter
the Phone Number of your ISP or of the remote device that you will be calling with this connection.
When complete, continue to click OK to leave the Set Additional Devices configuration screens.
To use this new connection, double-click on the New Dial-Up Networking Connection icon. Type in the
user name and password for your remote account and click Connect.
47
Page 55

3 Installation & Use in Windows 98
48
Page 56

MultiMobile MT128ZLX User Guide 3: Windows 98 Driver Procedures
MT128ZLX-ST/NT: Windows 98 Driver Procedures
Windows 98 Installation
NOTE: Before beginning the installation, you mu s t ob ta in the follow ing technical information from your
telephone company:
SPIDs (North America only)
Switch Type
Voice Encoding scheme
Telephone Number(s)
NOTE: As you begin this procedure, the MT128ZLX card should not be installed in the computer’s
PCMCIA slot. The setup.exe file must be run before the card is installed. Otherwise problems
will arise as Windows 98 detects the device.
NOTE: During the installation, you should have your Windows 98 CD-ROM close at hand. Windows 98
may need to add or update files which mu s t be copied from the C D .
1. For now, leave the MT128ZLX card out of the computer’s PCMCIA slot.
2. Insert the MT128ZLX Installation CD into the computer’s CD-ROM drive.
3. Using Windows Explorer, browse to the win9x directory on the MT128ZLX Installation CD.
49
Page 57

MultiMobile MT128ZLX User Guide 3: Windows 98 Driver Procedures
4. Double-click on the Setup.exe file to launch the Configuration Utility Setup program.
At the Welcome screen, click Next.
5. At the Choose Destination Location screen, you can accept the default path or enter a different path at
which to install the Configuration Utility files.
Click Next>.
50
Page 58

MultiMobile MT128ZLX User Guide 3: Windows 98 Driver Procedures
6. At the Select Program Folder screen, you can accept the default folder or select another folder into
which the program icons will be added.
Then click Next>.
7. The Start Copying Files screen allows you one last chance to go back and change information that you
have provided in previous steps.
When satisfied with your settings, click Next> to begin copying files.
8. Progress screens will appear while files are being copied to your hard disk.
51
Page 59

MultiMobile MT128ZLX User Guide 3: Windows 98 Driver Procedures
9. The Configuration Utility screen appears, displaying the various applets of the Configuration Utility
program.
Close the Configuration Utility window.
10. At the Setup Complete, screen, select Yes, I want to restart my computer now.
Click Finish.
52
Page 60

MultiMobile MT128ZLX User Guide 3: Windows 98 Driver Procedures
11. When the restart process is complete, a message will appear indicating that “ISDN PC Card does not
exist,” meaning that the card is not in the computer’s PCMCIA slot. This is normal. After the drivers are
installed, this message will appear upon restart anytime the MT128ZLX card is not installed in its slot.
Click OK.
12. Insert the MT128ZLX into the computer’s PCMCIA slot.
13. Windows 98 will detect the MT128ZLX card. The New Hardware Found wizard will display a series of
screens indicating that is has found new hardware and that it is installing the corresponding software.
53
Page 61

MultiMobile MT128ZLX User Guide 3: Windows 98 Driver Procedures
14. Go to Start | Settings | Control Panel. Select the Network icon. Select the Configuration tab.
Click Add.
15. At the Select Network Component Type screen, highlight Adapter and click Add.
54
Page 62

MultiMobile MT128ZLX User Guide 3: Windows 98 Driver Procedures
16. At the Select Network Adapters screen, highlight “MultiTech” in the Manufacturers pane. In the
right pane (the Network Adapters pane), the MT128ZLX ISDN Adapter appears in the list.
Click OK. This installs the NDIS Application Program Interface and adds ISDN-LINE0 and ISDN-LINE1
to the list of devices in Dial-Up Networking. At the Network screen (under the Configuration tab), click
OK.
17. The ISDN Configuration wizard begins.
NOTE: The information entered in the Microsoft ISDN Config u ration w iz ard does not affect the operation
of the MT128ZLX. However, completing this wizard is necessary to update certain dial-up
networking software components to add ISDN functionality to Windows 98. The MT128ZLX is
configured for use with the Configuration Utility tha t w a s ins talled during driver installation. In
the section “Configuring the MT128ZLX” (presented later in this chapter), you will supply setup
information for using the Configuration Utility progra m w ith you r pa rticu la r computer.
Click Next>.
18. Accept the default value for the “Switch Protocol.” Click Next>.
55
Page 63

MultiMobile MT128ZLX User Guide 3: Windows 98 Driver Procedures
19. The next wizard screen requests Phone Number and SPID information. It is not necessary to enter
this information here. You will be asked to supply this information later (in the Configuration Utility
program).
Leave the fields of this dialog box blank. Click Next>.
56
Page 64

MultiMobile MT128ZLX User Guide 3: Windows 98 Driver Procedures
20. At the ‘completion’ screen, click Finish.
21. In some cases, Windows 98 may require an additional software component which can be loaded from
the Windows 98 CD-ROM. If this occu rs , a notification screen will appear.
Insert your Windows 98 CD into the CD-ROM drive and follow the Windows 98 messages to allow the
required files to be copied.
22. When the ISDN Configuration wizard process is complete, you will be prompted to restart your
computer.
Click Yes.
23. Driver installation is now complete. However, before you can use your MT128ZLX in Windows 95, it
must be configured with SPIDs (in the U.S. and Canada), telephone numbers, voice-encoding information,
and switch-type information. (See the procedure “Configuring the MT128ZLX in Windows 98” below.)
57
Page 65

MultiMobile MT128ZLX User Guide 3: Windows 98 Driver Procedures
Verifying the Windows 98 Installation
1. Go to Start | Settings | Control Panel. Click on the System icon. When the System Properties screen
appears, select the Device Manager tab.
2. After a successful driver installation, the Device Manager will contain the following entries:
MultiMobile MT128ZLX-ST (ISDN)
MultiMobile MT128ZLX-ST (modem)
MultiMobile MT128ZLX-ST Multi-Function Card
MultiMobile MT128ZLX-ST ISDN TA (Net)
3. If these entries do not appear, re-do the driver installa tion procedure. If the ins tallation fails repeatedly,
call MultiTech Tech Support (800-972-2439).
58
Page 66

MultiMobile MT128ZLX User Guide 3: Windows 98 Driver Procedures
Configuring the MT128ZLX-ST/NT in Windows 98
NOTE: In this procedure, you will be asked to enter d eta iled config u ra tion information that relates to the
ISDN equipment being used by your telephone company. Specifically, your telephone company
must provide the following information:
SPIDs,
Phone Numbers,
Switch Type, and
Voice Encoding type.
This information is supplied by your telephone company and you mu s t have it available when
doing this procedure.
1. Go to Start | Programs | Configuration Utility | Config.
The Configuration Utility dialog box will appear.
2. Enter the information needed in each field of the dialog box.
59
Page 67

MultiMobile MT128ZLX User Guide 3: Windows 98 Driver Procedures
Switch Type: See listed options.
Phone Numbers: B1 number and B2 number.
SPID Needed only in the U.S. and Canada.
B-Channel Speed 56 kbps or 64 kbps
Voice Encoding: for Net3 or ETSI, use A-law voice encoding
for other switches, use Mu-law voice encoding
NOTE: It is essential for the proper operation of your device tha t this information is
entered correctly. Please take a moment to verify that the information
entered is correct.
Click OK.
60
Page 68

MultiMobile MT128ZLX User Guide 3: Windows 98 Driver Procedures
Uninstalling MT128ZLX-ST/NT Drivers in Windows 98
1. Close the Status program. After the Configuration Utility has been installed, the Status prog ra m’s icon
normally appears at the lower right corner of your screen. Click on this icon and close the Status program.
NOTE: Failure to close the Status program at this point will result in a n incomplete
uninstallation process.
2. Go to Start | Settings | Control Panel. Click on the Add/Remove Programs icon. The Add/Remove
Programs Properties dialog box will appear. At the Install/Uninstall tab, highlight Configuration
Utility. Click on the Add/Remove button.
61
Page 69

MultiMobile MT128ZLX User Guide 3: Windows 98 Driver Procedures
3. At the Confirm File Deletion screen, click Yes.
4. The Uninstall Shield program will appear. At the Remove Programs From Your Computer screen,
click OK.
62
Page 70

MultiMobile MT128ZLX User Guide 3: Windows 98 Driver Procedures
If, for any reason, the Status screen was not closed ea rlier (s tep 1 ) , the unins ta ll procedure w ill be
incomplete and some program files will remain on the c ompu ter. If this ha ppens, the Remove Programs
From Your Computer screen will point out that files need to be removed manually. To identify the files
that must be manually deleted la ter, click on the Details button. Record file names as needed.
Click OK to proceed.
5. A message screen appears recommending that you restart your computer.
Click OK. Then restart your computer.
63
Page 71

MultiMobile MT128ZLX User Guide 3: Windows 98 API Usage
MT128ZLX: Using APIs in Windows 98
About A PIs
The MT128ZLX-ST/NT operates in conjunction with three Application Program Interface software
packages: NDIS, VCOMM, or CAPI. This chapter presents examples of how the MT128ZLX can be used
with these APIs. The CAPI-compliant program used in these examples is RV S -COM Lite.
Each API contains software components that interact with the operating s ys tem of the compu ter in wh ich
the MT128ZLX is installed. Each API adds communications functionality to the system. Each of the three
APIs adds a somewhat different s et of features to the system, as summariz ed in the ta b le be low a n d
described more fully in subsequent sections.
API Full Name Functionality
NDIS Network Driver Interface
Specification
VCOMM Virtual Communications
Driver
CAPI Common ISDN Application
Program Interface
dial-up networking (DUN)connection, network
interface card (NIC) emula tion
dial-up networking (DUN)connection,
modem emulation
dial-up networking (DUN)connection, modem
emulation, G3 and G4 FAX, V.110, V.120, X.75,
HDLC, interface to ISDN features and s erv ices
The NDIS API
NDIS allows Network Interface Cards (NICs) to work with each other, with the operating system, and with
higher order protocol drivers. NDIS is a n interface that facilitates development of NIC driv ers . NDIS
program routines can implement the functions that NIC drivers must perform. Thes e include intera ction
with protocol drivers, the handling of hard ware interrupts, and interface with u n d erlyin g N I C s b y d ea ling
with registers, port I/O, and other functionality. NDIS allows drivers to be developed in high-level
programming languages, su ch tha t their crea tion and implementation are platform-independent.
The VCOMM API
The communications device driver known as “VCOMM” provides protected-mode services. It allows
makes ports and modems available to Windows-based software application programs. VCOMM also uses
plug-and-play functionality to simplify the insta lla tion and configuration of communications devices.
64
Page 72

MultiMobile MT128ZLX User Guide 3: Windows 98 API Usage
The CAPI API
Being a common interface, the ISDN CAPI ( C ommon A pplication Program Interface), allows softw a re
programs to use all ISDN services. Computer programs have access to most services and features of ISDN
when used with CAPI. This access is hardware-independent. CAPI makes call numbers available, as well
as several kinds of service information: caller numb er, c alled number, call charg e s , I SDN service ID. CAPI
also facilitates transmission of data, FAX, or voice, and multiple B-channels can also be used
simultaneously on a s in gle call.
It is the capabilities of the ISDN adapter a n d the type of IS D N connection tha t d etermine w hich s erv ices
and features are actually available. CAPI merely serves as a common interface. ISDN CAPI is a platformindependent standard which can be used in non-Windows operating systems like OS/2 and UNIX, as well
as in Microsoft operating systems.
CAPI 2.0 is the current form of CAPI. ISDN adapters with CAPI 2.0 can be used anywhere in Europe with
the DSS1 Euro-ISDN connection.
Intro to API Single-Channel and Mult i Li nk Exampl es
In the following procedures, you will use Application Program Interfaces (APIs) to set up a n d us e dia l-u p
networking with the MT128ZLX in conjunction with the particular operating system your computer is
using. The APIs are installed as part of the MT128ZLX driver installation, which must be complete before
these procedures can be done. Note that the procedures presented here are examples only. Your use of
APIs will depend on the needs and limitations of your operating environment.
65
Page 73

MultiMobile MT128ZLX User Guide 3: Windows 98 API Usage
Windows 98 NDIS : Single Channel Access Example
NOTE: To complete this procedure, you will need to know several technical details that can be provided by
your ISP or by your network administrator.
1. You will need to know whether or not an encrypted password is needed to access the network
to which you will be connected.
2. If you are connecting to a non-Windows NT server, you will also need to know in advance
whether or not the server requires you to type in login information or to know TCP/ IP addresses
before dialing.
3. If applicable, you will need to know the domain name of the network to which you will be
connected.
4. You will need to know the dial-out network protocol to be used (NetBEUI, TCP/IP, or IPX).
1. Go to Start | Programs | Accessories | Communications | Dial-Up Networking. If this is your first
communications connection, the Welcome to Dial-Up Networking screen will appear. Otherwise, click
on the Make New Connection icon.
Click Next>.
66
Page 74

MultiMobile MT128ZLX User Guide 3: Windows 98 API Usage
The Make New Connection screen appears. Enter a descriptive name for the connection. In the “Select a
device” drop-down box, highlight ISDN-Line0.
Click Next>.
3. At the next screen, enter the area code and phone number of your ISP or the remote device you will
be calling using this connection. Select the appropriate Country or Region Code and click Next> to
complete the setup.
67
Page 75

MultiMobile MT128ZLX User Guide 3: Windows 98 API Usage
4. At the completion screen, click Finish.
The new dialup connection is ready to configure.
5. From the Dial-Up Networking folder, right-click on your new connection icon. Choose Properties.
68
Page 76

MultiMobile MT128ZLX User Guide 3: Windows 98 API Usage
6. On the General tab, type in the phone number for the adapter port. You may chan g e the connection
options by clicking Configure.
7. Click on the Server Types tab to configure logon options, encryption, log file information and
network protocol options, including TCP/IP Settings for your remote server and DN S connections. If
necessary, contact your ISP or network adminis tra tor to ob tain the correct TCP/IP addressing
information.
8. Use the Scripting tab to define scripts that will run when this connection is ma d e. C lick OK to
complete the configuration.
To use this new connection, double-click on the New Dial-Up Networking Connection icon. Type in the
user name and password for your remote account and click Connect.
69
Page 77

MultiMobile MT128ZLX User Guide 3: Windows 98 API Usage
Windows 98 NDIS: Dual Channel Access Example (MultiLink)
NOTE: To complete this procedure, you will need to know several technical details that can be provided by
your ISP or by your network administrator.
1. You will need to know whether or not an encrypted password is needed to access the network
to which you will be connected.
2. If you are connecting to a non-Windows server, you will also need to know in advance
whether or not the server requires you to type in login information or to know TCP/ IP addresses
before dialing.
3. If applicable, you will need to know the domain name of the network to which you will be
connected.
4. You will need to know the dial-out network protocol to be used (NetBEUI, TCP/IP, or IPX).
If you would like to use multi-linking with your NDIS connection, first be sure that your ISDN provider
supports a 128kbps MLP option.
1. To begin, you will need to create a new dial-up connection as described above (“Windows 98 NDIS :
Single Channel Acc ess Example”) or modify an existing connection. Right-click on the Dial-Up
Connection icon and select Properties.
70
Page 78

MultiMobile MT128ZLX User Guide 3: Windows 98 API Usage
Click on the MultiLink tab.
2. Select Use Additional Devices. Click Add.
At the Edit Extra Device screen, in the Device Name drop-down box, select ISDN-Line1. Enter the
Phone Number of your ISP or of the remote device that you will be calling with this connection.
When complete, continue to click OK to leave the Set Additional Devices configuration screens.
To use this new connection, double-click on the New Dial-Up Networking Connection icon. Type in the
user name and password for your remote account and click Connect.
71
Page 79

MultiMobile MT128ZLX User Guide 3: Windows 98 API Usage
Windows 98 VCOMM: Single Channel Access Example
NOTE: To complete this procedure, you will need to know several technical details that can be provided by
your ISP or by your network administrator.
1. You will need to know whether or not an encrypted password is needed to access the network
to which you will be connected.
2. If you are connecting to a non-Windows server, you will also need to know in advance
whether or not the server requires you to type in login information or to know TCP/ IP addresses
before dialing.
3. If applicable, you will need to know the domain name of the network to which you will be
connected.
4. You will need to know the dial-out network protocol to be used (NetBEUI, TCP/IP, or IPX).
1. Go to Start | Programs | Accessories | Communications | Dial-Up Networking. If this is your first
communications connection, the Welcome to Dial-Up Networking screen will appear. Otherwise, click
on the Make New Connection icon.
Click Next>.
72
Page 80

MultiMobile MT128ZLX User Guide 3: Windows 98 API Usage
2. The Make New Connection screen appears. Enter a descriptive name for the connection. In the
“Select a device” drop-down box, highlight MultiMobile MT128ZLX-ST (modem).
Click Next>.
3. At the next screen, enter the area code and phone number of your ISP or of the remote device you will
be calling using this connection. Select the appropriate Country Code and click Next> to complete the
setup.
Click Next>.
73
Page 81

MultiMobile MT128ZLX User Guide 3: Windows 98 API Usage
4. At the completion screen, click Finish.
The new dialup connection is ready to configure.
5. From the Dial-Up Networking folder, right-click on your new connection icon. Choose Properties.
74
Page 82

MultiMobile MT128ZLX User Guide 3: Windows 98 API Usage
6. On the General tab, type in the phone number for the adapter port. You may change the connection
options by clicking Configure.
7. Click on the Server Types tab to configure logon options, encryption, log file information and
network protocol options, including TCP/IP Settings for your remote server and DN S connections. If
necessary, contact your ISP or network adminis tra tor to ob tain the correct TCP/IP addressing
information.
8. Use the Scripting tab to define scripts that will run when this connection is ma d e. C lick OK to
complete the configuration.
To use this new connection, double-click on the New Dial-Up Networking Connection icon. Type in the
user name and password for your remote account and click Connect.
75
Page 83

MultiMobile MT128ZLX User Guide 3: Windows 98 API Usage
Windows 98 Vcomm: Dual Channel Access Example (MultiLink)
NOTE: To complete this procedure, you will need to know several technical details that can be provided by
your ISP or by your network administrator.
1. You will need to know whether or not an encrypted password is needed to access the network
to which you will be connected.
2. If you are connecting to a non-Windows server, you will also need to know in advance
whether or not the server requires you to type in login information or to know TCP/ IP addresses
before dialing.
3. If applicable, you will need to know the domain name of the network to which you will be
connected.
4. You will need to know the dial-out network protocol to be used (NetBEUI, TCP/IP, or IPX).
If you would like to use multi-linking with your VCOMM connection, first be sure that your ISDN provider
supports a 128kbps MLP option.
In order to use VCOMM multi-linking , you mu s t ins tall a second ISDN device in the Modems applet in the
Control Panel. The first ISDN device wa s installed automatically during the initial driver installation.
1. Install the virtual modem for your MT128ZLX in Windows 98 by selecting Start | Settings | Control
Panel | Add. The Install New Modems screen will appear.
Select “Other” and click Next>.
76
Page 84

MultiMobile MT128ZLX User Guide 3: Windows 98 API Usage
2. At the next screen, Windows 98 will prepare to detect your modem.
Click on “Do not detect my modem; I will select it from a list.”
Click Next>.
3. The next screen displays a lis t of mod em manufacturers and modem models. In the Manufacturers
pane, highlight “MultiTech.” In the Models pane, highlight “MultiMobile MT128ZLX-ST (modem).”
Click Next>.
77
Page 85

MultiMobile MT128ZLX User Guide 3: Windows 98 API Usage
4. The next screens allows you to select which COM port to use with the MT128ZLX.
Select “ISDN 2nd COM.” Click Next>.
5. At the completion screen, click Finish. You should now see two ISDN devices in the Modems
Properties window.
Click Close to exit from the Modems Properties window. Then close the Control Panel window.
6. For this example, we will use the existing connection that was crea ted in the V C OMM single-channel
procedure above (“Windows 98 Vcomm: Single Channel Access Example”).
78
Page 86

MultiMobile MT128ZLX User Guide 3: Windows 98 API Usage
Go to Start | Programs | Accessories | Communications | Dial-Up Networking. This will open up the
Dial-Up Networking folder.
From the Dial-Up Networking folder, right-click on your new connection icon. Choose Properties.
7. The Connection menu screen appears. Click on the MultiLink tab.
Select Use Additional Devices. Click Add.
79
Page 87

MultiMobile MT128ZLX User Guide 3: Windows 98 API Usage
8. At the Edit Extra Device screen, in the Device Name drop-down box, select MultiMobile MT128ZLX-
ST (modem) #2. Enter the Phone Number of your ISP or of the remote device that you will be calling
with this connection.
When complete, continue to click OK to leave the Set Additional Devices configuration screens.
To use this new connection, double-click on the New Dial-Up Networking Connection icon. Type in the
user name and password for your remote account and click Connect.
80
Page 88

MultiMobile MT128ZLX User Guide 3: Windows 98 API Usage
Windows 98 CAPI: Single Channel Access Example
NOTE: To complete this procedure, you will need to know several technical details that can be provided by
your ISP or by your network administrator.
1. You will need to know whether or not an encrypted password is needed to access the
network to which you will be connected.
2. If you are connecting to a non-Windows server, you will also need to know in advance
whether or not the server requires you to type in login information or to know TCP/ IP
addresses before dialing.
3. If applicable, you will need to know the domain name of the network to which you will be
connected.
4. You will need to know the dial-out network protocol to be used (NetBEUI, TCP/IP, or IPX).
To use the Common ISDN Application Interface (CAPI), you mu s t ins ta ll a CAPI-compliant
telecommunications application, such as the RV S-COM Lite program, which will be u s ed for this
example.
After installing RVS-C O M Lite, several new virtual mod ems b e c ome available to configure. The followin g
example uses the RVS ISDN V.120 modem. Before beginning, be sure that the RVS-COM Center is running
(the icon will appear in the Windows 98 Task Bar).
1. Go to Start | Programs | Accessories | Communications | Dial-Up Networking. If this is your first
communications connection, the Welcome to Dial-Up Networking screen will appear. Otherwise, click
on the Make New Connection icon.
Click Next>.
81
Page 89

MultiMobile MT128ZLX User Guide 3: Windows 98 API Usage
2. The Make New Connection screen appears. Enter a descriptive name for the connection. In the
“Select a device” drop-down box, highlight RVS ISDN V.120.
Click Next>.
3. At the next screen, enter the area code and phone number of your ISP or of the remote device you will
be calling using this connection. Select the appropriate Country Code and click Next> to complete the
setup.
82
Page 90

MultiMobile MT128ZLX User Guide 3: Windows 98 API Usage
4. At the completion screen, click Finish.
The new dialup connection is ready to configure.
5. From the Dial-Up Networking folder, right-click on your new connection icon. Choose Properties.
83
Page 91

MultiMobile MT128ZLX User Guide 3: Windows 98 API Usage
6. On the General tab, type in the phone number for the adapter port. You may change the connection
options by clicking Configure.
7. Click on the Server Types tab to configure logon options, encryption, log file information and
network protocol options, including TCP/IP Settings for your remote server and DN S connections. If
necessary, contact your ISP or network adminis tra tor to ob tain the correct TCP/IP addressing
information.
8. Use the Scripting tab to define scripts that will run when this connection is ma d e. C lick OK to
complete the configuration.
To use this new connection, double-click on the New Dial-Up Networking Connection icon. Type in the
user name and password for your remote account and click Connect.
84
Page 92

MultiMobile MT128ZLX User Guide 3: Windows 98 API Usage
Windows 98 CAPI: Dual Channel Access Example (MultiLink)
NOTE: To complete this procedure, you will need to know several technical details that can be provided by
your ISP or by your network administrator.
1. You will need to know whether or not an encrypted password is needed to access the
network to which you will be connected.
2. If you are connecting to a non-Windows server, you will also need to know in advance
whether or not the server requires you to type in login information or to know TCP/ IP
addresses before dialing.
3. If applicable, you will need to know the domain name of the network to which you will be
connected.
4. You will need to know the dial-out network protocol to be used (NetBEUI, TCP/IP, or IPX).
If you would like to use multi-linking with your CAPI connection, first be sure that your ISDN provider
supports a 128kbps MLP option.
The ports you link must first be enabled through RVS-Com. In this example, the RVS ISDN V.120
modems are used.
1. To enable the ports in RVS-Com, open the RVS-Com Comm Center.
2. Click the Services tab. In the Virtual Com Ports section of the window, place a check mark in front of
both ports. Associate each port with a unique COM port number (the two devices must use different COM
ports).
Click Apply, and then OK.
Next you will need to identify the two modems to be linked or installed.
3. In the example, if two RVS ISDN V.120 modems do not exist, you will need to create a new definition for
each of them. To create a new definition, go to Start | Settings | Control Panel | Modems | Add. The
Install New Modems screen will appear.
Select “Other” and click Next>.
85
Page 93

MultiMobile MT128ZLX User Guide 3: Windows 98 API Usage
4. At the next screen, Windows 98 will prepare to detect your modem.
Click on “Do not detect my modem; I will select it from a list.”
Click Next>.
5. The next screen displays a lis t of mod em manufacturers and modem models. In the Manufacturers
pane, highlight “RVS Datentechnik.” In the Models pane, highlight “RVS ISDN V.120.”
Click Next>.
86
Page 94

MultiMobile MT128ZLX User Guide 3: Windows 98 API Usage
6. The next screens allows you to select which COM port to use with the “RVS ISDN V.120 modem.”
Select “RVS Port (COM 5).” Click Next>.
7. At the completion screen, click Finish. You should now see two “RVS ISDN V.120” devices in the
Modems Properties window.
Click Close to exit from the Modems Properties window. Then close the Control Panel window.
87
Page 95

MultiMobile MT128ZLX User Guide 3: Windows 98 API Usage
8. For this example, we will use the existing connection that was crea ted in the CAPI s ing le- channel
procedure above (“Windows 98 CAPI: Single Channel Access Example”).
Go to Start | Programs | Accessories | Communications |Dial-Up Networking. This will open up the
Dial-Up Networking folder.
From the Dial-Up Networking folder, right-click on your new connection icon. Choose Properties.
9. The Connection menu screen appears. Click on the MultiLink tab.
Select Use Additional Devices. Click Add.
88
Page 96

MultiMobile MT128ZLX User Guide 3: Windows 98 API Usage
10. At the Edit Extra Device screen, in the Device Name drop-down box, select MultiMobile
MT128ZLX-ST (modem) #2. Enter the Phone Number of your ISP or of the remote device that you will
be calling with this connection.
When complete, continue to click OK to leave the Set Additional Devices configuration screens.
To use this new connection, double-click on the New Dial-Up Networking Connection icon. Type in the
user name and password for your remote account and click Connect.
89
Page 97

4 Installation & Use in Windows NT
90
Page 98

MultiMobile MT128ZLX User Guide 4: Windows NT Driver Procedures
MT128ZLX-ST/NT: Windows NT4 Driver Procedures
Windows NT4 Installation
Note: To install, configure, and remove devices in Windows NT, your logon permissions must include the
ability to load and remove device drivers.
1. Insert the MT128ZLX card into the laptop PC.
2. Insert the MT128ZLX Installation CD into the computer’s CD-ROM drive.
3. In Windows Explorer, browse to the NT40 directory on the MT128ZLX Installation CD.
91
Page 99

MultiMobile MT128ZLX User Guide 4: Windows NT Driver Procedures
4. Double-click on the Setup.exe file to launch the Configuration Utility Setup program.
At the Welcome screen, click Next>.
5. At the Choose Destination Location screen, you can accept the default path or enter a different path at
which to install the Configuration Utility files.
Click Next>.
92
Page 100

MultiMobile MT128ZLX User Guide 4: Windows NT Driver Procedures
6. At the Select Program Folder screen, you can accept the default folder or select another folder into
which the program icons will be added.
Then click Next>.
7. The Start Copying Files screen allows you one last chance to go back and change the information that
you have provided in previous steps.
When satisfied with your settings, click Next> to begin copying files.
93
 Loading...