

Page 1
Model MMH2834
28.8 bps Internal modem Upgrade
Product Update
PN S000321A
12/11/03
This Product Update covers installing an internal MMH2834 modem in the MultiMux MMH904Ca. The MMH2834
modem can not be installed in the MMH900C series. The MMH900C series has a 4-pin connector that supports
the DSU and older style modems. The MMH900Ca series has a 10-pin connector that supports both the DSU
and MMH2834 mode.
Step Procedure
1 Check the contents of your upgrade kit to ensure that it contains the parts listed below:
a) MMH2834 modem
b) RJ11 telephone cable
c) Mounting screws (2)
d) Screwdriver
d) Serial tag label
2 Turn the MultiMux power switch to OFF and unplug the MultiMux power cord from the w all outlet.
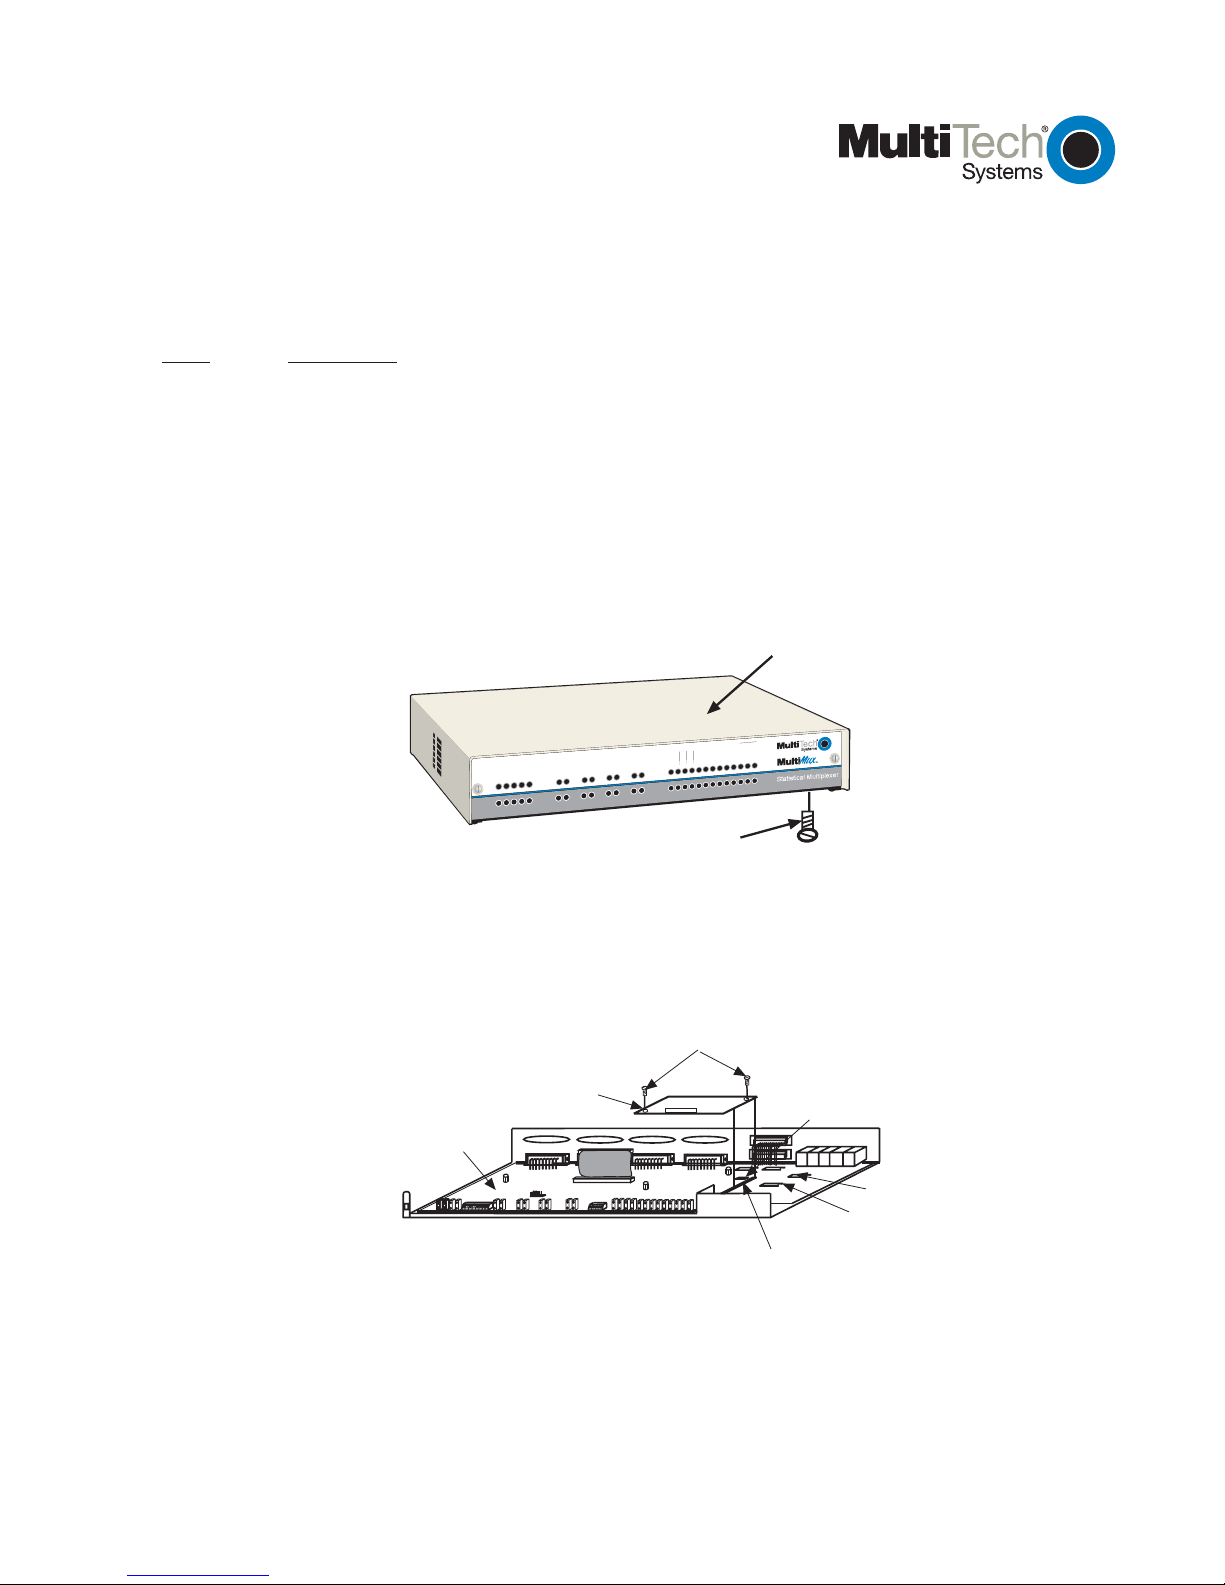
3 T urn the MultiMux upsidedown and remo ve the f our screws securing the cover to the base .
4 Slide the cover off the base.
Cover
Mounting
Screw
(x4)
Figure 1. MMH900 Cover
5 Plug in the Internal MMH2834 modem to the connector on the motherboard and the back 6-pins on the
side 10-pin connector. Be careful to align the 6-pins of the MMH2834 with the pins on the 10-pin
connector that are the farthest from the modem 96-pin connector.
Modem Mounting
Screws
MMH2834
Motherboard
1 2 3 4 5 6 7 8
Modem
OTHER RKWL14.4
1 2 3 4
Modem 10-pin
Connector
V.35 V.24
V29/V33
2834
Modem 96-pin
Connector
V.29/V.33
Shunt
2834
Shunt
Base
6 Secure the MMH2834 to the base using the two plastic mounting screws provided in the upgrade kit. One
of the screws goes into the connector and the other one into the standoff on the motherboard.
7 Ensure that the shunt is in the 2834 position
8 Set switch position 2 of the 8-position DIP-switch to the OPEN (UP) position.
Page 2

9 Slide the cover onto the base and replace the f our cov er screws.
1 0 Attach the modem serial tag tothe bottom of the MultiMux cabinet next to the existing serial tag(s).
1 1 Connect the RJ11 cable provided in the upgrade kit to the COMPOSITE LINK INTERNAL MODEM DIAL-
UP or LEASED connector on the backpanel of the MultiMux.
1 2 Connect the other end of the RJ11 cable into a telephone wall connector and plug in the power cord.
1 0 Refer to Chapter 5 of your MultiMux Owner's Manual to configure your MMH2834 modem.
 Loading...