

Page 1
Quick Start Guide
Page 2

Congratulations on purchasing
a P3, the world’s first multi-game
physical pinball platform!
One machine
Many games
Endless fun!
The P3 delivers an evolved pinball experience,
an entire pinball arcade in a single machine.
TM
Page 3

This quick start guide will help you
unbox, set up, and operate your new P
3
pinball machine, as well as demonstrate
simple operational tasks.
Tools Needed:
Utility Knife
9/16” (14mm) Socket or Wrench
5/8” (16mm) Socket or Wrench
Soft Cotton Cloth
For information about changing the
upper playfield module or servicing the
machine, please visit:
www.multimorphic.com
© 2017 Multimorphic, Inc.
Page 4
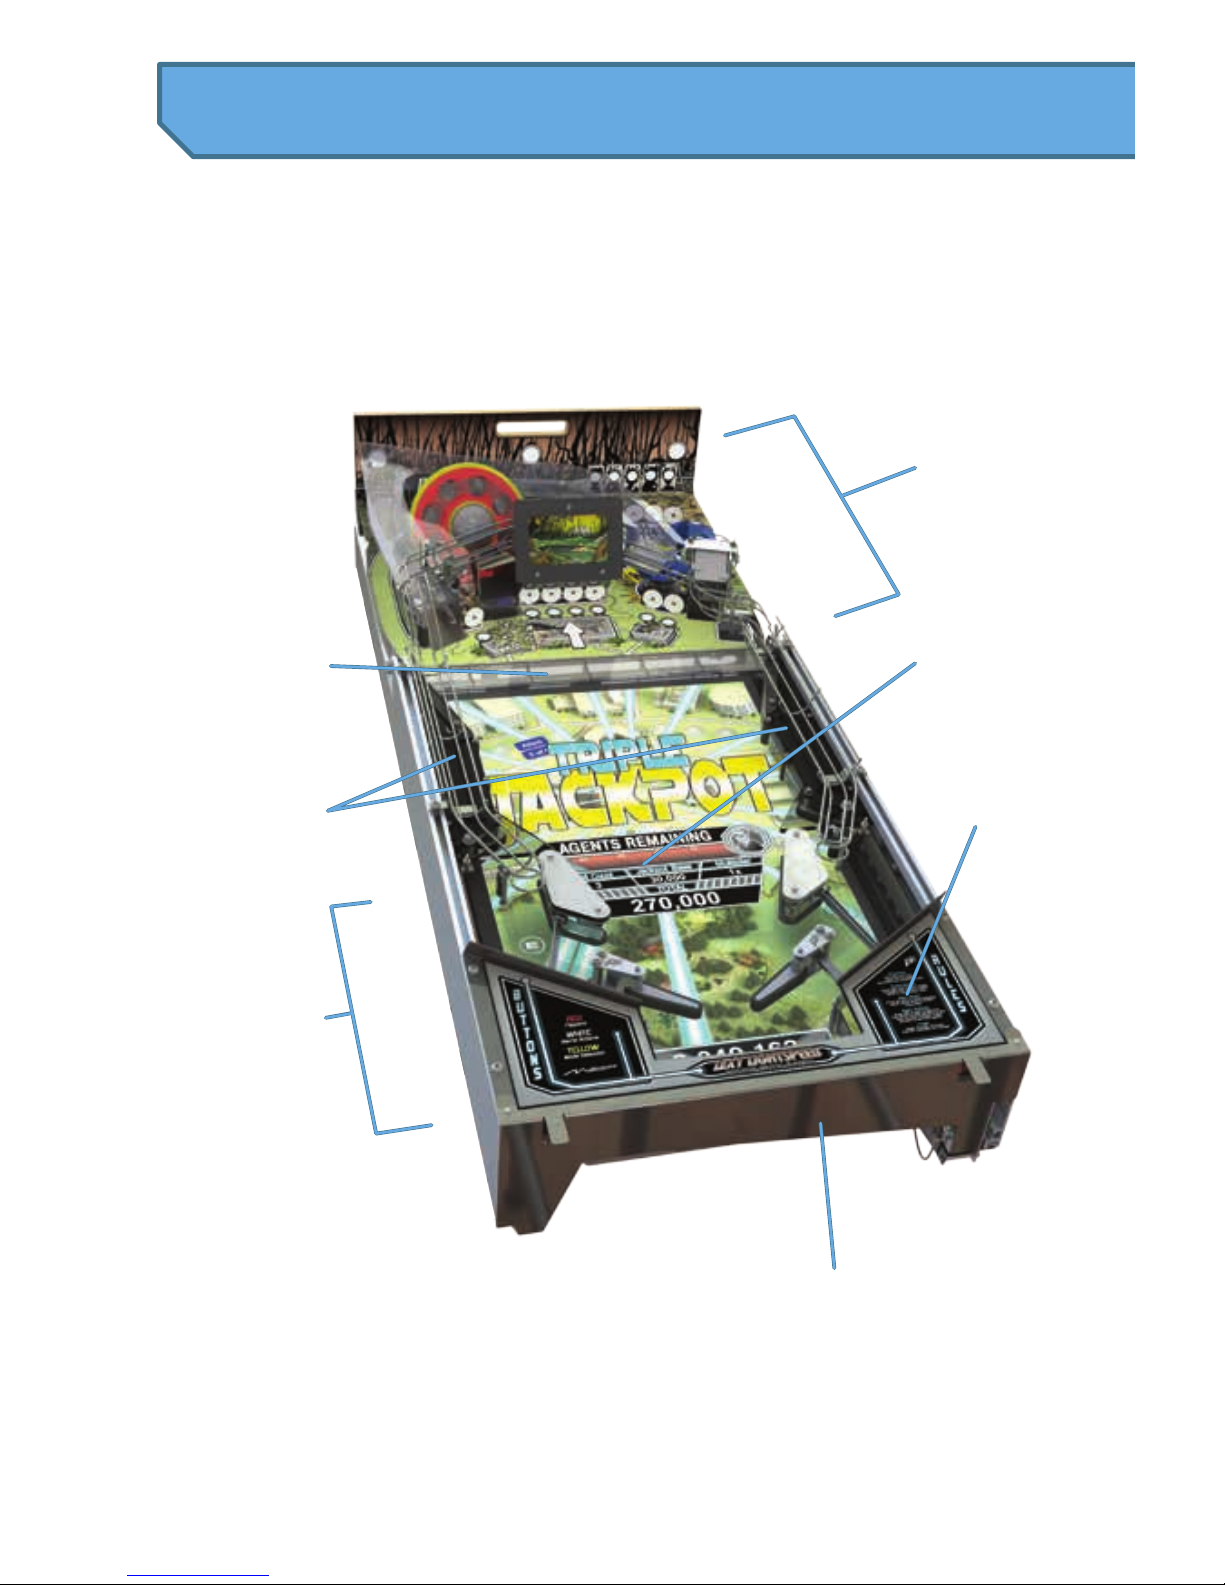
Upper
Playfield
Module
Side
Modules
Flipper
Assembly
Apron
Front
Door
Playfield
Display
Wall &
Scoop
Assembly
Know Your Machine
3
Page 5

Backbox
Translite
Speaker Panel
Magnetic
Artwork
Coin Door
Start
Button
Launch
Button
Legs
Playfield
Button Box
Lockbar
Cabinet
Power
Switch
Power
Plug
4
Page 6
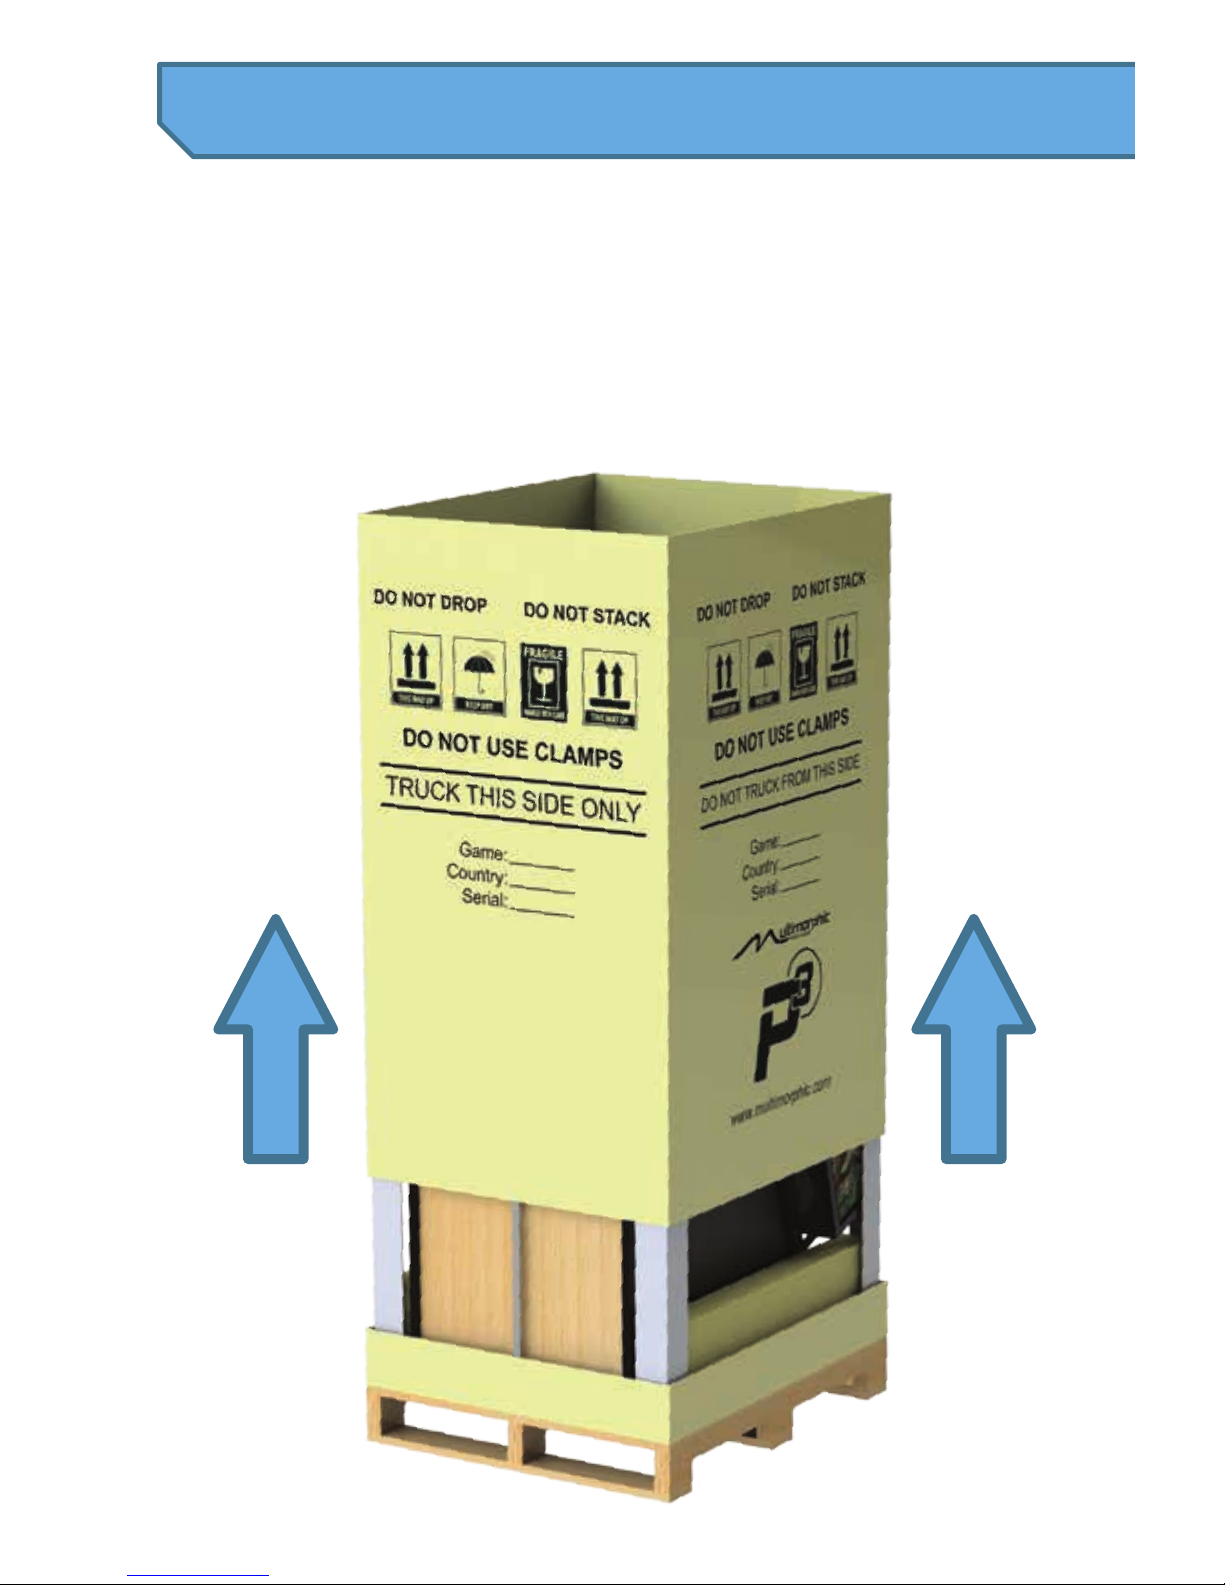
If you wish to reuse your shipping box,
simply lift the wraparound cardboard
upwards and set it aside.
Step 1. Unboxing
5
Page 7
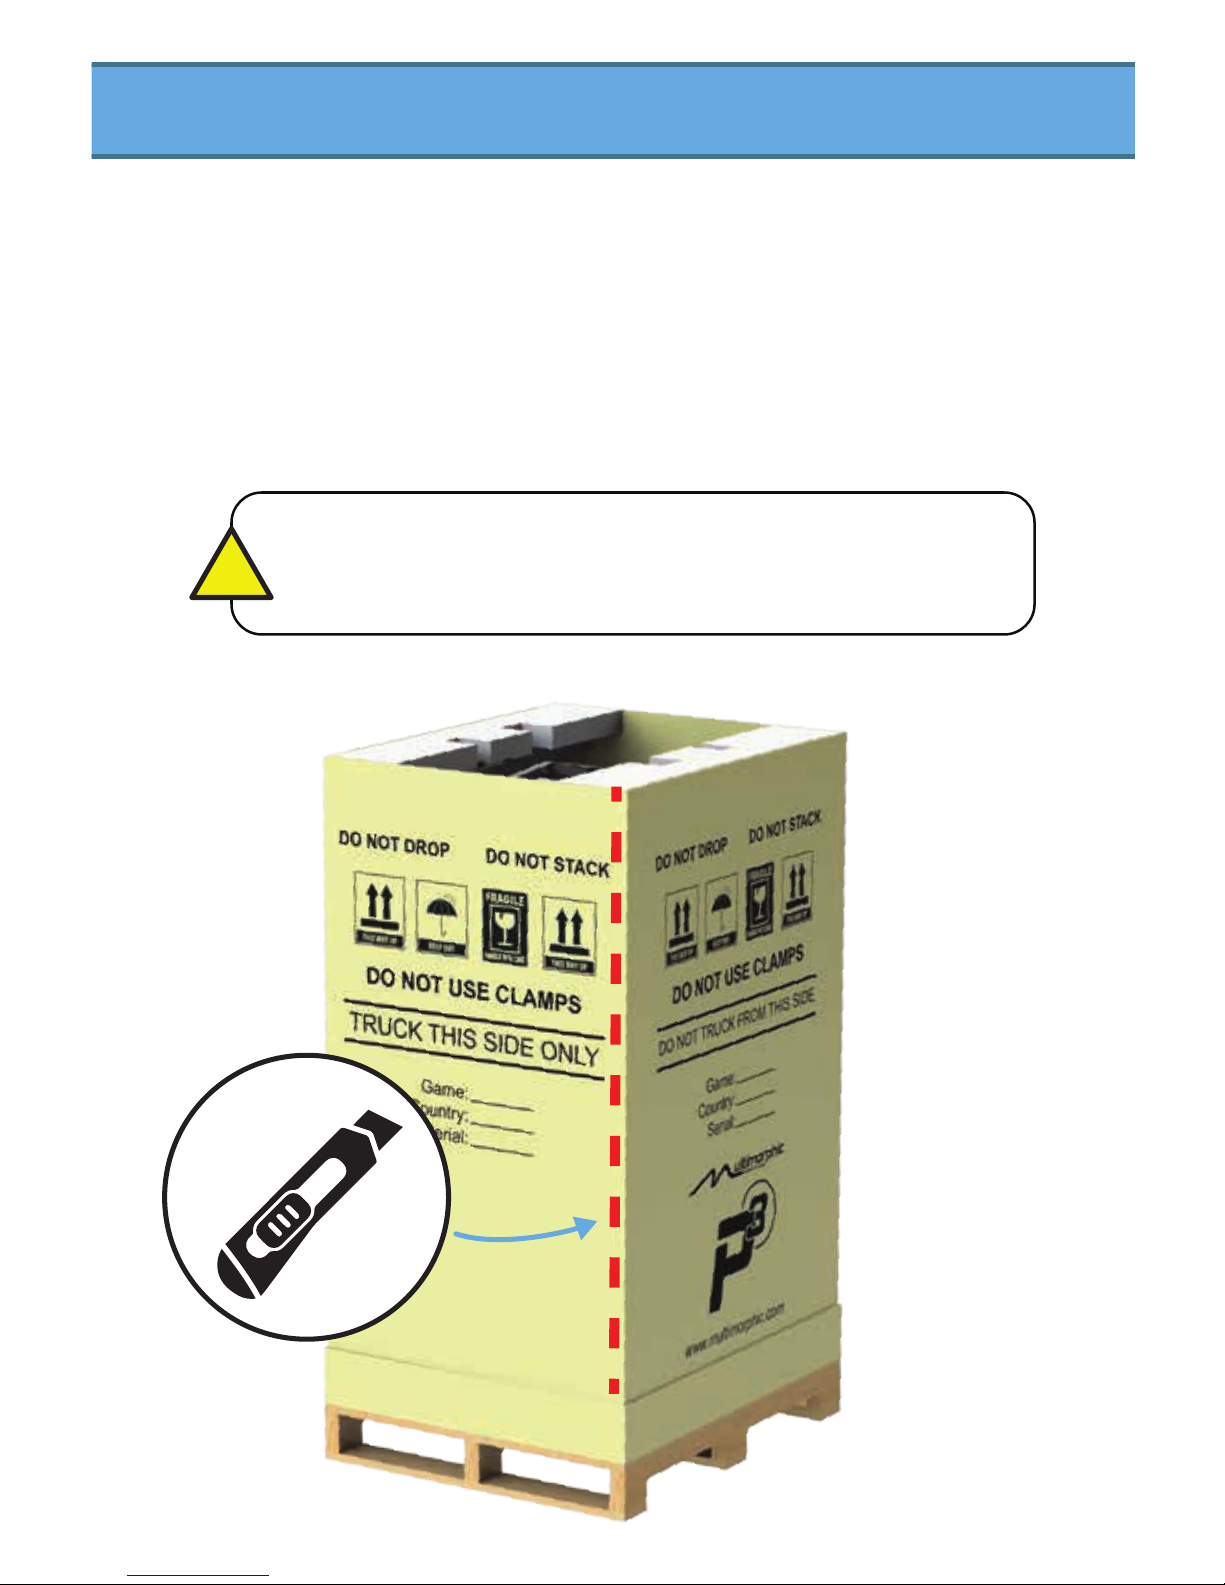
If you do not wish to reuse your shipping box,
or if you do not have enough ceiling clearance,
lift the wraparound cardboard 5” to clear the
bottom tray and use a utility knife to cut down
the corner of the wraparound cardboard where
the dotted red line is shown below.
Cutting the box farther than 2” from the corner may
result in damage to your game.
!
6
Page 8
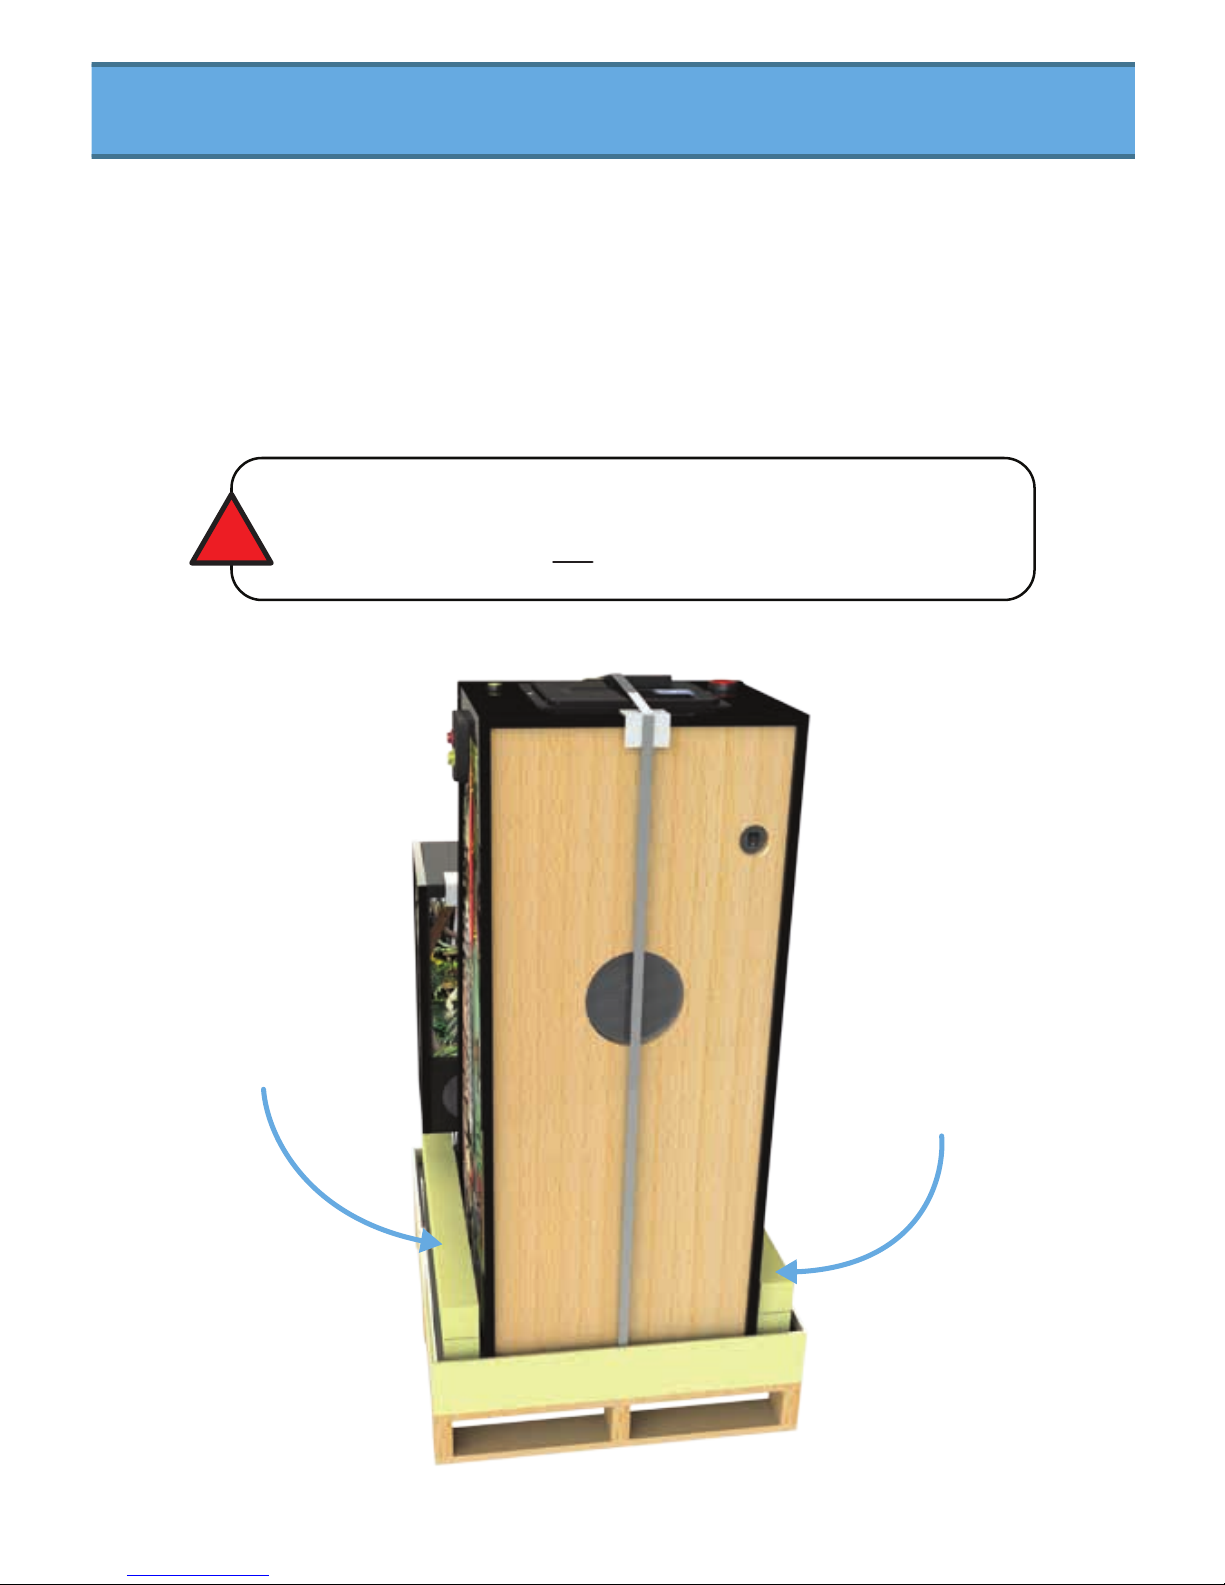
Box A
contains the
four legs
Box B
contents are
displayed on
the next page
Remove and set aside the two top foam pieces
and the four cardboard corners.
Locate and remove the two rectangular boxes at
the base of the shipping box.
Warning: Do not cut the strap wrapped around the machine
at this time. Doing so will result in damage to your machine.
!
7
Page 9
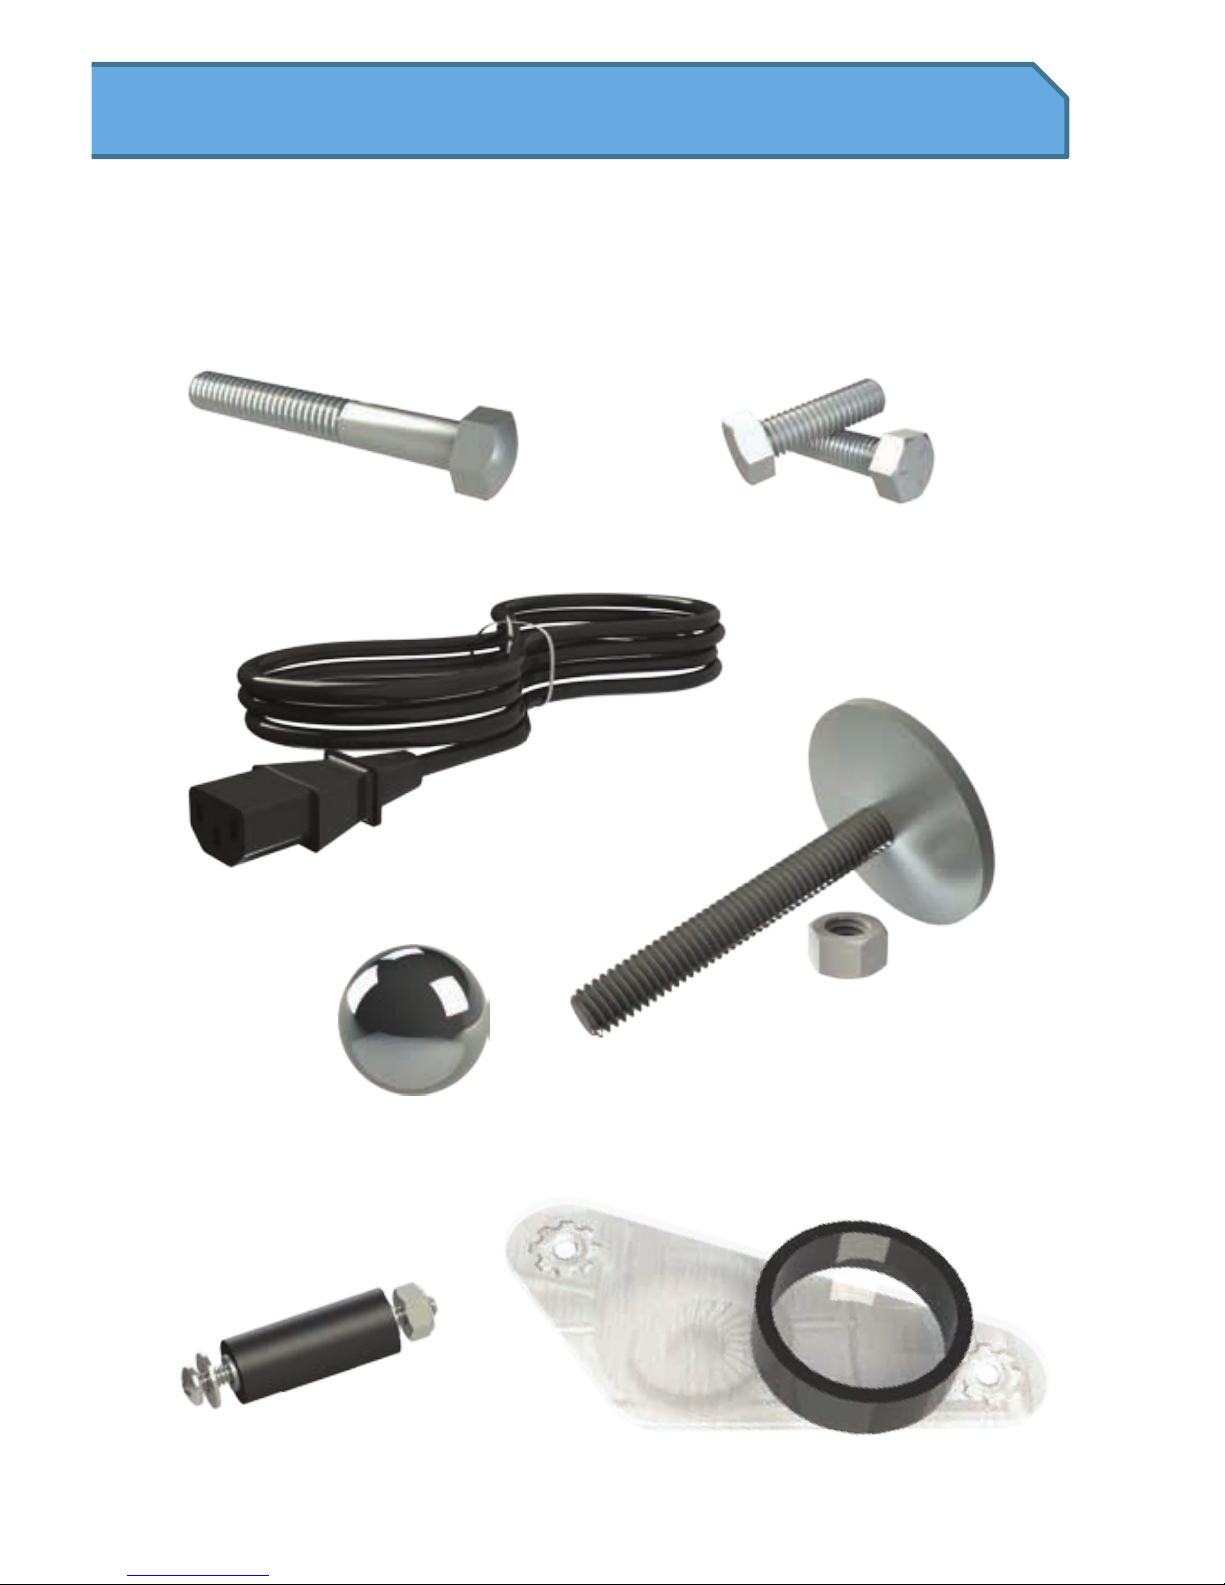
Contents of Box B
Pinball x12
Leg Bolt x8 Hinge Bolt x2
Power Cord
Optional Flipper
Assembly
Center Post*
Extra Flipper Rubbers
and Slingshot Plastics
*Instructions for installing the center post onto a flipper
assembly can be found at www.multimorphic.com.
Leg Leveler
and Nut
x4
8
Page 10
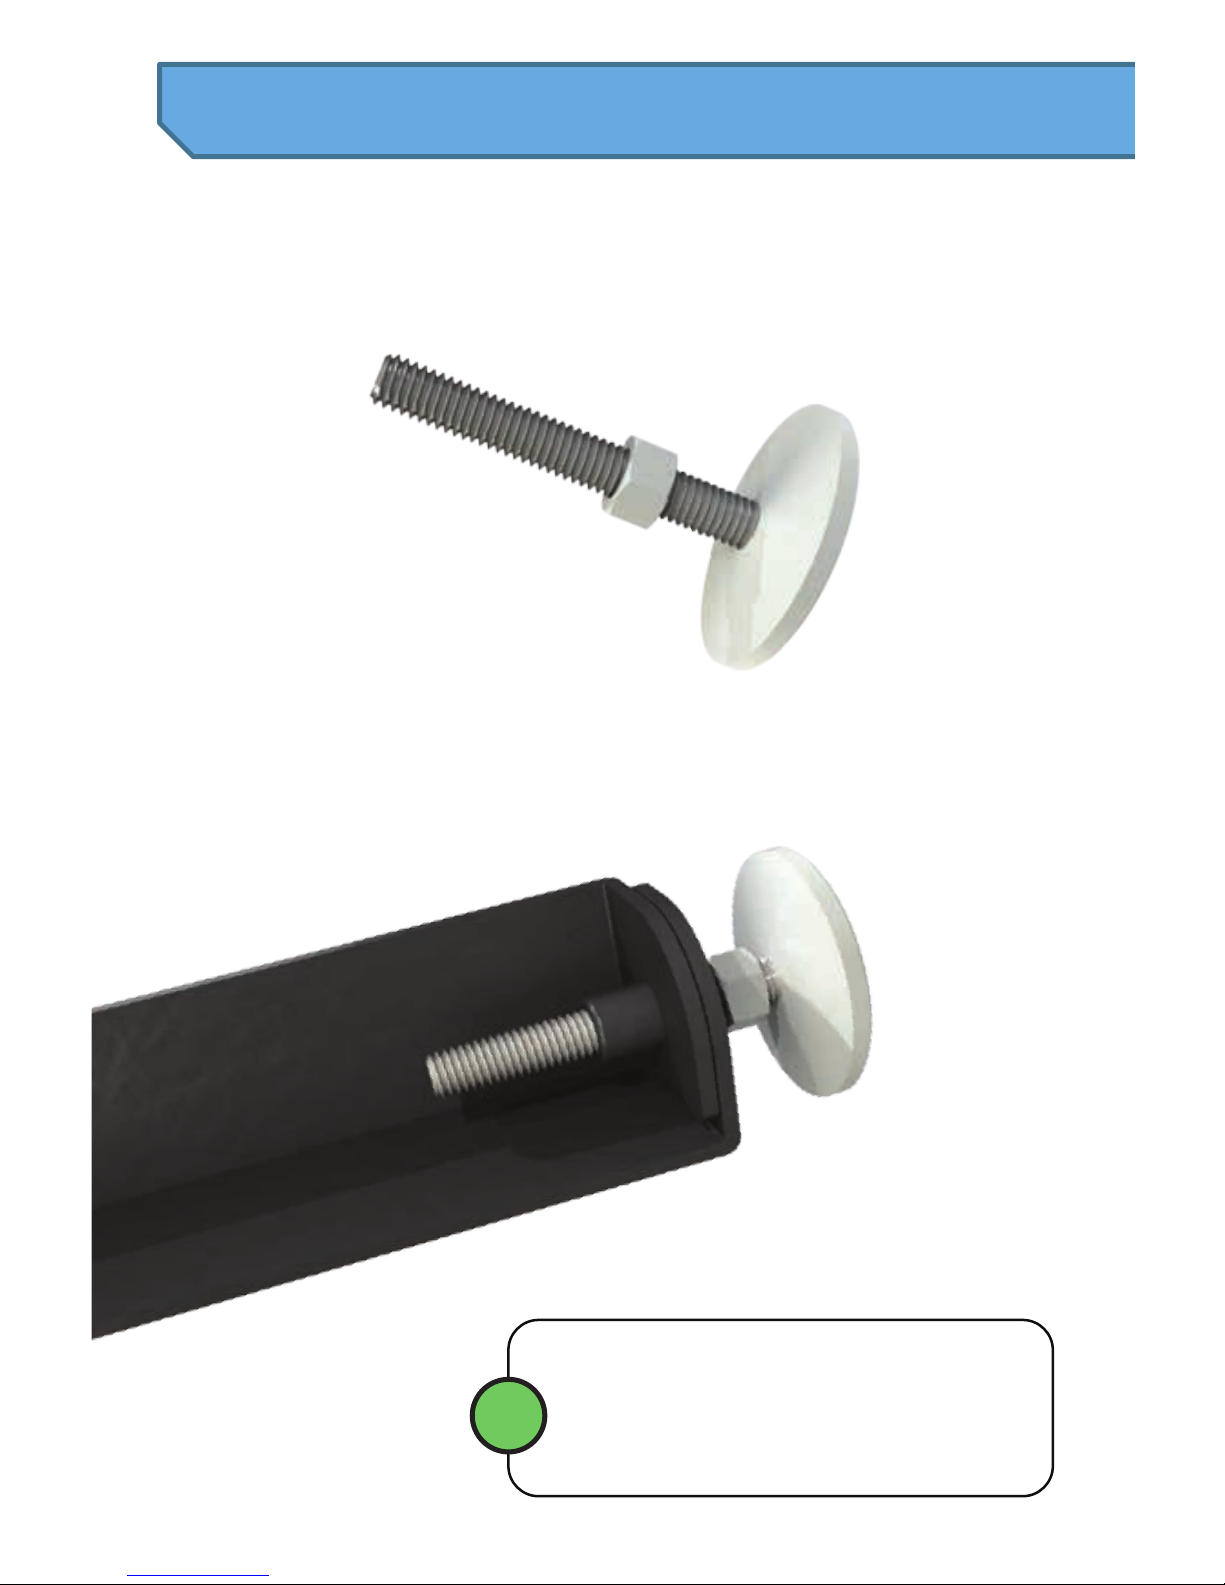
Install a 3/8”- 16 hex nut onto each of the four
leveler feet.
Thread a leveler foot into each of the four legs.
Step 2. Setup
i
For a standard playfield angle of 6.5°,
adjust all of the feet to the same height
on each leg. For faster gameplay, the
rear feet can be adjusted taller.
9
Page 11
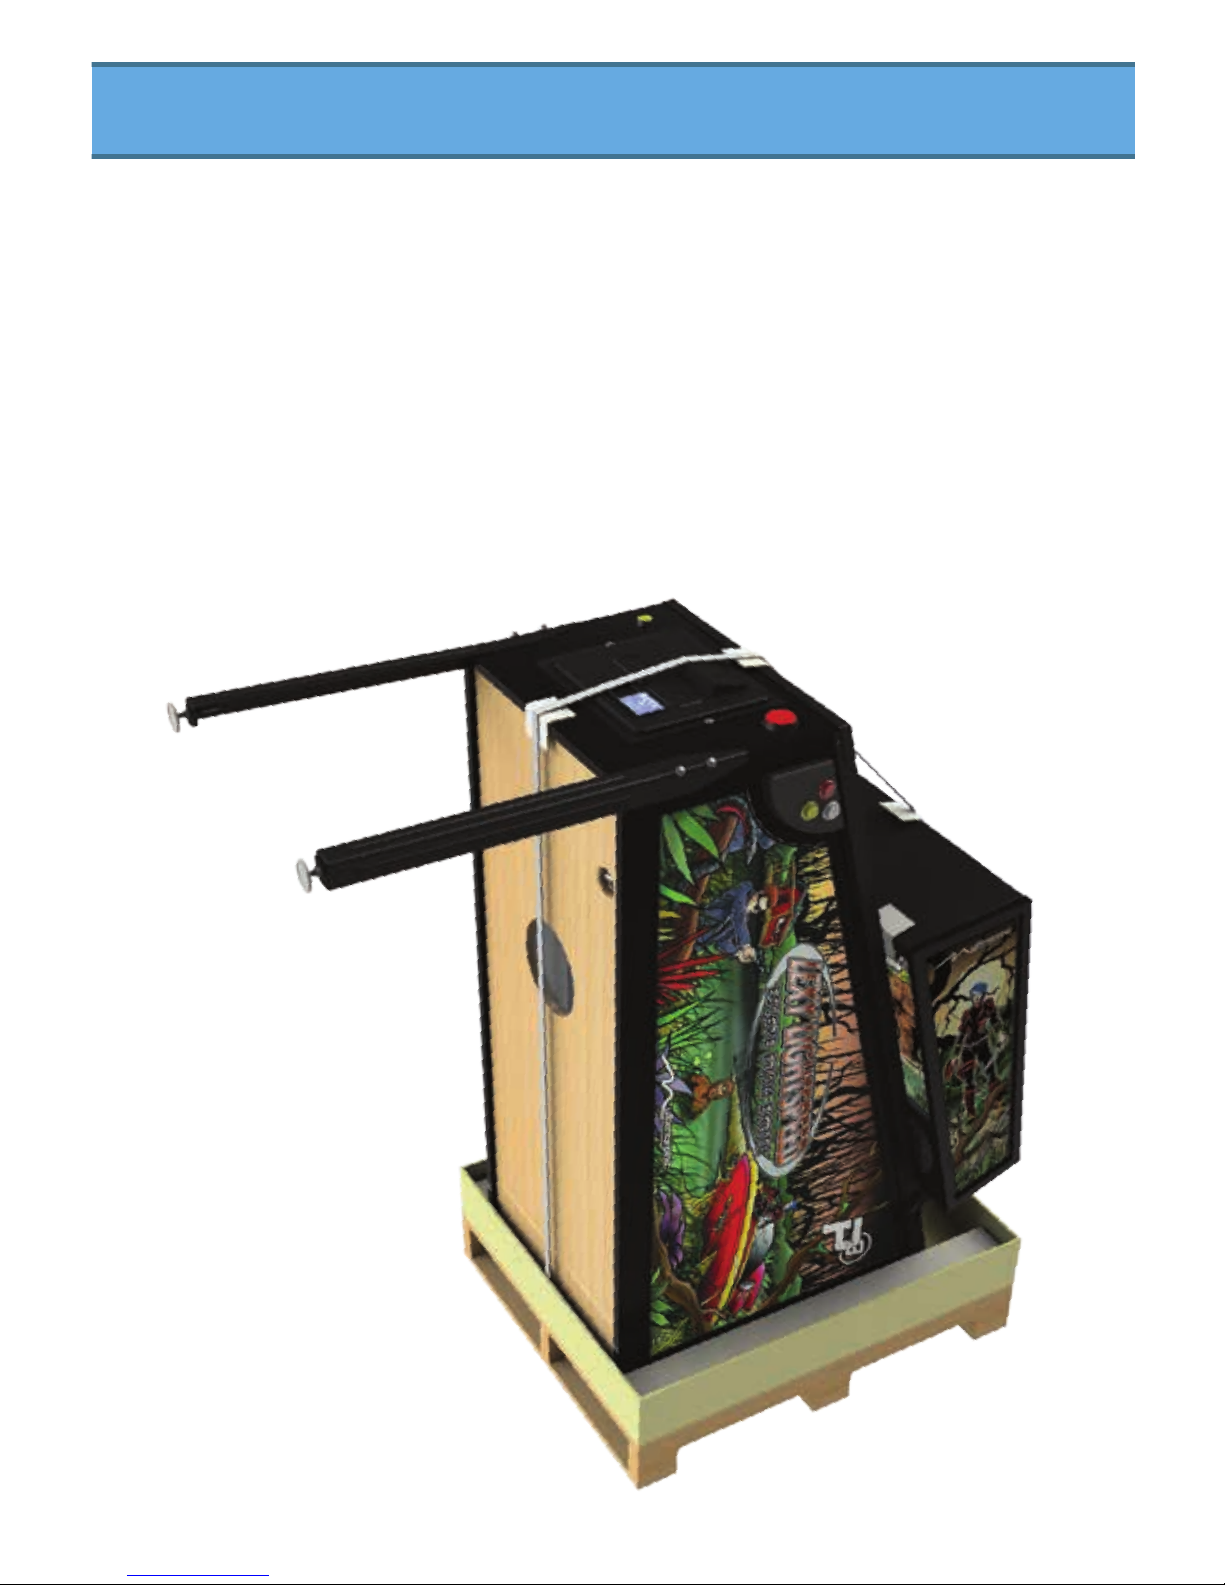
Install one leg onto each of the two front corners
of the machine using two leg bolts each.
Tighten the bolts with a 5/8” socket or wrench.
10
Page 12
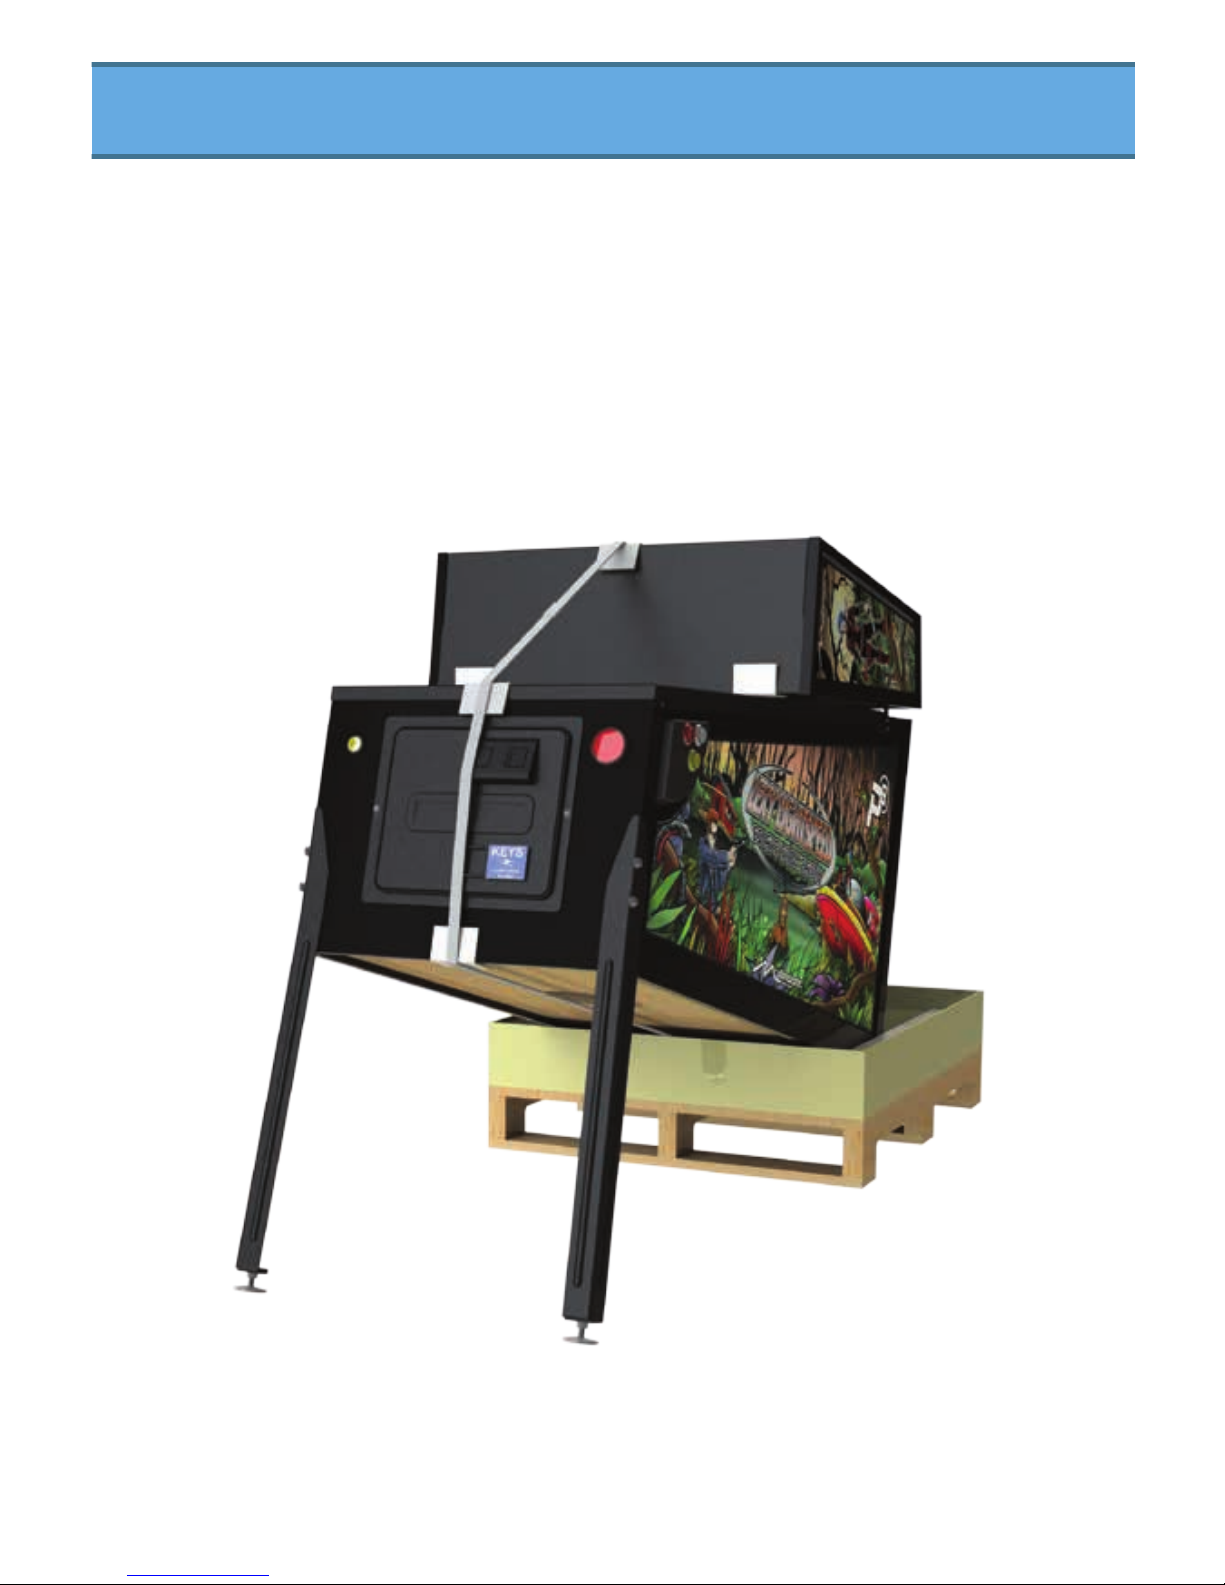
Tilt the machine forward until the front legs are
resting on the floor.
11
Page 13
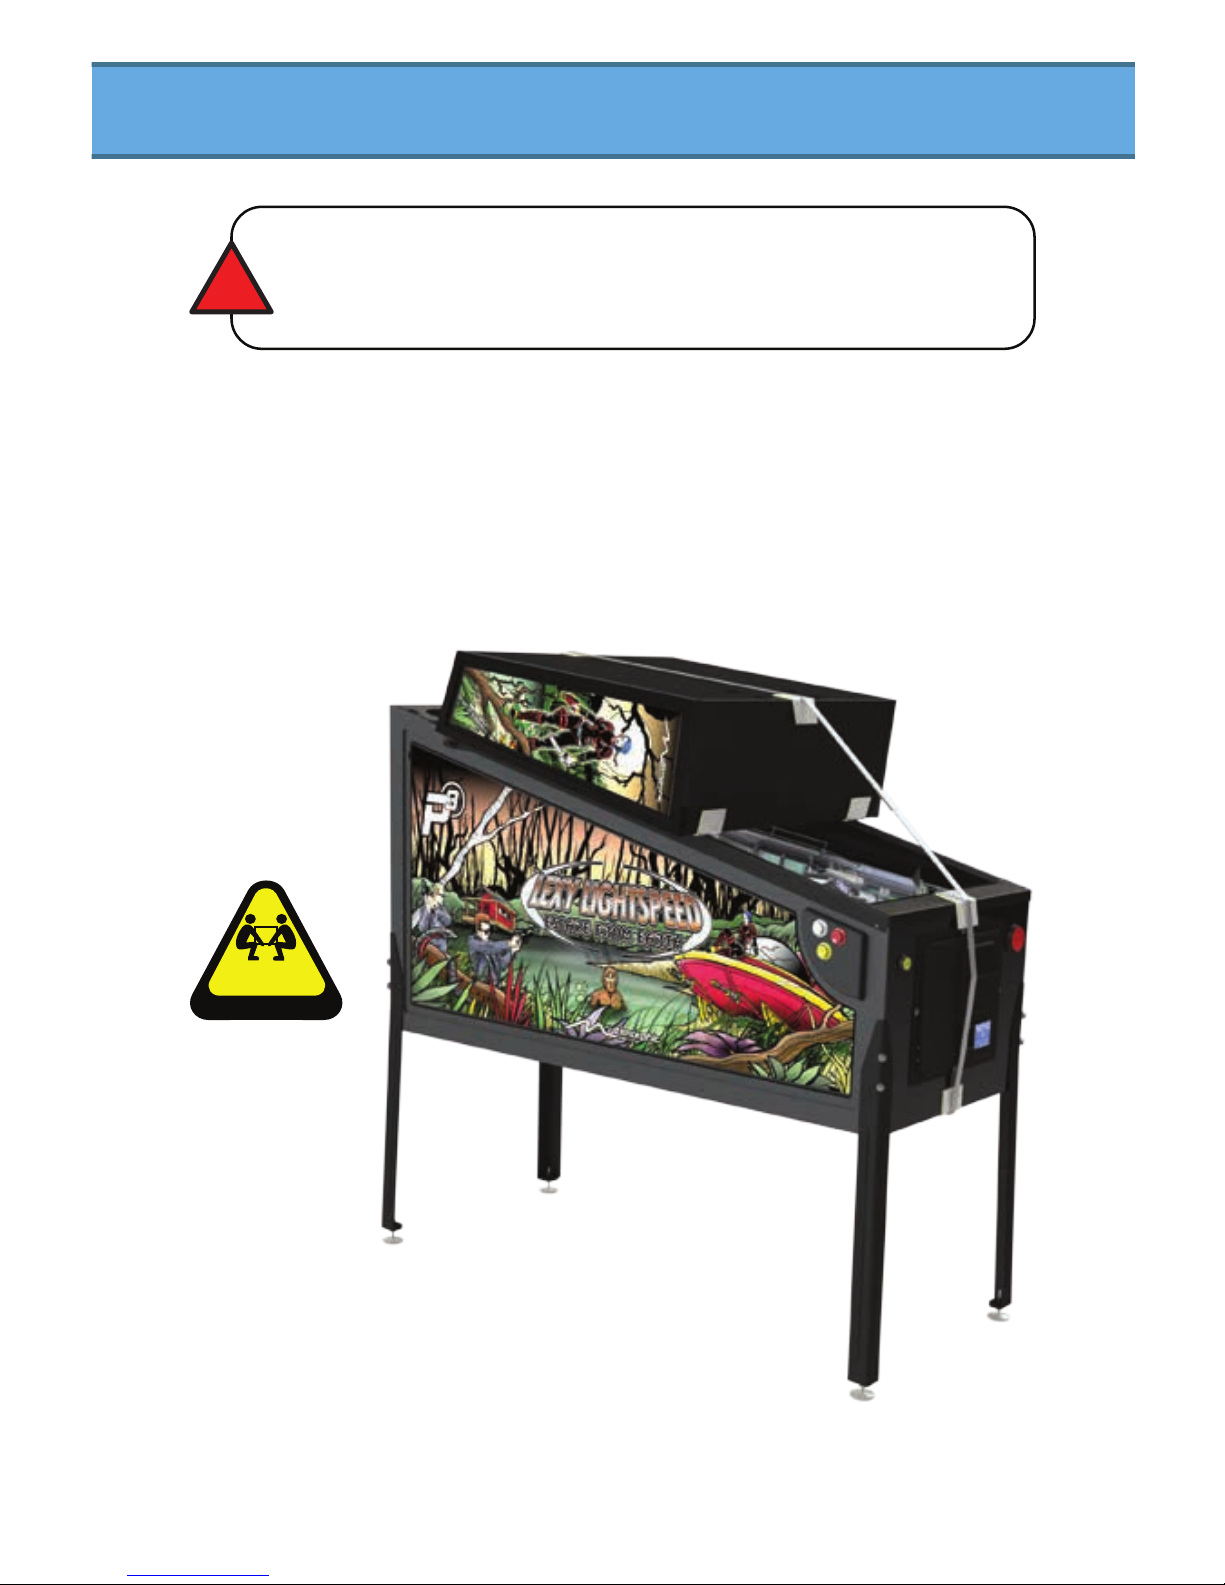
With help from at least one other person, lift
the rear of the machine, move any remaining
shipping material out of the way, and install
the two rear legs with two leg bolts each.
Once the rear legs have been
installed, set the machine down so
that it is standing on all four legs.
Single person lifting could cause personal injury. Seek the
assistance of at least one other person to perform this step.
!
HEAVY
CAUTION
12
Page 14
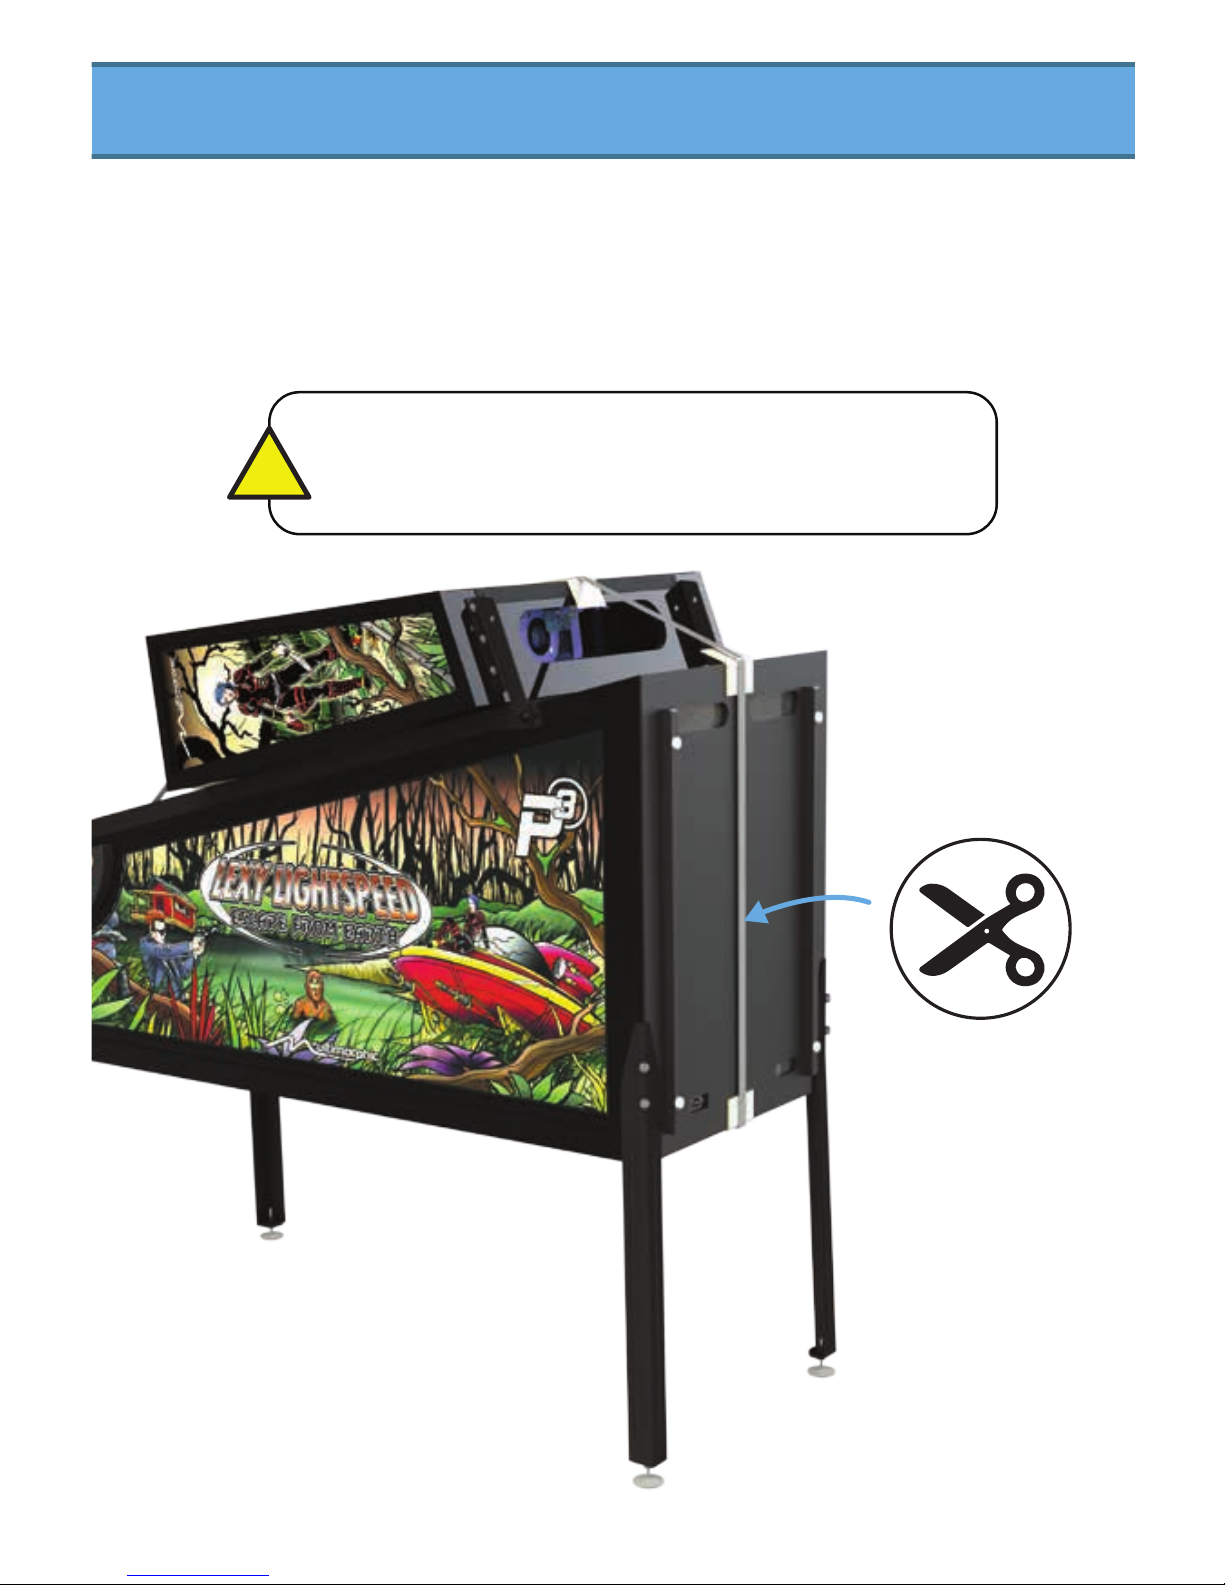
Cut the plastic strap that is securing the backbox.
Caution: The strap is under tension and may move
unexpectedly when cut.
!
13
Page 15
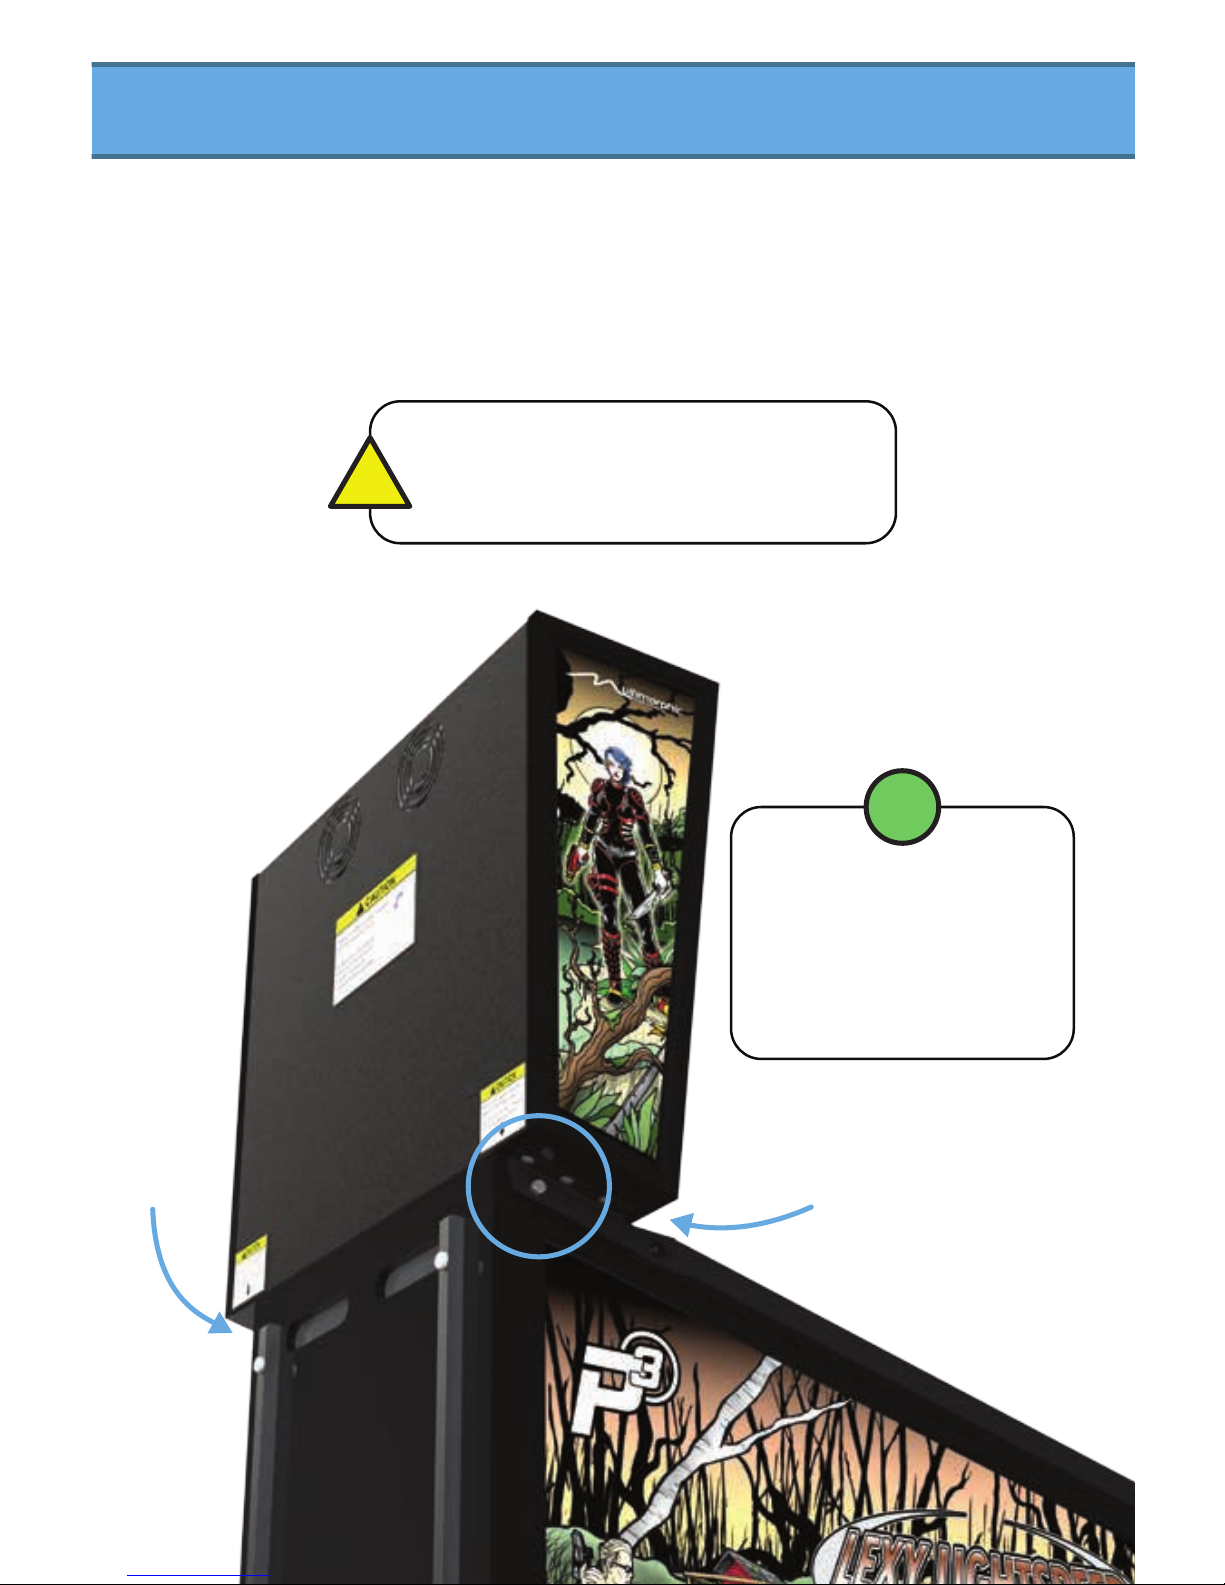
Lift the backbox up into place and secure it
upright with one hinge bolt on either side using a
9/16” socket or wrench.
After tightening these
bolts, the hinges should
not contact the sides of
the cabinet. There should
be a gap of about 1/8”.
i
Caution: Do not deform the hinges
by overtightening the bolts.
!
Page 16
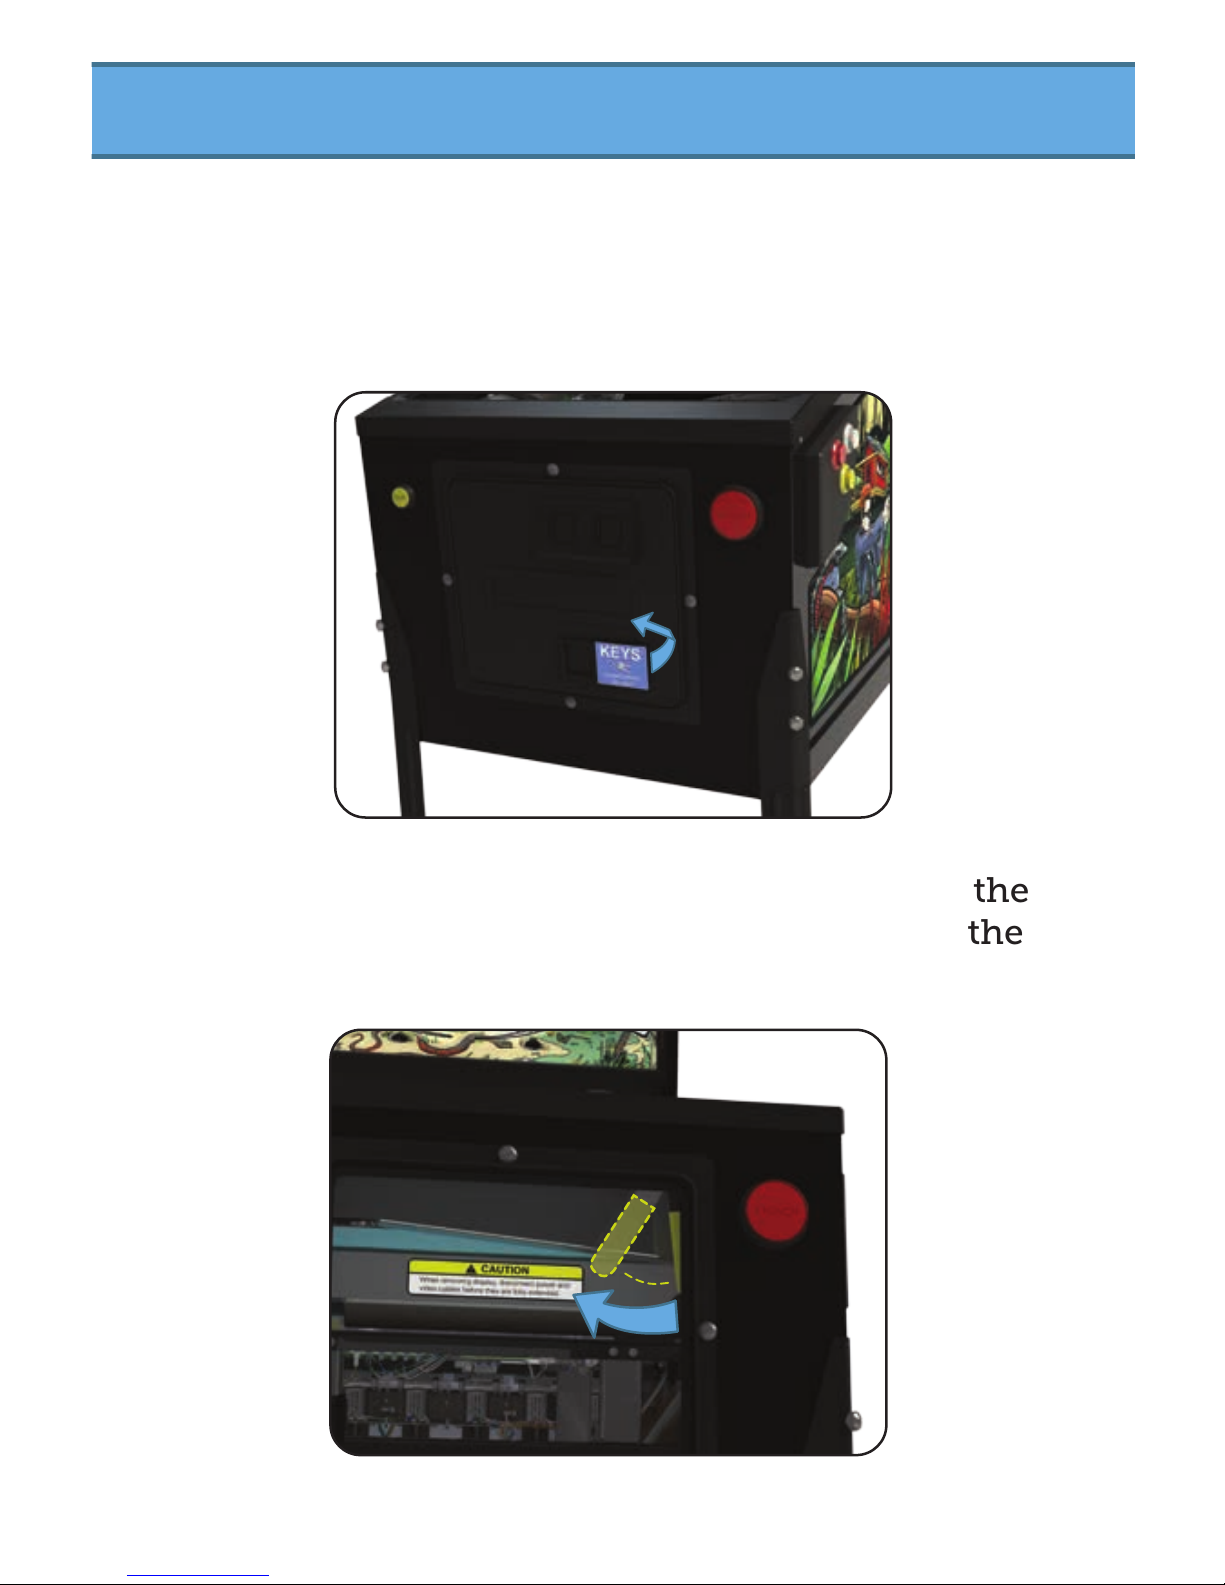
Locate the blue [KEYS] label on the coin
door. Remove the label and use the keys to
unlock and open the coin door.
Locate the yellow lever inside the cabinet on the
upper right and move it to the left to release the
lockbar.
15
Page 17
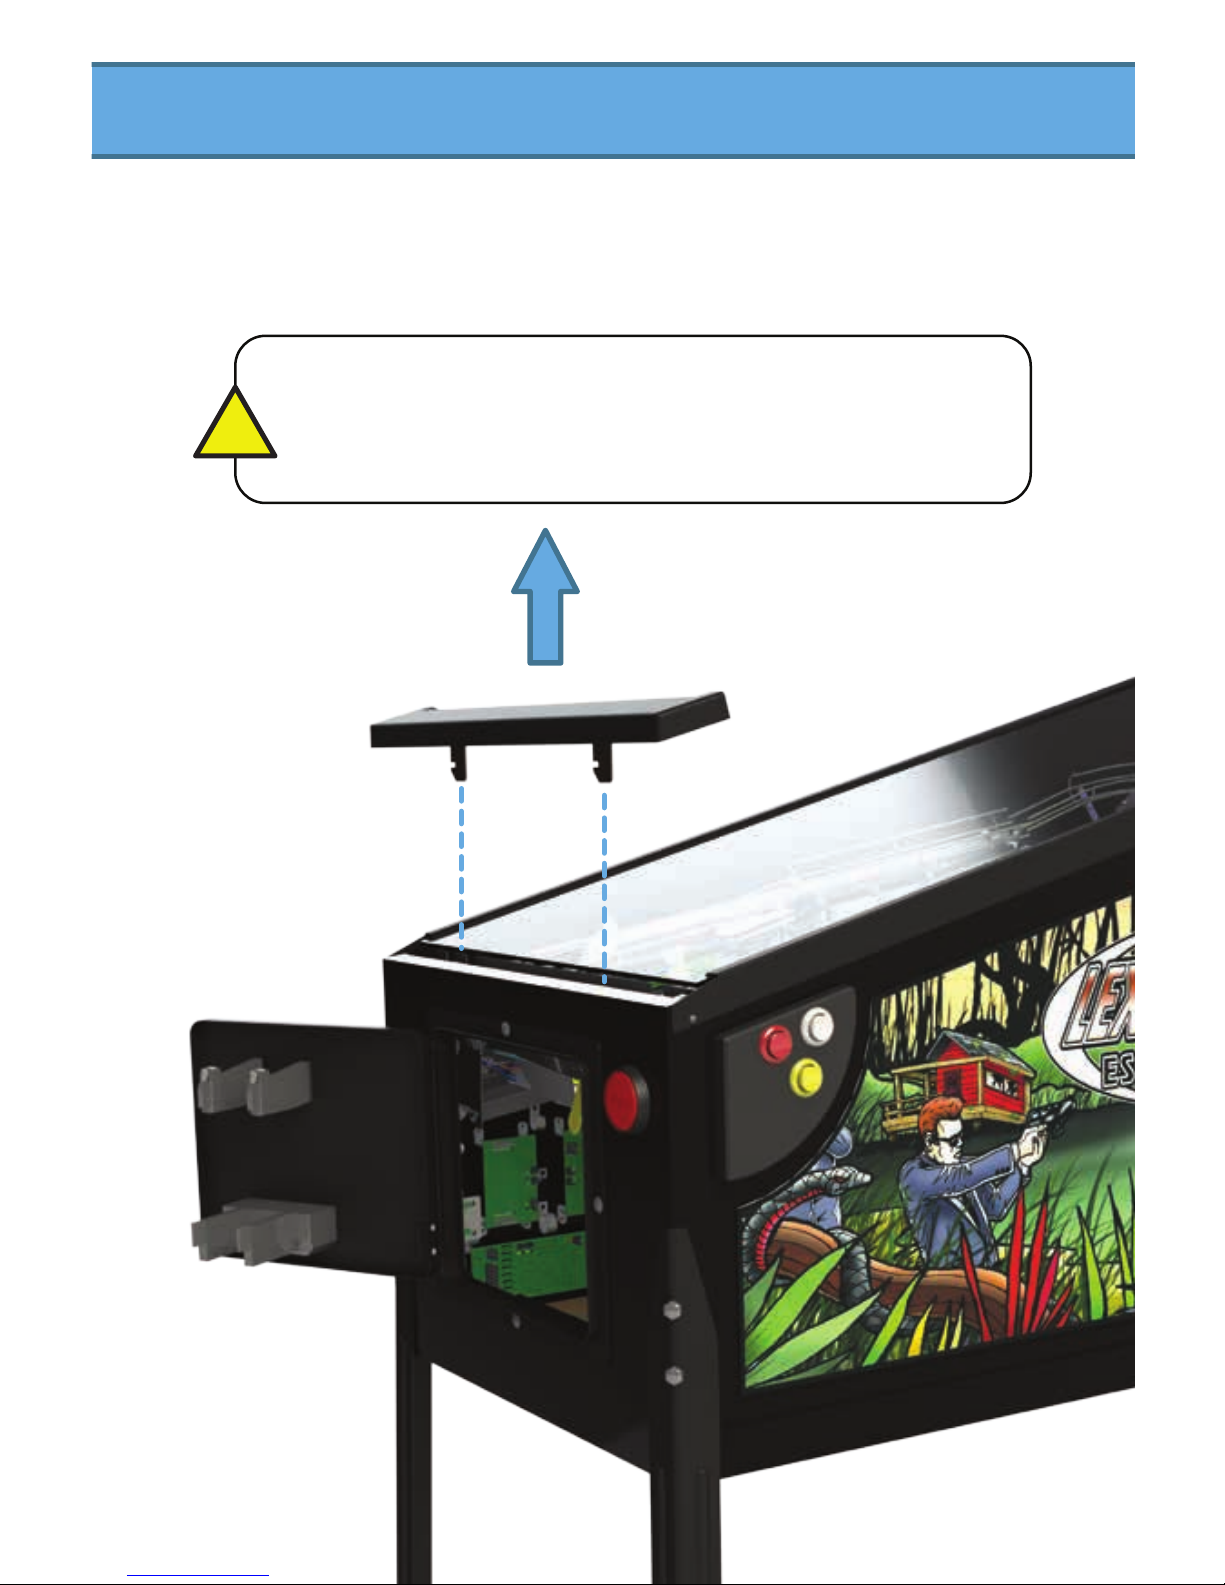
Lift the lockbar from the machine and carefully
set it aside.
With the lockbar removed, the glass may slide outwards
under gravity. If this occurs, hold it in place and proceed
to the next step.
!
16
Page 18
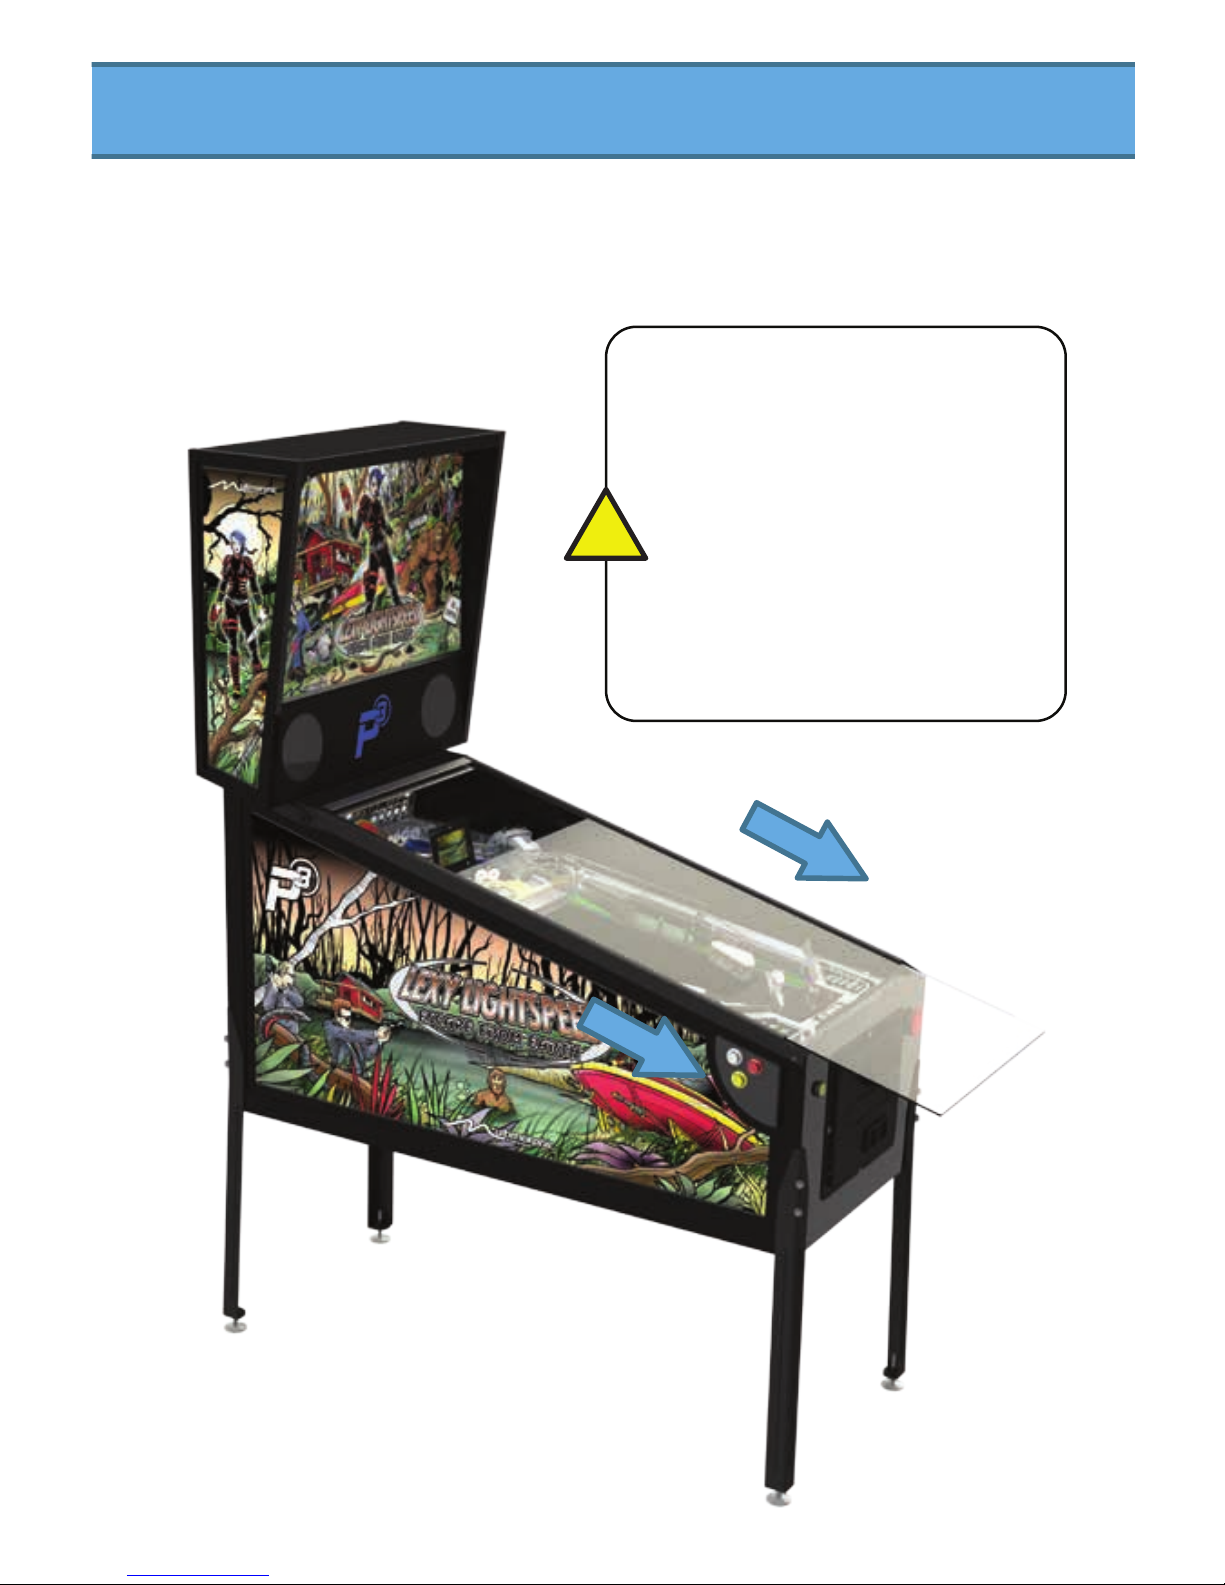
Close and lock the coin door. Then slide the glass
out from the front of the machine.
Playfield glass is made from
high-strength tempered glass,
which is sensitive to extreme
temperature shifts and corner
nicks. These conditions can
cause the glass to shatter.
Take care to store the glass
on a soft, room temperature
surface.
!
17
Page 19
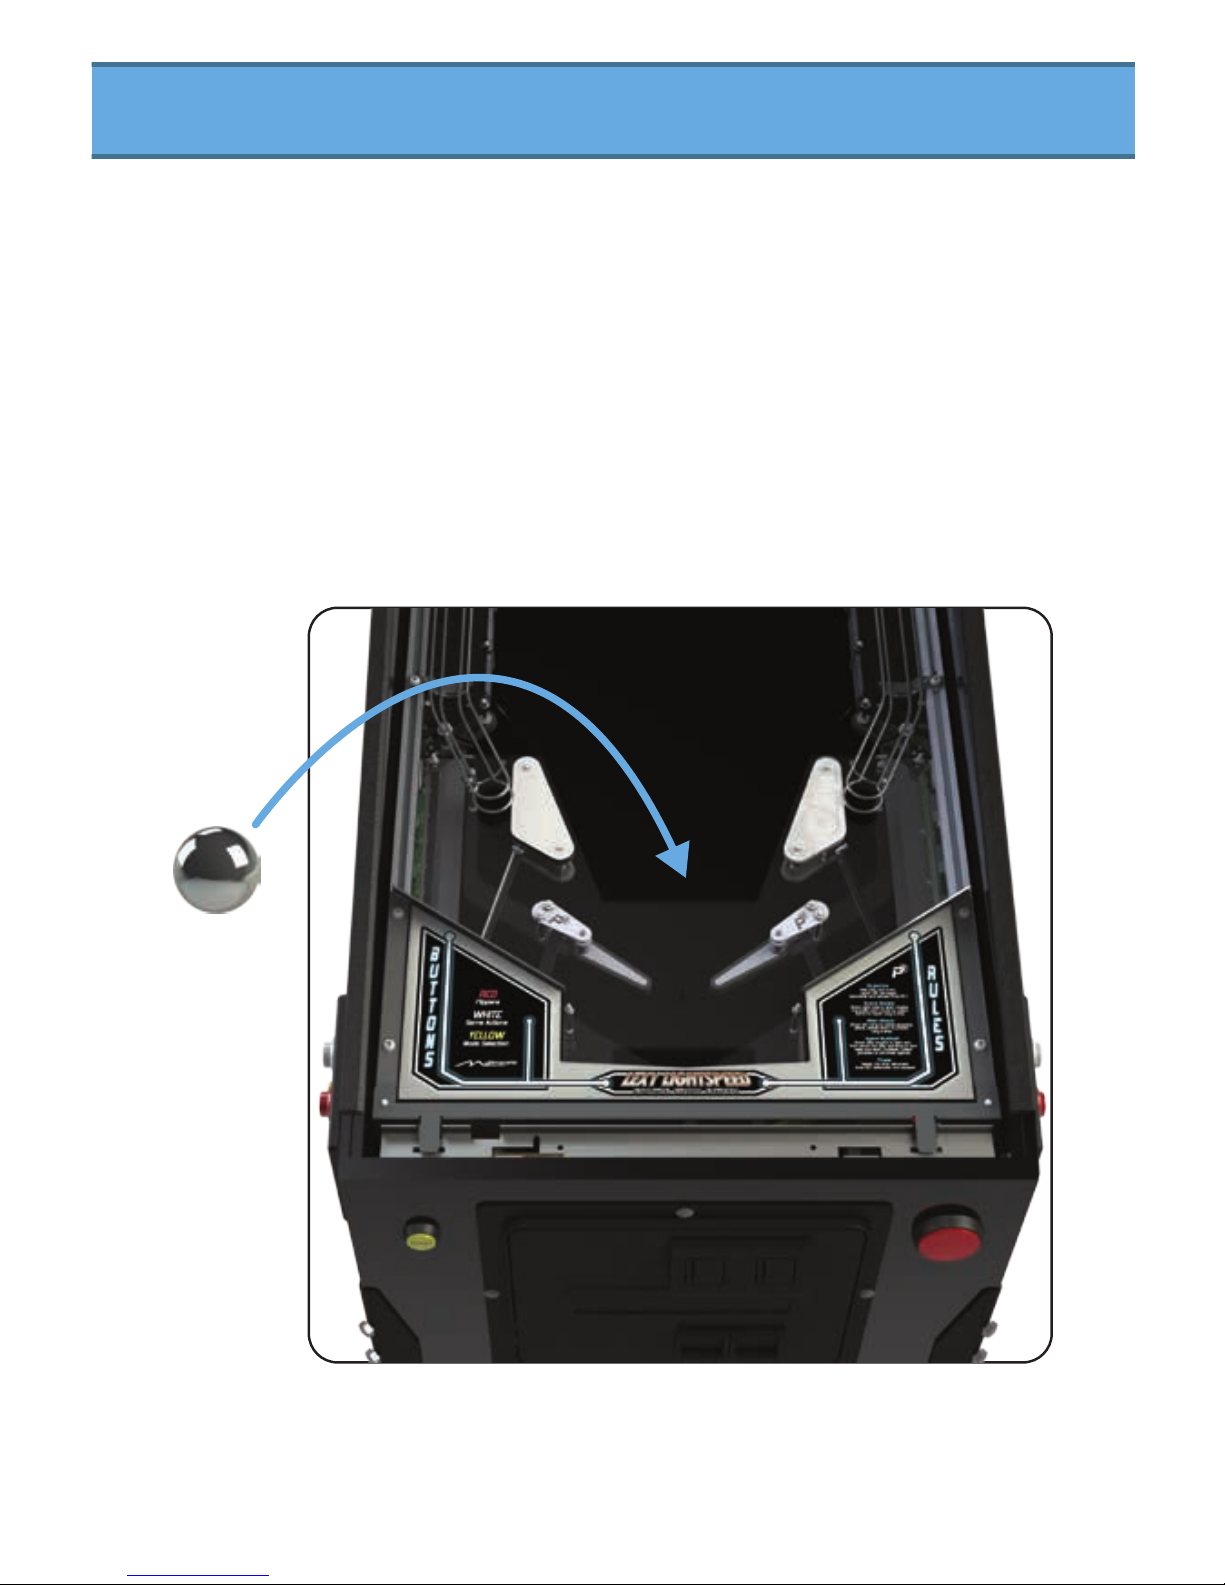
Locate and open the bag containing the pinballs.
The balls are coated by a light machine oil which
must be removed prior to use.
Using a soft cotton cloth, remove the oil from the
surface of each ball. Place the balls onto the
playfield, just above the flippers, allowing them to
roll down into the drain
After installing the balls, replace the glass, reinstall
the lockbar, and close and lock the coin door.
12x
Page 20
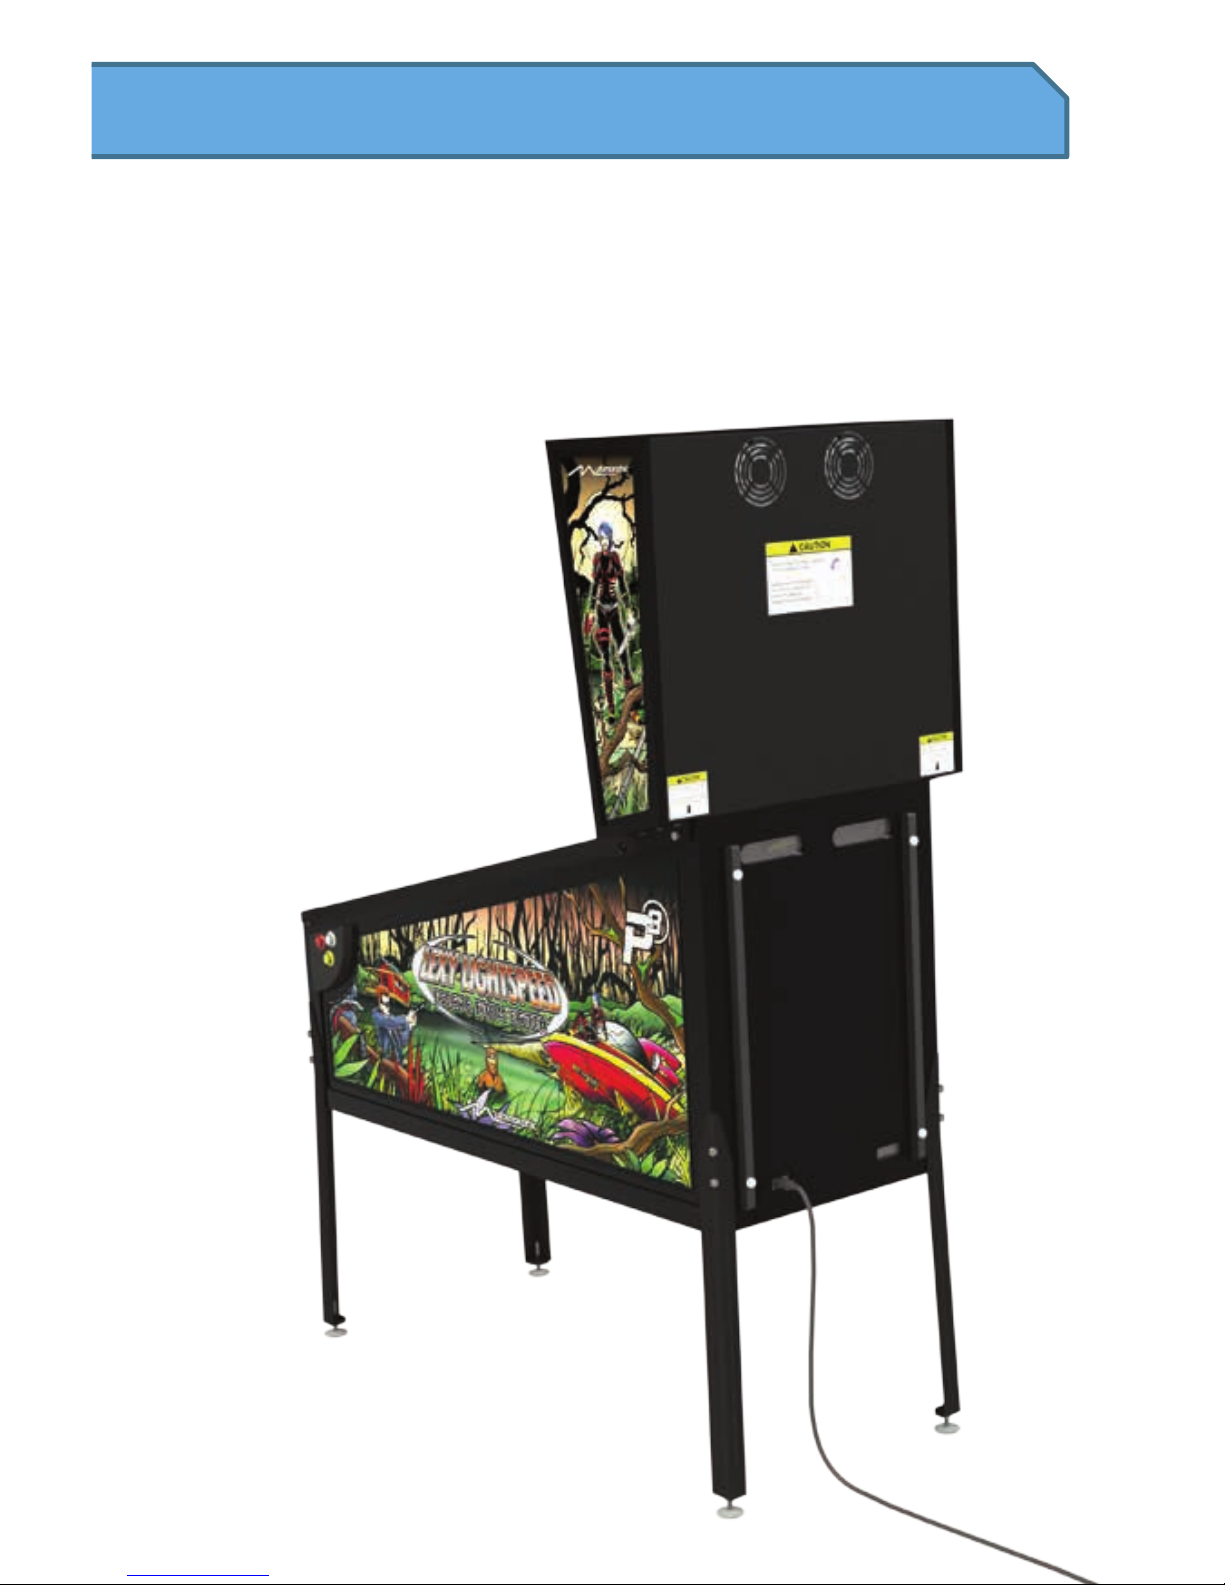
Install the power cord into the power connector
on the back of the machine and connect it to a
grounded outlet.
19
Page 21
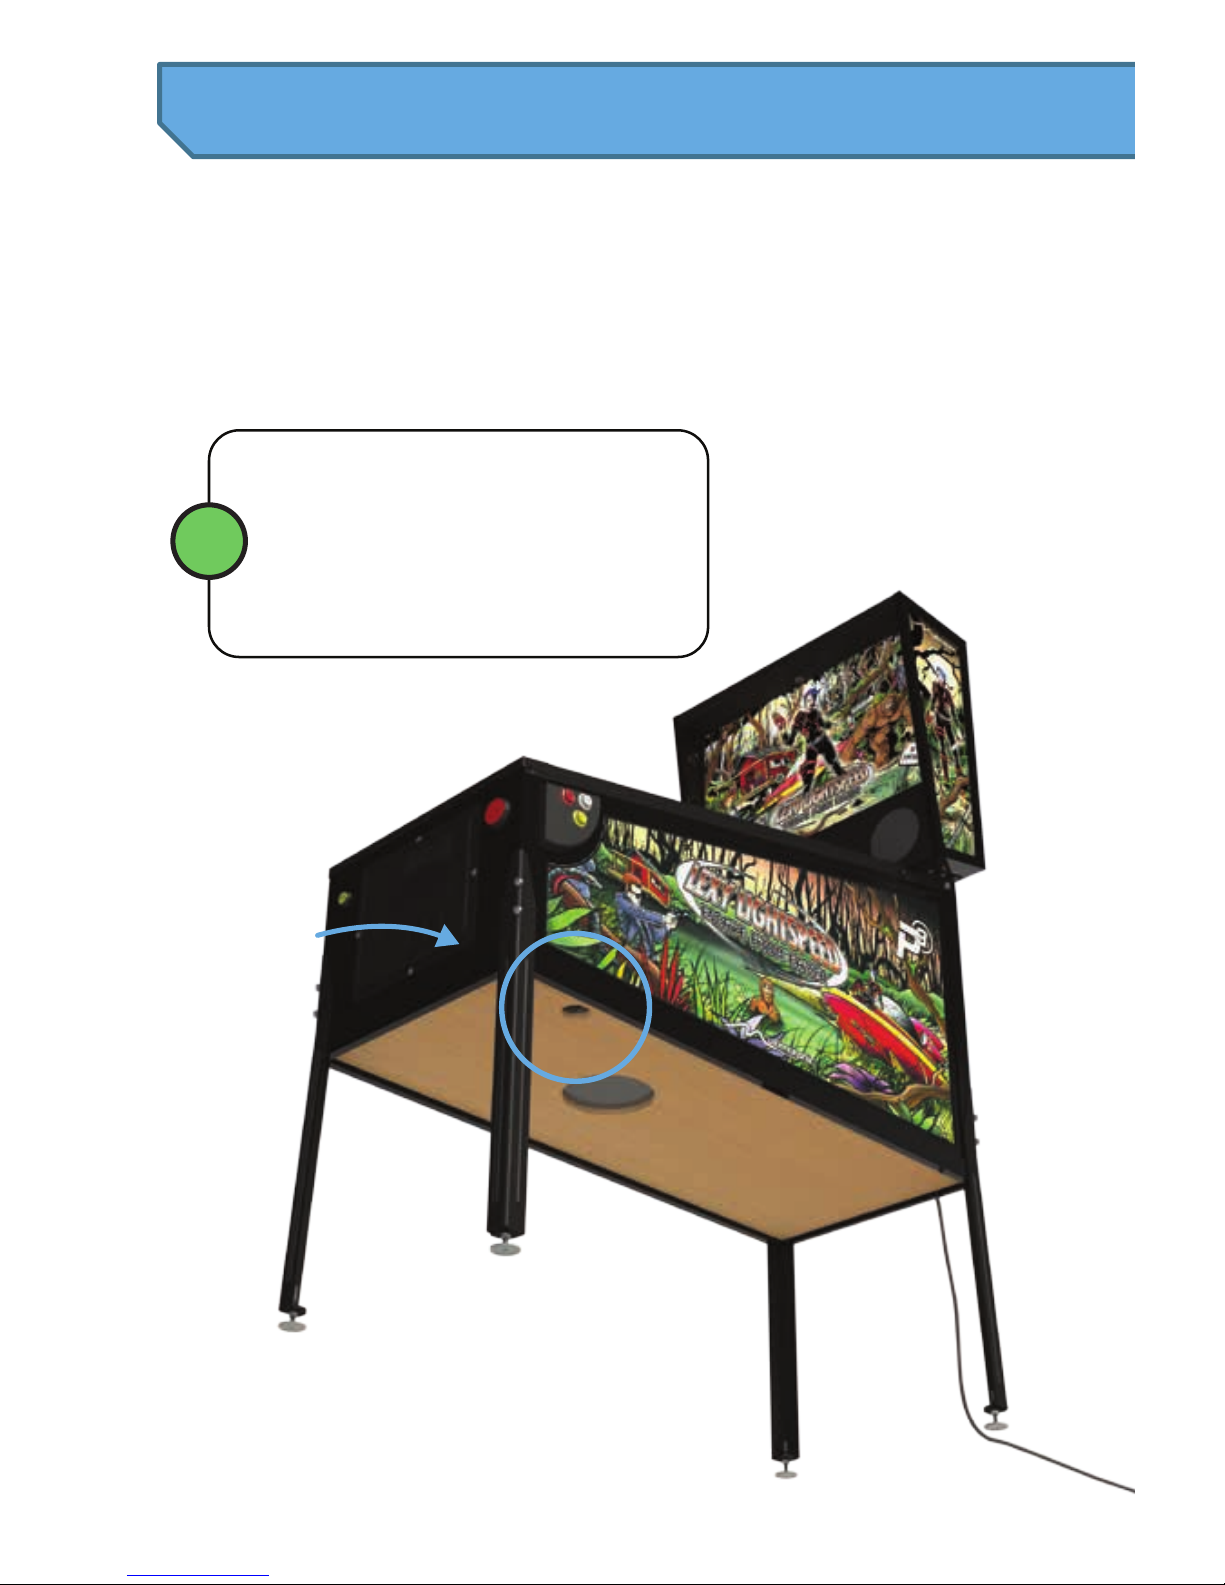
Power on the machine by toggling the switch
located on the underside of the cabinet near the
front right corner.
Step 3. Operation
A few seconds after power-up, the
machine will stage the balls into
the ball trough. This is a loud
process which will finish within
about 15 seconds.
i
20
Page 22
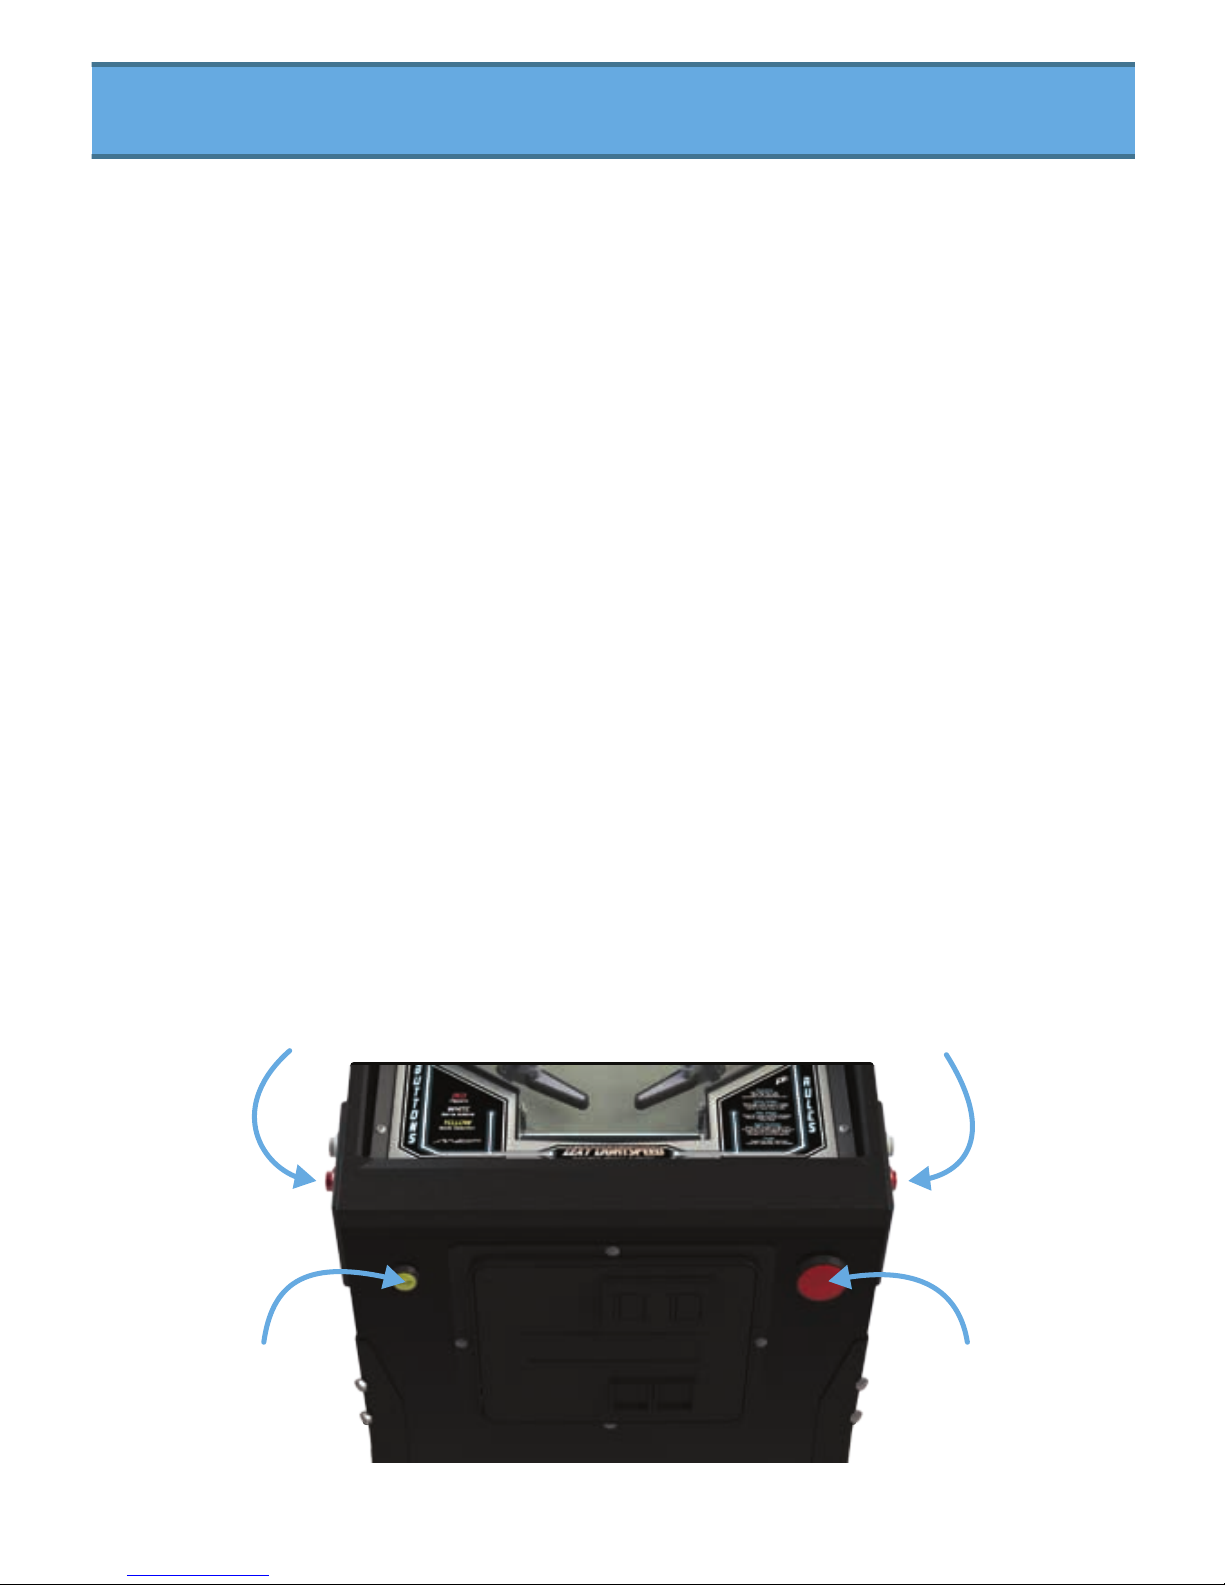
When the P3 has completed its startup sequence,
the Launcher application will appear, presenting
the following apps:
-System Manager
(System configuration and
application management)
-Diagnostics
-Games
Navigating Menus
Navigate
Right/Down
Navigate
Left/Up
Exit Enter
Many apps provide menus for choosing options
(or launching apps in Launcher). The following
buttons are used to navigate these menus:
21
Page 23

To launch an application:
-Navigate with the red flipper buttons
-Select with the launch button
To leave an application:
-Navigate with the red flipper buttons to the exit option
and select with the launch button
or
-Open the coin door
-Press and hold the start button for up to 10 seconds
-Close the coin door
To change the volume of the current
application:
-Open the coin door
-Increase the volume with the right red flipper button
-Decrease the volume with the left red flipper button
-Close the coin door
To change application-specific settings:
-Open the coin door
-Press the launch button
-Navigate with the red flipper buttons
-Edit options or enter sub-categories with the launch
button
-Change selected option with the red flipper buttons
-Save changes with the launch button or cancel
changes with the start button
-Exit sub-categories with the start button
-Close the coin door
22
Page 24

info@multimorphic.com
www.multimorphic.com
Please enjoy your P3!
 Loading...