

Page 1

User’s Manual
Manual del Usuario
Tablet PC Diamond Lite
Page 2

2
WARRANTY TERMS
This warranty does not cover any deffect for bad use or natural wear, or even IF it is
not used according to our guidelines.
This warranty does not cover any deffct caused by use of non original or non compa-
tible peripherals and third party software installation.
In case this product has a factory defect, since you can prove it, Multilaser is compro-
mises to fix it or replace your product.
The below cases are not covered by this warranty:
· Natural use
· Damages caused by liquids, high temperature (Hot or cold)
· Oxidation or fungus
· Shocks
· Impacts
· Damages caused t LCD because of bad use, pressing, shock or humidity
This certified is only valid under the presentation of the purchase receipt.
Page 3

3
Sumary
Index | ENGLISH
1. Tips ............................................................................................. 6
2. Appearance .................................................................................7
3. Power switch usage ................................................................... 8
4. Touch screen .............................................................................. 8
5. Adapter cable .............................................................................. 8
6. Micro SD usage .........................................................................9
7. Getting started ......................................................................... 10
8. Desktop ....................................................................................12
9. Locking desktop ........................................................................13
10. Main applications .................................................................... 14
11. Desktop menu function ........................................................... 17
12. Program Manager ................................................................... 17
13. Sound recorder ....................................................................... 19
14. Clock ......................................................................................20
15. Downloads .............................................................................21
16. Browser .................................................................................. 22
17. Calendar ................................................................................. 22
18. Camera ...................................................................................23
19. Calculator ...............................................................................24
20. E-mail .....................................................................................25
21. Explorer ..................................................................................28
22. My music ................................................................................ 28
23. Vídeo.......................................................................................29
24. Gallery .................................................................................... 30
25. Maps ......................................................................................31
26. search ...................................................................................31
27. Play Store ...............................................................................32
28. Specifications .........................................................................32
Page 4

4
Indice | ESPAÑOL
1. Recomendaciones de empleo.................................................... 35
2. Descripción del tablet ...............................................................36
3. Uso del botón de poder ...........................................................37
4. Pantalla al tacto ....................................................................... 37
5. Conexión de transferencia .........................................................37
6. Uso de Micro SD .......................................................................38
7. Iniciando para usar ..................................................................39
8. Escritorio ..................................................................................41
9. Interfaz de Bloqueo de Pantalla ................................................. 42
10. Programa ................................................................................43
11. Menú ...................................................................................... 45
12. Programa de aplicación .............................................46
13. Registro de Sonido ..................................................................48
14. Reloj .......................................................................................49
15. Descargar aplicaciones e instalar ...........................................51
16. Buscador ................................................................................51
17. Calendario ..............................................................................52
18. Cámara ..................................................................................52
19. Calculadora .............................................................................53
20. E-mail .....................................................................................54
21. Explorador de Archivos ............................................................ 56
22. Música ....................................................................................57
23. Vídeo.......................................................................................58
24. Galería de Fotos ...................................................................... 59
25. Mapas ....................................................................................60
26. Búsqueda local .....................................................................60
27. Play Store ...............................................................................61
28. Especificaciones .....................................................................62
Page 5

5
English
Page 6

6
1. Tips
When you use this device, please follow the safety notice below to prevent fire, electric
shock and injury.
· Keep the device away from rain and moisture.
· Keep the device away from direct sunlight and heat source.
· Protect the power cord. When connect the power cord, do not step onto it or place any
object on it, which may cause extrusion. Protect the connector of the power cord connected devices specially.
· Please use the original power adapter for charging. Nonconforming chargers may cause
harms.
· Do not disassemble the shell or repair it without authorization.
Cleaning
Handle the screen gently. To clear the fingerprints or dust on the screen, use soft cloth
dedicated for camera lens instead of gauze.
Page 7
7
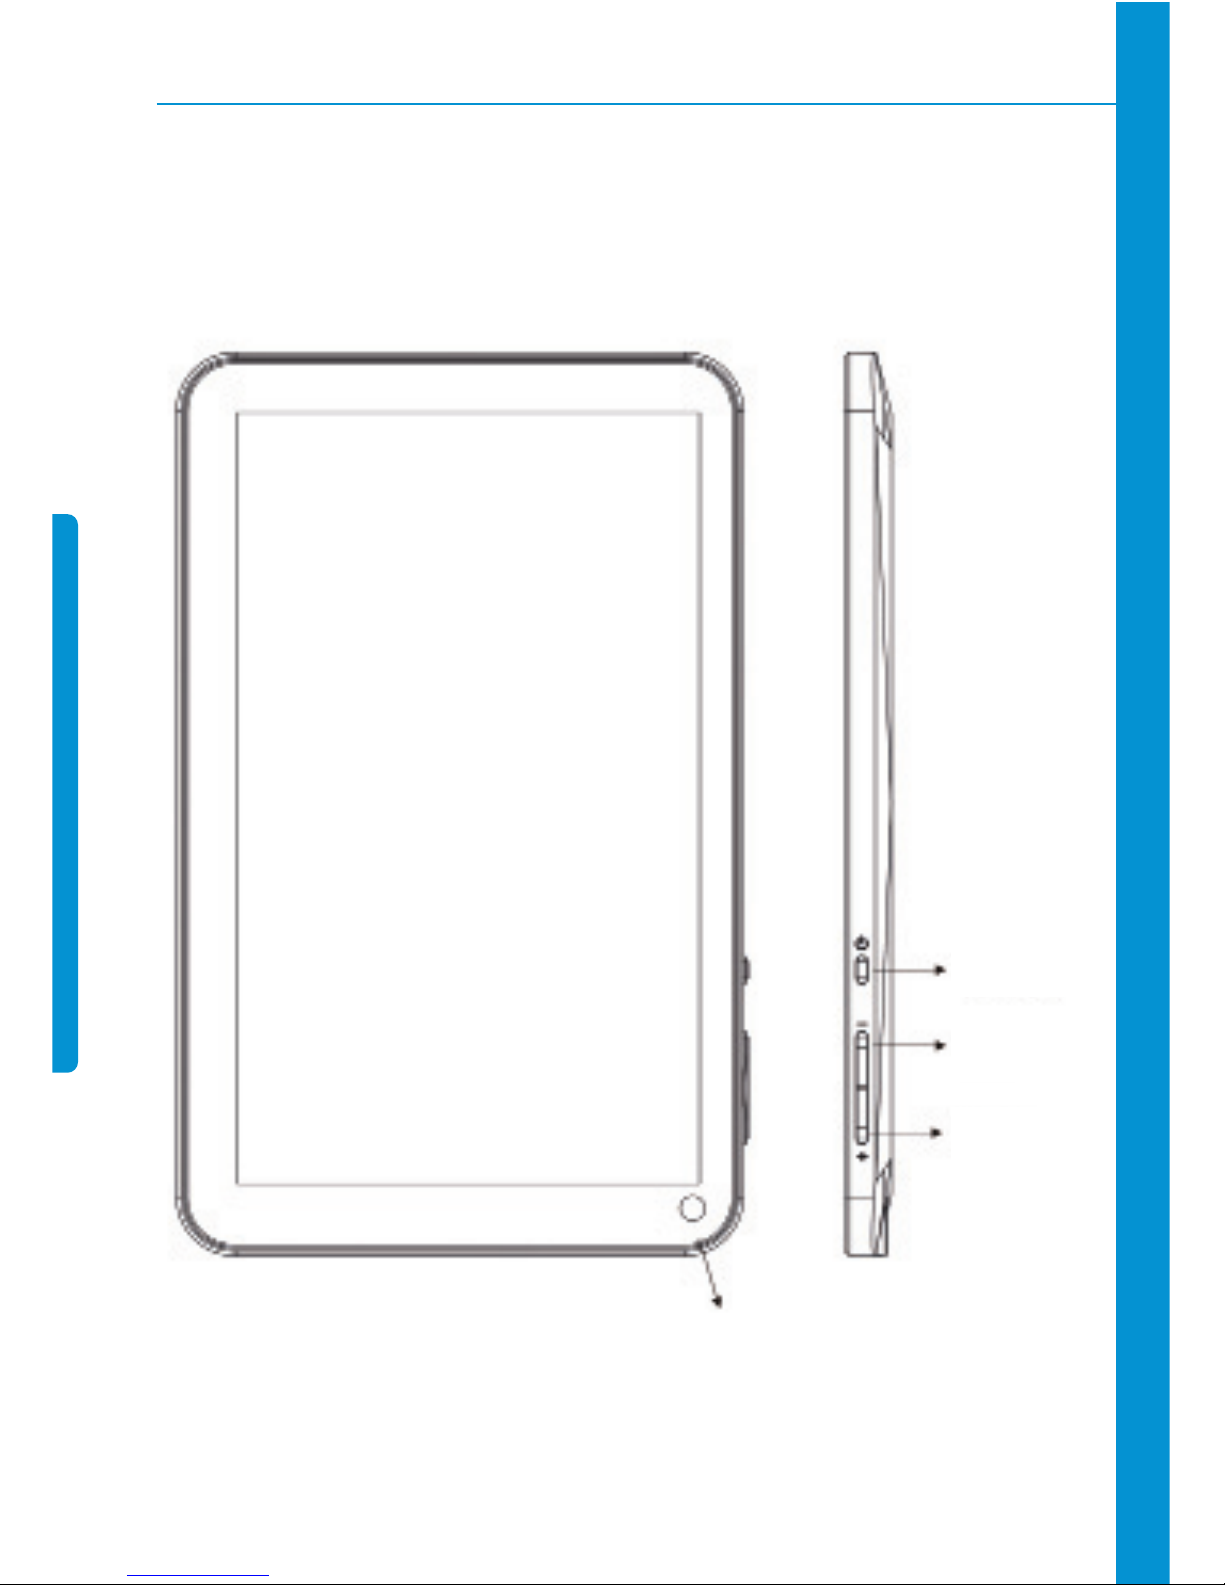
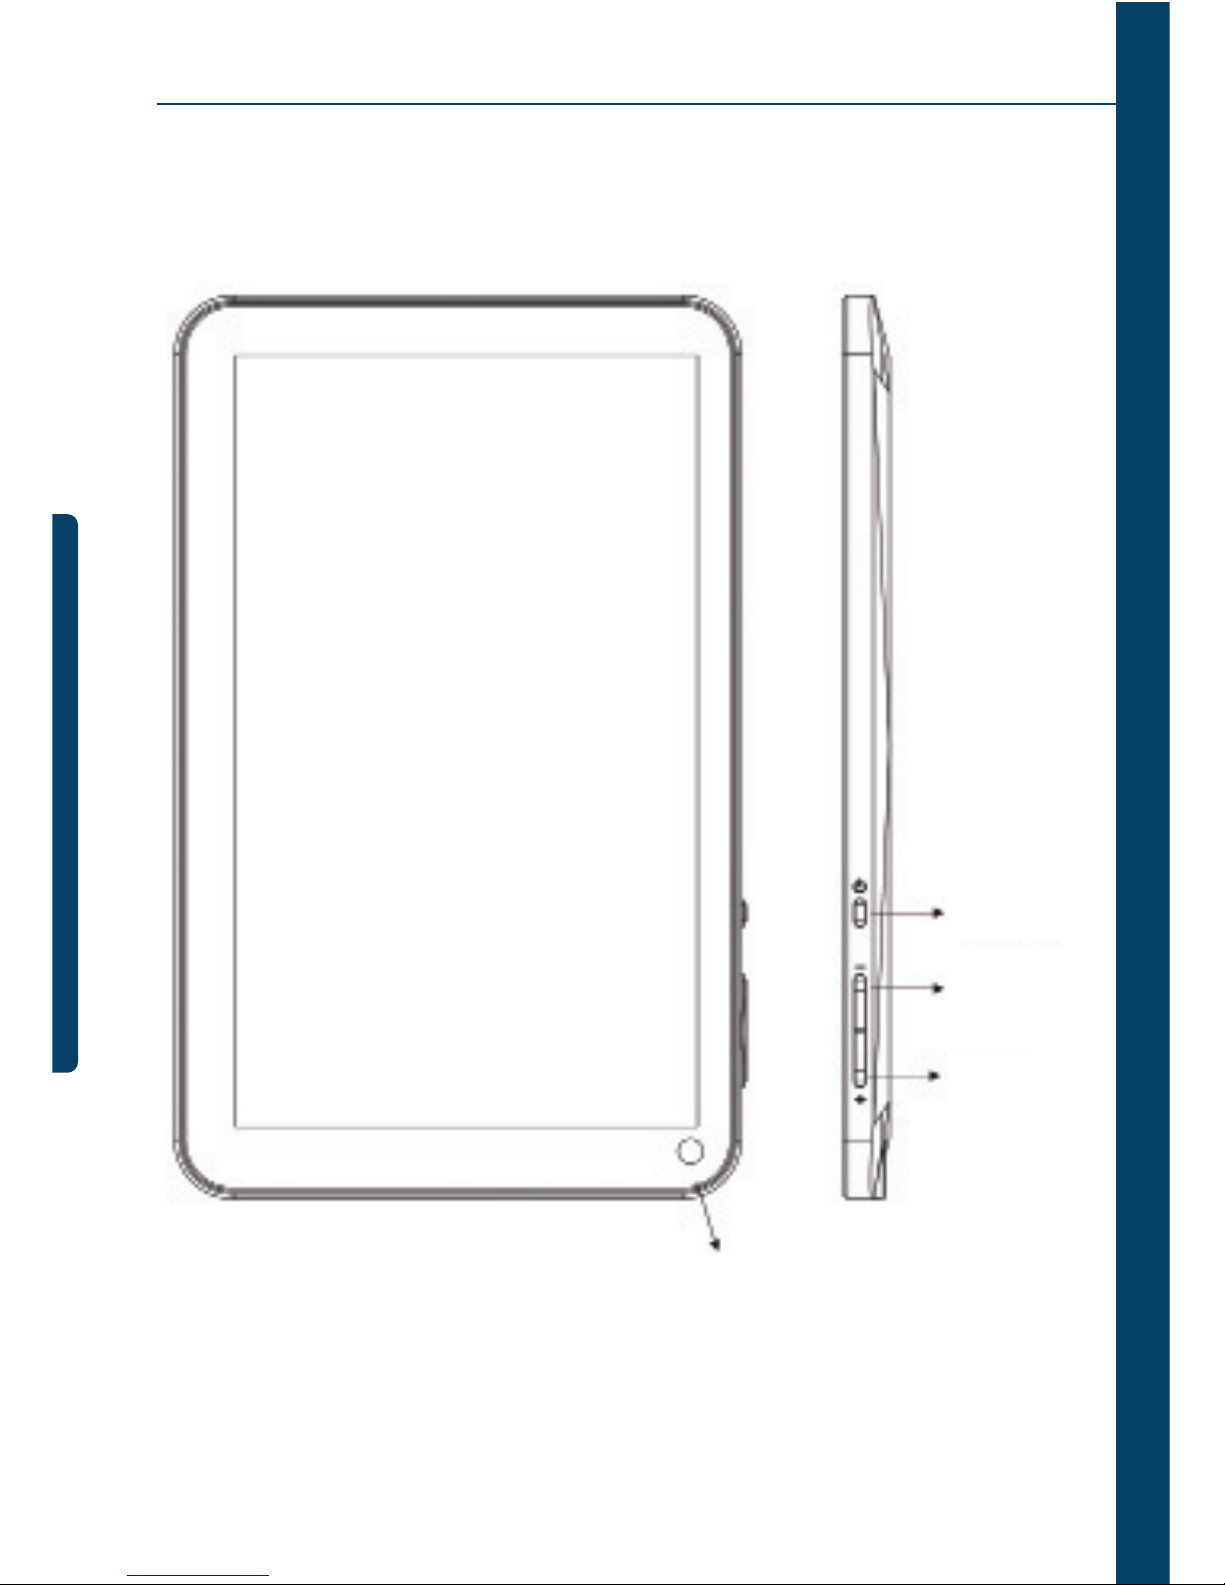
2. Appearance
camera
vol +
power
vol -
Page 8

8
3. Power switch usage
· Turning on: Press and hold the power switch for five seconds.
· Turning off: Press and hold the power switch for five seconds – Tap Turn Off – Tap OK.
· Screen locking/unlocking: Press the power switch to lock/unlock the screen.
· Force shut-down: If the device doesn’t have response, press the Reset key to restart
the device.
Note: Do not force shut down the device unless necessary. Under normal condition, please follow the normal procedure to turn off the device.
· Reset key: Press the Reset key to restart the device.
4. Touch screen
The User Instructions guide you to operate the touch screen as follows:
· Tap: Tap to select an icon or option.
· Tap and hold: Tap and hold an icon to drag it to the desktop.
· Drag and drop: Drag and drop on the desktop to switch among different interfaces.
To avoid scratching or breaking the screen, do not put any object on it
5. Adapter cable
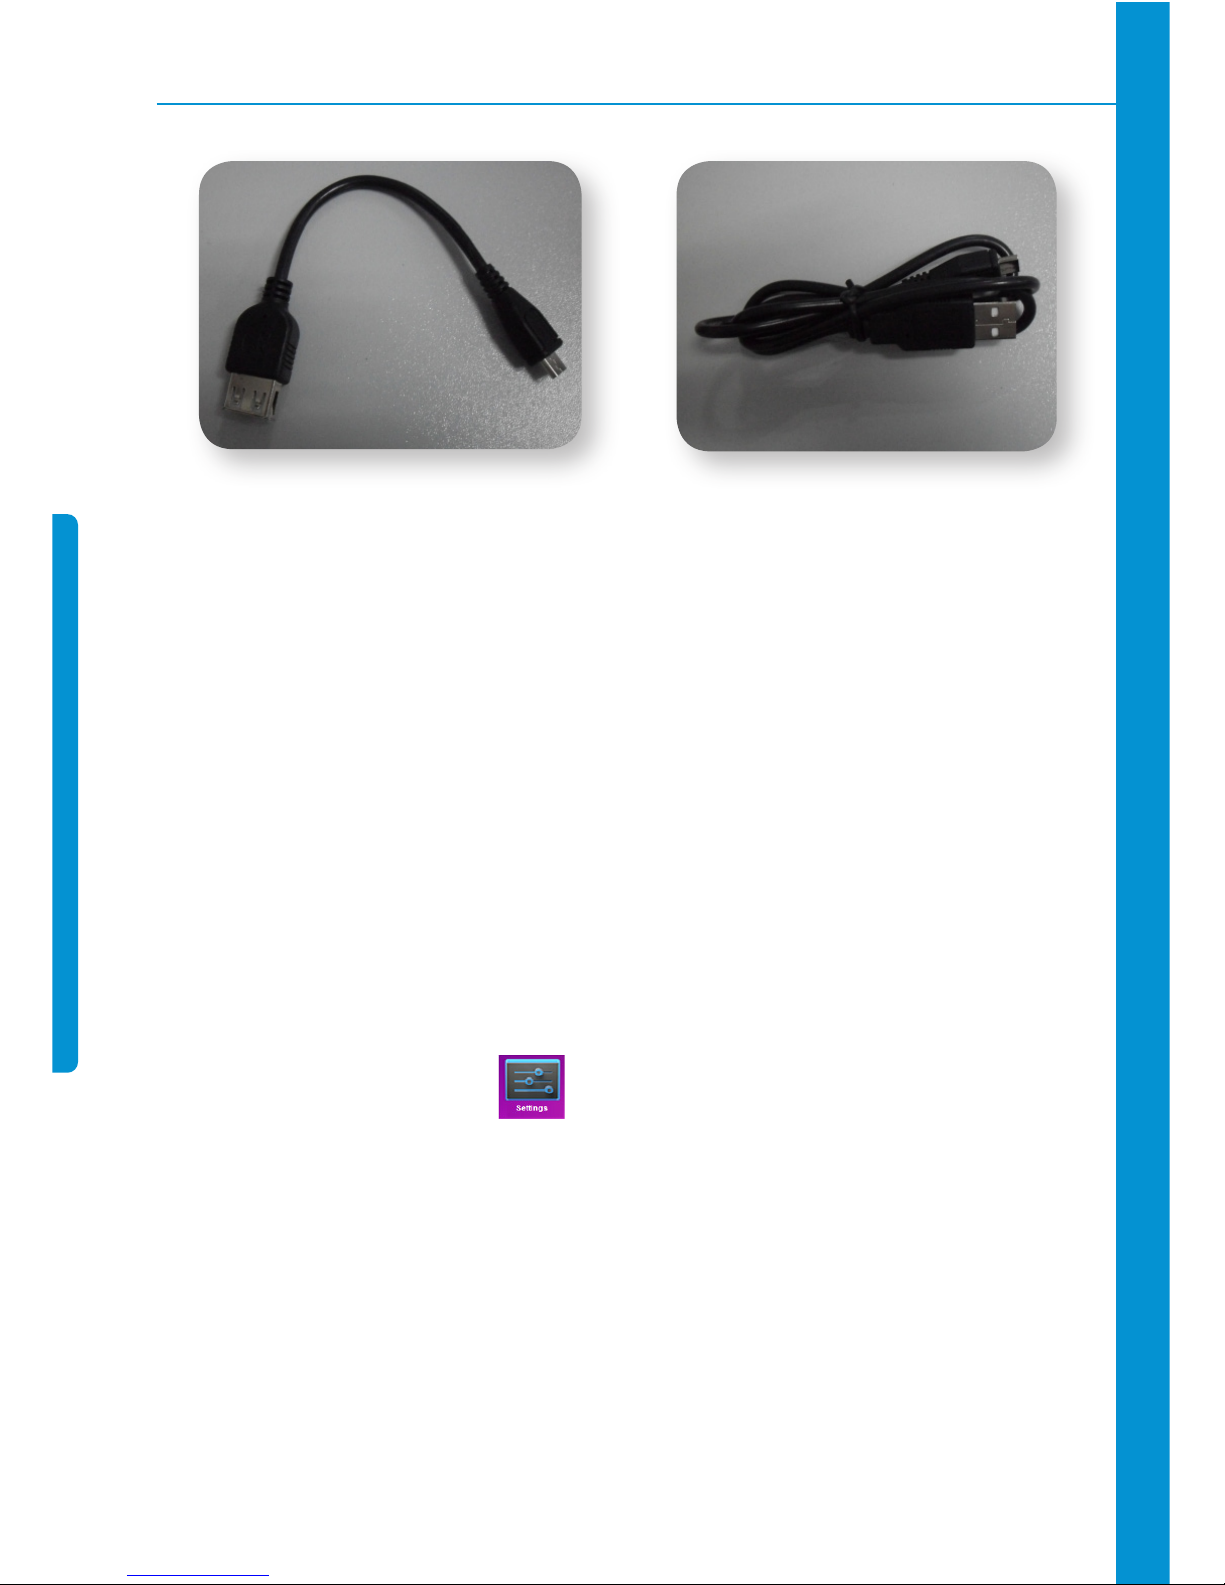
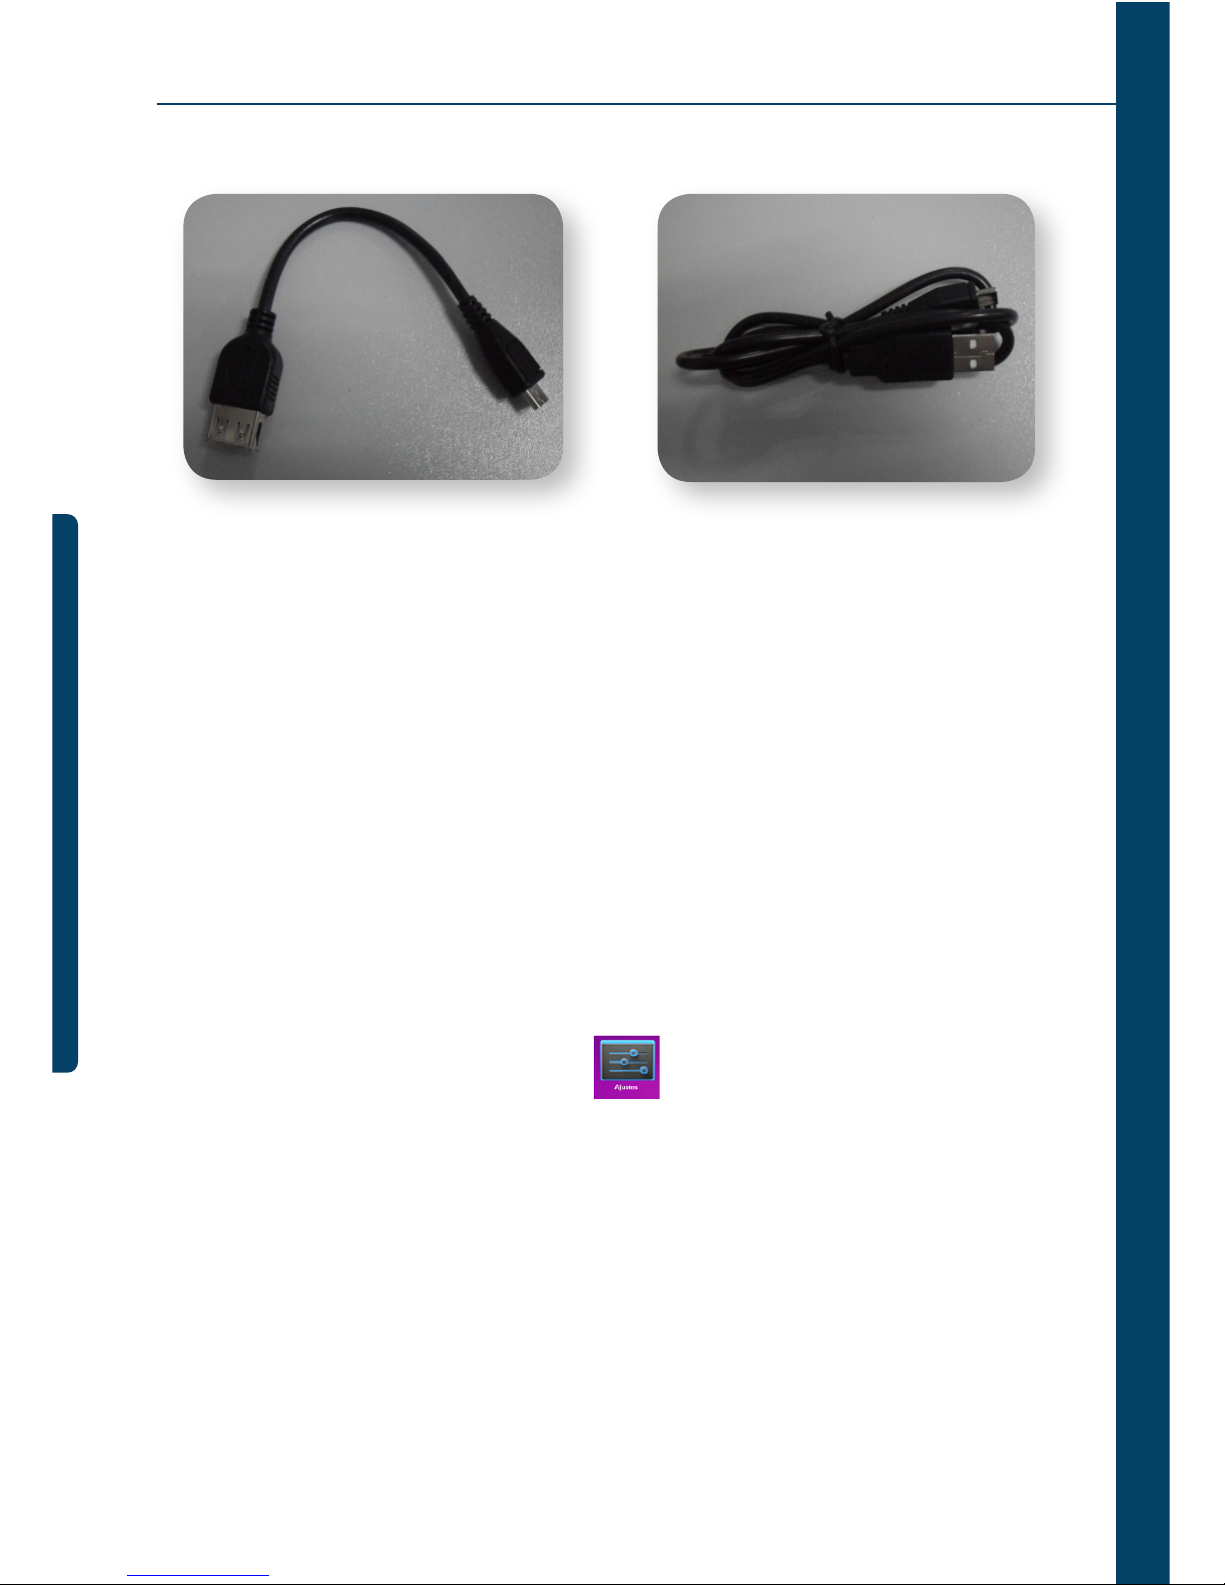
To use USB storage device, it is required to connect the adapter cable and then
connect to PC.
USB flash drive
· Connect one end of the OTG cable to the flash drive and the other end to the USB OTG
interface of the device. You can use the flash drive when it is ready.
Page 9
9
OTG cable USB cable
Do not insert/remove the USB flash drive frequently, or else it may damage the
flash drive.
6. Micro SD usage
The device supports memory card up to 32GB.
· Insert the memory card into the slot, press with fingers to clamp it; the screen will show
Preparing SD card, and the Micro SD is ready for use when the characters disappear. You
can operate when the card is ready.
Removing Micro SD
· Close all programs or files opened from the memory card.
· Cancel Micro SD: tap Settings > Storage > Unmount SD Card > OK
· Press the card and it will eject.
Do not insert/remove the memory card repeatedly, or else it may damage the
card.
Please use qualified memory card to avoid incompatibility.
Page 10
10
7. Getting started
Charging the device
· Connect the adaptor on the device and the other extremity with plug must be connected
to the socket when the battery is charging, the icon will be displayed at the bottom
right of the screen.
· After charged, the battery symbol turns into: .
You can use USB cable to charge the device.
You can use the device while charging; however, it will extend the charging time.
Battery management
“The battery is provided with incomplete load, so we recommend charging the battery
for at least 5 hours before using the device, or until the icon indicates a full charge.
The charging time and discharging time of the battery are limited. However, you can
try the following measures to extend the life of the battery:
· Use the device at least once every week.
· Charge the battery regularly.
· Do not keep the battery too low for long time.
· Always keep the device and battery away from heat source.
Start-up
Press and hold the power switch for five seconds ( ).
Page 11
11
Wi-Fi network settings
Since many functions require Wi-Fi connection, please configure the Wi-Fi network
before operation.
· Click > Select the WiFi menu left of the screen
The available networks will appear on the right side of the screen> select the network
you want and wait until the connection is made by the system.
If you get between Wi-Fi networks, then you must enter a password to
connection.
· Tap to return to the desktop.
If you set to hide Wi-Fi, it won’t be scanned automatically. Please tap Add Wi-Fi
Network, and then enter corresponding information to add the Wi-Fi.
Page 12
12
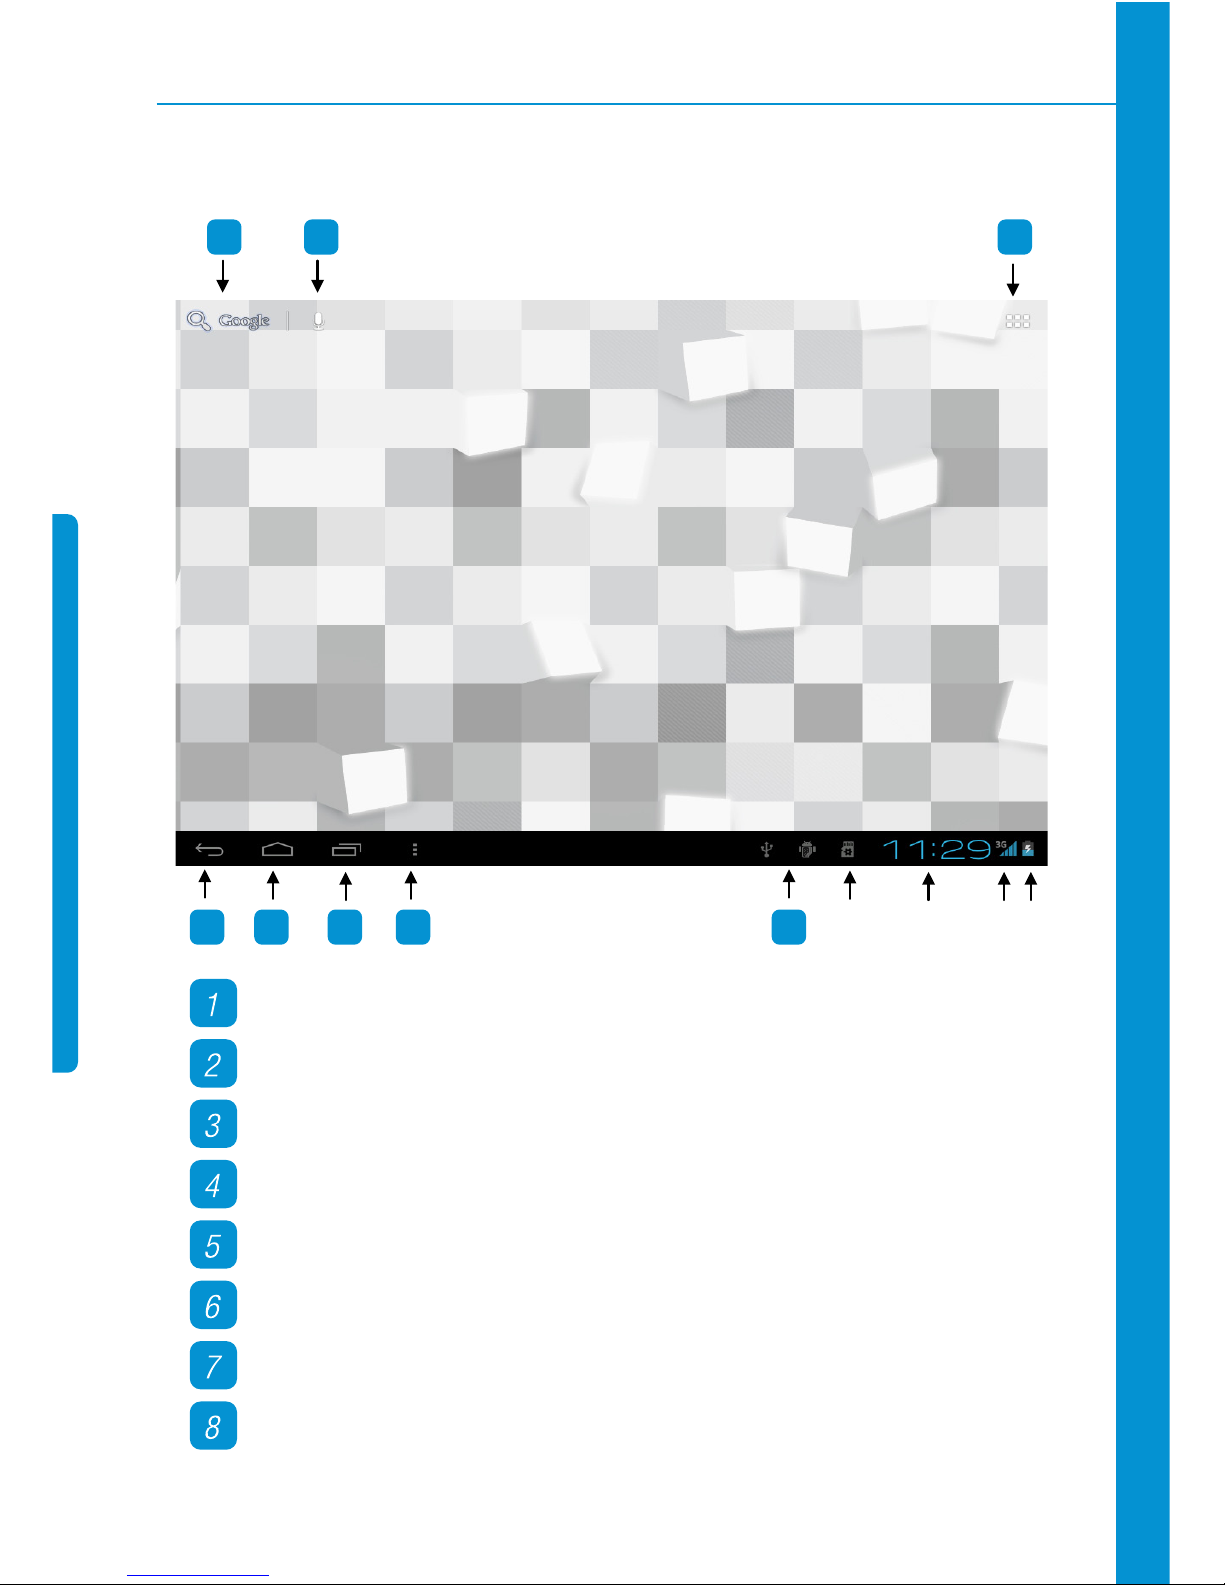
8. Desktop
1
23
5 6 7 8
A B
C
D
4
Tap to view all applications
Voice search shortcut
Browser shortcut
Return to current operation
Return to desktop directly from the program interface
Multipage task selection key
Menu function shortcut
USB connection symbol
Page 13
13
A: Micro SD connection status
B: Current time
C: WIFI connection signal symbol
D: Battery status
· Tap any application icon to run it.
· Tap and hold the icon to drag and drop to other position on the screen.
· Tap and hold the icon to drag and drop to to delete from the desktop.
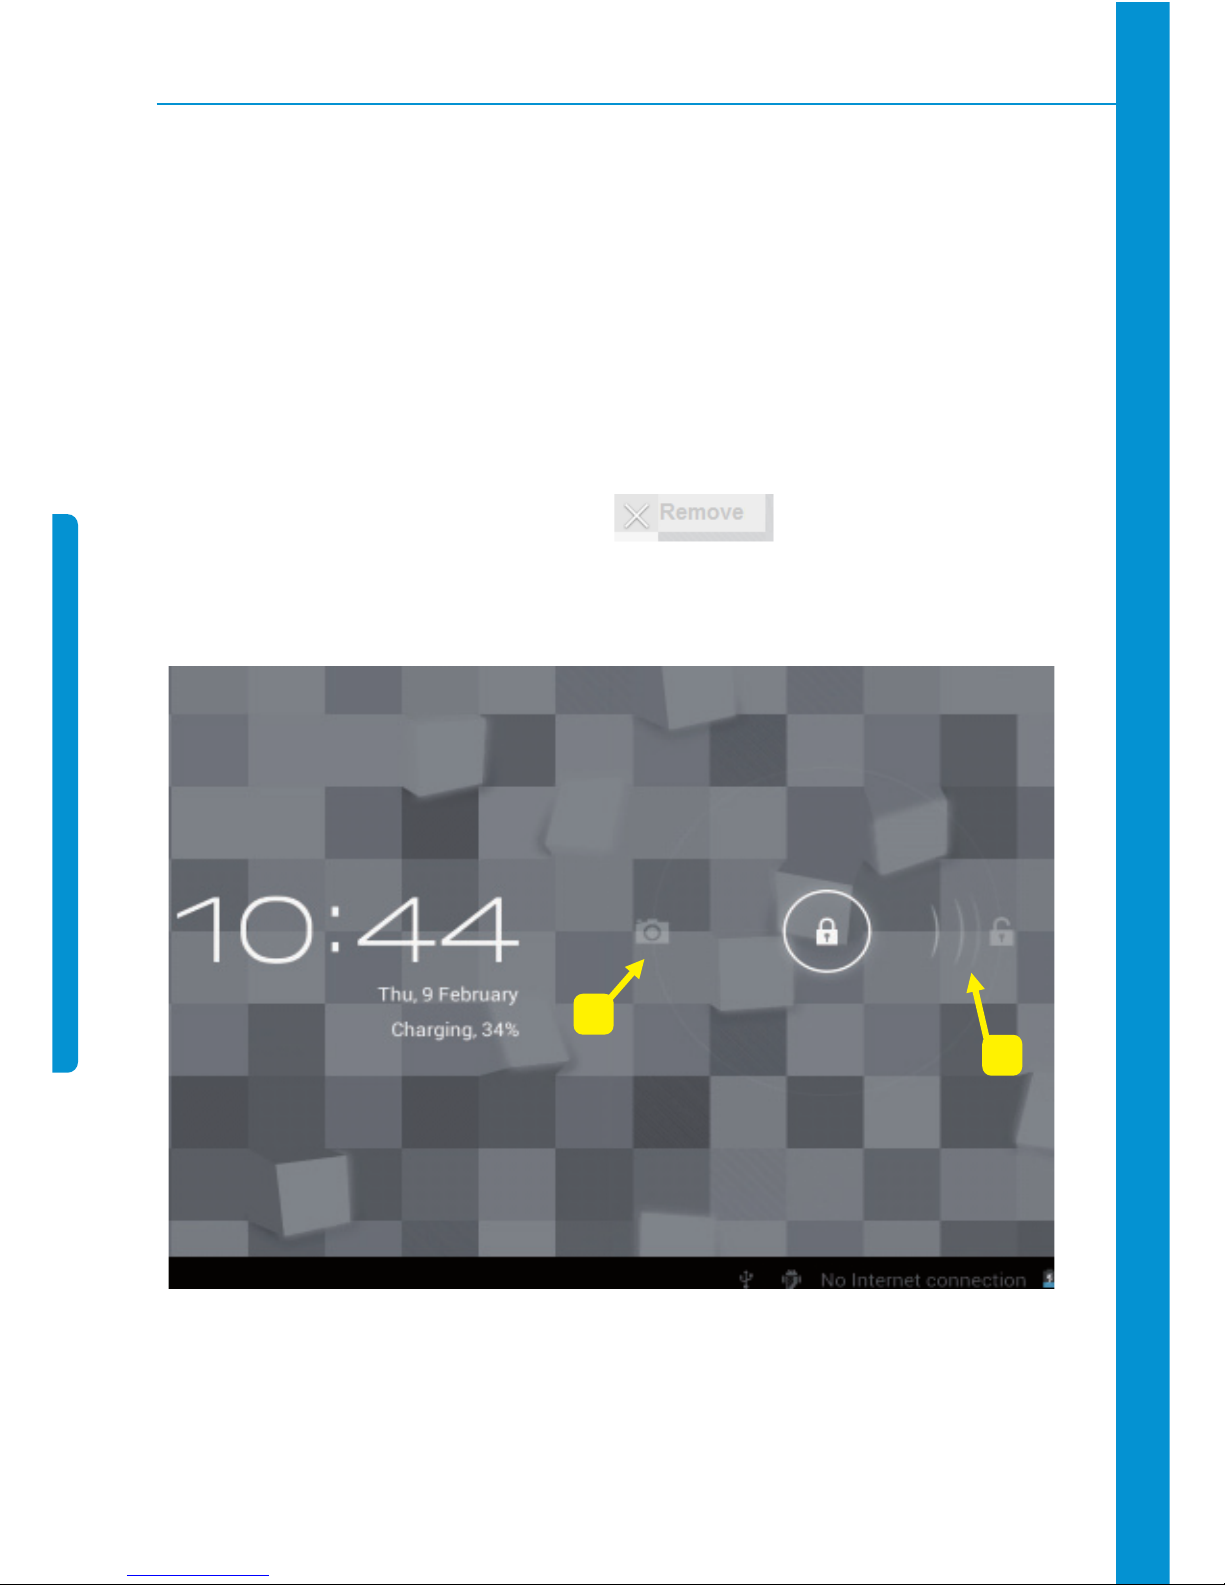
9. Locking desktop
B
A
If the PC won’t be used for a long time, or the power switch is tapped, the device enters
standby state. The standby has two states. One is deep-sleep standby, in which the screen
is turned off; the other is light standby after pressing the power switch. The picture shows
Page 14
14
the default light standby state. Tap and hold the unlocking switch , is and the A, B
symbols as shown in the picture appear; point A is the camera icon and point B is the unlocking icon. The system will prompt about the path of unlocking. The ripple at point B in the
picture is the path of the prompt. Tap and drag the unlocking switch to point B to unlock
the screen, tap and drag the unlocking switch to point A to activate the camera function.
10. Main applications
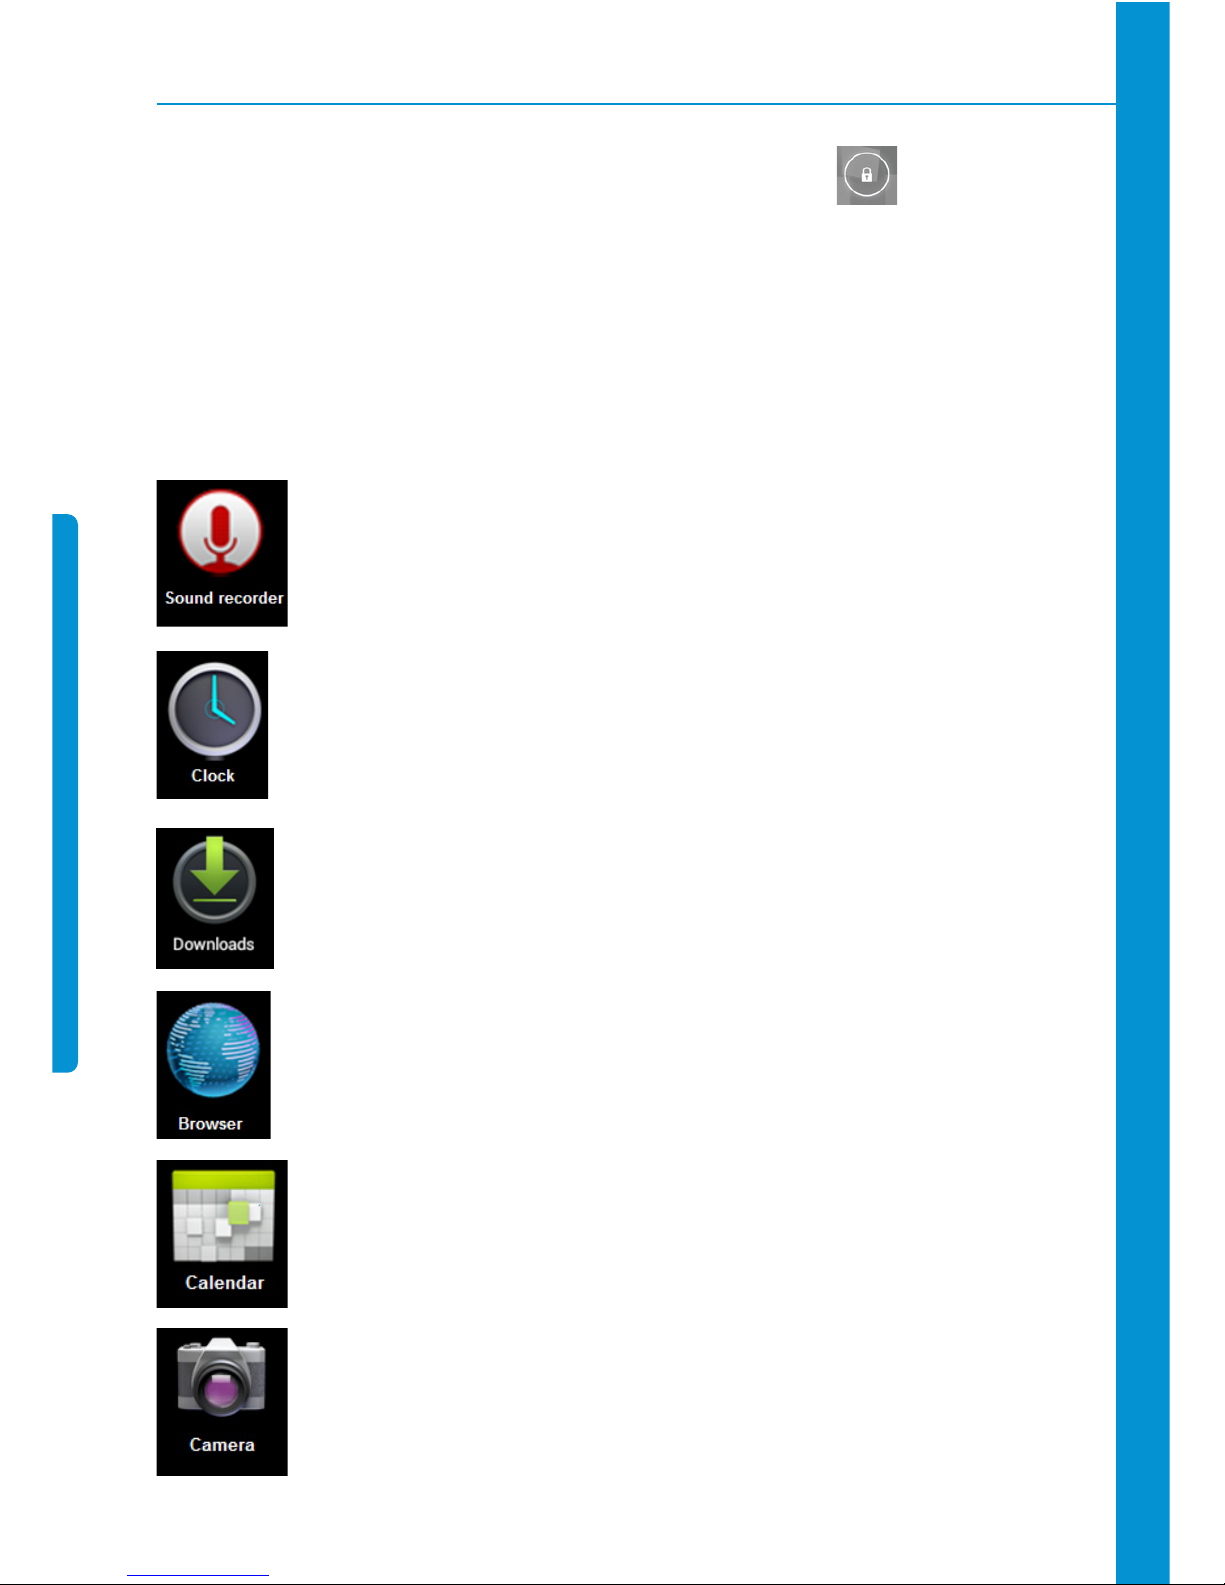
Recorde: record external sound
Clock: display time and set the clock
Downloads: install the downloaded applications quickly
Browser: connect to Internet browser
Calendar: set the calendar of the event
Camera: take pictures
Page 15
15
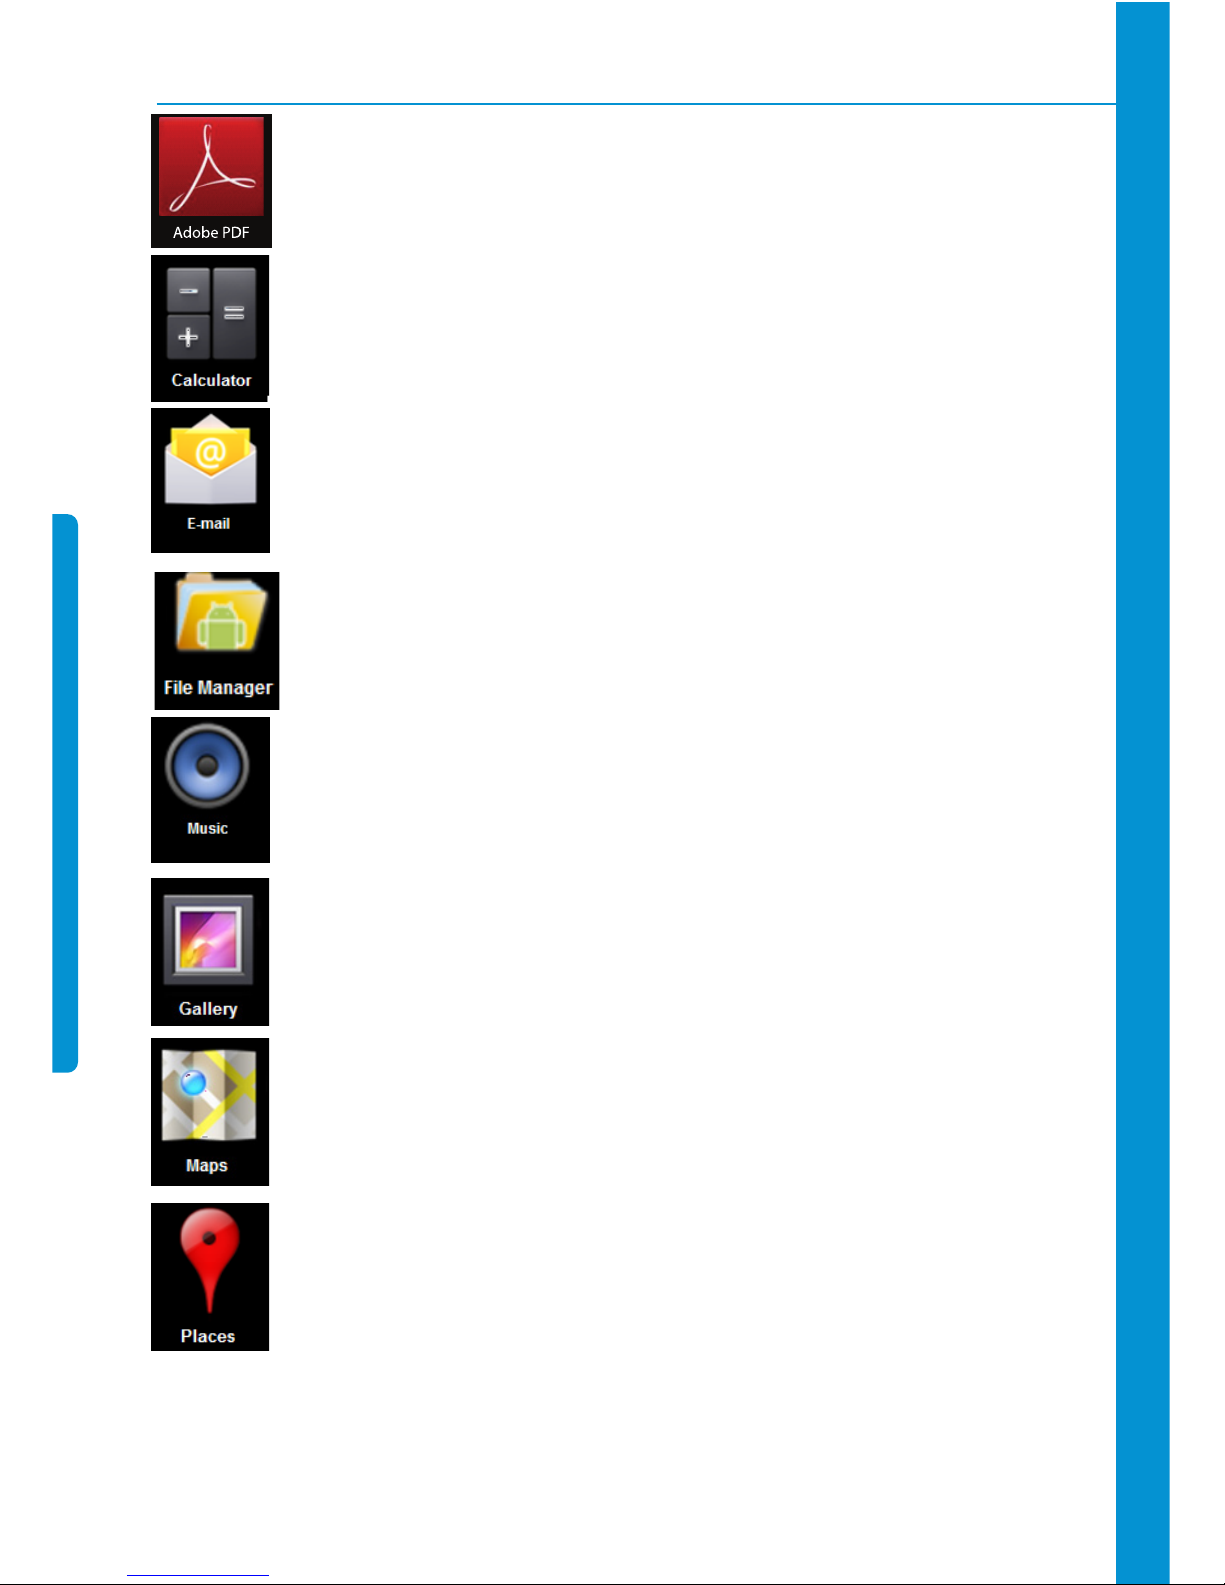
Calculator: do simple arithmetic
Explorer: view and manage files and programs. Install Android applica-
tions and back up files in SD card.
My Music: play and manage music files
Gallery: browse and manage picture files
Map: connect to the Internet and view current position in the map
Local Search: connect to the Internet and view the information of the
facilities near current position
E-mail: send and receive e-mail with existing e-mail address
PDF Files Reader
Page 16
16
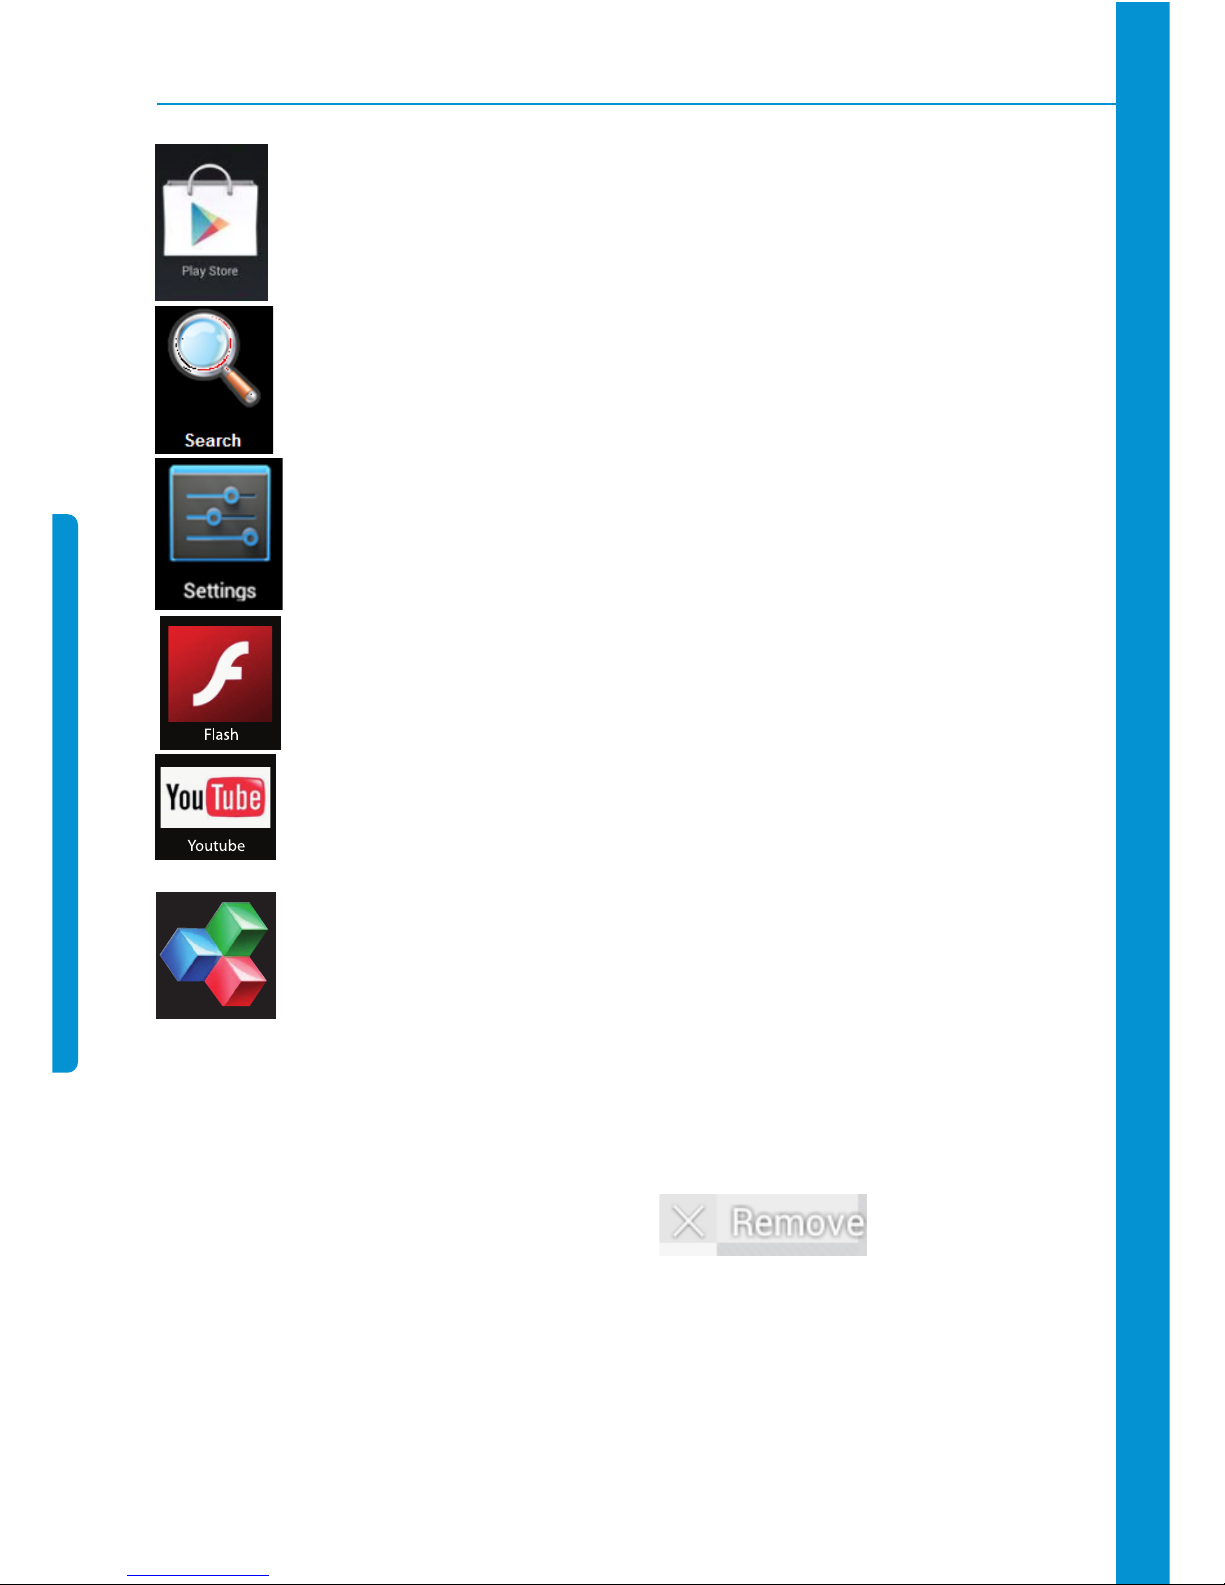
Settings: perform personalized setting
Search: enter the desired data directly
Tap and hold the icon to drag and drop to other position on the screen.
Tap and hold the icon to drag and drop to to delete from the
desktop.
Play Store: log in and download system application
Flash Files player.
Youtube videos player
Office Suite: documents viewer and editor.
Page 17
17
11. Desktop menu function
On the desktop, use the button tlocated on the top right of the screen to
display the application menu.
In this menu you can change the device settings or run the applications on your
desktop, the application execution will occur automatically when the application is selected.
12. Program Manager
Install applications from external sources
It is possible to download interesting and free Android applications. You just
need to start the browser and search for “Android applications”.
You can install the purchased or downloaded Android applications quickly through
:
· Copy desired .apk files to SD card or USB storage device > insert the card into the
device or connect USB flash drive to the device.
· Tap the File Managericon .
· Tap or and find the folder that saves .apk files.
· Select an .apk file > Install.
· After the application is installed, the icon will appear in the interface that shows all
applications.
· Tap to run the application directly, or tap OK to return to the File Managerinterface.
Downloading applications from Internet directly
You can download Android applications from the Internet directly, and install in the
device quickly.
Page 18
18
· Click the icon to connect to the Internet.
· Enter the URL and tap the download link of desired application.
· After downloading, tap and hold the downloaded files (in download log interface), >
click Open > Install.
Connecting to PC to save files
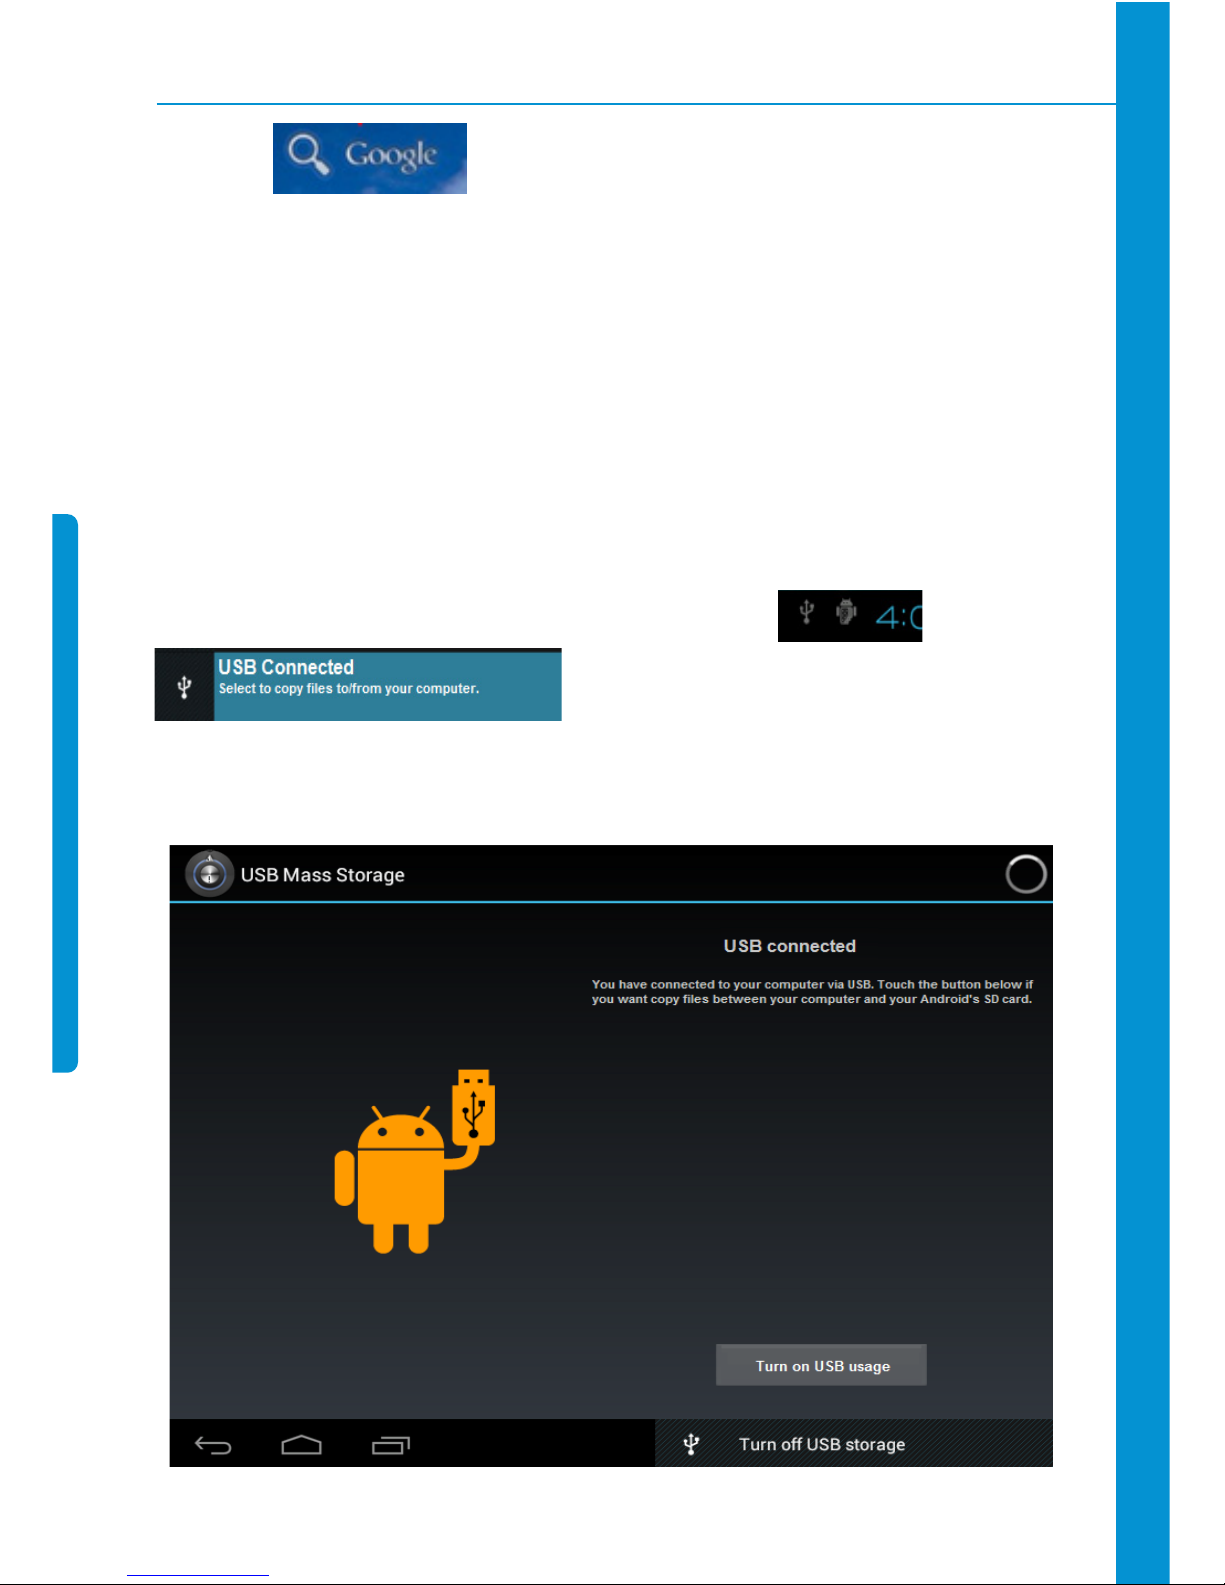
· Connect the tablet PC to PC and the tablet PC can be used as mobile storage device; to
connect to PC, connect one end of the USB cable to the USB OTG interface of the tablet PC
and the other end to the USB interface of PC.
· After connected, the tablet PC will prompt , click the
icon and then select Turn on USB storage to
transmit data between PC and tablet PC, as shown below:
Uninstalling the application
Page 19
19
You can uninstall the Android application quickly.
· Click on Menu> Settings > Applications
· Tap an application > Uninstall.
· Tap OK to uninstall.
13. Sound recorder
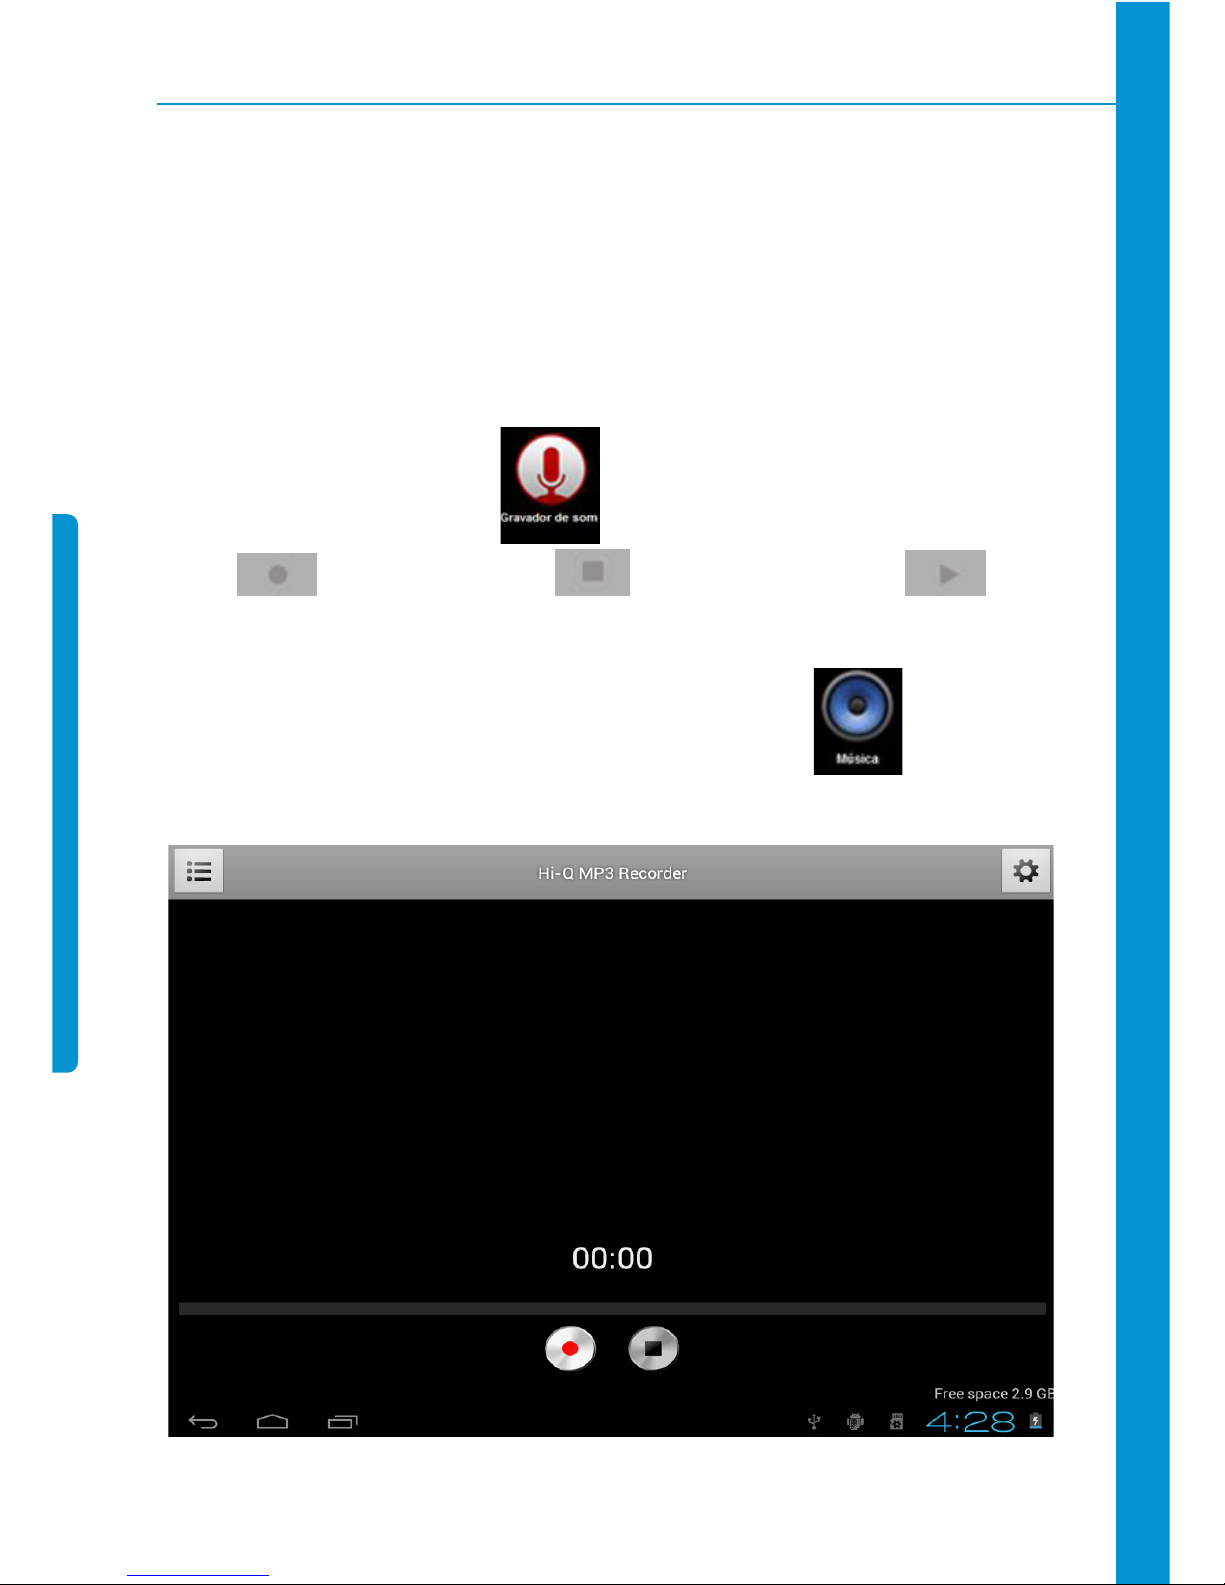
Click the sound recorder icon :
Tap to start recording, tap to stop the recording, tap to view
the recorded file, the file names will be given according to the time of recording. To delete
the recent recording, click “DISCARD”, to store the recording, click “FINISH”.
To run the recordings, go to mene, select the application , the top menu,
select the “LISTS”> My recordings, simply click on the desired record to start execution.
Page 20
20
14. Clock
Tap the clock icon to view current date and time.
Alarm clock
You can set several alarm clocks at the same time.
When the icon appears in the upper status bar of the screen, at least one
alarm clock is activated.
Adding alarm clock
· Tap the clock icon .
· Press the Menu key > Add alarm clock.
· Set the alarm clock accordingly.
If you don’t select Repeat, the alarm clock will be deleted automatically after
the alarm time.
· Tap Enable alarm clock.
· Tap OK.
Turning off alarm prompt
When the alarm time is out, a window with the name of alarm clock will pop up.
If you want to repeat the alarm clock in 10 minutes, tap Snooze.
· Tap Cancel to stop the prompt.
Page 21
21
Enabling alarm clock
If you select Repeat in the settings, the alarm clock will be deactivated temporarily,
but won’t be deleted:
· In the alarm clock interface, tap the icon after desired alarm clock.
· Tap to re-activate the alarm clock.
Editing alarm clock
· Tap the clock icon > tap .
· Tap a desired alarm clock > edit.
Deleting alarm clock
· Tap the clock icon > tap .
· Tap desired alarm clock and enter.
· Tap Delete.
· Tap to return to the desktop.
15. Downloads
· Tap the download icon .
· View currently downloaded applications in PC, select and install.
Page 22
22
16. Browser
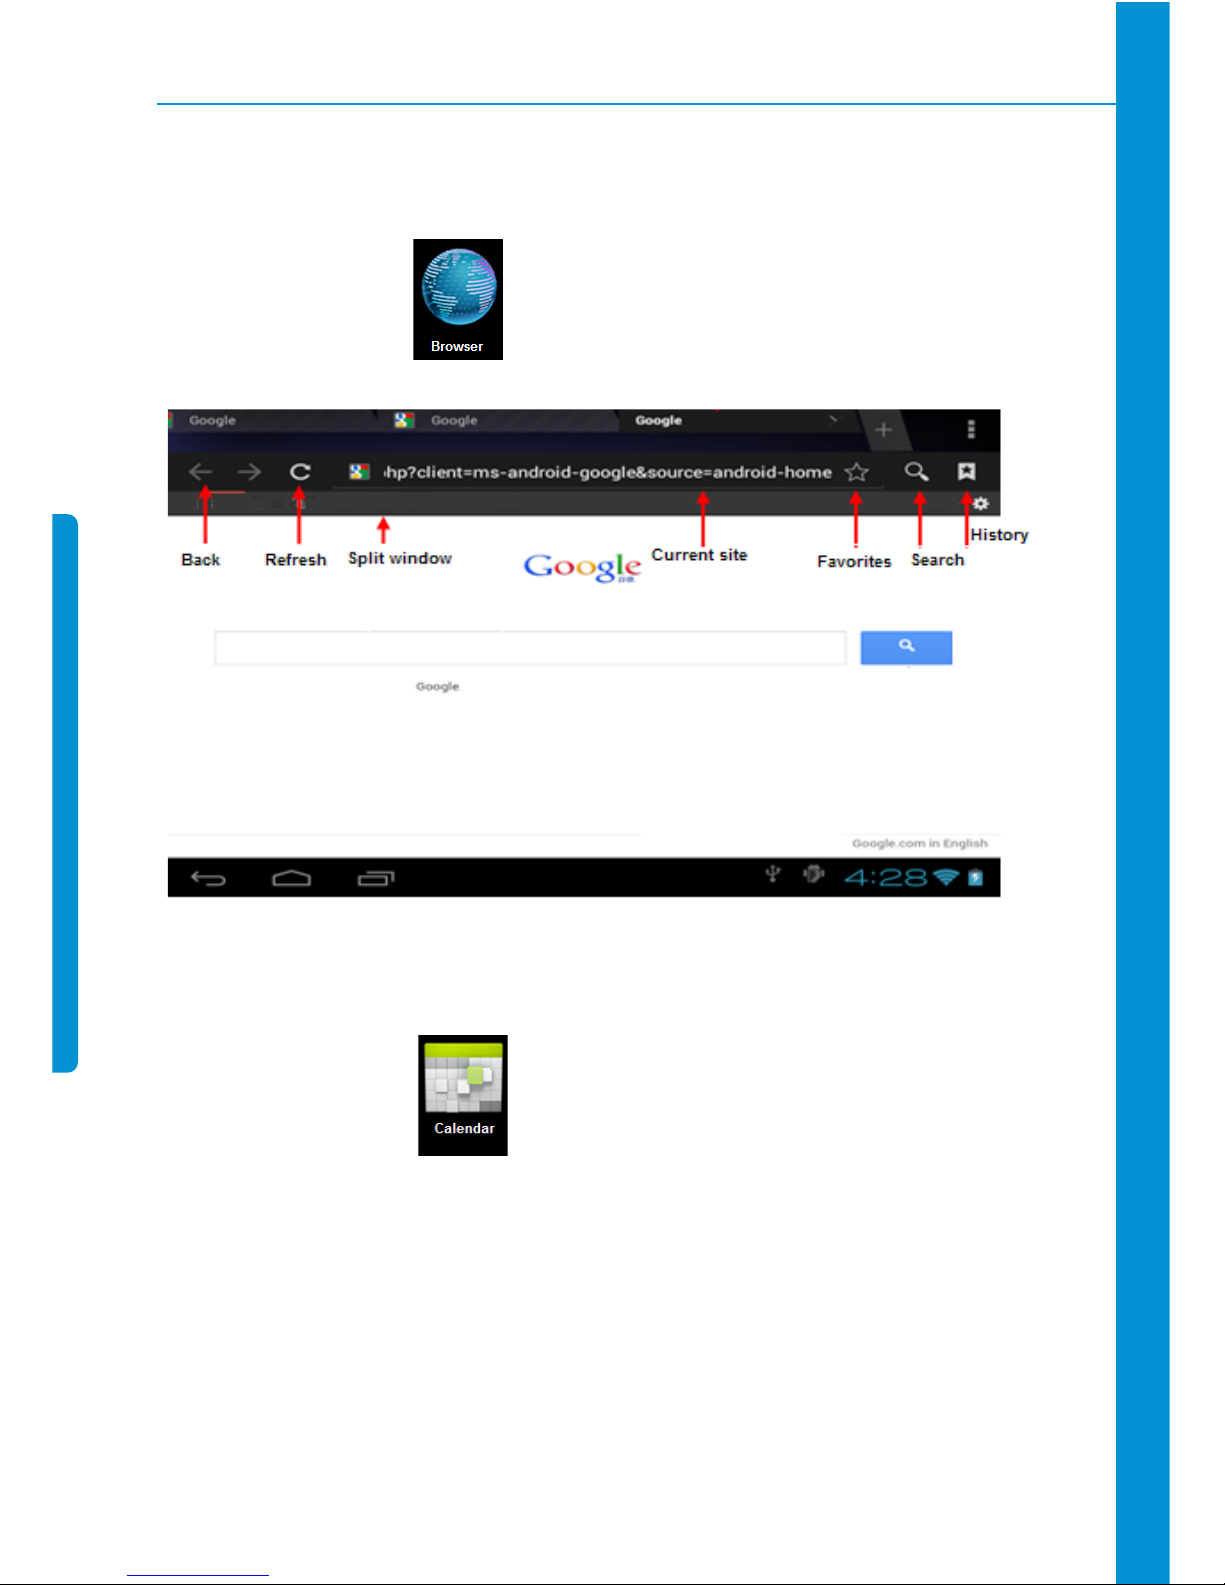
You can connect to the Internet through the browser.
Tap the browser icon on desktop to access the Internet:
17. Calendar
Tap the calendar icon .
When the calendar is used for the first time, you need to add an Exchange account.
Enter the e-mail address and password of the account, tap Next and follow the prompt the
finish the account setting, and then the calendar is available.
Page 23
23
New event
· In the Calendar interface, tap the date you want to create an event.
· Select the time > enter the details in each field.
· Tap OK.
· Tap the Menu key to select desired calendar interface
The dates displayed in grey have events.
18. Camera
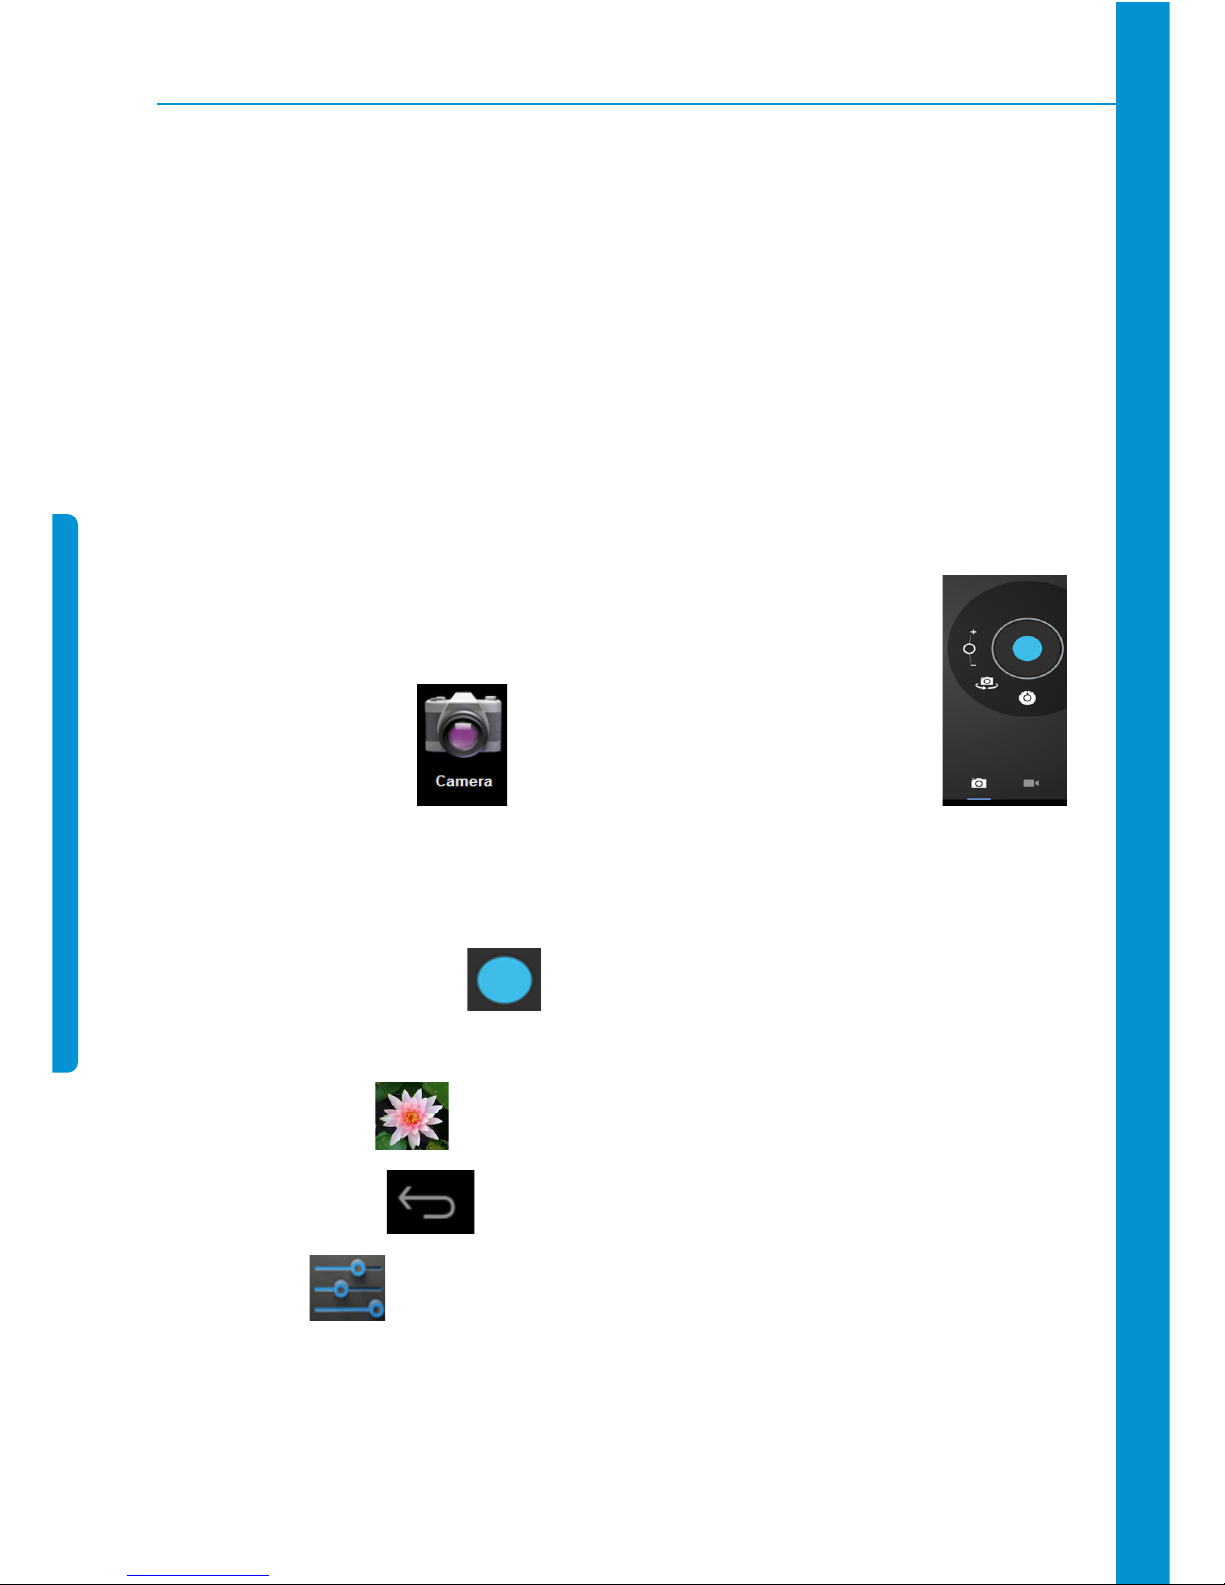
Tap the camera icon to turn on the camera and the interface
appears.
Taking pictures
· In the camera interface, tap to take pictures.
· The pictures will be saved automatically.
· Tap the thumbnail of the picture to view the original in Gallery.
· Press the Back key to return to the camera.
· Tap the icon to perform camera setting.
Page 24
24
Recording video
· Tap to switch to the video mode, in which you can record video.
· Tap to start recording, and tap to stop recording.
· The video files will be saved automatically.
· Tap the video thumbnail to play the video.
· Press the Back key to return to the camera.
· Tap to switch to camera interface.
· Press the key to perform settings for video recording.
19. Calculator
· Tap the calculator icon .
· Tap the figures and operators to calculate.
· Tap Clear to delete one, or tap and hold Clear to clear all the results.
Page 25
25
20. E-mail
Support POP3 and SMTP accounts.
Adding e-mail account
You can enter one or several desired e-mail addresses on the device.
· Tap the e-mail icon .
· In Your account interface, tap Next.
· In e-mail address option, enter your e-mail address.
· In password option > enter your e-mail password.
· Tap OK.
Manual setting (optional): The server fills the supplier (i.e. gmail.com) automatically
according to your e-mail account. However, if you need to change the server setting, click
Manual setting to make necessary change.
· Tap Next.
· Optional: Enter the account name.
· Enter the name of the message > Tap OK.
After setting, if you can’t access a free e-mail account, please check with your
e-mail service provider whether their server support POP and SMTP protocol.
Inbox
· Tap the e-mail icon .
· If you only set one e-mail account, it will be opened directly. If you have set several
accounts the account list will be displayed.
Page 26
26
· Tap desired e-mail account > tap Inbox.
Opening e-mail
· In the Inbox interface, tap and open an e-mail.
· For attachment, tap Open to start respective application, or tap Save to save the atta-
chment to SD card.
· To Reply, tap Reply or Reply to all.
· a) Write the message you want to send.
· b) Tap Send to send the e-mail immediately; tap Drafts to save but do not send
the e-mail, or delete directly but do not save or send.
· To delete the e-mail directly, tap Delete.
Writing new e-mail
· In Inbox interface, press the Menu key > Write.
· Tap Send to, and then enter the address of the recipient.
· Or if you want to send a cc or bcc, press the Menu key > Add cc and bcc, and enter the
e-mail addresses of the recipients.
· Enter desired subject in the title bar of the e-mail.
· Tap Write option to enter your personal information.
· If necessary, press the Menu key > tap Add attachment to add the attachment file.
· After writing, press the Menu key > tap Send.
Editing e-mail account
· Tap the e-mail icon .
· In the Inbox interface, press the Menu key > tap Account setting.
· Set your e-mail account accordingly.
Page 27
27
· Tap to return to the Inbox interface.
Deleting e-mail account
If you have several accounts and have deleted the default account, the next e-
-mail account in the list will be set to default automatically.
· Tap the e-mail icon .
· In the Inbox interface, press the Menu key > tap Account.
· Tap and hold the account you want to delete.
· In the popup Account option window, tap Delete account.
· Tap OK to confirm the operation.
Setting default e-mail account
You should always have a default account. Therefore, if you have several e-mail ac-
counts, you can set anyone to default.
· Tap the e-mail icon .
· In the Inbox interface, press the Menu key tap > Account setting.
· Tap Default account to select it.
If you delete the default account, the next e-mail account in the list will be set
to default automatically.
Page 28
28
21. Explorer
Tap the File Managericon to view the files in all storage devices (internal
memory, SD card, USB storage), and install Android applications to the device quickly.
The icons in the top of the screen have the following functions:
Copying files between PC and the device
You can copy files between external storage device, internal memory and the PC
through Explorer. To copy files to the device, it is required to copy to SD card or USB
storage device first.
The folder of the internal memory is “LocalDisk”, the memory card is “sdcard”,
and the USB storage device is “udisk”.
To copy files from SD card or USB storage to the device, you can copy the files to
SD card or USB storage in the same way, then connect the storage device to PC
and copy the files to your folder.
· Click “SD CARD” or “USB” to find the files on your storage device. Select “Internal Me-
mory” to access the internal memory of the device.
· Tap and hold the desired file or folder and tap Copy.
· Tap the icon to return to the internal memory, tap the target folder and then tap
Paste.
Excluir arquivos
Pressione o arquivo que deseja excluir > clique no botão Deletar > clique em OK para
excluir.
22. My music
The compatible audio formats are: MP3, WMA, OGG, FLAC, WAV, ACC.
Page 29
29
Playing music
· Tap My Music icon .
· Select desired music to play from the music/album/artist/playing list.
· Tap Previous > Pause > Next icon for operation.
· To return to previous interface while playing music, tap or HOME to
return to the desktop.
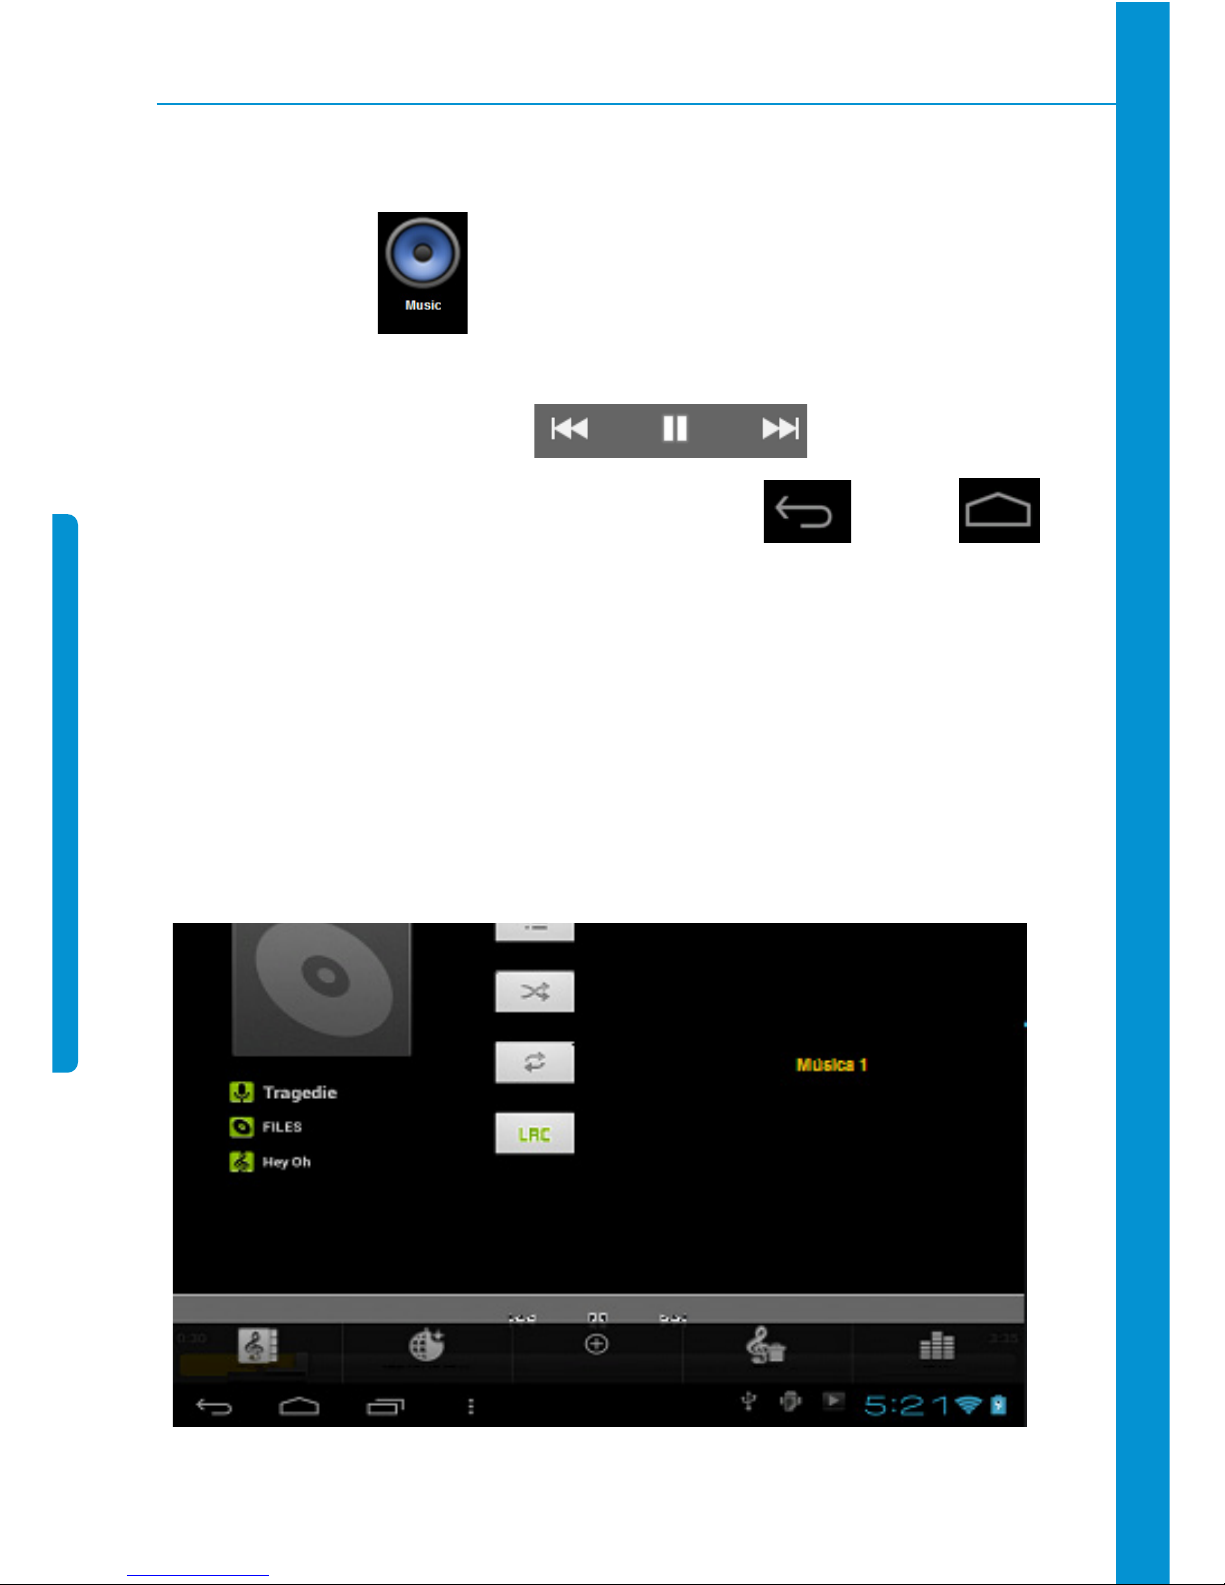
Press the Menu key for music operation, as in the interface below:
23. Vídeo
AVI,MKV,MOV,TS,RM/RMVB /3GP, MPEG, DAT, MP4
Playing video
Page 30
30
· Tap My Video icon .
· Select desired video to play from the all/contents/my favorite/custom list.
· Tap on the screen to adjust the video (including volume, pause/play, brightness, etc.)
· Press the Back key or tap the icon to return to My Video interface.
24. Gallery
The compatible picture formats are: JPEG, BMP, GIF, PNG.
· Tap the gallery icon and then tap a picture group.
· Tap a picture to browse.
· Press the Back key to return to the picture group interface.
· Tap the icon at the top of the screen to start the “Slide Presentation” mode.
Delete photos and dynamically switch settings wallpaper
· To Edit Delete or Set An Image as wallpaper, select one of the related options on the
Menu at the top of the screen, the Menu will appear as soon as you select any image.
Page 31
31
25. Maps
This function requires Internet connection.
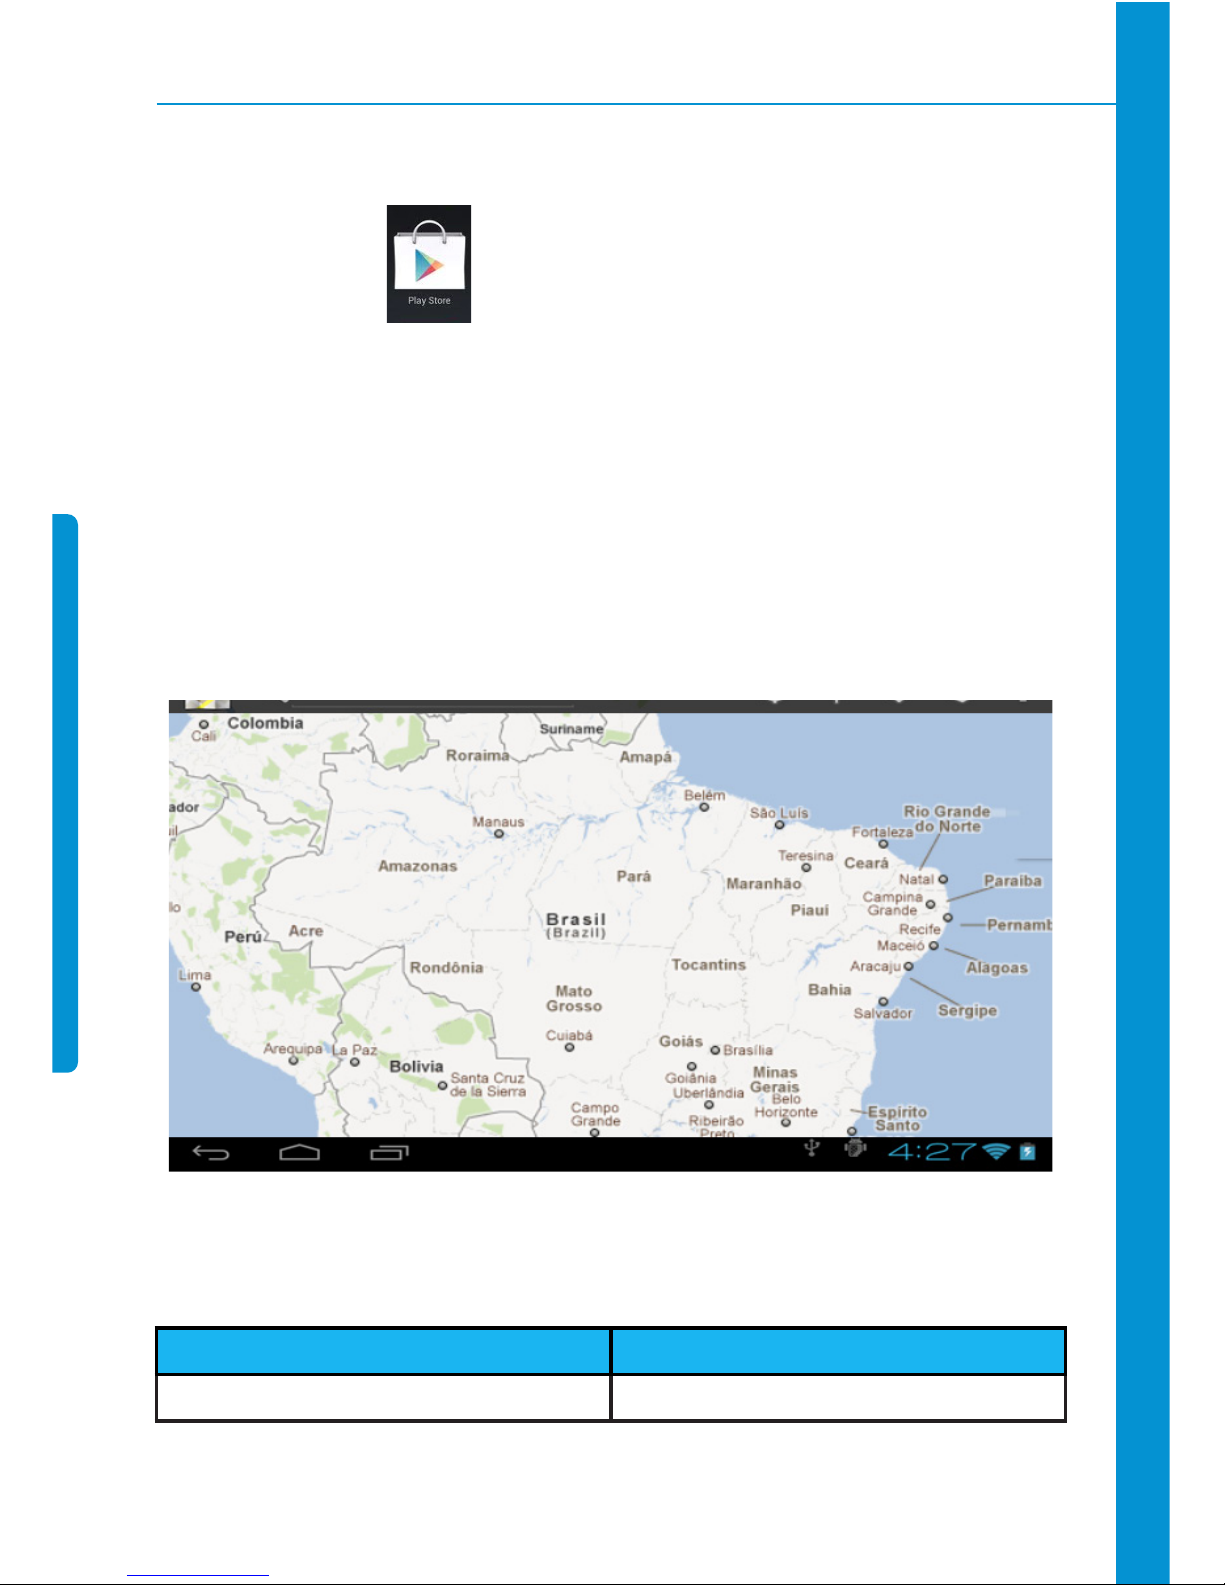
After connecting to the Internet, tap the map icon to open your current posi-
tion automatically; as shown below, you can search desired information.
26. search
Tap : similar to the map function, it can save a large number of environmental
information.
Page 32
32
27. Play Store
Turn on Play Store to query and download applications.
When Play Store is run for the first time, the system will ask to log in with GMAIL ac-
count (if you don’t have a GMAIL account, please apply at http://gmail.google.com).
After downloading, install the applications.
As soon as you open the application, you will need a GMAIL account. Follow the steps
on screen. As soon as you enter the Play Store, you will be able to surf between the paid
and the free applications, thus being able to chose by categories. To buy an application,
click on “Install” or on the price, in case of paid applicatons. As soon as you select the
application, confirm the download and wait untill the status inform the conclusion of the
operation. The downloaded application can be found on Application menu.
28. Specifications
PRODUCT MODEL
Tablet PC DIAMOND LITE
Page 33
33
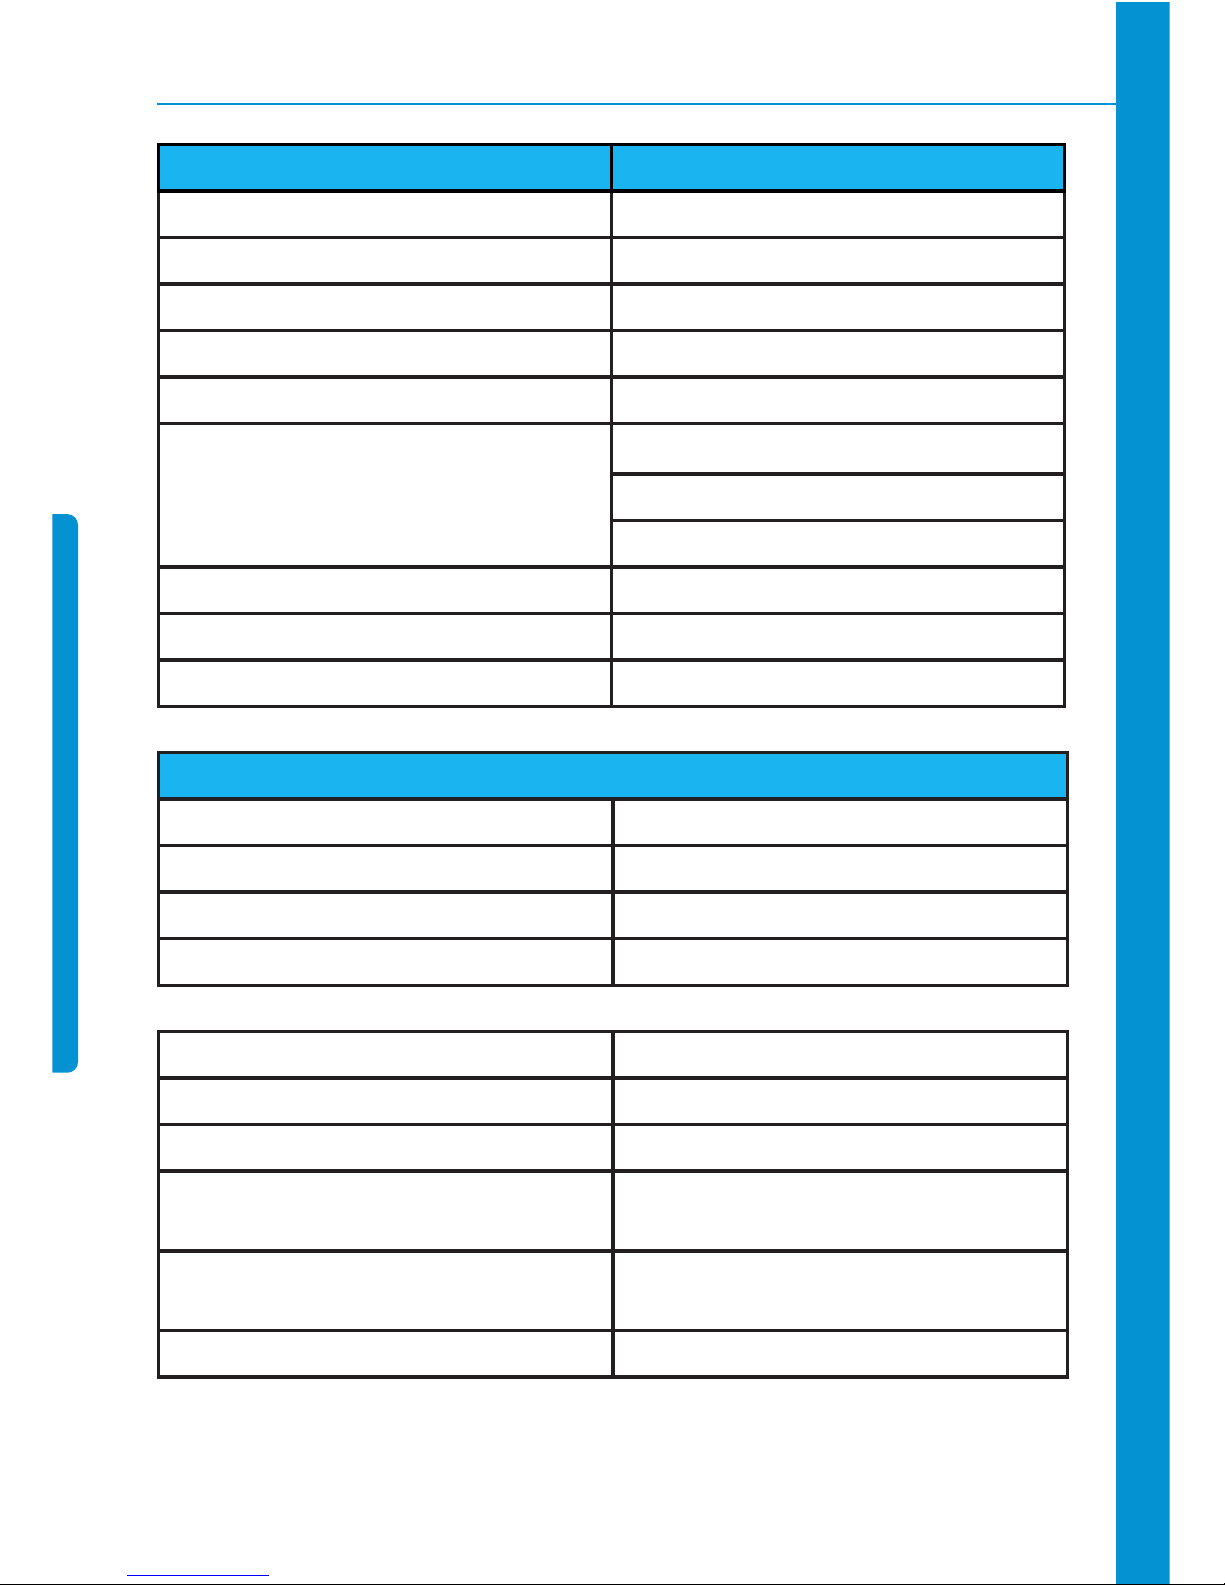
ITEM DESCRIPTIONS
CPU A13 processor of 1.2GHz
RAM MEMORY 512MB DDR3
INTERNAL MEMORY 4GB/ 8GB Optional
OPERATIONAL SYSTEM ANDROID 4.0
BATTERY CHARGING TIME Aprox. 3 HOURS (when device is off)
BATTERY LIFE
Music: 7 horas
Video: up to 4 hours
Navigation: up to 4 hours
SCREEN 7" - Capacitive - 800 x 480 pixels
BATTERY CAPACITY 3.7V 2300 mAH li-polymer
BATTERY CHARGING AC Input AC100 ~ 240V/DC 5V/2A
MINI USB OUTPUT 1
E-BOOK FORMAT PDF/Epub/TXT
IMAGE FORMAT JPG, JPEG, GIF, BMP, PNG
AUDIO FORMAT MP3,WMA,WAV,AAC,QCP,MIDI,MP4A,OG,
FLAC,MP4,MIDI
VIDEO FORMAT AVI,MKV,MOV,TS,RM/RMVB /3GP, MPEG,
DAT, MP4
SAR DISTANCE 10 cm
FUNCTIONS
INTERFACE mini USB
MEMORY CAPACITY Expandable up to 32GB via Micro SD
CONECTION WIFI 802.11 B/G/N
FRONT CAMERA 1.3 MP
Page 34

34
Español
Page 35

35
1. Recomendaciones de empleo
Al emplear su equipo debe poner atención en los aspectos que se indica. Ello reducirá
los riesgos de incendio, golpes eléctricos, y heridas:
· No permita que el equipo se moje en la lluvia o se humedezca.
· Por favor mantenga el equipo alejado de la luz directa del sol y de objetos calientes.
· Proteja el cable de poder. Cuando conecte el cable, no permita que sea pisado o que
objetos sean puestos encima de él. Evite la extrusión. Ponga especial cuidado con el
conector del equipo.
· Por favor use el adaptador original. Usar otro cargador causará daños.
· No desarme el equipo, no intente repararlo usted mismo.
Limpieza del equipo
Toque la pantalla suavemente. Para limpiar huellas o polvo de la pantalla es mejor usar
un paño suave. No use gasa para limpiar el polvo.
Page 36
35
2. Descripción del tablet
cámara
vol +
on/off
vol -
Page 37

35
3. Uso del botón de poder
· Para comenzar: Mantenga apretado el botón por tres segundos.
· Para apagar: Mantenga apretado el botón por tres segundos. > click en off > click en
confirmar
· Pantalla off y on: Clic corto en el botón de poder para presentar u ocultar la pantalla.
· Corte obligado: Si el aparto no responde, click en el botón de poder por seis segundos
para forzar la desconexión.
Recomendación: Si no es estrictamente necesario, no debería usarse el corte
obligado. El corte de poder debería realizarse normalmente de acuerdo a los
pasos estándar.
· Botón reset: Click en el botón “reset” para reiniciar el equipo.
4. Pantalla al tacto
Use la pantalla al tacto según la siguiente guía del usuario:
· Click: Click en un ícono a su elección en la pantalla.
· Mantener apretado: Escoja un ítem y mantenga apretado, entonces puede arrastrarlo
y mostrarlo en el menú del escritorio.
· Arrastrar: Los íconos pueden ser colocados en diferentes interfaces de pantalla arras-
trando el icono entre diferentes interfaces de pantalla.
Para proteger la pantalla, por favor no ponga ningún objeto sobre la superficie
de la pantalla...
5. Conexión de transferencia
Antes de utilizar un dispositivo USB por favor conecte el cable de transferencia
al computador.
Conexión OTG
· Conecte un extremo de la OTG de la unidad flash y el otro extremo al dispositivo de
Page 38
35
Por favor no empuje los cables con frecuencia, ello dañará.
6. Uso de Micro SD
Tarjeta de respaldo de memoria 16GB.
· Inserte la memoria en el puerto de conexión: en la pantalla se desplegará: “SD card
is reading now” (tarjeta SD está ahora en preparación), cuando el mensaje desaparece,
significa que la tarjeta SD está preparada y puede ser usada.
Cancelación de la Micro SD
· Cierre todos los programas o documentos en la tarjeta.
· Cancelar Micro SD: Haga clic en Ajustes > Almacenamiento > Desactivar tarjeta
SD > OK.
Por favor no inserte la tarjeta más de una vez y no la empuje, o dañará la tarjeta.
Use tarjetas de marca para evitar incompatibilidades.
interfaz USB OTG. Puede utilizar la unidad flash cuando esté listo.
Conexión OTG Cable de datos USB
Page 39
35
7. Iniciando para usar
Carga de la batería
· Conectar un extremo de la fuente de alimentación y la interfaz DC de socket a otro
· dispositivo, cuando la batería se está cargando, el icono aparece en la parte inferior
derecha de la pantalla.
· Cuando la batería está totalmente cargada el ícono Batería aparece como: .
Puede usar un cable USB para conectar el PC a la fuente.
Puede usar el aparato mientras se está cargando pero deberá ocupar más tiem-
po en la carga.
Administración de la batería
La batería cuenta con carga incompleta, por lo que se recomienda cargar la batería
durante al menos 5 horas antes de utilizar el dispositivo, o hasta que el icono indica
carga completa.
La vida útil de la batería recargable depende de los tiempos de carga y descarga. Sin
embargo, si usted sigue las instrucciones siguientes puede extender la vida de la batería:
· Use el aparato por lo menos una vez a la semana
· Regularmente, use la batería con plena carga
· No permita que la batería esté sin conexión a poder por un tiempo largo
· Mantenga siempre el aparato y la batería alejados de objetos calientes.
Page 40
35
Preparación para el uso
Mantenga apretado el botón por cinco segundos ( ).
Configuración para redes Wi-Fi
Dado que muchas funciones requieren conexión Wi-Fi, configure la red Wi-Fi antes
de comenzar a usar.
· Click en )> Seleccione el menú WiFi izquierda de la pantalla.
· Las redes disponibles aparecen en el lado derecho de la pantalla> seleccionar la red
que desee y espere hasta que la conexión se realiza por el sistema.
Si usted ve entre redes Wi-Fi, debe introducir una contraseña para
conexión.
· Haga clic en el botón para volver al área de trabajo.
Si la conexión Wi-Fi está oculta, no aparecerá por sí sola. Es necesario apretar
“Agregar red Wi-Fi”, luego ingresar la información relevante para agregar la red
Wi-Fi deseada.
Page 41
35
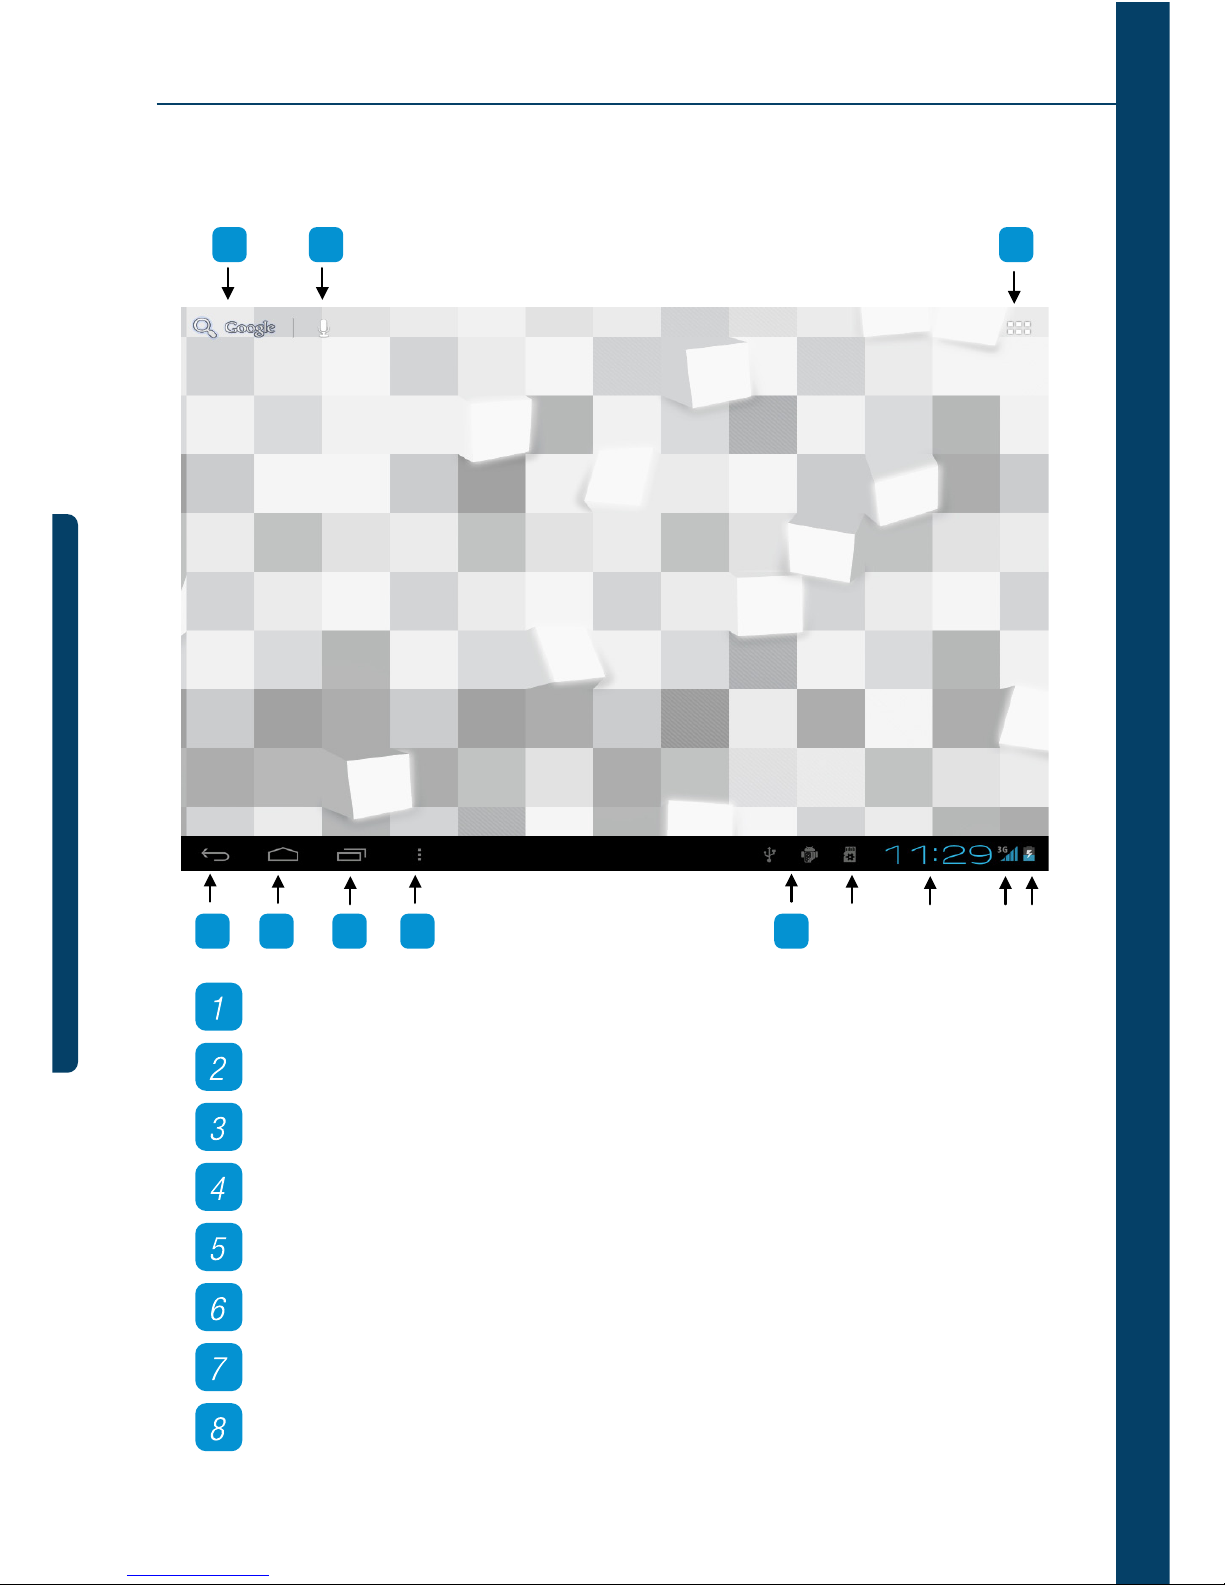
8. Escritorio
1
23
5 6 7 8
A B
C
D
4
Click en para ver todas las aplicaciones
Función buscar voz rápidamente
Interfaz para abrir navegador rápidamente
Volver a la operación actual
Volver a escritorio desde pantalla de aplicación
Seleccionar llave para multi-página
Botón para ir directo Menú de función
Conexión USB
Page 42
35
A: Estado de conexión de Micro SD
B: Hora actual
C: Estado de conexión WIFI
D: Estado de la batería
· Click en cualquier ícono de programa para correrlo.
· Mantenga apretado y arrastre icono, muévalo a otras partes de la pantalla.
· Mantenga apretado por más tiempo y arrastre el icono a para eliminarlo
del escritorio.
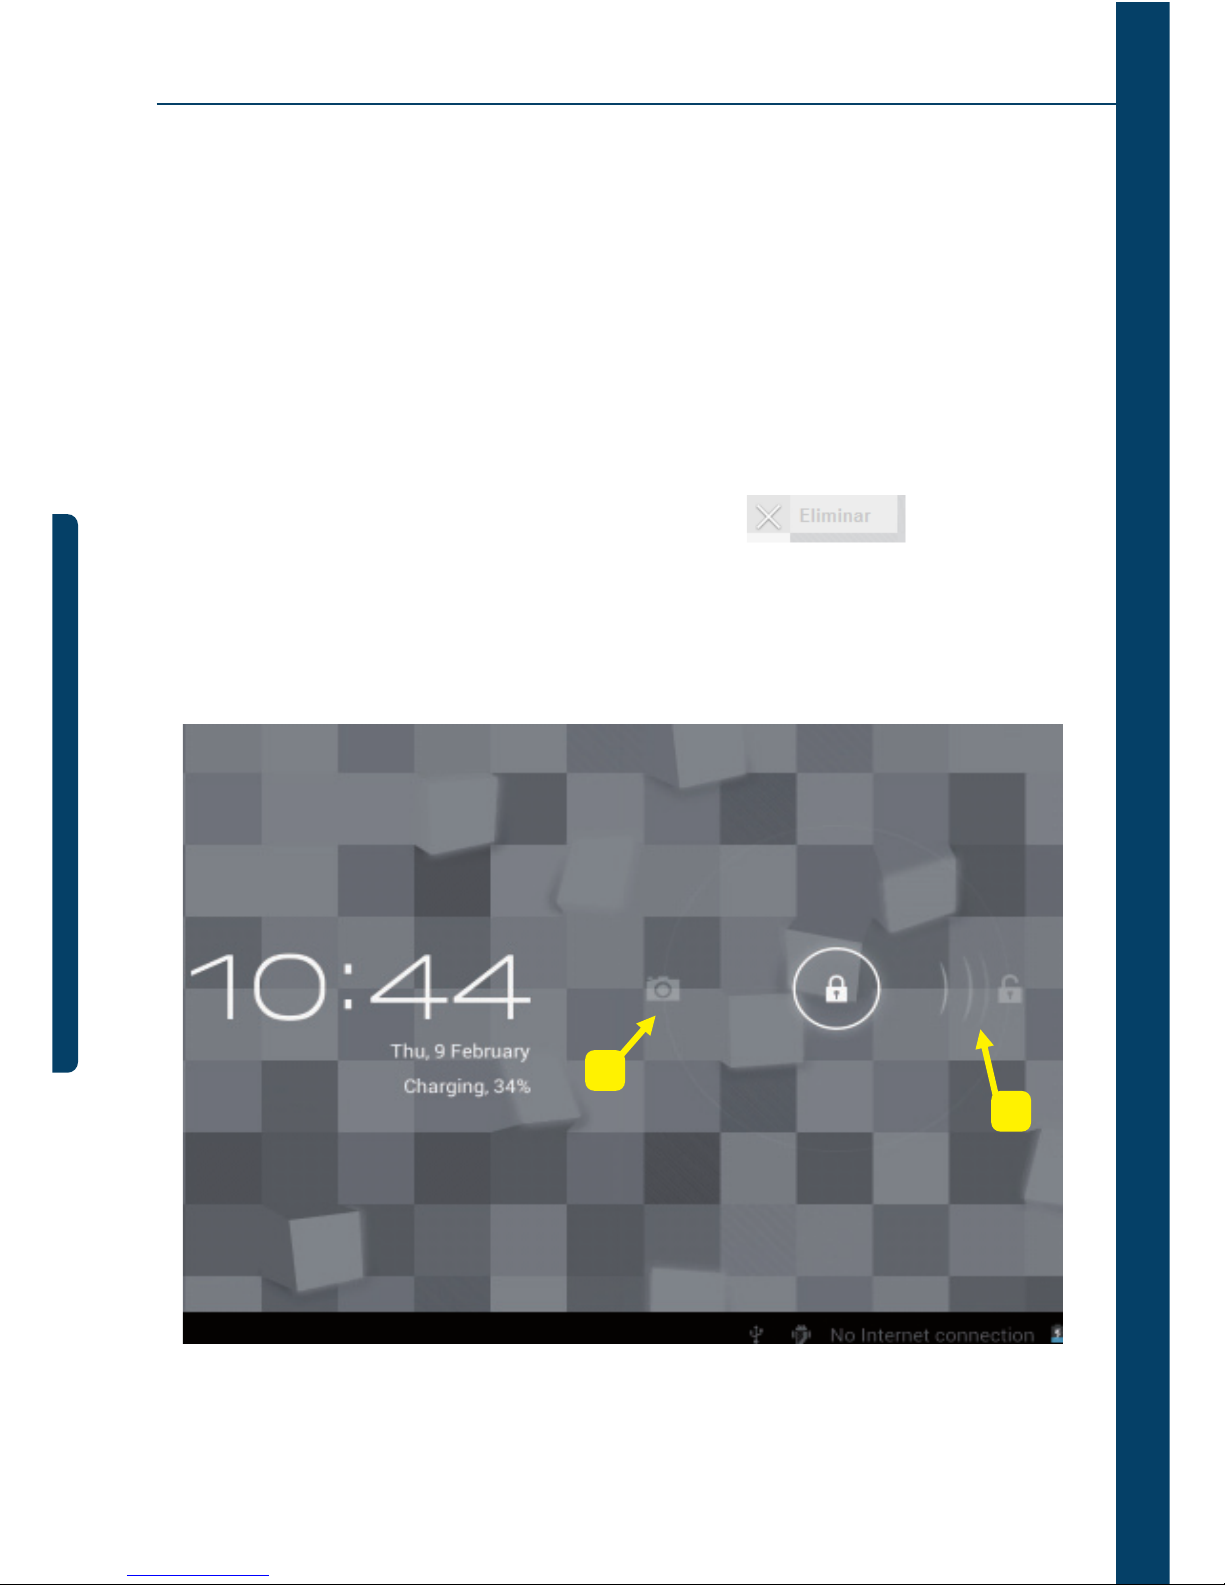
9. Interfaz de Bloqueo de Pantalla
B
A
Page 43
35
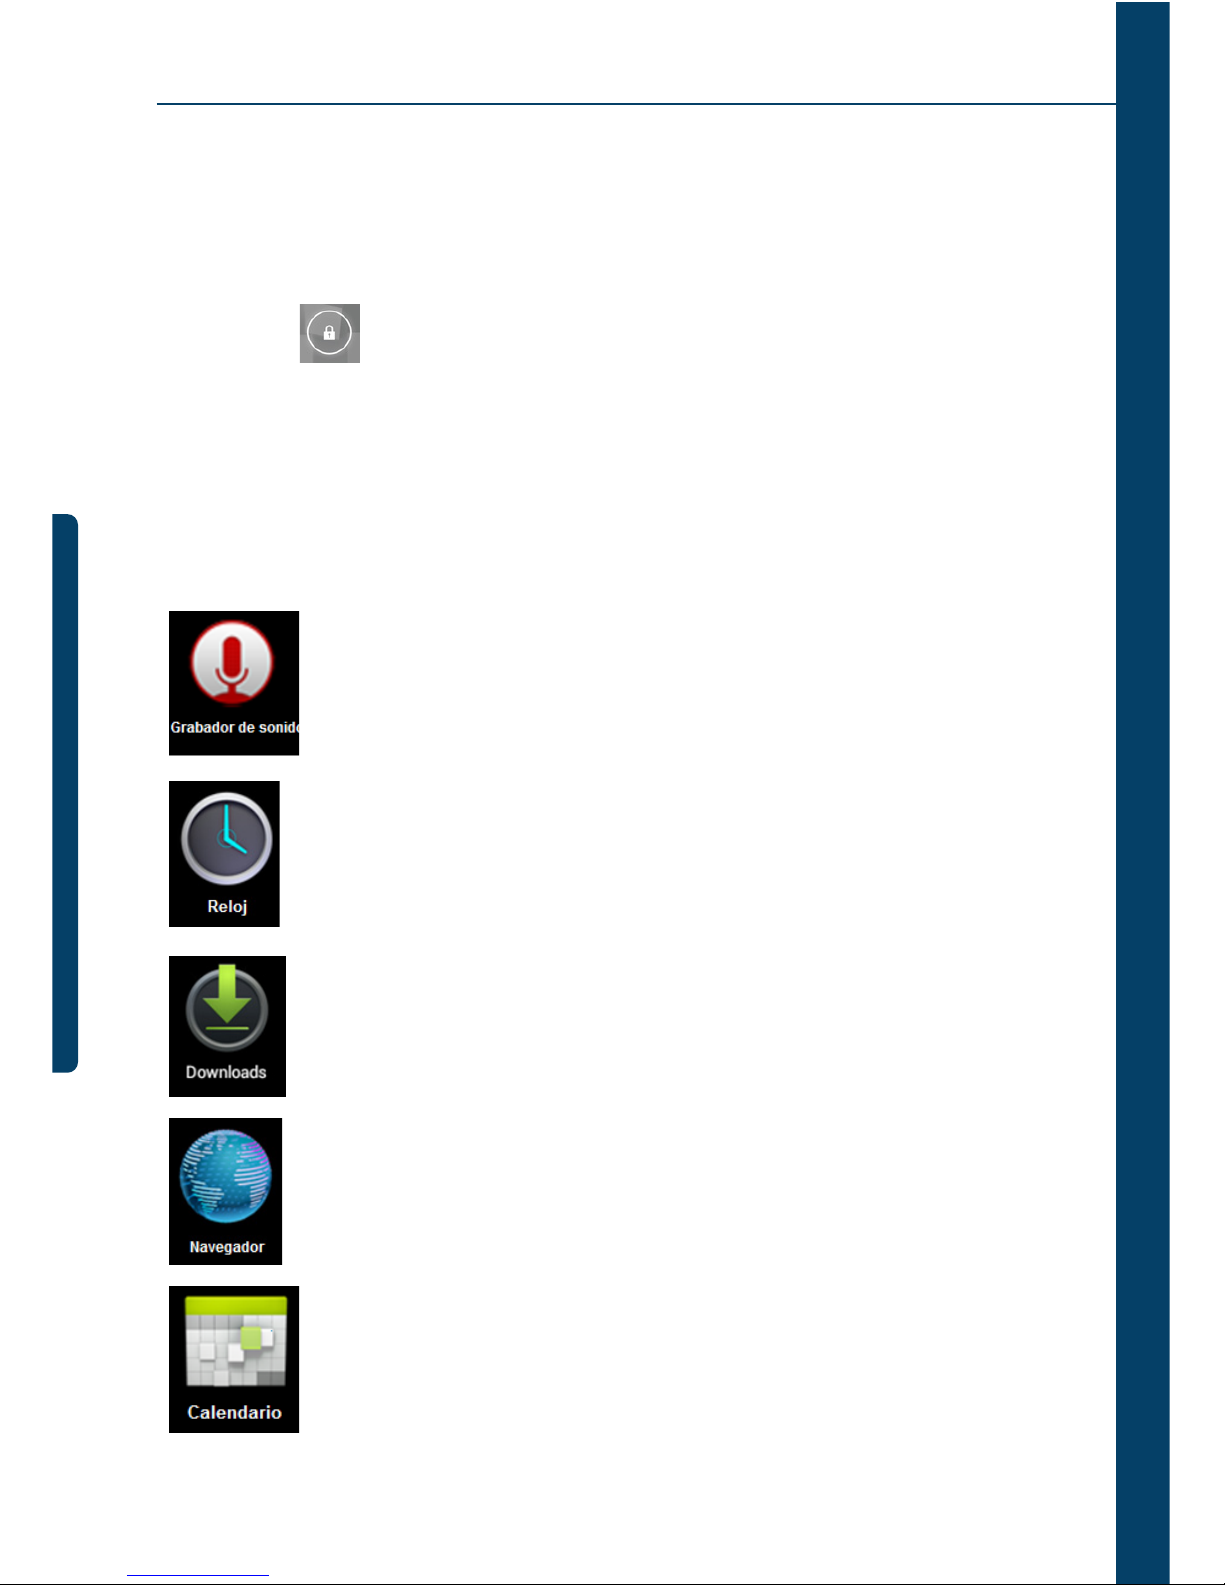
Si pasa un tiempo largo sin usar el dispositivo o aprieta corto el botón de poder, el
dispositivo pasará a estado stand-by (pausa). Hay dos estados: Primero es stand-by dormido profundo, la pantalla del dispositivo se apaga; después, para entrar en la pantalla
de stand-by es necesario apretar el botón de poder, por ejemplo ver el cuadro de arriba,
click en el botón desbloquear.
El switch , desplegará el punto A/B como en el cuadro de arriba, presione A para
usar la cámara, presione B para desbloquearlo, aparecerá como condición B; presionar
el botón desbloquea hacia B realizará la función de desbloqueo, presione el botón de
desbloqueo hacia A para usar la función Cámara.
10. Programa
Grabadora: registre sonidos externos
Reloj: muestre la hora y ajuste la hora
Downloads: instalación rápida de la aplicación bajada
Navegador: conecte al navegador de Internet
Calendario: ajuste el calendario
Page 44
35
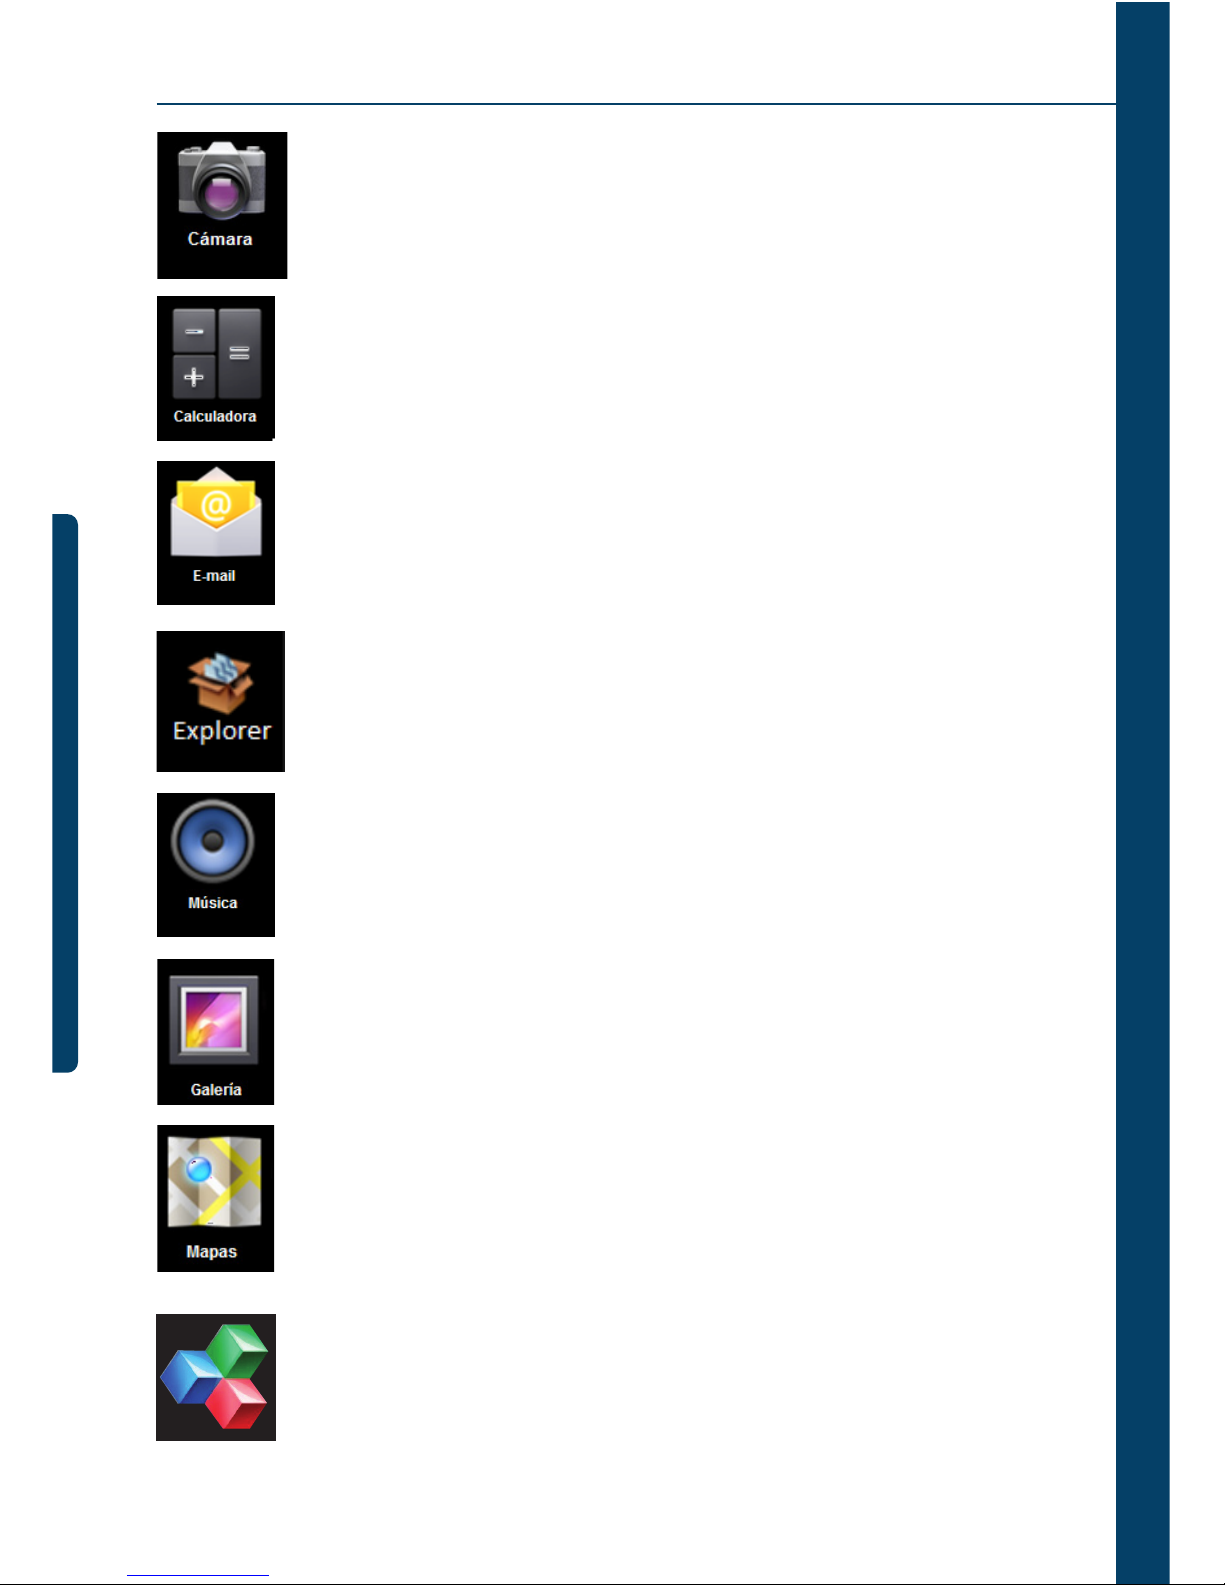
Calculadora: para hacer cálculos simples
Visor de archivos: revise y maneje archivos, instale aplicaciones An-
droid y archivos SP de respaldo
Música: toque y administre archivos de música
Mi Galería: vea y administre archivos Mis Fotos
Mapa: revise su posición local, cuando hay conexión a la red
E-mail: Reciba y envíe e-mails con direcciones existentes
Cámara: tome fotos y videos
Office Suite: visor y editor de documentos.
Page 45
35
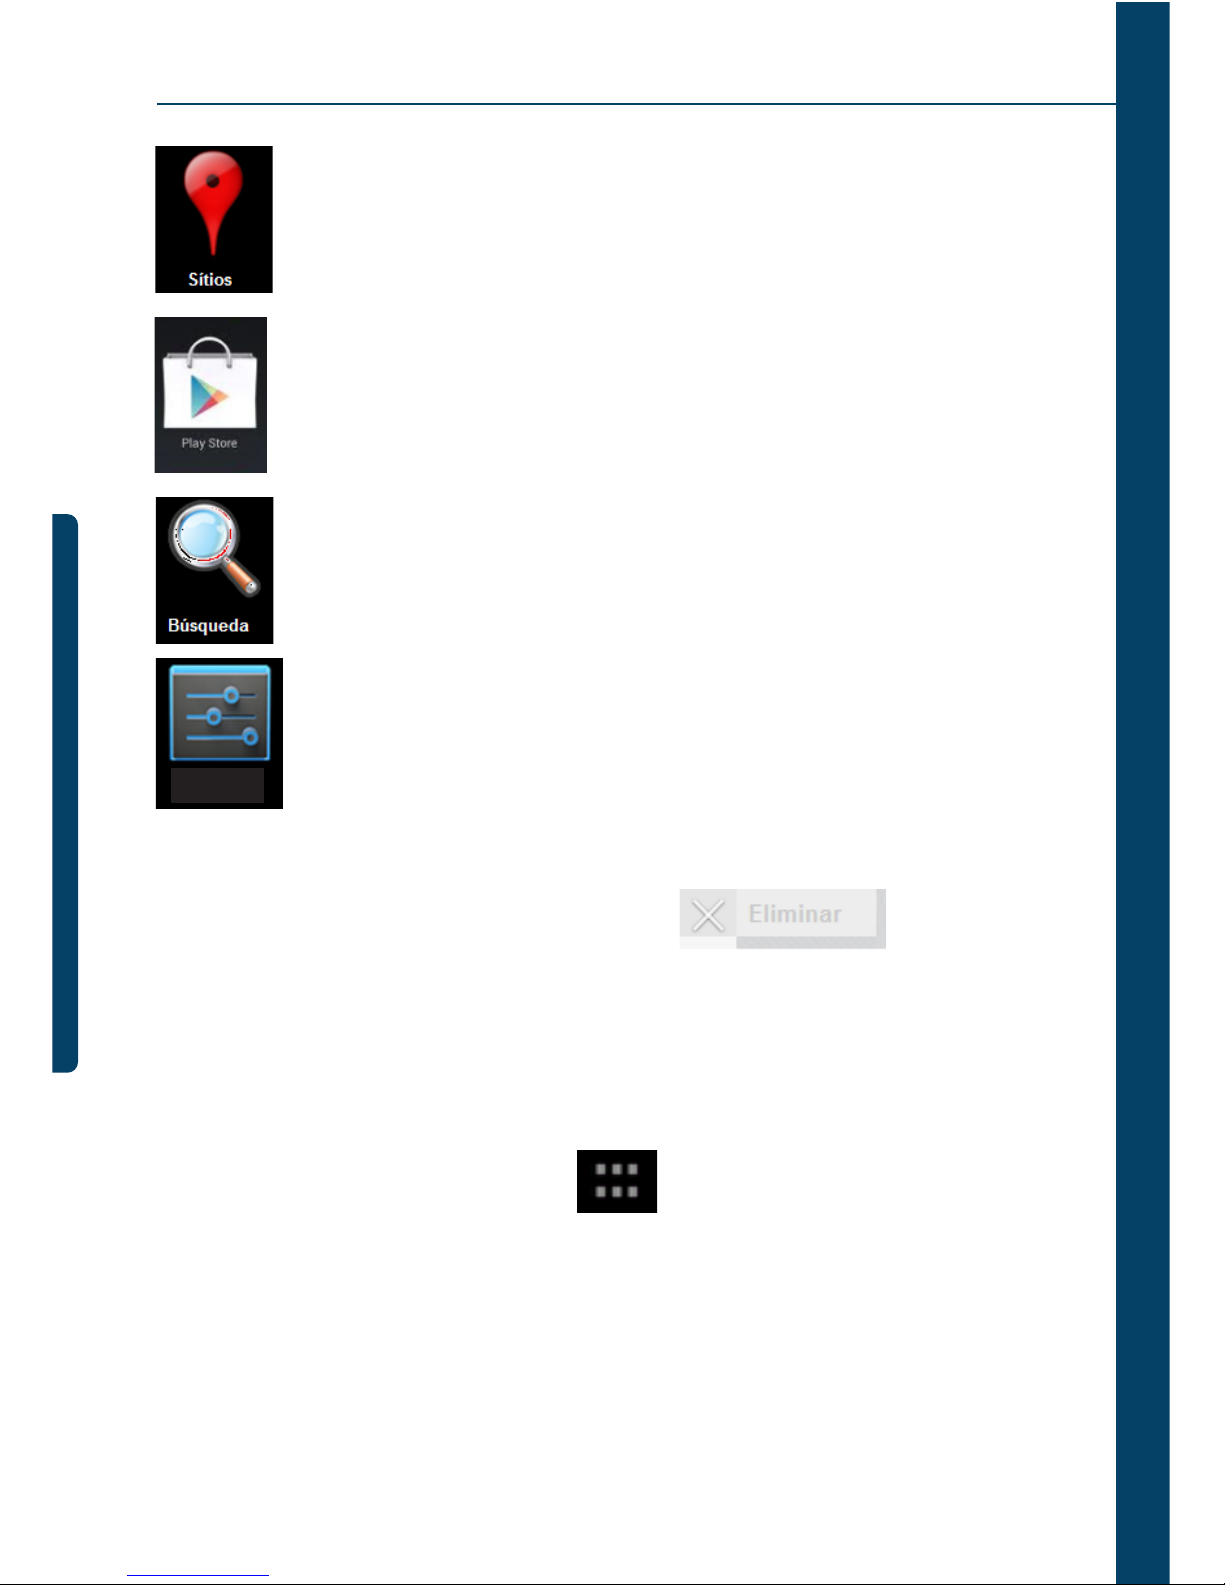
Mantenga apretado para arrastrar el icono.
Configuración: Defina especificaciones de su sistema
Mantenga apretado un ícono y déjelo en para eliminarlo
del menú
11. Menú
En el área de trabajo, utilice el botón situado en la parte superior derecha de
la pantalla para que aparezca el menú de aplicaciones.
En este menú, puede cambiar la configuración del dispositivo o ejecutar las aplicaciones del escritorio, la ejecución de la aplicación se producirá automáticamente cuando la
aplicación está seleccionada.
online.
Play Store: ingrese para bajar aplicaciones, juegos, etc.
Búsqueda: busque herramientas, busque cualquier cosa que necesite
Ajustes
Page 46
35
12. Programa de aplicación
Instalar aplicaciones:
Una gran cantidad de Aplicaciones interesantes y gratuitas están disponibles en
Internet, basta con buscarlas por las palabras clave de “aplicaciones Android”.
Las aplicaciones Android que usted baje serán almacenadas en usted puede
instalarlas fácilmente:
· Copie la aplicación apk a un dispositivo SD o USB > Ponga la tarjeta SD en el Tablet o
conecte el dispositivo USB con el Tablet.
· Click en el logo del administrador de archivos .
· Click o encuentre el archivo con apk.
· Haga clic en “tarjeta SD” o “USB” y busque el archivo apk.
· Una vez que está instalado exitosamente, el icono de la nueva aplicación aparecerá en
el menú.
· Click en ícono para correr la aplicación o en Finish (Fin) para retornar a la interfaz del
buscador.
Para bajar aplicaciones desde Internet
El usuario podría bajar cualquier aplicación Android desde Internet e instalarla en for-
ma sencilla y rápida.
· Click para buscar aplicación en Internet.
· Introduzca la dirección del sitio, click en el botón “Download” (descarga) para bajar la
aplicación.
Page 47
35
· Una vez finalizada la descarga, mantenga apretado el botón de la aplicación (que fue
grabado en la historia de descarga) > Click y abrir > install.
Conectar a PC y grabar archivos
· Conecte el Tablet con PC usando cable USB. Un extremo va en el puerto USB OTG, el otro
se conecta al puerto USB del PC.
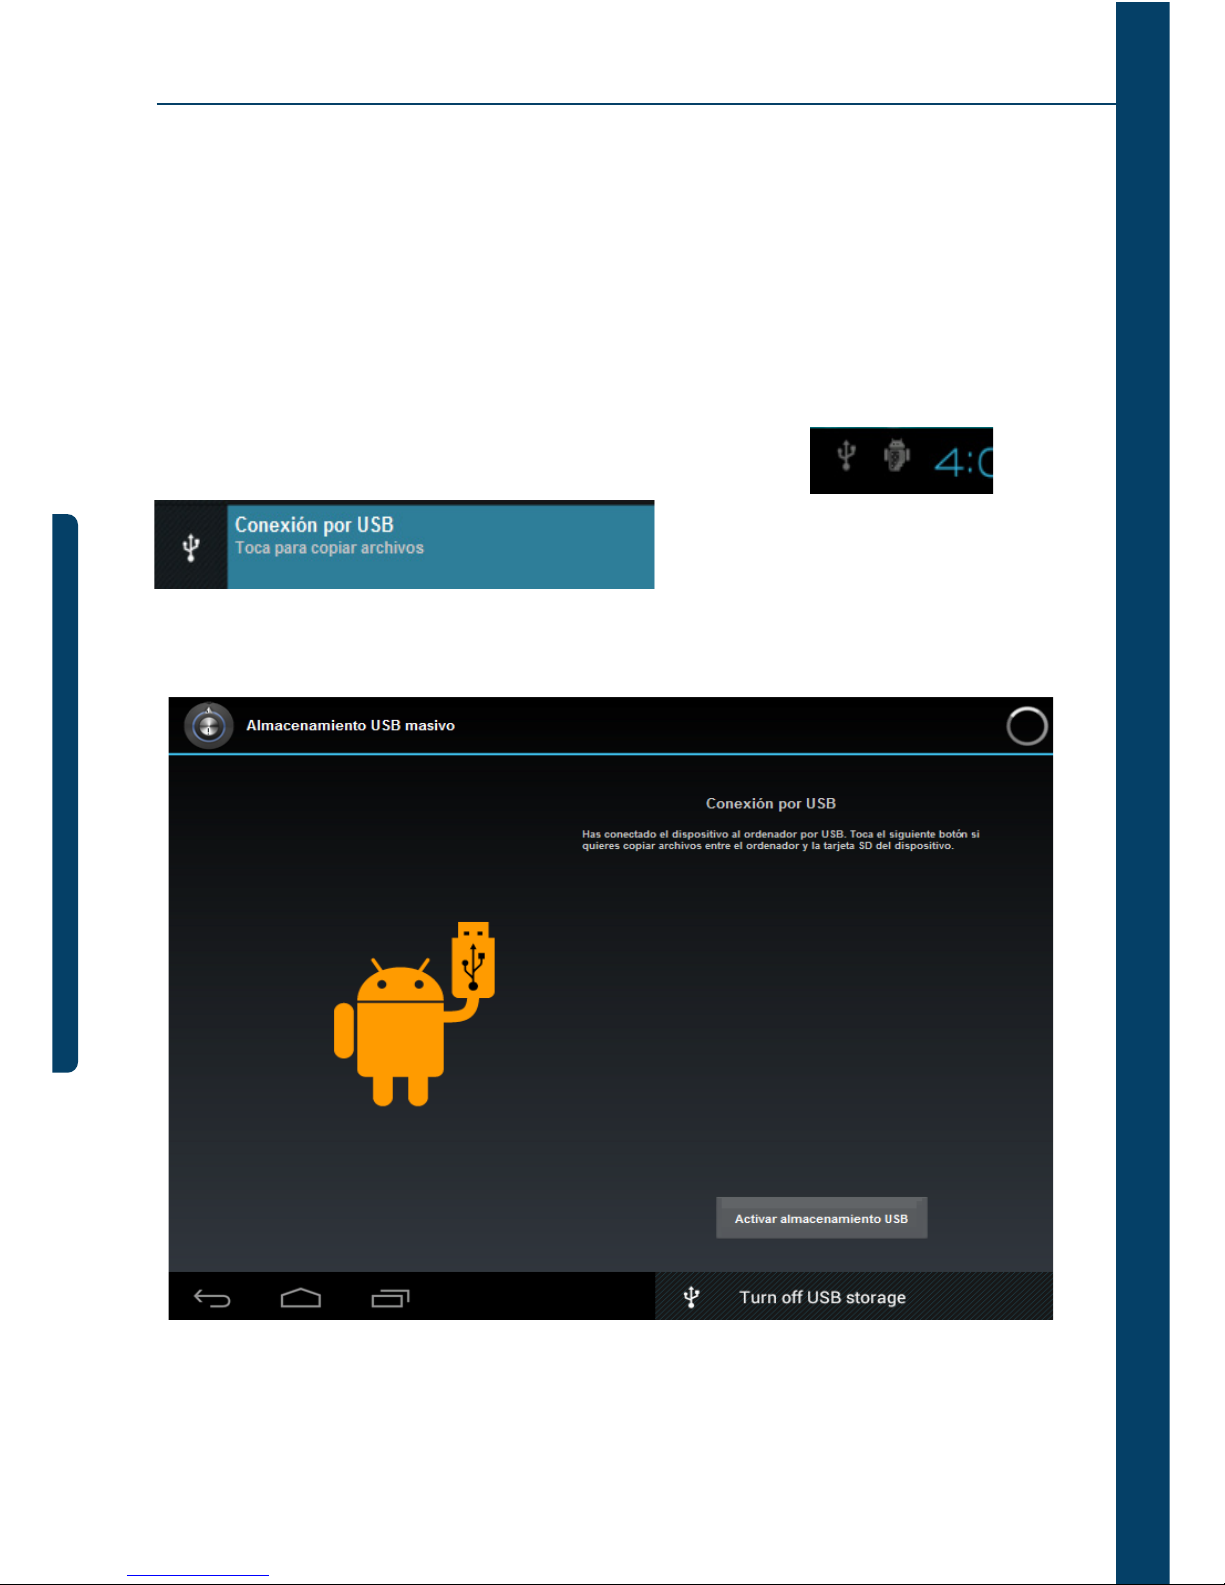
· Una vez conectado, se desplegará la imagenn , elija
para correrla, luego click en “Turn on”
(conectar) en el dispositivo USB, ahora el usuario puede intercambiar información entre el
PC y el dispositivo Tablet como se muestra abajo:
Page 48
35
Desinstalar aplicación
El usuario puede desinstalar fácilmente aplicaciones Android como se muestra abajo:
· Haga clic en Menú> Ajustes> Aplicaciones
· Elija la aplicación > “uninstall” (desinstalar)
· Click “Yes” (si) para confirmar la desinstalación
13. Registro de Sonido
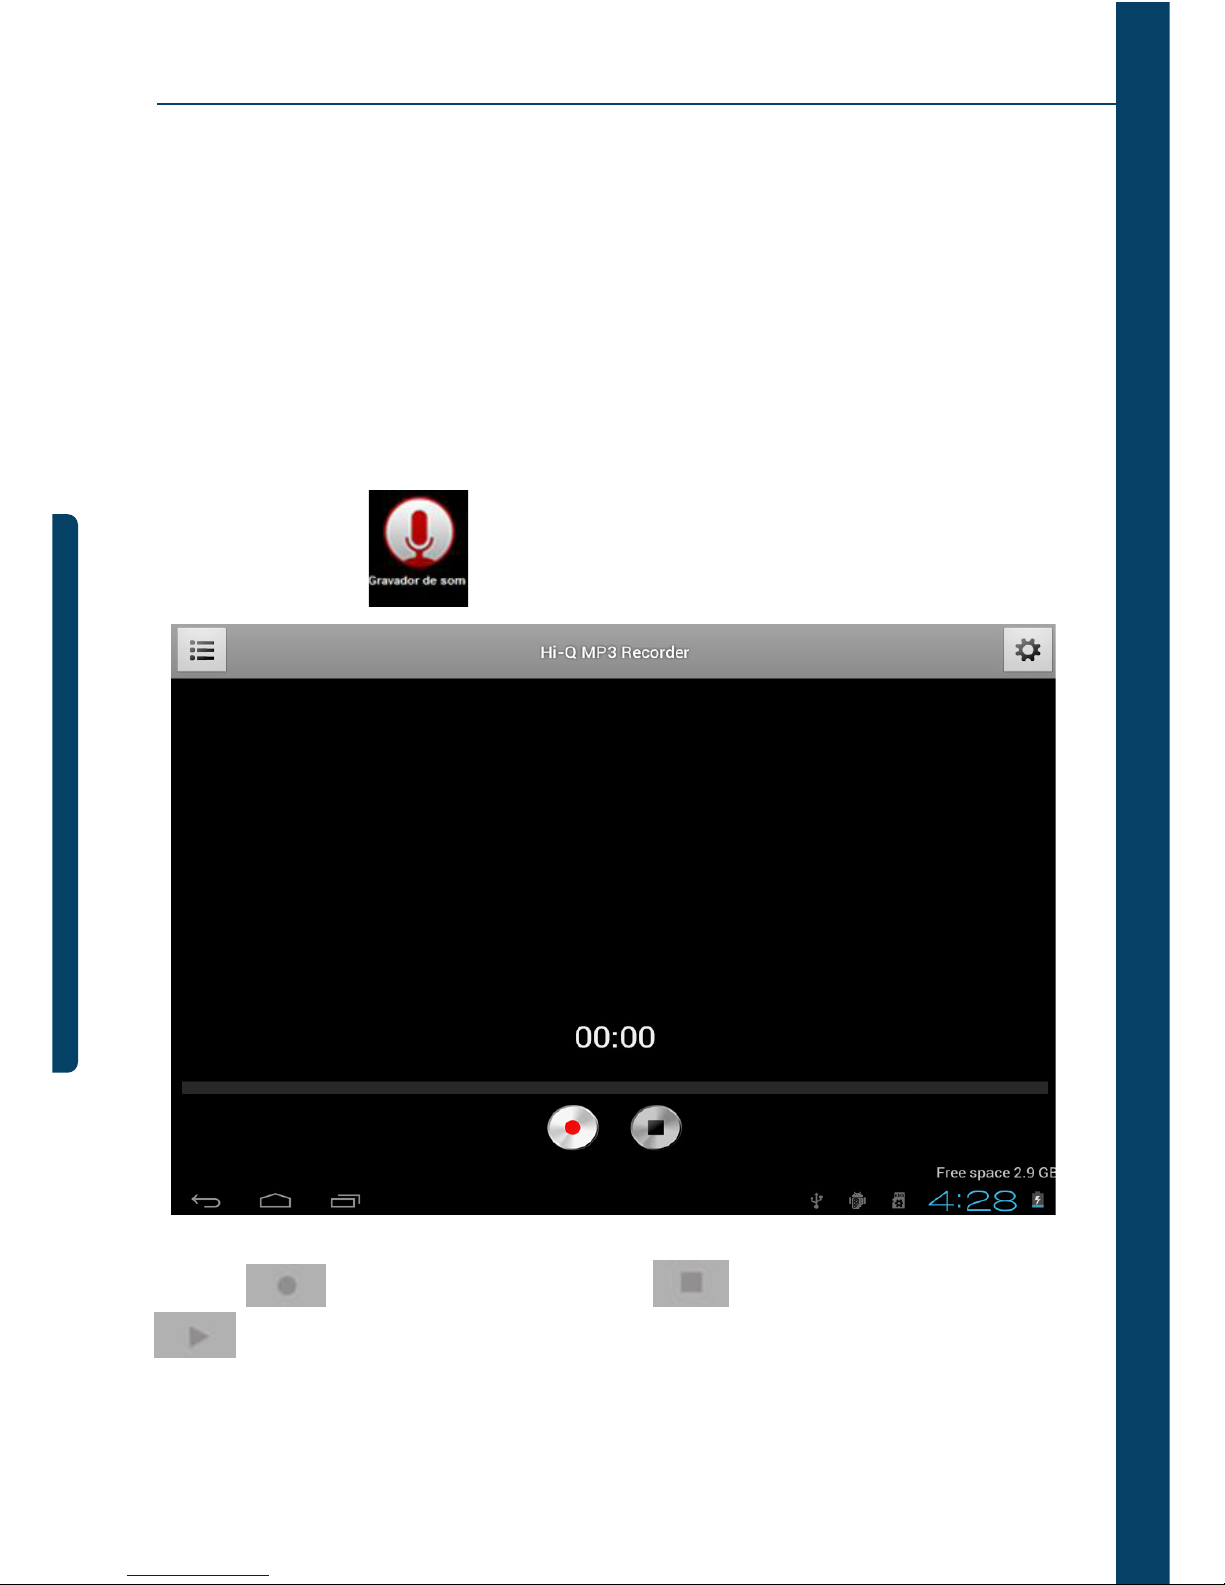
Click en el icono y el display aparecerá como se ve abajo:
Click para comenzar a grabar, click para detener la grabación, click
para ver el archivo grabado, los nombres de los archivos serán datos
de acuerdo con el tiempo de grabación. Para borrar la grabación reciente, haga clic en
“Descartar”, para almacenar la grabación, haga clic en “Finalizar”.
Page 49
35
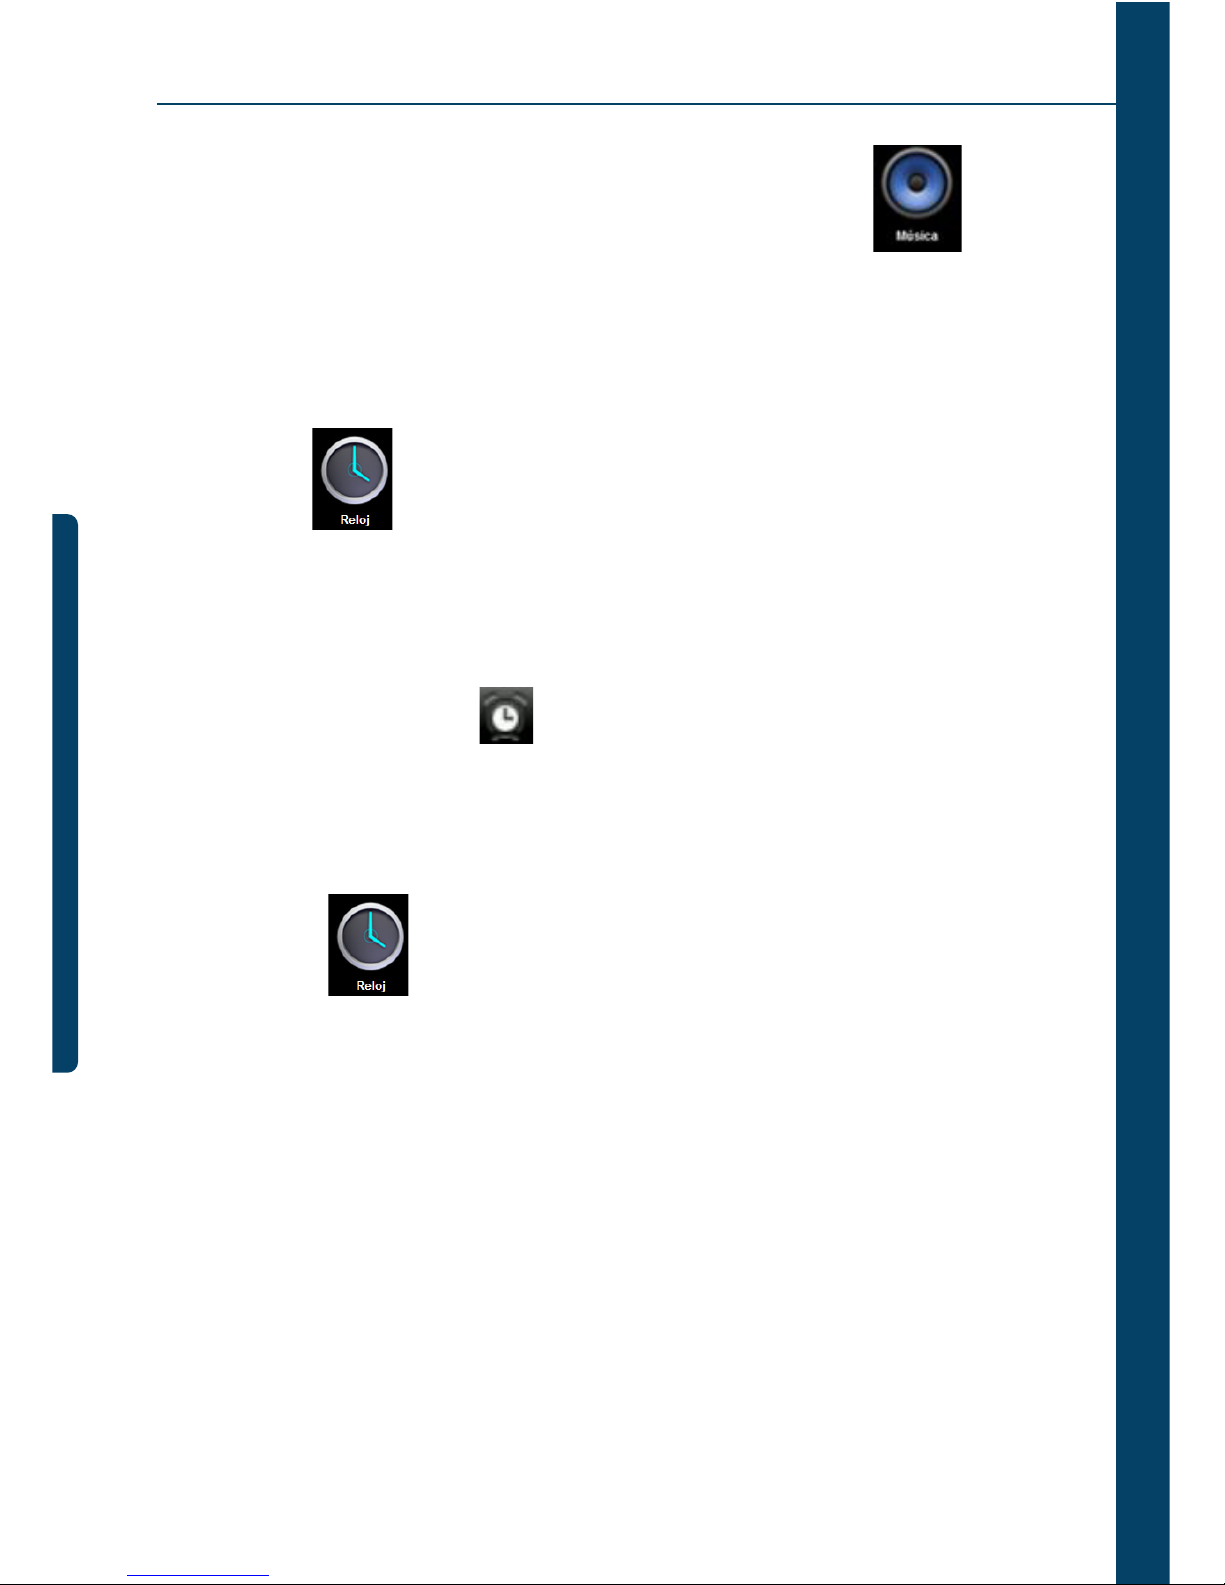
Para ejecutar la grabación, vaya a mene, seleccione la aplicación , el menú
superior, seleccione la opción “Listas”> Mis grabaciones, simplemente haga clic en el
registro deseado para iniciar la ejecución.
14. Reloj
Click ícono el usuario puede verificar la fecha y hora actuales.
Reloj de alarma
Varios relojes de alarma pueden existir en el mismo Tablet.
Cuando aparece el icono en la parte superior de la pantalla, significa que
al menos un reloj de alarma está funcionando.
Agregar nuevo reloj de alarma
· Click en icono .
· Click en botón Menú > add clock (agregar reloj)
· Configurar el nuevo reloj de alarme.
Si no configuró “repeat” (repetir) la alarma funcionará en la hora especificada,
luego el sistema auto-borrará la información.
Click para empezar a usar el Nuevo reloj de alarma.
· Terminar
Deshabilitar el reloj de alarma
· Cuando el reloj está conectado, aparecerá una ventaba con “Clock” (reloj).
Page 50
35
· Si el usuario necesita la alarma nuevamente después de 10 minutos, clic “Pause” (pau-
sa).
· Click “Cancel” (cancelar) para detener la alarma.
Habilitar el reloj de alarma
Cuando el reloj de alarma está configurado en repetir, generalmente el usuario nece-
sita suspenderlo, no apagarlo:
· En la interfaz de Clock (reloj) > click icono para suspender este reloj de alarma.
· Click para reanudar.
Editar el reloj de alarma
· Click > click .
· Entre al reloj que necesita editar > reset.
Desconectar reloj de alarma
· Click icono > click .
· Abra el reloj de alarma que necesita eliminar.
· Elija “delete it” (eliminar)
· Click para retornar al escritorio.
Page 51
35
15. Descargar aplicaciones e instalar
· Click icono .
· El usuario pude verificar e instalar las aplicaciones disponibles desde el PC.
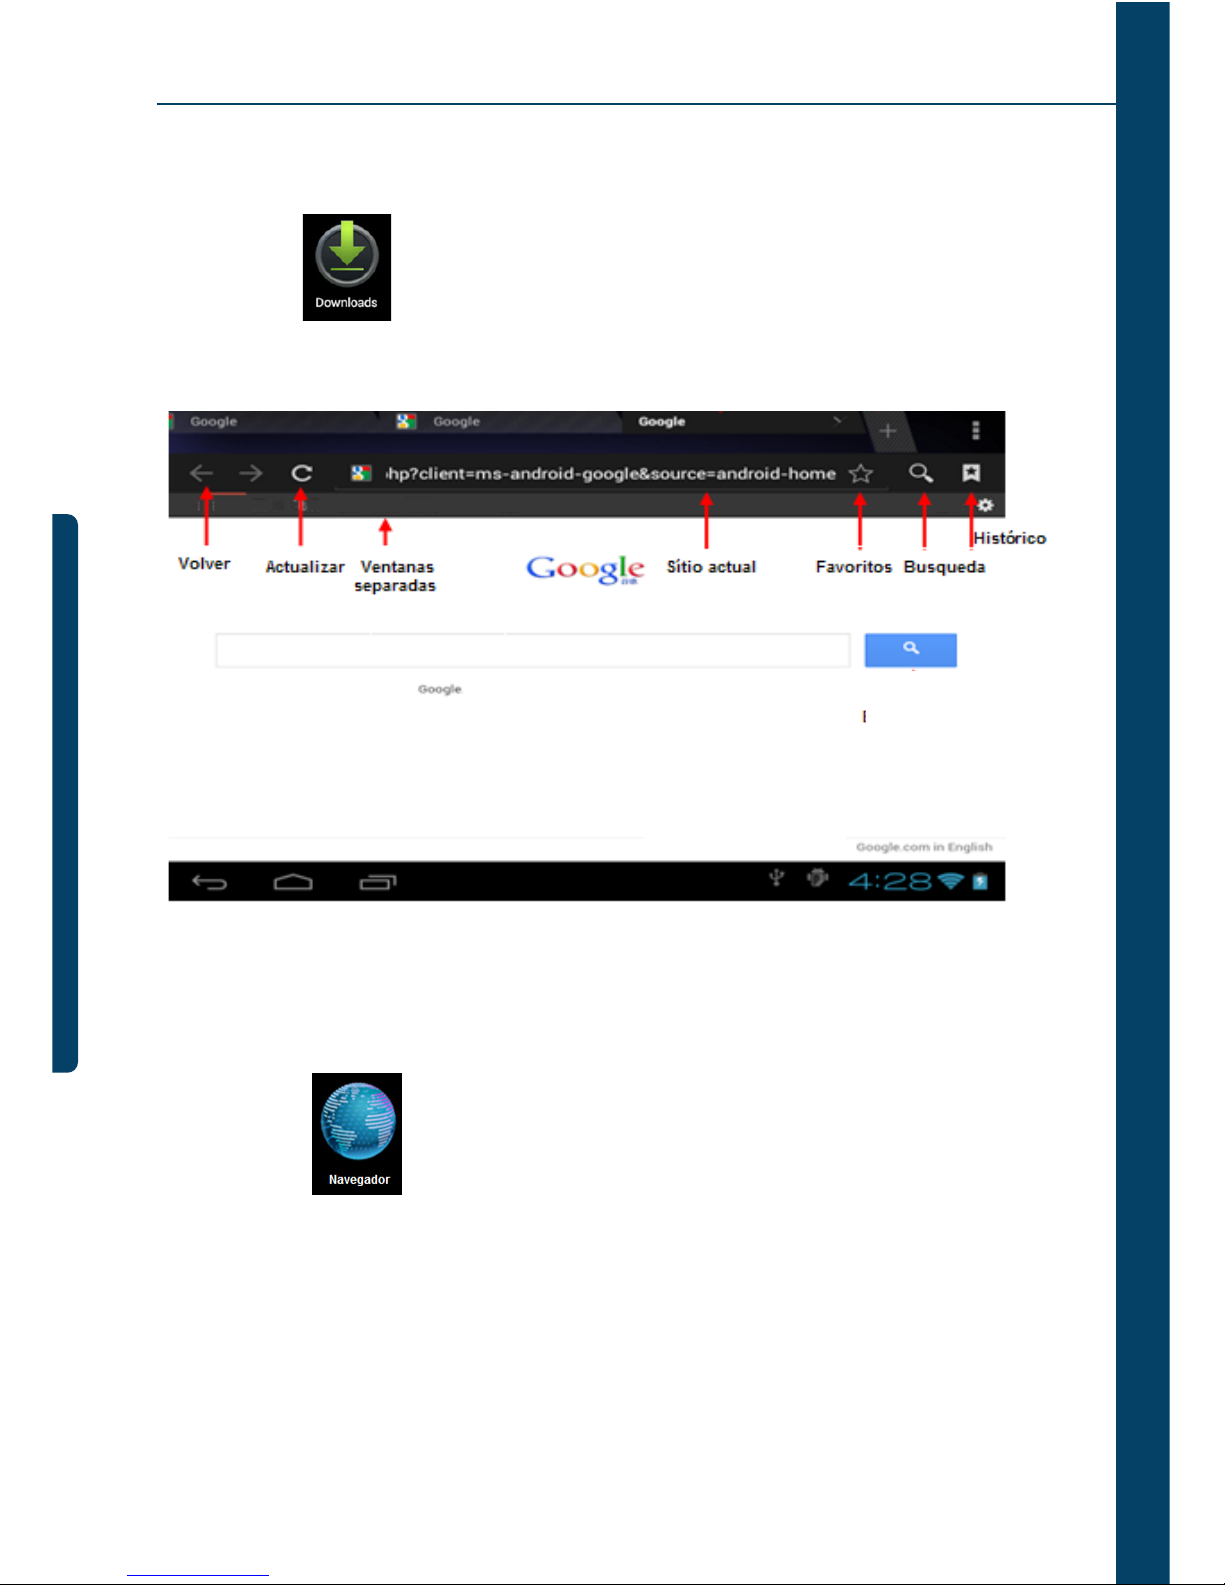
16. Buscador
El buscador permite al usuario acceder a Internet.
Click icono para abrir Internet.
Page 52
35
17. Calendario
Click icono programa de calendario.
La primera vez que se usa el calendario es necesario agregar una cuenta de intercambio. Ingrese la dirección E-Mail de la cuenta y la contraseña. Luego Click, según la
configuración rápida deseada, ahora el calendario puede ser ocupado.
Nuevas actividades
· En el interfaz de calendario, click en nuevas fechas de eventos que desea construir.
· Elija la hora de la actividad – coloque detalles relevantes de la actividad en cada campo
· Click “finish” (final).
Cuando el color del display es gris, significa que hay agenda para el día.
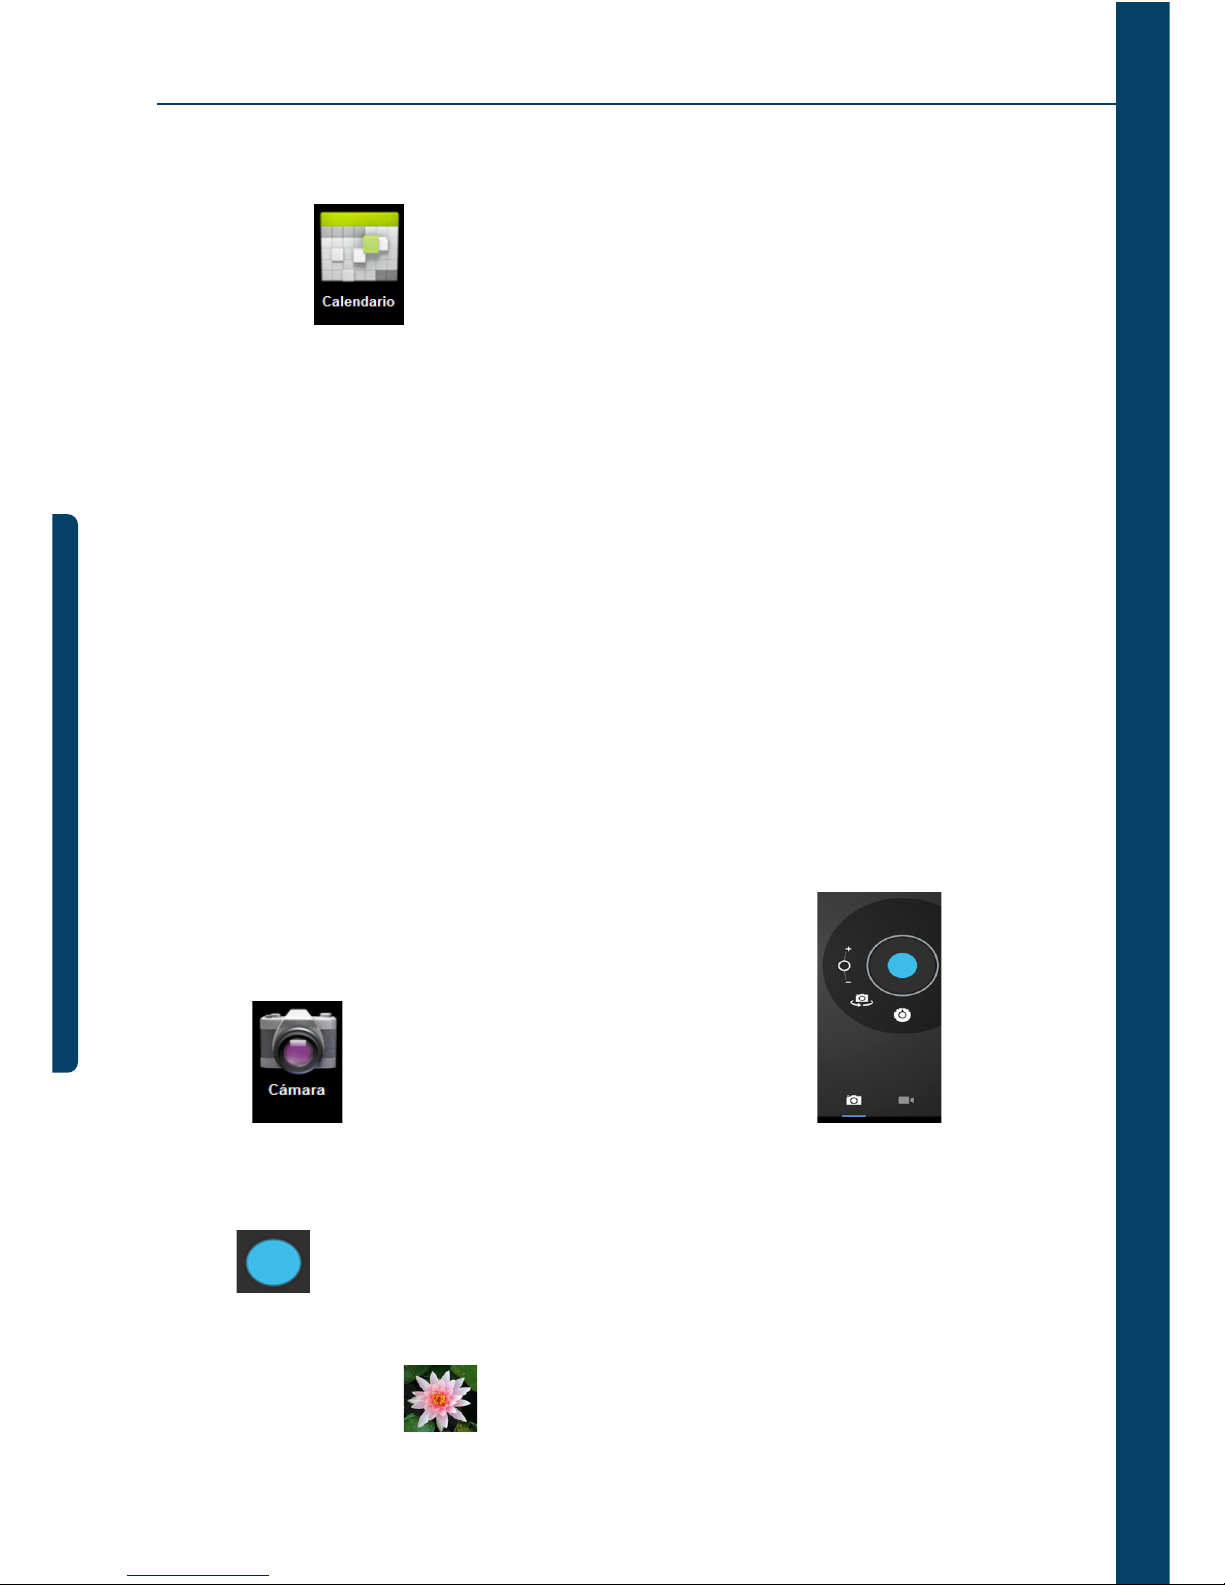
18. Cámara
Click para abrir la cámara, luego el icono “display” .
Tomar fotos
· Click para tomar fotos.
· Las fotos serán grabadas.
· Click en la miniatura para entrar en Mi Album para ver fotos.
Page 53
35
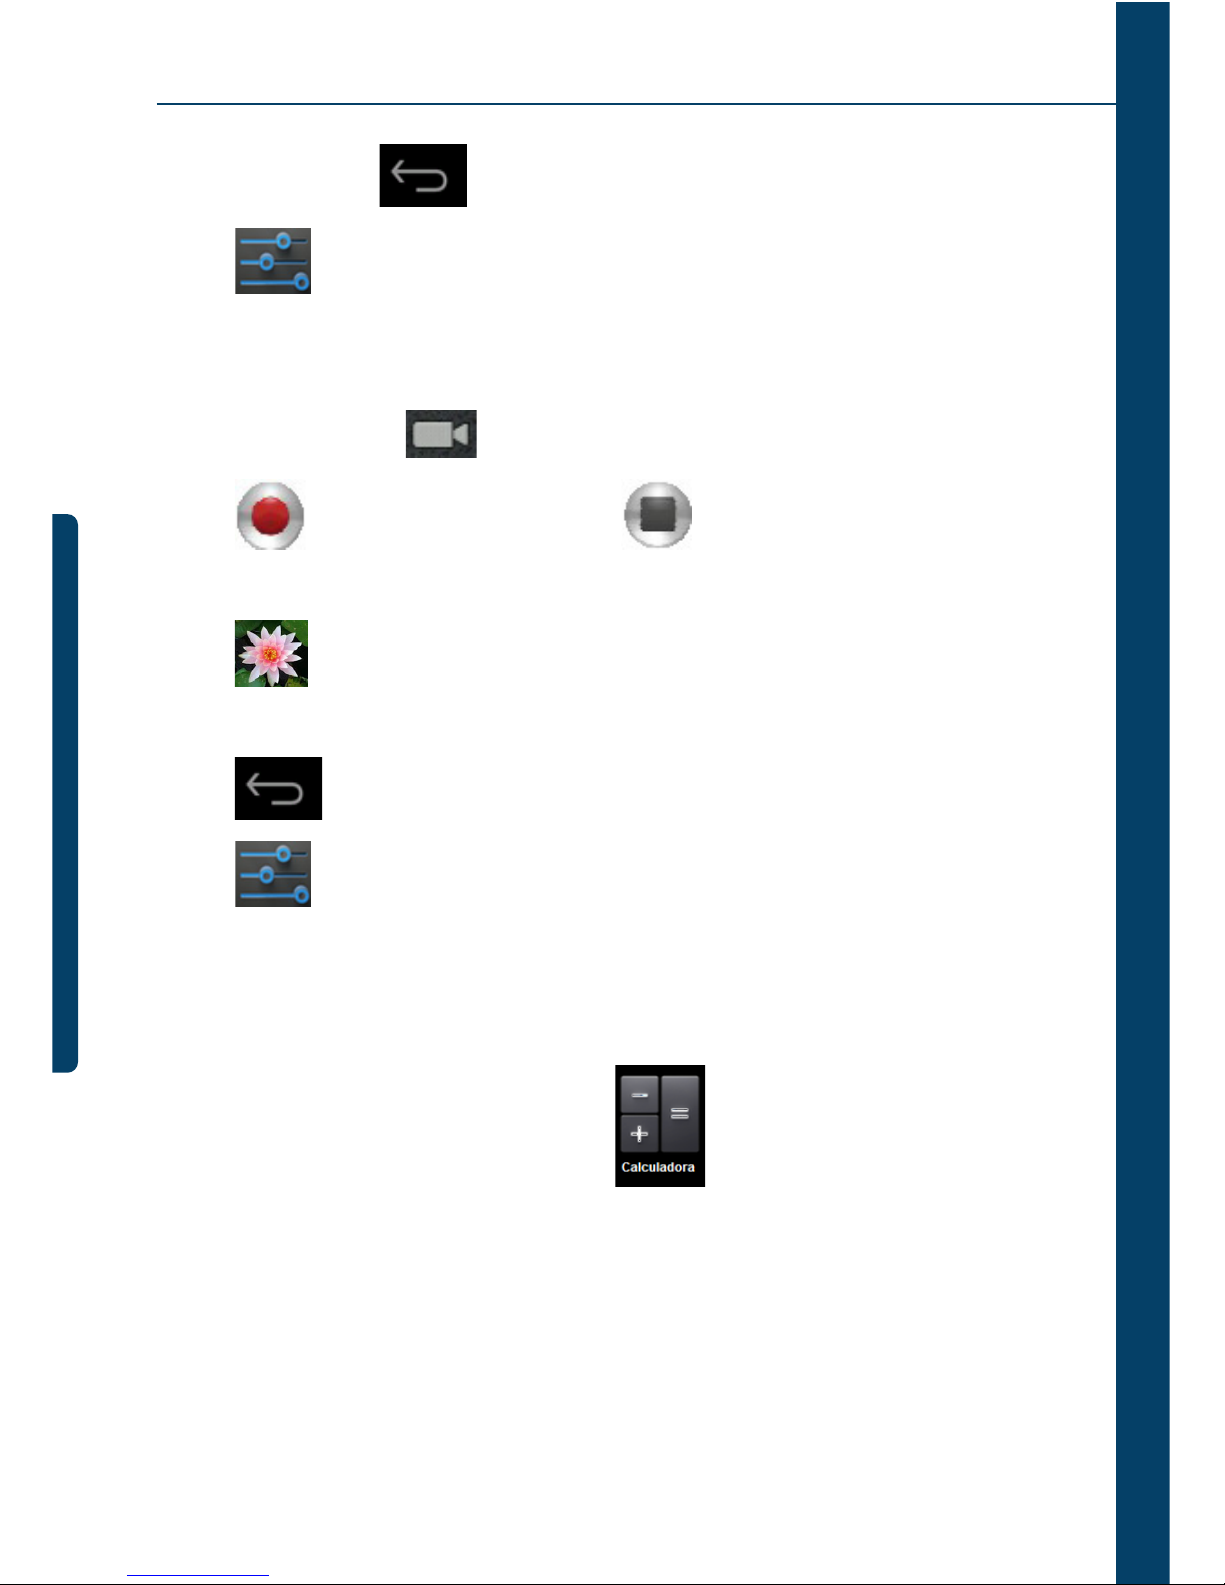
· Click ícono “back” para retornar a la cámara.
· Click para configurar la cámara.
Grabación de Videos
· Click en el interruptor para Video.
· Click para comenzar a grabar, click para pasar el video.
· Click icono “back” (atrás) para retornar a La cámara.
· Click para pasar el video.
· Click icono “back” (atrás) para retornar a La cámara.
· Click para salir de la cámara y volver a la interfaz UI.
· Click para realizar la configuración del video.
19. Calculadora
· Click en el icono programa de calculadora .
· Click en números y símbolo operacional para comenzar a calcular.
· Click “remove” para borrar todos los displays.
Page 54
35
20. E-mail
Soporta cuentas POP3 y SMTP.
Agregar cuenta E-mail
Usted puede ingresar una o más cuentas para usar en el dispositivo.
· Click el icono del programa E-mail.
· En la interfaz de su cuenta, click “next” (siguiente).
· Click las opciones de dirección de E-mail, > ingrese su dirección de E-mail.
· En las opciones de Password (contraseña), > entre sus contraseñas de E-mail.
· Click “finish” (fin)
Configuración manual (opcional): la configuración del servidor permite ingresar el pro-
veedor de E-mail (como gmail.com) de acuerdo a su cuenta de E-mail. Si necesita revisar
el la configuración del servidor, podría hacerlo hacer click en “manual setup” (configuración manual) para hacer cualquier cambio.
· Click “Next Step” (próximo paso)
· Opcional: Ingrese el nombre de la cuenta
· Se desplegará el nombre de la cuenta cuando envíe y reciba E-Mail, click “Finish”
(terminar)
Si después de configurar usted no puede conectar a una cuenta de E-mail libre,
por favor contacte a sus proveedores locales de E-mail para confirmar si su
servidor soporta convenio de transmisión (POP) y (SMTP)
Inbox (Bandeja de entrada)
· Click ícono de programa E-mail.
· Si solamente agregó una cuenta de E-mail, se abrirá de inmediato. Si agregó varias cuentas de E-mail,
Page 55
35
se desplegará la lista de cuentas.
· Click en la cuenta de E-mail que desea revisar > Click “Inbox”
Abrir E-mail
· En la bandeja de entrada, click E-mail para abrirlo.
· Respecto a los adjuntos, click “open” (abrir) para iniciar la aplicación relacionada o click
“Save” (guardar) para grabar el adjunto en la tarjeta SD.
· Para responder, click “reply” o “reply all” (responder o responder a todos)
· Click “delete” para borrar E-mail.
Componer nuevo E-mail
· Click > ícono “Compose” (componer).
· Click “ To” (para), luego agregue la dirección E-mail de destino.
· Si es necesario, Click “Menú” para agregar adjunto.
· Terminado el E-mail, click “send” (enviar).
Editar cuenta de E-mail
· Click el ícono de programa E-mail.
· Elija “Account Setting” (configuración de cuentas) del “Menú”
· 3. Una vez completada la configuración, click .
Borrar cuenta de E-mail
Si usted tiene varias cuentas y borró la cuenta por defecto en la configuración,
la próxima cuenta se convertirá automáticamente en la cuenta por defecto...
Page 56
35
· Click el icono de programa E-mail
· 2. En la interfaz de bandeja de entrada, click “Menu “ para elegir “account” (cuenta)
· 3. Click y mantenga el E-mail que desea eliminar
· 4. Cuando aparece “Account options” (opciones de cuentas), click “Delete account”
(borrar cuenta)
· 5. Click en el icono “Confirm”.
Definir la cuenta de E-mail por defecto
Usted debe tener siempre una cuenta designada como cuenta por defecto, de manera
que si tiene varias cuentas, puede elegir cuál de ellas será la cuenta por defecto.
· Click en el icono de programa E-mail .
· En el interfaz de su bandeja de entrada click MENU > account Settings (Configuraciones)
· Click en la cuenta por defecto para seleccionarla
Si usted borra la cuenta por defecto, la siguiente cuenta en su lista de cuentas
se convertirá automáticamente en cuenta por defecto.
21. Explorador de Archivos
Click el icono “File Manager” (explorador de archivos) para revisar archivos
en todos los dispositivos de almacenaje (almacenaje interno del Tablet, tarjeta SD, dispositivo de almacenaje USB) y podría instalar fácil y rápidamente la aplicación Android en
el tablet PC.
Page 57

35
Copiar archivos desde computador a Tablet PC
Usted podría copiar archivos al Explorador de Archivos desde un dispositivo externo o
computador. Si necesita copiar archivos al PC Tablet, debe copiar primero los archivos a
la tarjeta SD y al dispositivo USB.
La carpeta de archivo interno del Tablet PC se llama “Disco local”, la tarjeta SD
se llama “SD card”, el dispositivo USB se llama “u disk”
Aquí está la instrucción para copiar archivos de la tarjeta SD y del dispositivo
de almacenamiento USB al Tablet PC. Usted podría usar el mismo método para
copiar sus archivos a la tarjeta SD o al dispositivo USB, luego conectar su dispo-
sitivo de almacenamiento al computador, luego iniciar el copiado de la carpeta
al archivo que necesita.
· Haga clic en “TARJETA SD” o “USB” para encontrar los archivos de su dispositivo de
almacenamiento. Seleccione “Memoria Interna” para acceder a la memoria interna del
dispositivo.
· Click y mantenga los archivos o carpeta que desea copiar > Luego click “copy” (copiar)
· Click para volver al almacenamiento interno del PC > click en la carpeta objetivo
> luego click “Paste” (pegar)
Eliminar archivos
Marque el archive que necesita eliminar > click botón “delete” (eliminar) > click “ok”
para eliminar.
22. Música
Soporta formatos de audio: MP2, MP3, WAV, WMA, y AAC
Page 58
35
Escuchar música
· Click el icono de programa Mi Música .
· Seleccione lo que desea escuchar desde “all/album/artist/directory/my favorite/custom
playlists” (todos/álbum/artista/directorio/mi favorito/listas personalizadas)
· Click en el icono “previous song” (canción anterior) > suspended (suspendida) > next
song (próxima canción) for operation.
· Para mantener la música mientras trabaja en una interfaz, puede presionar “Return”
o presionar HOME para volver al escritorio.
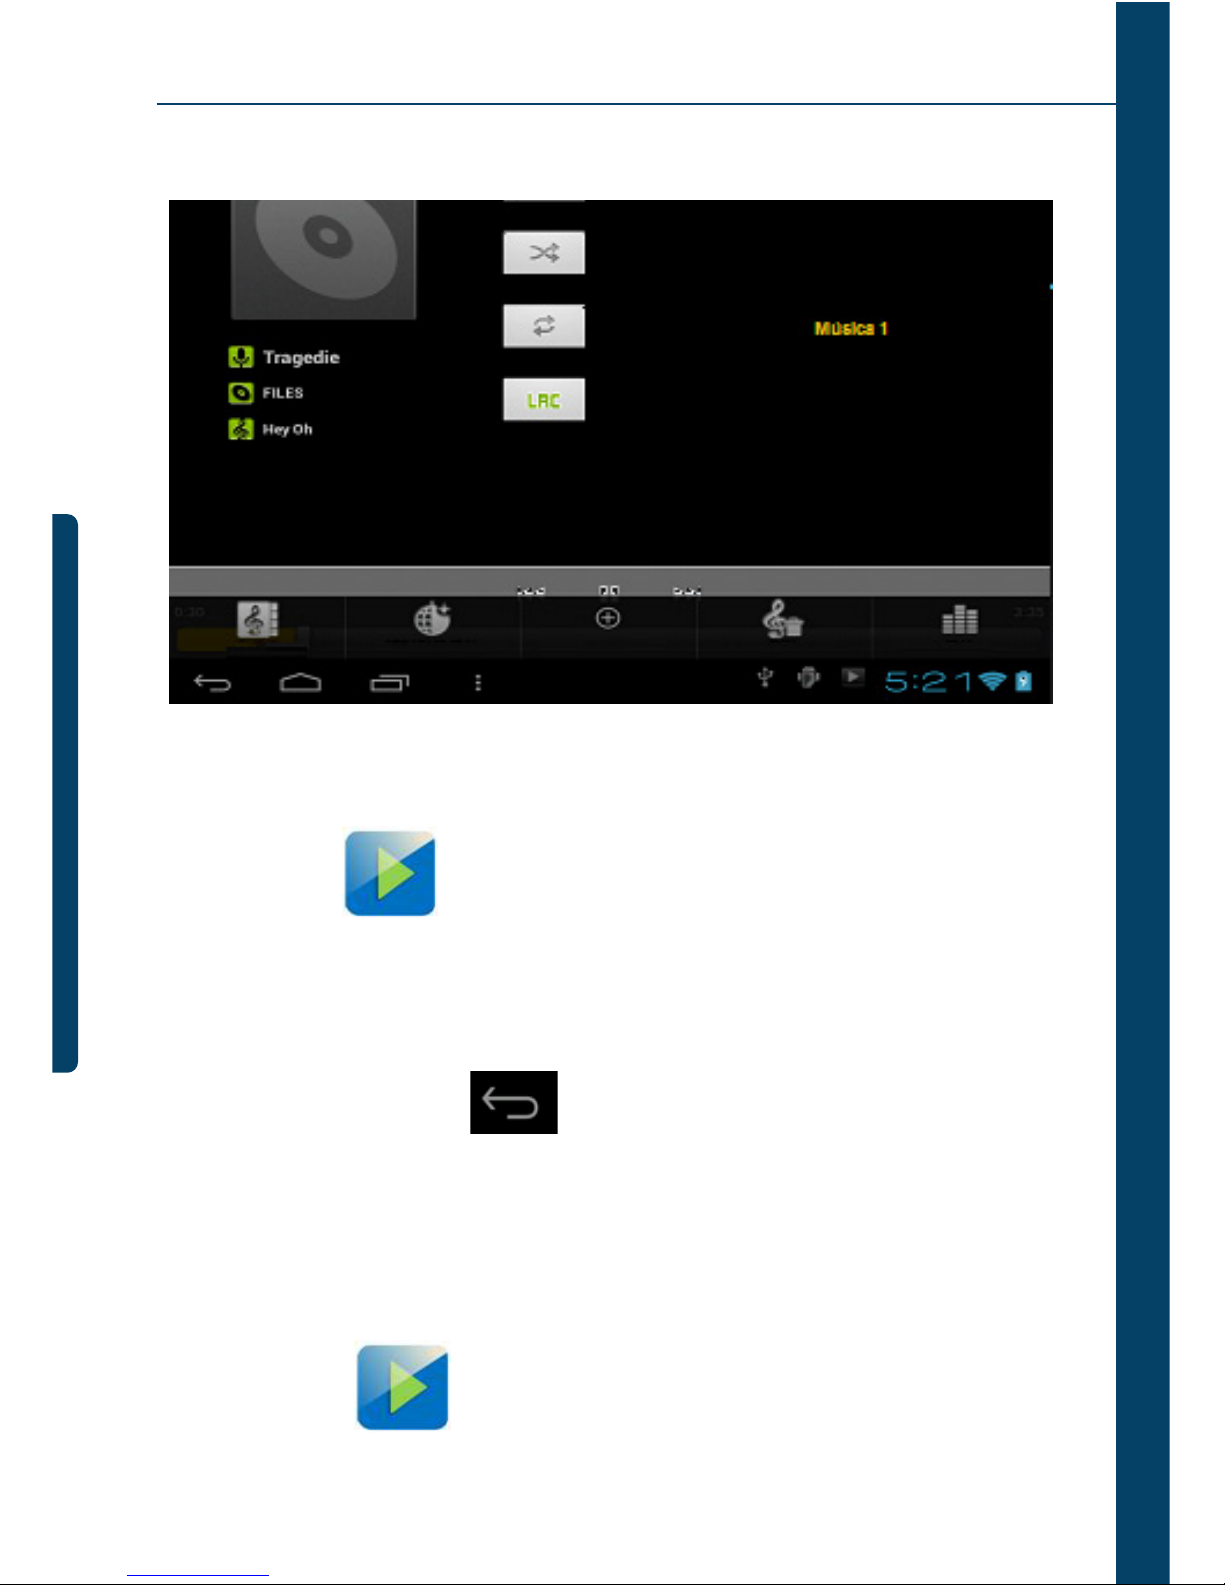
Click en la imagines en el rincón inferior derecho del interfaz del sistema de música,
mostrado abajo:
23. Vídeo
AVI,MKV,MOV,TS,RM/RMVB /3GP, MPEG, DAT, MP4
Page 59
35
· Clic en el icono > click en un grupo de video.
· Click en el video que desea ver
· Click en la pantalla para regulación relacionada con video (incluye volumen, stop y play,
brillo, etc.)
· Presione el botón de retorno para volver a la interfaz del reproductor de videos.
24. Galería de Fotos
Compatible con JPEG, BMP, GIF, PNG.
· Click en el ícono Galería de Fotos, entre a Galería
Reproducción de vídeo
Page 60
35
· Escoja grupos de fotos para navegar
· Presione el botón “Return” para volver a la interfaz de galería de fotos
· Click para empezar “Apresentación de Slides”.
Eliminar fotos y cambio dinámico de papel de fondo: configuración
· Para Editar, Eliminar o definir una imagen como papel de pantalla, seleccione una de
las opciones correspondientes en el menú superior derecho de la pantalla que aparecerá
cuando una imagen se selecciona.
25. Mapas
Cuando se use esta función, debe determinarse el estado de conexión del computador
con INTEL.
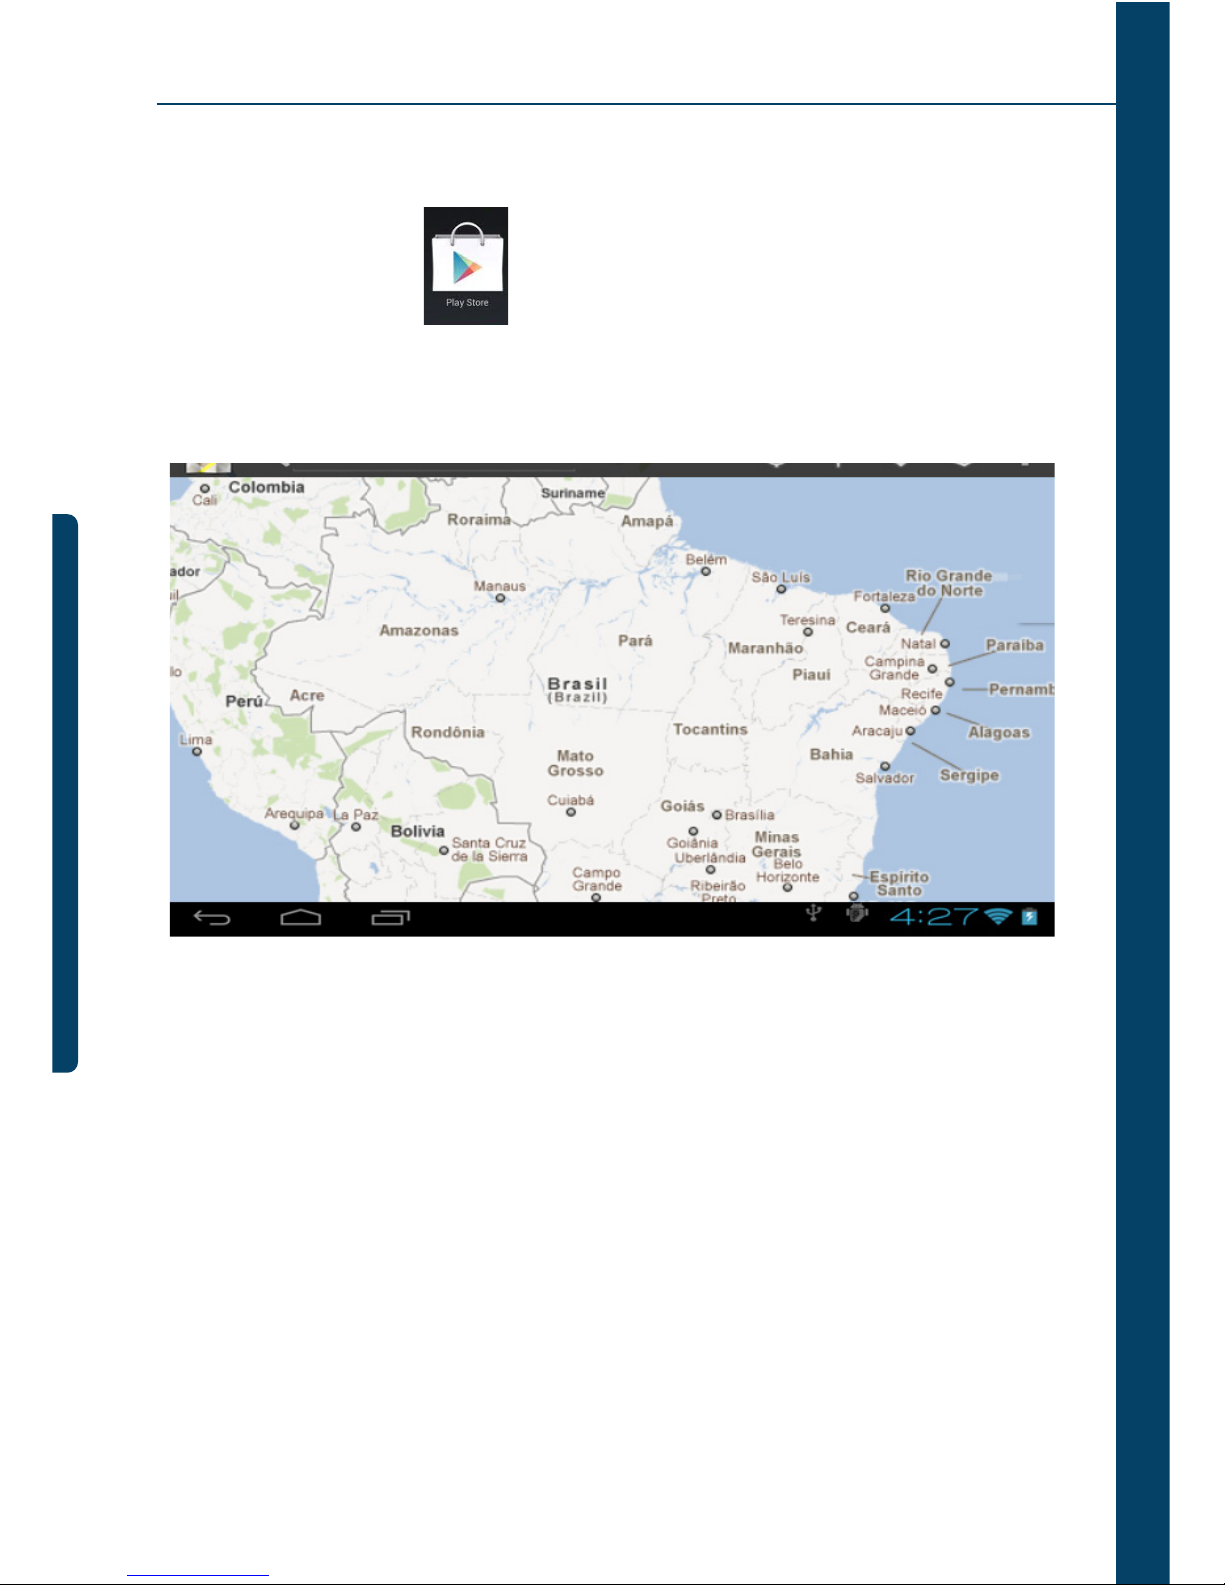
Una vez conectado a la red, por favor click permite abrir el mapa de posición
actual. Vea el cuadro abajo, usted puede encontrar lo que desea mediante configuración.
26. Búsqueda local
Click : Funciones similares a Mapas, puede usarse para almacenar grandes
cantidades de información.
Page 61
35
27. Play Store
Para abrir el Play Store , que permite averiguar sobre la descarga de programas
de aplicaciones.
Primero ejecute Play Store. El programa va a requerir cuentas GMAIL de E-mail (si
usted no tiene E-mail GMAIL por favor solicítelo en http://gmail.google.com).
Page 62
35
28. Especificaciones
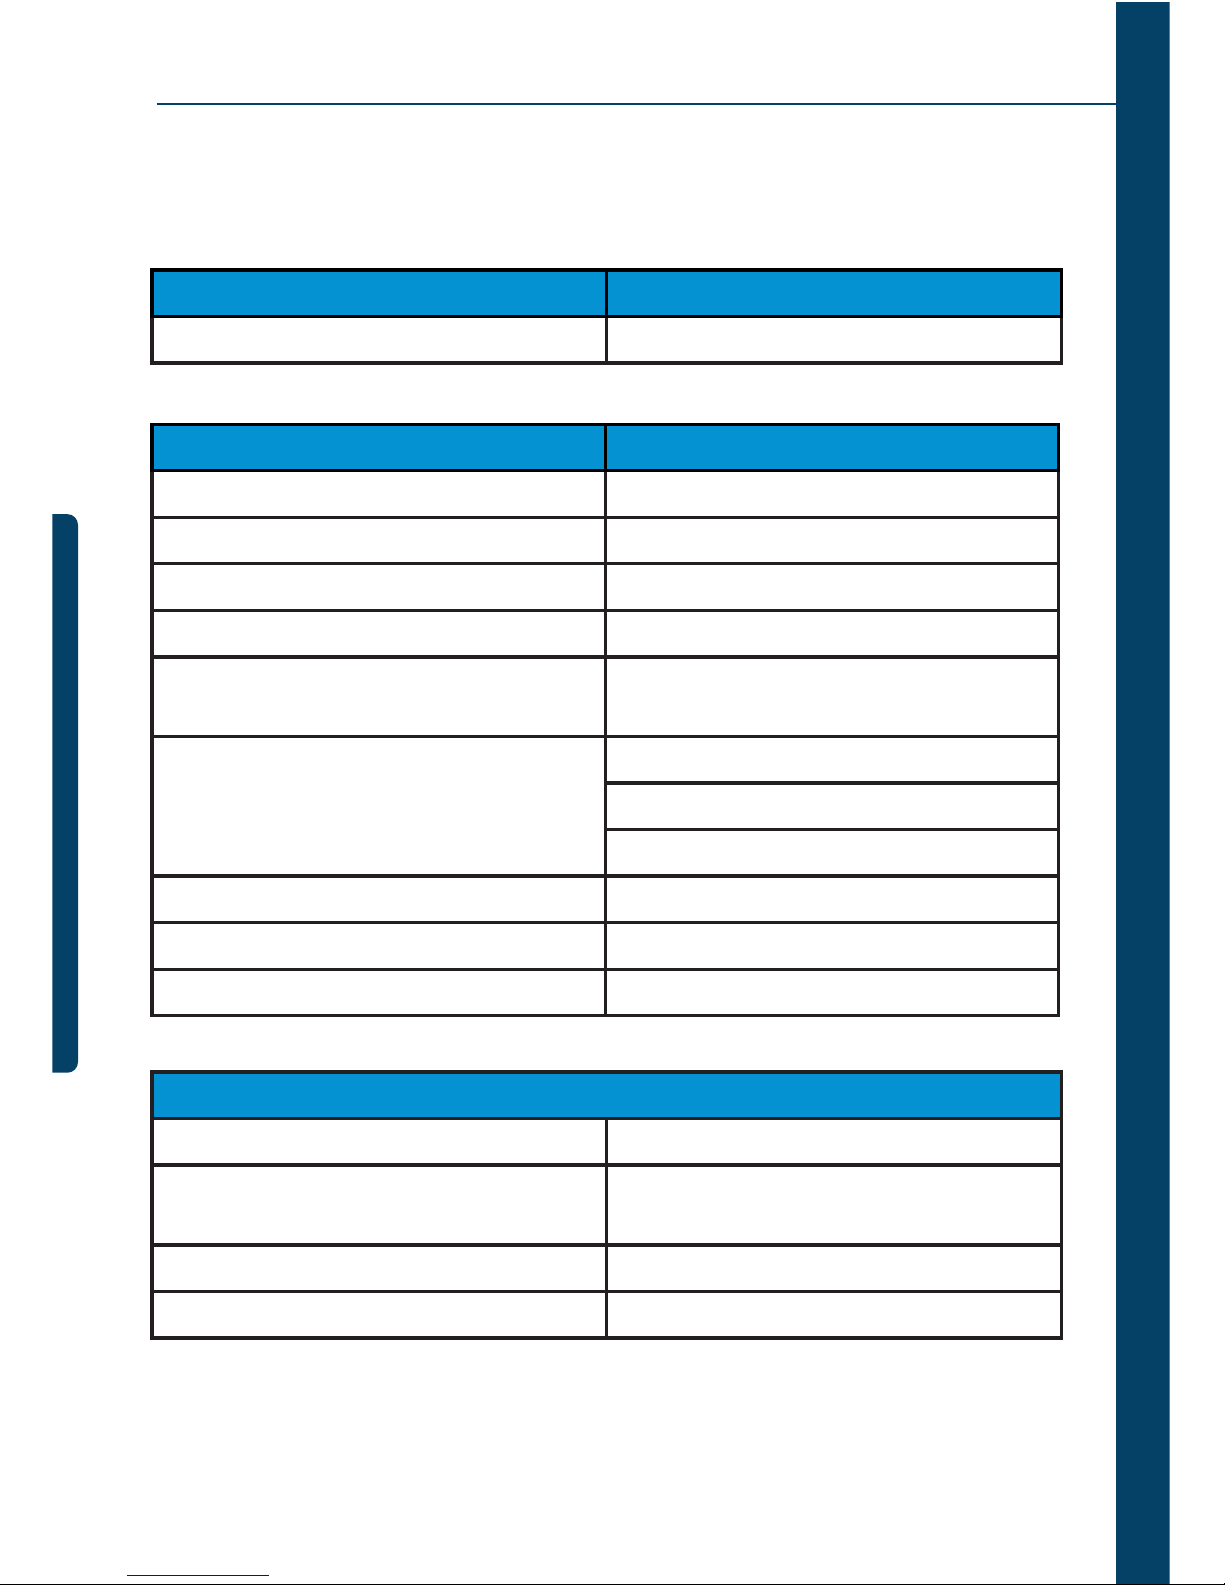
PRODUCTO MODELO
Tablet PC DIAMOND LITE
TEMA DESCRIPCIÓN
CPU Procesador A13: 1.2GHz
MEMORIA RAM 512MB DDR3
MEMORIA INTERNA 4GB/8GB Opción
SISTEMA OPERATIVO ANDROID 4.0
TIEMPO DE CARGA DA LA BATERÍA
Aprox. 3 HORAS (Con El dispositivo apagado )
DURACIÓN DE LA BATERIA
Música: 7 horas
Video: hasta 4 horas
Navegación: hasta 4 horas
PANTALLA 7” - Capacitiva de 800x480 pixels
CAPACIDAD DE LA BATERÍA 3.7V 2300 mAH li-polímero
VOLTAJE DE LA BATERIA AC Input AC100 ~ 240V/DC 5V/2A
FUNCIONES
INTERFAZ mini USB
CAPACIDAD DE MEMORIA Ampliable hasta 32GB a través de tarjeta
MICRO SD
CONEXIÓN WIFI 802.11 B/G/N
CÁMARA FRONTAL 1.3MP
Page 63
35
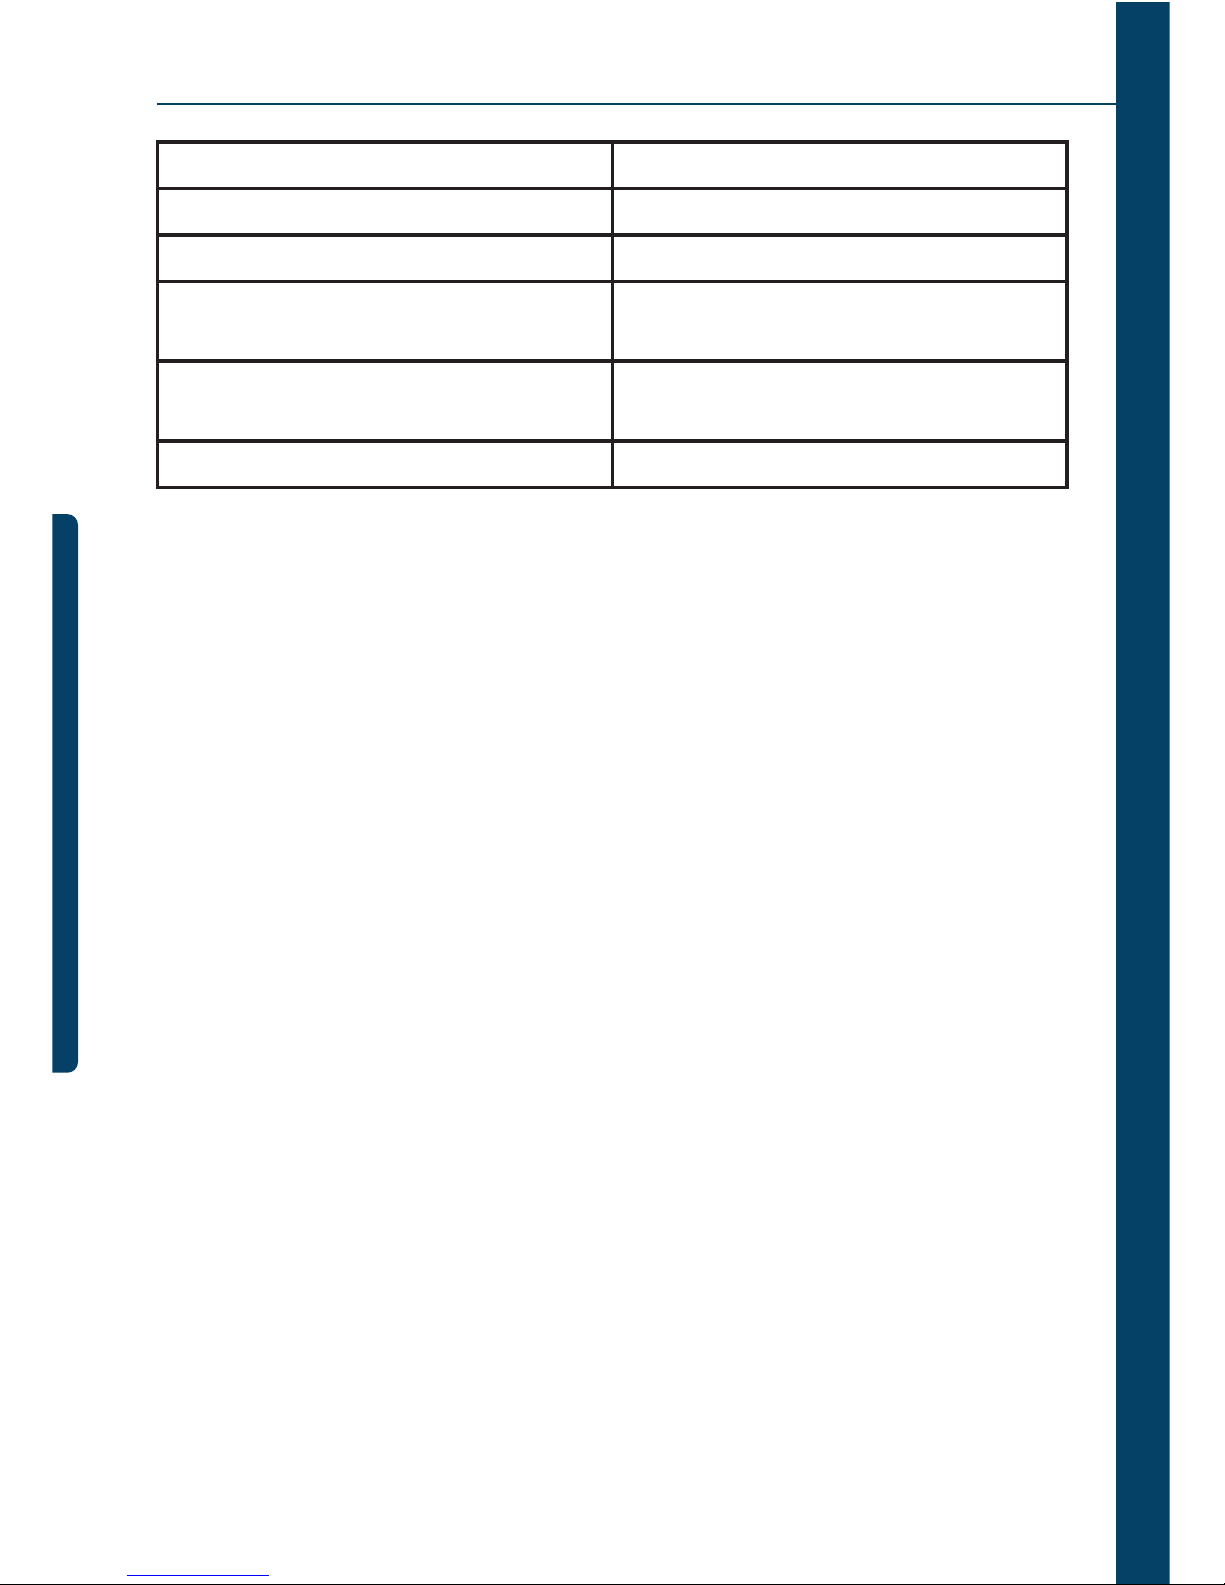
ENTRADA MINI USB 1
FORMATO DE E-BOOK PDF/Epub/TXT
FORMATO DE FOTOGRAFÍA JPG, JPEG, GIF, BMP, PNG
FORMATO DE AUDIO MP3,WMA,WAV,AAC,QCP,MIDI,MP4A,OG,
FLAC,MP4,MIDI
FORMATO DE VIDEO AVI,MKV,MOV,TS,RM/RMVB /3GP, MPEG,
DAT, MP4
DISTANCIA SAR 10 cm
Page 64

www.
multilaser
.com.br
 Loading...