

Page 1

24 Port Nway Gigabit Ethernet
Web Smart Switch
User’s Manual
Page 2
- 1-
Web Smart Switch
. Features Overview
Supports real-time status (link, speed, duplex) of each
port
Supports port setting for enable or disable operation (the
1st port can’t be disabled)
Supports port setting for N-Way or force mode operation
Supports Broadcast Storm Protection
Supports Port-bases VLAN
Supports priority queues for QoS
. Configure
Please follow the steps to configure this Web Smart switch.
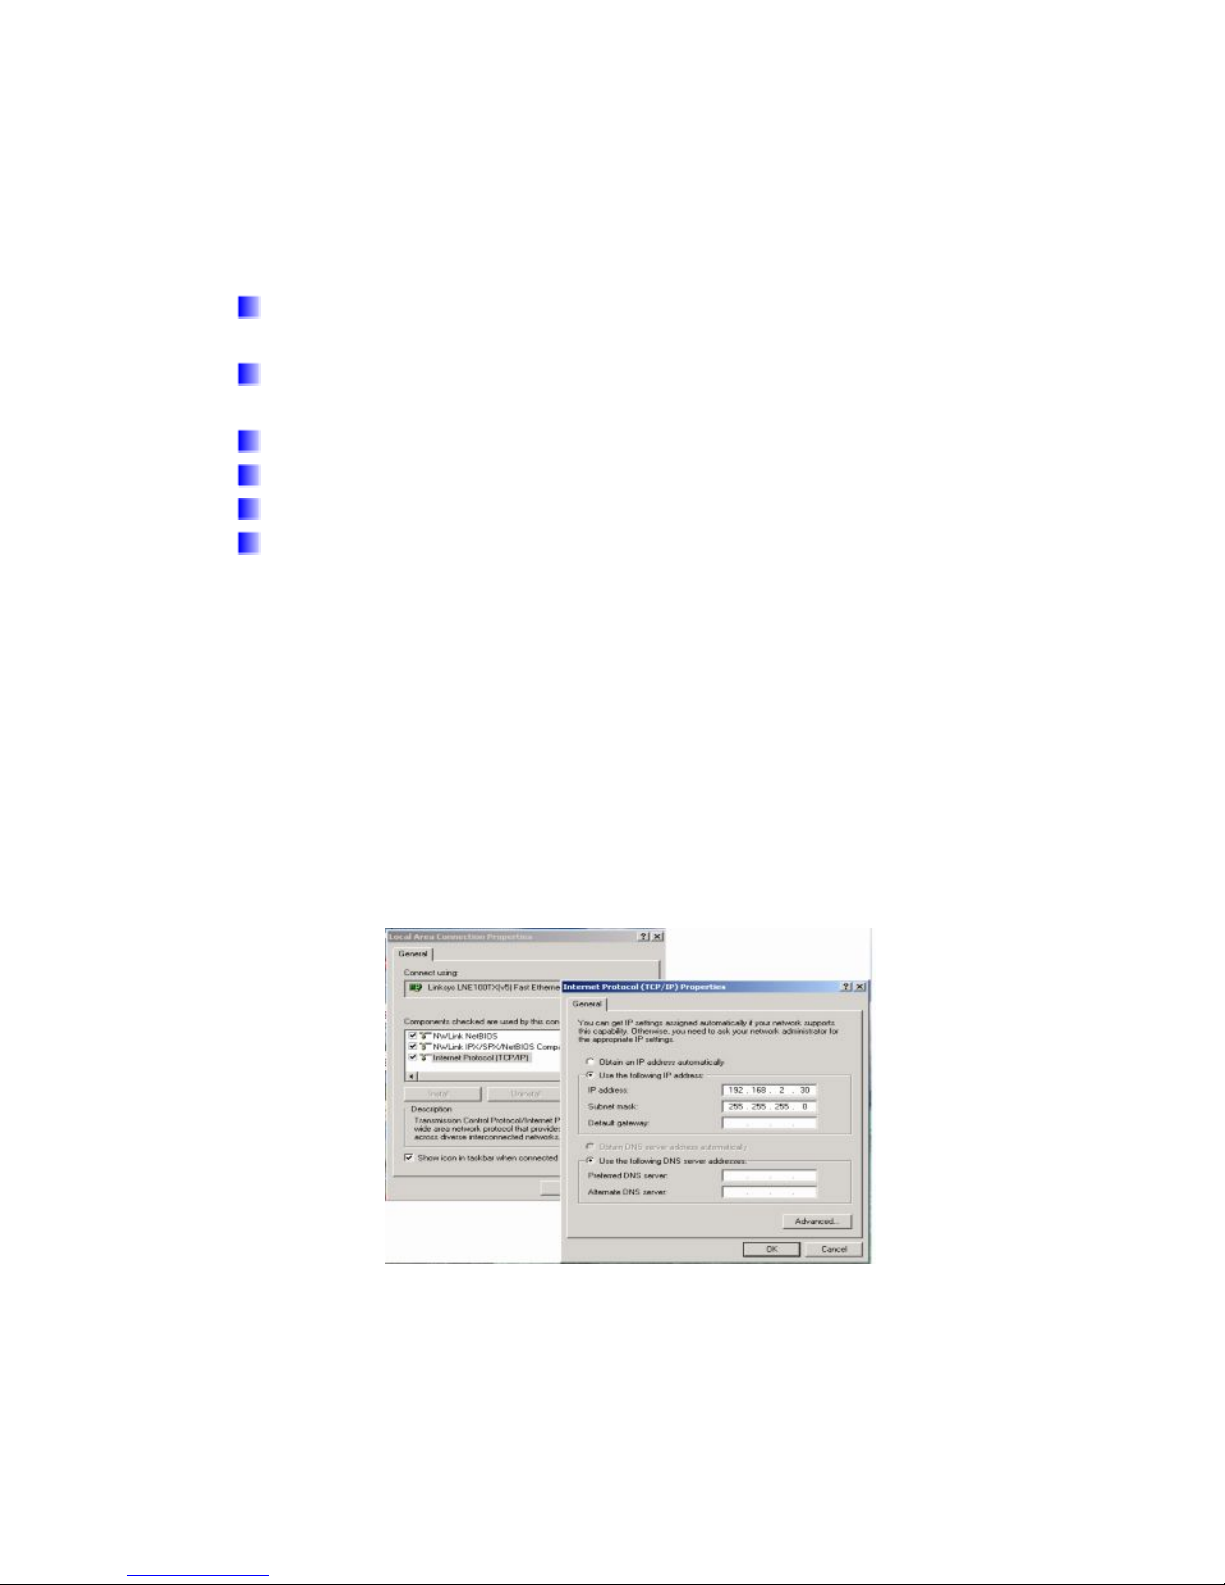
Step 1:
Use a twisted pair cable to connect this switch to your PC.
Step 2:
Set your PC’s IP to 192.168.2.xx.
Page 3
- 2-
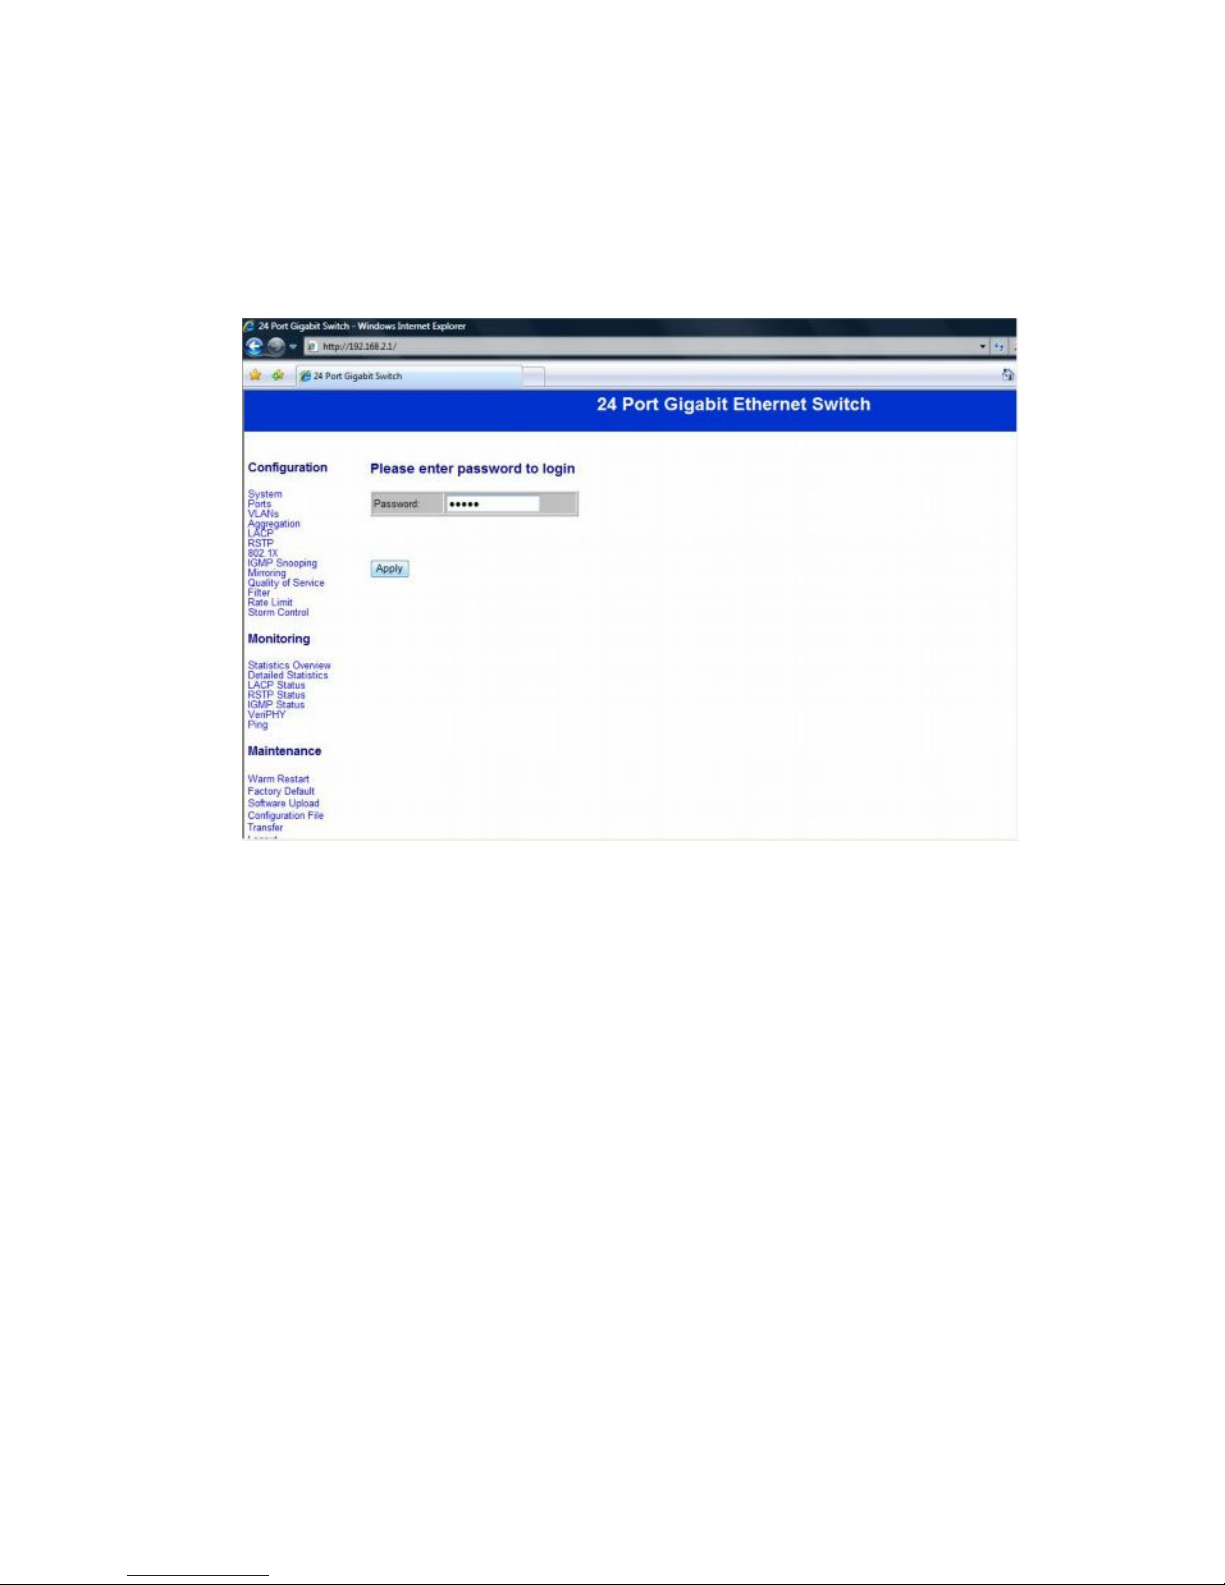
Step 3:
Open the browser (like IE…) and go to http:// 192.168.2.1
You will see the login screen as below:
Please key in the password to pass the authentication.
Password: admin
After the authentication procedure, the switch can be used
now.
Step 4:
On the home page, select the configuration by clicking the
icon as below:
- Configuration
- Monitoring
- Maintenance
- Logout
Page 4
- 3-
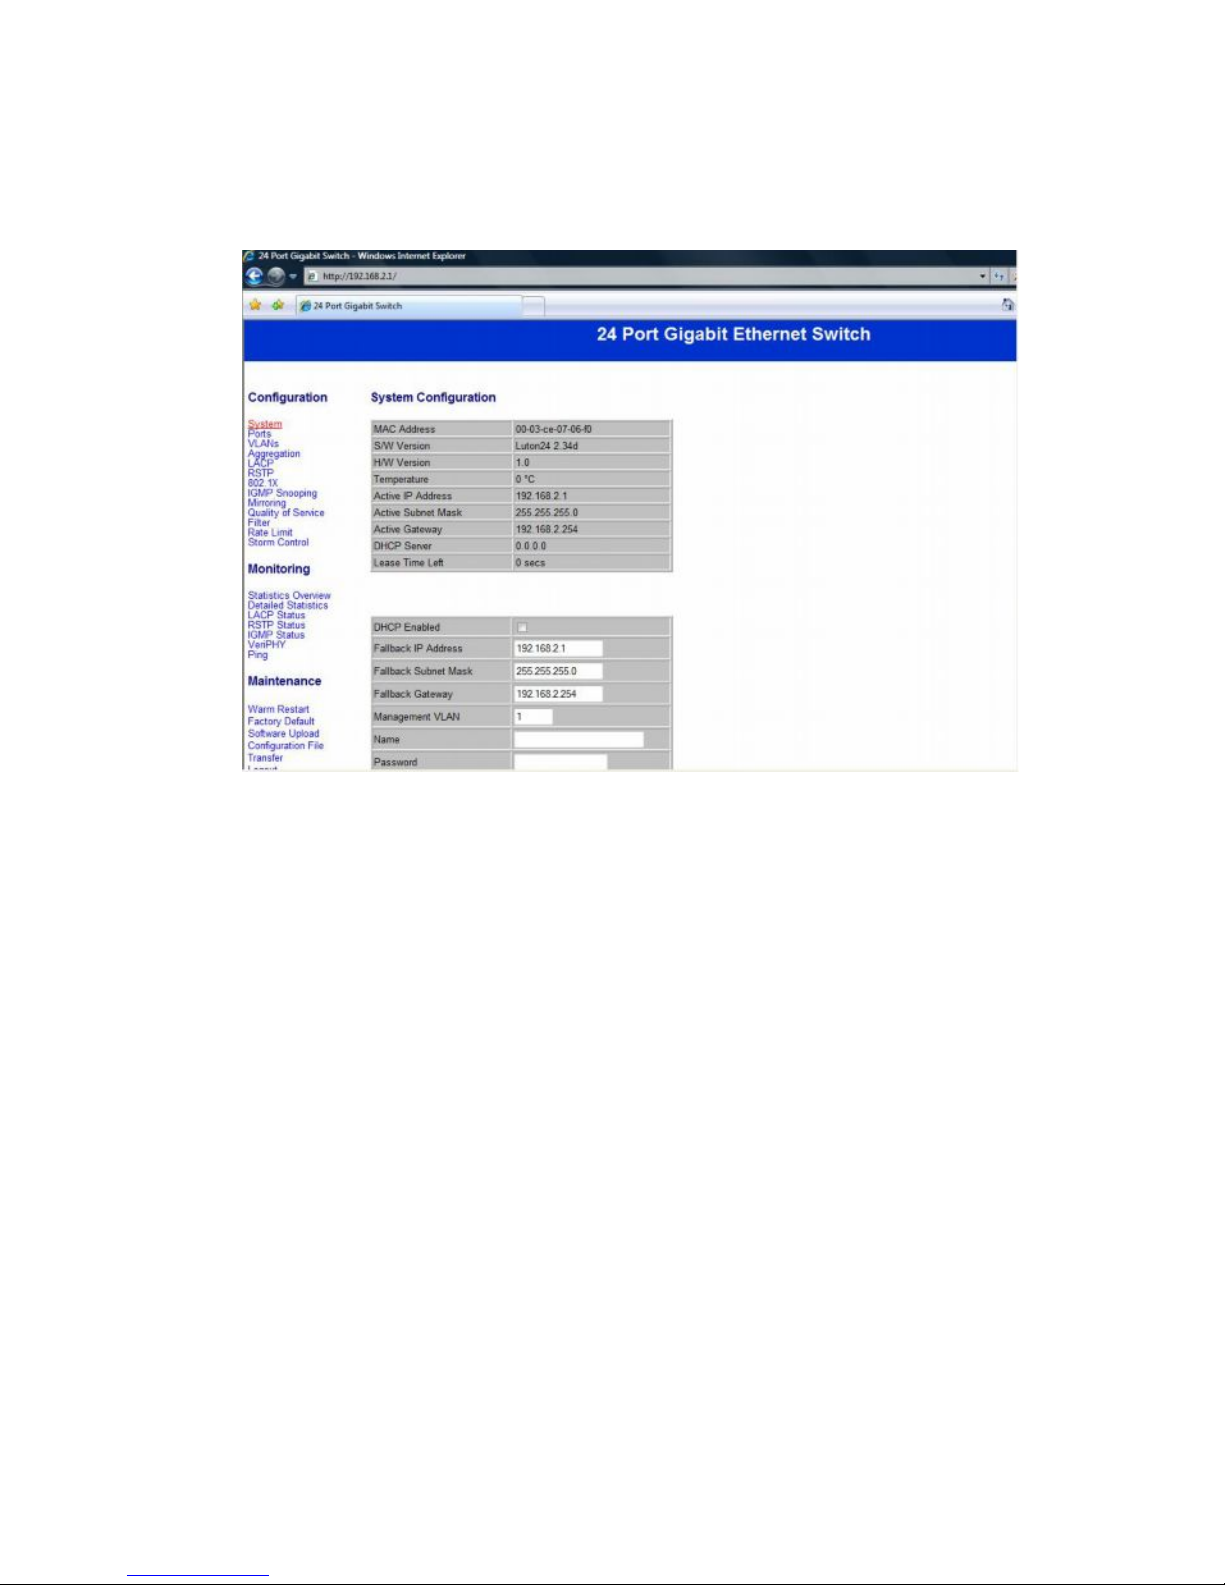
Configuration: System Configuration
It shows system status, such as: MAC address, system
firmware version and so on.
You can change the user name, the password and IP
address, and click “Apply” to confirm the new change.
Afterwards, you can reset the switch by turning off and
turning on it to take the new user name, the password and IP
address effectively.
Page 5
- 4-
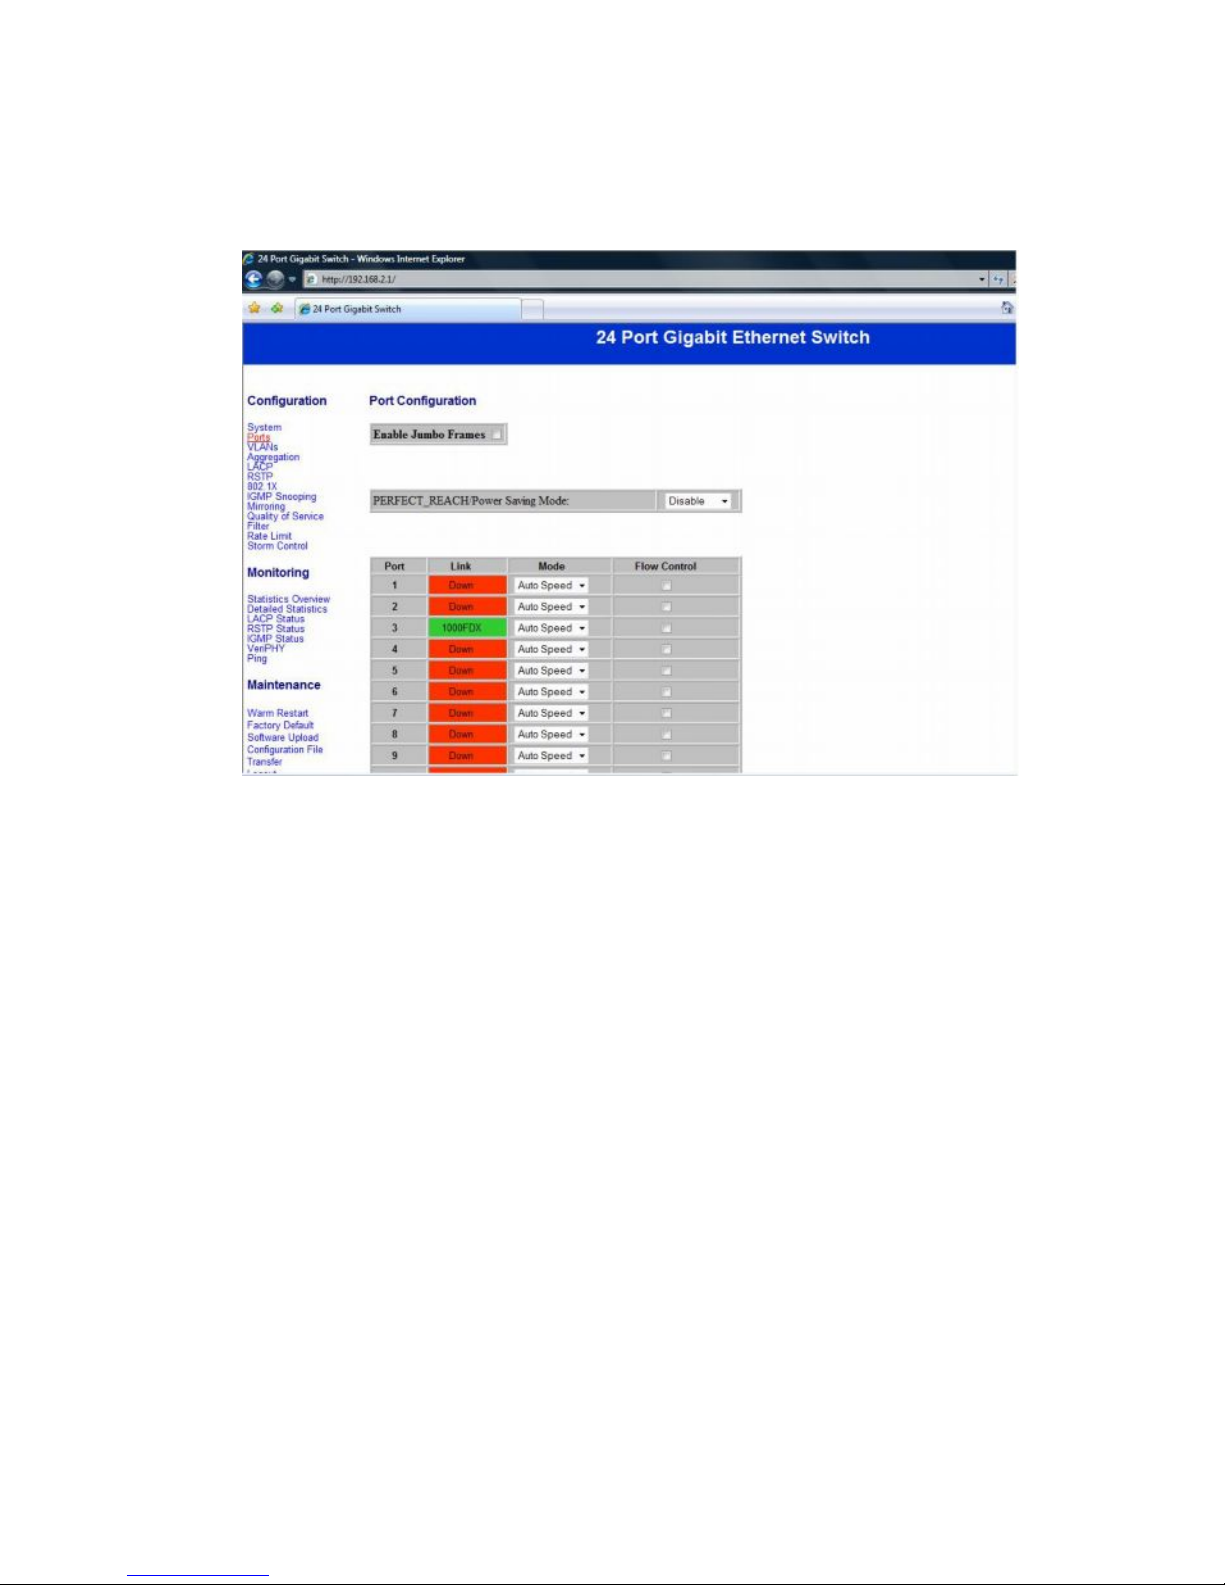
Configuration: Port Configuration
You can enable or disable Jumbo Frames by clicking the
checking box.
Select the “Port no.” which you want to configure the mode
below,
- Auto speed
- enable/disable the port
- 10M/100M/1000M
- full/half-duplex
- enable/disable flow control
Page 6
- 5-
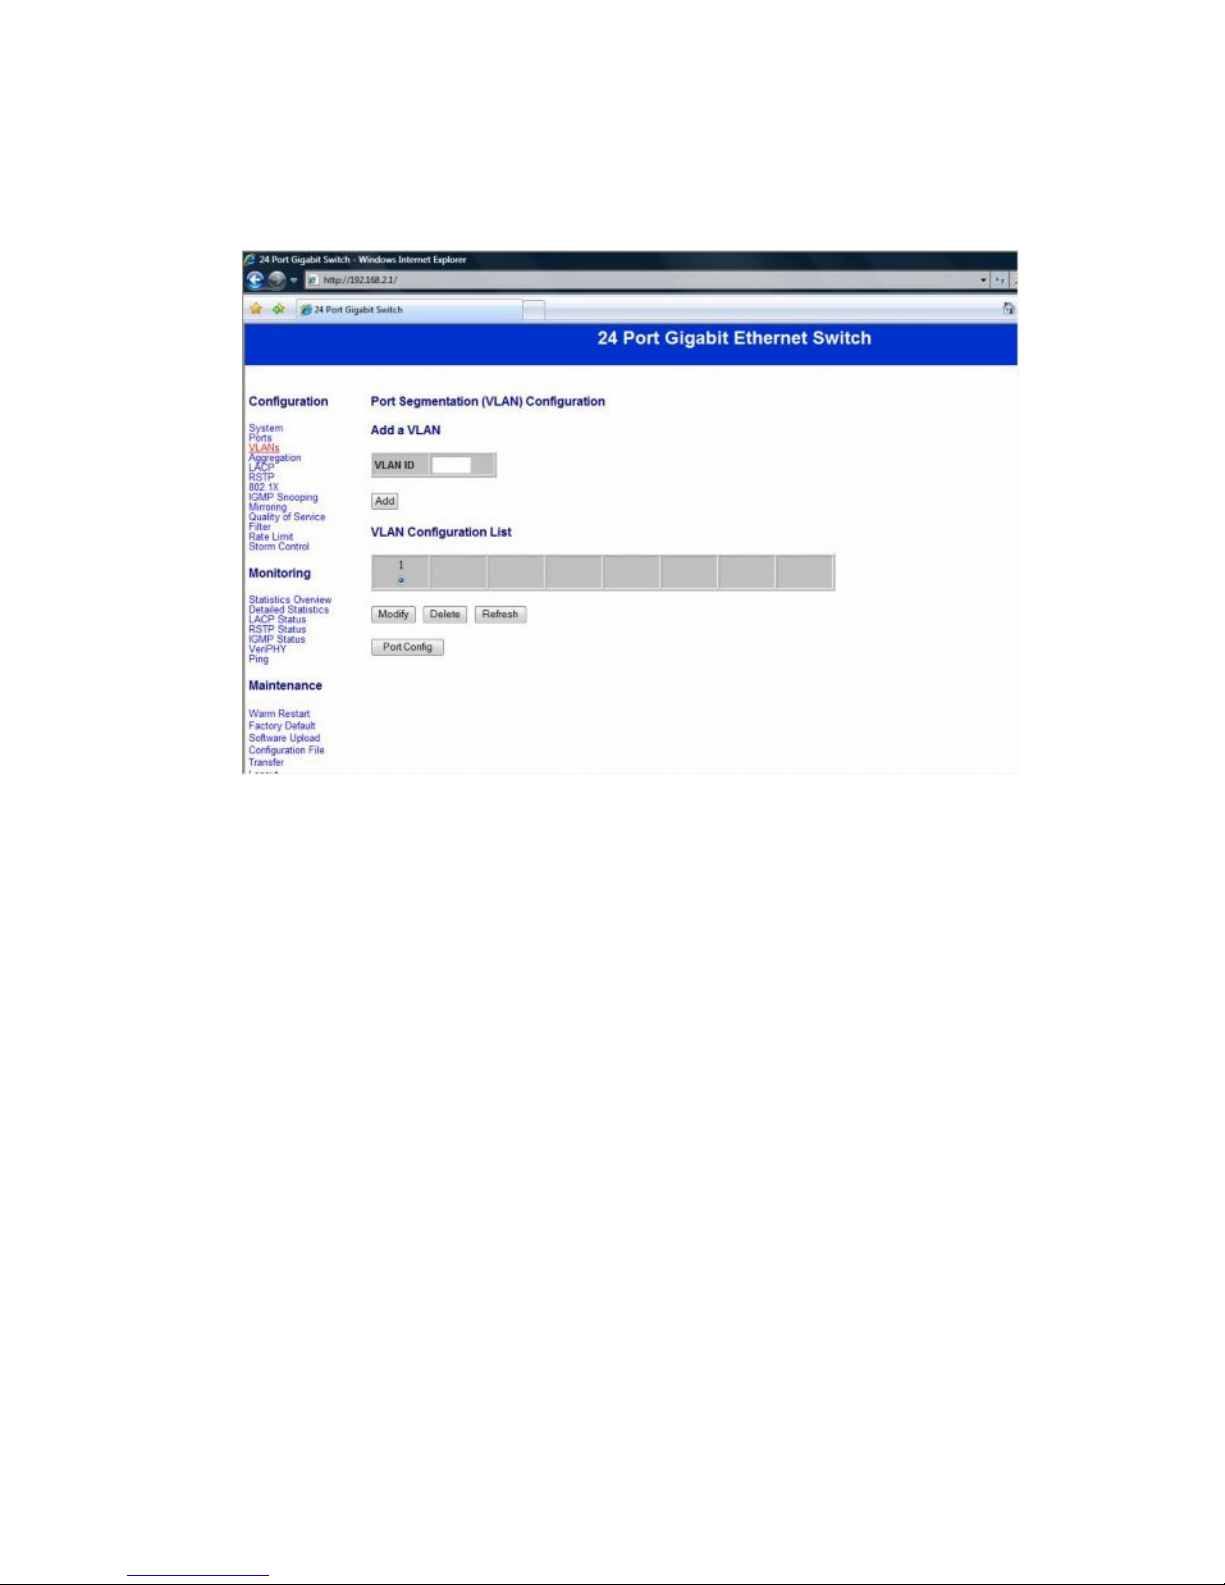
Configuration: VLAN Configuration
There are 16 VLAN groups.
Select and add a group into “VLAN ID” and then click the port
number which you want to put into the selected VLAN group.
Configuration: Aggregation/Trunk Configuration
Page 7

- 6-
Set up port trunk groups and then click the port number you
want to include into the same group.
There are eight groups to choose and the maximum for one
group is 24 ports.
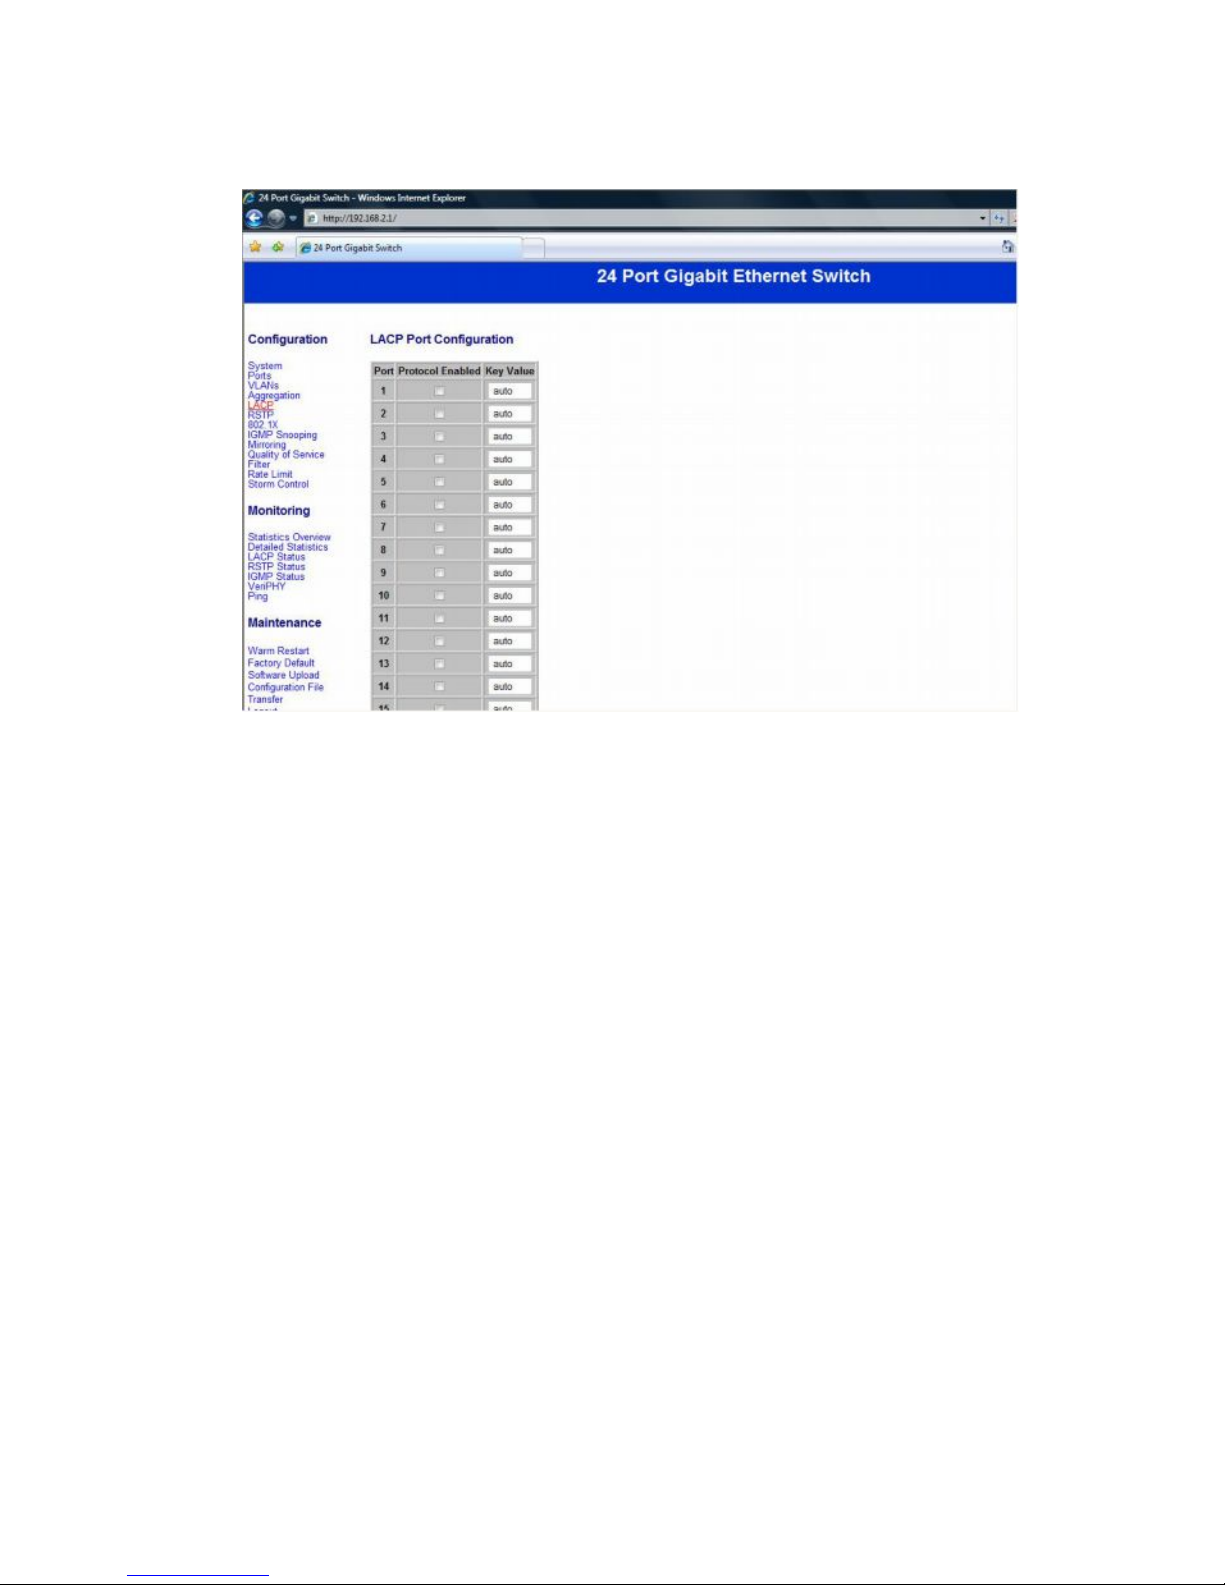
Configuration: LACP Port configuration
Page 8
- 7-
Select the port number which you want to enable/disable its
protocol.
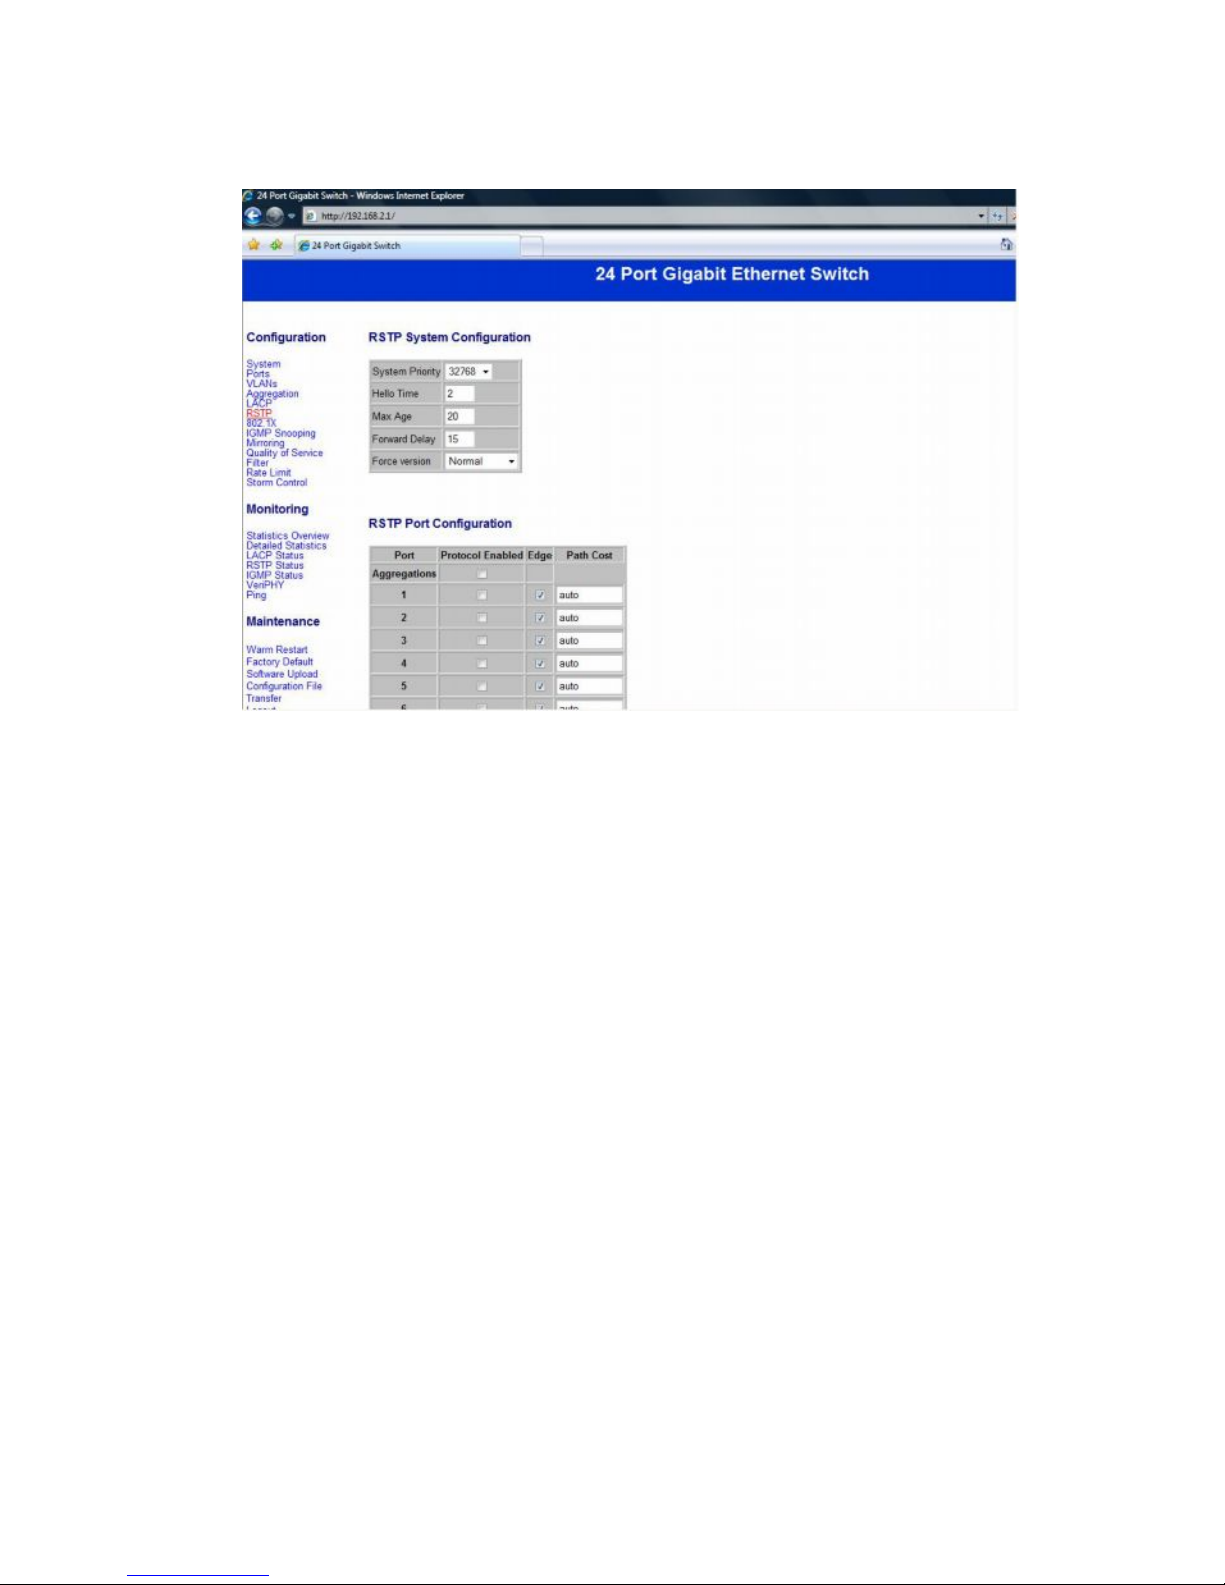
Configuration: RSTP Configuration
Page 9
- 8-
Select the port number which you want to enable/disable its
protocol.
Configuration: 802.1x Configuration
Page 10

- 9-
Select the “Port no.” which you want to configure the mode
below,
- Auto
- Force Authorized
- Force Unauthorized
Configuration: IGMP Configuration
Page 11

-
10
-
You can enable or disable IGMP by clicking the checking
box.
Select the “Port no.” which you want to configure the
mode.
Configuration: Port Mirror configuration
Page 12

-
11
-
Port Mirroring is for mirror the traffic from Source port to
Destination port.
Select the Destination port from port 1 to port 24, and then
select the Source port by clicking the checking box of each
port.
Configuration: QoS Configuration
Page 13

-
12
-
You can enable or disable QoS by clicking the checking box.
If you enable QoS, you can select the class of service for
each port.
Configuration: Filter Configuration
Page 14

-
13
-
Select the “Port no.” which you want to configure the mode to
enable/disable filtering IP address.
Configuration: Rate Limit Configuration
Page 15

-
14
-
Select the “Port no.” which you want to configure the mode of
the speed.
Configuration: Storm Control configuration
Page 16

-
15
-
You can set up storm control by configuring the modes.
Monitoring: Statistics Overview for All Ports
Page 17

-
16
-
You can read statistics for all ports.
Monitoring: Detailed Statistics
Page 18

-
17
-
You can have detailed statistics of each port by clicking the
port number.
Monitoring: LACP Status
Page 19

-
18
-
You can read LACP status for LACP ports.
Monitoring: RSTP Status
Page 20

-
19
-
You can read RSTP status for RSTP ports.
Monitoring: IGMP Status
Page 21

-
20
-
You can read IGMP status for IGMP ports.
Monitoring: VeriPHY Cable Diagnostics
Page 22

-
21
-
You can read VeriPHY cable status for all ports which you
want to check by clicking the port number and the mode.
Monitoring: Ping Parameters
Page 23

-
22
-
You can set target IP address by setting the mode which you
want.
Monitoring: Warm Restart
Page 24

-
23
-
You can select yes/no to do the warm restart, and then the
new settings will change according to your selection.
Maintenance: Factory Default
Page 25

-
24
-
You can select yes/no to perform a Factory Default, and then
the new settings will change according to your selection.
Maintenance: Software Upload
Page 26

-
25
-
Follow the instruction on the screen to upload the new
software.
Maintenance: Configuration Upload
Page 27

-
26
-
Follow the instruction on the screen to upload and download
the configuration.
Logout
When you forgot your IP or password,
Page 28

-
27
-
please use the reset button for the factory
default setting?
Please take the following steps to reset the Web Smart
Switch back to the original default:
Step 1:
Turn on the Web Smart Switch
Step 2:
Press and hold the reset button continuously for 15 seconds
and release the reset button.
Step 3:
The switch will reboot for 20 seconds and the configuration
of switch will back to the default setting.
Key in the password to pass the authentication; the user
password is “admin”.
IP: 192.168.2.1
Password: admin
 Loading...