

MUKii TIP-Q120U3SI User Manual
S ATA/IDE to US B 3.0 Adapter
SATA/IDE to USB 3.0 Adapter
User’s Manual
MODEL : TIP-Q120U3SI
使用手冊
/
www.mukii.com.tw
All Registered Trademarks Belong To Their Respective Companies Copyright © 2010 MUKii Technology INC. All Rights Reserved.

SATA/IDE to USB 3.0 Adapter
TABLE OF CONTENTS
PACKAGE INCLUDES .................................................................................................2
FEATURE / SPECIFICATIONS ....................................................................................3
SYSTEM REQUIREMENTS ........................................................................................4
PARTS LAYOUT ..........................................................................................................5
INSTALLATION ............................................................................................................6
M one TUNING SYSTEM INTRODUCTION ...............................................................10
FAQ ............................................................................................................................11
WARRANTY ...............................................................................................................12
CONTACT ..................................................................................................................12
目錄
包裝內附 .....................................................................................................................13
產品特色 / 產品規格 ...................................................................................................14
系統需求 .....................................................................................................................15
裝置介面 .....................................................................................................................16
安裝步驟 .....................................................................................................................17
M one 硬碟調校程式介紹 ...........................................................................................21
問與答 .........................................................................................................................22
授權 / 保證書 .............................................................................................................23
01
SATA/IDE to USB 3.0 Adapter
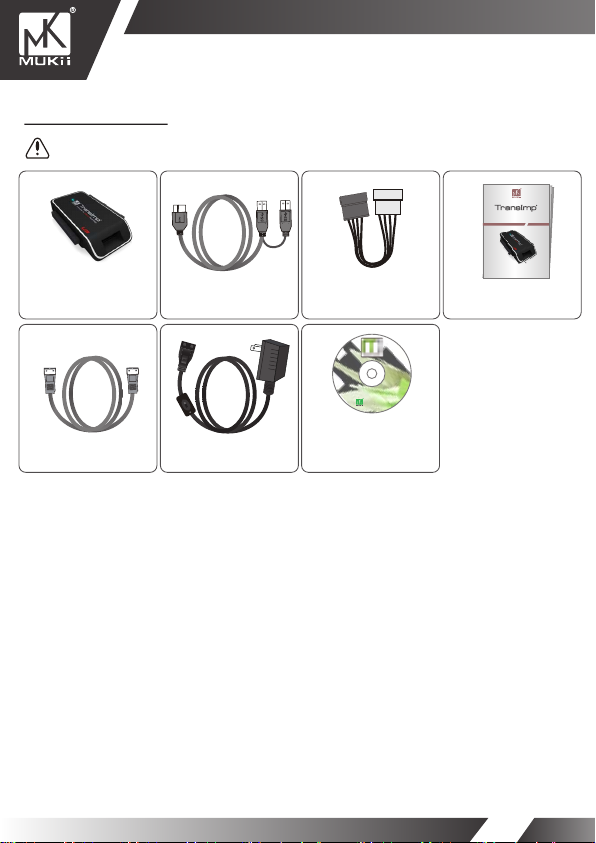
PACKAGE INCLUDES
Please check your packing list to be sure all parts are recieved
TransImp –SATA/IDE to
USB 3.0 Adapter
x 1
SATA
SATA Cable
SATA
x1
B
USB 3.0 Cable
x 1
AC Power Adapter
x 1
4 PIN to SAT A Power Cable
x 1
M1_V10.0.0_a
M ONE TUNING SYSTEM INCLUDED
Auto Format / Smart Energy Saving / USB Turbo / Auto Backup / Status Feedback
www.mukii.com.tw
Value Added
Software CD
x 1
SATA/IDE to USB 3.0 Adapter
User’s Manual
SATA/IDE to USB 3.0 Adapter
MODEL : TIP-Q120U3SI
www.mukii.com.tw
All Registered Trademarks Belong To Their Respective CompaniesCopyright © 2010 MUKii Technology INC. All Rights Reserved.
User’s Manual
x 1
使用手冊
/
02
SATA/IDE to USB 3.0 Adapter
FEATURE
■
Easy Installation with Tool-free Design.
■
Support 2.5”/3.5”IDE/SATAI/II HDD/SATA SSD
■
The Product Supports the Blu-ray Optical Drives and Regular 5.25" SATA/IDE Devices.
■
USB 3.0 Interface for Easy Data Access. Transfer Rates Up to 5Gbps with USB 3.0.
■
Includes a 110V~240V Certified External Power Adapter which Provides Consistent Power
to Your External Device.
■
The Port Features Foolproof Design to Prevent HDD Damage Caused by Incorrect Insertion.
■
Its Separate Power Switch Provides Trouble-free Hardware Protection.
■
Highly Compact and Extremely Portable
■
Hot Swappable : Plug and Play
■
M One Tuning System Included : Auto Format / Smart Energy Saving / USB Turbo / Auto
Backup / Status Feedback.
SPECIFICATIONS
■ Model : TIP-Q120U3SI
■ Device support : IDE/SATA I/II Hard Drive or SATA SSD
■ Device size : 2.5” / 3.5” / 5.25”
■ Internal interface : USB 3.0
■ Material : Plastic
■ Dimension : 75 x 49 x 13 mm
■ Power : AC Power Adapter
■ Cable : 80cm (31.5 inches)
For the most current storage capacity & Operating System Support, please check our website : www.mukii.com.tw
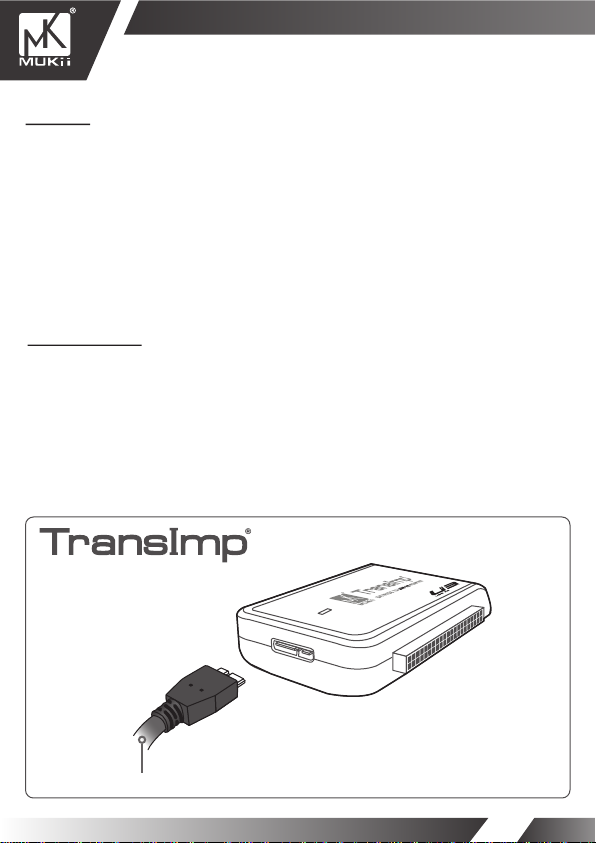
SA TA/IDE to US B 3.0 Adapter
USB 3.0 Cable
03

SYSTEM REQUIREMENTS
Intel Pentium II 350 MHz-compatible.
Microsoft Windows 2000/XP/VISTA/7.
1. USB Equipped System
2. For USB 2.0 Speeds, the System Must
Support USB 2.0 Specifications
3. For USB 3.0 Speeds, the System Must
Support USB 3.0 Specifications
4. CD Rom drive
(for value added software)
※ USB 3.0 Only Support Windows XP
and Later.
SATA/IDE to USB 3.0 Adapter
04
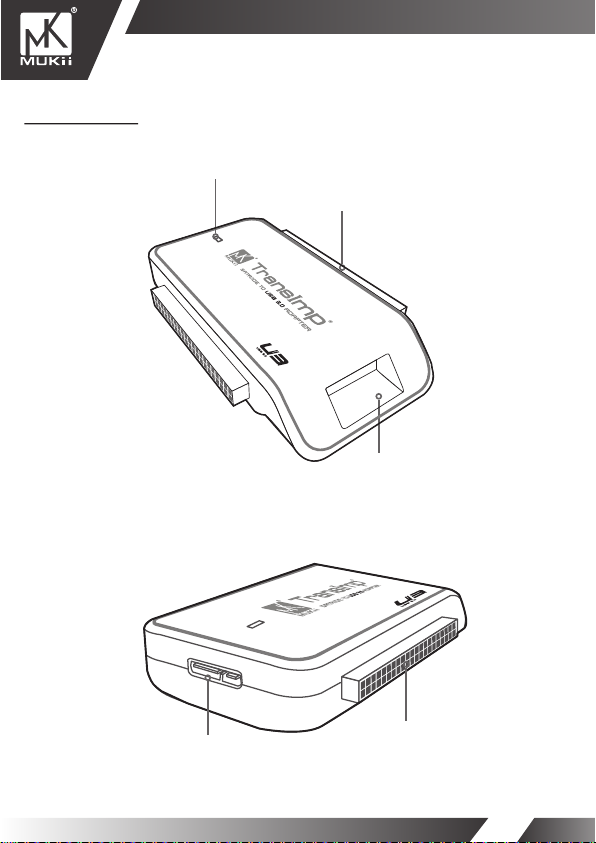
PARTS LAYOUT
SATA/IDE to USB 3.0 Adapter
LED Indicator
3.5”/5.25” IDE Connector
SATA Connector
USB 3.0 Connector
2.5” IDE Connector
05
INSTALLATION
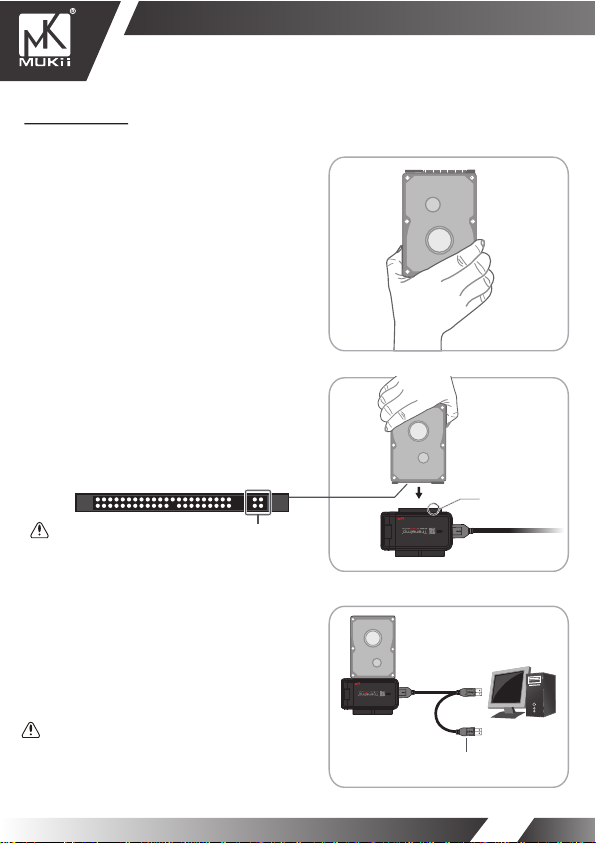
2.5” IDE Hard Drive Installation:
1. Insert 2.5” IDE hard drive (HDD) into the slot.
Turn the front side upward.
(Figure A)
2. Make sure that the IDE 2.5” HDD pins align
to the device slot.
(Figure B)
Don’t connect the 4-pins on the left side to the device.
SATA/IDE to USB 3.0 Adapter
IDE 2.5”
Hard Drive
Hard Drive
IDE 2.5”
( Figure A )
IDE 2.5”
Hard Drive
2.5”
B
(Figure B)
3. Connect the USB cable to the USB port on
the PC. Once connected properly, the HDD
should be automatically detected and be
ready for use.
(You might need to connect both USB cables
for adequate power.)
Once the power comsumption of PCIE bus is not
enough, please connect the power connector of
USB cable to the USB 2.0 port of motheroard.
(Figure C)
IDE 2.5”
Hard Drive
TransImp-SATA/IDE
to USB 3.0 Adapter
(Figure C)
B
Computer
Extra Power
06
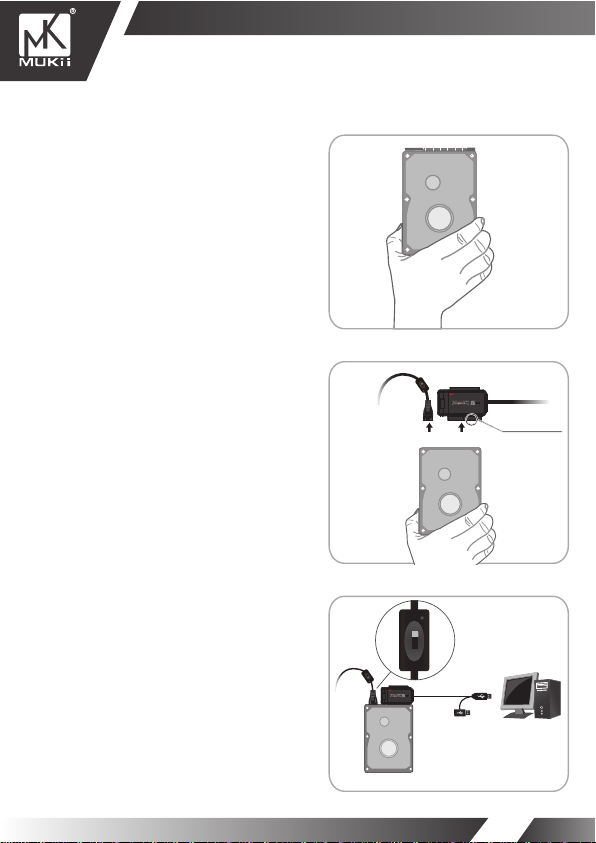
3.5” IDE Hard Drive Installation:
1. Insert 3.5” IDE hard drive into the slot. Turn the
front side upward. (Set the HDD to MASTER if
needed).
2. Connect the larger 40-pin IDE connector of
TransImp-SA TA/IDE to USB 3.0 Adapter to
the hard drive.
3. Connect a 4-pin power connector from power
supply to hard drive.
(Figure A)
(Figure B1)
(Figure B2)
SATA/IDE to USB 3.0 Adapter
IDE 3.5”
Hard Drive
Hard Drive
IDE 2.5”
( Figure A )
(B2) (B1)
( Figure B1.B2 )
3.5”/5.5”
Hard Drive
IDE 3.5”
4. Turn on the device power.
(Figure C1)
5. Connect the USB cable to the USB port on the PC.
Once connected properly, the HDD should be
automatically detected and be ready for use.
(Figure C2)
( Figure C1.C2 )
ON
(C1)
OFF
(C2)
IDE 3.5” Hard Drive
07
 Loading...