

Page 1
User Manual
MCR01
Precautions:
Please use the charger made by original factory.
Don’t dismantling the machine personally to avoid warranty affecting.
If you need refit the power line, please ask the professional to process.
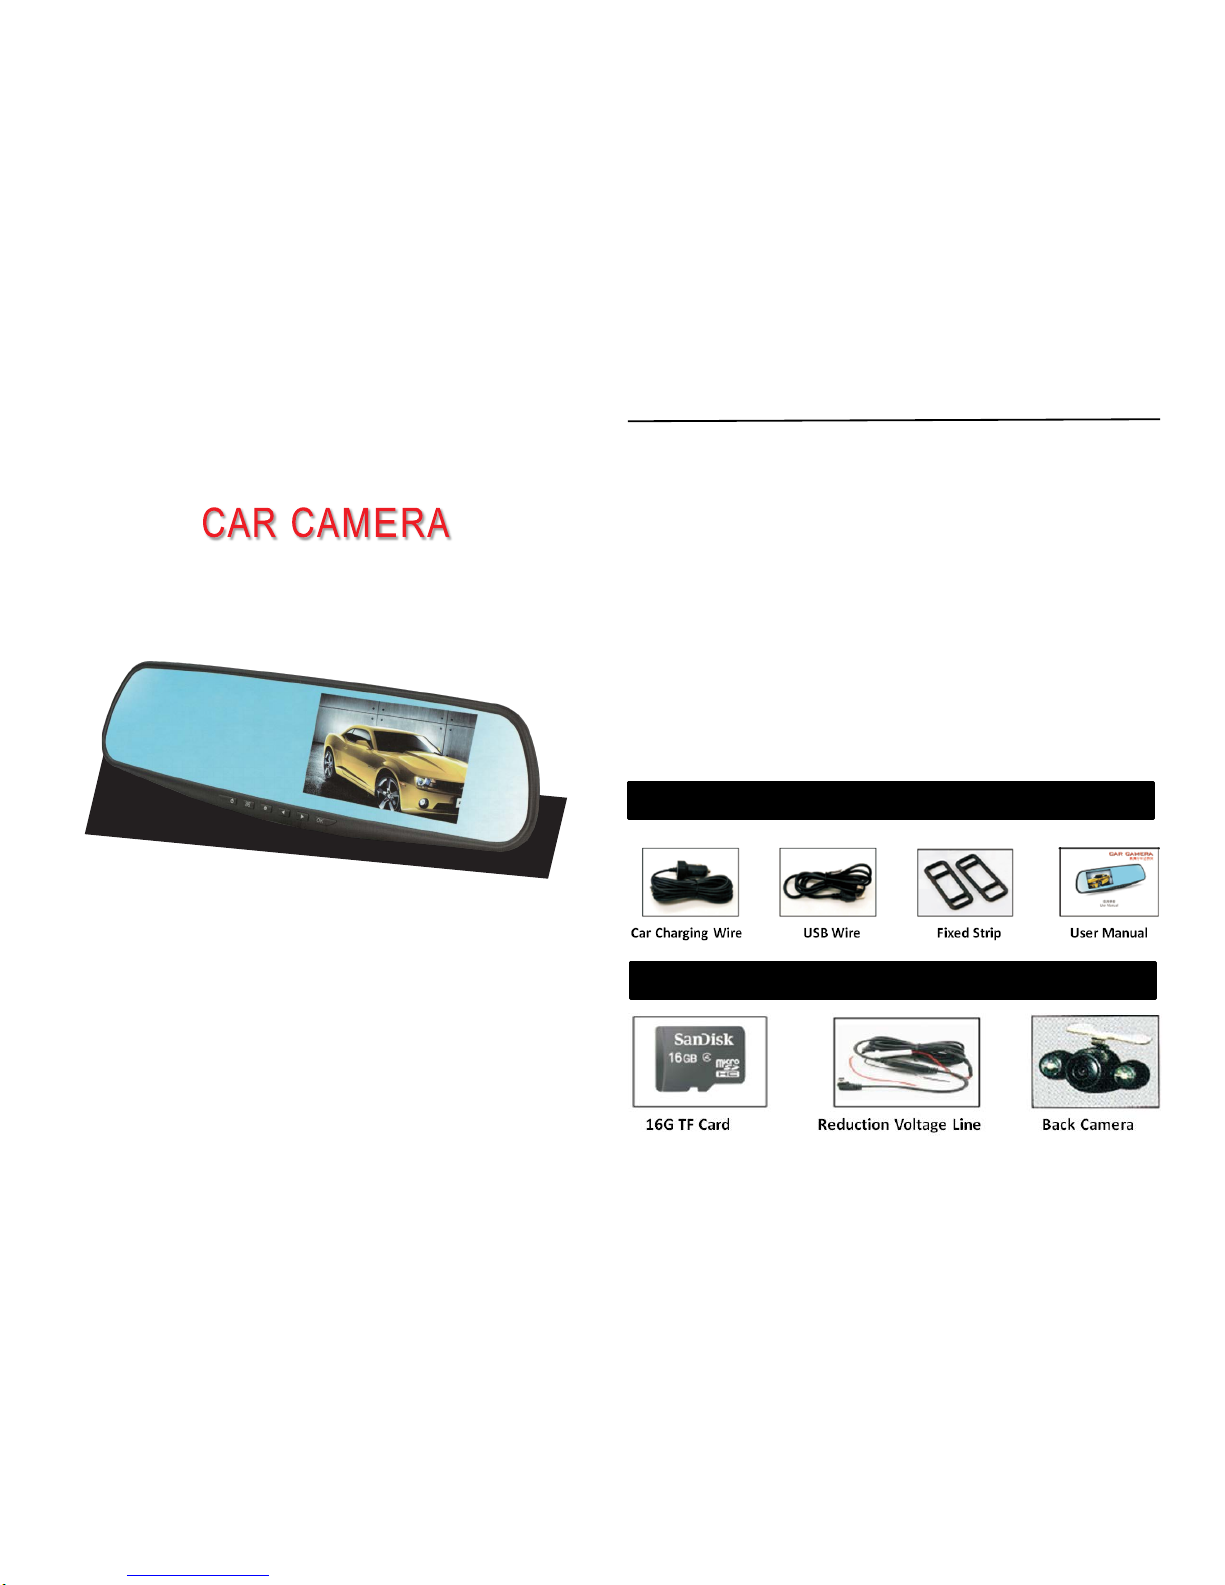
Accessories:
Please refer to below standard accessories and optional accessories. If
there is any missing or damage, please contact your local agent.
Standard
Optional
Page 2

The Structure
The Button Description
Installment
1. Insert TF Card: Please according the Icon instruction to insert the TF
card correctly until the clicking sound. Please use the SDHC (over
CLASS6)
2. Take off the TF Card: Press the TF card and then take it off.
Note: Don’t take out the card when the machine is power on
Page 3

3. Install the recorder: Fixed it on the original rearview mirror.
4. Connecting the power: Plug the car charger into the car cigarette
lighter. And then connect the recorder’s USB and car charger by the
extension charging cable.
5. Checking: To launch the engine and check if the recorder installed
correctly.
Function Instruction
1. Automatic recording function
To start the engine, the recorder will automatically start to recording with
the video light blinking. After the car flameout, the equipment can
preserve the record and power off in 15S automatically. The segmented
video will be saved on the TF card. The earlier recording images will be
covered when the TF card is full.
2. Manual recording function
Long press the button 3S to open/close the recorder manually.
3. Photograph function
Short press the button to enter the photo mode, the icon on the left
corner of the screen is converted from camera to photo icon. Short press
“OK” button can be photographed, the screen will flashing when taking
pictures.
4. Motion Detection
Long press the button “ ” into motion detection. And then short press
“OK” button to start the recording. It will switch into motion detection
Note: Charging cable can be laid along the edge of the windshield.
Note: When the machine is correctly installed, the system indicating lamp
lightens. The machine enter into recording status, video light is blinking.
Please check if the display on the screen is normal, if the display is a
reversed image, contact us please.
a. The recording time can be set in the Menu, the time range is
1/2/3/5/10 minutes separately.
b. If you choose recording time is close, it will not save the video after
the card is full.
Page 4

mode after 10 seconds recording. When there is a moving object before
the lens, machines will start to video recording with red video indicating
lamp flashing. And when there is no moving object before the lens, the
system will stop video.
5. G-Sensors
The product has built-in crash sensors (G-sensor), if a serious vehicle
collision happened, recorder will be locked automatically in case of
covering. Also, you can manually press the button “ ” to lock the
image.
6. Parking Detection
A. In the parking mode, the recorder will start to work automatically
when the car is shaking by external force. And then stop working
after the shaking 10-15s.
B. The video will be locked the file automatically under parking mode.
C.
7. Date & Time
A. Start the machine, press “OK” button into standby mode.
B. Press button “ ” twice, press or to choose the <Time &
Date>, and then press OK button to enter.
C. Press or to set the ti me and date, after it’s ok, press to
exit.
8. USB
Connecting the computer by the USB wire, the product will jump out
USB menu; you will have two choices as below:
A. Memory Unit: You can save and take the video and photo files from
here..
B. Camera: It will jump out the USB video equipment, you can use it as
PC camera to choose network photograph or video chatting.
9. Playback
A. If the machine is working on video recording, please press “OK” to
stop recording.
B. Press into playback mode, you can see playback icon .
C. Short press or to choose the file, and then short press “OK”
button to confirm the file. Short press “OK” button to stop the video.
10. Battery
Full Half Low Empty
This device can be charged through connecting the USB terminal of
computer as well as connecting charger. Please use car power during
the daily working.
11. Reset
If there is abnormal or system halted happened, reset the system.
Note: Parking detection is only working when the recorder close
automatically not by manually.
Page 5

Product Specification
Product Name Full HD Driving Recorder
Product Feature 170 degree Wide Angle,1080P HD
LCD Size 4.3" High definition display
Lens 170 Degree A+
Video Resolution 1280*1080P
Video Format PAL/NTSC
G-sensor Built-in (The file will be saved and locked)
Photo Resolution 1600*1200(2M),2048*1536(3M),2592*1944(6M)
Photo Format JPEG
TF Card Support (up to 32GB)
Microphone Support
Speaker Support
Current Frequency 50HZ/60HZ
USB Interface USB 2.0
Car Charger DC5V 2000mA ( Input DC12V-24V)
Battery Built-in 600mA Battery
Memory 1024MB NAND flash
Vision Infrared Night Vision
Language Chinese/English/Russian/Japanese/Korean and etc.
 Loading...