

MTX Blueprint H615W Owner's Manual
21A7558
1 Mitek Plaza
Winslow, IL 61089
815-367-3000
800-225-5689
www.mtx.com
H615W
OWNER'S MANUAL
IN-WALL LOUDSPEAKER
SYSTEM
CONGRATULATIONS
We appreciate your choice of MTX In-Wall Speakers. Properly installed and operated, MTX In-Wall
Loudspeakers should provide years of worry free listening pleasure. It’s important that you follow each
step in this guide carefully to insure proper installation.
SPECIFICATIONS H615W
Frequency Response 50Hz-20kHz
+/- 3dB
Power Handling 40W RMS
80W Peak Music
Sensitivity (2.83V/1M) 86dB
Woofer Diameter 6-1/2"
Tweeter 1/2" Polycarbonate
Balanced Dome
Mounting Depth 3-1/16" (77.8mm)
Baffle Size 12"H x 8-5/8"W
(304.8mm x 219.1mm)
Cutout Size 10-3/4"H x 7-3/8"W
(273.1mm x 187.3mm)
PAINTING YOUR MTX IN-WALL SPEAKERS
MTX In-Wall Speakers are designed to accept all types of interior and exterior paints. Spray or roller
application should provide excellent results. A paint shield is included with all MTX In-Wall Speakers
to protect the speakers during the painting process. When paintng the grilles, simply remove the cloth
backing material before painting by pulling the material gently away from the grille. After the paint is dry,
reinsert the cloth backing material behind the grille mesh.
LOUDSPEAKER PLACEMENT
MTX In-Wall Speakers are designed to work within any interior decorating scheme. They can be installed
in virtually any location where flush mounting is possible. To maximize their sound performance however
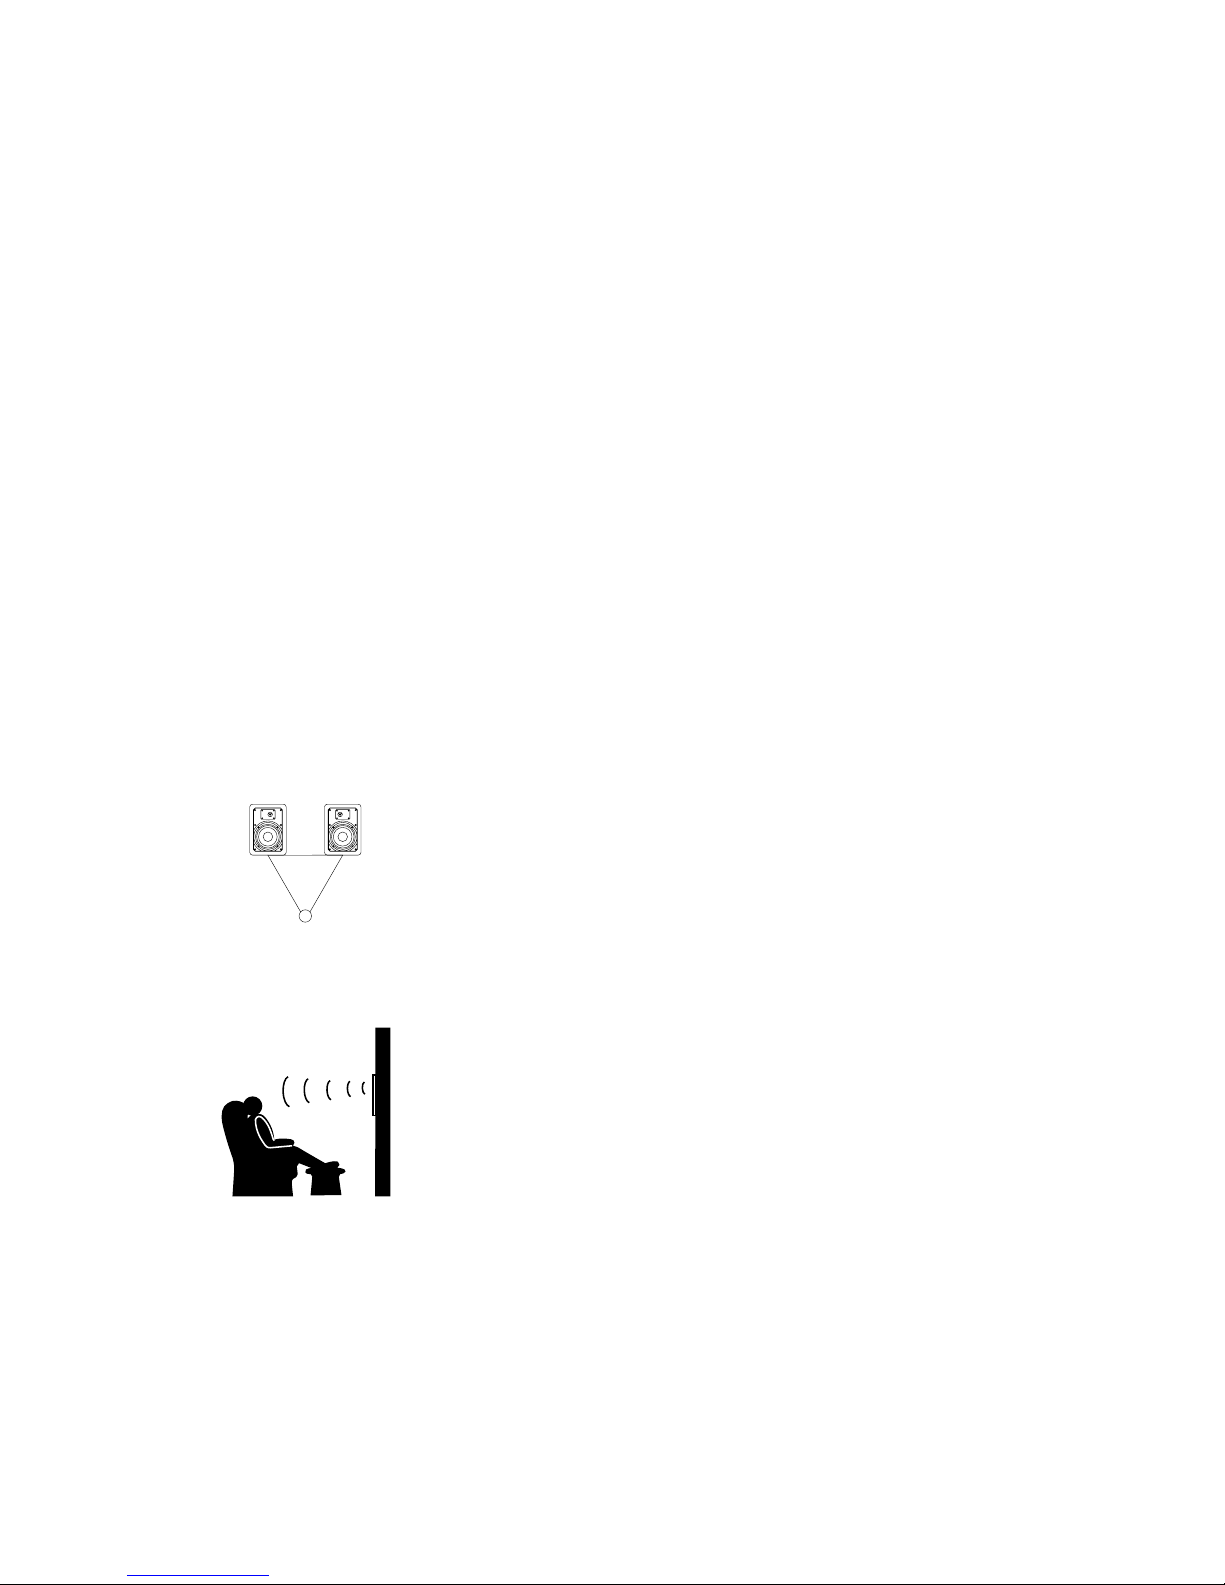
certain guidelines should be followed. For the best stereo reproduction the two loudspeakers should be
placed an equal distance from your listening position and separated so that the speakers and the listener
form an equilateral triangle, with all sides of the triangle being the same length.
For best stereo imaging, we recommend that the units be placed so that the tweeters are as close as
possible to the ear level of a seated listener. Also, the speakers should be placed so that the offset
tweeters are nearer to the inside edge of the speakers. The left and right speakers should have the
tweeter nearer to the center of the room. See Diagram 1.
Listener
Diagram 1

INSTALLATION PREPARATION-NEW CONSTRUCTION
When installing the H615W into a newly built wall, please follow these instructions carefully.
1) Determine placement
Determine the location in the wall the speakers will be placed, using the recommendations in the
"Loudspeaker Placement" section.
2) Mount a Rough-In Kit
For best results, mount a RIK6W Rough-In Kit form Mitek Corp. (available at your MTX dealer). Follow
the instructions included with the kit.
3) The location is ready for dry wall
The RIK6W bracket provides a stable opening around which the drywall installer can cut out an opening,
providing a perfect location for the installation of the H615W.
INSTALLATION
STEP 1
Using a stud finder (available at low cost at most hardware stores) or other accurate method, locate
center point between two studs and mark. Using template provided, trace hole pattern on surface of
wall. Placing a bubble level on either the horizontal or vertical guidelines of template will assist you in
leveling the hole pattern.
STEP 2
Using a sabre saw, keyhole saw or very sharp utility knife, cut hole in wall, following traced pattern.
STEP 3
Run loudspeaker wires to sound source location. There are several methods you can use to accomplish
wiring, depending on the construction characteristics of the room or house. You can add a professional
touch to your installation by using a speaker terminal plate at the source location. Leave sufficient amount
of wire at speaker location (8 to 10 inches) to complete connection.
MTX WARRANTY INFORMATION
All MTX In-Wall Speakers purchased in the United States from an authorized MTX
dealer are guaranteed against defects in material and workmanship for a period ten years from
the date purchased by the end user, and limited to the original retail purchaser of the product.
Product found to be defective during that period will be repaired or replaced by MTX at no
charge. This warranty is void if it is determined that unauthorized parties have attempted repairs
or alterations of any nature. Warranty does not extend to cosmetics or finish. Before presuming
a defect is present in the product, be certain that all related equipment and wiring is functioning
properly. MTX disclaims any liability for other incurred damages resulting from product defects.
Any expenses incurred in the removal and reinstallation of product is not covered by this warranty. MTX's total liability will not exceed the purchase price of the product. If a defect is present,
your authorized MTX dealer may be able to effect repairs.
Proof of purchase is required when requesting service, so please retain your sales
receipt and take a moment to register your product on line at www.mtx.com.
 Loading...