

Page 1

Rear Window
New Location of Jack
Handle
Jack
Enclosure
Mounted
in Vehicle
Hole Location for
Jack Arm Retaining Clip
Provided
Mounting Hole
TTP10
Enclosure Volume: 1 Cubic Foot, Sealed
READ ALL DIRECTIONS CAREFULLY BEFORE BEGINNING
MOUNTING LOCATION: The enclosure mounts behind the driver’s seat.
TOOLS FOR INSTALLATION:
Powered Screwdriver Power Drill
11/64” Drill Bit
INSTALLATION: Follow the steps below
1. Place gasket provided around woofer hole cutout. Connect black wire to the negative side of woofer and red to the posi-
tive side. Using screws provided install woofer into enclosure, making sure not to overtighten screws to avoid stripping.
2. Remove jack handle and relocate to position shown below using clips provided in existing holes in vehicle.
3. Place enclosure into vehicle and transfer hole location in the center of the enclosure to the back of the vehicle. Remove
the enclosure and drill a 11/64” hole.
4. Make speaker connections to the enclosure from your amplifier, loosen terminal knobs (a 13mm nut driver can be used).
Connect wires from amplifier to enclosure, positive to red terminal and negative to black terminal knob.
5. Using bolt provided, install the enclosure into vehicle as shown below. Using hole drilled in Step 3.
FACTORY SPEAKER WIRE COLORS
The speaker wires are located behind the radio. Colors are right side red (positive), white (negative), and left side black
(positive), yellow (negative).
Although every effort has been made to assure proper wiring color, Mitek is not responsible for any changes made by the
vehicle manufacturer which sometime occur. If wiring colors do not match then physical verification is required. These instructions are guidelines only and in no way are intended to replace a professional installation. As always before screwing
and drilling check to make sure you will not damage wires, hoses or cause damage to the vehicle.
See back for Maximum Enclosure Mounting Specs
Page 2
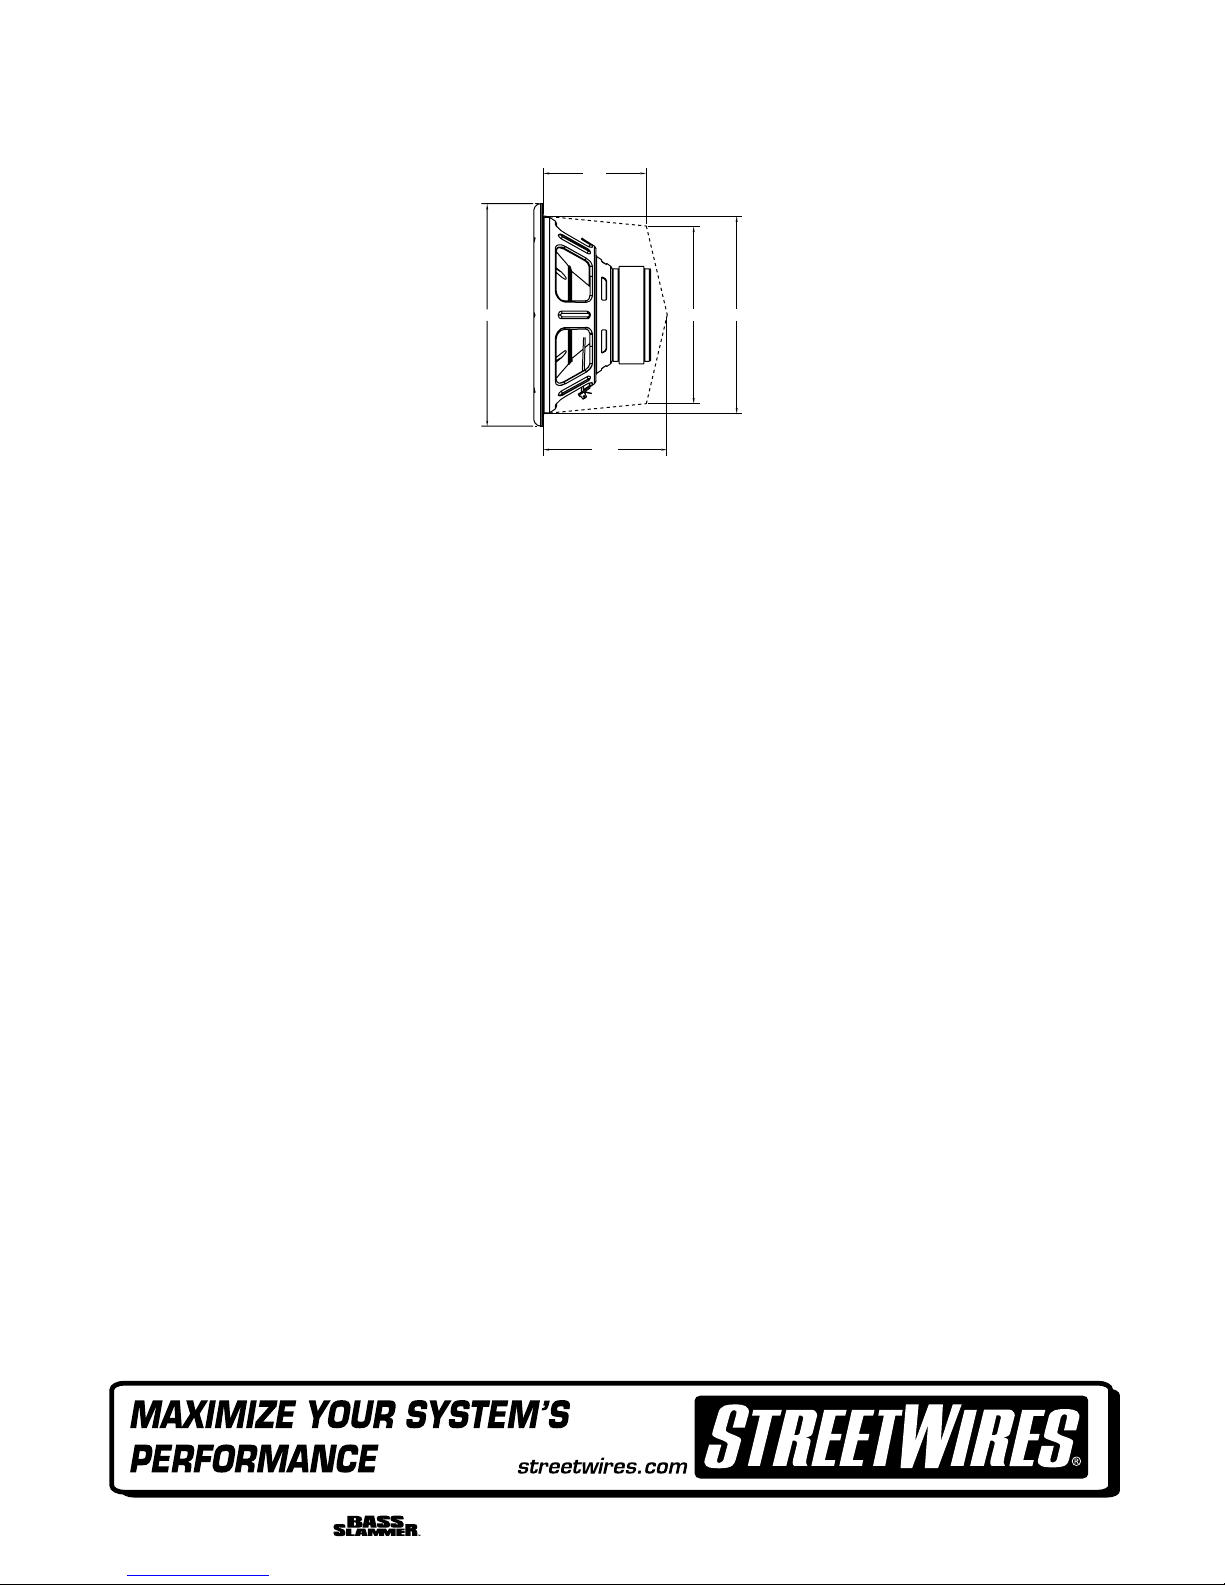
MAXIMUM ENCLOSURE MOUNTING SPECIFICATIONS
4 3/4"
10 3/8"
8 1/4"
9 3/16"
5 3/4"
One Mitek Plaza Winslow, IL 61089 BassSlammer.com 1-800-225-5689
21A7906
 Loading...