

MTN Products AquaHostess Quick Start Manual
!
Set-Up Instructions Continued
• Place the bottle on the base and close the door until it is in
the locked position.
• Ensure that the hot tank switch on back of unit is in the “Off”
position.
• Connect cooler to power source (do not use an extension
cord). This water cooler is intended to be plugged into a
receptacle of the ground fault circuit interrupting type (GFCI).
• The AquaHostess™ has a self-priming feature that takes
approximately 5 minutes to fill both the hot and cold tanks.
After that time, dispense water from both the hot and cold
tanks to confirm that they have filled. Then turn on the hot
tank.
Note: The maximum water supply should not exceed 80 psi.
!
!
!
!
!
!
!
!
!
!
!
!
!
!
!
MTN Products
1770 Brackett Street
La Verne, CA 91750,
909-629-7301
ACB210r-QSG Rev: 12/21/2015
MTN Products
AquaHostess™ (Bottle Water)
Quick Start Guide
!
Button Descriptions
!
• Hot Water - Press the Hot button (#3 below) and hold
for 1 second (the unlock indicator ring will light-up red-#2 below.) Then press the Water Dispense button (#2)
to dispense hot water.
• Cold Water - Cold water is the default setting and the
unlock indicator ring will always be blue (#2) unless hot is
selected (then it will be red). If the unlock indicator ring is
red, press the cold water button (#4 below), then press
the Water Dispense button (#2). Otherwise, just press
the Water Dispense button.
• When the water bottle is empty, the No Water indicator
light will flash (#1 below). Load a new bottle of water
and push the dispense button (#2) to continue
operation. The no water indicator light will turn off and
stop flashing.
• If the Cold Water light (#4) is flashing, this means the
compressor has shut down due to a low water/no water
situation for more than 10 minutes.
!
• Load a new bottle of water and push the dispense
button (#2) to resume normal operation. The no
water indicator light (#1) will turn off. The cold water
light will stop flashing when the water reaches normal
operating level.
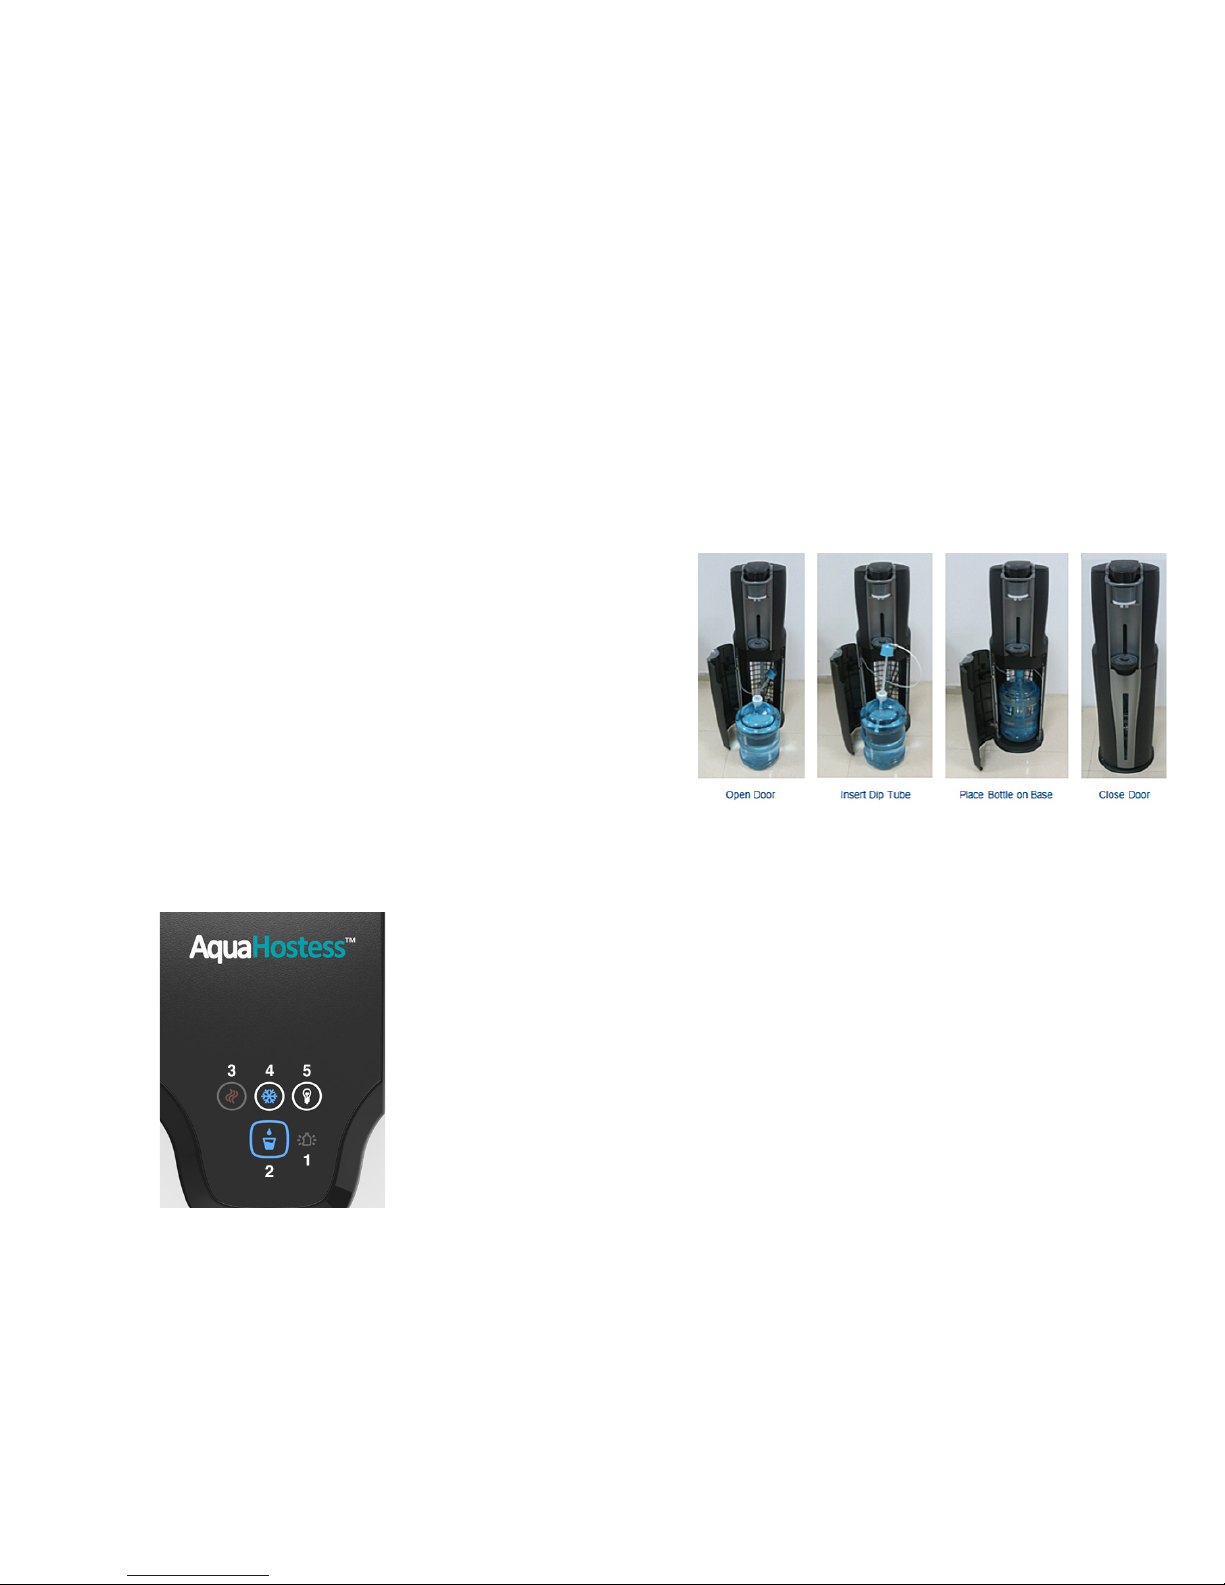
Bottle Loading
Set-Up Instructions
• Remove the cooler from the shipping box and verify
that there is no damage to cooler.
• Ensure cooler is located on a level floor out of direct
sunlight.
• Wipe water bottle with a damp cloth and remove
label from the No Spill cap. Insert dip tube into bottle.
Continued on back.
 Loading...