

Page 1
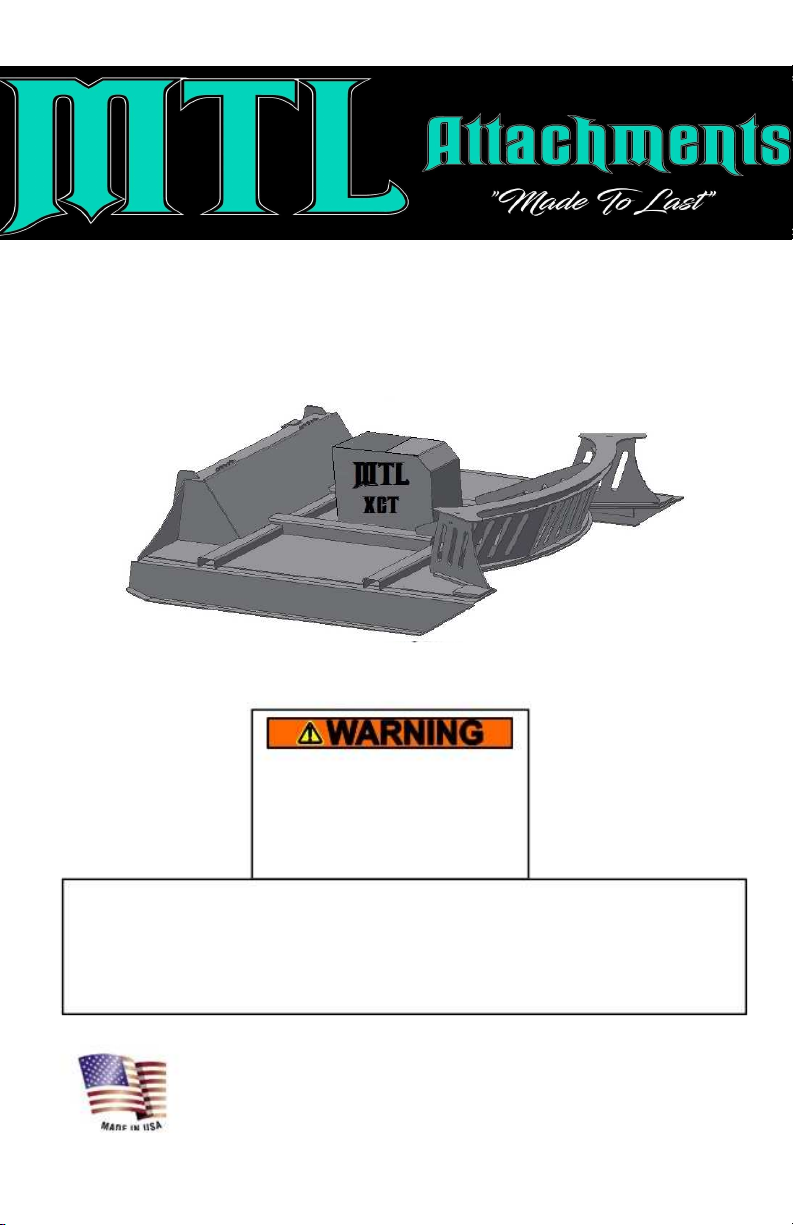
X-treme Duty
XC7 & XCT
Brush Cutters
Owner’s/Operator’s Manual
For safe operation, read these
rules and instructions carefully
to avoid accidents that could
result in Death or Serious Injury.
TO THE OWNER/OPERATOR OF THIS IMPLEMENT
Please read this manual “before” unpacking or using this implement for the first time.
This manual provides you with the necessary instructions to safely install and use your
purchase. Do not let other people use this attachment without first being instructed
how to safely use it.
MTL Attachments
1906 Old Hwy 100
Tallapoosa, GA 30176
404-433-5364
Save this manual for future reference!
Page 2

Thank You
Our sincere appreciation to you on the purchase of a quality X-treme Brush Cutter
designed and manufactured in the USA by MTL Attachments & MTL Attachments,
Incorporated. Product experience of a combined 30 years is the cornerstone of our
company, and our goal is to provide you with a heavy duty product that will give you
years of satisfaction and operation.
Our record of successful and satisfied customers is evidence of the concern for quality
and designed strength that we place into each and every product we build.
As this manual expresses the need for safe operation of your acquisition from
MTL Attachments, it is important that you and all operators of this implement become
familiar with the operation, maintenance and safety instructions found in this manual, as
well as in the manual that accompanied the skid steer machine that will power this
attachment. Add some common sense to the items mentioned in these manuals as the
recipe for safe operation.
We invite you to look at more innovative products on our web site:
Mtlattachments.com
Sincerely,
MTL Attachments.
WGA Equipment & Americas Idea Inc.
Information
Record product information here for future reference.
Model ()
68/60”cut XC7 _____ 68/60” XCT _____
78/72” XC7 _____ 78/72” XCT _____
84/78” XC7 _____ 84/78” XCT _____
S/N & MFG. Date ______________
Dealer Name _________________
Dealer Phone ____-_____-_______
Date of Purchase ___/____/______
MTL Attachments PAGE 2 X-treme Brush Cutters
January 2016
Page 3
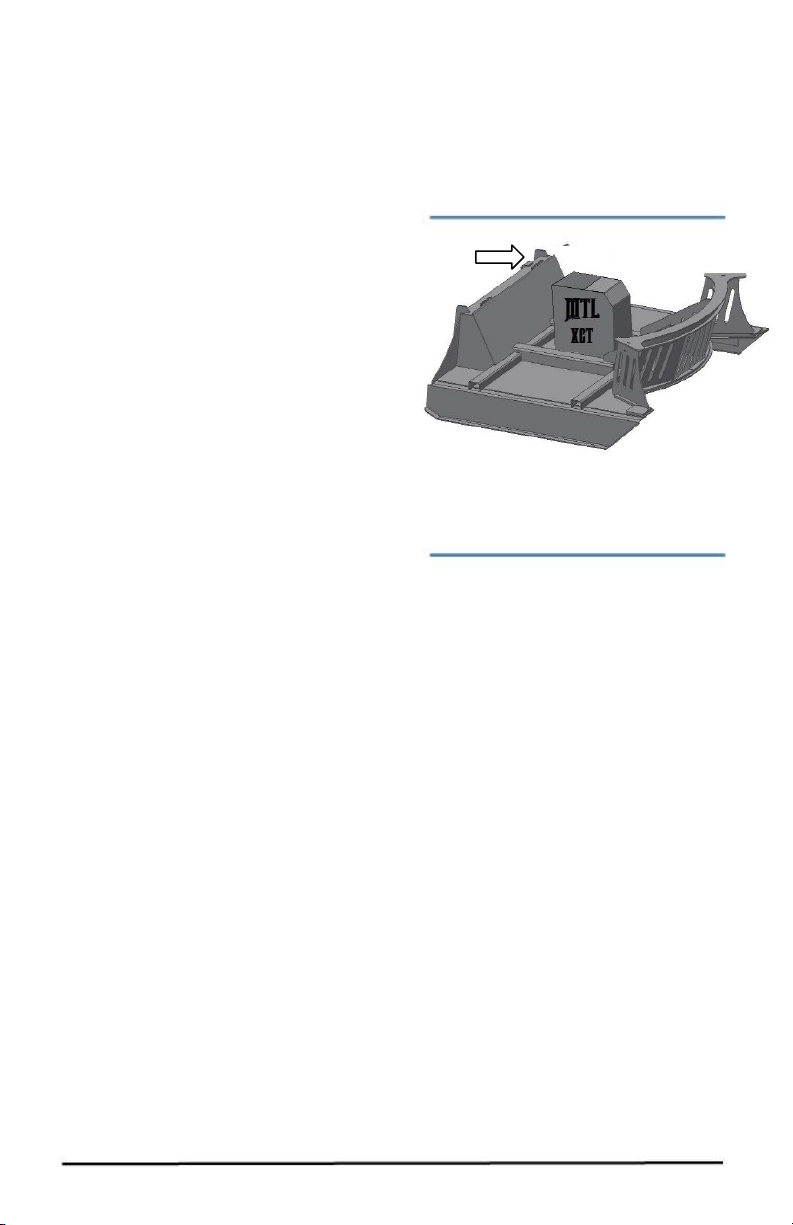
Table of Contents
Information ... ........................................ 2
Orientation ... ................................... .. 3
Importance of Safety ... .................... .. 3
Operator Safety Training Tips ... .......... 4
Skid Steer Requirements ... .............. .. 5
Unpacking Your Shipment ... .......... ... 5
Using Your Implement ... ................. ... 5
Connecting Cutter to Skid Steer ..... 5
Pre-Operation Walk-around
Inspection ... ...................................... 6
Cutter Boom Controls ... .............. .. 6
Engaging Cutter the First Time ... . 6
Starting the Cutter ... ...................... 7
Stopping the Cutter ... ................. ... 7
Getting Familiar with the
Attachment ... ............................. ... 7
Adjusting Cutter Height & Level ..... 8
Before Cutting ... ........................... .. 8
Cutting Tips ... ............................. ... 9
Maintaining your Attachment ... .... ... 9
Lubrication Check & Add ... ............. 9
Before Every Use ... .................... .. 10
Every Week ... ............................. . 10
After Every Season ... ................. .. 10
Blade Holder Removal & Installation
.. 10
Blade Removal & Replacement .... 11
Blade Installation Images ... ........ . 11
Hydraulic System ... ........................ 11
Parts ... ..................................................... 13
17-27 GPM Cutter Parts ... ....... ... 14
27-35 GPM Cutter Parts ... ....... ... 15
30-48 GPM Cutter Parts ... ....... ... 16
Decals ... .......................................... 17
Troubleshooting ................................. 18
Specifications ........................................ 19
Limited Warranty ... .............................. 20
Orientation
Serial Number Plate is Located on ID
Badge
Importance of Safety
Accidents can be very costly to human
life and property. As the operator is
the #1 safety device on all types of
vehicles or equipment, it is important
that the operator read, learn and know
all safety recommendations for this
product. The user is responsible to his
family, friends and co-workers to
operate in a safe manner. Ensure that
everyone who operates or assists in
the operation or maintenance of this
product read and understand all the
elements required to safely operate
this piece of equipment.
This attachment has spinning blades
that include additional dangers.
Throughout this manual you will find
safety notes which are very important
to read and understand before
operating this piece of equipment.
These classifications alert you to
situations that could be harmful to you
or bystanders. When you see these
alerts in the manual, carefully read and
MTL Attachments
PAGE 3 X-treme Brush Cutters
January 2016
Page 4

follow all instructions and also protect
other workers from the same danger.
Will result in
Death or Serious Injury.
Could result in
Death or Serious Injury.
Could result in
Minor or Serious Injury.
Not related to
Personal Injury.
Operator Safety
Training Tips
It is the responsibility of the operator
using this attachment to be acquainted
with the safe operation. In addition to
reading this manual, it is important that
the operator read the skid steer’s
operation manual and follow its
manufacturer’s recommendations!
Before lifting or lowering the
cutter, make sure the area is clear of
bystanders or objects.
Machinery parts sometimes have
sharp edges. Wear work gloves when
moving parts. Always use caution
around cutter blades as they often are
very sharp.
Always use eye protection during
operation. Mount this attachment on a
skid steer equipped with thermoplastic
polycarbonate door panel and side
panels.
Speed Kills! Operate this
implement at a safe working speed.
When transporting the implement,
keep a safe speed to avoid losing
control of the attachment or prime
mover.
Keep proper clearance between
the implement and objects (utilities,
tree stumps, large rocks, buildings,
etc.). Contacting these objects with the
implement or prime mover could cause
a loss of control or damage to the
implement or property.
Before each operation of this
implement, check all hardware (bolts,
nuts, pins, etc.) for their proper
location and tightness.
Stop the engine on the skid steer
and set the brake to avoid the
implement rolling forward or
backwards while you are exiting the
prime mover.
Store this implement in an area
not frequented by children.
Never use drugs or alcoholic
drinks when operating or servicing this
piece of equipment.
Always wear the proper personal
protection equipment when servicing or
operating this piece of equipment. Never
service or operate this
attachment with bare feet, sandals, or
other light footwear.
MTL Attachments PAGE 4
Allow no riders on this
attachment. Keep all bystanders clear
of attachment during operation.
Always replace worn, torn or
missing safety decals before operating.
Never operate the cutter when
bystanders are within 75 feet (23 m) of
the work area.
X-treme Brush Cutters
January 2016
Page 5

Cut only during daylight or well-lit
artificial light
Skid Steer
Requirements
Your X-treme Brush Cutter should only
be used on a skid steer with a lift
capacity of at least 1500 lbs. and with a
weight of at least 6000# with the
bucket removed. A skid steer equipped
with tracks will provide superior
stability in this application.
The availability and capability of a
high-flow system on your skid steer
loader may determine which model
X-treme Brush Cutter will work best
for you.
To protect the operator from any flying
debris, it is important that the skid
steer should be equipped with a
thermoplastic polycarbonate
windshield or similar material, and
similar protection on the sides of the
operator’s cab.
Make sure your
skid steer is in good working
condition. Follow the operating
instructions found in the manual that
accompanied your skid steer. Failure
to do so could result in Minor or
Serious Injury.
Unpacking Your
Shipment
Your attachment arrives from the
factory banded to a wooden pallet,
and requires no final assembly before
use.
Careless
removal of the shipping bands that
secure the implement to the pallet
could result in Minor or Serious Injury.
Clear the area of all bystanders and
MTL Attachments
PAGE 5 X-treme Brush Cutters
stand to the side when cutting the
bands with a pair of sheet metal
shears.
Using Your Implement
Connecting Cutter to
Skid Steer
Never enter the
area underneath the coupler or any
part of the attachment when it is in
the raised position to avoid an
accident that will result in Death or
Serious Injury.
Verify that the hydraulic hoses are
clear from the front of the attaching
plate on the attachment and that the
mounting plate is free from dirt and
debris. When clear, move the skid
steer to proximity of attachment plate.
Tilt skid steer coupler forward to align
coupling point with the upper part on
the attachment plate and raise the
coupler slightly.
Connecting Coupler to Attachment
When the top edge of the coupler is
seated in the top part of the coupler
plate, roll the skid steer tilt function
back until the attaching plate is flat
against the skid steer coupler. Lock
down the coupler levers. Note: If your
skid steer is equipped with a
hydraulically operated coupler,
activate the coupler lock at this time.
January 2016
Page 6
Wipe off any dirt
or dust from the male or female
hydraulic flat-face couplers with a
clean rag before attaching hoses, to
keep contaminants from entering the
hydraulic system.
Never operate this
cutter without the case drain hose
connected to the case drain circuit on
the prime mover.
Connect the attachment hydraulic
hoses to the auxiliary supply couplers
located on your skid steer loader lift
arm.
Attach the safety chain to a secure
place on the skid steer unit to limit the
height that the cutter can be raised.
Check the surrounding area for
bystanders and clear them before
starting the skid steer or attachment.
Before operating the attachment,
always visually inspect and verify that the
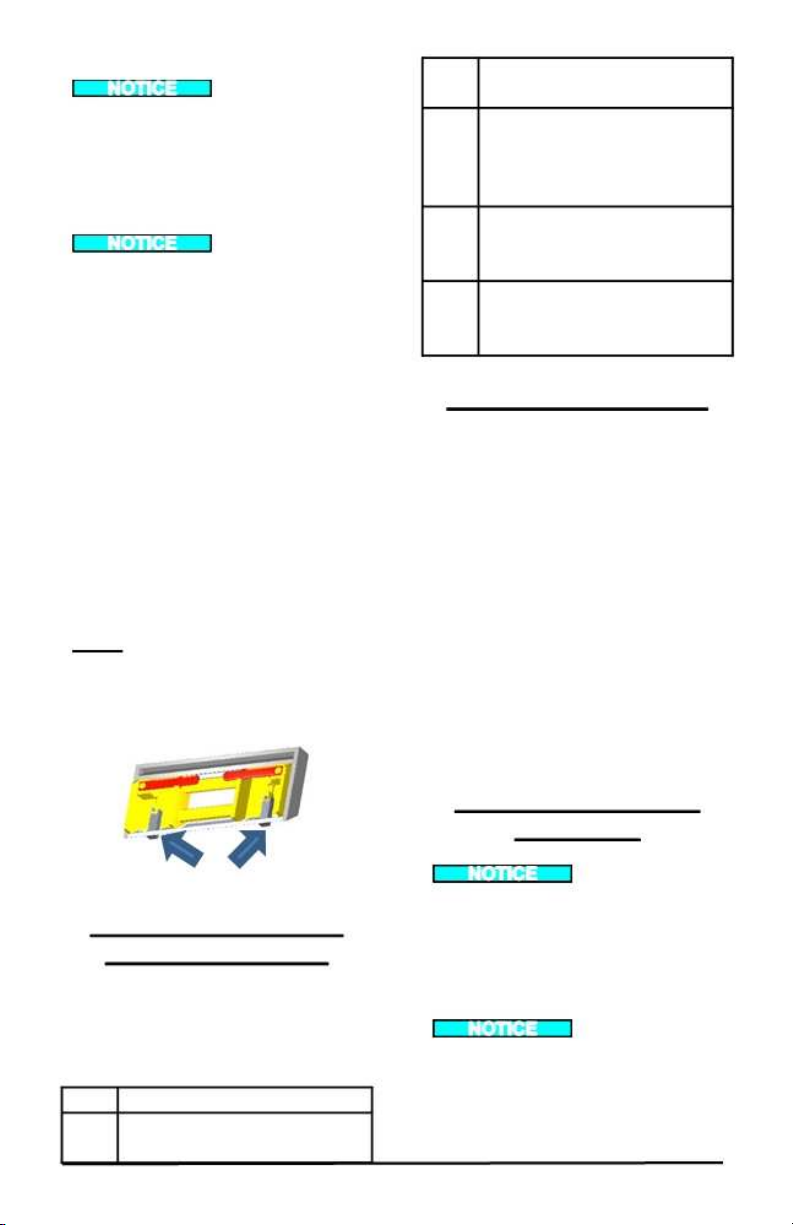
coupler lock pins are fully engaged
through the latch slots on the
attachment plate.
Check Coupler Lock Engagement
Pre-Operation Walk -
around Inspection
Before every use, it is important to
perform a short inspection and
certain maintenance on your brush
cutter.
Item
Check that all shields and
guards are in place.
MTL Attachments PAGE 6
Look for loose bolts and
tighten them if necessary.
Check that all safety decals
are in place and can be
read. Replace them if
necessary.
Check that blades are in
good condition. Sharpen or
replace them, if necessary.
Take care of our
environment. Repair any
hydraulic leaks.
Cutter Boom Controls
Your brush cutter is designed to run off
the skid steer loaders auxiliary
hydraulic system, and is activated and
deactivated by a control in the
operator’s cab. Consult your skid steer
operator’s manual for precise
instructions on how to activate and
deactivate the auxiliary circuit.
Height and tilt functions of the brush
cutter are operated with the control
handles or pedals in the cab. Consult
your skid steers operator’s manual for
precise instructions regarding these
functions.
Engaging Cutter the
First Time
If this is your
initial startup with this attachment on
this machine, check the skid steer’s
hydraulic oil level and add oil, if
necessary, before and after doing
steps 1- 3 below.
XCT models Make sure
the casedrain hose is properly attached to the prime
mover’s case drain connection. Do not operate this
attachment without the case drain hose attached
X-treme Brush Cutters
January 2016
.
Page 7
After starting skid steer, lift the
attachment 6” (152mm) off the ground
surface:
1. With the skid steer engine RPMs
just above idle, slowly engage the
auxiliary hydraulic flow to the
cutter head. Use your machine’s
auxiliary hydraulic flow lever or
switch, activate the auxiliary flow
to the brush cutter.
2. Allow the cutter to run for 30
seconds to purge the air from the
system. Turn off the cutter drive,
allowing it to come to a complete
stop.
3. Lower the cutter attachment to
the ground and shut off the skid
steer’s engine and exit the
operator’s compartment.
4. Check the skid steers hydraulic oil
level, and add oil if necessary.
5. Inspect the cutter hydraulic plumbing
for any noticeable leaks. Correct these
leaks before continuing.
6. Restart the skid steer. With the
attachment raised off the ground and
the engine throttle set just above idle,
engage the cutter drive circuit to start
cutter. Allow cutter to come up to
speed before increasing engine speed.
Starting the Cutter
Moving or
engaging the cutter with bystanders
in the area could result in Death or
Serious Injury. Before engaging cutter
hydraulics, always make sure the area
is clear of bystanders.
Engage the cutter drive hydraulics with
the prime mover’s engine at a low
rpm. Slowly raise the skid steer
engine’s rpm to the correct and
desired cutter speed. Use the skid
steer’s hand throttle to set the speed;
never use a foot throttle when using
the cutter.
MTL Attachments
If the cutter ever
creates a vibration when ramping up
speed, turn the cutter attachment to
the off position and investigate cause.
Refer today Troubleshooting section
in this manual.
Stopping the Cutter
When stopping the cutter, raise the
cutter slightly and lower the skid
steer’s engine RPMs to an idle, and
allow the cutter to slow down. After
the cutter has slowed down you may
turn the auxiliary hydraulics to the
“off” position.
Getting Familiar with
the Attachment
Never operate the
cutter when bystanders are within 75’
(23 m) of your work area. Flying
debris could result in Death or Serious
Injury.
Be cautious when
operating on un-level ground
surfaces. A machine roll over could
result in Minor or Serious Injury.
Always wear your seat belt when
operating this type of machinery.
Before starting the skid steer engine
with this cutter attached, make sure
you are knowledgeable and
comfortable with the operation of the
brush cutter controls as outlined in the
previous and following sections of this
manual.
When operating the cutter, set the skid
steer throttle at a speed that will
produce the required flow. Refer to
your skid steer manual or call your
local skid steer dealer for additional
help, if necessary. Your skid steer
dealer can measure the flow available
on your machine and recommend a
PAGE 7 X-treme Brush Cutters
January 2016
Page 8
throttle setting that is compatible with
this attachment.
To begin with, learn what the cutter
head looks like in a level cutting
position when you are seated in the
skid steer. Knowing what a level cutter
head looks like will help you avoid
damage to the cutting blades by
cutting too close to the ground
surface.
The correct ground speed for cutting
with this attachment can be monitored
by sound and feel and depends on the
material density. If the skid steer
engine is bogging down or if the cutter
speed is turning too slow because of too
much load, the ground speed
should be decreased.
Listen and feel for any strange
vibration when working the cutter. A
bad vibration felt when cutting could
indicate a damaged cutting blade, or
material trying to be cut at too fast a
pace. Slow down the skid steers
ground speed to see if vibration stops.
If it does not, stop the cutter, turn off
the skid steer engine and investigate
cause of vibration. Refer to the
Troubleshooting section in this manual
for further instructions.
Always be aware of your surroundings.
While watching the cutter, also pay
attention to what obstacles or terrain
are in front of the cutter and prime
mover’s wheels. Maintain a safe speed
while cutting.
Cutting tree
branches with the cutter in an
elevated position could result in Death
or Serious Injury if the skid steer
becomes unstable. Never raise the
cutter more a few feet off the ground
when working on slopes or uneven
terrain.
MTL Attachments
PAGE 8 X-treme Brush Cutters
Adjusting Cutter
Height & Level
Use the skid steer loader lift to adjust
the elevation of the cutter. The fore &
aft leveling can be accomplished by
using the skid steer’s attachment tilt
cylinders.
When cutting
dense or heavy material, you may
want to adjust the level of the cutter
deck so the front of the cutter is
approximately 1” (25mm) lower than
the back of the cutter. This will assist
the processing of the material and will
avoid material “balling” under the
deck.
Use care when
operating on uneven terrain or any
type of sloped surface. Keep your
cutter low to the ground when
working in these conditions to avoid a
roll over that could result in Minor or
Serious Injury.
Before Cutting
Inspect the area to be cut and make
sure it is free of any utilities, rocks,
fence posts, or any other objects that
you do not want to cut or that would
damage the cutter.
Determine a safe cutting pattern
before the start of the cut. Stop the
forward progress of the skid steer
loader.
Do not enter into an area to be cut
before the cutter rotation come up to
the operating speed.
January 2016
Page 9

Cutting Tips
Never operate
this attachment when bystanders are in
proximity of the work area that could
result in Minor or Serious Injury from
flying debris.
1. Always inspect work area before
starting the cutter. Locate and
mark any utilities, steel posts,
rocks or any other objects that
could be damaged or would
damage the cutter during
operation. Never assume the
work area is safe and never skip
the inspection part before start of
operation.
2. Operate at a safe slow-paced
speed that will allow you to watch
the area ahead of the cutter &
loader.
3. Make sure you are operating the
skid steer’s engine at an rpm that
will produce the volume of oil
flow required for this attachment.
Cutting Ground Level Vegetation
4. Raise the rear of the brush cutter
approximately 4” (102 mm) above
ground level. The deck should be
slightly sloping downward away
from the operator.
5. Your rotary brush cutter is
capable of cutting and mulching
small trees and other vegetation
of up to 7” in diameter.
Learn and realize which way the
tree is likely to fall so it does not
end up crashing onto you in the
skid steer.
Do not operate
the cutter if you (the operator) can see
MTL Attachments
PAGE 9 X-treme
Brush Cutters
the cutter blade. If the operator can
see the cutter blade, the back of the
cutter is raised TOO HIGH and should
be lowered to avoid debris being
thrown back at the operator and
causing Minor or Serious Injury.
Cutting Above Ground Level Vegetation
6. Tilt the front of the deck
approximately 1 to 2 feet above
ground level, but do not raise the
rear of the deck. Drive slowly into
the vegetation and use the
hydraulic tilt to bend or push the
vegetation forward. Allow the
cutter blade to cut the vegetation.
Lower the front of the deck as you
continue to much the material.
Back drag the cutter to further
minimize the size of the debris.
7. If the cutter speed slows down,
reduced your travel speed and
allow cutter to reach the proper
rotating speed. Mowing too fast
in thick material could result in
balling of material underneath the
cutter deck resulting in a loss of
cutting efficiency.
8. Never use your cutter to push,
pull, lift or move any type of
object or vehicle. Do not use this
attachment to “push” down trees
without the cutter being used.
9. Always allow cutter to come up to
operating speed before moving
attachment into the material you
want to cut.
Maintaining your
Attachment
Lubrication Check & Add
The use and maintenance of proper
lubrication is critical to the successful
January 2016
Page 10

operation and performance of the
MTL bearing housing.
Level the cutter attachment.
Remove MTL Motor cover to expose
hydraulic motor and Bearing housing.
Locate grease bellow, and directly
above will be a grease fitting, apply
Grease with a grease gun-automotive
type. This should be done every 8-12
hours of use, use Hi-Temp
automotive grease- grease will come
out of bellow if over filled. This is
normal and will cause no damage
Before Every Use:
that all fasteners (nuts, bolts, pins,
keepers) are in their right place and
are tight. Inspect and replace any
worn, torn or missing safety decals.
Investigate the location of any oil
leaks and repair.
Check the hydraulic oil level in the
skid steer. Add the recommended
oil, if necessary.
Check
Every Week
Check the condition of the blades by
raising the cutter attachment off the
ground and tilt the attachment
forward to the 90° position. Lower
the attachment to the ground.
Inspect the cutter blades and
remove and sharpen them if
necessary. Sharp cutter blades will
cut more efficiently than dull blades.
MTL Attachments PAGE
After Every Season
Inspect the implement for any loose or
worn parts that may need to be
replaced prior to the next cutting
season.
Visually inspect the cutting blades.
Sharpen or replace them, if necessary.
Clean, sand & repaint any area that
looks worn or scratched to prevent
further rusting. Use an equipmentpaint found at your local hardware
store or building center.
Store your implement in a shed or
cover with a water-proof tarp to
protect it from the weather. Store in
an area not frequented by children.
Blade Holder Removal
& Installation
Removal:
Tilt the skid steer’s tool cylinder all the
way back to place the attachment in a
near vertical position. Secure the front
of the cutter with an overhead hoist or
prop a 4” x 4” under the front or lean
the cutter head against a large tree to
support it in the raised position.
Be cautious
during the following step. The blade
cutter could fall resulting in Minor or
Serious Injury. Stand to the side.
Remove the six ¾” cap screws that
secure the holder to the gearbox shaft.
If holder cannot be removed, start the
skid steer and place the cutter level
and jar the cutter on the floor or
ground surface. The holder should
separate from the gearbox flange.
Repeat if necessary.
10 X-treme Brush Cutters
January 2016
Page 11
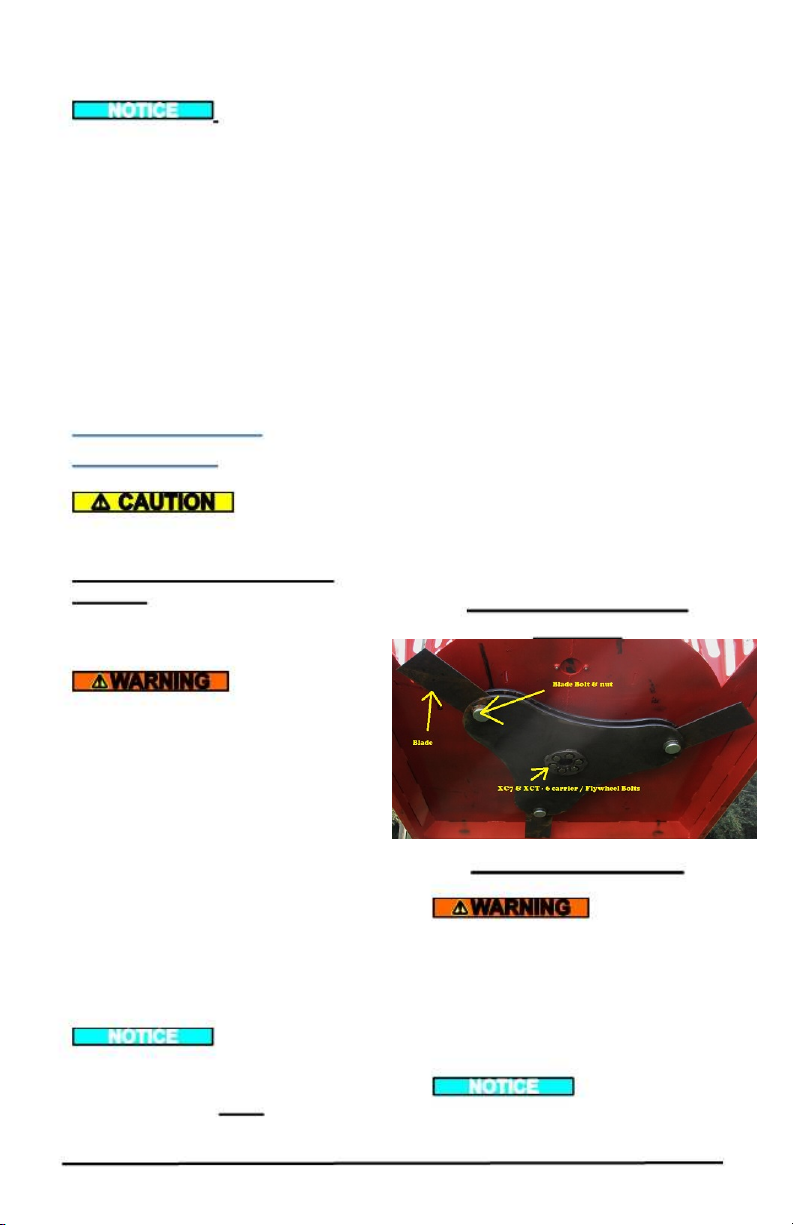
Installation:
Use a hoist, power
jack or forklift to support the blade
holder during installation
Align the hole in the holder to gearbox
shaft fully seat the holder on shaft. Tap
with a hammer to assure full
engagement. Make sure the holder is
properly aligned and seated on
gearbox shaft splines. Install the six ¾”
capscrews and torque to the value
shown in the Hardware Torque table on
page 12 of this manual.
Blade Removal &
Replacement
Cutter blades
can be very sharp and could cause
Minor or Serious Injury if mishandled.
Always wear protective gloves and
footwear.
Blade Removal:
To avoid an
accident that could result in Death or
Serious Injury, never find yourself in a
position where any body part is
located under an unsupported cutter
deck when servicing this attachment.
Remove the blade Nut from bolt
holding blade. Drive the bolt shank from
the blade and holder, being careful not
to allow blade to fall off and contact
your foot or other body part.
Blade Inspection:
(sharpen or replace) the blades as a
set. Never run the cutter with
unmatched blades. Never install one
used and one new blade as they will
cause the cutter to be unbalanced and
Always service
result in a vibration during operation
and may cause harm to other cutter
components.
Sharpen the blades with the
appropriate equipment, but be careful
not to overheat the blade steel causing
the blade material to become brittle
and prone to early failure. Grind both
blades to the similar shape and size
being careful not to create a
mismatched set of blades
Blade Installation:
Insert the new blade bolt up through
the hole in the blade and blade holder
and insert the nut in the recess hole in
the holder. Tighten the bolt into the
nut. Weld the inside diameter of the
nut to the outside diameter of the bolt
or use RED locktite.
Blade Installation
Images
Blade Hardware Weld
Hydraulic System
A small stream
of oil from a pinhole leak could
penetrate your skin if contacted. To
avoid an accident that could result in
Death or Serious Injury, never use
your hand or other body parts in an
attempt to locate a hydraulic leak.
Always release the
hydraulic system pressure from the
cutter circuit prior to removing the
MTL Attachments PAGE
11 X-treme Brush Cutters
January 2016
Page 12
attachment or any hydraulic system
service work.
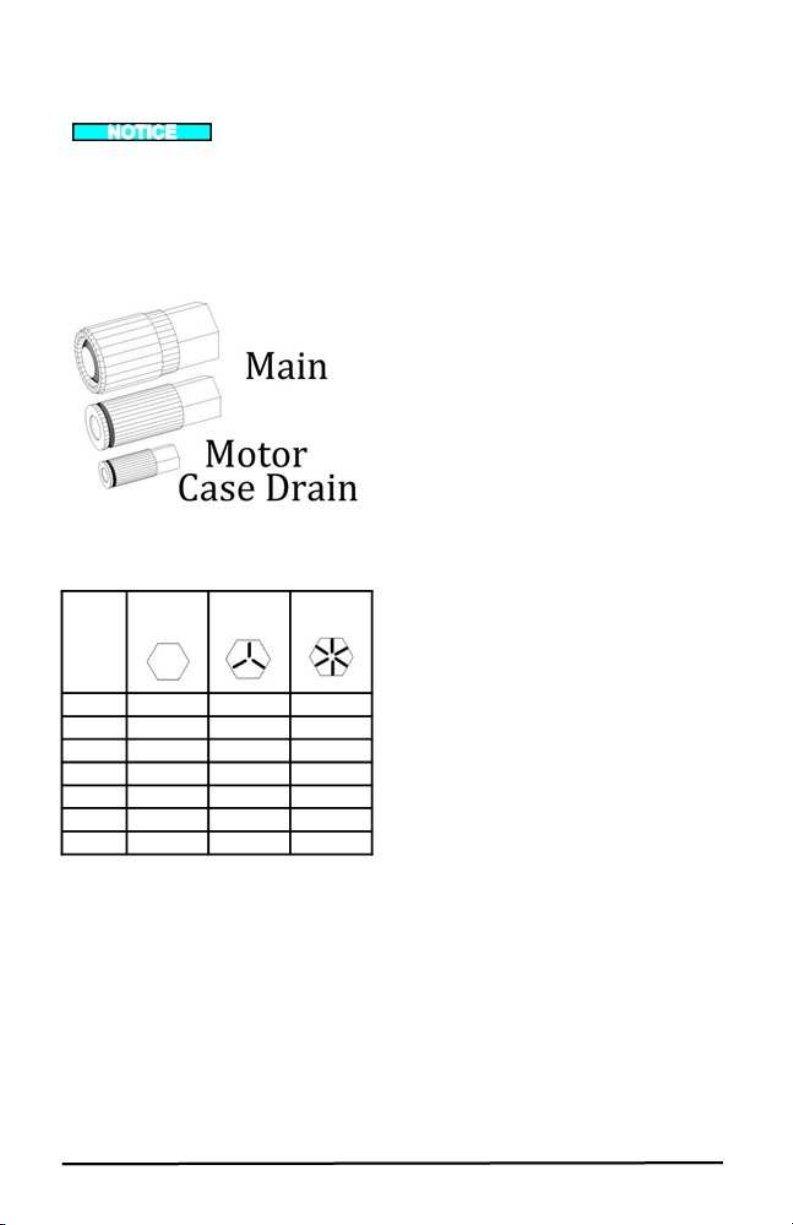
Piston Drive case
drain hose is properly attached to the
prime mover’s case drain connection.
Do not operate this attachment w/o
the case drain hose attached &
connected to the skid steer case
drain circuit. (only Piston drive
Models)
Hardware Torque
Grade 2 Grade 5 Grade 8
lb-ft lb-ft lb-ft
¼” 66* 8 12
5/16” 10 17 20
3/8” 20 30 45
½” 45 75 110
¾” 160 260 380
7/8” 190 400 600
1” - 580 900
*
= inch pounds
Higher torques may require
the use of a torque
multiplier.
All values are “dry” torques.
MTL Attachments PAGE 12 X-treme Brush Cutters
January 2016
Page 13

Parts
When requiring any parts for your implement, please collect the following
information:
Implement Model Number
Implement Serial Number
Cut Width
Parts Manual Date
Parts Manual Page
Part Description
Quantity Required
Ship-to Name & Address
Payment Method
(lower right corner)
…then call MTL Attachments dealer for factory fresh parts specifically designed
for your attachment.
Use Genuine Parts from
MTL Attachments
MTL Attachments has the specific information logged under your
invoice number , name , phone number when order was placed
to order any parts - please call 404-433-5364 or email us at
[email protected].
Hydraulic drive motor - XC7-XCT - 100, 120, 160, 200, 250 cc
Forged pressure relief block - mounted on to hydraulic motor
Hydraulic line - required 2
Hydraulic Couplers - 2 (1 female & 1 Male- 1/2 FFC or 3/4 FFC
Both are ISO compliant
MTL Attachments PAGE 13 X-treme Brush Cutters
January 2016
Page 14
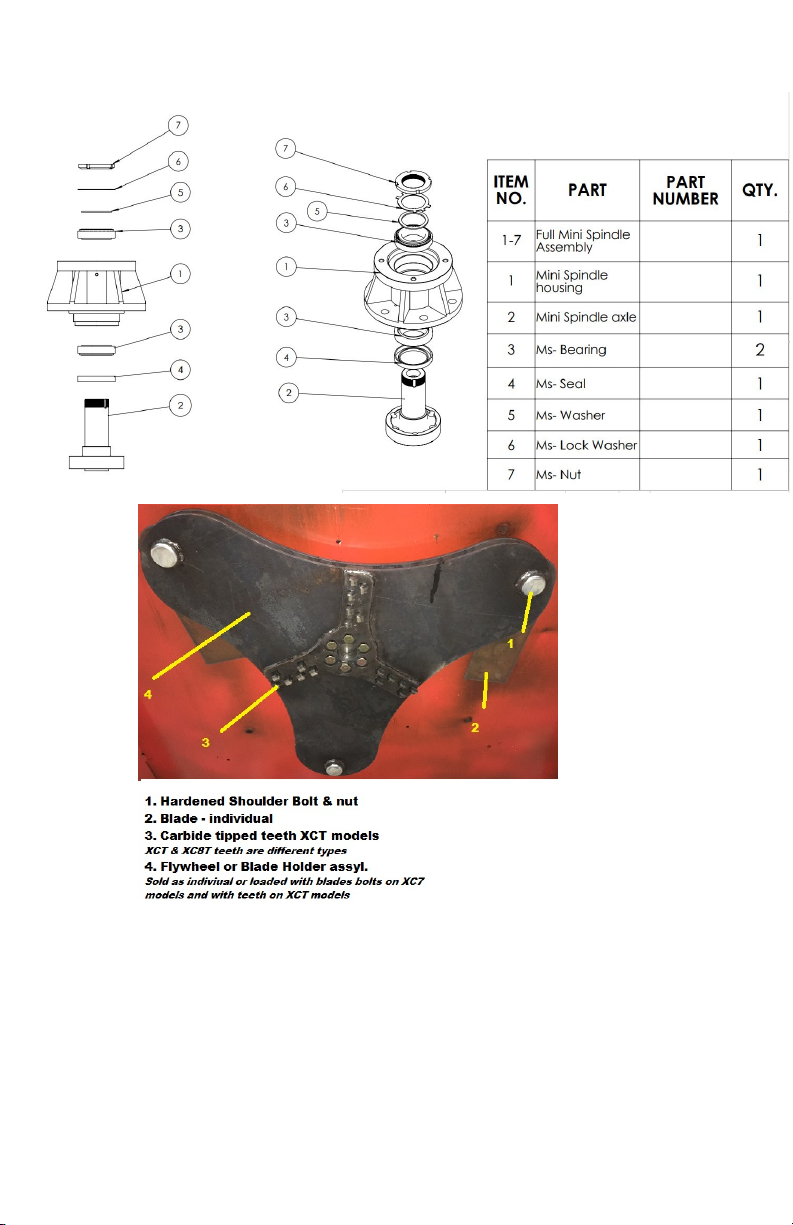
XC7 & XCT Cutter Parts - Bearing Housing
Located below Hydraulic Motor
Specify GPM requirements when ordering parts
MTL Attachments PAGE 14 X-treme Brush Cutters
January 2016
Page 15

Troubleshooting
Problem Cause
Cutter bogs down Deck is not properly
leveled & material is
balling under deck
Dull blades
Ground speed too fast
Cutter speed too slow
Vibration felt when Missing, loose, damaged or
running cutter unbalanced cutter blades
Blade mount damaged
Planetary set loose on deck
Cutting height too low for
cutting in sandy or rocky
soils
Blades get dull too quickly Blades have contacted
solid objects (rocks, steel
pipes, etc.)
Blades breaking Excessive shock loads
Hydraulic oil level goes Leak at cutter motor or
down during operation other plumbing
Leaks in skid steer
hydraulic system
Motor seal leak
Blades do not spin when No oil flow
flow is activated
Motor or drive shaft failed
MTL Attachments PAGE 15 X-treme Brush Cutters
Refer to leveling
instructions found in this
manual.
Remove and sharpen
blades.
Slow down ground speed.
Raise engine RPMs or
investigate other low oil
flow problem
Replace blades with new or
re-sharpened and equally
balanced blades.
Replace blade mount
Tighten & torque
mounting bolts. Replace
bolts if they are damaged.
Raise cutter height.
Clear cutting area of solid
objects before hitting
them, or raise the cutter
height to clear exposed
rock surfaces.
Avoid hitting solid objects
(rock, steel pipes, large
tree stumps, etc.).
Investigate & repair
Investigate & repair
Cutter run without case
drain connected to skid
steer.
Confirm that quick
disconnects are fully
seated in their mating
connector.
Check that skid steer
auxiliary circuit is
activating.
Call your dealer for further
recommendations.
Resolution
January 2016
Page 16

Owner’s Manual
X-treme
Brush Cutter
Website
1906 Old Hwy 100
Tallapoosa, GA 30176
Limited Warranty
MTL Attachments, & Americas Idea Inc. products are warranted to be free from
defects in
lease or rental
This warranty does not cover normal wear items, including but not limited to, bearings,
hoses, ground engaging parts such as, teeth, blades, cutting edges, pilot bits, auger
teeth and broom bristles. This warranty does not cover maintenance, service or
adjustments. This warranty does not cover damage due to misuse, negligence,
accidents, or improper maintenance. This warranty does not cover damage due to
improper application, installation, contamination, adjustment or setup. This warranty
does not cover improper modifications of product. This warranty is void if any
components have been disassembled, i.e. pumps, gear boxes, motors.
workmanship or materials for period of (12) months from initial sale,
date.
Warranty Exclusions
www.mtlattachments.com
For More Information, Contact
Phone: (404)433-5364
Specially modified attachments built by MTL Attachments to meet your
customer's needs shall not be warranted by MTL Attachments, Inc.
This warranty does not cover replacement parts not supplied by MTL.
Warranty Statement
Our obligation under this Limited Warranty shall be solely limited to repairing or
replacing any part (see non-covered items) free of charge that, according to our
judgment, show evidence of a defect in quality of workmanship or materials for the
stated (12) month warranty period. All defective parts must be routed directly to
MTL, with freight or delivery charges to be prepaid. This Limited Warranty shall not
be interpreted to render MTL liable for any injury or damage to persons, business or
property of any kind nor expenses or losses incurred for labor, supplies, substitute
machinery rental, or for any other reason. Repair or replacement parts are subject to
the supply conditions at the time of repair or replacements, which may directly affect
our ability to obtain material and/or replacements parts. MTL reserves the right to
make improvements in design or changes in specifications at any time without incurring
any obligations to owners of previously purchased units. No one but MTL is allowed to
alter, modify or enlarge this warranty nor the exclusions, limitation and reservation at
any time.
MTL Attachments PAGE 16 X-treme Brush Cutters
January 2016
Page 17

Terms & Conditions ("Terms")
Last updated: February 24, 2018.
Please read these Terms and Conditions carefully before using the http://www.mtlattachments.com website operated by MTL Attachments, Inc.
Your access to and use of the Service is conditioned on your acceptance of and compliance with these Terms. These Terms apply to all visitors, users and
others who access or use the Service
By accessing or using the Service you agree to be bound by these Terms. If you disagree with any part of the terms then you may not access the Service.
EXCLUSIONS OF WARRANTY
Except as otherwise expressly stated herein, MTL makes no representation or warranty of any kind, expressed or implied, AND MAKES NO WARRANTY
OF MERCHANTABILITY IN RESPECT TO ITS MACHINERY AND/OR ATTACHMENTS ARE FIT FOR ANY PARTICULAR PURPOSE. MTL shall not be
liable for incidental or consequential damages for any breach or warranty, including but not limited to inconvenience, rental or replacement equipment, loss
of profits or other commercial loss.
Upon purchase the buyer assumes all liability for all personal injury and property resulting from the handling, possession or use of the goods by the buyer.
No agent, employee, or representative of MTL has any authority to bind MTL to any affirmation, representation or warranty concerning its machinery and/
or attachments except as specifically set forth herein. This warranty policy supersedes any previous documents
Termination
We may terminate or suspend access to our Service immediately, without prior notice or liability, for any reason whatsoever, including without limitation if
you breach the Terms.
All provisions of the Terms which by their nature should survive termination shall survive termination, including, without limitation, ownership provisions,
warranty disclaimers, indemnity and limitations of liability.
Links To Other Web Sites
Our Service may contain links to third計arty web sites or services that are not owned or controlled
My Company, Inc. (change this) has no control over, and assumes no responsibility for, the content, privacy policies, or practices of any third party web
sites or services. You further acknowledge and agree that My Company, Inc. (change this) shall not be responsible or liable, directly or indirectly, for any
damage or loss caused or alleged to be caused by or in connection with use of or reliance on any such content, goods or services available on or through
any such web sites or services.
We strongly advise you to read the terms and conditions and privacy policies of any third party web sites or services that you visit
Governing Law
These Terms shall be governed and construed in accordance with the laws of the Unites States of America, without regard to its conflict of law provisions
Our failure to enforce any right or provision of these Terms will not be considered a waiver of those rights. If any provision of these Terms is held to be
invalid or unenforceable by a court, the remaining provisions of these Terms will remain in effect. These Terms constitute the entire agreement between us
regarding our Service, and supersede and replace any prior agreements we might have between us regarding the Service
Changes
We reserve the right, at our sole discretion, to modify or replace these Terms at any time. If a revision is material we will try to provide at least 30 days
notice prior to any new terms taking effect. What constitutes a material change will be determined at our sole discretion.
By continuing to access or use our Service after those revisions become effective, you agree to be bound by the revised terms. If you do not agree to the
new terms, please stop using the Service.
To sharpen Blades on your MTL Cutter – use a high grade
Grinding disc for High Carbon steel to sharpen the blades
 Loading...