

MTHTrains Tinplate 1134 Operator's Manual

®
By M.T.H. Electric Trains
Tinplate 1134
Steam Locomotive
OPERATOR’S MANUAL
Contemporary Version
Compatibility
®
This engine will operate on any traditional
42” STD Gauge track system, including
M.T.H.’s traditional tubular track. It is also
compatible with most standard AC
transformers. (See page 22 for a complete
list of compatible transformers and wiring
instructions.)
PLEASE READ BEFORE USE AND SAVE

Table of Contents
Set Up Checklis t...................................................................................................3
Lubrication.............................................................................................3
Priming The Smoke Unit....................................................................... 4
Checking The Battery............................................................................ 4
Assembling The Passenger Cars............................................................5
Placing The Engine On The Track.........................................................5
Basic Operation ....................................................................................................6
Activating Features................................................................................6
Proto-Sound 2.0 Operating Instructions........................................................... 8
Activating Proto-Sound 2.0 Conventional Mode Features....................8
Passenger Station Announcements (PSA)............................................. 9
Speed Control........................................................................................ 11
Locking Locomotive Into A Direction.................................................. 12
Reset To Factory Default.......................................................................12
Automatic Sound Effects.......................................................................12
Maintenance.........................................................................................................13
Lubricating and Greasing Instructions...................................................13
Cleaning The Wheels, Tires and Track..................................................15
Headlight Replacement Instructions......................................................16
Self Charging Battery Back-Up.............................................................16
ProtoSmoke® Unit Operation................................................................17
Troubleshooting Proto-Sound® 2.0 Problems.......................................19
Transformer Compatibility and Wiring Chart....................................... 22
Additional Features Accessible Of DCS Remote Control System........23
Service & Warranty Information........................................................... 24
Limited One-Year Warranty..................................................................24
CAUTION: ELECTRICALLY OPERATED PRODUCT:
Not recommended for children under 10 years of age. M.T.H. recommends adult supervision with children ages 10 - 16.
As with all electric products, precautions should be observed during handling and use to reduce the risk of electric shock.
WARNING: When using electrical products, basic safety precautions should be observed, including the followi ng:
Read this manual thoroughly before using this device.
M.T.H. recommends that all users and persons supervising use examine the hobby transformer and other electronic equipment
l
periodically for conditions that may result in the risk of fire, electric shock, or injury to persons, such as damage to the primary
cord, plug blades, housing, output jacks or other parts. In the event such conditions exist, the train set should not be used until
properly repaired.
Do not operate your layout unattended. Obstructed accessories or stalled trains may overheat, resulting in damage to your layout.
l
This train set is intended for indoor use. Do not use if water is present. Serious injury or fatality may result.
l
l
Do not operate the hobby transformer with damaged cord, plug, switches, buttons or case.
Set Up Checklist
Lubricate Pick Up Rollers (L)
Lubricate Wheel Axles (L)
•
Lubricate the locomotive
• Prime the smoke unit
• Check to see whether the battery needs to be charged for full sound effects
• Apply power to run as described in the Basic Operating Section of this manual
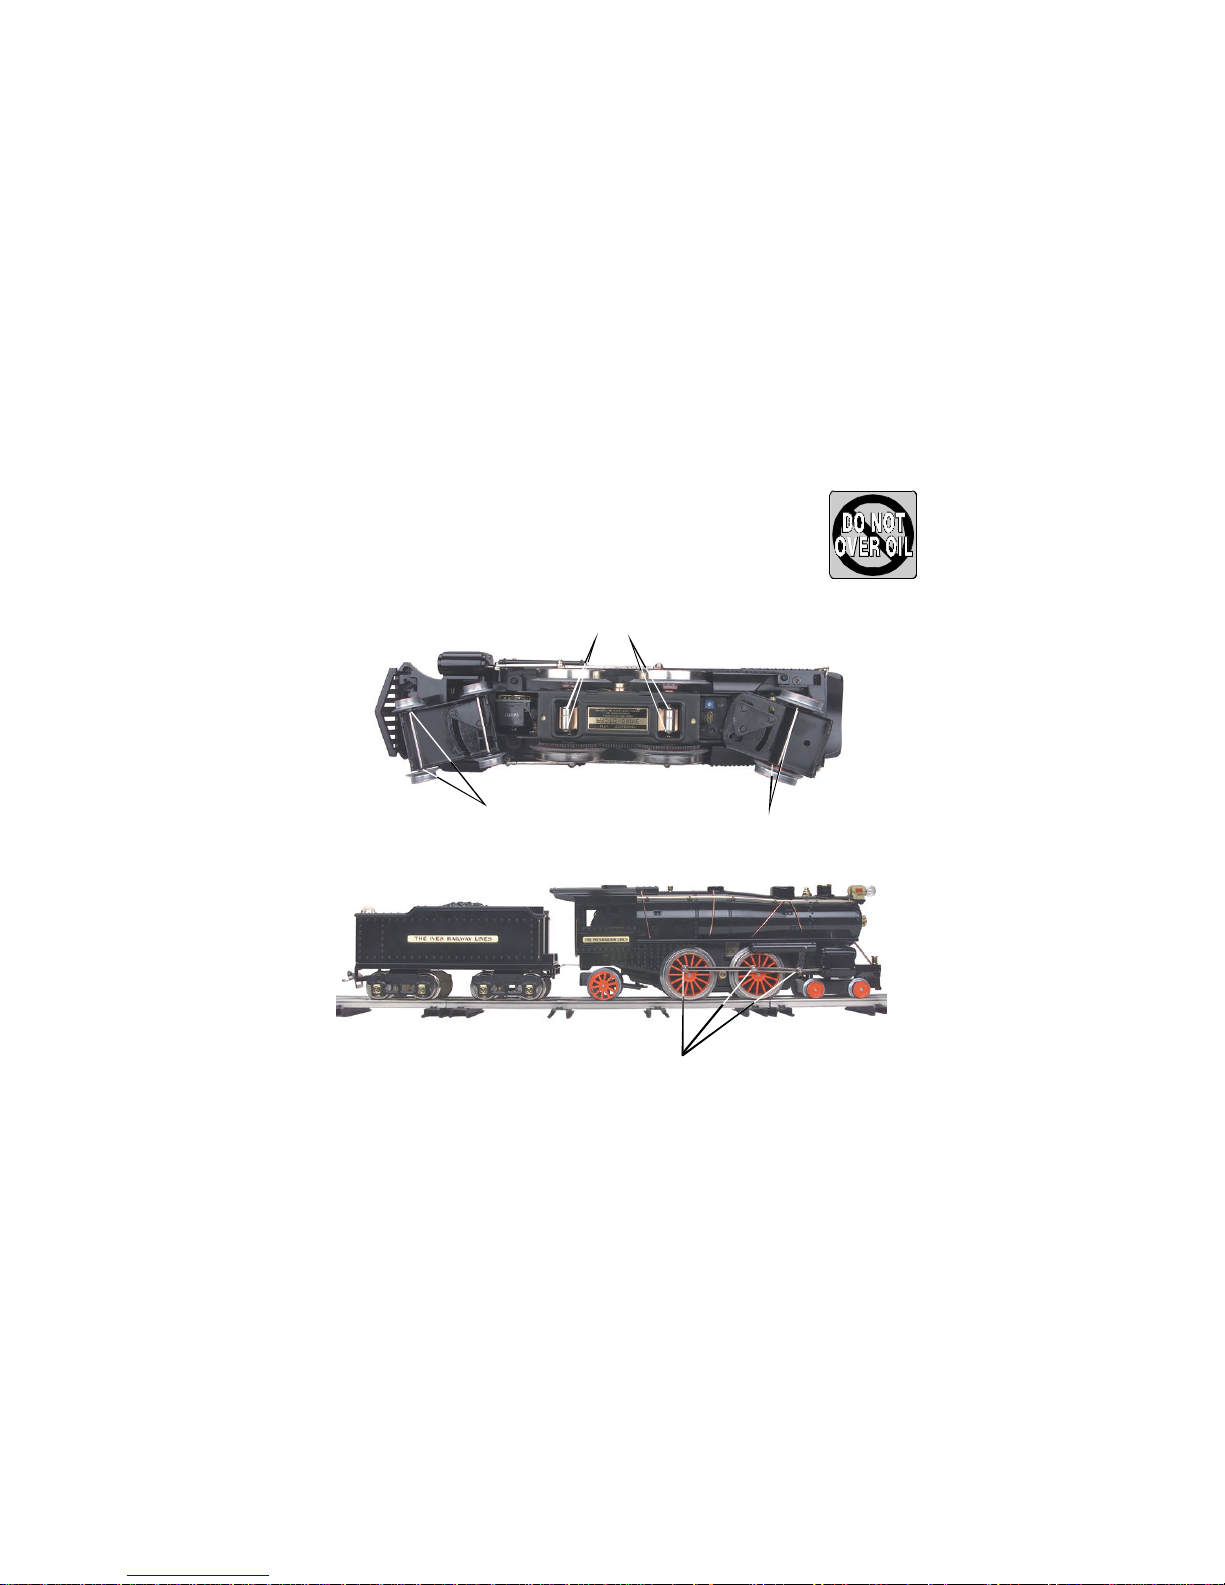
Lubrication
You should lubricate the engine to prevent it from squeaking. Use
light household oil and follow the lubrication points marked “L” in
Fig. 1. Do not over-oil. Use only a drop or two on each pivot point.
Lubricate Wheel Axles (L)
Figure 1. Lubrication Points on the Locomotive
Lubricate Side Rods
Figure 2: Lubricating Side Rods
DO NOT
OVER OIL
Tinplate 1134 Steam Locomotive 3
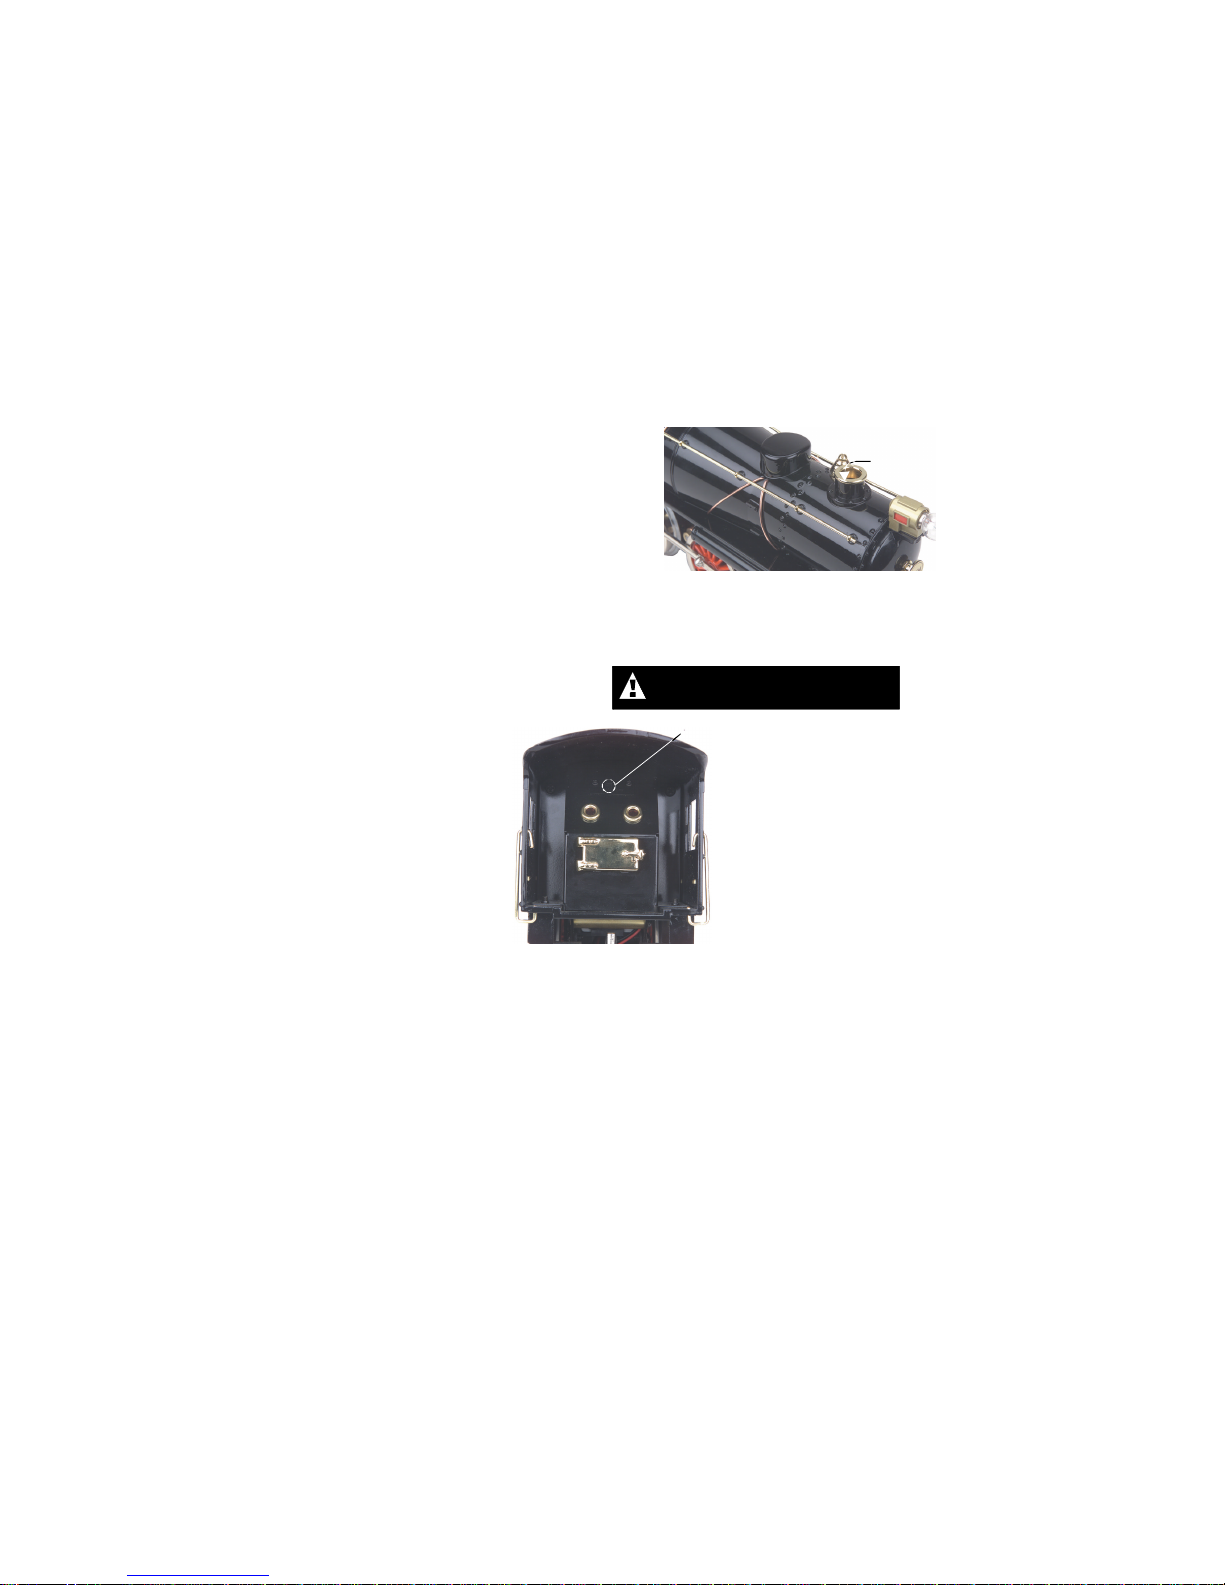
Priming The Smoke Unit
When preparing to run this engine, add 15-20
drops of smoke fluid through the smokestack (see
Fig. 3). We recommend M.T.H. ProtoSmoke,
Seuthe, LGB, or LVTS fluids. Do not overfill
the unit or the fluid may leak out and coat the
interior engine components.
If you choose not to add the fluid (or have
already added the fluid but choose to run
smoke-free), turn off the smoke unit switch
located under the engine (see Fig. 4). Failure
either to add fluid to the unit or to turn it off
may damage the smoke unit heating element
and/or wicking material.
Add Smoke Fluid
Figure 3: Adding Smoke Fluid
Running the engine without a primed
smoke unit may cause damage
Smoke Unit
ON/OFF Switch
Figure 4 Smoke Unit Switch Location
Checking The Battery
You may find, if your locomotive was built several months before you set it up, that the
rechargeable battery has run down and needs to be charged before operating. If you
notice that the sounds are garbled, test and charge the engine as described in the
"Self-Charging Battery Back-Up" on page 16.
4 Tinplate 1134 Steam Locomotive
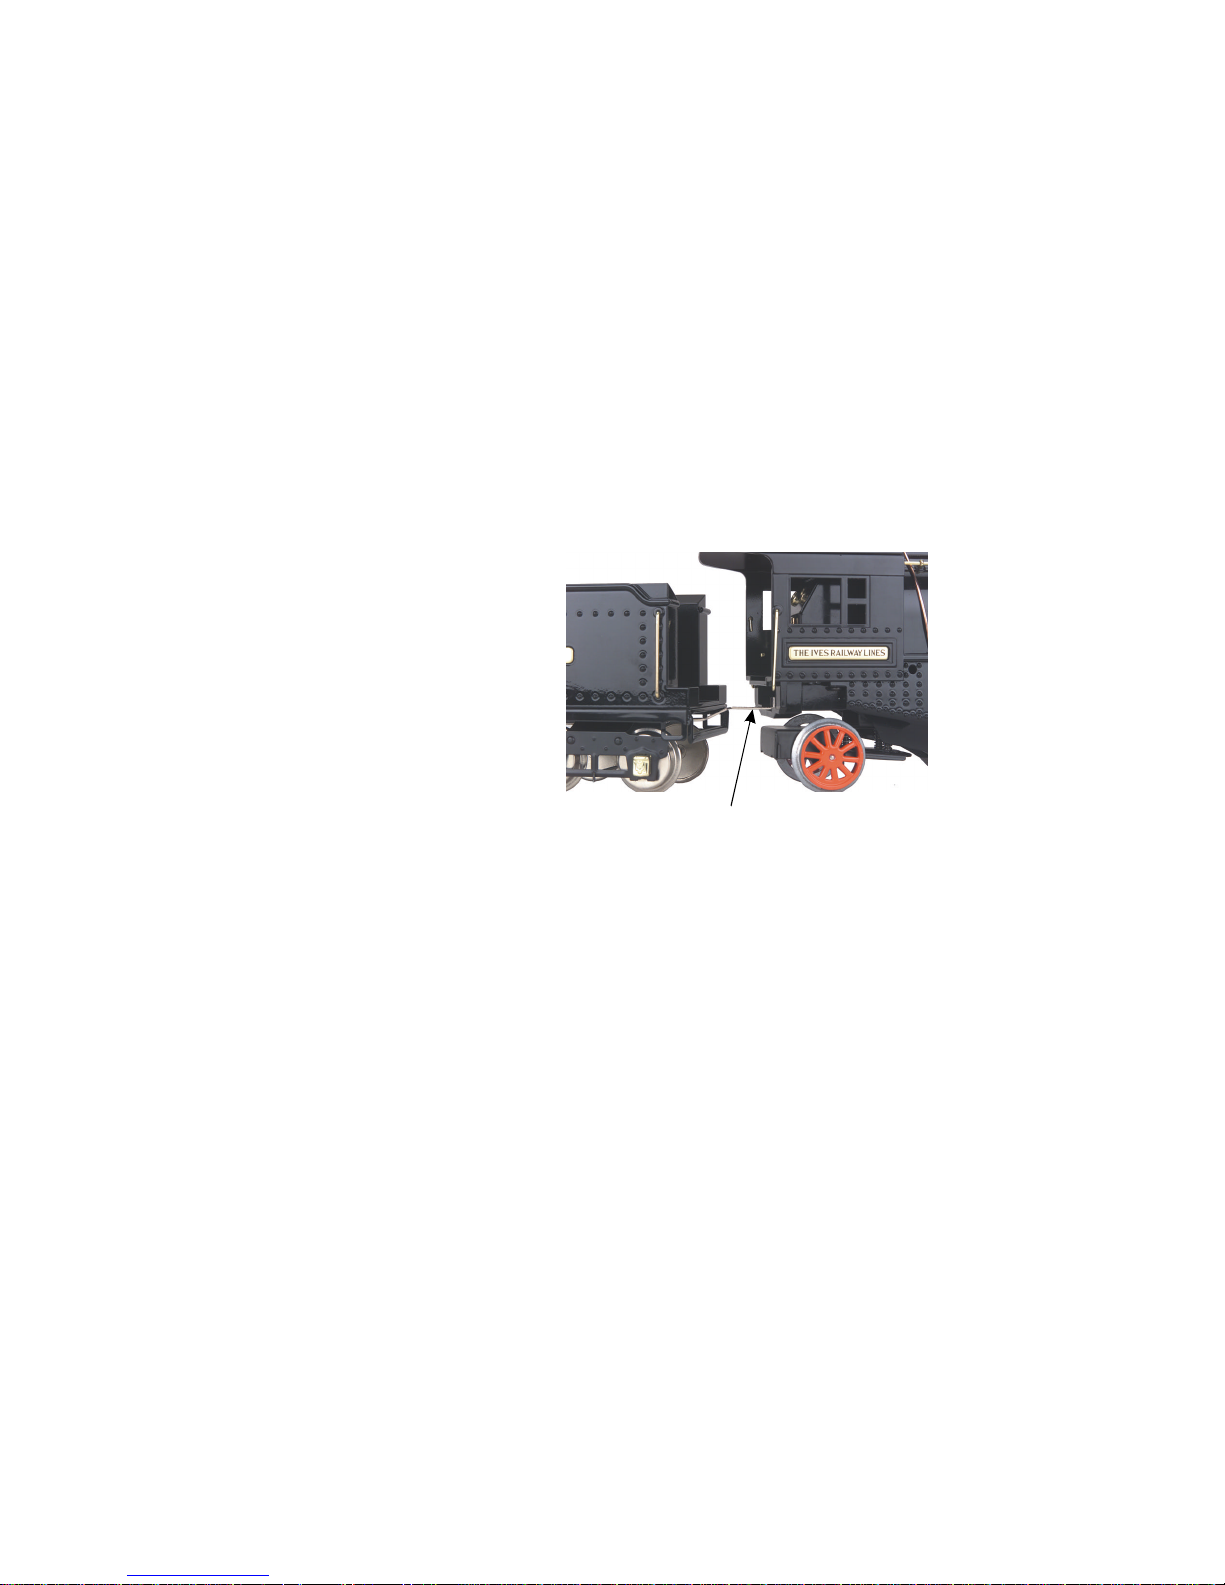
Placing The Engine On The Track
Connect draw bar as shown.
Place the engine on the track, then connect the draw bar between the engine and tender.
(Figure 5) The draw bar hole located farthest from the tender is for applications such as
display. The second hole is for normal operation on the track.
At this point, you are ready to begin running your engine.
Figure 5: Connecting the draw bar
Tinplate 1134 Steam Locomotive 5
Basic Operation
The Throttle knob controls how fast your train will travel.
Turn the throttle knob up ½-way, until the engine and car lights shine bright.
Put the engine into motion by pressing the Direction button on your transformer once.
(hold it for approximately 1 second)
If the engine does not begin to move as soon as you firmly press the Direction button,
you may not have sent enough voltage to the track to make the train move. Turn the
throttle up a bit higher until the train begins to move.
Activating Features
Throttle To increase or decrease track voltage, and therefore train speed, turn the
throttle control knob. Turning clockwise will increase voltage and speed, while turning
counterclockwise will decrease voltage and speed. The engine will maintain the speed
you set after you release the throttle until you turn it again to change the voltage and
speed.
Bell - To sound the bell, in an engine equipped with a bell firmly press and release the
Bell button. To turn the bell off, press and release the Bell button again. The bell will
continue to ring from the time you turn it on until you press and release the button again
to turn it off.
Horn/Whistle - To sound the whistle, firmly press the Horn/Whistle button. The whistle
will sound for as long as you continue to depress the button. It will stop when you
release the button.
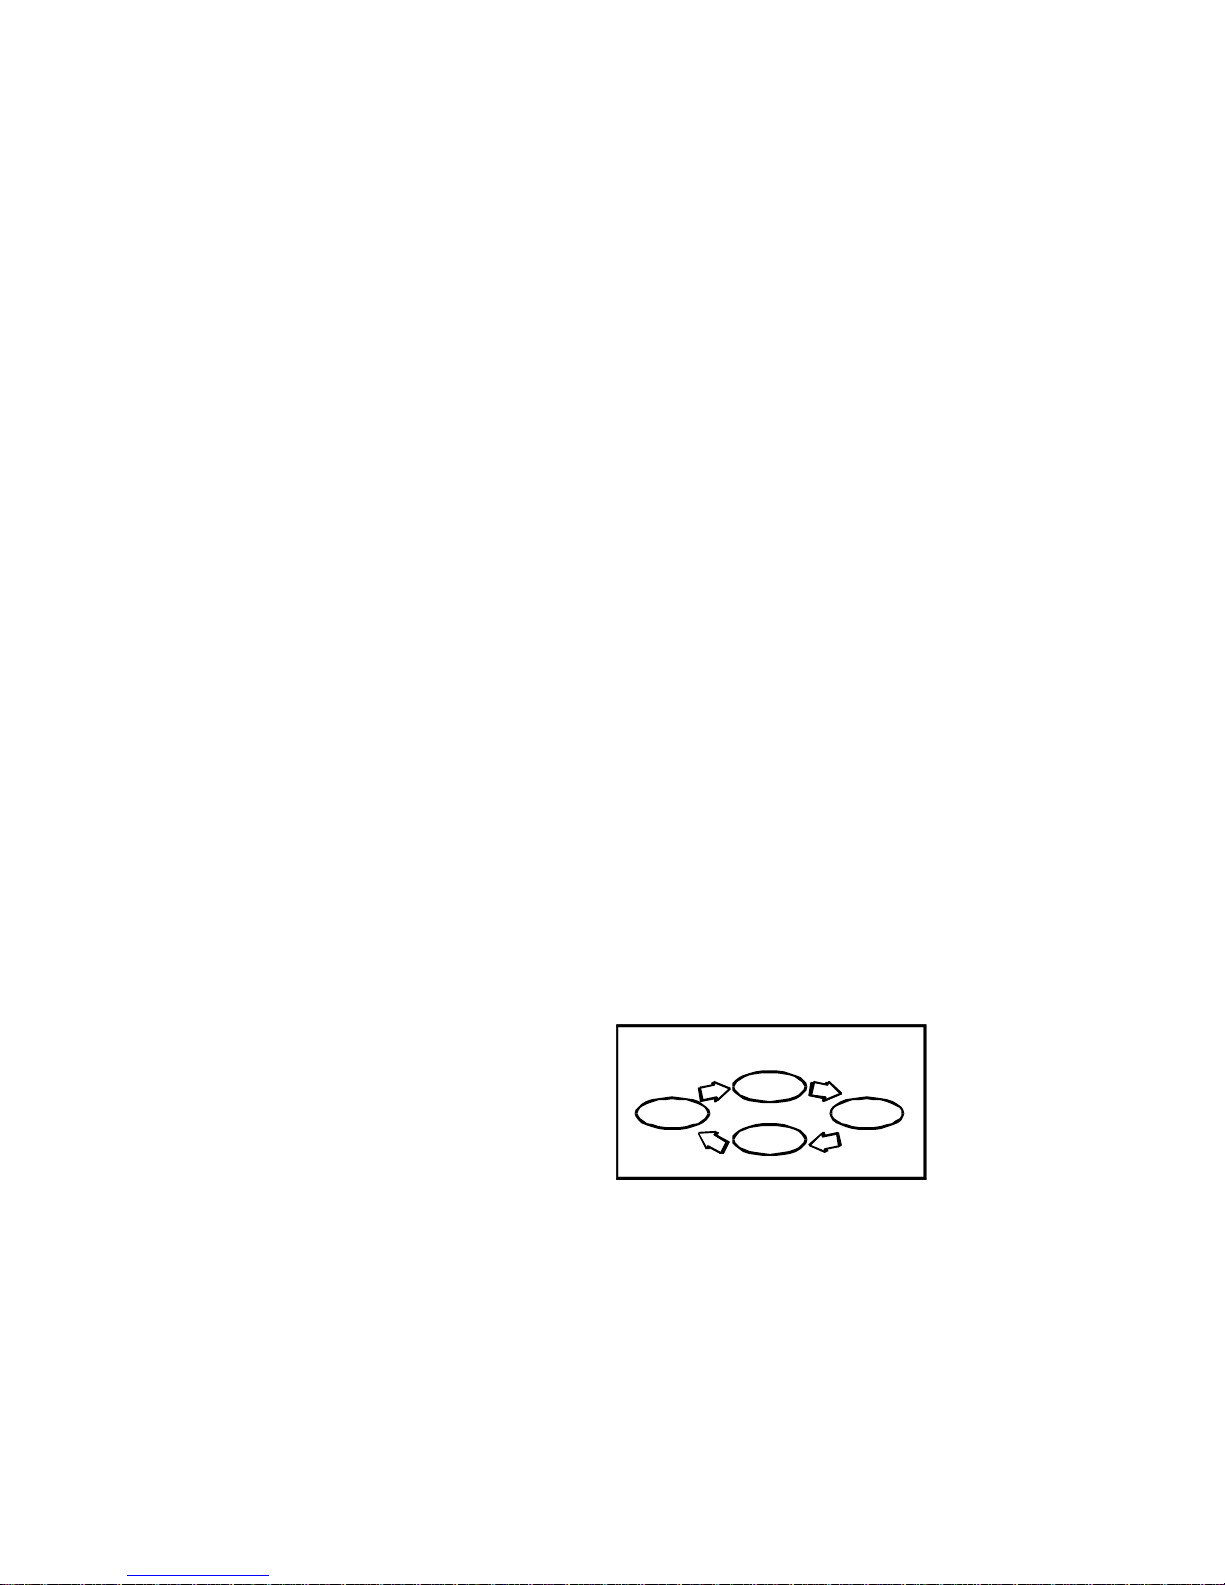
Direction Your train is programmed to
start in neutral. The train will always
cycle neutral-forward-neutral-reverse with
each press and release of the direction
button. The engine is programmed to
restart in neutral each time the track
voltage is turned off for 25 seconds or
more.
Cycle Phases
Neutral
ForwardReverse
Neutral
6 Tinplate 1134 Steam Locomotive

Manual Volume Control
Proto-Sound 2.0
To adjust the volume of all sounds made by this engine, turn the master volume control
knob located under the tender clockwise to increase the volume and counter-clockwise to
decrease the volume.
Volume Adjustment Knob
Figure 6: Proto-Sound Manual Volume Adjustment
Tinplate 1134 Steam Locomotive 7
Proto-Sound 2.0
Operating Instructions
This manual contains the operating instructions for Proto-Sound 2.0 in conventional
mode only. Instructions for accessing DCS command mode features accompany the DCS
Remote Control System equipment.
Activating Proto-Sound 2.0 Conventional
Mode Features
Proto-Sound 2.0 features are activated by sequences of Bell and Horn button pushes
described below. Please read the full descriptions of each feature before using it. To use
these buttons to activate features rather than to blow the horn or ring the bell, you should
tap the buttons very quickly with a ½-second pause between button presses. You may
need to practice your timing to make this work smoothly.
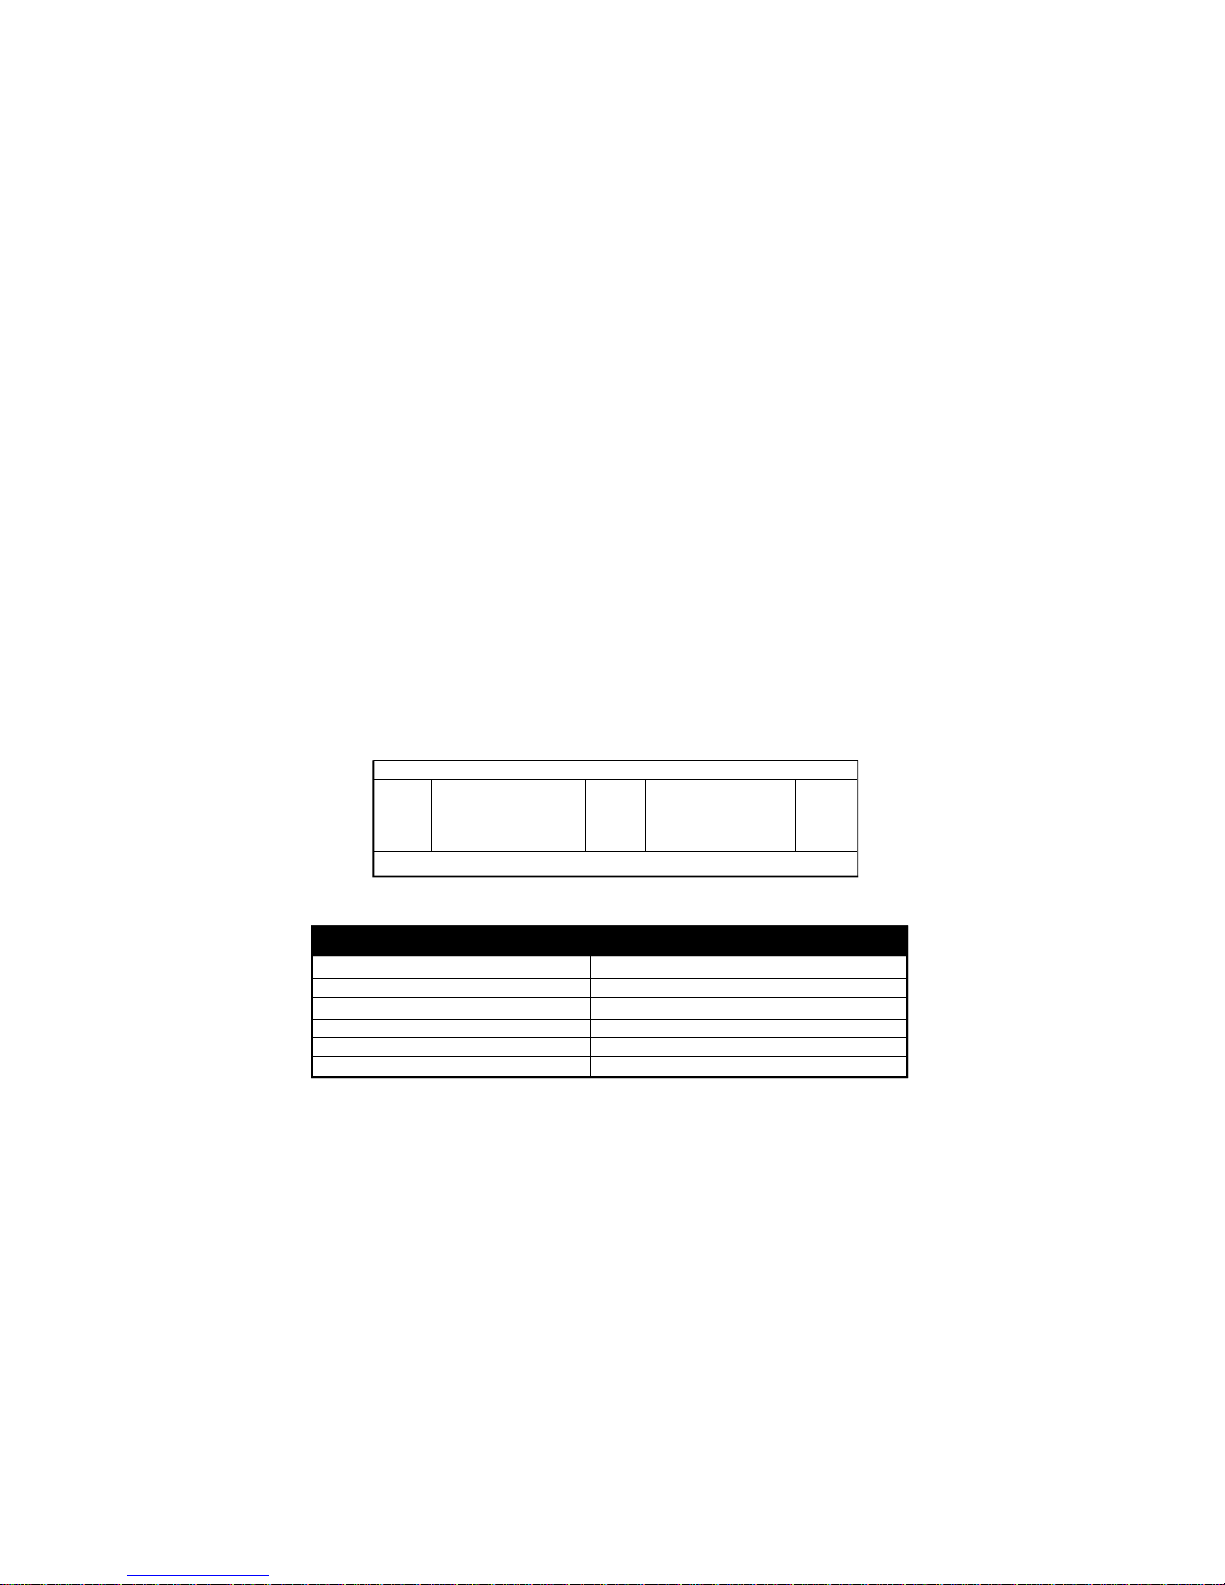
Timing Chart
Press
Horn
Short &
Firm
½ Sec.
Pause
Total Time Lapse: 1 Seconds½
Press
Bell
Short &
Firm
½ Sec.
Pause
Press
Bell
Short &
Firm
Feature to Be Activated Button Code:
Passenger Station Announcements
Fire the Rear Coupler
Fire the Front Coupler
Speed Control On/Off
Lock into a Direction
Reset to Factory Defaults
1 Bell, 2 Horns
1 Bell, 3 Horns
1 Bell, 4 Horns
1 Horn, 2 Bells (from Neutral only)
1 Horn, 3 Bells
1 Horn, 5 Bells (from Neutral only)
8 Tinplate 1134 Steam Locomotive

Passenger Station Announcements (PSA)
Your engine is equipped with a sound package of passenger station announcements that
you can play when you pull into a station. Each sequence described below will play as
long as it is left on, randomly generating sounds, but be sure to allow approximately 30
seconds between the button pushes described below to allow the PSA sufficient time to
run through each sequence.
• To cue the sound system to play the PSA, quickly but firmly tap the Bell button
once followed by 2 quick taps of the Horn button while the engine is moving.
Tap the buttons quickly but allow approximately ½ second between each press.
Press the Direction button once to stop the engine. This will trigger the first
•
sequence of PSA. The reverse unit is temporarily disabled so that the train will
not move as you use the Direction button to trigger the sounds, and Proto-Sound
2.0 has disabled operator control over the Horn and Bell buttons until the full
PSA sequence is complete.
• After waiting about 30 seconds for that sequence to run, press the Direction
button again to trigger the second sequence of PSA.
• After about 30 seconds, press the Direction button again to trigger the third PSA
sequence.
Again, after allowing about 30 seconds for that sequence to run, press the
•
Direction button one more time to trigger the fourth and final PSA sequence.
The PSA will continue, and within a few seconds, the engine and bell will start
and move out on its own at the current throttle setting, in the same direction it
was traveling when you began the sequence. Once the bell turns off, the operator
Bell
Station Announcements (PSA)
Horn Horn
Sound System Cued
to Play Passenger
Tinplate 1134 Steam Locomotive 9
Direction
+
Sequence
PSA
1st
Direction
+
2nd
Sequence
PSA
Direction
+
Sequence
PSA
3rd
Direction
+
4th
Sequence
PSA
Operator
Controls
=
When Bell
Turns Off
 Loading...