

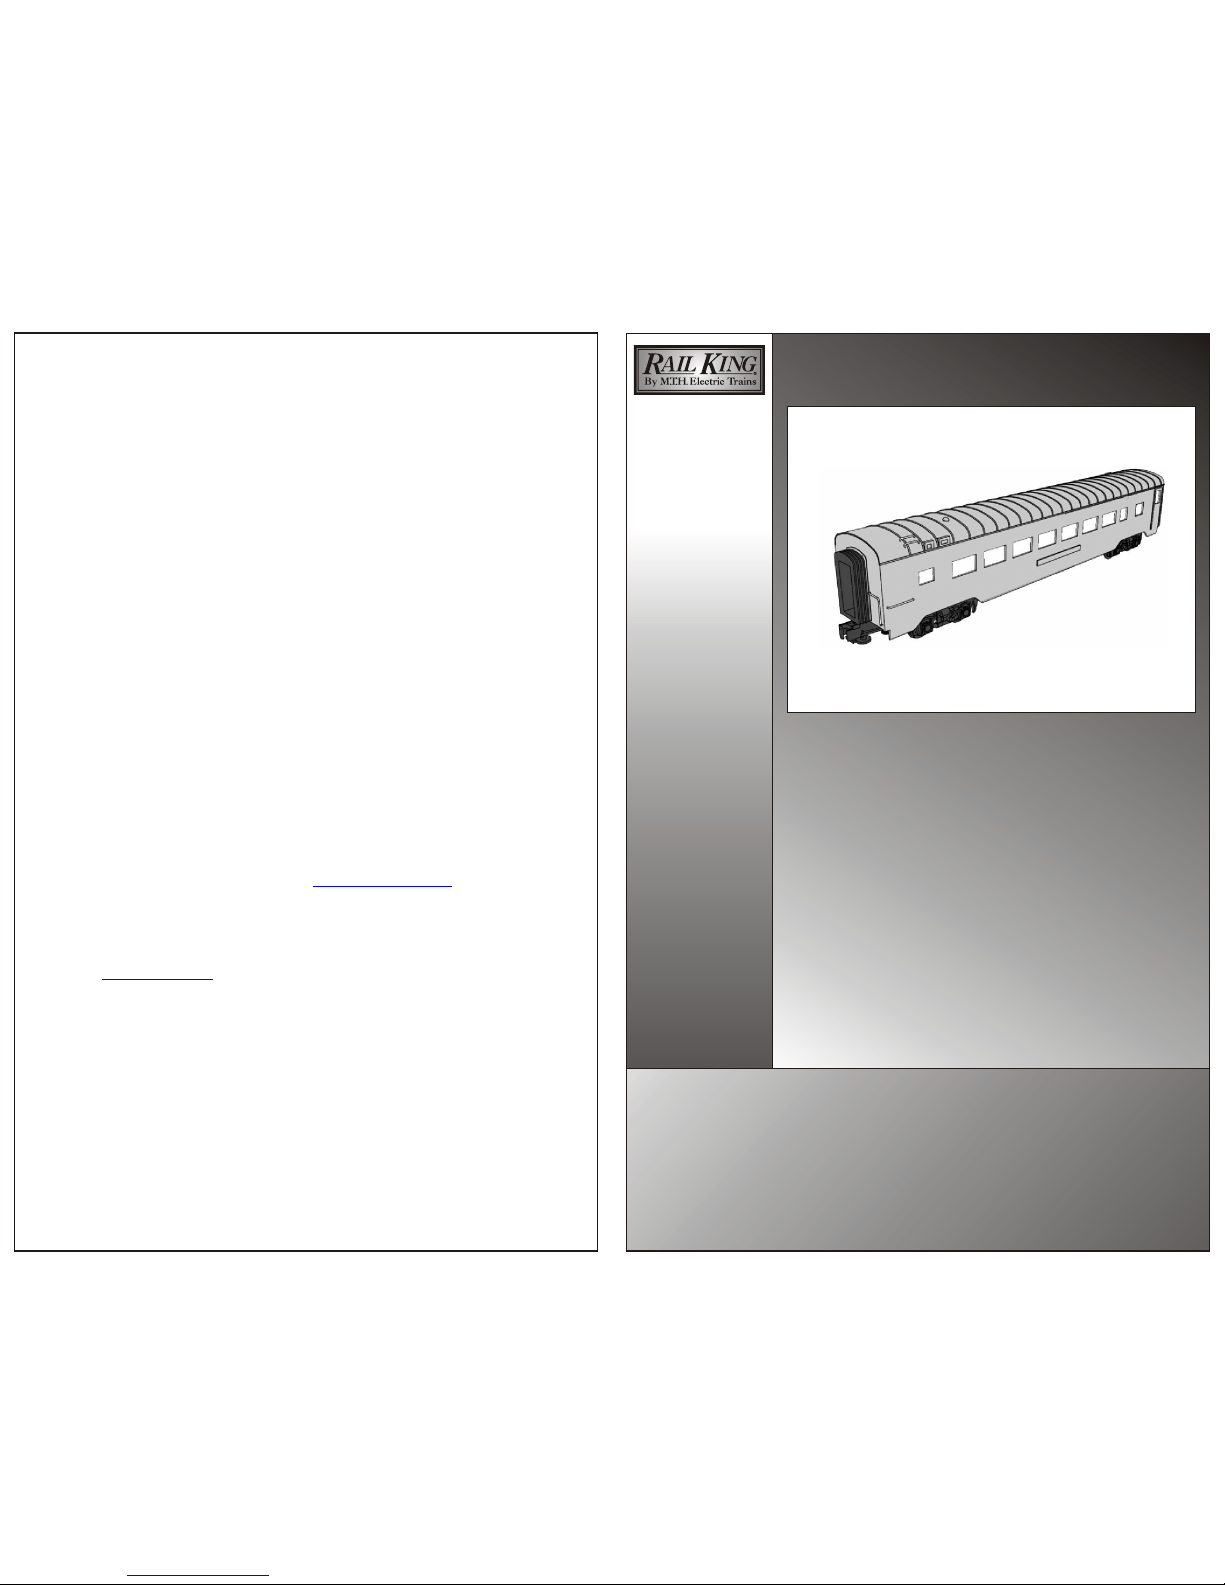
The RailKing® 60' Streamlined Passenger cars offer
sleek good looks and realism to any O Gauge layout.
With its durable ABS construction and die-cast trucks
and couplers, these passenger cars were designed for
years of operating enjoyment.
The streamlined cars come fully assembled, decorated,
and ready to use right out of the box. Simply place
them on the track and couple them to a train. They
feature detailed interiors and an illuminated interior
controlled from track power. Follow the easy
instructions in this booklet to change the lights in your
60' streamlined cars.
Passenger Cars
60ft
M.T. H.
7020 Columbia Gateway Drive
Columbia, MD 21046-1532
www.mth-railking.com
ELECTRIC TRAINS, INC.
Streamlined
Service & Warranty Information
How to Get Service Under the Terms of the Limited One-Year
Warranty
When you suspect an item is defective, please check the operator's manual for standard
operation and trouble-shooting techniques that may correct the problem. Additional
information may be found on the M.T.H. Website. Should you still require service,
follow the instructions below to obtain warranty service.
First, e-mail, write, call or fax a M.T.H. Authorized Service Center (ASC) in your area to obtain a Repair
Authorization Number. You can find the list of ASCs on the M.T.H. Website, www.mth-railking.com.
Authorized Service Centers are required to make warranty repairs on items sold only from that store; all other
repairs may-- or may not be done at the store's own discretion. If you did not purchase the item directly from
the ASC, you will need to select a National Authorized Service Center (NASC). These centers are compensated
by M.T.H. to perform warranty service for any customer whose repair qualifies for warranty service. A list of
NASC retailers can be located on the M.T.H. Website or by calling 1-888-640-3700. Should the warranty no
longer apply, you may choose either an ASC or NASC retailer to service your M.T.H. Product. A reasonable
service fee will be charged.
CAUTION: Make sure the product is packed in its original factory packaging including its foam and plastic
wrapping material to prevent damage to the merchandise. There is no need to return the entire set if only one of
the components is in need of repair unless otherwise instructed by the Service Center. The shipment must be
prepaid and we recommend that it be insured. A cover letter including your name, address, daytime phone
number, e-mail address (if available), Return Authorization number (if required by the service center, a copy
of your sales receipt and a full description of the problem must be included to facilitate the repairs. Please
include the description regardless of whether you discussed the problem with a service technician when
contacting the Service Center for your Return Authorization.
Please make sure you have followed the instructions carefully before returning any merchandise for service.
Authorized M.T.H. Service Centers are independently owned and operated and are not agents or representatives
of M.T.H. Electric Trains. M.T.H. assumes no responsibility, financial or otherwise, for material left in their
possession, or work done, by privately owned M.T.H. Authorized Service Centers.
If you need assistance at any time email MTH Service at , or call 410 381-2580.
Limited One-Year Warranty
All M.T.H. products purchased from an Authorized M.T.H. Train Merchant are covered by this warranty.
See our website at or call 1-888-640-3700 to identify an Authorized M.T.H. Train Merchant near you.
M.T.H. products are warrantied for one year from the date of purchase against defects in material or workmanship, excluding
wear items such as light bulbs, pick-up rollers, batteries, smoke unit wicks, and traction tires. We will repair or replace (at our
option) the defective part without charge for the parts or labor, if the item is returned to an M.T.H. Authorized Service Center
(ASC) or M.T.H. National Authorized Service Center (NASC) within one year of the original date of purchase. This warranty
does not cover damages caused by improper care, handling, or use. Transportation costs incurred by the customer are not
covered under this warranty.
Items sent for repair must be accompanied by a return authorization number, a description of the problem, and a copy of the
original sales receipt from an Authorized M.T.H. Train Merchant, which gives the date of purchase. If you are sending this
product to an Authorized Service Center, contact that Center for their return authorization.
This warranty gives you specific legal rights, and you may have other rights that vary from state to state. Specific questions
regarding the warranty may be forwarded to M.T.H. directly.
Service Department
M.T.H. Electric Trains
7020 Columbia Gateway Drive
Columbia MD 21046-1532
service@mth-railking.com
www.mth-railking.com
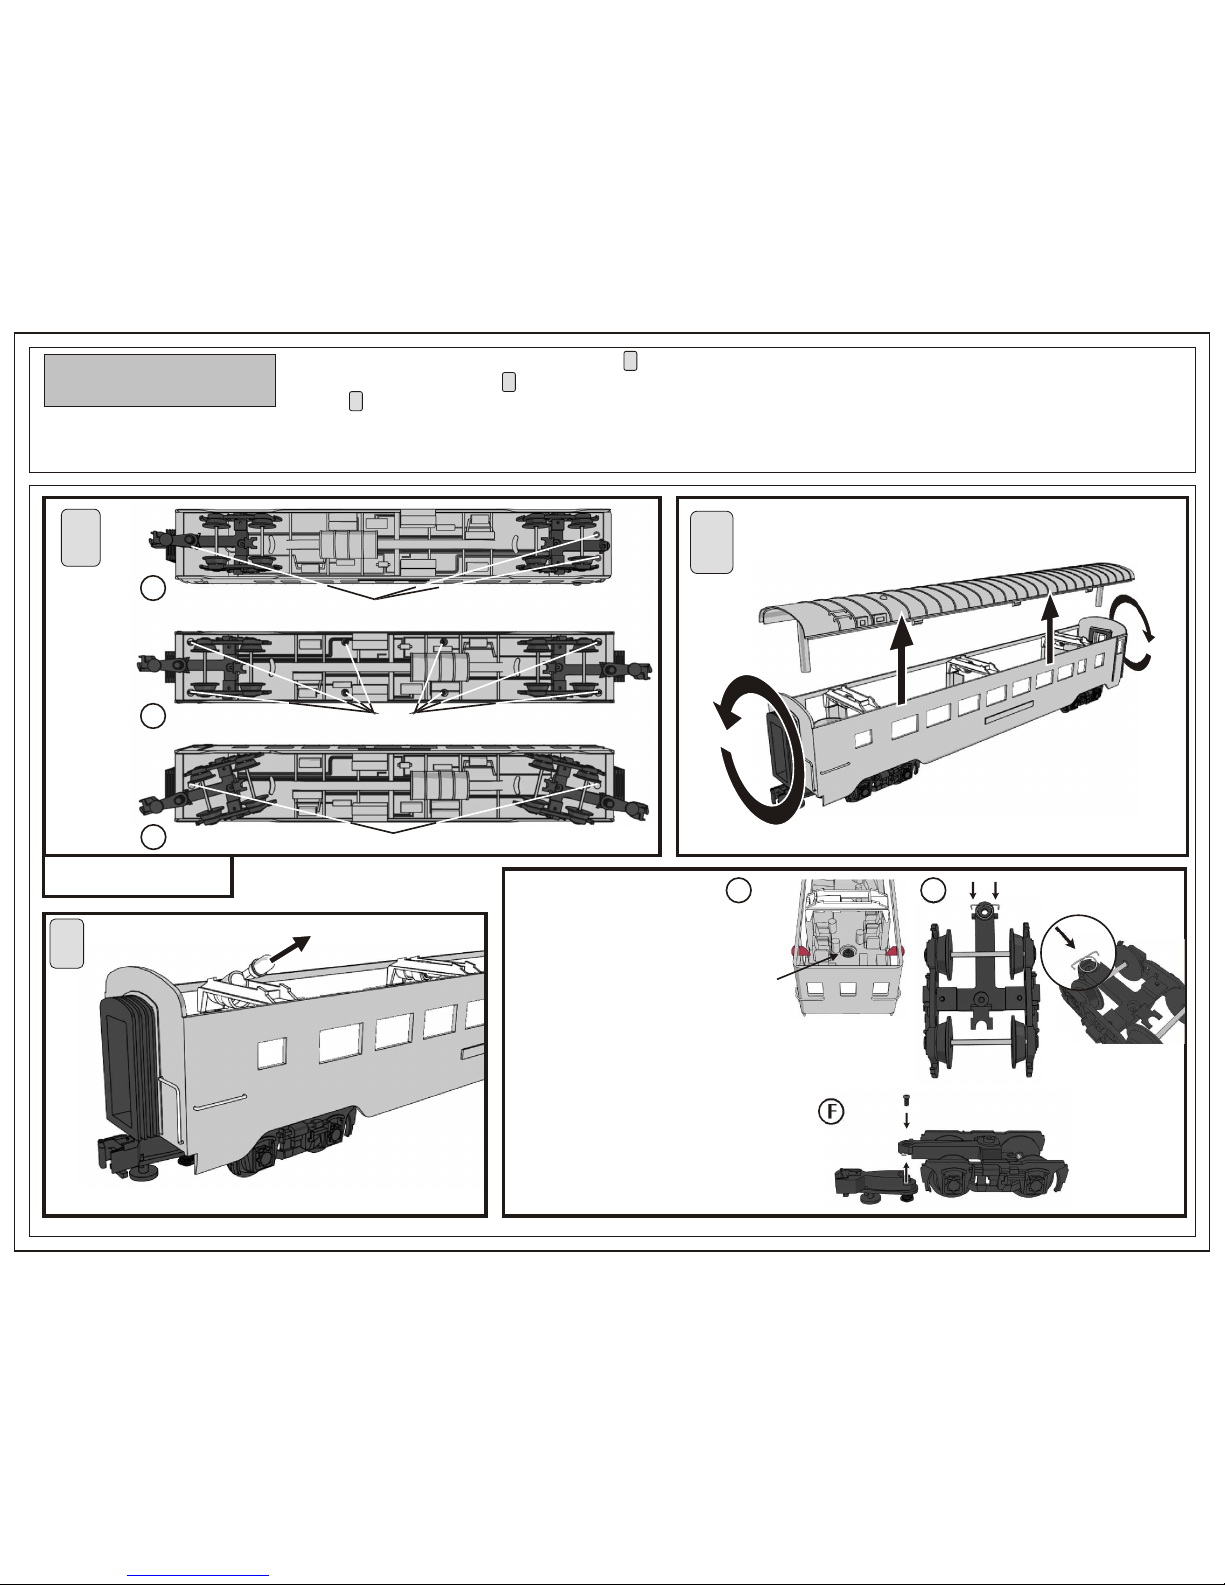
INSTRUCTIONS
To replace the interior lights, follow these steps: Remove the recessed mounting screws located under the specific car you are
servicing, as shown in Fig. A-C. Pop the roof off the car by holding each end of the car and twisting them in the opposite
direction. Tilt the plastic housing for the bulb(s) you want to change so you can reach the light bulb, then pull the bulb gently
from its socket, like a Christmas tree light. Replace the bulb and reassemble in reverse order. You can obtain replacement bulbs
directly from the M.T.H. Parts Department (phone: 410-381-2580; e-mail: parts@mth-railking.com; mail: 7020 Columbia
Gateway Drive, Columbia MD 21046-1532)
STEP
11
STEP
22
Baggage Car (8 screws)
Coach, Dome Car, Sleeper, Diner (2 screws)
Observation Car (3 screws)
STEP
33
STEP
1
STEP
2
STEP
3
Figure A, B, C
A
B
C
D E
F
This set is delivered without a coupler
on the back of the observation car.
Should you choose to add the spare
coupler included with the set, follow
the instructions below.
• Complete steps 1 and 2 above to
remove the roof from the observation
car
• Remove the truck mounting screw
from inside the car as shown in Figure
D and pull the truck loose from the
body.
• Install the coupler spring as shown
in Figure E.
• Screw the coupler onto the truck.
As shown in Figure F.
• Reassemble in reverse order.
Truck
Mounting
Screw
 Loading...