

MTHTrains Premier 4-4-2 Atlantic Operator's Manual
Compatibility
This engine is available in 2-rail and 3-rail
versions and will operate on any traditional
track system with the following minimum
curvature.
3-rail = O-31 Diameter
2-rail = 42” Radius
This engine is also compatible with most AC &
DC transformers.(See pages 24 and 25 for a
complete list of compatible transformer and
wiring instructions)
Premier 4-4-2 Atlantic
Steam Locomotive
OPERATOR’S MANUAL
PLEASE READ BEFORE USE AND SAVE
Passenger Station Announcements

Table of Contents
Configuring Locomotive for 2-Rail or 3-Rail Operation................................. 3
Installing/Removing Pickup Rollers....................................................... 3
Configuring for 2-rail or 3-rail power input........................................... 3
Ensuring Proper Power to Track Polarity............................................... 4
Changing Track Polarity Inside Locomotive......................................... 4
Locomotive Coupler Options................................................................. 5
Set Up Checklist................................................................................................... 7
Lubrication............................................................................................. 7
Priming The Smoke Unit....................................................................... 7
Checking The Battery............................................................................ 8
Basic Operation.................................................................................................... 9
Activating Features................................................................................ 9
Proto-Sound 2.0 Operating Instructions........................................................... 10
Activating Proto-Sound 2.0 Conventional Mode Features.................... 10
Passenger Station Announcements (PSA)............................................. 11
Proto-Coupler® Operation.................................................................... 12
Speed Control........................................................................................ 13
Locking Locomotive Into A Direction.................................................. 13
Reset To Factory Default....................................................................... 14
Automatic Sound Effects....................................................................... 14
Maintenance......................................................................................................... 15
Lubricating and Greasing Instructions................................................... 15
Cleaning The Wheels, Tires and Track.................................................. 16
Traction Tire Replacement Instructions................................................. 16
Headlight Replacement Instructions...................................................... 18
Self Charging Battery Back-Up............................................................. 21
ProtoSmoke® Unit Operation................................................................ 22
Troubleshooting Proto-Sound® 2.0 Problems....................................... 24
Transformer Compatibility and Wiring Chart....................................... 26
Recommended DC Power Supplies....................................................... 27
Additional Features Accessible Of DCS Remote Control System........ 28
Service & Warranty Information........................................................... 29
Limited One-Year Warranty.................................................................. 29

Premier 4-4-2 Atlantic Steam Locomotive
3
Configuring Locomotive for
2-Rail or 3-Rail Operation
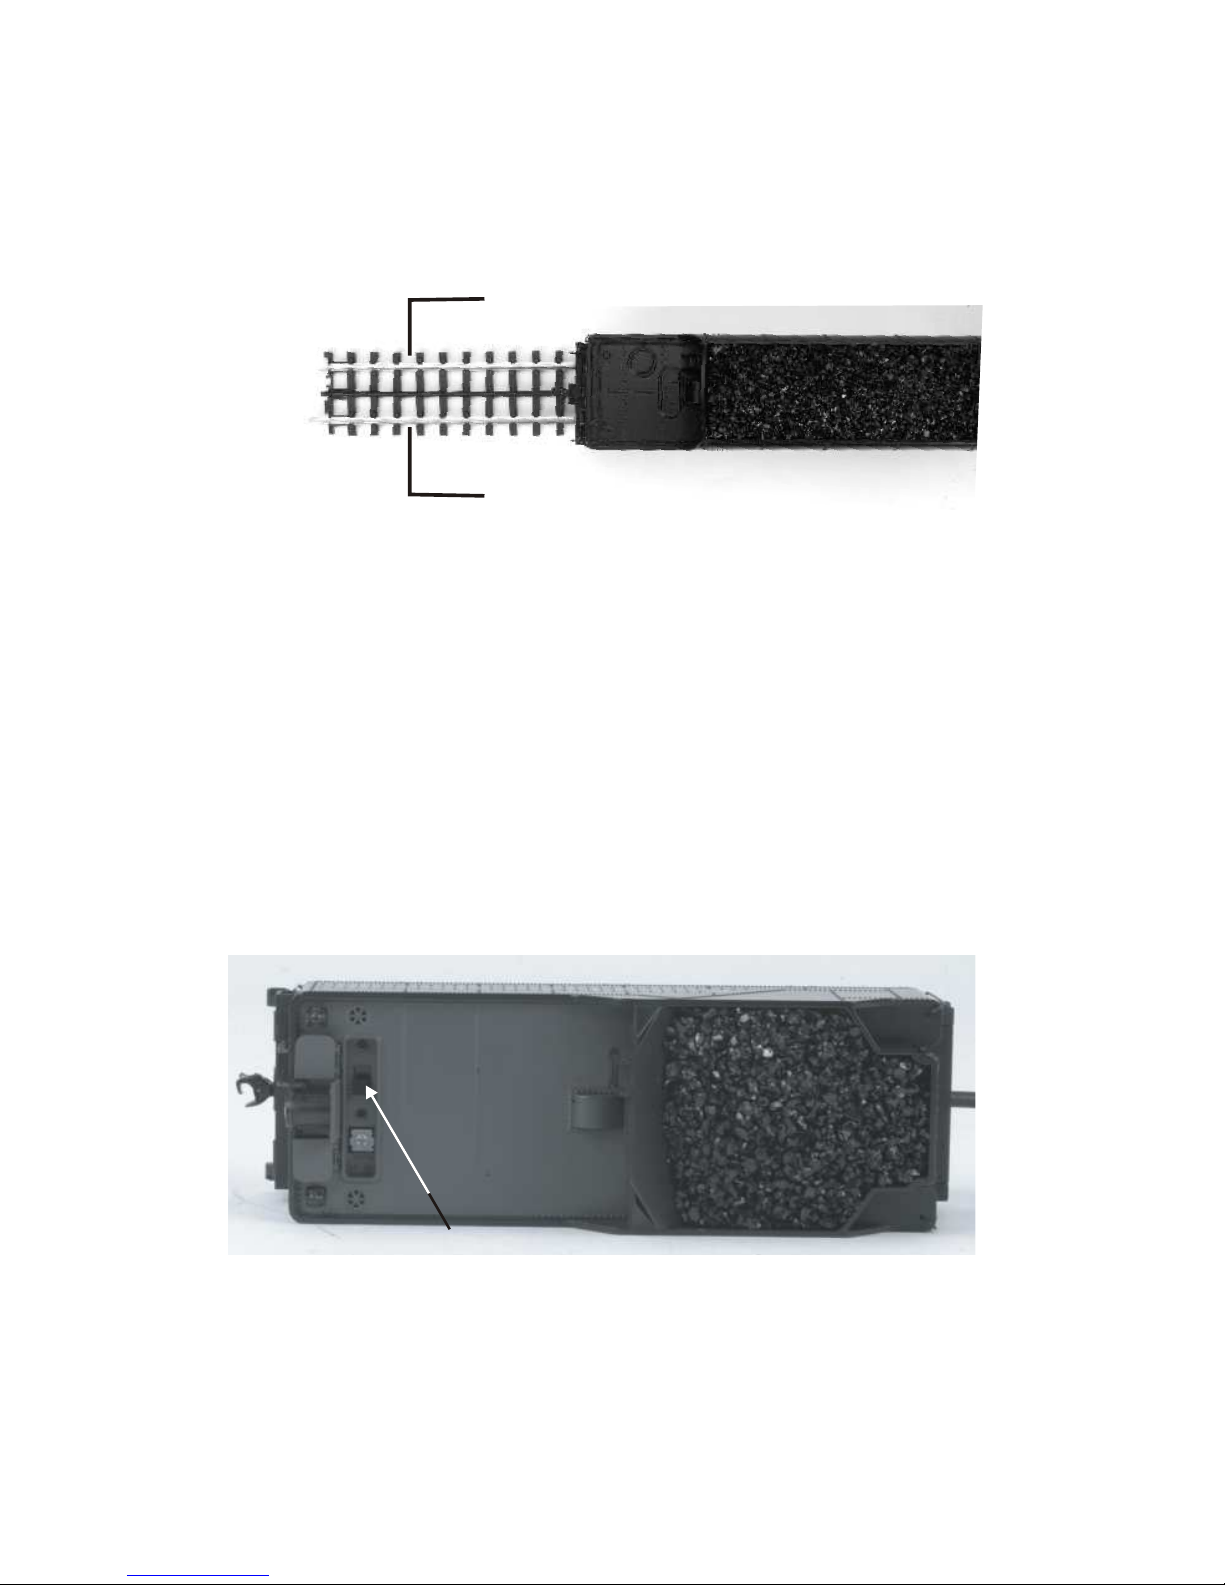
Installing/Removing 3-Rail Pickup Rollers
Both 2-Rail and 3-Rail versions of
this locomotive can be configured
to opperate on either 2-rail or 3-rail
track by removing or adding the
center rail pickups. 3-rail rack
operation requires the pickups, 2ral track operation does not. The
pickups are factory installed on 3rail versions and packaged
seperately in the locomotive box
for 2-rail versions. Each pickup
roller installs with a single phillips
screw seen in Figure 1.
Once you have configured the engine for 2-rail or 3-rail operation, you must
manually select the power input switch. The 2-rail/3-rail switch is located
under the tender, as shown in Figure 2.
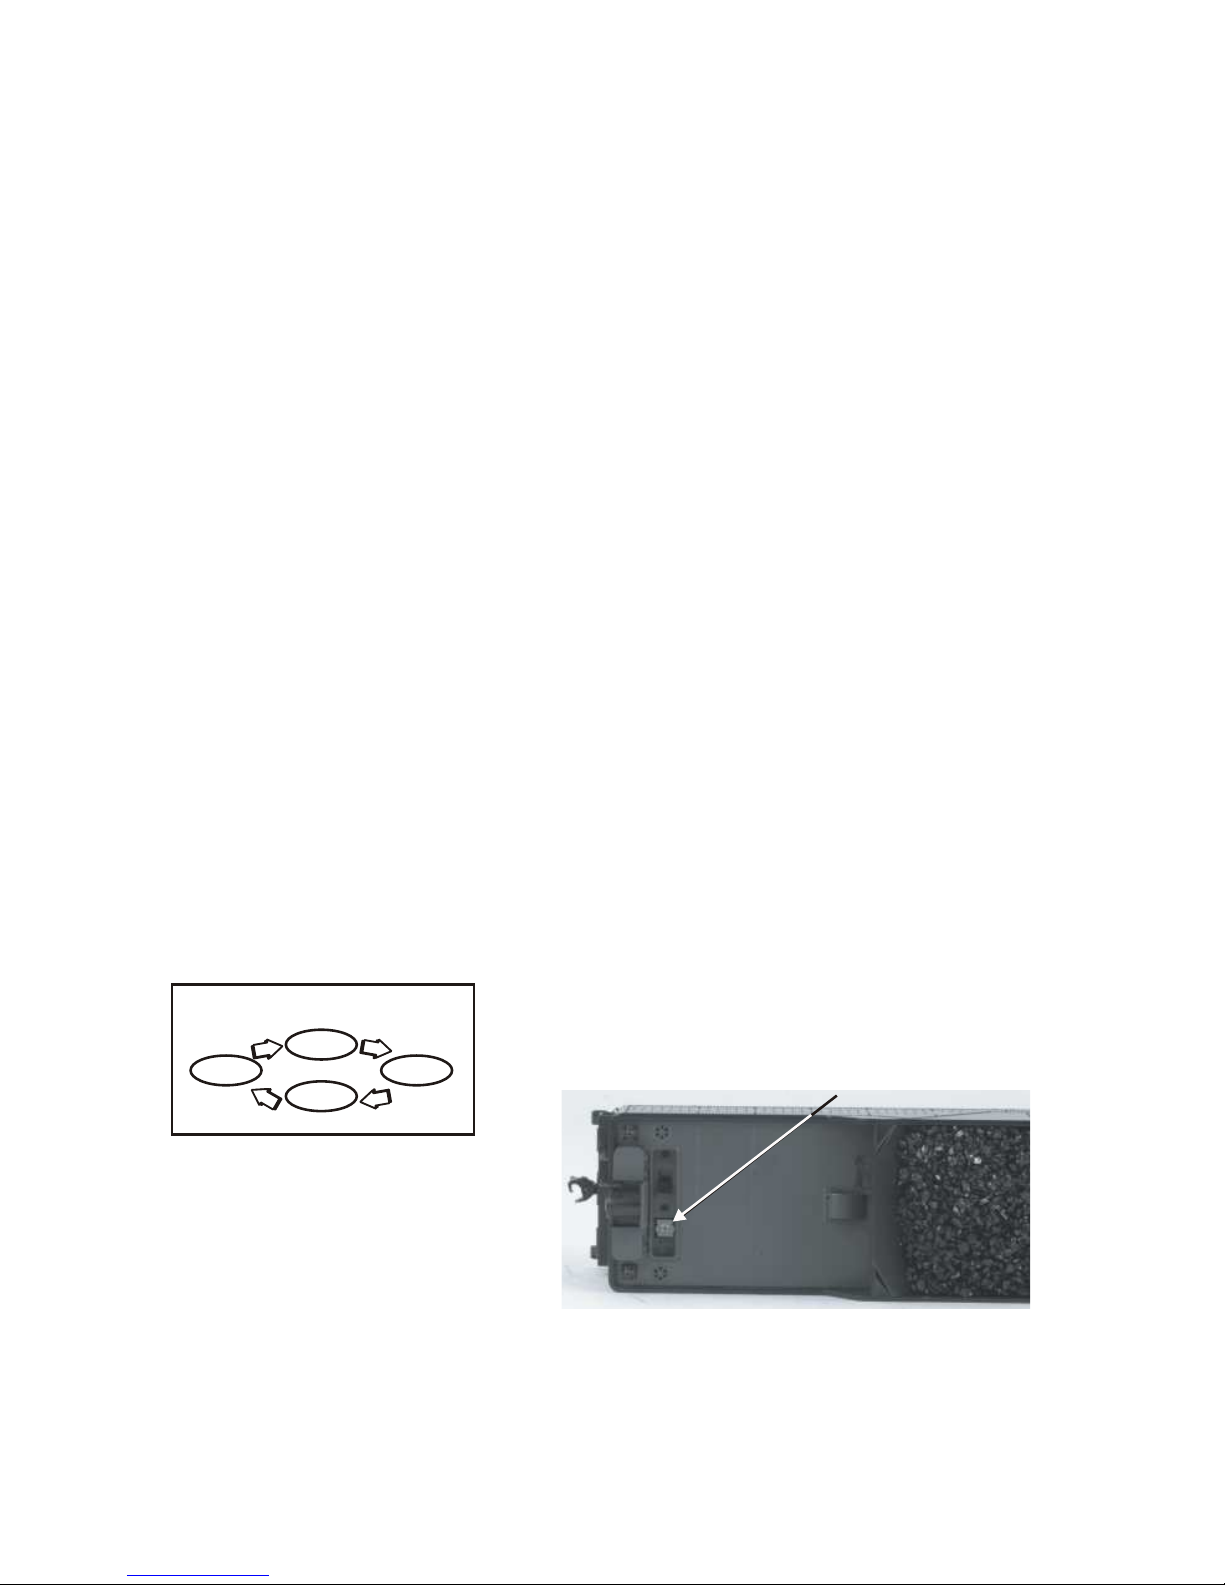
Configuring for 2-Rail or 3-Rail Power Input
Figure 1: 3-Rail Pickups installed with a single Phillips Screw
Figure 2: Selecting 2-rail or 3-rail power input setting
2 Rail-3 Rail Switch
Premier 4-4-2 Atlantic Steam Locomotive
4
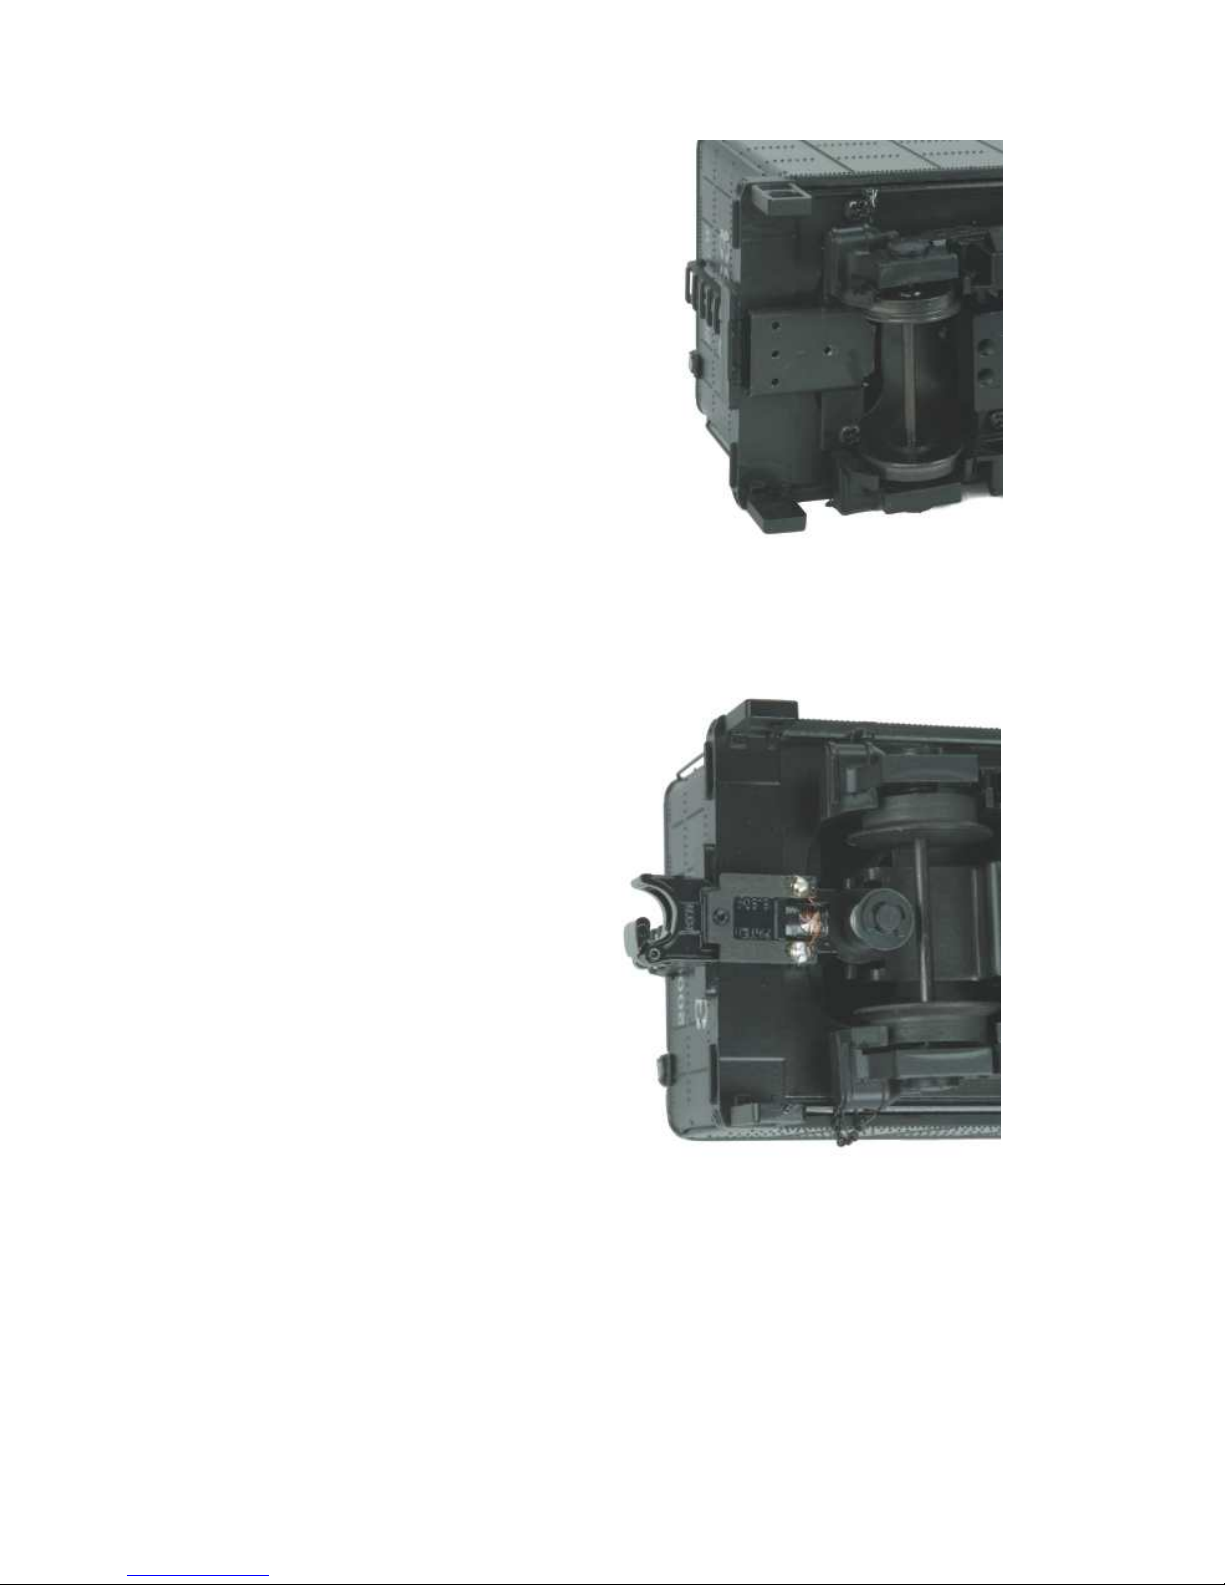
Ensuring Proper Power to Track Polariy
Changing Track Polarity Inside the Locomotive
Figure 4: Changing the polarity with the locomotive polarity switch
For 2-rail DCS operation, it is important that the polarity from the transformer to the
engine is properly configured. Correct polarity can be accomplished by ensuring that
the wiring from the TIU to the track and orientation of the locomotive when sitting on
the track follows the illustration in Figure 3.
Failing to properly configure the polarity will result in the locomotive
starting in reverse instead of forward or not receiving the DCS signal.
Should this occur, it is not necessary to swap the wires from the
transformer to the track or reverse the locomotive’s orientation on the
track itself. Instead, simply slide the polarity switch located under the
tender as seen in Figure 4.
Figure 3: Proper 2-Rail polarity wiring and locomotive orientation
To TIU Black Terminal
To TIU Red Terminal
DCS Polarity Switch
Premier 4-4-2 Atlantic Steam Locomotive
5
Figure 6: 3-Rail Proto-Coupler
Tender Couplers
Figure 5: Pre-drilled Kadee® Coupler mounting holes
2-rail locomotive models do not
come with a rear coupler since
many 2-rail enthusiasts may utilize
different coupler types on their 2rail locomotives and cars. Each
tender does have pre-drilled holes
for use when installing a Kadee®
scale coupler as seen in Figure 5.
Follow the individual coupler
installation instructions when
installing another manufacturer’s
coupler system.
Proto-Coupler Installation
Owners of 2-rail models who
intend to run this locomotive on a
3-rail layout may wish to use the
M.T.H. Proto-Coupler so that they
may enjoy the remote uncoupling
anywhere on the layout.
A Proto-Coupler and the necessary
mounting hardware are included in
the packaging with each 2-rail
locomotive. The wire harness in the
tender is prewired with a plug-in
connection for the Proto-Coupler.
To install the Proto-Coupler on a 2rail tender, follow the step by step
instruction listed below.
- First remove the Kadee Coupler
Mounting Plate from the bottom of
the tender chassis.
- Next remove the shell from the
tender by removing the 4 body
screws and then unplug
The wire harness between the shell
and the chassis.
-Attach the Proto-Coupler to the
truck and thread the wire with
connector through the large hole in
the frame.
CAUTION - Keep the speaker away from screws and other small pieces of
magnetic material. The speaker has a very strong magnet that can attack
small pieces of metal. These small pieces of metal can become lodged in the
speaker cone and cause distortion of the speaker sound.
- Plug the connector into the wire harness.
- Replace the tender shell. Make sure the wires fir properly.
When power is applied to the engine the Proto-Coupler can be operated
anywhere on the layout. To operate the coupler in the command mode, press
the rear coupler button on the DCS remote each time you want the coupler to
open.
To operate the coupler in the conventional mode, the coupler can be opened
by quickly pressing the Bell Button and Horn Button (1 Bell and 3 Horns)
on a Z-4000 or compatible Toy Train Transformer. Refer to the Proto-Sound
2.0 Operating Instructions on page 10.
Premier 4-4-2 Atlantic Steam Locomotive
6
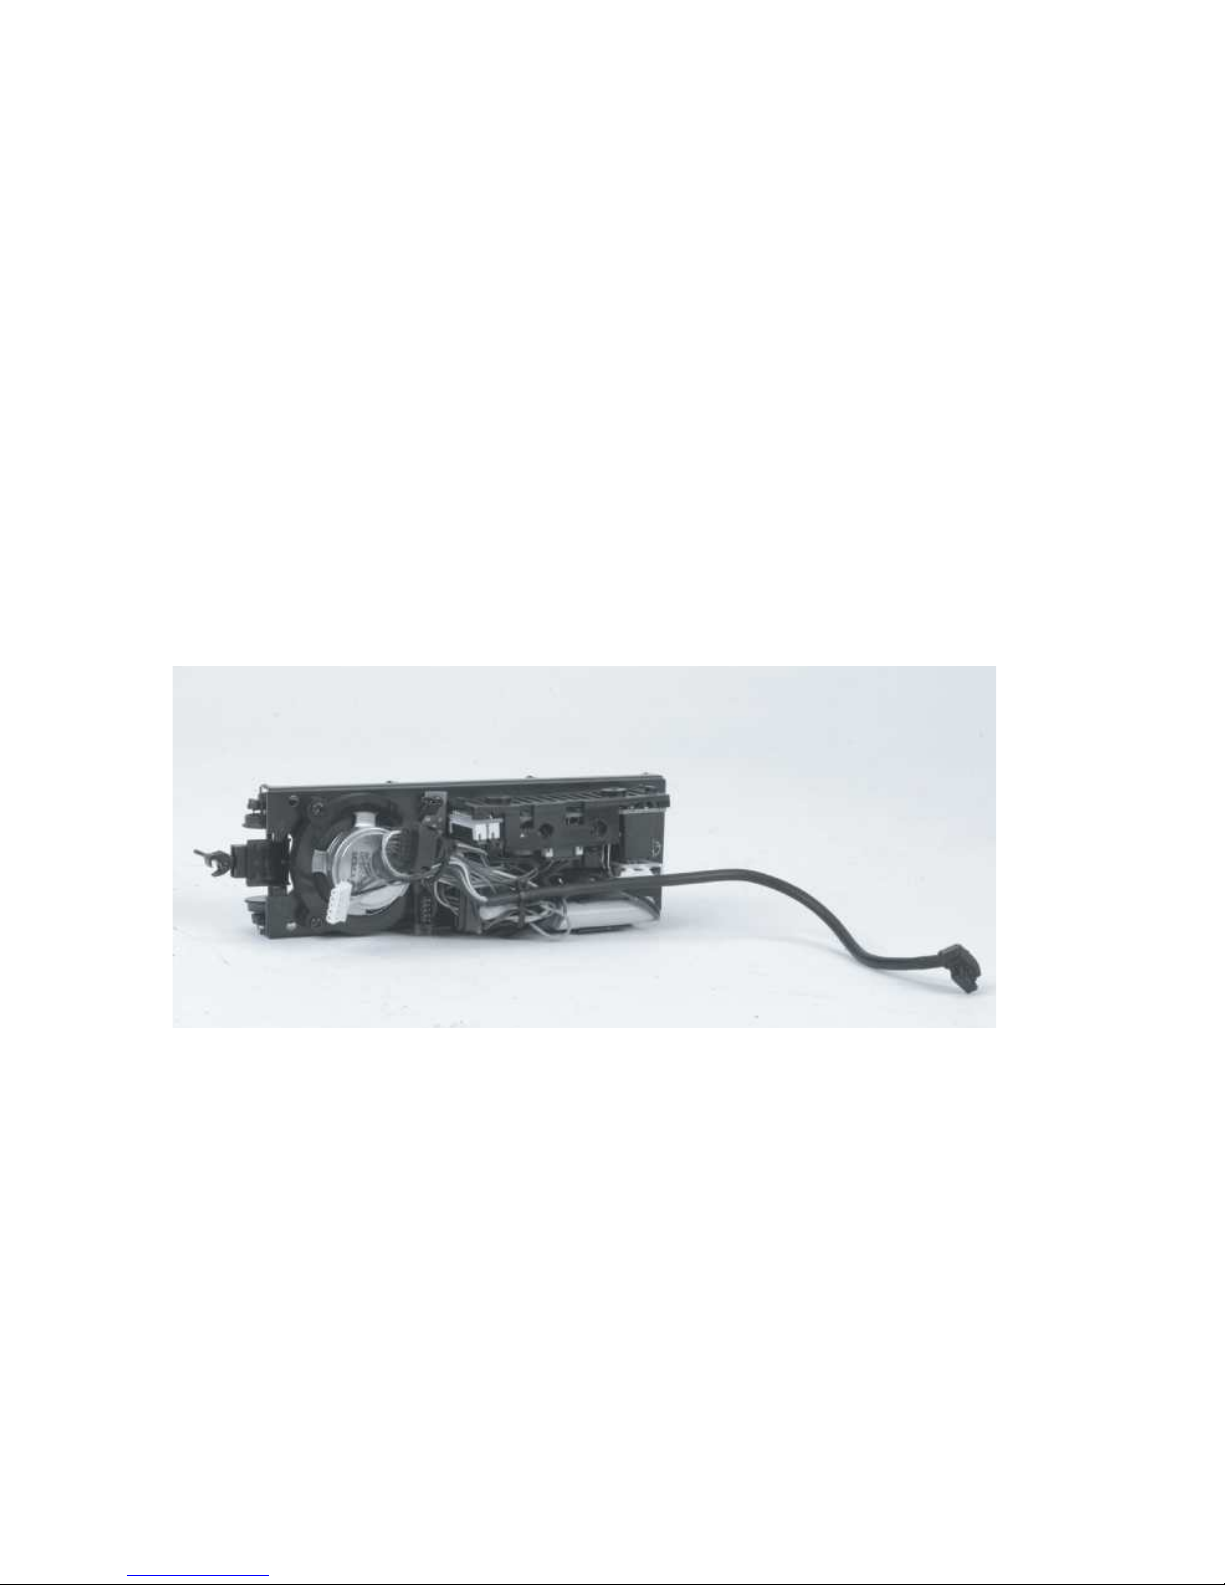
Figure 7

Premier 4-4-2 Atlantic Steam Locomotive
•Lubricate the locomotive
•Prime the smoke unit
•Check to see whether the battery needs to be charged for full sound effects
•Apply power to run as described in the Basic Operating Section of this manual
Set Up Checklist
Lubrication
You should lubricate the engine to prevent it from squeaking. Use light
household oil and follow the lubrication points marked “L” in Fig. 1. Do
not over-oil. Use only a drop or two on each pivot point.
Lubricate
Lubricate Side Rods and Linkage (L) (Both Sides)
Lubricate Axle Bushings (L)
Figure 8: Lubrication Points on the Locomotive
Priming the Smoke Unit
When preparing to run this engine, add 1520 drops of smoke fluid through the
smokestack. We recommend M.T.H.
ProtoSmoke, Seuthe, LGB, or LVTS fluids.
Do not overfill the unit or the fluid may
leak out and coat the interior engine
components.
If you choose not to add the fluid (or have
already added the fluid but choose to run
smoke-free), turn off the smoke unit switch
located on top of the tender (see Fig. 8).
Failure either to add fluid to the unit or
to turn it off may damage the smoke unit
heating element and/or wicking material.
Figure 9: Smoke Unit Switch Location
(Inside Tender Hatches)
Smoke Control
7
Premier 4-4-2 Atlantic Steam Locomotive
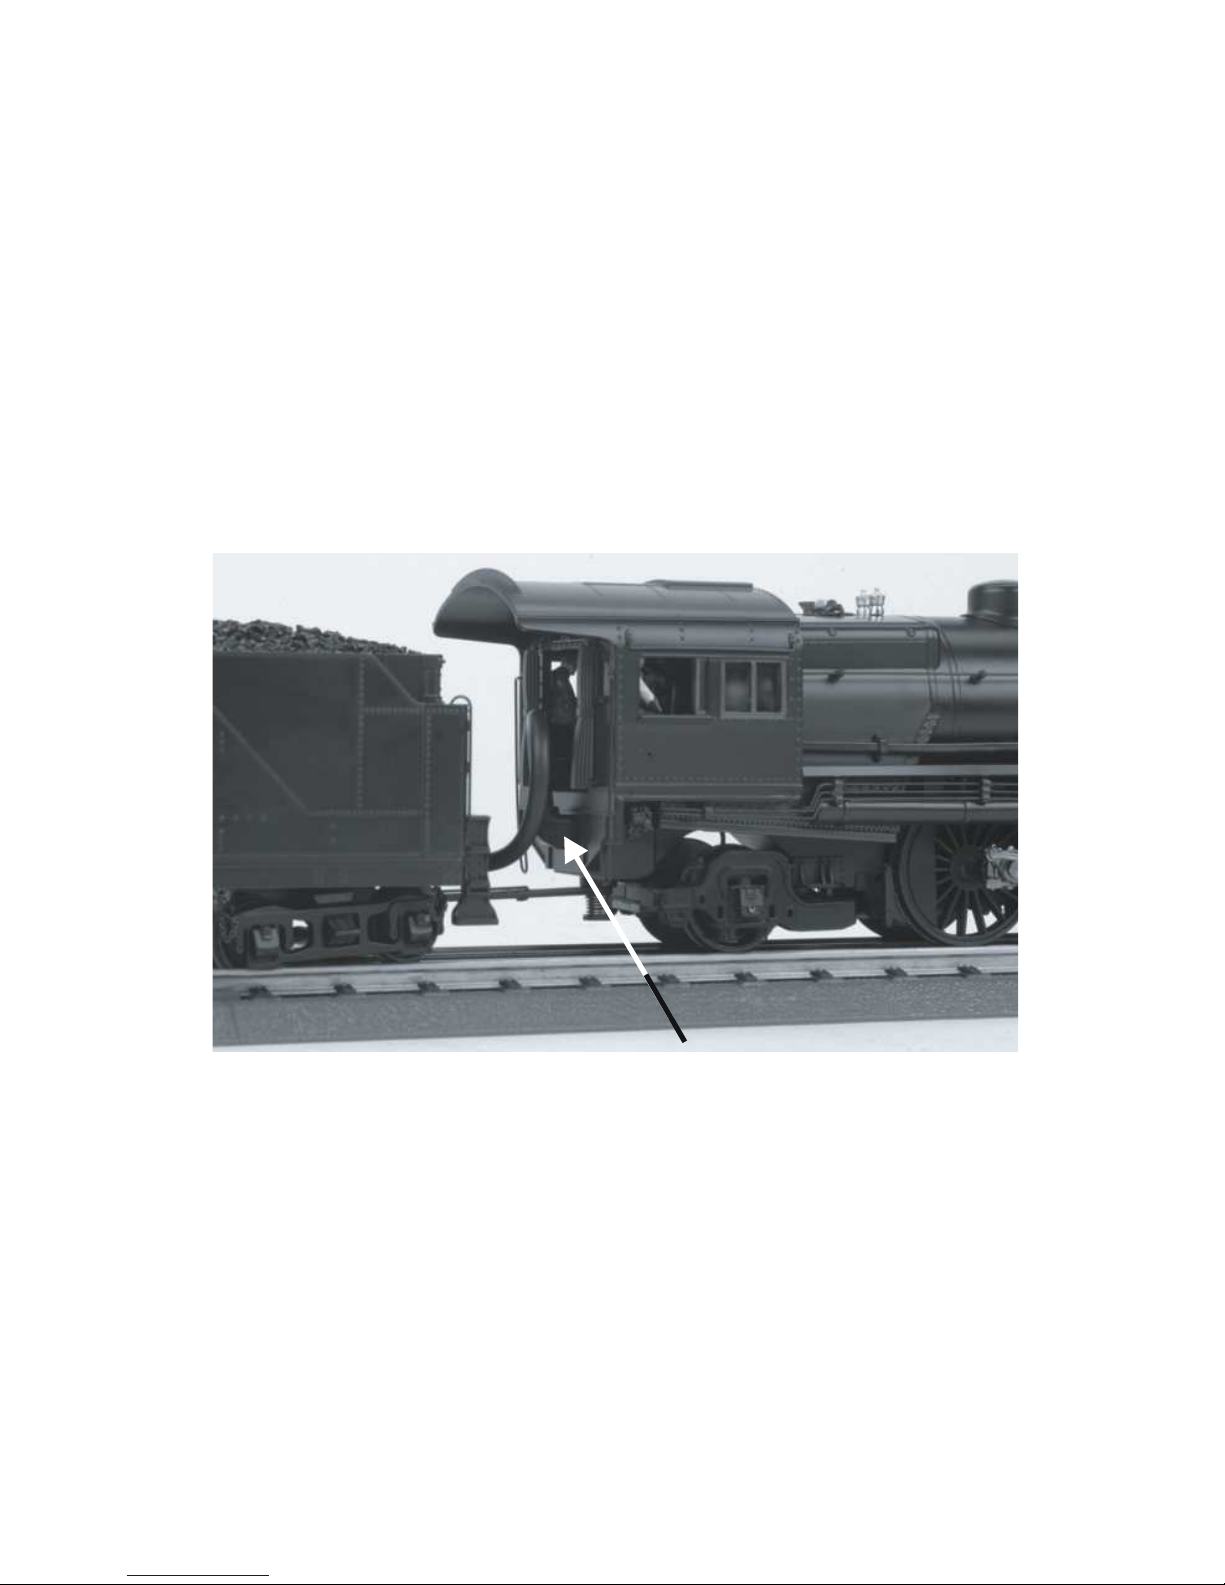
Place the engine on the track, then insert the reverse unit plug that extends out of the
tender into the receptacle at the back of the boiler cab (Figure 9. WARNING: DO
NOT CONNECT THIS ENGINE TO A TENDER FROM ANOTHER ENGINE;
IT MAY CAUSE SERIOUS DAMAGE. Look at the bottom of the engine and tender
where each will have a color-coded stamp. If they match you may connect those two
pieces; if not, don’t.
Connect the draw bar between the engine and tender. The draw bar hole located
farthest from the tender is for applications such as display. The second hole is for
normal operation on the track.
At this point, you are ready to begin running your engine.
Placing The Engine On The Track
Figure 10
Plug Tender Plug into
Boiler Socket at back of cab.
Checking the Battery
You may find, if your locomotive was built several months before you set it up, that the
rechargeable battery has run down and needs to be charged before operating. If you
notice that the sounds are garbled, test and charge the engine as described in the "SelfCharging Battery Back-Up" on page 18.
8
The Throttle knob controls how fast your train will travel.
Turn the throttle knob up ½-way, until the engine and caboose lights shine bright.
Put the engine into motion by pressing the Direction button on your transformer once.
(hold it for approximately 1 second)
If the engine does not begin to move as soon as you firmly press the Direction button,
you may not have sent enough voltage to the track to make the train move. Turn the
throttle up a bit higher until the train begins to move.
Activating Features
Throttle - To increase or decrease track voltage, and therefore train speed, turn the
throttle control knob. Turning clockwise will increase voltage and speed, while turning
counterclockwise will decrease voltage and speed. The engine will maintain the speed
you set after you release the throttle until you turn it again to change the voltage and
speed.
Bell - To sound the bell, in an engine equipped with a bell firmly press and release the
Bell button. To turn the bell off, press and release the Bell button again. The bell will
continue to ring from the time you turn it on until you press and release the button again
to turn it off.
Horn/Whistle - To sound the whistle, firmly press the Horn/Whistle button. The whistle
will sound for as long as you continue to depress the button. It will stop when you
release the button.
Direction - Your train is programmed to start in neutral. The train will always cycle
neutral-forward-neutral-reverse with each press and release of the direction button. The
engine is programmed to restart in neutral each time the track voltage is turned off for
25 seconds or more.
Premier 4-4-2 Atlantic Steam Locomotive
Basic Operation
Manual Volume Control
To adjust the volume of all sounds
made by this engine, turn the master
volume control knob located under the
left water hatch on the tender deck
clockwise to increase the volume and
counter-clockwise to decrease the
volume.
Figure 11: Manually Adjusting the Volume
Cycle Phases
Neutral
Neutral
ForwardReverse
9
Volulme Adjustment Knob
 Loading...