

Page 1
Mulch 'N Catch
Convertible Rotary Lawnmower
Mower Models - 35m, 75m
50m, 51m, 60m, 61m
80m
W ARNING
Before changing any
component or adjustments
(where applicable):
• Release the operator
presence control.
• Disconnect the spark plug
wire from the spark plug.
• Blades and moving parts
must be stopped.
TM
TM
Page 2
Congratulations on your purchase of a Rover Mulch ‘N Catch mower with the exclusive Patent
Pending Rover V ari-T ilt System. The Rover Mulch ‘N Catch is a convertible mower. This allows
you to use the mower with the grass catcher fitted to the mower, (to pick up the grass cuttings) or
remove the grass catcher and fit with the mulching plug to mulch the grass. The advantages of this
design is that it allows you to gain the benefits of mulch mowing, but at times of rapid growth, or
when the mulched grass clippings are tending to buildup, the grass catcher can be fitted and the
grass clippings removed.
CAUTION
Follow these instructions to
avoid mower damage and
possible loss of warranty.
WARNING
The safety of the user and others
involved. Personal injury may
result should this information be
disregarded.
i
Rover Mowers Limited MULCH 'N CATCH
TM
CONTENTS P A G E
Preface i
1. INTRODUCTION 1
1.1 Mulching 1
1.2 Benefits for your lawn 1
1.3 Benefits for you 1
2. SETTING UP 1
2.1 Multipurpose 1
2.2 Installing the Mulch Plug
for models 35m and 75m 1
2.3 Installing the Mulch Plug
for models 50m, 51m,
60m, 61m & 80m 2
2.4 Removing the Mulch Plug
for models 35m, and 75m 2
2.5 Removing the Mulch Plug
for models 50m, 51m,
60m, 61m & 80m 2
2.6 Vari-Tilt Conbar System 2
2.7 Vari-Tilt Conbar
Adjustment - Mulching 2
2.8 Vari-Tilt Conbar
Adjustment - Catching 2
CONTENTS P A G E
3. MAINTENANCE 3
3.1 General Mower Maintenance 3
3.2 Mulching equipment 3
3.3 Cutting Assembly 3
3.4 Blade Change 3
USEFUL MULCHING HINTS 3
ILLUSTRATIONS
Figure 1 - Installing the Mulch
Plug 35m, 75m 1
Figure 2 - Installing the Mulch
Plug 50m, 51m, 60m, 61m & 80m 2
Figure 3 - Conbar Adjustment 2
Figure 4 - Blade Change 3
Figure 5 - Blade & Fasteners 3
Figure 6 - Grass Height 4
Page 3
1
Rover Mowers Limited MULCH 'N CATCH
TM
1. INTRODUCTION
1.1 Mulching
The Rover Mulch ‘N Catch mower setup as a
mulching mower (grass catcher removed and
mulch plug fitted) reduces the grass clippings
into very fine particles. The design allows for
the even distribution of the grass particles at
the base of the lawn.
The mulched clippings can then:
• Break down quickly, releasing nutrients into
the soil, saving on fertiliser costs.
• Reduce evaporation of moisture from the soil
which reduces watering costs and effort.
• Help to control temperature extremes
protecting the roots of the grass.
• Assist in controlling soil erosion.
1.2 Benefits for your lawn
Research has shown that lawns are usually cut
too short. Grass, like any other plant life, relies
on photosynthesis to regenerate and survive.
Reduced leaf size (from cutting too low) can
seriously affect a lawn by:
• Making it easy prey for disease.
• Encouraging weeds to take hold.
• Exposing the soil to:
– greater evaporation;
– temperature extremes; and
– erosion.
Raising the cut height and using mulch mowing
follows the best practice for nurturing a
healthier more attractive lawn with less water
usage.
1.3 Benefits for you
Because you mulch as you mow the time and
cost savings are also significant:
• Eliminates raking of leaves before mowing
(the Mulch ‘N Catch mower picks up and
converts fallen leaves into mulch).
• Eliminates raking of cut grass.
• Saves the time spent emptying the catcher.
• Automatically disposes of grass clippings.
• Eliminates the need to dispose of clippings
at the refuse tip.
2. SETTING UP
2.1 Multipurpose
Your Mulch ‘N Catch mower is fitted with
multipurpose cutting blades for both mulching
and catching, as shipped from the factory. It is
also supplied with a mulch plug for mulch
mowing and a grass catcher for catch mowing.
To convert to a mulching mower install the
mulch plug (Refer 2.2 or 2.3) and adjust the
conbar to suit (Refer 2.7).
To convert to a catching mower, install the grass
catcher (Refer Owner’s Manual), and adjust the
conbar to suit (Refer 2.8).
2.2 Installing the Mulch Plug for
Models 35m and 75m (
Figure 1
):
1. Stop the engine.
2. Lift the rear flap of the mower.
3. Remove the grass catcher or deflector (if
fitted).
4. Insert the long right hand side of the mulch
plug first, into the rear of the mower.
5. Guide the mulch plug in until the spring tab
rests against the top edge of the mower base
and the lower edge rests on the front top edge
of the axle retaining bracket.
6. Give the mulch plug a firm jolt forward and
down into place.
Figure 1 - Installing the Mulch Plug -
35m, 75m
WARNING
Before removing or installing
the mulch plug or
grasscatcher. The engine
must be stopped.
Page 4

2
Rover Mowers Limited MULCH 'N CATCH
TM
2.3 Installing the Mulch Plug for
Models 50m, 51m, 60m, 61m & 80m
(
Figure 2
):
1. Stop the engine.
2. Lift the rear flap of the mower.
3. Remove the grass catcher or deflector (if
fitted).
4. Insert the long right hand side of the mulch
plug first, into the rear of the mower.
5. Guide the mulch plug in and seat down on
the rear axle retainer.
6. Close the rear flap.
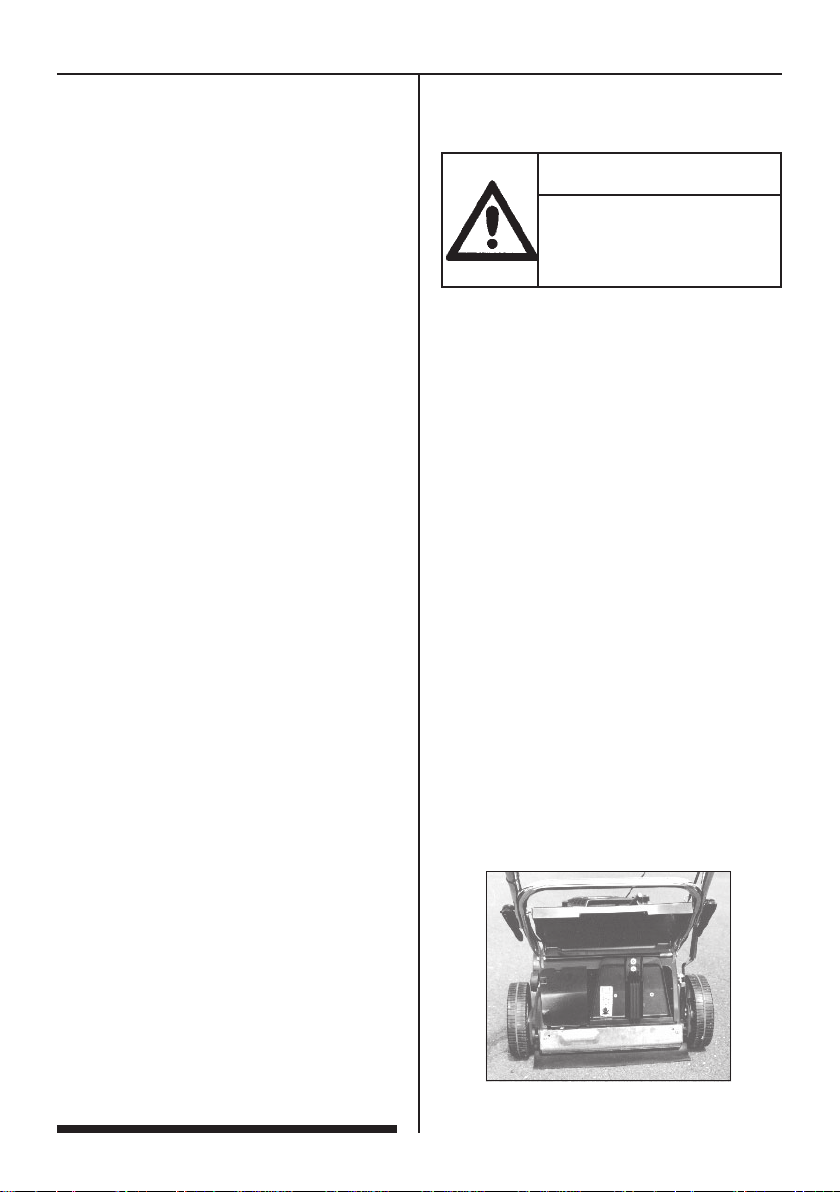
Figure 2 - Installing the Mulch Plug -
50m, 51m, 60m, 61m, & 80m
2.6 Vari-Tilt Conbar System (
Figure.
3
):
The Rover Vari-Tilt System (Patent Pending) is
fitted to provide improved performance.
Generally it is recommended that the Conbar is
at it’s longest length for Mulch Mowing and it’s
shortest for Catch Mowing. These
recommendations may not suit your grass
conditions in which case you should adjust to
suit. The Conbar at it’s longest length also
provides a greater maximum height of cut.
2.7 Vari-Tilt Conbar Adjustment Mulching (
Figure. 3
):
1. Stop the engine.
2. Move the Cut Height Lever to the high cut
position (1).
3. Loosen the Conbar Locking Knob (2).
4. Apply pressure to the top of the handle bars
to tilt the mower back so that the gap in the
Conbar arms is at its widest.
5. Maintain pressure on the handle bars and
tighten the Conbar Locking Knob.
2.8 Vari-Tilt Conbar Adjustment -
Catching (
Figure. 3
):
1. Stop the engine.
2. Move the Cut Height Lever to the high cut
position (1).
3. Loosen the Conbar Locking Knob (2).
4. Pull the handle bar towards the front of the
mower to level the mower so that the gap in
the Conbar is at its narrowest.
5. Maintain forward pressure on the handle bars
and tighten the Conbar Locking Knob.
2.4 Removing the Mulch Plug for
Models 35m and 75m (
Figure 1
):
1. Stop the engine.
2. Lift the rear flap.
3. Grasp the handle and, with a firm jolt, lift
the mulch plug up and away from the mower.
4. Guide the mulch plug out by rotating the
shorter left hand side to the right and then
guiding the longer right hand section until
clear of the mower.
2.5 Removing the Mulch Plug for
Models 50m, 51m, 60m, 61m & 80m
(
Figure 2
):
1. Stop the engine.
2. Lift the rear flap of the mower.
3. Grasp the handle and lift the mulch plug up
and away from the mower.
4. Guide the mulch plug out by rotating the
shorter left hand side to the right and then
guiding the longer right hand section until
clear of the mower.
Figure 3 - Conbar Adjustment - 35m, 75m,
50m, 51m, 60m, 61m, & 80m
1
2
Page 5

3
Rover Mowers Limited MULCH 'N CATCH
TM
3. MAINTENANCE
3.1 General Mower Maintenance
Refer to your Rotary Lawnmower Owner’s
Manual, Maintenance Section.
3.2 Mulching Equipment
For optimum mulching performance:
• The mulching blades are to be kept sharp.
• Maintain the blade sharpening angle when
sharpening.
• Keep the cutting edge feather free when
sharpening.
• Keep the underside of the mower deck and
the mulch plug free of buildup.
3.3 Cutting Assembly
1. Disconnect the spark plug wire.
2. Move the Cut Height Lever to the high cut
position and fold the handle bars down.
3. Tilt the mower so that the spark plug is up.
4. Inspect the cutting assembly for damage and
wear.
5. Check the disc retaining bolts. Tighten the
centre bolt to 65-70 Nm and the three
concentric bolts to 8-11 Nm. For Models
35m, 75m, 16-19 Nm. For Models 50m, 51m,
60m, 61m and 80m
3.4 Blade Change
1. Disconnect the spark plug wire.
2. Set the mower to the high cut position.
3. Lift the rear flap and prop open to give access
to the blades. (Figure 4).
4. Remove the blade retaining bolts, nuts and
washers and discard.
5. Fit new blades, blade bolts, washers and nuts
in sets to maintain balance (Figure 5).
6. Tighten the blade nuts to 16 Nm. Check that
the blades are free to move when the nut is
tensioned.
7. Remove the flap prop and replace the spark
plug wire.
USEFUL MULCHING HINTS:
Mulch mowing is an acquired art form and
to produce the best results consistently, follow
these useful hints:
• Do not attempt to mulch if the grass is too
wet. Wet grass tends to clump together and
does not evenly spread out. It also clogs up
the underside of the base.
• Do not mulch on too low a cutting height.
Remember the maximum cut should be
25mm off the top of the grass, or 1/3 the
grass blade height, whichever is the lesser
amount. (Figure 6).
• Do not push the mulch mower too fast. To
obtain the best finish it may be necessary to
regulate the ground speed.
Figure 5- Blade and Fasteners
Figure 4 - Blade Change
WARNING
Before working on the mower.
* Stop the engine
* Remove the spark plug wire
WARNING
Before working on the mower.
* Stop the engine
* Remove the spark plug wire
Page 6

4
Rover Mowers Limited MULCH 'N CATCH
TM
• Run the engine at full throttle. Running
the engine at low speed does not allow the
blades to mulch the grass efficiently.
• Keep the mulch blades sharp. The mulch
blades are designed to cut and re-cut the
blades of grass. If the mulch blades are not
kept sharp mulching performance will be
reduced.
Figure 6 - Grass Height
• Keep the underside of the base and mulch
plug clean. Buildup of grass under the base
blocks the air flow created by the mulch
blade and reduces the mulching performance.
If the conditions for Mulching are not ideal
and some grass clipping trails are visible after
cutting it may be necessary to:
1. Fit the grass catcher and catch mow.
2. Re-mow over visible clippings.
3. Raise the cut height.
4. Rake the clippings up after mowing.
If a trail of grass is visible raise the cutting
height of the mower.
Read the Instructions Carefully
Rotary Cutting Blade
Keep Hands Clear
SAFETY SYMBOLS LOCATED ON THE MULCH PLUG
Page 7

5
Rover Mowers Limited NOTES
Page 8

Warranty Conditions
MTD Products Australia Pty Ltd warrant that
this machine is free from defects in material and
workmanship. This warranty is limited to making
good or replacing any part which appears upon
inspection by the manufacturer or his agent to be
defective in material or workmanship.
The engine used to power this machine is warranted
by the manufacturer whose warranty statement has
been included with the machine. As the warranty
for the engine may differ from the warranty for the
other components, you are advised to read the engine
manufacturer’s warranty carefully.
For other items this warranty shall apply for a
period of 12 months from date of purchase except
for products used commercially where the warranty
is limited to 90 days.
This warranty does not obligate the manufacturer, his
agents or dealers to bear the transport costs incurred in
the repair or replacement of any defective part.
Online warranty registration:
www.rovermowers.com.au
For Your Record:
Dealer's Name:..................................................................
Dealer's Address:...............................................................
Dealer's Phone No:............................................................
Product Model No:............................................................
Product Serial No:.............................................................
Date of Purchase:..............................................................
MTD Products Pty Ltd reserves the right to make changes and add improvements to
its product at any time without notice or obligation. The Company also reserves the
right to discontinue manufacture of any product at its discretion at any time
This warranty excludes fair wear and tear, or any
damage caused by misuse or abuse. Parts such as
blades, blade bolts, v-belts and spark plugs, which
can be subjected to use beyond their normal intended
working capacity are also excluded.
This warranty is void if parts other than genuine have
been used or if repairs or alterations have been made
without the manufacturer’s written authority.
The above warranty does not exclude any condition
or warranty implied by the Trade Practices Act 1974
or any other relevant legislation which implies any
condition which cannot be excluded.
REMEMBER:
PROOF OF PURCHASE IS THE RESPONSIBILITY
OF THE OWNER AND IS NECESSARY PRIOR
TO WARRANTY WORK BEING UNDERTAKEN.
REPAIRS MUST BE CARRIED OUT BY AN
AUTHORISED DEALER AND GENUINE SPARE
PARTS MUST BE USED OR YOUR WARRANTY
WILL BE VOID.
MTD Products Australia Pty Ltd
A.B.N. 96 004 873 572
PO Box 376, Dandenong, Victoria 3175 Australia
This Rover Owners Manual has been printed on
recycled paper as a sign of Rover Mowers
commitment to Greening Australia and New Zealand.
04016305 PRINTED IN AUSTRALIA © Copyright
Rev: F 9 - 2010
Recycled paper
 Loading...