

Page 1
Instruction for set up
USB modem MF100
MTS Connect 3G
on basis of 3G/UMTS/EDGE/GPRS/GSM
Page 2

2
ENG
Table of Contents
1. USB modem. Introduction 3
1.1. Introduction 3
1.2. Warning about safe use 5
2. Installation 7
2.1. Hardware installation 7
2.2. Installation and start of modem software 9
2.3. Start of MTS Connect program 10
2.4. Safe removal of USB modem 11
2.5. Removal of software 11
3. Functions 12
3.1. Get to know the interface 12
3.2. Connection to Internet 15
3.3. Account 16
3.4. Messages 18
3.5. Contacts 20
3.6. Statistics 22
3.7. Settings 22
3.8. Help 24
3.9. Warning about safe use 25
4. FAQ and answers 25
Page 3

3
ENG
1. USB modem. Introduction
1.1. Introduction
Thank you for using USB modem MF100. To achieve
the best results of modem operation, please read the
instruction attentively and keep it available.
Drawings, symbols and contents of this instruction are
given for information only. They may not coincide with
those of your USB modem.
MF100 modem is a wireless USB modem, used in 3G/
UMTS/EDGE/GPRS/GSM network. Using UMTS/EDGE/GPRS/
GSM mobile network, it carries out data transfer, in such
a way, you do not depend on limitations on time and
location, and may communicate in wireless mode any
time and in any place.
Page 4
4
ENG
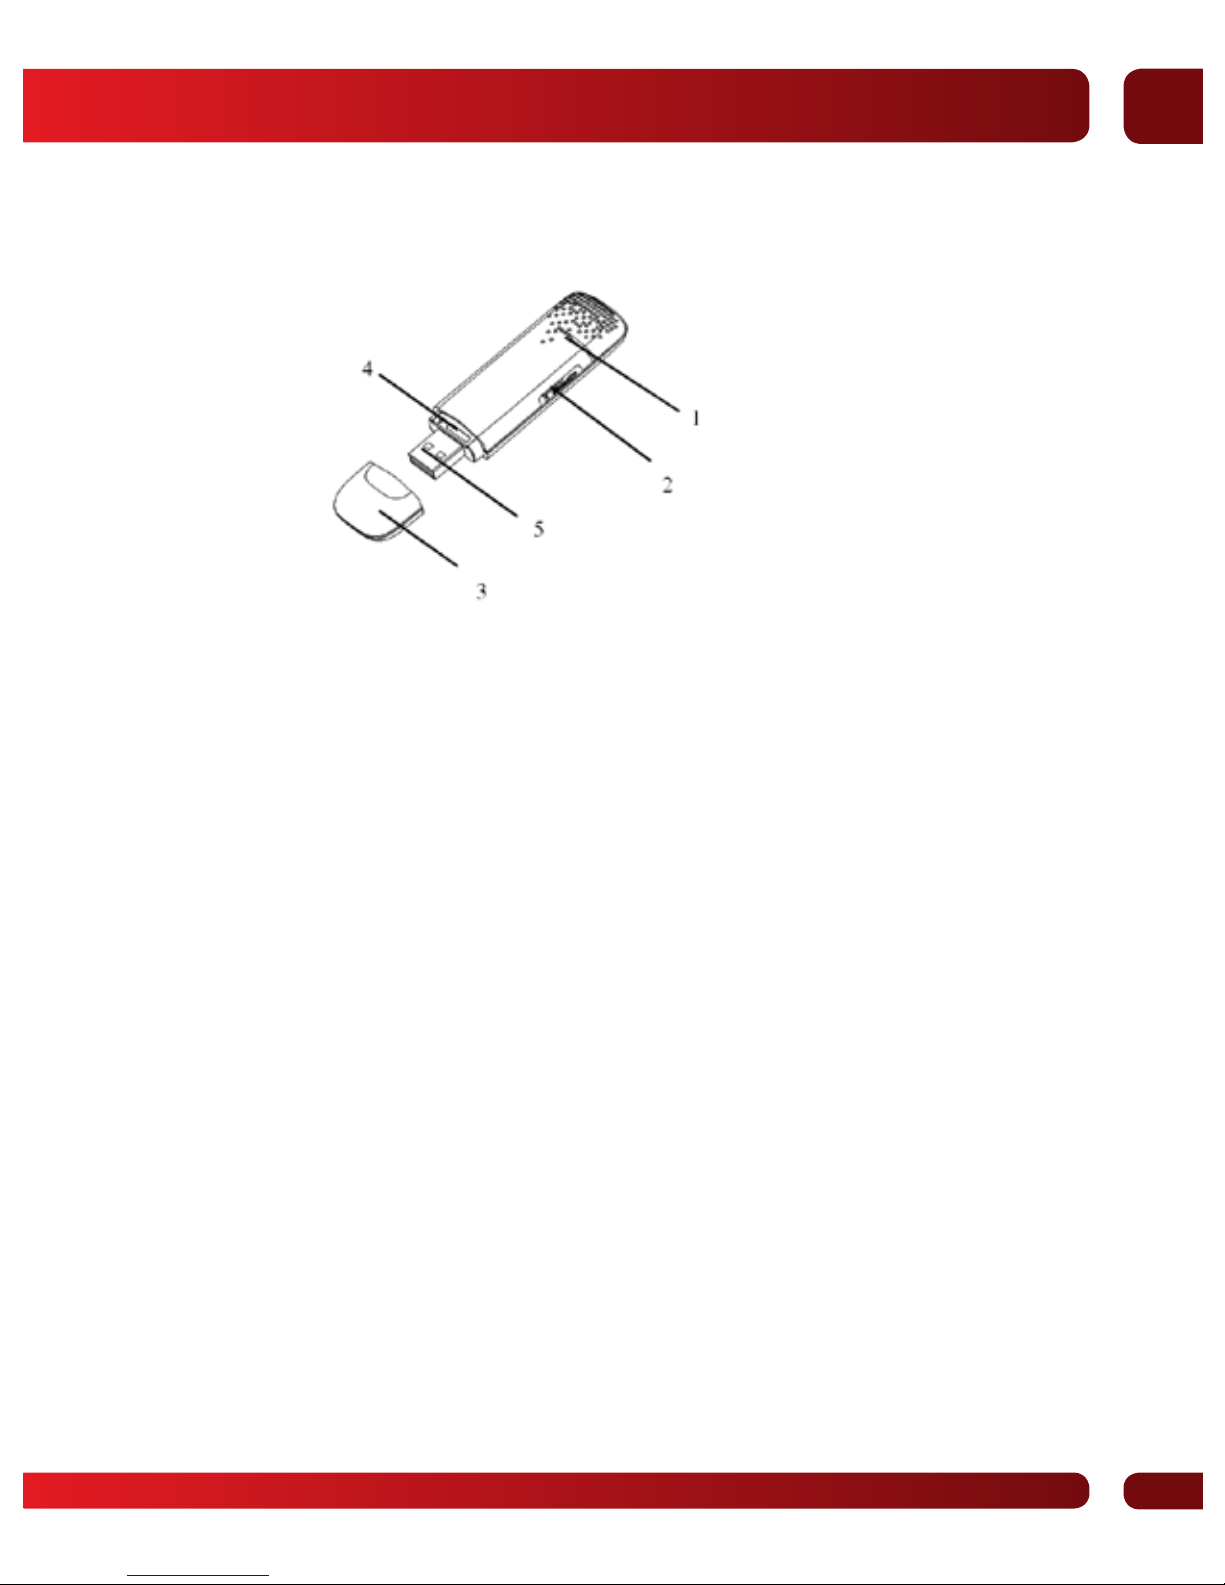
1.1.1. Brief Manual
1. Light Indicator
Informs about the state of the modem
2. Flash Card Slot (MicroSD)
The place to insert the memory flash card (MicroSD)
3. Modem Cap
Prevents USB port from damage during transportation
4. SIM/USIM Card Slot
Retractable slot for SIM/USIM card installation
5. USB Port
Device that connects the modem to a notebook
or a desktop PC
Page 5

5
ENG
1.2. Warning about safe use
1.2.1. To the owner
• Some electronic devices, such as electronic systems
of vehicles, are subject to action of electromagnetic
interference, created by USB modem in case
of inappropriate protection. If necessary, please consult
with the manufacturer of the USB modem prior to start
of its operation.
• Use of laptop with USB modem may affect operation
of medical appliances, such as hearing aid and
cardioaccelerators. We ask you to keep the card
at the distance of more than 20 cm from such medical
appliances. If necessary, switch off USB modem. Consult
with doctor or manufacturer of medical appliances prior
to start of operation of USB modem.
• Do not use USB modem at the petrol station.
• It is necessary to pay attention on limitations in use
of USB modem in such places as oil storages or chemical
plants, where explosive gases or products are
manufactured.
• Keep USB modem inaccessible for little children.
USB modem may cause trauma if used as a toy.
• We kindly ask you to use original auxiliary equipment
or auxiliary equipment, approved by manufacturer.
Use of any auxiliary equipment, not permitted for use,
may affect the productivity of the USB modem and lead
to violation of appropriate national regulations about
telecommunication terminals.
Page 6

6
ENG
• Avoid use of USB modem near metal devices or buildings
with metal structures, which may emit electromagnetic
waves. Otherwise, it may affect reception of signal.
• USB modem is not moisture-proof, so please keep
it in dry, shaded and cool place.
• NOTE: It is prohibited to take out SIM/USIM card during
connection of USB modem to PC.
• Please first insert SIM/USIM card, then connect modem
to the PC and launch software, installed on PC.
• When taking out SIM/USIM card, you should first shut
down software, disconnect USB modem and then take
out SIM/USIM card.
• Do not use USB modem under conditions of temperature
drops. In this case, condensate is forming, it is prohibited
to use modem up to complete dryout.
• Handle USB modem carefully. Do not throw, fold or beat
it to avoid its damaging.
• Disassembling of modem by non-qualified persons
is prohibited; only qualified staff may carry out repair.
Page 7
7
ENG
2. Installation
2.1. Hardware installation
2.1.1. Installation of SIM/USIM card into USB modem
Prior to start of operation of the device, please ensure
that your SIM/USIM card supports data transfer services.
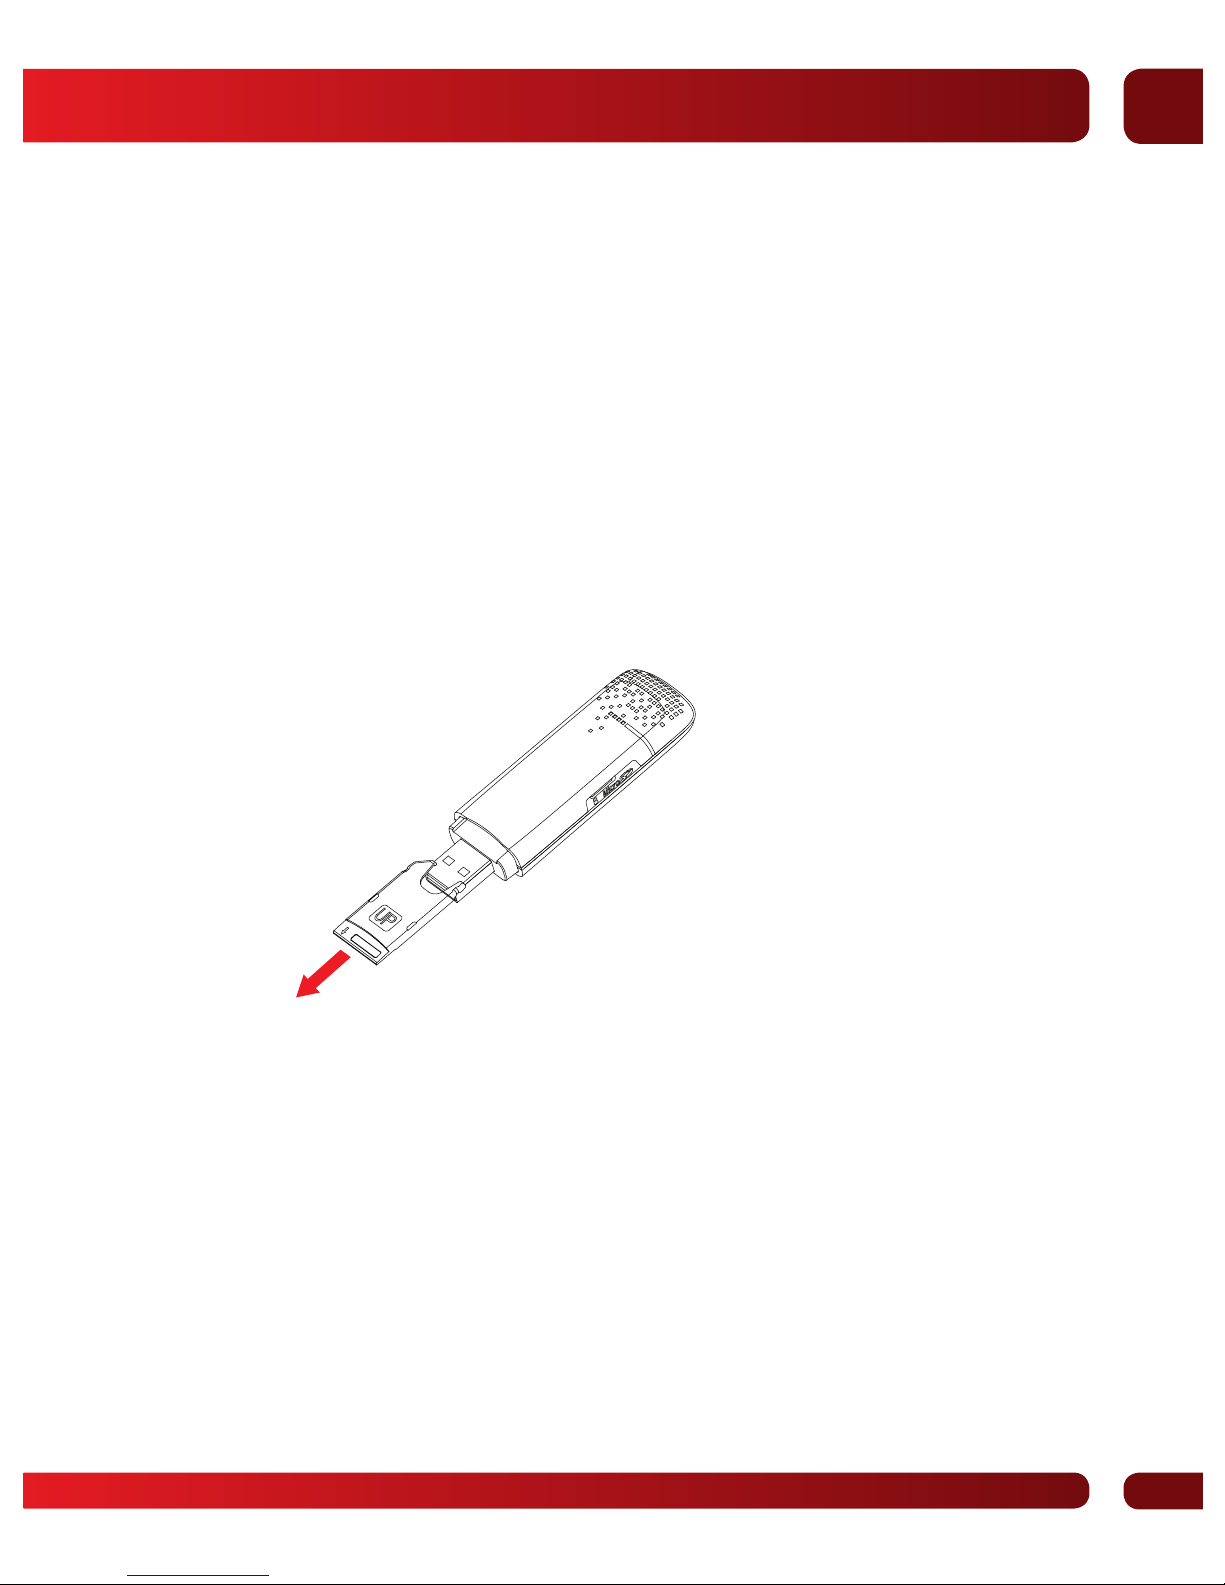
Open cap of modem and carefully take out holder of SIM/
USIM card, according to the picture below.
Page 8
8
ENG
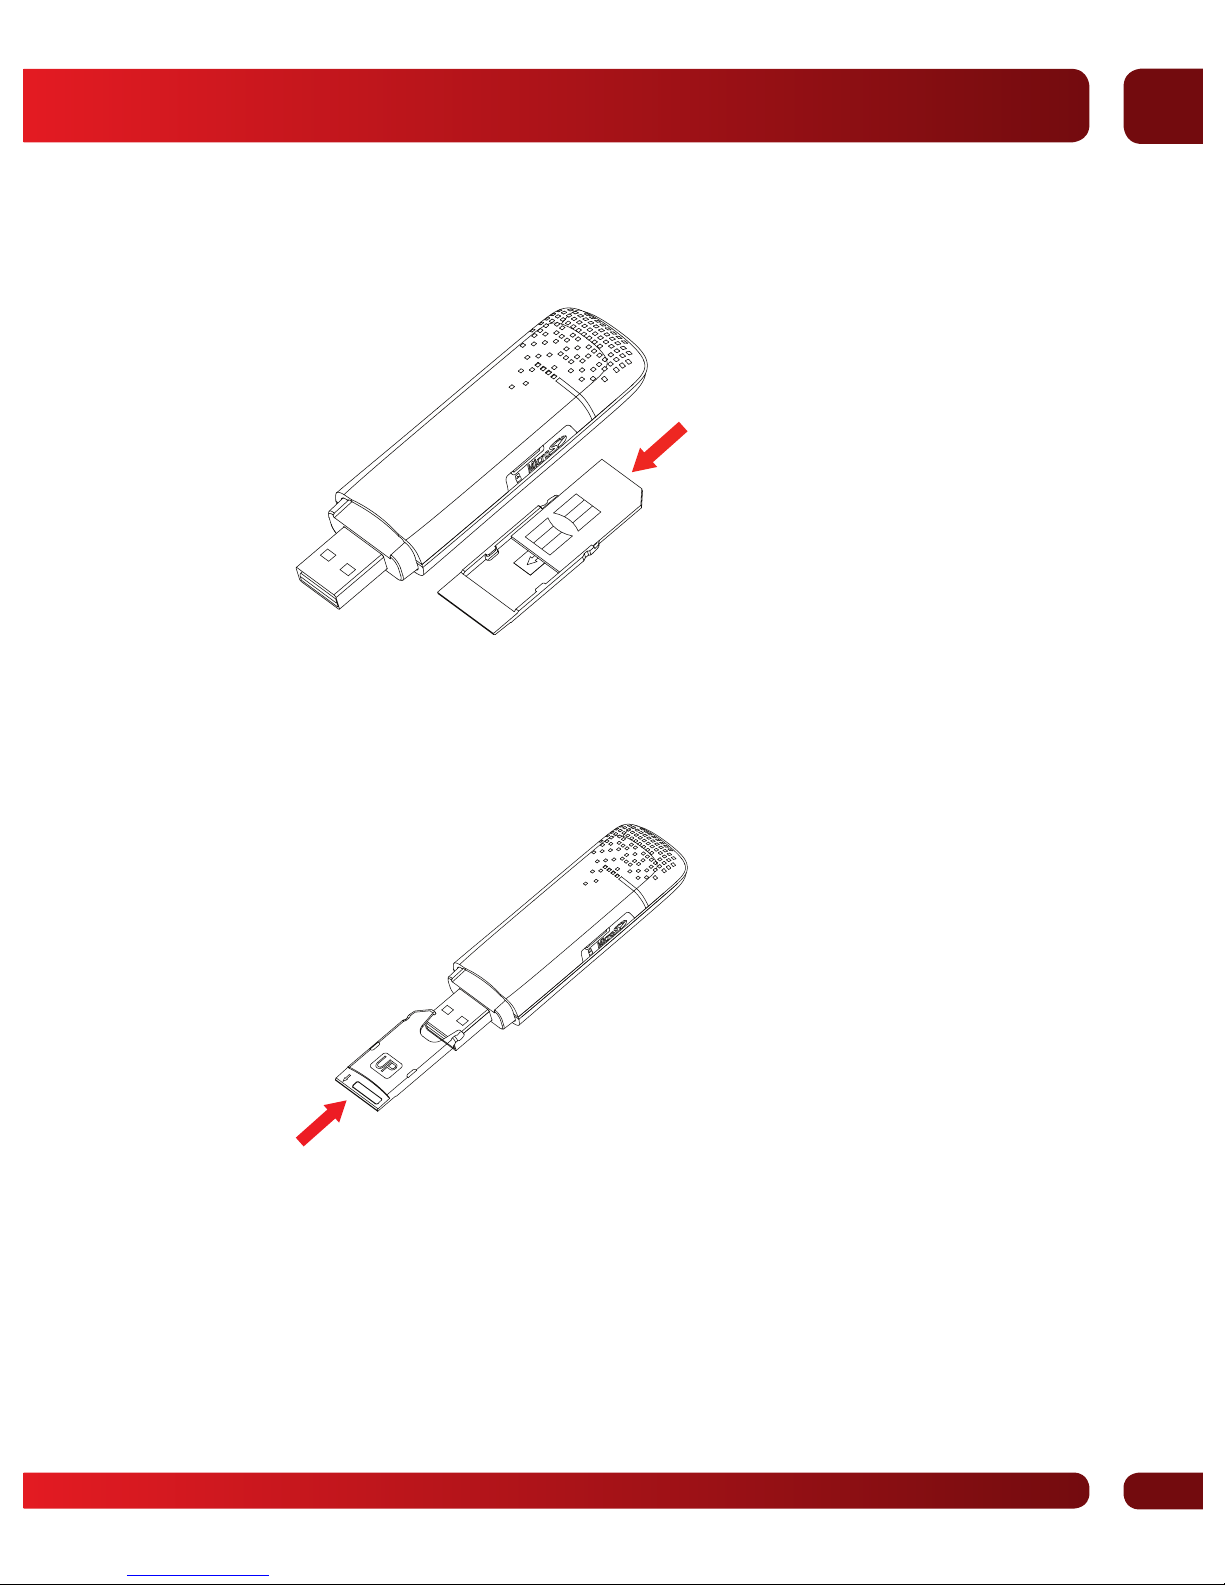
Insert SIM/USIM card into holder, as it shown on the
picture below.
Insert the holder with a SIM/USIM-Сard in the modem
as shown on the picture below. You may hear one click
when a SIM/USIM-Сard is installed in its place.
Page 9
9
ENG
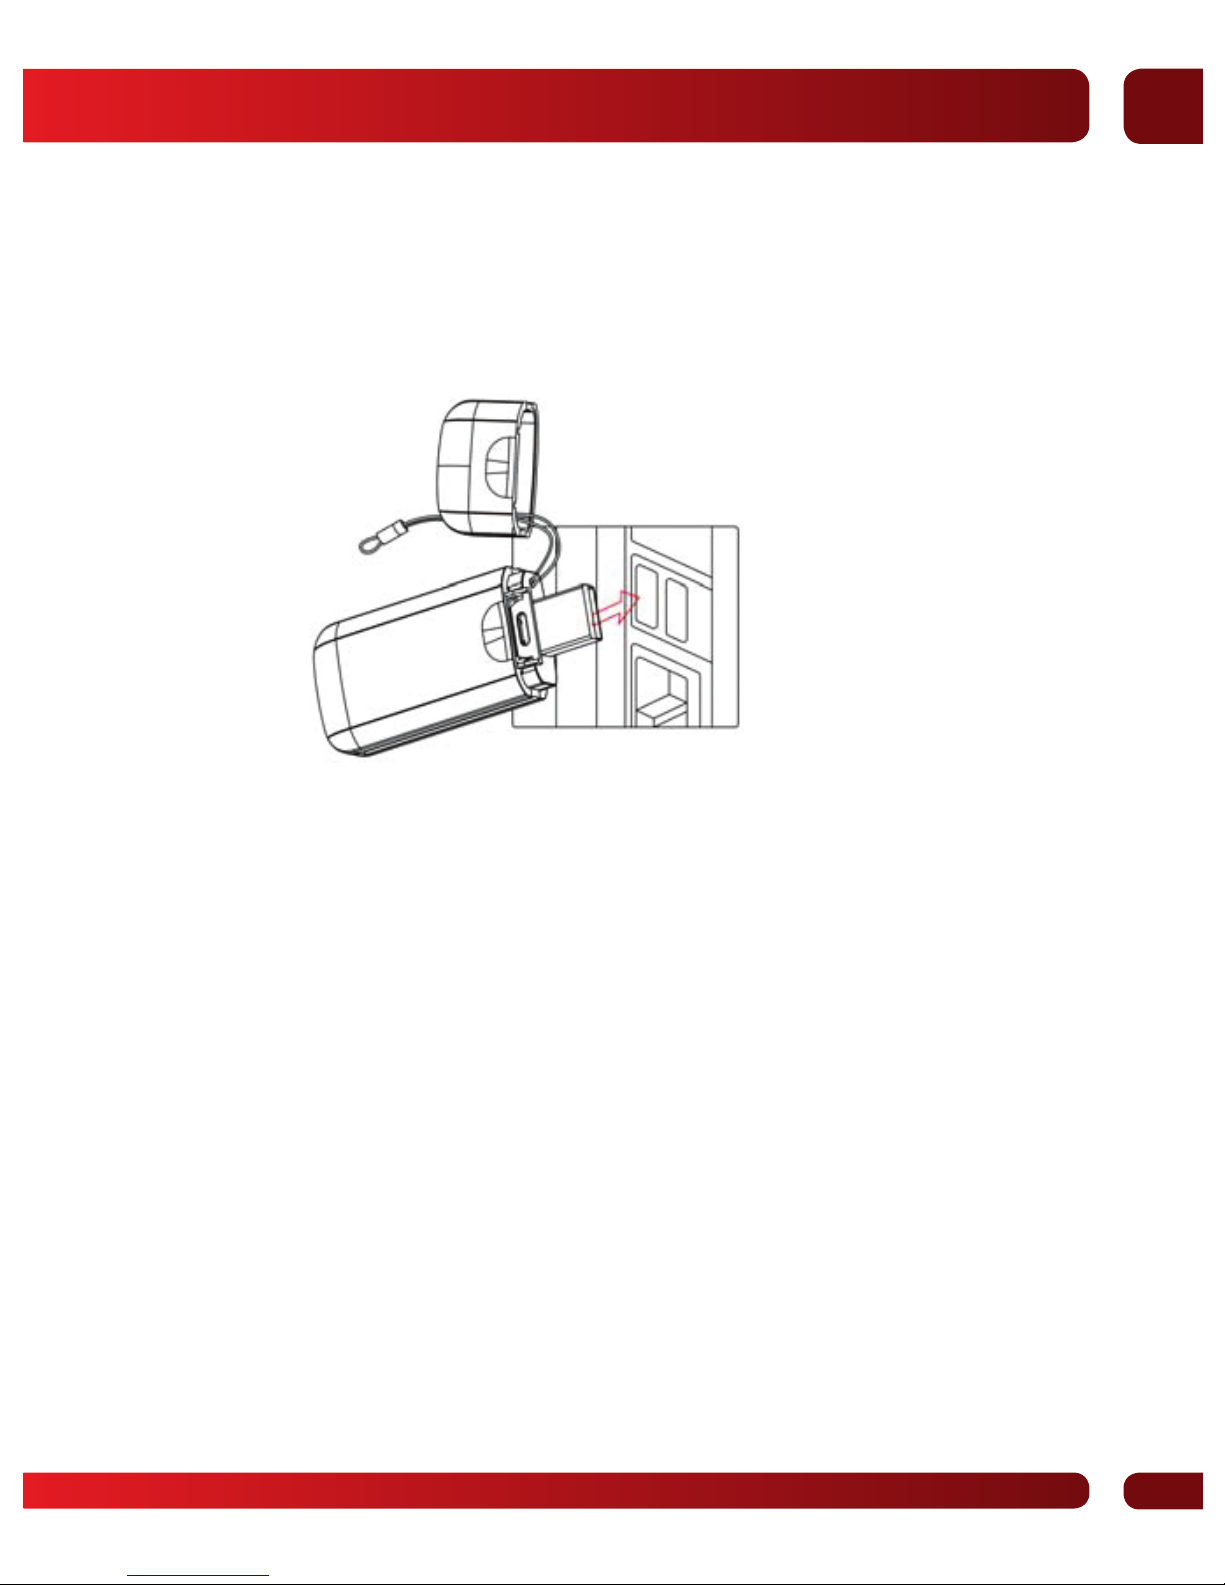
2.1.2. Installation of USB modem into computer/laptop.
Install USB modem into USB slot of PC/laptop. If red
indicator switches on, USB modem is connected
correctly.
2.2. Installation and start of modem
software
OS automatically recognizes new device and launches
installation wizard.
Note: If driver does not start automatically, enter
My Computer.
Then, double click MTS Connect CD-ROM for driver
installation. Or open My Computer > MTS Connect, then
double click Autorun.exe.
Choose language of installation and press OK
Then, following the installation wizard, select directory
on your PC/laptop to save driver and install it.
Page 10
10
ENG
Then you should select the components to install
or deselect those components that shouldn't be
installed.
Then, press OK to finish installation.
When installation of USB modem is finished, MTS Connect
program is launched automatically.
During next switching-on of USB modem, control
of USB modem is carried out by MTS Connect program.
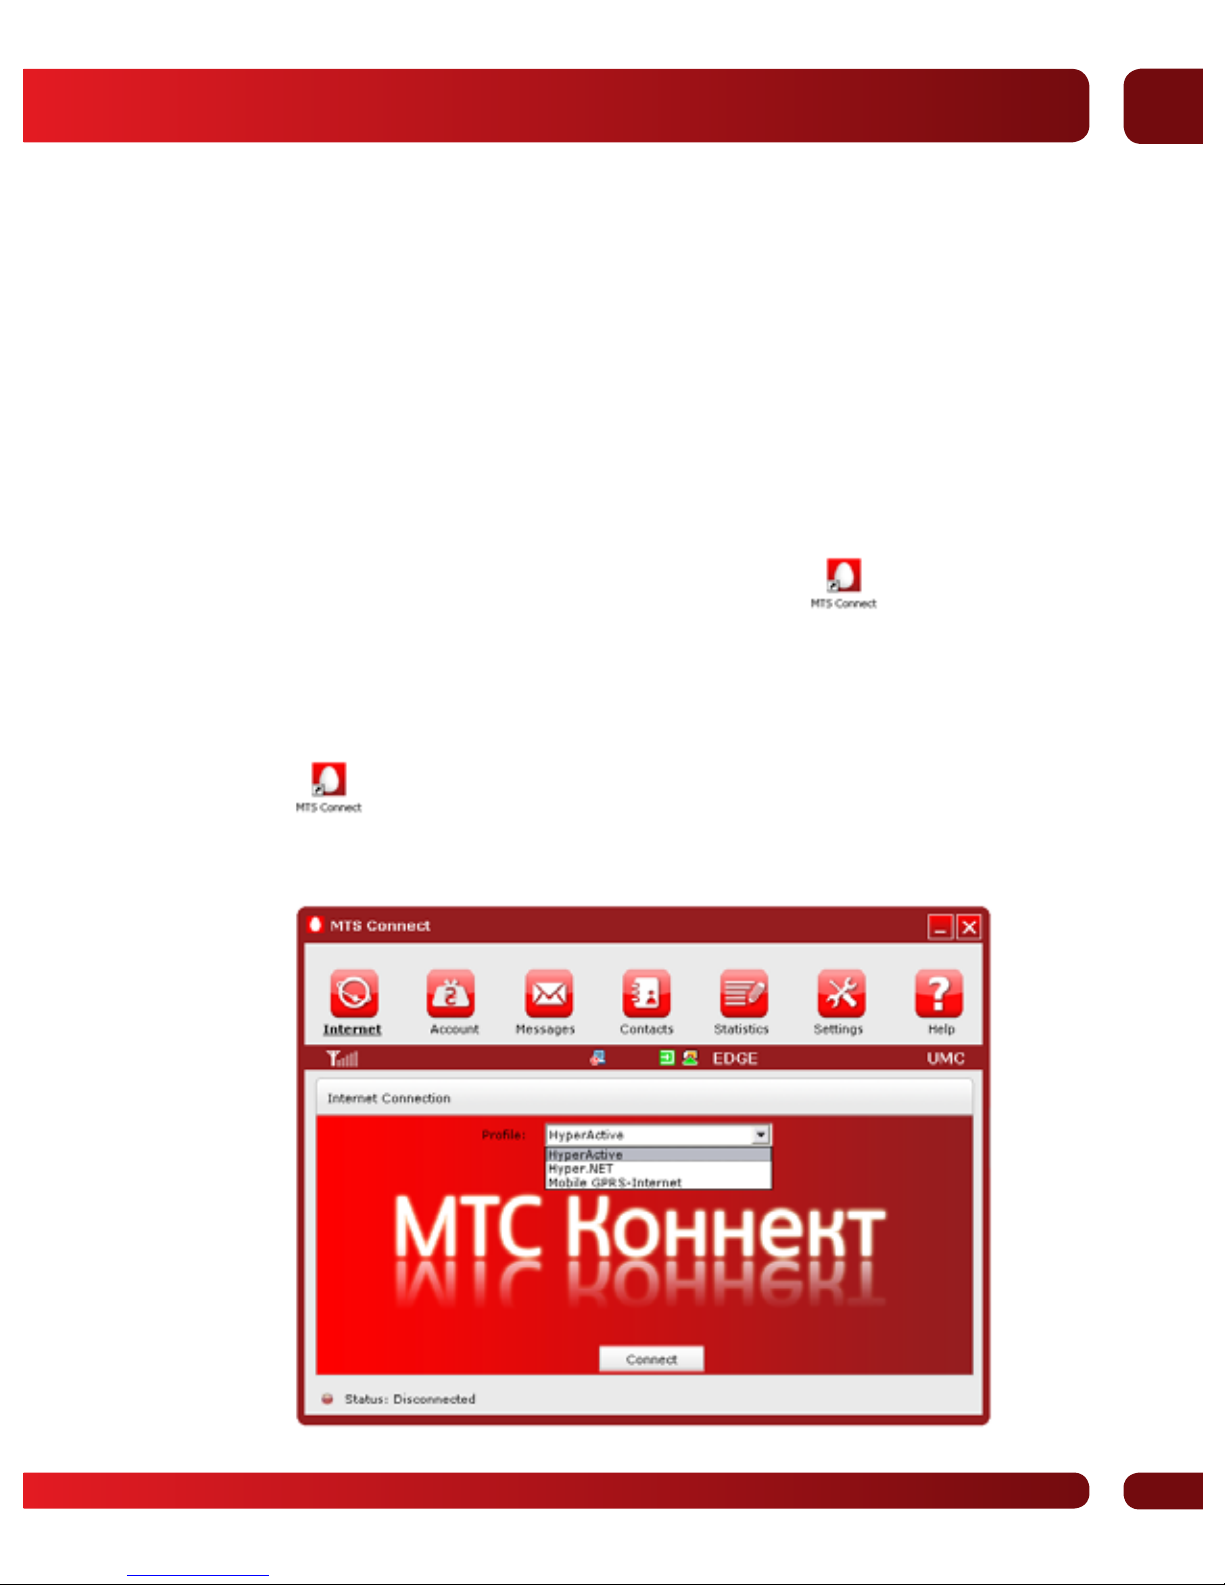
To start MTS Connect program, use sign at the desktop.
2.3. Start of MTS Connect program
To start MTS Connect program, double click the icon
at the desktop.
After start-up of USB modem, main page of interface
will appear.
Page 11
11
ENG
2.4. Safe removal of USB modem
Note: It is prohibited to retrieve the device from PC/
laptop without carrying out operations, mentioned
below, because this may cause damage of PC/laptop.
First, close all MTS Connect software applications.
Double click icon on the control panel. Message “Stop
or remove the device” will appear.
Press “Stop”. select the device to be stopped
and press ОК.
When message “Now the device may be removed”
appears, press OK and remove USB modem from
PC/laptop.
2.5. Removal of software
Finish your work with MTS Connect program and
USB modem, remove USB modem from PC/laptop.
Enter Start menu of PC/laptop.
Select Control Panel.
Find tab MTS Connect and press “Add/Remove Program”
to remove it.
Note: After finishing of the uninstall procedure,
it is recommended to restart computer for complete
removal of MTS Connect from your PC/laptop.
Page 12
12
ENG
3. Functions
3.1. Get to know the interface
Note: All drawings in this instruction are given only for
information. They may not coincide completely with the
interface displayed.
3.1.1. Basic interface
Interface of USB modem consists of three parts:
functional buttons area, system information area and
user’s area. Appropriate functions may be executed
in respective area.
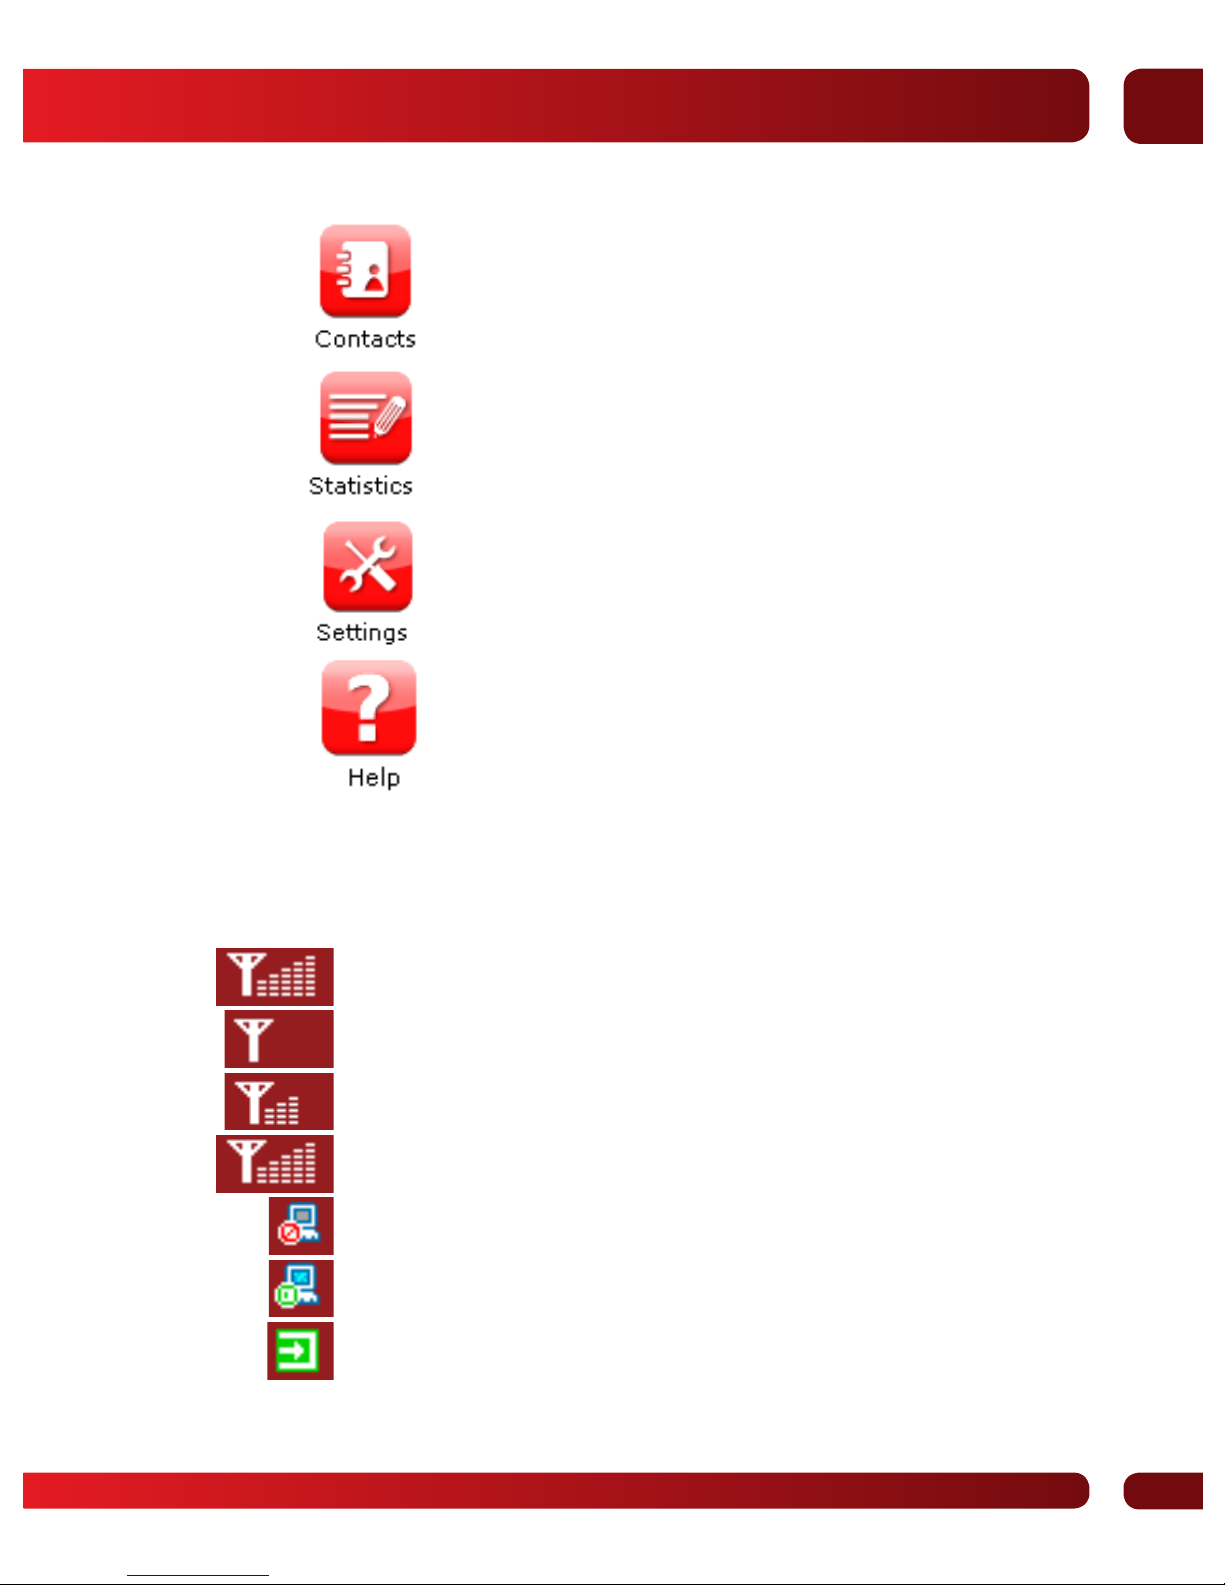
Functional buttons area
In this area, icons of different functional buttons will
be displayed. When pressing these buttons, respective
operations will be carried out.
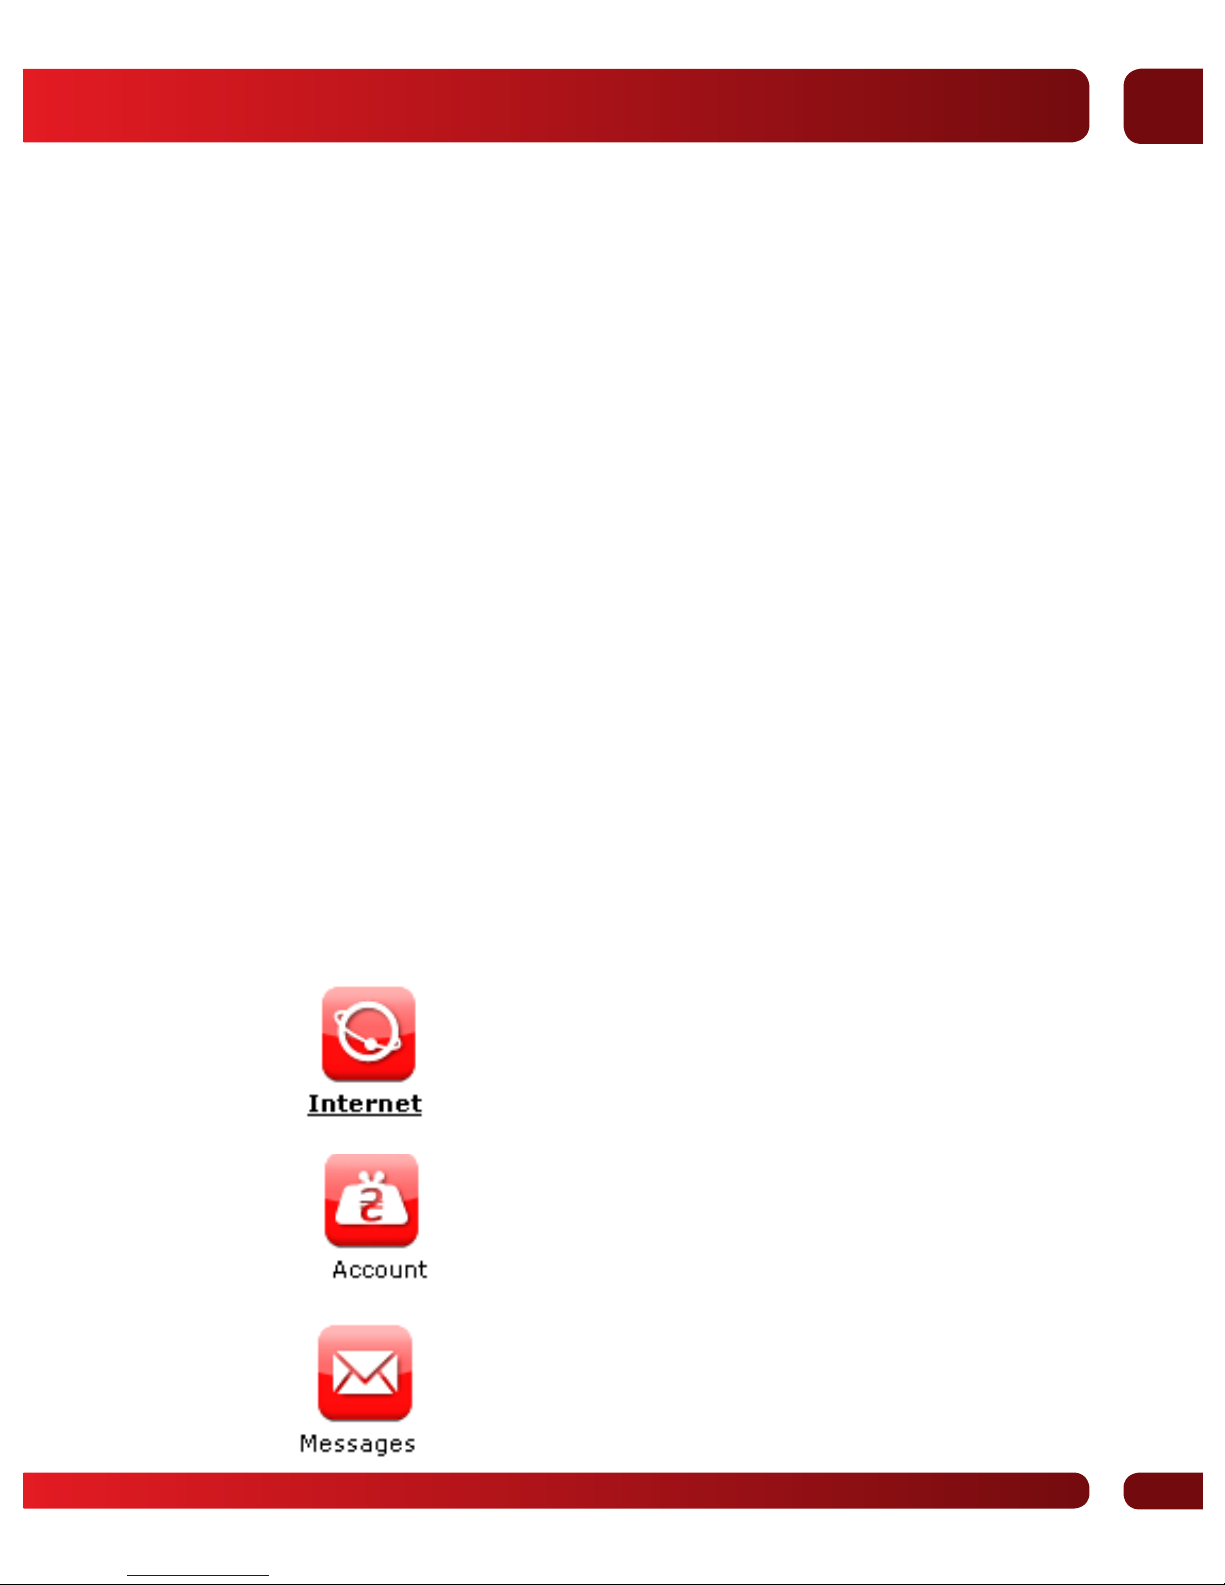
Internet: Connection to Internet.
Account: Account balance.
Messages: Send Message or Read Message
in folders. Incoming/Sent/Drafts.
Page 13
13
ENG
Contacts: Save and look different information
in the contact list.
Statistics: Check history of Internet
connections.
Settings: To install required parameters and
functions of USB modem.
Help: System information for operation
of USB modem.
System information area
Displays system status and different types of tips.
intensity of network signal, 5 states.
“no signal”.
medium signal.
very high signal.
USB modem is disconnected from Internet.
USB modem is connected to Internet.
USB modem is connected to PC/laptop.
Page 14
14
ENG
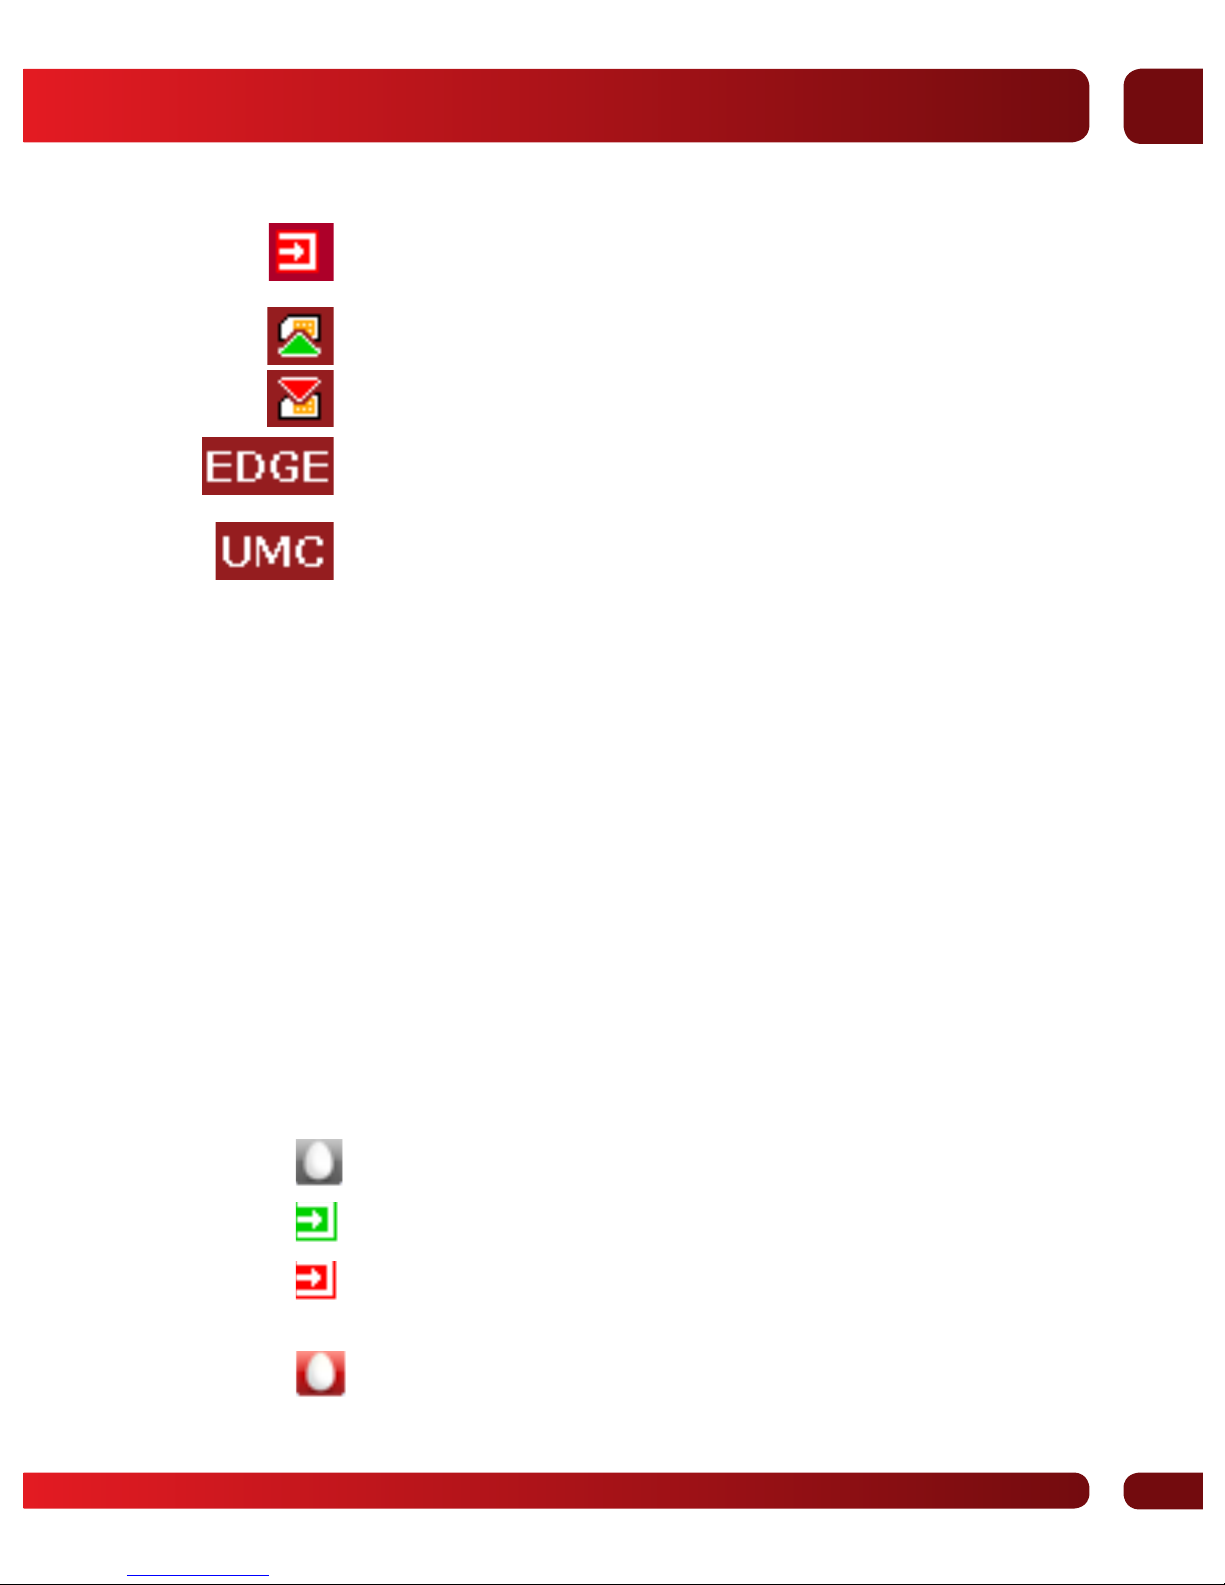
USB modem is not connected to PC/laptop
or is switched off.
SIM/USIM card is inserted into USB modem.
SIM/USIM card is not inserted into USB modem.
Current type of network service, i.e. UMTS/EDGE/
GPRS/GSM.
Name of current supplier of services.
User’s area
Displays interactive information about condition
of USB modem under various conditions.
3.1.2. Description of window reduction icons
When pressing window reduction icon, software will
be reduced to the icon on the task bar of the window,
that will not affect data loading or reception of SMS
in case of connection to Internet. Double click the icon,
and USB modem will restore.
Description of icons at the task bar
USB modem is in waiting mode.
USB modem is connected to PC/laptop.
USB modem is not connected to PC/laptop
or is switched off.
successful connection of USB modem to Internet.
Page 15
15
ENG
3.2. Connection to Internet
You may visit Internet sites after connection to Internet
using USB modem.
3.2.1. Connection to Internet
Press Internet button, select one of MTS Connect
services (Mobile UMTS/GPRS Internet, HyperNET
or HyperActive) that you will use, an press Connect.
Information window will appear, where cost of service
selected appears. To continue, you should press “YES”,
otherwise — “NO” and select other MTS Connect service.
After connection, Disconnect button will be displayed.
During connection Connect button will change
to Disconnect, and you may stop connection.
At the same time, icon that indicates connection
to network . appears on the task bar. After that, you
may receive access to Internet.
3.2.2. Disconnection from Internet
Press Disconnect button to disconnect from Internet.
After disconnection, standard icon of waiting mode
will appear.
3.2.3. Statistics of connections to Internet
Press Statistics to look through information about
connection to the Internet — duration, information
about data, etc.
Page 16

16
ENG
The information provided in the Statistics section about
the volume and length of the connection is approximate
and may differ from the actual tarrificated data by the
Operator.
3.3. Account
This function allows to check account balance, top up the
account, or send Internet package.
On the left side of the tab, there is account management
menu, that contains following items:
Contract account
• Account balance
• Top up the account
• Internet packages
Prepaid account
• Account balance
• Top up the account
• Internet packages
3.3.1. Account balance
To check your account balance, you need to press
“Account balance” in the menu, located at the left side
of “Account” tab.
Then press the button “Account balance”.
In several seconds, information about status of your
account will appear.
Page 17

17
ENG
3.3.2. Topping up the account
To top up your account, you need to press
“Top up the account” in the menu, located at the left
side of “Account” tab.
Then, in the input field, located at the bottom of the
program, enter 14-digit replenishment code and press
“Top up” button.
In several seconds, information about successful
or unsuccessful topping-up the account will appear.
3.3.3. Internet packages
This item will allow you to manage Internet packages:
connect, disconnect and change them.
In addition, you may activate those internet packages
that allow to decrease mobile internet costs for
subscribers.
To receive information about current Internet proposals
from MTS, you need to press “Internet packages” in the
menu, located at the left side of “Account” tab. Then
press “Internet proposals” button.
After that, WEB-page with detail information about
proposals for users of Internet access services and their
ordering opens.
Page 18
18
ENG
3.4. Messages
Press icon “Messages”, then number of Messages
in folders “Incoming”, “Sent” and “Drafts” appears.
Press button “Incoming”, “Sent”, “Drafts”
or “New Message” to enter respective interface.
Incoming: contains received messages.
Sent: contains sent messages.
Drafts: save edited messages as draft in the PC prior
to sending or after unsuccessful sending.
3.4.1. Reading of SMS
Press “Incoming” messages to read messages, stored
in “Incoming” folder.
Use lower menu buttons to read (Read), send (Send),
move (Move), delete (Delete), save (Save) or cancel
(Cancel) the message(-s).
3.4.2. Creation of new message
Press “New message” button to enter number
of addressee and text of message.
Enter number of addressee directly or select it from
contact list by pressing button.
MTS Connect software allows to send message both
to one or several addressees. Use symbol “;” to separate
phone numbers of several users.
Text of message may not exceed 160 separate English
letters (including English symbols).
Page 19
19
ENG
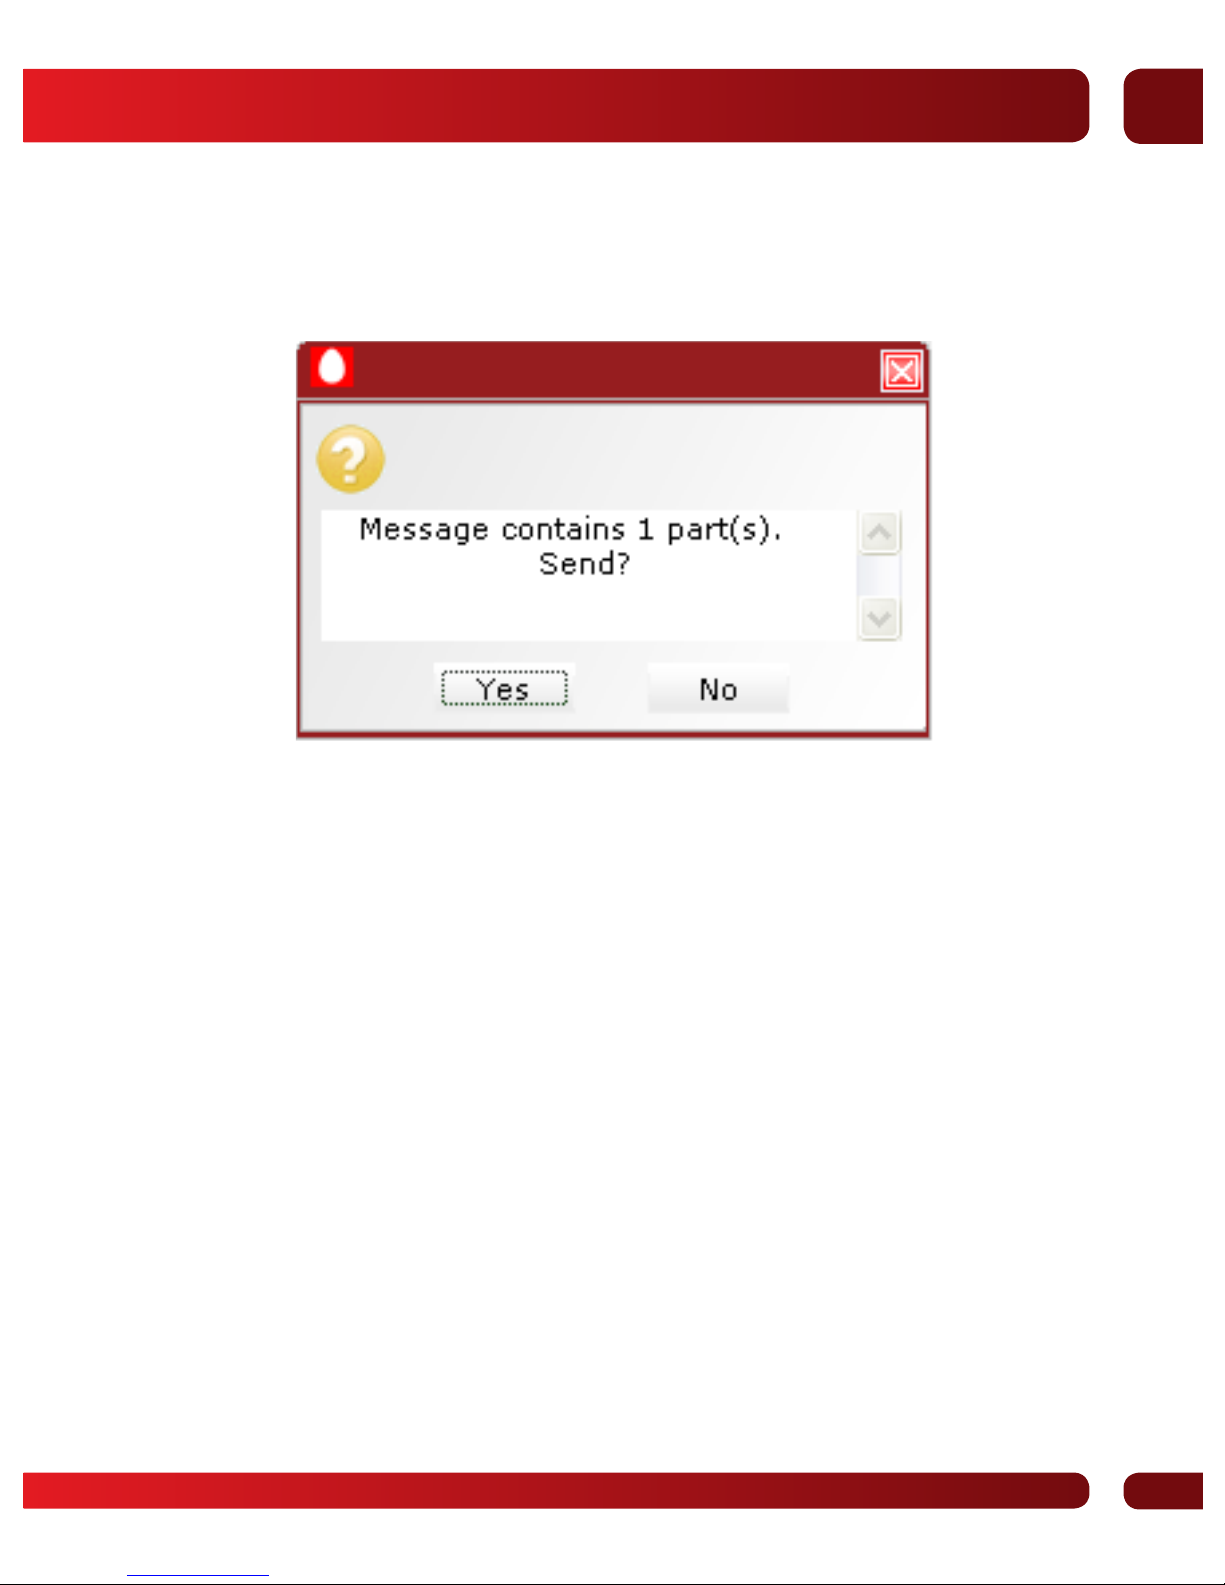
Press “Send”, select between “YES” or “NO” according
to information on the display to send short message
or cancel sending.
After successful sending, this message will
be automatically sent to “Sent” folder.
In case of sending error, error message will appear, and
message will be automatically saved into “Draft” folder.
Then, interface for creating new message will appear
again.
3.4.3. How to work with Message folder
Enter any folder “Incoming”/”Sent”/”Drafts” to execute
following functions:
Read: read all information, contained in short messages.
(Contents of short messages, phone number of sender,
time and date of sending).
Reply: Reply to sender with short message. (In folders
“Sent”, “Drafts”, there is no such item).
Page 20

20
ENG
Forward: Forward short message to other addressees.
(In folder “Drafts”, there is no such item).
Move: Change place of storage of short message(-s)
between SIM/USIM card and PC/laptop. (In folders “Sent”,
“Drafts”, there is no such item. You may not move short
messages from PC/laptop to SIM/USIM card).
Delete: Delete selected short message(-s).
Save: Save phone number of sender to Contacts.
Cancel: Return to Messages interface.
Use “Ctrl” or “Shift” and left mouse button to select several
messages and simultaneous execution of command.
System displays message if SIM/USIM card is full (SIM/
USIM cards have different capacities).
New message may be received and stored only if user will delete
some short messages in “Incoming” folder on the SIM/USIM card.
3.5. Contacts
Press “Contacts” button to switch to the interface
of contact list. Information from the contact list may
be stored either in PC or in SIM/USIM card.
Each record includes name of contact person (Name),
its/his/her mobile phone number (Mobile Phone), home
phone number (Home Phone), office phone number
(Office Phone), e-mail (E-Mail) and group (Group),
to which it/he/she belongs. Record on SIM/USIM card
includes only its/his/her name and mobile phone
number. It is possible to press “Search” button to find
required information.
Page 21
21
ENG
New contact person
Press “New” “New Contact”, enter all information
and press “YES” to confirm.
New group
It is possible to add new groups of contacts to PC/laptop.
It is not possible to add new groups on the SIM/USIM
card.
Press “New” “New Group”, and name new group
in the tree of “Groups” folder of PC/laptop.
Select folder of group, in which you would like to add
or edit information, and enter all information following
the instructions.
Search in records
It is possible to enter all or any part of symbols
of record or phone number you are searching. Press
“Find” to start searching. List of appropriate results
is displayed. Scroll it to the record you want to view
in detail.
Select records from the list and press “Change” to edit
information, then press “YES” to finish.
Description of buttons
If any record is selected, following steps may be made:
View: View information.
New: Create new contact.
Page 22

22
ENG
Delete: Delete record.
SMS: Send SMS to the numbers of mobile phones
in records.
Save: Save information to PC/laptop as text.
Change: Edit information of selected record.
3.6. Statistics
Detail information about speed and data streams by day,
month, and year.
3.7. Settings
Press “Settings” icon to switch to setting interface.
It switches on connection profiles, security settings,
signal settings and factory settings.
3.7.1. Connection Settings
To ensure appropriate connection of USB modem
to Internet, it is necessary first to adjust information
of user’s network. It is possible to save network settings
of different operators in different files.
Description of buttons
Add: add settings of new connection profile.
Remove: remove selected connection profiles.
Edit: edit selected connection profile.
Page 23

23
ENG
Default: select one profile from the list with names
of connection profiles and set it as current profile.
Configuration file
Information about user settings includes:
• name of connection profile;
• dialing number;
• name of user;
• password;
• access point (APN);
• DNS server address;
• PDP address;
• authentication;
• IP address.
3.7.2. Security settings
Activation of personal identification (PIN code)
If item “PIN code request” is selected, you need to input
PIN code of your SIM/USIM card to operate your USB
modem.
To change PIN code, select “Change PIN code”.
Note: For this action, network support is required.
In addition, you may back up your phone book, messages
or internet connection data in this menu item.
Page 24

24
ENG
3.7.3. Setting up the Network
In this menu item you may change the mode for the
modem registration. You can also set the priority
of modem operation to GSM or 3G networks.
3.7.4. Message settings
SMS center: In the software for your modem, there
is a number of SMS center of MTS Ukraine mobile
operator.
Delivery time: Input SMS storage time, limited
by network.
Options: 12 hours/one day/one week/maximum period
Location for storage of new SMS: select location where
you would like to store SMS.
Delivery report: turning on / off the delivery report.
3.7.5. Signal settings
You may set active notification about connection,
notification about disconnection, and notification about
incoming SMS. Notification is generated by
PC/laptop with beep. If select “Silent” mode, notification
is generated without beep.
3.8. Help
Press “Help” icon to switch to Help interface. In this
interface, you may receive information about USB
modem by functions of input, installation, operation
manual, etc.
Page 25
25
ENG
3.9. Warning about safe use
Recommended ambient temperature is 20°С ~ +55°С,
humidity 5% ~ 95%.
4. FAQ and answers
If you will face with the following problems during
work, we kindly ask you to use this table to solve them.
If problems still exist, please contact your network
operation.
Problem
Description
Possible Causes Problem Solving
The system can not
run the installation
program
automatically.
The system
configuration
is having difficulty
with the auto-run
software.
The device will
appear as a virtual
CDROM on the
PC’s start menu.
Click on the icon
and start the
autorun.exe. If you
have previously
installed a version
of the program,
please uninstall
it first.
After installation,
the system
doesn't install the
driver program
properly.
The system
configuration
is having difficulty
with the auto-run
software.
Please install the
driver program
manually. The
driver program
can be found
in installation
folder.
Page 26
26
ENG
Problem
Description
Possible Causes Problem Solving
After the device
is plugged in,
the UI program
doesn't run
automatically.
The system
configuration
is incorrect.
Please open
the UI program
manually. You
can find it on the
desktop.
After restarting
the computer,
there is no signal
indicated.
1. You are in the
place where there
is no GSM/ GPRS /
EDGE /WCDMA /
HSDPA network
coverage. Such
places include
underground
parking garages,
tunnels, and some
remote rural areas.
1. Change location
to find a good
where having
signal.
2. The device
is not properly
connected.
2. Close the device
safely as usual, pull
out the device and
reinsert the device
again.
3. The SIM/USIM
card isn't inserted
properly.
3. Remove and
reinsert the
SIM/USIM card
correctly.
4. The MODEM
device is positioned
in such a way
as that adversely
affects the devices
signal reception.
4. Adjust the angle
/ position of the
MODEM device or its
proximity to other
electronic devices.
When the Device
is being installed,
the computer
cannot find it.
1. The installation
programs of the
MODEM device have
not been installed
properly.
1. Run the
installation
program first then
connect the device.
Now install the
drivers as normal
in Windows.
Page 27
27
ENG
Problem
Description
Possible Causes Problem Solving
2. The device
is not connected
properly.
2. Restart the
computer,
or reconnect the
device.
3. The SIM/USIM
card is not inserted
properly.
3. Reinsert the
SIM/USIM card
correctly.
Sent Message
failure.
1. The SMS
center number
is incorrect.
1. Your device
is preconfigured
so it is unlikely
that it will need
changing. However
if it is missing
or incorrect
contact your
operator.
2. The network
is busy or you are
in an area with
no signal.
2. Try later or move
to an area with
a stronger signal.
Page 28
28
ENG
Problem
Description
Possible Causes Problem Solving
Date connection
failed.
1. You are in the
place where there
is no GSM/ GPRS/
EDGE/ WCDMA/
HSDPA network
coverage.
1. Move to an area
with good signal.
2. The network
is busy.
2. Try later.
3. The APN in the
user configuration
file is incorrect.
3. Check the
APN in the user
configuration file
in the "Network
settings".
4. The device data
is corrupted.
4. Local network
access or the target
server maybe
experiencing
problems. Retry
data request.
5. The network type
has been selected
manually, but
is incorrect.
5. Reselect the
network type
according to the
type of the SIM/
USIM card.
Connected to the
Internet, but
it cannot open any
website page.
1. After connection,
you are unable
to open web pages.
1. Check that
the APN in the
configuration files
is correct.
Page 29
29
ENG
Problem
Description
Possible Causes Problem Solving
2. IE browser
is causing
problems.
2. Upgrade to the
new version
or reinstall the
IE browser.
3. Your operating
system maybe
infected by a virus.
Worm Blaster
for example can
affect upload and
downloaded data
flow, resulting
in an inability
to access a website.
3. Use the
professional antivirus software
to check and
remove the virus.
4. You have
connected
to an APN which
cannot connect
to the Internet.
4. This happens
when you are
changing any
preset operator
value in the setting
section. Check the
entry and enter the
correct APN from
your operator.
Page 30

www.mts.com.ua
wap.mts.com.ua
Algorithm of fast Internet connection via a modem
Step 1. Inser t a SIM/USIM card in MF100 modem
Step 2. Connect a modem to PC/notebook
Step 3. Install required soft ware
Step 4. Check your account balance
Step 5. Select one of Internet services
Step 6. Enjoy Internet from МТS
Information about current Internet services and tarif f rates
Mobile EDGE/GPRS Internet
Hyper.NET
HyperActive
Please see the detailed information about current internet ser vices,
packages and tarif fs at w ww.mts.com.ua
 Loading...