

MSI RX9800PRO-TD128 Quick Installation Manual
Hardware Installation
Follow the steps to install the VGA card :
1. Remove the computer case.
2. Locate the AGP slot on your mainboard.
Warning: Inserting the VGA card into a wrong
slot (e.g. PCI slot)will damage your card (refer
to your mainboard manual for more Information).
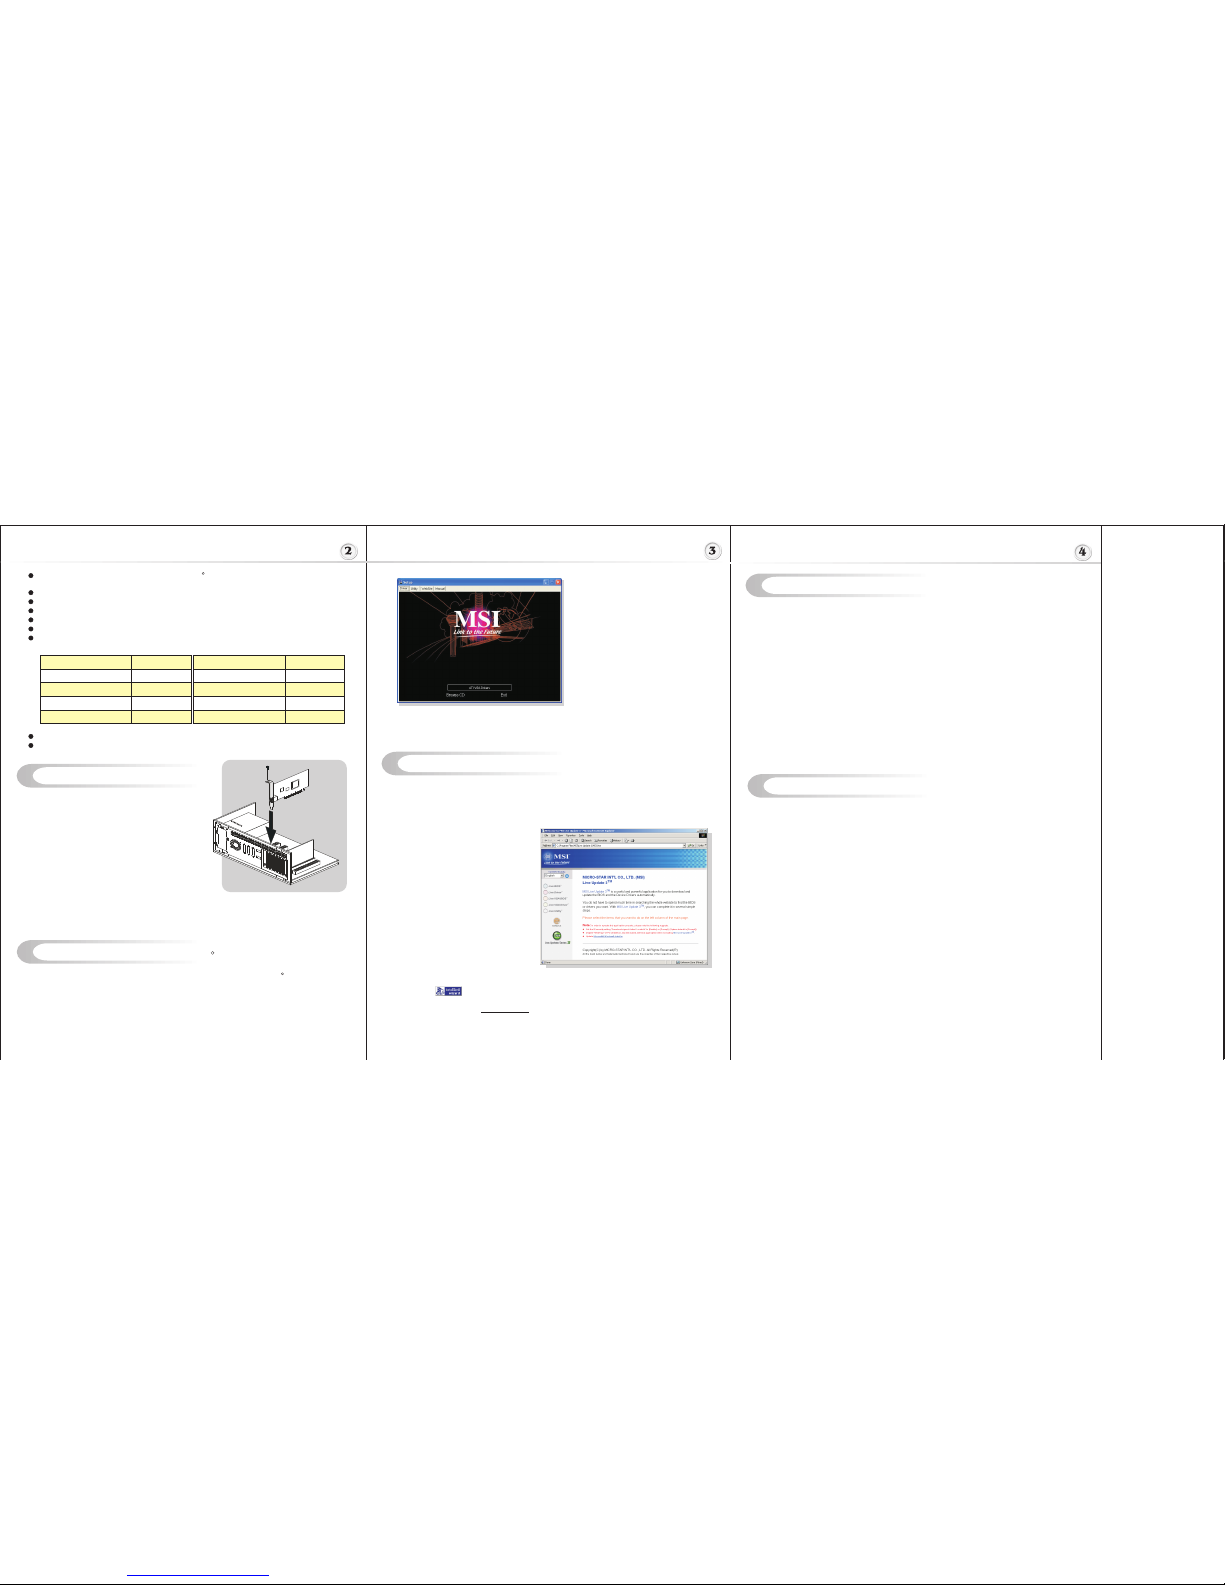
3. Put the card directly over the AGP slot and
press one end of the card into the slot first.
Gently but firmly press the other end until it is
fully seated in the slot.
4. Secure the card with a bracket screw.
below
Software Installation (for )
Windows XP/ 2000/ 98SE/ ME
R
I
TM TM
nstalling MSI Live Update 3
To install the driver of the VGA card to your computer running CDWindows XP/ 2000/
98SE/ ME, please follow the steps below:
1. Turn on the computer.
2. Insert the into the CD-ROM drive. The Autorun program will start the Setup
program, and show the setup screen as follows:
R
TM
MSI Live Update 3 is a useful utility for you to upgrade your MSI mainboard and
VGA card. Thanks to the powerful capacity of this utility, you can conveniently download
and automatically update the BIOS and the drivers on-line, without spending much time in
searching many Web sites to find the BIOS or drivers you want.
TM TM
Tip : If, on your computer, the
Autorun program does not execute
automatically, please 1) enable the
CD-ROM drive Auto-detect function
from Control Panel; or 2) find and
run the setup.exe file manually from
the CD.
3. Click ATI VGA Drivers. Follow the on-screen instructions to complete the installation.
4. After finishing the installation, restart the computer as instructed.
U
TM TM
sing MSI Live VGA Driver Update
MSI Live VGA Driver Update
This service enables you to update the latest VGA driver for your VGA card.
1. To update the MSI Live VGA Driver , click Live VGA Driver item on the left
column of the main page.
TM TM
TM TM TM
2. This utility will start checking your platform and the information on the VGA card, and
display the information in a list.
3. Click the graph button on the bottom to connect MSI Live Update Series Server.
Then, it will automatically connect the Internet and compare the version of the driver
in the database.
4. It may take several minutes to detect the required drivers. Please wait while
proceeding detection.
5. Click the InstallShield Wizard button on the right side of the table to download and
update the driver. All actions will proceed automatically.
6. Follow the on-screen instructions to complete the updating procedure.
3.
TM
Click the InstallShield Wizard button to have the program of MSI Live
TM TM
Update 3 with MSI Live monitor downloaded and installed on your system
automatically, or click here (manual) to download and install the program manually.
4. Follow the on-screen instructions to complete the installation.
TM
SMARTSHADERTM 2.1 offers complete DirectX 9.0 support, enabling cinematic quality
lighting effects
TM
SMOOTHVISIONTM 2.1delivers the sharpest, clearest textures
Comprehensive AGP 8X/4X/2X support
RADEON 9800 PRO Visual Processing Unit (VPU)
One display (VGA or DVI) simultaneously connected with a TV or VCR
YPrPb output adapter (available in North America only)
Core Clock: 378 Mhz
Clock: 338 MHz
2D Display Modes: Resolutions, colors and masimum refresh rates(Hz) in 256, 65K Or 16.7M
colors
Memory
R
640x480 200Hz
800x600 200Hz
1024x768 200Hz
1152x864 200Hz
1280x1024 160Hz
1600x1200 120Hz
1920x1080 120Hz
1920x1200 100Hz
1920x1440 90Hz
2048x1536 85Hz
5. Install all other cards and devices and connect all the cables, and then install the case.
6. Connect the monitor. Now, you are ready to install the software on your computer.
Installing from the CD-Title
1. Insert the CD into the CD-ROM
drive, and start the Setup program.
2. Click the Utility tab on the setup
screen.
3. Click the MSI Live Update 3 .
Follow the on-screen instructions to
complete the installation.
Installing from the MSI Web Site
1. Make connection to MSI's website at
http://www.msi.com.tw
2. Select /Support/Live Update 3/ on
the upper part of the MSI's
homepage to enter the setup page.
TM TM
TM
U
TM TM
sing MSI Live VGA BIOS Update
MSI Live VGA BIOS Update
This service enables you to update the latest VGA BIOS for your VGA card.
1. To update your VGA BIOS, click Live VGA BIOS item on the left column of the main
page.
TM TM
TM
TM
2. If your VGA card does not support the Live VGA BIOS function, you will receive a
warning message on the screen.
TM
3. If your VGA card do support the Live VGA BIOS function, please pay attention to the
message shown on the screen telling you that in what circumstance flashing BIOS
may fail to reboot.
4. Click Yes if you would like to try it at your own risk or No to return to the main page
with everything unchanged.
5. If you click Yes to continue, it will check the information and BIOS version of your
VGA card, and list them in a table.
TM TM
6. Click the graph button at the bottom to connect the MSI Live Update 3 Server.
TM TM
7. The MSI Live VGA BIOS will automatically connect the Internet and search the
TM
supported BIOS in the database of MSI .
8. If it has found one (or several) supported BIOS for your VGA card, click the
InstallShield Wizard button on the right side of the table to have the new BIOS
downloaded and updated automatically.
9. Follow the on-screen instructions to complete the updating procedure.
Getting Started
System Requirements
Card Features
Please check out the following items to make sure that you get the complete product:
VGA card
CDs
- Drivers and documentation on CD
- Applications on CD
Consult your dealer immediately if anything is missing or damaged.
I
n
t
e
r
a
r
t
n
a
S
-
t
i
o
o
r
n
c
i
a
l
M
TEL. 886-2-32345599
FAX. 886-2-32345488
http://www.msi.com.tw
* All trademarks used in this manual are the sole property of their respective owners.
VGA is a trademark of International Business Machines Corporation.
Pentium is a registered trademark of Intel Corporation.
Windows is a registered trademark of Microsoft Corporation.
R R
R R
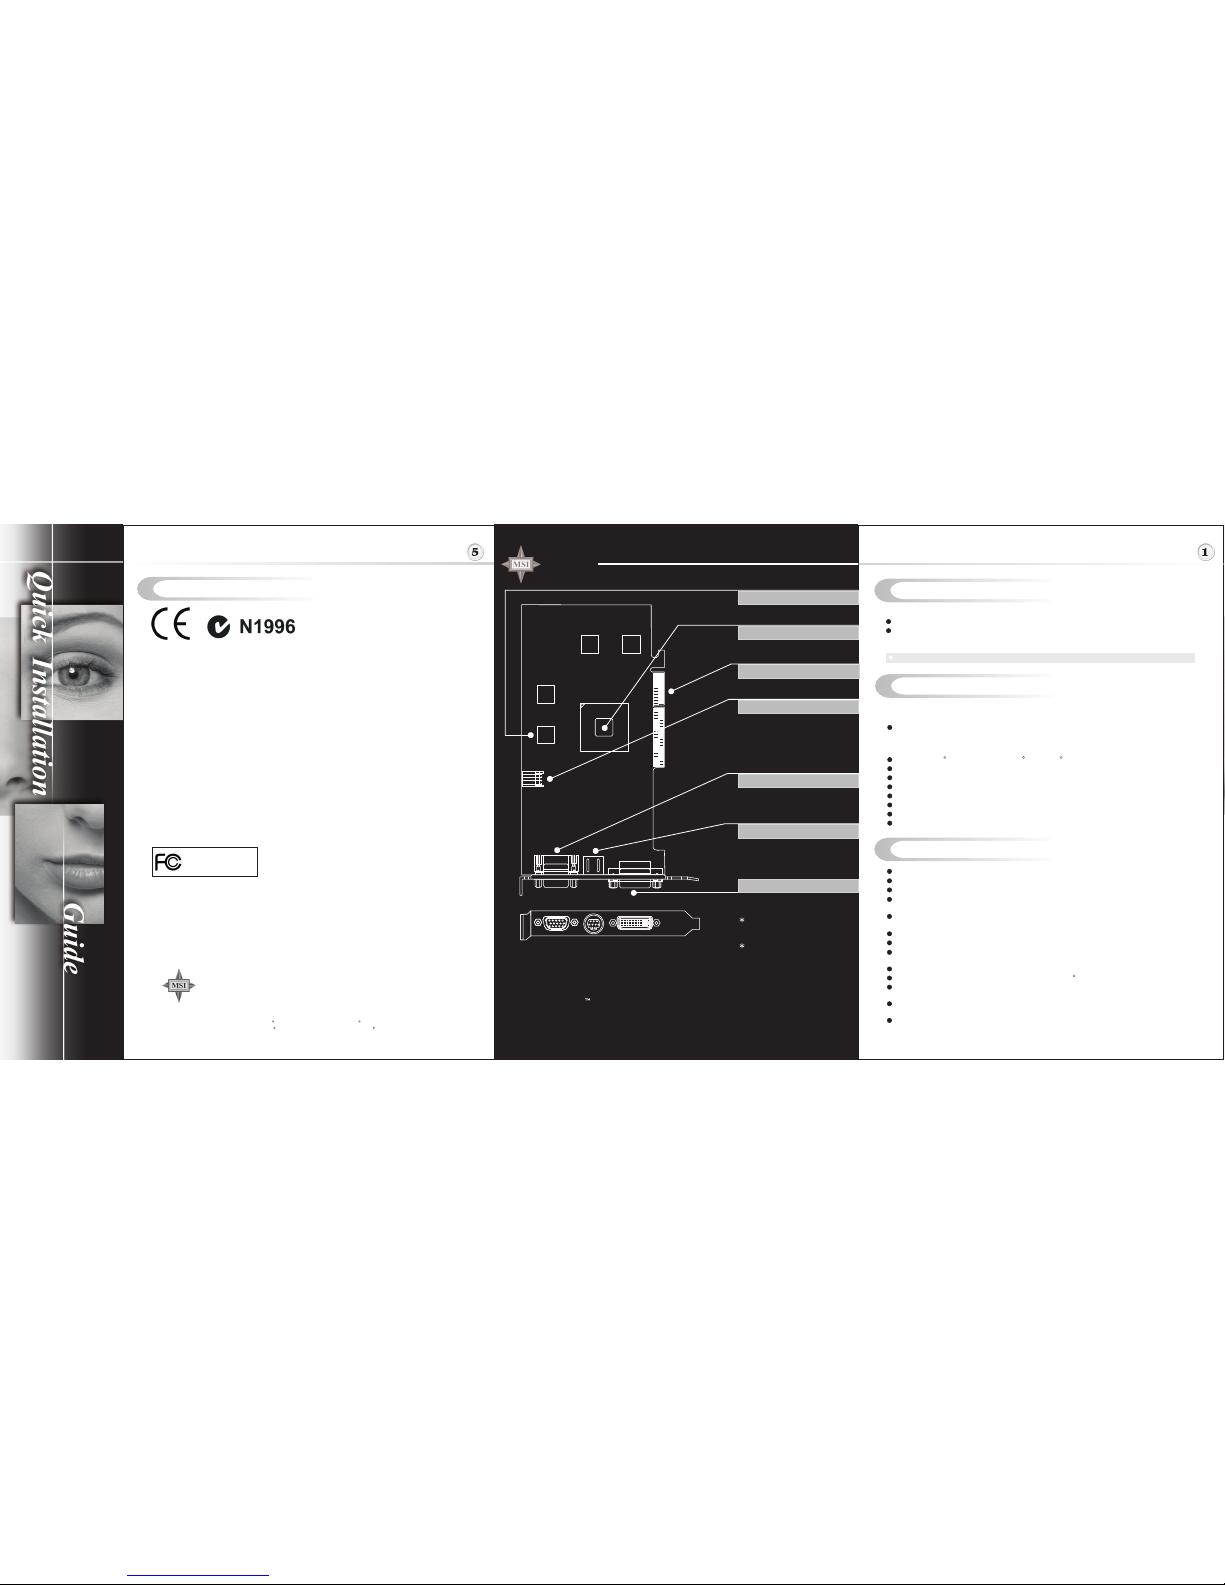
RX9800PRO-TD128
ATI Radeon 9800PRO inside!!!
MICRO-STAR
INTERNATIONAL
D-Sub Port
TV_Out Connector (S&C)
ATI Radeon 9800PRO
DVI Port
Power Connector*
AGP 8X interface
N
Quad-Pipe architecture delivers real-time cinematic rendering and animation
TM
THRUVIEW creates live, translucent TV, video and DVD windows for easy desktop access
Radio frequency wireless remote adds the flexibility of a hand held, 30 foot user interface
TM
ew EAZYLOOK full-sized programming grid offers theme controls and single click
navigation
TM
MulTView enables dual TV tuner capabilities including Picture-in-Picture and independent
TM
channel surfing. (Additional ATI TV WONDER is required for this to work.)
TM
Add effects, transitions and sound to videos with Pinnacle Studio software
Save projects to VideoCD and DVD formats or output to digital ready television
TM
VideoSoap provides filtering techniques that improve sharpness and smooth blurry motion
for high quality personal video
Capture pictures and video at up to 30 frames per second.
Output to HDTV ready devices with ALL-IN-WONDER 's video output component adapter
128MB DDR memory to generate the most detailed and immersive gaming experiences
without sacrificing frame rates
256-bit memory interface delivers bandwidth for real-time 3D visuals and barrier-free
performance
8-pixel pipeline architecture doubles the rendering power of any competing product currently
on the market
R
To install the VGA card, your computer system needs to meet the following
requirements:
RADEON 9800 Series of products requires connection to your PC's internal power supply
for operation. Consult your system builder or OEM to ensure your system has an adequate
power supply. Otherwise, a 300-Watt power supply or greater will be recommended to
ensure normal system operation where a number of other internal devices are installed.
Intel Pentium 4/III/II/Celeron , AMD K6/Athlon or compatible with AGP 8X/4X/2X slot
128MB of system memory
Installation software requires CD-ROM drive
DVD playback requires DVD drive
Interactive Program guide requires Internet connection for listing updates
Remote control receiver requires available USB port
500MHZ minimum processor speed for MPEG-2 video capture
Operation System Support: Windows XP / 2000 / Me / 98 / 98SE
TM
TM
R R R
128MB DDR memory
NOTE:
The supplied power cable
must be attached to ensure
the card works properly.
Always connect or
disconnect the supplied
power cable when the
system power is off.
FCC-B Radio Frequency Interference Statement
This equipment has been tested and found to comply with the limits for a class B digital device,
pursuant to part 15 of the FCC rules. These limits are designed to provide reasonable protection
against harmful interference when the equipment is operated in a commercial environment. This
equipment generates, uses and can radiate radio frequency energy and, if not installed and used
in accordance with the instruction manual, may cause harmful interference to radio
communications. Operation of this equipment in a residential area is likely to cause harmful
interference, in which case the user will be required to correct the interference at his own expense.
Notice 1
The changes or modifications not expressly approved by the party responsible for compliance
could void the user authority to operate the equipment.
Notice 2
Shielded interface cables and A.C. power cord, if any, must be used in order to comply with the
emission limits.
VOIR LA NOTICE D NSTALLATION AVANT
DE RACCORDER AU RESEAU.
This device complies with Part 15 of the FCC Rules. Operation is subject to the following two
conditions:
(1) this device may not cause harmful interference, and
(2) this device must accept any interference received, including interference that may cause
undesired operation.
Macrovision Corporation Product Notice
This product incorporates copyright protection technology that is protected by method claims of
certain U.S. patents and other intellectual property rights owned by Macrovision Corporation and
other right owners. Use of this copyright protection technology must be authorized by Macrovision
Corporation, and is intended for home and other limited viewing uses only unless otherwise
authorized by Macrovision Corporation. Reverse engineering or disassembly is prohibited.
Micro Star International
MS-8956
 Loading...