

Page 1

Video Graphics Accelerator
Quick Installation Guide
Page 2

Content
English 03
Italiano 09
Turkiy 15
Polska 21
Poccия 27
Español 33
简体中文 39
繁體中文 45
Deutsch 51
Français 57
Version 4.0
January 2005
G52-V2QIK06
1
Page 3

English
Quick Installation Guide
3
Page 4
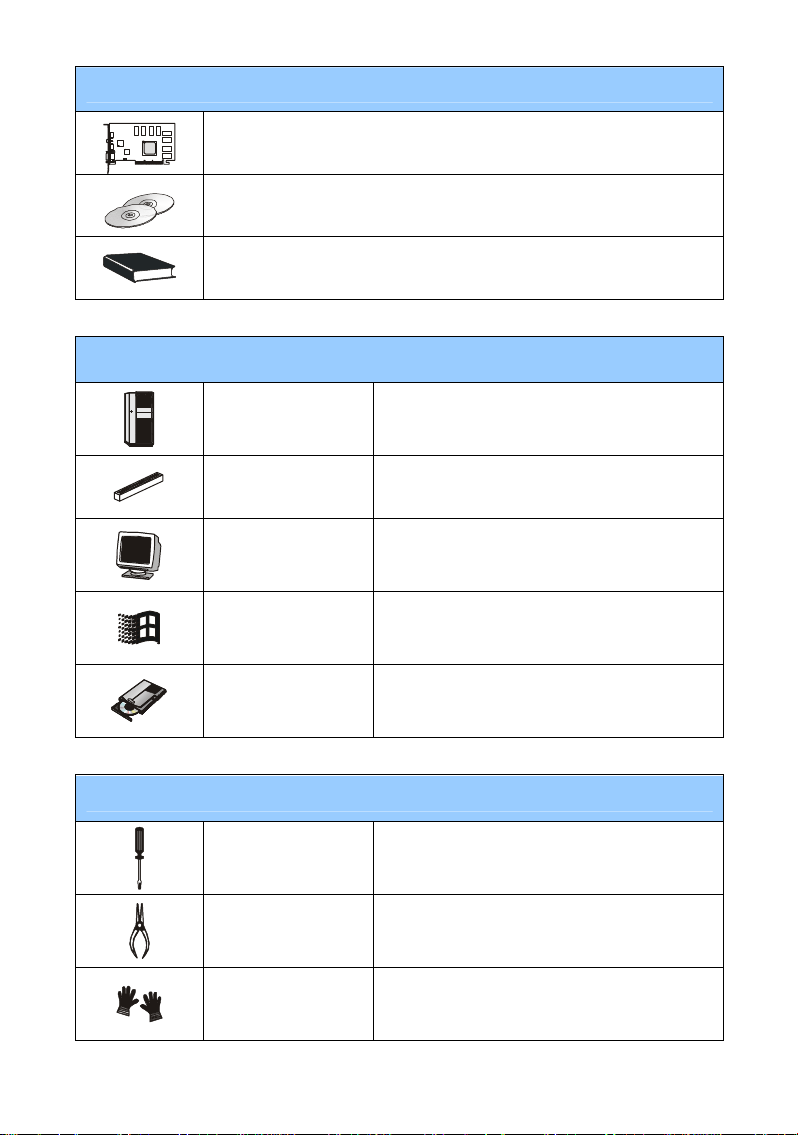
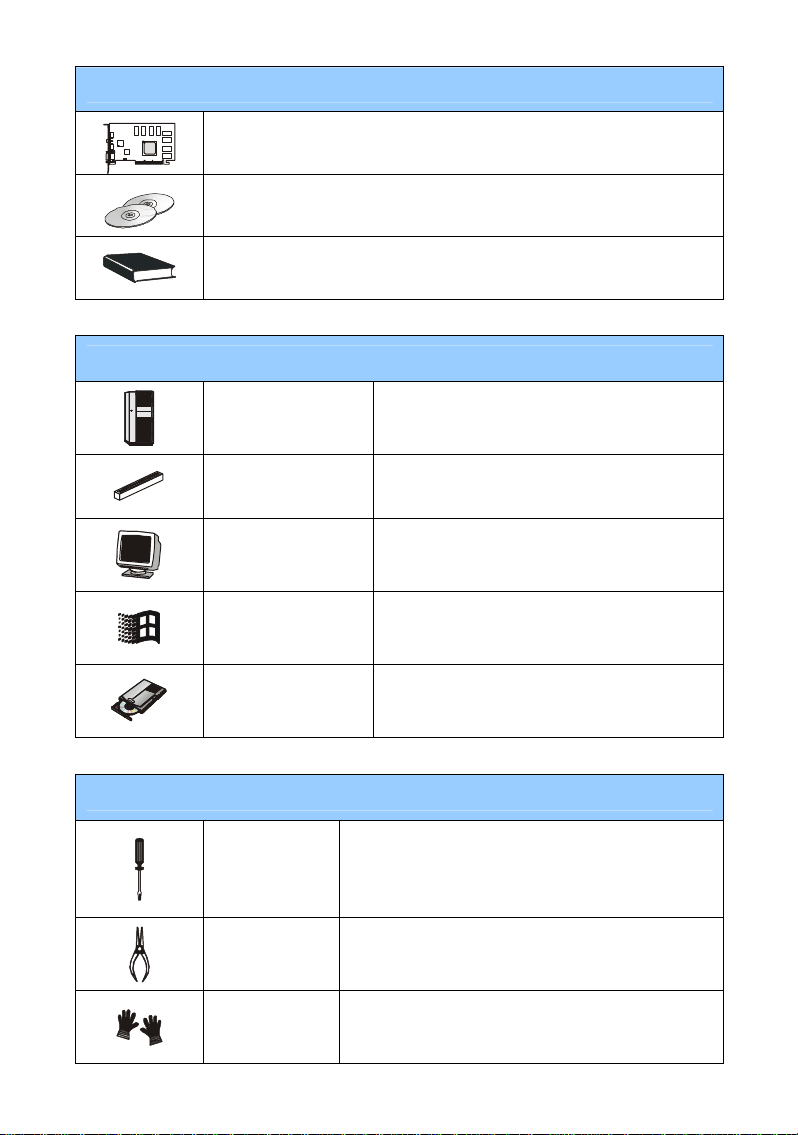
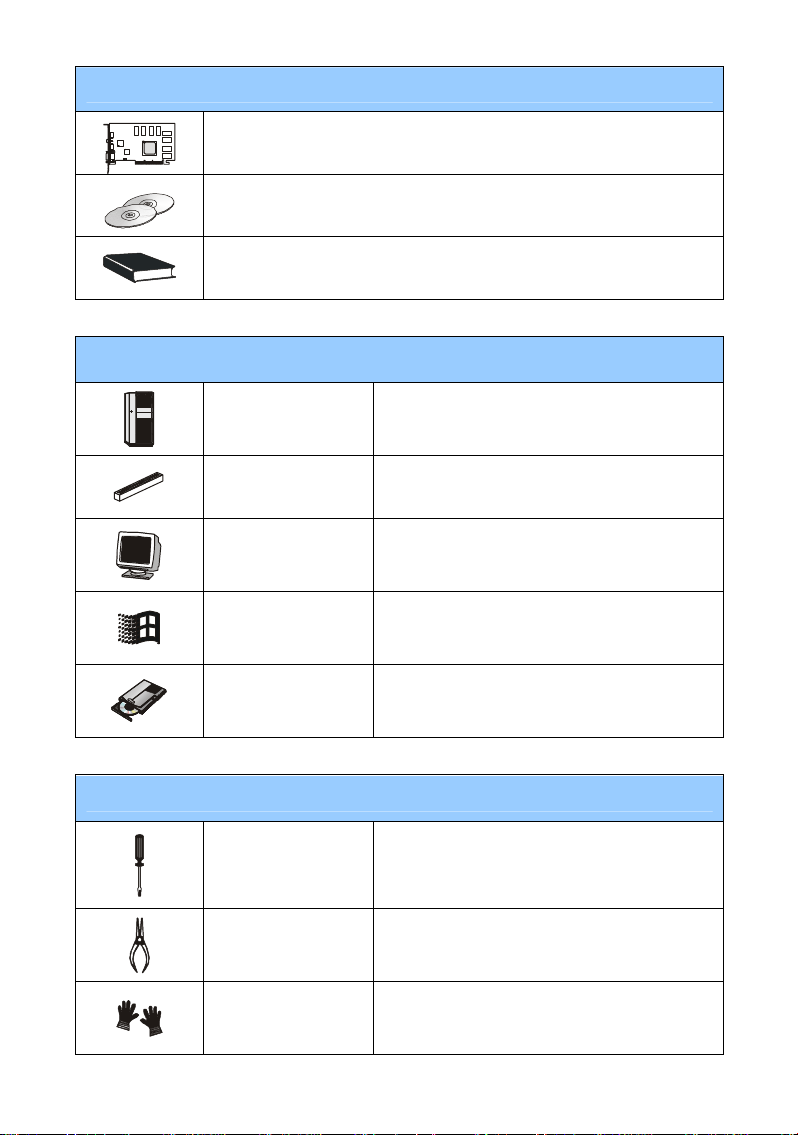
Package Content
VGA card (Consult your agent if anything is missing or damaged.)
CD-ROM
User’s Manual
System Requirement
Auxiliary Tools
Computer
Expansion Slot
Monitor
Operation System
CD-ROM Drive
Cross-screwdriver
Pliers
Intel® Pentium II/III/4 processor, or compatible
system
AGP/PCI Express slot
VGA support, minimum 640 x 480 resolution
Windows® 2000/XP
Double Speed or Higher
This can be used to do most of the installation.
Choose one with a magnetic head would be
better.
This can be used as an auxiliary tool to pull out
the power connectors or remove the brackets.
Rubber gloves
This can prevent you from being incised and
suffering the static charge.
4
Page 5
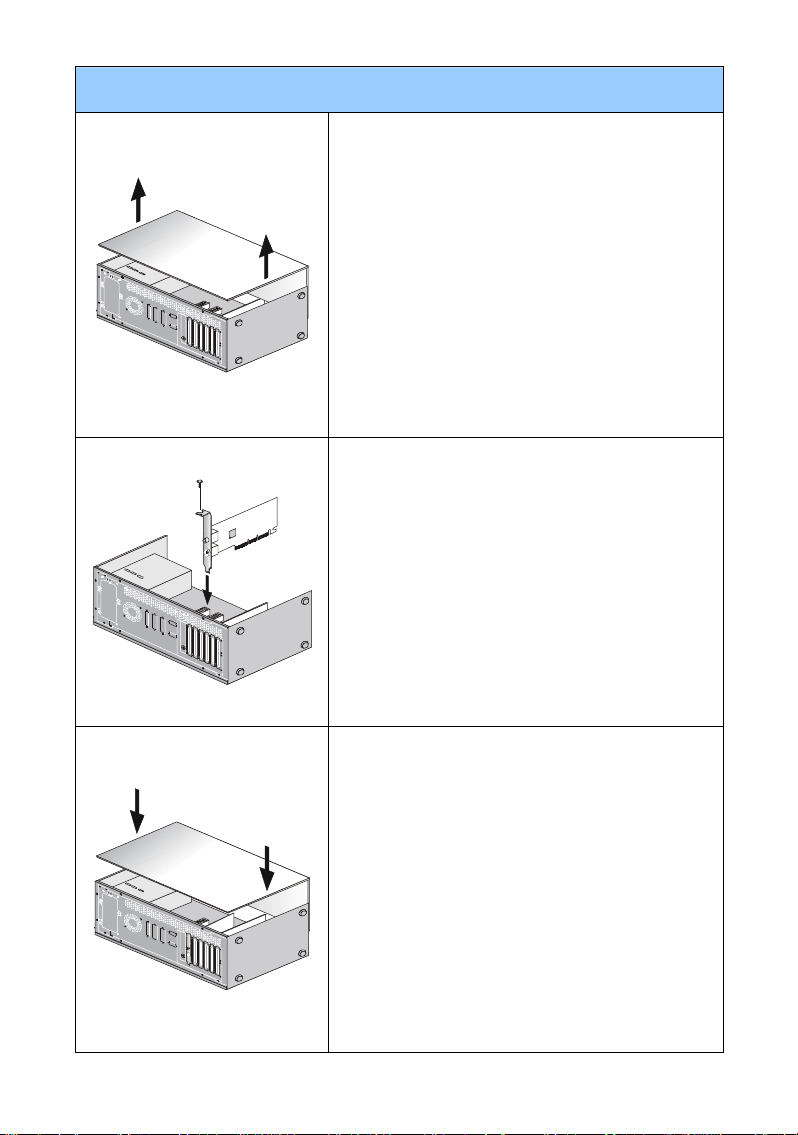
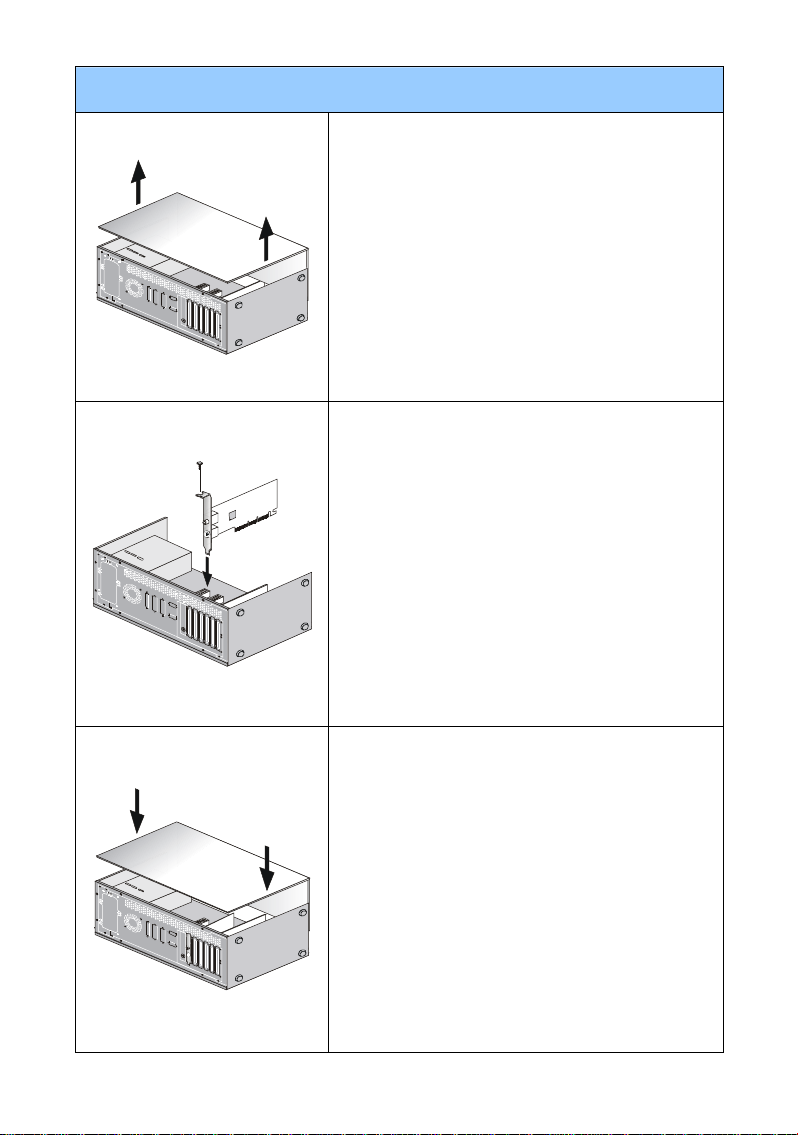
Hardware Installation
Turn off the power and remove the case of your
computer. Remove the bracket which may obstruct
your VGA card.
* Remove the bracket with the pliers and gloves.
Put the card directly over the AGP/PCI EXPRESS
slot and press one end of the card into the slot first.
Gently but firmly press the other end until it is fully
seated in the slot. Secure the card with a bracket
screw.
Replace the case and connect the VGA port and
the monitor with the VGA cable.
5
Page 6
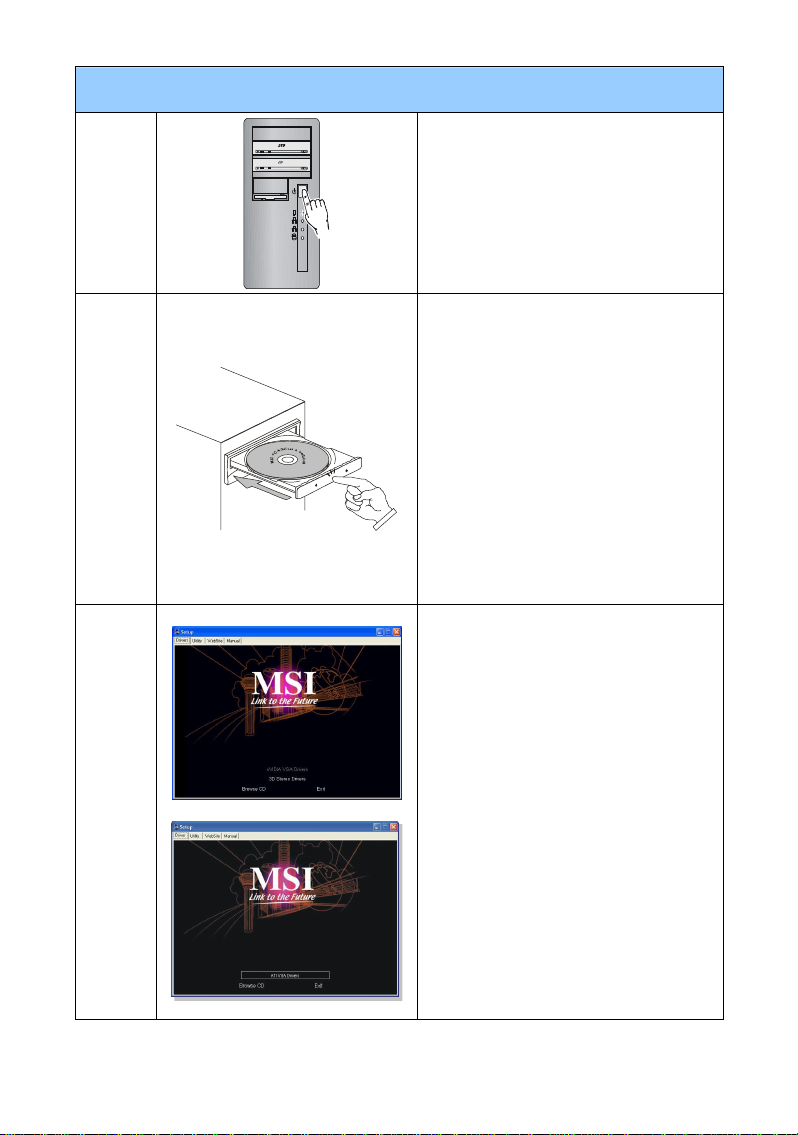
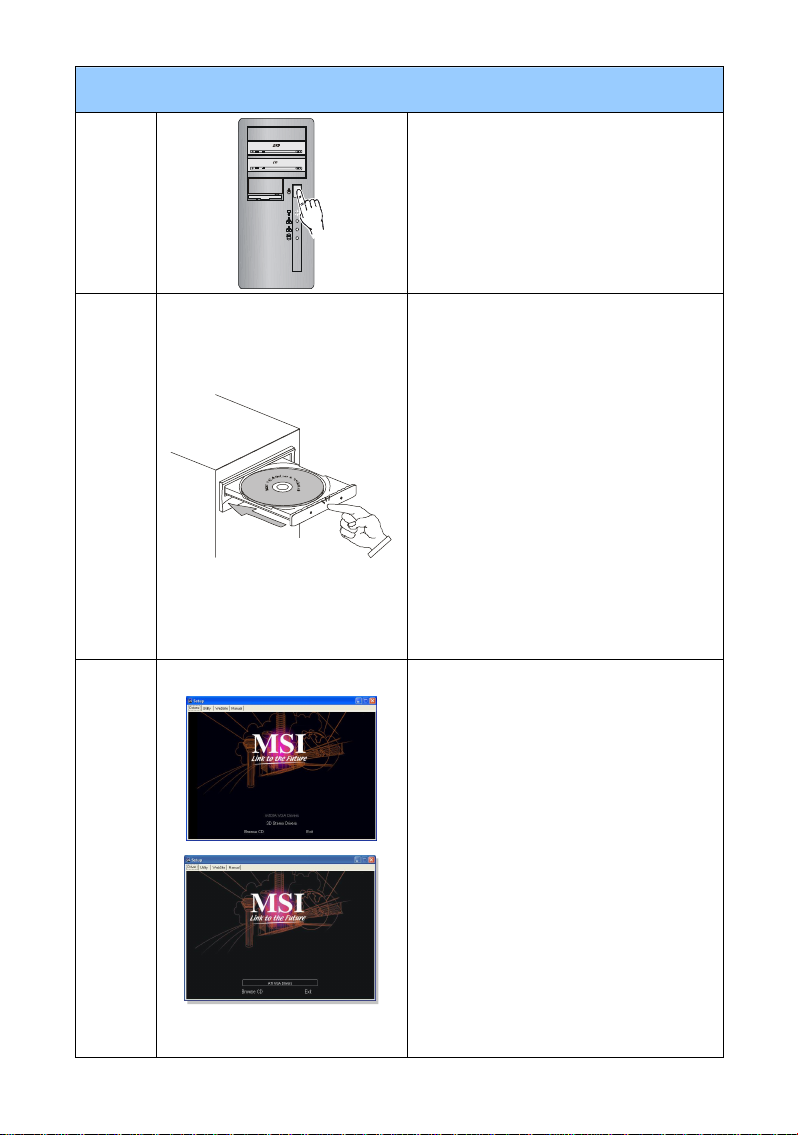
Software Installation
Step 1.
Step 2.
Step 3.
Turn on your computer.
Insert the CD into the CD-ROM drive.
The Autorun program will start the
Setup program, and the setup screen
will be shown as Step 3.
If, on your computer, the Autorun
program does not execute
automatically, please
§ Enable the CD-ROM drive’s
auto-detect function from Control
Panel
§ Or find and run the setup.exe file
manually from the CD-ROM.
Click nVIDIA/ATi drivers. The program
will find a proper driver for your VGA
card.
Note that the installation pictures
shown here are for reference only and
may vary from the actual ones.
6
Page 7
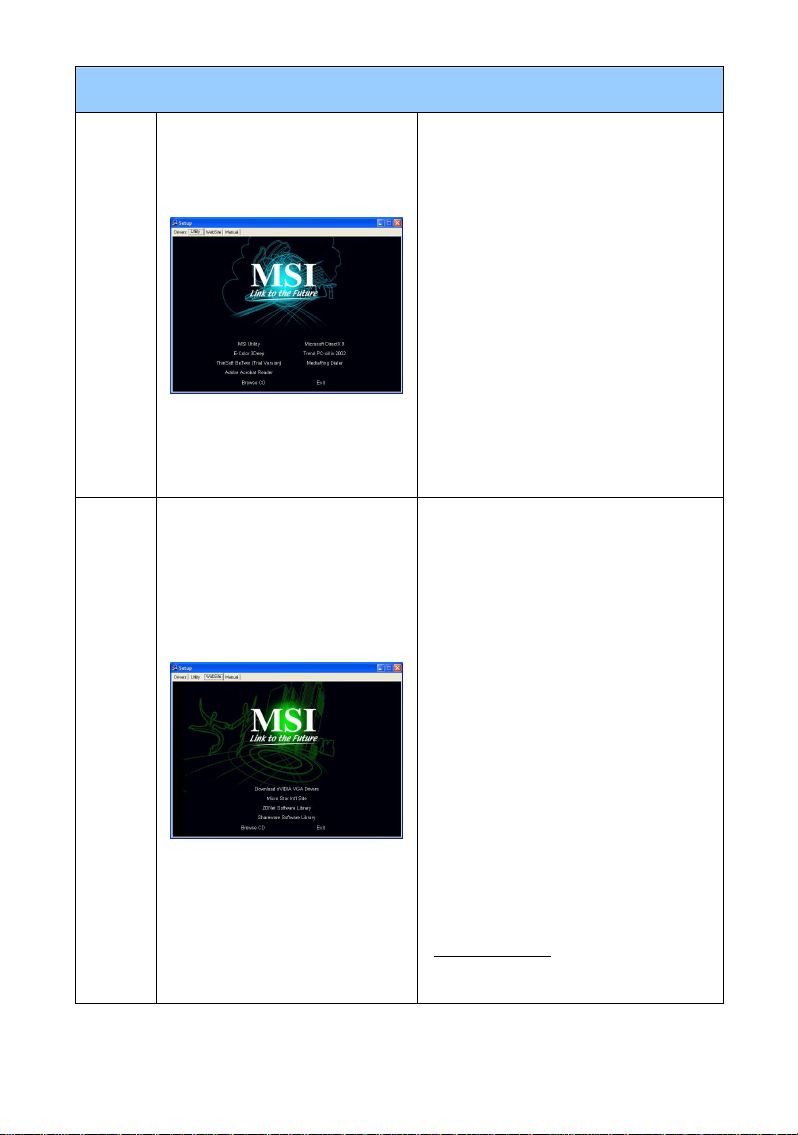
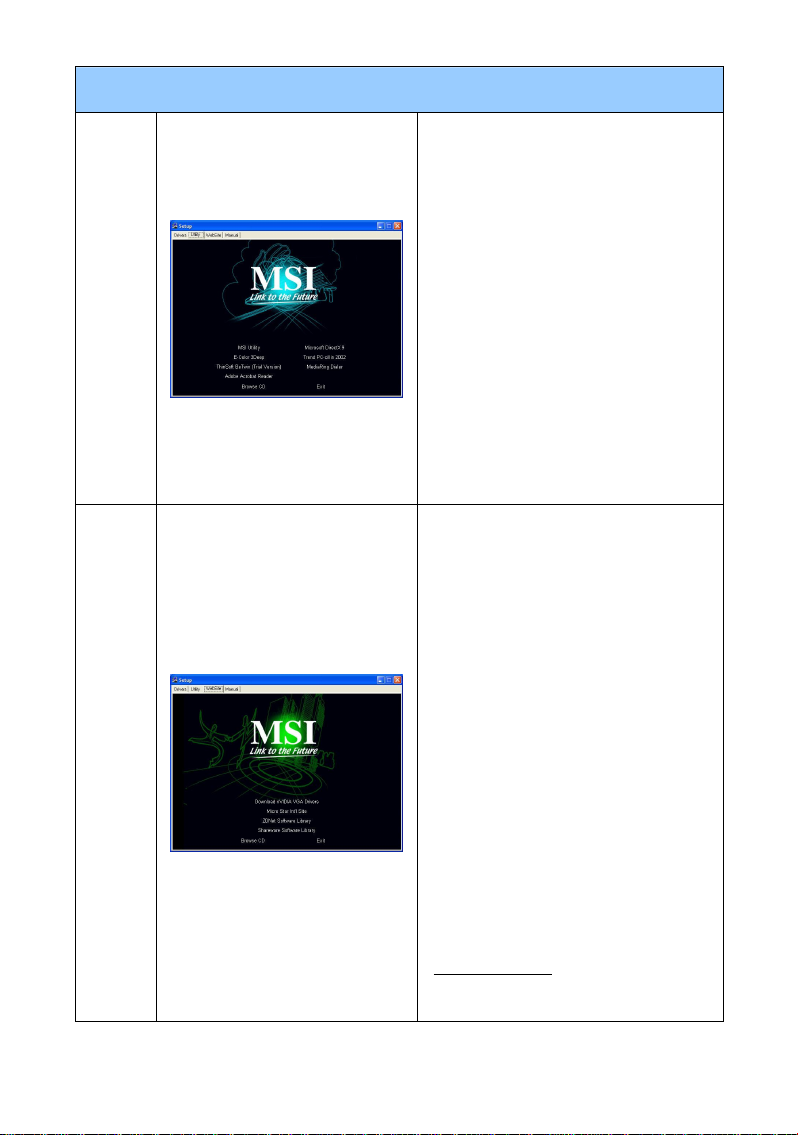
Software Installation
Step 4.
Step 5.
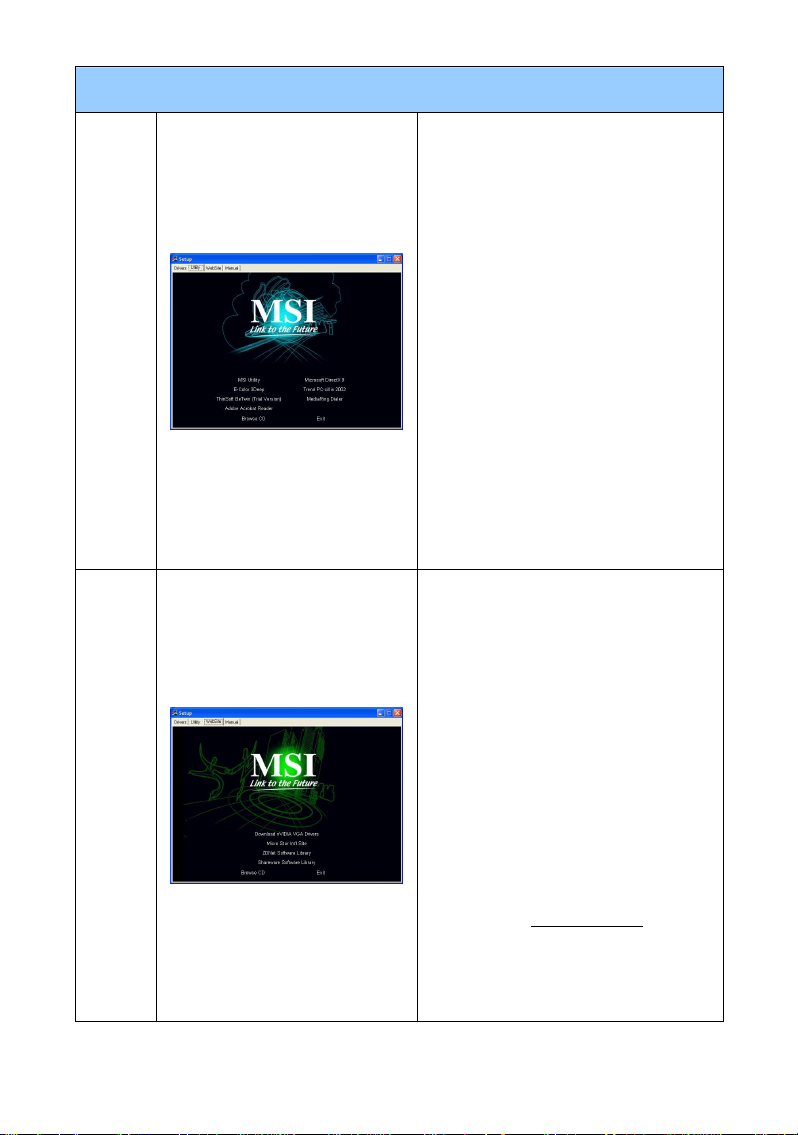
After restarting the computer, you can
install the optional software from the
CD-ROM provided, such as Microsoft
DirectX, Adobe Acrobat Reader, and
MSI 3D Turbo Experience.
§ Insert the CD into the CD-ROM
drive, and start the Setup program.
§ Choose the Utilities tab on the
setup screen.
§ Click the software’s button that you
want to install, then follow the
on-screen instructions to complete
the installation.
Since our products are under continual
improvement, there may be a later
version of the driver and BIOS for your
purchase. Simply click to select the
linkage and browse the website as you
usually do.
§ Insert the CD into the CD-ROM
drive, and start the Setup program.
§ Choose the WebSite tab on the
setup screen.
§ Click the corresponding button to
launch your browser and access
the website.
For more information about MSI VGA
products, please visit MSI website at
www.msi.com.tw
7
Page 8

8
Page 9

Italiano
Guida Rapida all'Installazione
9
Page 10
Contenuto del Pacchetto
VGA card (Consultate il vostro rivenditore nel caso in cui manchi
qualcosa o sia danneggiato or damaged.)
CD-ROM
Manuale dell’Utente
Requisiti del Sistema
Computer
Slot di espansione Slot AGP/PCI EXPRESS
Monitor Supporta VGA, risoluzione minima 640 x 480
Sist. Operativo Windows® 2000/XP
Unità CD-ROM Doppia Velocità o Superiore
Strumenti Ausiliari
Cacciavite a
croce
Pinze
Processore Intel® Pentium II/III/4 o sistema
compatibile
Cacciavite a croce, da utilizzarsi in gran parte
delle operazioni di installazione. Se è possibile,
sceglierne uno con la testa magnetizzata per
migliori risultati.
Pinze, possono essere usate come strumento di
aiuto per estrarre gli spinotti o per togliere le
grappe.
Guanti di
gomma
Guanti di gomma, evitano di tagliarsi o di sentire
la scossa della carica statica.
10
Page 11
GUIDA DI INSTALLAZIONE RAPIDA
Scollegare l’alimentazione e togliere il coperchio
del computer. Togliere la grappa che potrebbe
bloccare la scheda VGA.
*Togliere la grappa con le pinze e i guanti
Collocare la scheda direttamente nello slot
AGP/PCI EXPRESS e premere prima un’estremità
della carda nello slot. Premere dolcemente, ma
con forza, l’altra estremità fino a quando si colloca
perfettamente all’interno dello slot. Fissare la
scheda con la vite apposita.
Collocare nuovamente il coperchio e collegare la
porta VGA e il monitor con l’apposito cavo VGA.
11
Page 12
ACCELERATORE GRAFICO
Passo
1.
Passo
2.
Spegnere il PC
Inserire il CD nell’unità CD-ROM. Il
programma Autorun avvierà il
programma di installazione, e mostrerà
lo schermo di installazione come nel
Passo 3.
Se non si avvia automaticamente il
programma di Autorun seguire le
istruzioni qui sotto
§ Attivare nell’unità CD-ROM la
funzione di rilevazione automatica
dal Pannello di Controllo
§ Altrimenti trovare ed eseguire il
programma setup.exe manualmente
dal CD-ROM.
Fare clic su nVIDIA/ATi drivers.
Il programma cercherà automaticamente
Passo
3.
un driver adeguato per la scheda VGA.
Nota che le figure relative alle
installazioni, mostrate qui, sono solo un
esempio e possono variare.
12
Page 13
ACCELERATORE GRAFICO
Passo
4.
Passo
5.
Dopo avere riavviato il computer, è
possibile installare il software
facoltativo fornito con il CD-ROM, come
ad esempio Microsoft DirectX 8.0,
Adobe Acrobat Reader e MSI 3D Turbo
Experience.
§ Inserire il CD nell’unità CD-ROM, e
avviare il programma di Setup.
§ Scegliere la scheda Utilities nello
schermo di Setup.
§ Fare clic sul pulsante del software
che si desidera installare, quindi
seguire le istruzioni sullo schermo
per completare l’installazione.
Dal momento che i nostri prodotti sono
soggetti a continui miglioramenti, vi
potrebbero essere delle versioni più
recenti del driver e della BIOS per il
vostro acquisto.
Basta fare clic per selezionare il link e
cercare nel sito web, come si fa
normalmente.
§ Inserire il CD nell’unità CD-ROM, e
avviare il programma di Setup.
§ Selezionare la scheda WebSite
nello schermo di setup.
§ Fare clic sul pulsante adeguato per
lanciare il browser ed entrare nel
sito web.
Per avere maggiori informazioni circa i
prodotti MSI VGA, puoi visitare il sito:
www.msi.com.tw
13
Page 14

14
Page 15

Turkiy
Hızlı Montaj Klavuzu
15
Page 16

Paket İçeriği
Gerekli Sistem
VGA kart (Eksik veya hasarlı ürünler için firmaya danışın)
CD-ROM
Kullanım Klavuzu
Bilgisayar Intel® Pentium II/III/4 işlemci veya
Yardımcı Aletler
Slot
Monitör
İşletim Sis.
CD-ROMSürücü Çift hızlı veya daha yüksek
Cross-screwdriver
Kerpeten
Plastik eldivenler
AGP/PCI EXPRESS Slot uyumlu sistem
VGA desteği, en az 640 x 480 çözünürlük
Windows® 2000/XP
Montajın tamamı yıldız tornavida kullanılarak
yapılabilir. Manyetik başlıklı olanlar tavsiye
edilir.
Kerpeten, güç bağlantılarını çıkarmak veya
ayraçları kaldırmak için yardımcı alet olarak
kullanılabilir.
Plastik eldivenler, statik elektriği ve elinizin
çizilmesini engeller.
16
Page 17

Hızlı Montaj Klavuzu
Elektriği kapatın ve bilgisayarınızın kasasını açın.
VGA kartınızı engellememesi için kasa üzerindeki
demir slot koruma çubuğunu kaldırın.
* Çubuğu kerpeten ve eldivenle kaldırın.
Kartı AGP/PCI EXPRESS slot üzerine koyun ve
kartın bir tarafını ilk slota doğru bir kez basın. Slota
tamamen oturana kadar diğer tarafına da kuvvetli
fakat dikkatli bir şekilde bastırın.
Kasayı yerleştir ve VGA port ile monitörü VGA
kablosu ile bağla.
17
Page 18

Sürücü Montaj Klavuzu
Step 1.
Step 2.
Step 3.
Bilgisayarınızı açın.
CD’yi CD-ROM sürücüye yerleştir.
Autorun programı Setup programını
başlatacaktır ve 3. Basamaktaki gibi
kurulum ekranı gözükecektir.
Bilgisayarınızda Autorun programı
otomatik çalışmıyorsa lütfen:
§ Denetim Masasından CD takılınca
otomatik uyar seçeneğini seçin.
§ Ya da CD-ROM’dan setup.exe
dosyasını bulup çalıştırın.
NVIDIA/ATi sürücüsüne tıklayın.
Program VGA kartınız için uygun
sürücüyü bulacaktır.
Burada gösterilen montaj resimlerinin
sadece referans için olduğunu ve
gerçeklerine göre farklılık
gösterebileceğini unutmayınız.
18
Page 19
Sürücü Montaj Klavuzu
Step 4.
Step 5.
Bilgisayarınızı yeniden başlattıktan
sonra, Microsoft DirectX 8.0, Adobe
Acrobat Reader ve MSI 3D Turbo
Experience gibi CD-ROM’da bulunan
yazılımları isteğe bağlı olarak
yükleyebilirsiniz.
§ CD’yi CD-ROM sürücüye yerleştirin
ve Kurulum programını çalıştırın.
§ Kurulum ekranından “Utilities” i
seçin.
§ Yüklemek istediğiniz yazılımın
üzerine basın ve işlemi bitirmek için
talimatları takip edin.
Ürünlerimiz sürekli geliştirilmekte
olduğu için, ürününüzün yeni bir sürücü
ve BIOS versiyonu olabilir. Bağlantıyı
seçin ve web sitesinden araştırın.
§ CD’yi CD-ROM sürücüye yerleştirin
ve Kurulum programını başlatın.
§ Kurulum Ekranından Web Sitesi’ni
seçin.
MSI VGA ürü nleri ile ilgili daha fazla
bilgi için lütfen MSI'ın websitesini
ziyaret ediniz www.msi.com.tr
19
Page 20

20
Page 21

Polska
Instrukcja użytkownika
21
Page 22

Zawartość pudełka
Karta VGA (Skontaktuj się ze sprzedawcą jeśli czegoś brakuje lub jest
uszkodzone)
płyty CD-ROM
Instrukcja
Wymagania sprzętowe
Komputer Procesor Intel® Pentium II/III/4 lub kompatybilny
Gniazdo
Monitor
System operacyjny
Napęd CD-ROM podwójnej szybkości lub szybszy
Narzędzia pomocnicze
Śrubokręt
krzyżakowy
Szczypce
Gumowe rękawice
AGP/PCI EXPRESS
VGA, minimalna rozdzielczość 640 x 480
Windows® 2000/XP
potrzebny podczas całego procesu instalacji.
Wybierz taki z magnetyczną końcówka, a
ułatwi Ci to pracę.
mogą być potrzebne do wyciagnięcia złącza
zasilania lub usunięcia zaślepek-śledzi.
pozwolą zapobiec rozcięciom na dłoniach oraz
ochronią przed wyładowaniami statycznymi.
22
Page 23

Hardware Installation
Wyłącz zasilanie i zdejmij obudowę komputera.
Usuń tylną zaślepkę w miejscu instalowania karty
grafiki.
* używaj rękawic i szczypiec
Przyłóż kartę bezpośrednio nad gniazdem AGP/PCI
EXPRESS i wsuń jeden koniec karty do gniazda.
Delikatnie, ale pewnie przyciśnij drugi koniec, aż do
pełnego osadzenia karty. Zabezpiecz śledzia karty
przed wysunięciem przykręcając go śrubą.
Zamocuj obudowę a następnie podłącz kabel
monitora do wejścia VGA.
23
Page 24

Software Installation
Krok
1.
Krok
2.
Krok
3.
Włącz computer.
Umieść płytę ze sterownikami w
napędzie CD-ROM. Po automatycznym
uruchomieniu postępuj zgodnie z
instrukcjami ukazującymi się na ekranie.
Ieśli oprogramowanie nie startuje
automatycznie:
§ włącz funkcję auto-startu płyty
CD-ROM w panelu sterowania
§ lub znajdź i uruchom plik setup.exe
znajdujący się na płycie CD-ROM.
Kliknij na “nVIDIA/ATi drivers”.
Program pomoże Ci odnaleźć
odpowiednie sterowniki.
Nie gwarantujemy takiego samego
wyglądu jak na podanych zdjęciach,
zostały one użyte jedynie jako przykład
naszej oferty
24
Page 25

Software Installation
Krok
4.
Krok
5.
Po ponownym uruchomieniu komputera
możesz zainstalować dodatkowe
oprogramowanie, takie jak Microsoft
DirectX 8.0, Adobe Acrobat Reader oraz
MSI 3D Turbo Experience.
§ umieść płytę CD w napędzie
CD-ROM, a następnie uruchom
Setup
§ wybierz zakładkę „Utilities” (użytki)
§ kliknij na przycisku
oprogramowania, które chcesz
zainstalować a następnie postępuj
zgodnie z instrukcjami ukazującymi
się na ekranie.
Ponieważ wszystkie nasze produkty są
nieustannie ulepszane, może zdarzyć
się, że wersja sterowników znajdująca
się na dołączonej płycie, nie jest
najnowsza. Wystarczy wtedy odwiedzić
nasza stronę WWW i pobrać aktualne.
§ umieść płytę CD w napędzie
CD-ROM, a następnie uruchom
Setup
§ wybierz zakładkę „WebSite”
§ kliknij na odpowiedni guzik i
uruchom przeglądarkę uzyskując
dostęp do strony WWW.
Aby uzyskać więcej informacji na temat
naszych kart graficznych, prosimy o
odwiedzenie strony www.msi-polska.pl
25
Page 26

26
Page 27

Краткое руководство по
Poccия
установке видео карты
27
Page 28

Комплект поставки
Видеокарта (Обратитесь к продавцу, если что-либо из комплекта
поставки отсутствует или повреждено)
CD-диски
Руководство пользователя
Системные требования
Платформа Intel® Pentium II/III/4 или совместимая
Разъем
расширения
AGP/PCI EXPRESS
Монитор
VGA, минимальное разрешение 640 x 480
ОС
Устройство
CD-ROM
Windows® 2000/XP
Двухскоростной и более
Инструменты
Крестовая отвертка используется для
сборки и монтажа оборудования. По
Cacciavite a croce
Pinze
Guanti di gomma
возможности возьмите отвертку с
магнитным наконечником, это обеспечит
дополнительное удобство.
Пассатижи могут использоваться для
отсоединения разъемов питания и
удаления кронштейнов задней панели.
Резиновые перчатки защитят вас от
возможных порезов и статического
электричества.
28
Page 29

Краткое руководство
Выключите компьютер, отсоедините шнур
питания и снимите крышку корпуса. Удалите
кронштейн задней панели, который может
мешать установке видеокарты.
* Кронштейн следует удалять в защитных
перчатках, используя пассатижи
Поместите видеокарту непосредственно над
разъёмом AGP/PCI EXPRESS и, опуская,
вставьте с одной стороны в разъём AGP.
Аккуратно, но с усилием нажимая на другую
сторону карты, добейтесь того, чтобы она была
полностью вставлена в разъём AGP. Закрепите
видеокарту с помощью винта.
Закройте крышку и подсоедините монитор к
разъему VGA с помощью кабеля.
29
Page 30

Установка драйверов
Шаг 1.
Шаг 2.
Шаг 3.
Включите компьютер.
Вставьте CD-диск в устройство
CD-ROM. Программа
автоматического запуска вызовет
программу Setup, и вы увидите
заставку, показанную в Шаге 3.
Если на вашем компьютере
программа автоматического запуска
не работает
§ Либо разрешите использование
функции автоматического
запуска для устройства CD-ROM
в Control Panel (Панели
управления).
§ Либо найдите и запустите
вручную программу setup.exe с
вашего CD-диска.
Выберите nVIDIA/ATi drivers.
Программа найдет необходимые
драйверы для вашей VGA карты.
Замечание: представленные
изображения приведены только для
иллюстрации и могут отличаться от
тех, что увидите вы на экране своего
компьютера.
30
Page 31

Установка драйверов
Шаг 4.
Шаг 5.
После перезапуска компьютера вы
можете установить дополнительное
ПО с CD-диска такое как Microsoft
DirectX 8.0, Adobe Acrobat Reader и
MSI 3D Turbo Experience.
§ Вставьте CD в устройство
CD-ROM и запустите программу
Setup.
§ На установочном экране
выберите Utilities
§ Выберите ПО, которое вы хотите
установить и следуйте
инструкциям на экране.
Наши изделия постоянно
совершенствуются, поэтому для
вашего изделия может существовать
новая версия BIOS’а и драйвера, чем
та с которой вы его приобрели.
Просто нажмите на ссылку нашего
вебсайта и работайте, как вы обычно
работаете в интернете.
§ Вставьте CD в устройство
CD-ROM и запустите программу
Setup.
§ На установочном экране
выберите WebSite.
§ Н ажмите соответствующую
кнопку для запуска вашего
броузера и доступа на вебсайт.
Более подробная информация о
видео картах MSI находится на
вебсайте компании MSI по адресу
www.msi.com.tw (на английском
языке) и www.microstar.ru (на
русском языке).
31
Page 32

32
Page 33

Españ
ol
Guía de Instalación Rápida
33
Page 34
Contenido del paquete
Tarjeta VGA (consulte con su vendedor si falta alguna pieza o está
dañada.)
CD-ROM
Manual de Usuario
Requisitos del Sistema
Ordenador
Ranura de
expansión
Sistema Operativo
Operation System
CD-ROM Drive
Herramientas necesarias
Destornillador de
estrella
Alicates
Procesador Intel® Pentium II/III/4, o sistema
compatible
Ranura AGP/PCI Express
Soporta VGA, mínimo resolución 640 x 480
Windows® 2000/XP
Doble velocidad o superior
Se puede utilizar para hacer la mayoría de la
instalación. Utilizar uno con cabeza magnética
serí a mejor.
Se pueden utilizar como herramienta auxiliar
para sacar los conectores de energía o para
quitar los soportes.
Guantes de goma
Previene que sea portador y pueda transmitir
la carga estática.
34
Page 35

Instalación de hardware
Desconéctelo de la luz y quite la tapa de su
ordenador. Quite el soporte que puede obstruir su
tarjeta VGA.
* Quite el soporte con los alicates y los guantes.
Inserte la tarjeta directamente en la ranura
AGP/PCI EXPRESS y presione primero un
extremo de la tarjeta en la ranura. Presione suave
pero firmemente el otro extremo hasta que se
asiente completamente en la ranura. Asegure la
tarjeta con un tornillo de soporte.
Vuelva a poner la carcasa de su ordenador y
conecte el puerto VGA y el monitor con el cable
VGA
35
Page 36

Instalación de Software
Paso 1
Paso 2
Paso 3
Encienda el ordenador
Inserte el CD en la unidad de CD-ROM.
Con El programa Autorun comenzará el
programa de configuración, y la pantalla
de configuración le será mostrada como
en el paso 3.
Si no se ejecuta automáticamente el
programa Autorun en su ordenador, por
favor:
§ Active la función de auto-detección
de su CD-ROM en el Panel de
control
§ O busque y ejecute manualmente el
archivo setup.exe desde el
CD-ROM.
Haga clic en los drivers nVIDIA/ATi. El
programa encontrará el driver adecuado
para su tarjeta Gráfica.
Tenga en cuenta que las imágenes de la
instalación mostradas aquí son tan sólo
de referencia y pueden variar con las
actuales.
36
Page 37

Instalación de Software
Paso 4
Paso 5
Después de reiniciar el ordenador,
puede instalar el software opcional
incluido en el CD-ROM, por ejemplo
Microsoft DirectX, Adobe Acrobat
Reader, y MSI 3D Turbo Experience.
§ Inserte el CD en el lector e inicie el
programa Setup (configuración)
§ Elija Utilidades en la ventana de
configuración
§ Haga Clic en el botón del software
que quiera instalar, entonces siga
las instrucciones que aparecen en
pantalla para completer la
instalación.
Como nuestros productos están en
continua mejora, puede haber una
versión más actual del driver y de la
BIOS para su VGA. Simplemente haga
clic para seleccionar el link y para
hojear el website
§ Inserte el CD en el lector e inicie el
programa Setup (configuración)
§ Elija Website en la ventana de
configuración
§ Haga Clic en el botón
correspondiente y seleccione el
navegador y acceda a la web
Para más información sobre las tarjetas
gráficas de MSI, por favor visite la web
www.msi.com.tw (central) o
www.msi-es.com (España)
37
Page 38

38
Page 39

体中文
简
快速安装手册
39
Page 40

包装内容
VGA 卡(若有缺损,请联系您购买卡片的经销商)
CD 光盘
用户手册
系统要求
辅助工具
计算机
Intel® Pentium II/III/4 处理器,或其它兼容设备
扩展插槽
显示器
AGP/PCI Express 插槽
支持 VGA,最小分辨率为 640 x 480
操作系统
CD-ROM 设备
Windows® 2000/XP
双倍或更高速
十字螺丝刀
钳子 可用于拔出电源插头或取下挡板
在安装过程中经常要使用。最好选择具有磁性刀
头的螺丝刀。
防静电手套 可避免静电的产生和双手的割伤
40
Page 41

硬件安装
关闭电源,并取下机箱盖。取下安装 VGA 卡处的挡
板。
* 请您带上手套,使用十字螺丝刀来取下挡板。
直接把显示卡对准 AGP/ PCI EXPRESS 插槽,并先
把显示的一端向下按入插槽。轻轻地把显示的另一端
也按入槽内,使卡牢固插入。再锁上螺丝固定挡板。
盖上机箱盖,并用 VGA 数据线连接 VGA 端口到显
示器。
41
Page 42

软件安装
步骤
1.
步骤
2.
开机
把 CD 光盘放到 CD-ROM 设备中。
Autorun 程序会自动运行 Setup 程序,且
屏幕会出现入步骤 3 的安装画面。
若在您的机器上,Autorun 程序没有自动
运行,请您:
§ 从控制面板中开启 CD-ROM 设备的
自动侦测功能
§ 或从 CD-ROM 中寻找并运行
setup.exe 文件。
点击 nVIDIA/ ATi Drivers。此程序将为
步骤
3.
您的显示卡找到适当的驱动程序。
请注意:此处的安装图标跟您的实际安
装接口会有所差异,仅供参考。
42
Page 43

软件安装
步骤
4.
步骤
5.
重启计算机之后,您可以从 CD-ROM提
供的可选软件中挑选安装,例如
Microsoft DirectX、Adobe Acrobat
Reader 和 MSI 3D Turbo Experience。
§ 把 CD 光盘放到 CD-ROM 设备中,
并开始运行 Setup 程序。
§ 在屏幕上选择 Utilities 卷标。
§ 点击您要安装的软件,然后根据屏幕
提示,循序渐进地完成安装。
由于我们的产品在不断更新,因此,此
处的图标与您产品的较新版本驱动程
序、BIOS 会有所差异。只需同平时一样,
点击要相关链接、浏览网站即可。
§ 把 CD 光盘放到 CD-ROM设备中,
并开始运行 Setup 程序。
§ 在屏幕上选择 WebSite 卷标。
§ 点击对应的按钮以开启您的浏览器,
并进入相关网站。
要了解 MSI VGA 产品的更多信息,请 访
问 MSI 网站,网址为:www.msi.com.tw
43
Page 44

44
Page 45

繁體中文
快速安裝手冊
45
Page 46

包裝內容
VGA 卡(若有缺損,請聯繫您購買卡片的經銷商)
CD 光碟
用戶手冊
系統要求
輔助工具
電腦
Intel® Pentium II/III/4 處理器,或其他相容設備
擴展插槽
顯示器
AGP/PCI Express 插槽
支援 VGA,最小解析度為 640 x 480
作業系統
CD-ROM 設備
Windows® 2000/XP
雙倍或更高速
十字螺絲刀
鉗子 可用於拔出電源插頭或取下擋板
在安裝過程中經常要使用。最好選擇具有磁性刀
頭的螺絲刀。
防靜電手套 可避免靜電的產生和雙手的割傷
46
Page 47

硬體安裝
關閉電源,並取下機箱蓋。取下安裝 VGA 卡處的擋
板。
* 請您帶上手套,使用十字螺絲刀來取下擋板。
直接把顯示卡對準 AGP/ PCI EXPRESS 插槽,並先
把顯示的一端向下按入插槽。輕輕地把顯示的另一端
也按入槽內,使卡牢固插入。再鎖上螺絲固定擋板。
蓋上機箱蓋,並用VGA 資料線連接 VGA 埠到顯示
器。
47
Page 48

軟體安裝
步驟
1.
步驟
2.
開機
把 CD 光碟放到 CD-ROM 設備中。
Autorun 程式會自動運行 Setup 程式,且
螢幕會出現入步驟 3 的安裝畫面。
若在您的機器上,Autorun 程式沒有自動
運行,請您:
§ 從控制面板中開啟 CD-ROM 設備的
自動偵測功能
§ 或從CD-ROM中尋找並運行
setup.exe文件。
點擊 nVIDIA/ ATi Drivers。此程式將為
步驟
3.
您的顯示卡找到適當的驅動程式。
請注意:此處的安裝圖示跟您的實際安
裝介面會有所差異,僅供參考。
48
Page 49

軟體安裝
步驟
4.
步驟
5.
重啟電腦之後,您可以從 CD-ROM 提供
的可選軟體中挑選安裝,例如 Microsoft
DirectX、Adobe Acrobat Reader 和 MSI
3D Turbo Experience。
§ 把 CD 光碟放到 CD-ROM 設備中,
並開始運行Setup 程式。
§ 在螢幕上選擇 Utilities 標籤。
§ 點擊您要安裝的軟體,然後根據螢幕
提示,循序漸進地完成安裝。
由於我們的產品在不斷更新,因此,此
處的圖示與您產品的較新版本驅動程
式、BIOS 會有所差異。只需同平時一
樣,點擊要相關鏈結、流覽網站即可。
§ 把 CD 光碟放到 CD-ROM 設備中,
並開始運行Setup 程式。
§ 在螢幕上選擇 WebSite 標籤。
§ 點擊對應的按鈕以開啟您的流覽
器,並進入相關網站。
要瞭解 MSI VGA產品的更多資訊,請訪
問 MSI 網站,網址為:www.msi.com.tw
49
Page 50

50
Page 51

Deutsch
Benutzerhandbuch
51
Page 52

Packungsinhalt
Grafikkarte(im Falle fehlender Teile, wenden Sie sich bitte an Ihren Händler)
CD-ROMs
Anleitung
Systemvorraussetzungen
Hilfsmittel
Computer
Steckplatz
Monitor
Intel® Pentium II/III/4 Prozessor, oder
kompatibles System
AGP/PCI Express-Steckplatz
VGA-Unterstützung, minimale Auflösung von 640 x 480
Betriebssystem
CD-ROM Laufwerk
Windows® 2000/XP
2x oder schneller
Ein
Kreuzschraubenzieher
Eine Zange
Ein Kreuzschraubenzieher ist für die meisten
Installationsschritte ausreichend. Ein Schraubenzieher mit
magnetischem Kopf erleichtert die Installation.
Eine Zange kann bei der Entfernung von Steckblechen
hilfreich sein.
Gummihandschuhe
Gummihandschuhe schützen vor statischer Aufladung und
elektrischen Schlägen.
52
Page 53

Installations-anweisung
Schalten Sie den Computer aus, entfernen Sie das
Stromkabel und öffnen Sie das Gehäuse. Entfernen Sie
eine eventuell bereits installierte Grafikkarte oder ein
vorhandenes Abdeckungsblech vor dem AGP-Steckplatz..
*verwenden Sie Handschuhe u. Zange.
Plazieren Sie die Grafikkarte direkt über den AGP/PCI
Express-Steckplatz und stecken Sie zunächst ein Ende der
Karte leicht in den Steckplatz. Stecken Sie dann die Karte
mit Druck aber ohne Gewalt anzuwenden in den
AGP/PCI Express-Steckplatz des Mainboards. Sichern
Sie die Grafikkarte mit einer Schraube.
Schließen Sie das Gehäuse und schließen sie das
Stromkabel an. Verbinden Sie das VGA-Kabel des
Monitors mit der Grafikkarte.
53
Page 54

Treiber-Installation
Schritt 1
Schritt 2
Schalten Sie Ihren Computer an.
l Legen Sie die Treiber-CD in Ihr
CD-Laufwerk. Das Autorun-Programm
wird das Setup-Programm starten und
öffnet die Setup- Ansicht, wie in Schritt
3 gezeigt.
Tip: Falls das Autorun-Programm auf Ihrem
Computer nicht automatisch startet,
gehen Sie bitte wie folgt vor:
l Aktivieren Sie in der Systemsteuerung
die Funktion der automatischen
Geräteerkennung Ihres CD-ROM
Laufwerks.
l Alternativ können Sie die
Setup-Exe-Datei manuell starten..
Klicken Sie auf nVIDIA/ATI drivers. Das
Schritt 3
Programm sucht den passenden Treiber für
Ihre Grafikkarte.
54
Page 55

Treiber-Installation
Schritt 4
Schritt 5
Nach dem Neustart können Sie weitere
Software von der Installations-CD laden,
z.B. Microsoft DirectX, Adobe Acrobat
Reader und MSI 3D Turbo Experience.
l Legen Sie die CD in Ihr CD-ROM
Laufwerk und starten Sie das
Setup-Programm.
l Wählen Sie Utilities in der
Setup-Ansicht.
l Klicken Sie auf die Software, die
Sie installieren möchten und folgen
Sie den Anweisungen um die
Installation durchzuführen
Da unsere Produkte kontinuierlich
weiterentwickelt werden, besteht die
Möglichkeit, daß neuere Treiber und BIOS
Versionen für Ihre Grafikkarte verfügbar
sind.
l Legen Sie die Installations-CD ein
und starten Sie das
Setup-Programm.
l Wählen Sie den Punkt WebSite in
der Setup-Ansicht.
l Klicken Sie auf den entsprechenden
Browser und suchen Sie die
gewünschte Software auf der
MSI-Website.
55
Page 56

56
Page 57

Français
Guide d’Installation
57
Page 58

Contenu du package
Carte VGA(Consultez votre revendeur si quelque chose est manquant)
CD-ROM
Manuel d'utilisation
Système nécessaire
Ordinateur
Slot d'extension
Moniteur
Operation Sys.
Lecteur de CD
Equipement Complémentaire
Tournevis cruciforme
Pinces
Gants en caoutchouc
Processeur Intel® Pentium II/III/4 ou compatible
Slot AGP/PCI Express
Supportant une résolution minimum de 640 x480
Windows® 2000/XP
Double vitesse ou supérieur
Vous pouvez utiliser un tournevis cruciforme pour
la majorité des installations. Le choix d'un modèle
magnétique est préférable.
Les pinces seront très utiles pour retirer les
connecteurs.
Les gants en caoutchouc vous permettent d'éviter
les coupures et l'électricité statique les coupures
et l'électricité statique
58
Page 59

Guide d’Installation Rapide
Eteindre le PC et ouvrir le boîtier. Retirer le bracket
pour permettre la mise en place de la carte graphique.
Mettre la carte dans le slot AGP/PCI Press et appuyer sur
les extrémités pour qu'elle s'insère correctement.
Sécurisez le montage en vissant le bracket sur le boîtier.
Refermer le boîtier et connecter le port VGA avec le câble
du moniteur.
59
Page 60

Guide d’Installation des Drivers
Etape 1
Etape 2
Allumer l'ordinateur.
Mettre le CD dans le lecteur. Le programme
d'autorun se lance automatiquement et
l'écran de setup apparaît (cf écran de l'étape
3).
TIP : Si le CD ne se lance pas
automatiquement, veuillez :
l Activer la fonction d'auto-détection
du CD-ROM dans le panneau de
contrôle.
l Ou chercher le fichier setup.exe et
l'executer manuellement.
Cliquer sur nVIDIA/ATI drivers. Le
Etape 3
programme va rechercher les bons drivers
pour la carte graphique.
60
Page 61

Guide d’Installation des Logiciels
Une fois le PC redémarré, vous pouvez
installer les utilitaires qui se trouvent sur le
CD MSI (DirectX 8.0, Adobe Acrobat
Reader et MSI 3D Turbo Experience).
l Insérer le CD dans le lecteur et
Etape 4
Etape 5
lancer le programme de setup.
l Choisir l’onglet Utilities dans
l’écran de setup.
l Cliquer sur les utilitaires que
vous voulez installer et
suivre la procédure pour
terminer l’installation.
Etant donné que nos produits ne cessent
d’évoluer, il est possible qu’il existe depuis
votre achat un nouveau Bios ou Driver pour
votre carte.
l Insérer le CD dans le lecteur et
lancer le programme de setup.
l Choisir l’onglet WebSite dans
l’écran de setup.
l Cliquer sur un bouton pour lancer
votre explorateur internet et accéder
au site web.
61
 Loading...