

Page 1

Instruction Manual
Chillgard® RT
Refrigerant Monitor
Order No.: 814073/18
MSAsafety.com
Page 2

THIS MANUAL MUST BE CAREFULLY READ BY ALL INDIVIDUALS WHO HAVE OR WILL
HAVE THE RESPONSIBILITY FOR INSTALLING, USING OR SERVICING THE PRODUCT.
Like any piece of complex equipment, this instrument will perform as designed only if it
is installed, used and serviced in accordance with the manufacturer’s instructions.
OTHERWISE, IT COULD FAIL TO PERFORM AS DESIGNED AND PERSONS WHO RELY
ON THIS PRODUCT FOR THEIR SAFETY COULD SUSTAIN SEVERE PERSONAL INJURY
OR DEATH.
The warranties made by Mine Safety Appliances Company with respect to the product
are voided if the product is not used and serviced in accordance with the instructions in
this manual. Please protect yourself and others by following them. We encourage our
customers to write or call regarding this equipment prior to use or for any additional
information relative to use or repairs.
WARNING
1000 Cranberry Woods Drive
Cranberry Township, PA 16066
USA
Schlüsselstrasse 12
8645 Rapperswil-Jona
Switzerland
For your local MSA contacts please go to our website www.MSAsafety.com
©
MSA 2016. All rights reserved
Page 3

1.
Warranty- Seller warrants that this product will be free from
mechanical defect or faulty workmanship for a period of eighteen
(18) months from date of shipment or one (1) year from installation,
whichever occurs first, provided it is maintained and used in
accordance with Seller’s instructions and/or recommendations.
This warranty does not apply to expendable or consumable parts
whose normal life expectancy is less than one (1) year such as,
but not limited to, non-rechargeable batteries, filament units, filter,
lamps, fuses etc. The Seller shall be released from all obligations
under this warranty in the event repairs or modifications are made
by persons other than its own or authorized service personnel or if
the warranty claim results from physical abuse or misuse of the
product. No agent, employee or representative of the Seller has
any authority to bind the Seller to any affirmation, representation or
warranty concerning the goods sold under this contract. Seller
makes no warranty concerning components or accessories not
manufactured by the Seller, but will pass on to the Purchaser all
warranties of manufacturers of such componen
THIS WARRANTY IS IN LIEU OF ALL OTHER WARRANTIES,
EXPRESSED, IMPLIED OR STATUTORY, AND IS STRICTLY
LIMITED TO THE TERMS HEREOF. SELLER SPECIFICALLY
DISCLAIMS ANY WARRANTY OF MERCHANT ABILITY OR OF
FITNESS FOR A PARTICULAR PURPOSE.
2.
Exclusive Remedy- It is expressly agreed that Purchaser's sole
and exclusive remedy for breach of the above warranty, for any
tortious conduct of Seller, or for any other cause of action, shall be
the repair and/or replacement at Seller's option, of any equipment
or parts thereof, which after examination by Seller is proven to be
defective. Replacement equipment and/or parts will be provided at
no cost to Purchaser, F.O.B. Seller's Plant. Failure of Seller to
successfully repair any non-conforming product shall not cause the
remedy established hereby to fail of its essential purpose.
3.
Exclusion of Consequential Damage- Purchaser specifically
understands and agrees that under no circumstances will seller be
liable to purchaser for economic, special, incidental or
consequential damages or losses of any kind whatsoever, including
but not limited to, loss of anticipated profits and any other loss
caused by reason of nonapplicable to claims for breach of warranty, tortious conduct or any
other cause of action against seller.
MSA Permanent Instrument Warranty
ts.
operation of the goods. This exclusion is
i
Page 4

General Warnings and Cautions
1.
The monitor and Relay Module described in this manual must be
installed, operated, and maintained in strict accordance with the
labels, cautions, warnings, instructions, and within the limitations
stated.
2.
The monitor must not be installed in outdoor areas or in locations
where explosive concentrations of combustible gases or vapors
might occur in the atmosphere: Class I, Group A, B, C, and D
areas as defined by the NEC. Because the monitor is not
explosion-proof, it must be located in non-hazardous areas.
3.
The Chillgard RT Refrigerant Monitor is designed to detect one
particular refrigerant gas or vapor at ambient atmospheric
pressures. The unit will not detect refrigerant gas at elevated
temperatures.
4.
High levels of or long exposure to certain compounds in the tested
atmosphere may contaminate the sensor. In atmospheres where
the system may be exposed to such materials, perform calibration
frequently to ensure dependable system operation and accurate
indications.
5.
Do not paint the Chillgard RT System. Also, do not paint near any
of the sample line inlets to ensure paint is not deposited on the
sample inlet fitting of the units. Such p
with the sampling process, whereby a sample of the atmosphere
being monitored is drawn into the Chillgard RT System.
6.
The only absolute method to assure the proper overall operation of
a gas detection instrument is to check it with a known
concentration of the gas for which it has been calibrated.
Consequently, a calibration check must be included as part of the
installation and as a routine inspection of the system.
7.
Perform periodic leak checks on all the sample lines and all flow
system components and fittings of the Chillgard RT System.
8.
Use only genuine MSA replacement parts when performing any
maintenance procedures provided in this manual. Failure to do so
may impair instrument performance. Repair or alteration of the
Chillgard RT System, beyond the scope of these maintenance
instructions or by anyone other than authorized MSA service
personnel, could cause the product to fail to perform as designed,
and persons who rely on this product for their safety could sustain
serious personal injury or death.
WARNING
aint deposits would interfere
ii
Page 5

9.
Properly vent the exhaust of the Chillgard RT System to a safe
area. Improper venting of the exhaust may cause serious personal
injury or death.
10.
Ensure the gas sample to the system is clean and non-condensing.
Install end-of-line filters in all sample inlet lines.
11.
Avoid any installation where condensation may form. Condensation
may possibly clog or block the sampling line; this will prevent the
instrument from receiving new or fresh gas samples from the area
being monitored.
12.
The Chillgard RT Refrigerant Monitor must be installed, located
and operated in accordance to all applicable codes. These codes
include, but are not limited to, the National Fire Prevention Code
and National Electric Code.
13.
The Chillgard RT Relay Module must be connected to proper main
voltages. Connection of improper voltages will cause the unit to
fail. The Chillgard RT Relay Module uses the same electrical
ground as the RT Monitor.
14.
Protect the Chillgard RT Relay Module from vibration and heating;
otherwise, improper operation may result, which can result in
personal injury or death.
15.
Do not exceed the relay contact ratings listed in Appendix B,
TABLE B-1 Otherwise,
relay operation may fail, which can result in
personal injury or death.
Failure to comply with the above warnings can result in
serious personal injury or death.
1.
Do not attempt to modify or adjust the sensing element.
CAUTION
iii
Page 6

Chapter 1
General Information ........................................ 1-1
Introduction ...................................................................... 1-1
Table 1-1. Chillgard RT System
General Operating Specifications .................... 1-2
Identifying Your Unit ........................................................ 1-3
Multipoint Sequencer .................................................... 1-3
Figure 1-1. Identifying your Unit ............................... 1-4
Figure 1-2. Single Point Sequencer Unit .................. 1-5
Figure 1-3. Four Point Sequencer Unit ..................... 1-5
Figure 1-4. Eight Point Sequencer Unit .................... 1-5
Beacon .......................................................................... 1-6
End of Sample Line Filters ........................................... 1-6
General Description ......................................................... 1-6
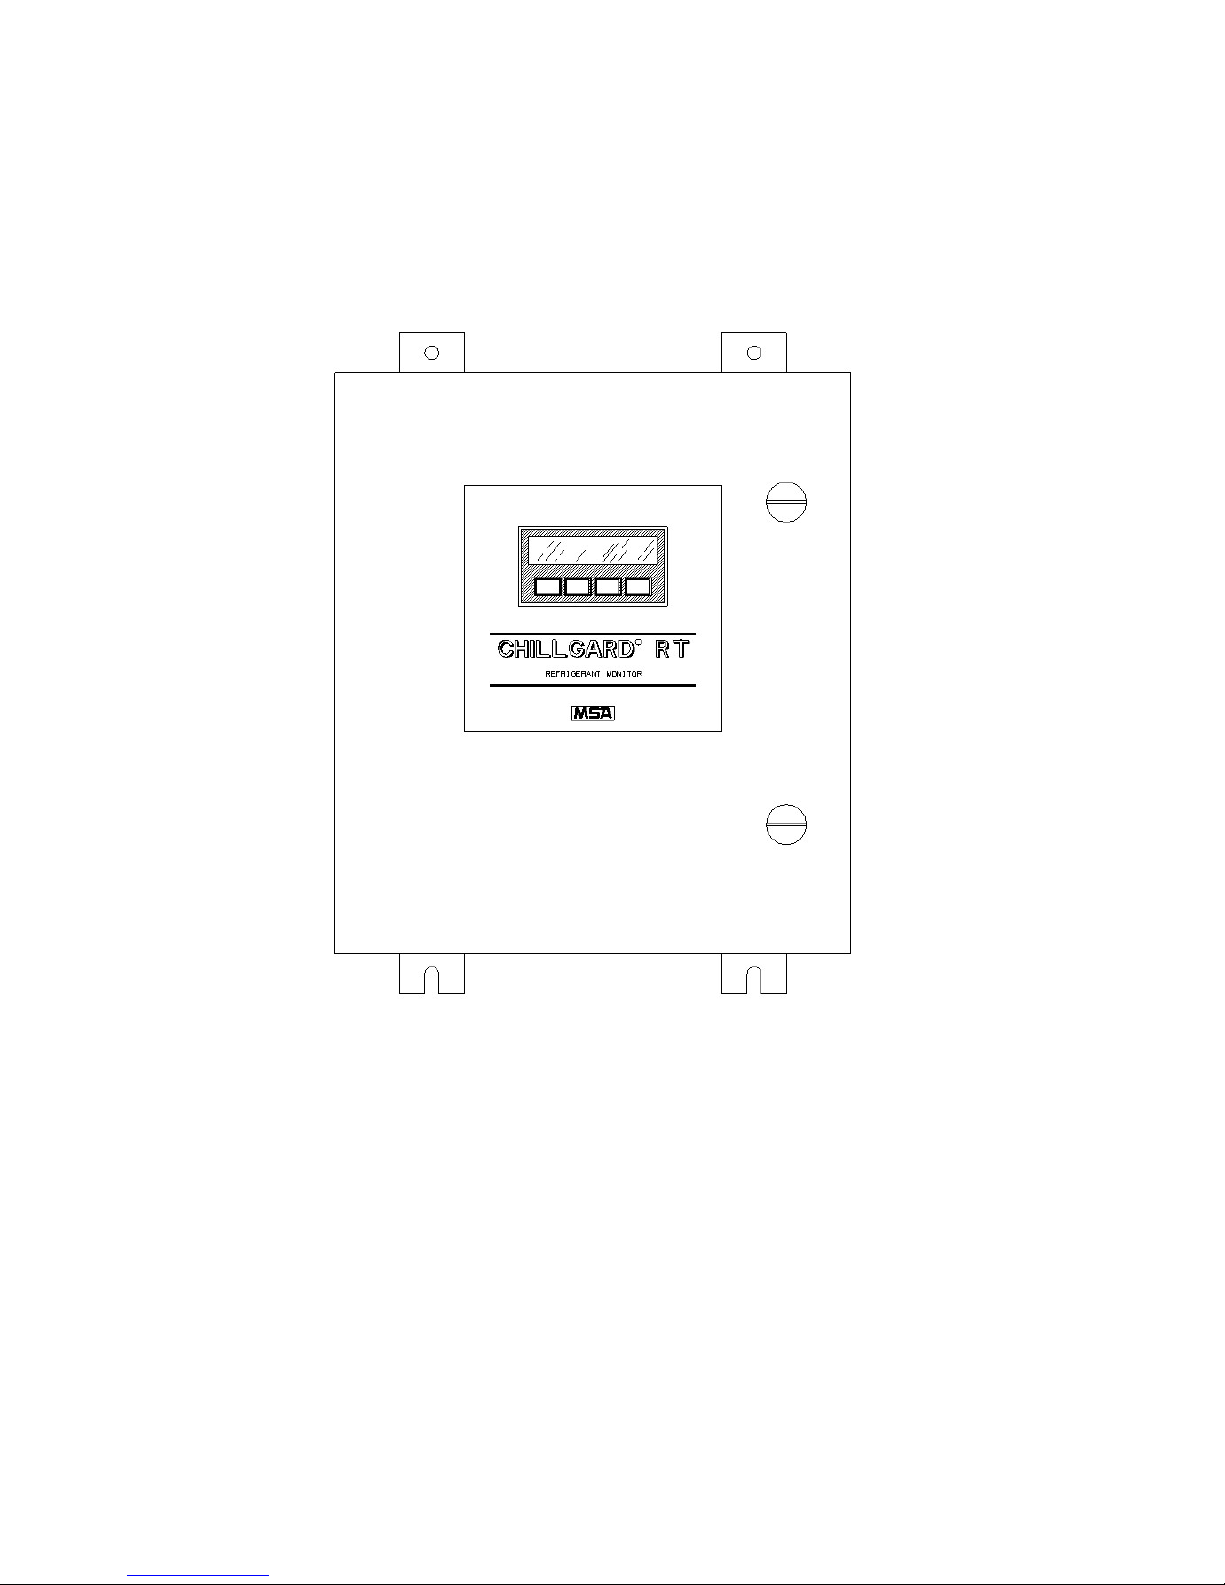
The Chillgard RT Unit: .................................................. 1-6
Figure 1-5. Chillgard RT Monitor
with Optional Beacon ...................................... 1-6
The Internal Multipoint Sequencer Unit: ....................... 1-7
Terminology ..................................................................... 1-8
Applications ..................................................................... 1-9
Sensor Selectivity* ........................................................... 1-9
Table 1-2. Typical Chillgard RT System for
R-11 Cross-Sensitivity Response Data ........... 1-9
Table 1-3. Typical Chillgard RT System for
R-12 Cross-Sensitivity Response Data ......... 1-10
Table 1-4. Typical Chillgard RT System for
R-22 Cross-Sensitivity Response Data
Table 1-5. Typical Chillgard RT System for
R-123 Cross-Sensitivity Response Data ....... 1-11
Table 1-6. Typical Chillgard RT System for
R-134a Cross-Sensitivity Response Data ..... 1-11
Table 1-7. Typical Chillgard RT System for
R-113 Cross-Sensitivity Response Data ....... 1-12
Table 1-8. Typical Chillgard RT System for
R-114 Cross-Sensitivity Response Data ....... 1-12
Table of Contents
......... 1-10
iv
Page 7

Table 1-9. Typical Chillgard RT System for
R-500 Cross-Sensitivity Response Data ....... 1-12
Table 1-10. Typical Chillgard RT System for
R-502 Cross-Sensitivity Response Data ....... 1-13
Table 1-11. Typical Chillgard RT System for
Ammonia*
Cross-Sensitivity Response Data .................. 1-13
Table 1-12. Typical Chillgard RT System for
R-404a Cross-Sensitivity Response Data ..... 1-14
Chapter 2
Installation and Set-up .................................... 2-1
Receiving ......................................................................... 2-1
Unpacking the System .................................................... 2-1
Initial Inspection ............................................................ 2-1
WARNING ........................................................... 2-1
Location of the Monitor .................................................... 2-2
Instrument Location Guidelines .................................... 2-2
WARNING ........................................................... 2-2
Figure 2-1. Front Door Latches ................................ 2-2
Guidelines for Locating the Sampling Point(s) ................ 2-3
Equipment Configuration .............................................. 2-3
Figure 2-2. Typical Monitor Installation .................... 2-4
Activity in the Room ...................................................... 2-5
CAUTION ............................................................. 2-5
Mounting the Unit ............................................................ 2-6
Sample System Installation ............................................. 2-6
WARNING ............................................................ 2-6
WARNING ............................................................ 2-6
Wiring Connections ......................................................... 2-7
Opening the Unit ........................................................... 2-7
CAUTION ............................................................. 2-7
CAUTION ............................................................. 2-7
Figure 2-3a. Mounting Dimensions ........................... 2-8
Figure 2-3b. Mounting Dimensions ........................... 2-9
Unit Power Wiring .......................................................... 2-10
Power Supply Wiring .................................................. 2-10
CAUTION ........................................................... 2-10
Figure 2-4. Primary Power Wiring .......................... 2-10
v
Page 8

Wiring the Chillgard RT Unit ....................................... 2-11
Analog Signal Output Wiring (FIGURE 2-5) ............... 2-11
4-20 mA ...................................................................... 2-11
0-10 VDC .................................................................... 2-11
RS 232 Output ............................................................ 2-12
Figure 2-5. Wiring Connections .............................. 2-12
Ferrite Bead Installation .............................................. 2-13
Figure 2-6. Ferrite Bead Installation ....................... 2-13
CAUTION ........................................................... 2-13
Optional Alarm Beacon ............................................... 2-14
Relay Outputs ............................................................. 2-14
Alarm Relays ............................................................... 2-14
Trouble Relay .............................................................. 2-15
Trouble Relay Connection Wiring ............................... 2-15
Remote Reset ............................................................. 2-15
Audible Alarm Output .................................................. 2-16
Auxiliary Input - Use UL Listed Devices ..................... 2-16
Initial Calibration ............................................................ 2-16
CAUTION ........................................................... 2-16
Multipoint Sequencer Operation .................................... 2-17
Chapter 3
Start-up and Initial Adjustments .................... 3-1
Figure 3-1a. Display Screen Overview ..................... 3-2
Figure 3-1b. Display Screen Overview Continued 3-3
Figure 3-2a. Start-up and
Normal Operation Screens .............................. 3-4
Figure 3-2b. Start-up and
Normal Operation Screens Continued ............ 3-5
Figure 3-3a. Setup Screens ...................................... 3-6
Figure 3-3b. Setup Screens Continued .................... 3-7
Figure 3-4. Span Calibration ..................................... 3-8
Figure 3-5. Zero Calibration ...................................... 3-9
Figure 3-6. Check Calibration ................................. 3-10
Figure 3-7. Diagnostic Screens .............................. 3-11
Figure 3-8. Diagnostic Screens .............................. 3-12
Figure 3-9. Diagnostic Screens .............................. 3-13
Figure 3-10. Data Screens ...................................... 3-14
vi
Page 9

Figure 3-11. Sequencer Set-up Screen .................. 3-15
Figure 3-12. Sequencer Set-up Screen .................. 3-16
Figure 3-13. Alarm Level Screen ............................ 3-17
Figure 3-14. Alarm Latching Screen ....................... 3-18
Figure 3-15. Alarm Latching Screen ....................... 3-19
Figure 3-16. Audio Alarm Screen ............................ 3-20
Figure 3-17. Analog Output Screen ........................ 3-21
Figure 3-18. Aux Alarm Screen ............................... 3-22
Figure 3-19. Auxiliary Alarm Screen ....................... 3-23
Figure 3-20. Setup Time ......................................... 3-24
Figure 3-21. Setup Log ........................................... 3-25
Figure 3-22. Setup Password ................................. 3-26
Figure 3-23. Review Log ......................................... 3-27
Figure 3-24. Review Data ....................................... 3-28
Chapter 4
Calibration ....................................................... 4-1
Introduction ...................................................................... 4-1
Calibration Equipment ..................................................... 4-2
Equipment needed: ....................................................... 4-2
Figure 4-1. Kit Components ...................................... 4-2
Table 4-1. RP Calibration Gases............................. 4-3
Chillgard RT identification ................................................ 4-3
CAUTION ............................................................ 4-3
Figure 4-2. Chillgard RT Models ............................... 4-4
Calibration Procedures .................................................... 4-5
Table 4-2.
Calibration Sequence Screens .............. 4-5
Figure 4-3a. Zero Calibration .................................... 4-6
Figure 4-3b. Zero Calibration Continued .................. 4-7
Figure 4-4. SPAN Calibration .................................... 4-8
Figure 4-5. Ammonia or R-404a Unit Calibration ..... 4-8
WARNING ........................................................... 4-9
vii
Page 10

Chapter 5
Maintenance .................................................... 5-1
General Maintenance ...................................................... 5-1
Obtaining Replacement Parts ......................................... 5-1
WARNING ........................................................... 5-1
Table 5-1. Replacement Parts ................................. 5-2
Troubleshooting Guidelines (see TABLE 5-2) ................. 5-3
Table 5-2. Troubleshooting Guidelines.................... 5-3
Chapter 6
Data Logging ................................................... 6-1
Log Size ........................................................................... 6-1
Last Values ...................................................................... 6-1
Number of Data Points Used .......................................... 6-1
User Setup Options ......................................................... 6-1
Viewing Alarms/Events and Data .................................... 6-1
Appendix A
Check List ....................................................... A-1
Appendix B
Relay Module .................................................. B-1
General Description………………………………………..B-1
Figure B-1. Relay…………..………………………….B-1
Figure B-2. Mounting the Relay Module…………….B-2
Specifications……………………………………………….B-3
Table B-1. Specifications…………………………….B-3
Figure B-3. Relay Module Main Power Connector
and Communication Cable Connector
Locations………………………………………...B-3
Communication Cable Connections…………………B-4
Figure B-4. Chillgard RT Relay Module Power
Wiring Diagrams for 120 Volts and
240 Volts ………………………………………..B-4
Figure B-5. Chillgard RT Refrigerant Monitor………B-4
viii
Page 11

Figure B-6. Typical Interface Modules………………B-5
Unpacking the Shipping Carton ...................................... B-6
Identifying the Unit .......................................................... B-6
Table B-2. Part Numbers and Supplied Relays .... B-6
Mounting Your Unit ............................................................... B-6
Electrical Connections for the Chillgard RT
Relay Module ....................................................................... B-6
Main Power Connections ................................................ B-6
CAUTION ................................................................... B-6
Communication Cable Connections ............................. B-7
WARNING .................................................................. B-7
CAUTION ................................................................... B-7
WARNING .................................................................. B-7
Communication Cable Connections
to the Chillgard RT Relay Module ................................... B-8
Communication Cable Connections
to the Chillgard RT Refrigerant Monitor .......................... B-8
Relay Wiring .................................................................... B-8
Operation ............................................................................. B-9
Front Panel ..................................................................... B-9
Power ............................................................................. B-9
Trouble ........................................................................... B-9
CAUTION ................................................................... B-9
WARNING .................................................................. B-9
Ready Indicator ............................................................. B-10
Chillgard RT Relay Module Relays ............................... B-10
The Common Horn Relay ............................................. B-10
The Trouble Relay ......................................................... B-10
The Discrete Caution, Warning and Alarm Relays ....... B-11
Applying Power ............................................................. B-11
Alarm Relay Configuration ............................................
Latching ......................................................................... B-11
Normally Energized/De-energized ................................ B-11
Operation ....................................................................... B-12
Reset Switch ................................................................. B-12
Trouble Relay ................................................................ B-12
Horn Operation .............................................................. B-13
Configuration ................................................................. B-13
Reset Switch ................................................................. B-13
B-11
ix
Page 12

Maintenance .................................................................. B-13
Troubleshooting ............................................................ B-14
Table B-3. Troubleshooting ................................. B-14
Obtaining Replacement Parts ..................................... B-14
Table B-4. Replacement Parts ............................ B-14
Appendix C
RS-232 Output ................................................ C-1
Introduction ...................................................................... C-1
Figure C-1. RS-232 Location
Table C-1. RS-232 Parameters ....................................... C-2
Three types of messages can be transmitted
from the RS-232 port: ................................................ C-2
Status............................................................................... C-3
Data Logged Value .......................................................... C-3
Alarm Events ................................................................... C-3
Table C-2. Status Message ........................................ C-4
Table C-3. Data Logging ............................................ C-5
RS-232 Output ................................................................ C-6
Table C-4. Alarm Logging........................................... C-6
Figure C-2. Typical RS-232 Wiring ............................ C-7
Remote Gas Sampling Channel Identification ................ C-8
Table C-5. Voltage Output
Corresponds to Channel ................................. C-8
Appendix D
Multi-refrigerant Capability* .......................... D-1
Introduction ...................................................................... D-1
Specifications .................................................................. D-1
Table D-1*. Multi-Refrigerant
Chillgard RT Refrigerant Monitor
Table D-2. Typical Cross Sensitivity
at 100 Parts Per Million (PPM) at 25°C
for the Chillgard RT Refrigerant Monitor
Calibrated at 1000 PPM R11
as Expressed in Response Factors ................ D-2
Identifying Your Unit ........................................................ D-2
x
...................... D-1
Page 13

Installation ....................................................................... D-2
Figure D-1. Label and RS-232 Location ................... D-3
Figure D-2. Calibration Label .................................... D-4
Figure D-3. Manufacture Date Label ........................ D-4
Initial Setup ............................................................... D-5
Calibration ....................................................................... D-5
Display Screens .............................................................. D-5
WARNING ............................................................. D-5
Figure D-4. Gas by Point Setup Screens ................. D-7
Figure D-5. Alarm Level Screens .............................. D-8
Figure D-6a. Alarm Level Screens ............................ D-9
Figure D-6b. Alarm Level Screens .......................... D-10
xi
Page 14
xii
Chillgard RT Refrigerant Monitor
Page 15

Chapter 1
CHILLGARD RT MONITORS EVALU ATED BY UNDERWRITERS LABORATORIES, INC.
R-11
R-502
R-12
R-123
R-113
R-22
R-114
R-134a
R-500
R-404a
General Information
Introduction
This manual provides instructions for the:
• Chillgard RT Monitor
• Chillgard RT unit with Multipoint Sequencer.
These instruments can provide continuous refrigerant gas monitoring
(see TABLE 1-1 for Operating Specifications).
All units listed below have been evaluated by Underwriters Laboratory.
The ammonia units have not been evaluated by Underwriters
Laboratories, Inc.
1-1
Page 16

Table 1-1. Chillgard RT System General Operating Specifications
PERFORMANCE SPECIFICATIONS
STABILITY
0-50 ppm, +1 ppm; ammonia is 2 ppm
51-1000 ppm, +10% of reading
SHORT TERM NOISE
+1 ppm peak over a 10-minute period;
ammonia* is +2 ppm
LINEARITY
0-50 ppm +1 ppm; ammonia* is +2 ppm
51-1000 ppm, +10% of reading
WARM-UP TIME (READY)
24 hours maximum; typical, 20 minutes at 70°F (21°C)
ambient
RESPONSE TIME
90% of a step-change and alarm condition
within 110 seconds
TRANSPORT TIME
500 FT (152 M) OF
SAMPLING TUBING LENGTH
13 minutes for a 90%
step change
OPERATING
TEMPERATURES
0°C to 50°C (32°F to 122°F)
TEMPERATURE EFFECT
+0.3%/°C of reading, +0.1 ppm/°C
RELATIVE HUMIDITY
0 to 95%, RH non-condensing
SAMPLE FLOW RATE
.75 liter per minute - minimum with maximum tubing
length; typically 1.2 to 1.5 liters per minute with no tubing
MAXIMUM SAMPLE OR
EXHAUST TUBING LENGTH
150 feet (46 m) with 1/8" (3.2 mm) ID tubing, 1/4" (6.4 mm)
0.18" (4.6 mm) ID tubing
OPERATING PRESSURE
ambient atmospheric
OPERATING SPECIFICATIONS
VOLTAGE RATING
100 to 240 VAC, 50-60 Hz
POWER REQUIREMENTS
.88 amps at 120 VAC;
.54 amps at 240 VAC
TROUBLE RELAY
Normally energized, Form C contact: 240 VAC,
8 amp resistive SPDT
WARNING RELAY
One relay, Form C contacts: 240 VAC,
8 amps resistive SPDT
CAUTION RELAY
One relay, Form C contacts: 240 VAC,
8 amps resistive SPDT
ALARM RELAY
One relay, Form C contacts: 240 VAC,
8 amps resistive SPDT
ANALOG OUTPUTS
4 to 20 mA sourcing, 1,000 ohm load, 0-10 V,
2 K ohm load
MAXIMUM OUTPUT SIGNAL
LOAD FOR 4-20 MA OUTPUT
1000 ohms (includes wiring)
AUDIO ALARM DRIVE
OUTPUT
10 VDC 20-ohm load maximum
(available only with non-beacon models)
SAMPLE TUBING
CONNECTIONS
1/4" (6.4 mm) OD
DIMENSIONS
18" high, 16" wide, 7" deep
45.7 cm high, 40.6 cm wide, 17.8 cm deep
SAMPLING TUBING LENGTH
150 FT (46 M) OF
OD (total of Inlet & Outlet); 500 feet (152 m) with
step change
105 seconds for a 90%
1-2
Page 17

WEIGHT OF CHILLGARD
RT WITH SEQUENCER
45 pounds (20 kg)
TRANSPORT AND STORAGE CONDITIONS
TEMPERATURE
-67°F to 158°F (-55°C to +70°C)
HUMIDITY
99% RH non-condensing
*This unit has not been evaluated by Underwriters Laboratories, Inc.
**For UL2075 testing from 50°C to 61°C, the Temperature Effect is +0.6%/°C of reading
and +1 ppm/°C
For the Chillgard RT Remote Relay* unit option, see Appendix B, "Relay Module."
Th
e Chillgard RT Monitor is intended for indoor use in mechanical
equipment rooms housing air conditioning or refrigeration equipment or
for use in areas where bulk refrigerants are stored.
onitor uses infrared sensing technology, allowing accurate
The m
measurement of refrigerant vapors with minimum interference from
other vapors. Your Chillgard RT unit is factory-calibrated for a specific
refrigerant. It is extremely sensitive, capable of measuring down to 1
part per million (ppm). The unit monitors the signal and can operate
three alarm levels at software-selectable gas concentration values.
There is also a trouble indication to alert the operator when something
is wrong with the unit.
Identifying Your Unit
Multipoint Sequencer
The Chillgard RT Refrigerant Monitor is capable of monitoring different
types of refrigerants. However, each unit is factory-calibrated to detect
one type of refrigerant.
Check t
he label inside the front door to determine what gas your unit is
designed to detect (FIGURE 1-1). For specific guidelines on using the
RS232 function (serial communication port), see Appendix C. For
specific guidelines on the multi-refrigerant version of the Chillgard RT
Monitor, see Appendix D.
The uni
t monitors only one zone or location, but your instrument may
contain a Multipoint Sequencer capable of monitoring up to four or eight
different zones or locations. To determine the number of sampling
locations your particular unit is able to monitor, carefully tilt the unit and
count the number of inlet ports at the bottom of the case (FIGURE 1-2,
1-3 or 1-4).
1-3
Page 18

1-4
Figure 1-1. I
dentifying your Unit
Page 19

Figure 1-2. Single Point Sequencer Unit
Figure 1-3. Four Point Sequencer Unit
Figure 1-4. Eight Point Sequencer Unit
1-5
Page 20

Beacon
The optional beacon is mounted on top of the unit (FIGURE 1-5). It is
powered by the monitor’s internal DC voltage.
d of Sample Line Filters
En
End of sample line filters are required for proper unit operation; they
may be included in the shipping carton.
he end of sample line filters are not included, they must be
If t
purchased. Place an end-of-sample line filter (P/N 711561).
Fi
gure 1-5. Chillgard RT Monitor with Optional Beacon
General Description
The Chillgard RT Unit:
• Monitors refrigerant gases up to 1000 parts-per-million (ppm)
perates on the photo-acoustic principle, allowing refrigerant gas
• O
concentration measurement in a complex mixture of backgroun
gas
es
1-6
d
Page 21

• Allows refrigerant gas detection in applications where contaminants
or interferants preclude use of other techniques
• Provides a digital display; if it is a multi-point monitor, it also shows
the point number currently being sampled by the unit
• Is also used for applications requiring long-term stability and low
maintenance
• Is factory-calibrated to the full scale value of refrigerant gas
• Is compensated for the relative humidity of the gas to give
excellent zero stability and enable alarms at refrigerant gas levels
as low as 3 ppm.
• Operates over a wide temperature range
• Has front-panel windows for viewing:
• Gas concentration
• Diagnostics
• Alarm Conditions
• Is highly selective to enable operation in:
• Areas with varying humidity
• Areas containing other contaminants.
• Comes standard with:
• Four sets of relay contacts
• Two completely independent outputs:
0-10 V
4-20 mA
• One input: 4-20 mA, assignable to the ALARM relay
• RS 232 output (see Appendix C for more information).
The Internal Multipoint Sequencer Unit:
• Allows a single Chillgard RT unit to monitor up to four or eight
areas or locations, if equipped
• Each point is capable of sampling from remote areas up to 500
feet (152 m) from the Chillgard RT unit
• Contains all necessary flow components (excluding end-of-line filter
and sampling line) to properly sample four or eight areas and
indicate the gas or vapor concentrations.
1-7
Page 22

Terminology
Become familiar with the following terminology.
ZERO- A ze
air (no refrigerant gas present).
ZEROING- Th
calibration.
N- Full-scale or up-scale reading on meter display.
SPA
NNING- The process of placing a full-scale or span gas on the unit
SPA
during calibration.
N GAS VALUE- The gas concentration that gives the instrument a
SPA
full-scale or up-scale value. This value is printed on the calibration gas
cylinder containing the gas.
FLOW RATE- Vo
EXHAUST G
PUMP- T
the Chillgard RT Monitor.
ALARMS- T
at specific, user-adjustable refrigerant gas concentrations.
(Level 1 = Caution, Level 2 = Warning and Level 3 = Alarm.)
RELAT
given temperature.
ro (0) indication on the meter display usually indicates fresh
e process of placing a zero gas on the unit during
lume of gas drawn through the sample line per minute.
AS- Sample gas after it passes through the sensor.
he electric motor driven device that moves the gas sample to
he Chillgard RT System has three alarms to alert the user
IVE HUMIDITY- The percent of water vapor saturation in air at a
POINT N
drawn. Up to four or eight areas, sequentially numbered from 1 to 8,
can be sampled.
BYPA
drawn from the next area to be sampled. This feature reduces the
monitor response time when long sampling lines are used.
FRESH A
TEMPERAT
instrument (PPM) can change +0.3% for each degree (C) that the
instrument is operating above/below the temperature at which the
instrument was last calibrated.
UMBER- The location or area from which a gas sample is
SS- The Sequencer is a look-ahead system; bypass gas flow is
IR- Air that has no possibility of containing refrigerant gas.
URE EFFECT- The gas response displayed by the
1-8
Page 23

Applications
The Chillgard RT Monitor is factory-calibrated for a particular refrigerant
gas. When calibrated, the Chillgard RT System is used in a wide variety
of industrial applications, such as:
• detection of refrigerant gases leaking into the atmosphere
• ambient air monitoring for health and safety purposes
Sensor Selectivity*
The Chillgard RT Refrigerant Monitor is factory-calibrated for your
particular refrigerant gas (TABLE 1-3). The system is highly selective to
refrigerant gases in air; however, the system also responds to other
gases (interferants). See TABLES 1-2 through 1-11* for typical crosssensitivities. Actual cross-sensitivities vary from instrument to
instrument. *Typical cross-sensitivities not verified or investigated by UL.
NOTE: These cross-sensitivity values do not apply to a multi-refrigerant
unit where the optics have been adjusted to detect a variety of
refrigerants.
If it is not known whether the gas to be detected is an interferant gas,
contact MSA at 1-800-MSA-INST.
Table 1-2. Typical Chillgard RT System for
R-11 Cross-Sensitivity Response Data
GAS CONCENTRATION (PPM) EQUIVALENT PPM R-11
Acetone 100 14
Methyl Ethyl Ketone 100 32
Methanol 1000 130
iso-Propanol 500 400
Methylene Chloride 100 0
Xylene 100 0
Ammonia 50 0
R 113 100 25
R 11 100 100
R 22 100 30
R 12 983 490
R 134 A 100 20
R 123 100 3
Propane 0.6% 18
Ethylene 500 20
TEST CONDITIONS: Calibrated 0-1000 PPM R-11 in N2; Temperature: 25°C
1-9
Page 24

Ta
ble 1-3. Typical Chillgard RT System for
R-11 Cross-Sensitivity Response Data
GAS CONCENTRATION (PPM) EQUIVALENT PPM R-12
Acetone 100 3
Methyl Ethyl Ketone 1000 25
Methanol 1000 2
Methylene Chloride 1000 14
Trichloroethylene 1000 167
Ethyl Acetate 1000 22
Xylene (ortho-Xylene) 1000 5
R113 100 35
R11 100 5
R22 100 1
R12 100 100
R134A 100 2
R114 100 45
TEST CONDITIONS: Calibrated 0-1000 PPM R-12 in N
Temperature - 25°C
2;
Table 1-4. Typical Chillgard RT System for
R-22 Cross-Sensitivity Response Data
GAS CONCENTRATION (PPM) EQUIVALENT PPM R-22
Acetone 100 <1
R11 100 16
R123 100 35
R134A 100 25
R1132A 100 40
R22 100 100
R113 100 39
TEST CONDITIONS: Calibrated 0-1000 PPM R-22 in N2; Temperature: 25°C
1-10
Page 25

Table 1-5. Typical Chillgard RT System for
R-123 Cross-Sensitivity Response Data
GAS CONCENTRATION (PPM) EQUIVALENT PPM R-123
Acetone 100 22
Methyl Ethyl Ketone 500 48
Methanol 100 2
iso-Propanol 100 5
Methylene Chloride 1000 14
Trichloroethylene 1000 4
Ethyl Acetate 100 42
Xylene (ortho-Xylene) 1000 5
Ammonia 910 7
Natural Gas 1000 5
R113 100 80
R11 100 <1
R22 100 4
R12 100 8
R134A 100 140
R123 100 100
TEST CONDITIONS: Calibrated 0-1000 PPM R-123 in N2; Temperature: 25°C
Table 1-6. Typical Chillgard RT System for
R-134a Cross-Sensitivity Response Data
GAS CONCENTRATION (PPM) EQUIVALENT PPM R-134a
R113 100 17
R11 100 2
R22 100 1
R134A 100 100
R123 100 8
TEST CONDITIONS: Calibrated 0-1000 PPM R-134a in N2; Temperature: 25°C
1-11
Page 26

Ta
ble 1-7. Typical Chillgard RT System for
R-113 Cross-Sensitivity Response Data
GAS CONCENTRATION (PPM) EQUIVALENT PPM R-113
R11 100 1
R12 100 10
R22 100 5
R123 100 125
R134A 100 175
R114 100 155
R113 100 100
TEST CONDITIONS: Calibrated 0-1000 PPM R-113 in N2; Temperature: 25°C
Table 1-8. Typical Chillgard RT System for
R-113 Cross-Sensitivity Response Data
GAS CONCENTRATION (PPM) EQUIVALENT PPM R-114
R11 100 105
R12 100 50
R22 100 35
R113 100 30
R123 100 3
R134a 100 20
R114 100 100
TEST CONDITIONS: Calibrated 0-1000 PPM R-114 in N2; Temperature: 25°C
Table 1-9. Typical Chillgard RT System for
R-500 Cross-Sensitivity Response Data
GAS CONCENTRATION (PPM) EQUIVALENT PPM R-500
R11 100 8
R22 100 0
R113 100 41
R114 100 60
R123 100 2
R134a 100 7
R502 100 5
R500 100 100
TEST CONDITIONS: Calibrated 0-1000 PPM R-500 in N2; Temperature: 25°C
1-12
Page 27

Table 1-10. Typical Chillgard RT System for
R-502 Cross-Sensitivity Response Data
GAS CONCENTRATION (PPM) EQUIVALENT PPM R-502
R11 100 25
R22 100 160
R123 100 60
R134a 100 40
R502 100 100
TEST CONDITIONS: Calibrated 0-1000 PPM R-502 in N2; Temperature: 25°C
Table 1-11. Typical Chillgard RT System for
Ammonia* Cross-Sensitivity Response Data
GAS CONCENTRATION (PPM) EQUIVALENT PPM AMMONIA
Acetone 1000 45
Methyl Ethyl Ketone 100 25
Methane 2.5% 5
Iso-Propanol 1000 725
Methylene Chloride 1000 12
O-Xylene 100 7
NH
3
R11 500 50
R22 550 15
R12 100 65
R134a 100 130
R123 100 20
Propane 0.6% 50
Pentane 0.75% 100
Ammonia 100 100
TEST CONDITIONS: Calibrated 0-1000 PPM Ammonia in N2; Temperature: 25°C
*This gas has not been evaluated by Underwriters Laboratories,Inc.for the Chillgard RTunit.
100 100
1-13
Page 28

Ta
ble 1-12. Typical Chillgard RT System for
R404a Cross-Sensitivity Response Data
GAS CONCENTRATION (PPM) EQUIVALENT PPM R-404a
R11 100 <1
R12 100 3
R22 100 2
R113 100 30
R123 100 40
R134a 100 56
TEST CONDITIONS: Calibrated 0-1000 PPM R-404a in N2; Temperature: 25°C
1-14
Page 29

Chapter 2
Installation and Set-up
Receiving
Upon receipt of the unit, inspect the shipping carton for signs of visible
damage. Report any damage to the carrier and note it on the delivery
receipt. The unit must be stored in a dry, secure place prior to its
installation and use. Store unit in the original shipping carton.
Unpacking the System
To unpack the equipment:
1.
Carefully remove the Chillgard RT Monitor from its shipping
container(s) in order to prevent damage to sensitive electrical
components. If any damage is found, report it to the shipper
immediately.
Do not install or operate a damaged unit. It may not function
properly and may not alert you to any gas conditions.
2.
Search through all packing material and containers to avoid
WARNING
Inadvertently discarding usable or valuable parts. Report any
shortages immediately to MSA.
The contents of the shipping carton are:
• instrument
• manual
• end-of-line filters (may be purchased separately).
Retain the original packing form for re-use in the event the unit
must be returned for service.
3.
Using a screwdriver, loosen the two latches on the Chillgard RT
door (FIGURE 2-1) by turning 1/4 turn counterclockwise.
4.
Open the front door.
Initial Inspection
With the front door open, carefully inspect components and assemblies
inside the enclosure. If damage or shortage is evident, advise and
promptly file the proper claim with the carrier.
2-1
Page 30
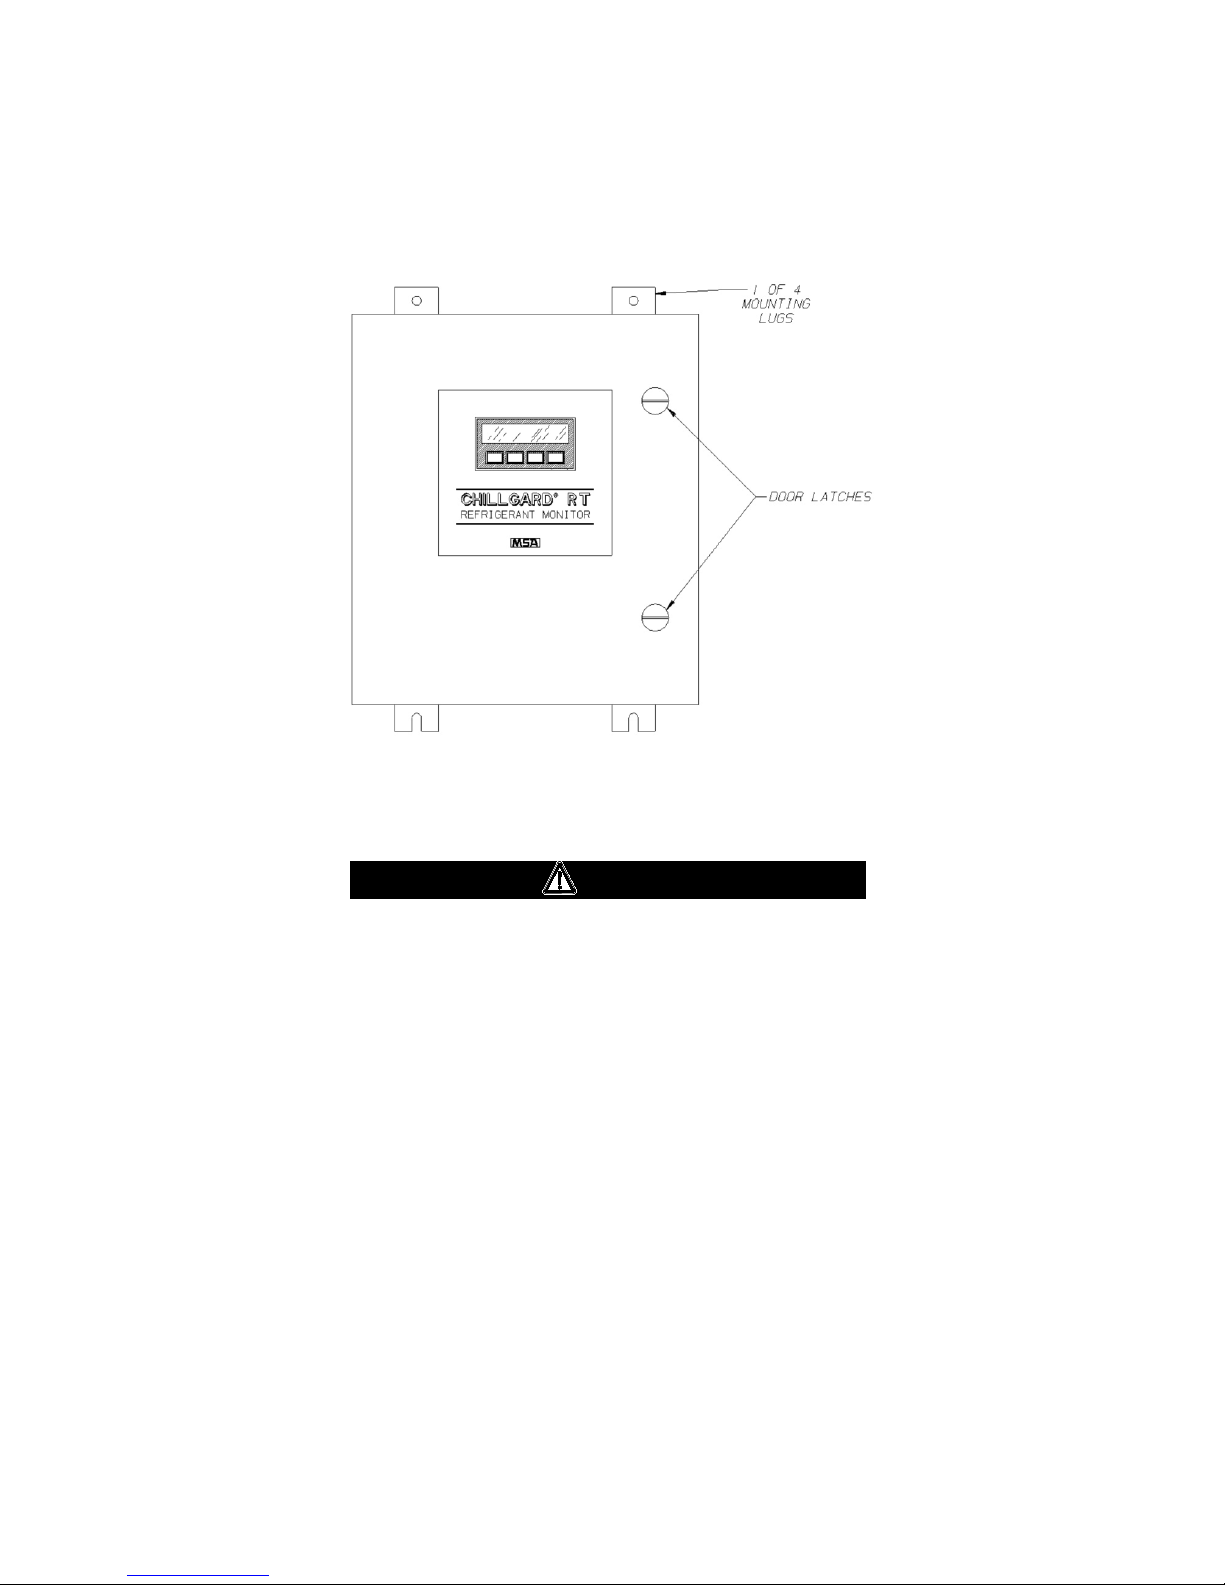
Fi
gure 2-1. Front Door Latches
Location of the Monitor
WARNING
This unit must not be located in areas that may contain a
flammable mixture of gas and air; otherwise, an explosion
may occur.
The monitor performance is dependent on its location and sensing pickup location(s). Follow the guidelines listed below before mounting the
monitor.
Instrument Location Guidelines
1.
Select a location where personnel will see the front panel or the
ional beacon before they enter the equipment room or the area
opt
where the monitoring point is located.
2.
Mount the unit vertically; do not mount the unit to structures subject
to vibration and shock, such as piping and piping supports.
3.
Do not locate the unit near an excessive heat source or in wet and
p locations.
dam
2-2
Page 31

4.
Do not mount unit where it will be exposed to direct solar heating.
5.
For proper cooling, allow at least three inches (7.6 cm) clearance
around all surfaces except for the mounting surface.
6.
Mount the unit so the front panel is easily seen and accessed for
service and calibration.
Guidelines for Locating the Sampling Point(s)
Due to the wide variation in equipment room layouts, each situation
must be analyzed individually. A sampling point may be remotely
located up to 150 feet (46 m) from the monitor (500 feet [152 m] if
0.180" (4.6 mm) I.D. tubing is used) in an area where refrigerant
vapors are most likely to leak or accumulate (FIGURE 2-2).
NOTE: The 150 and 500 feet (46 and 152 m) allowances refer to the
total sample and exhaust line length for each sample point.
Equipment Configuration
The equipment arrangement in the room can also have an impact on
the most effective place to sample. As a general guideline:
• If there is one chiller in the room, sample at the perimeter of unit.
• For two chillers, sample between them.
• With three or more chillers, multiple monitors or a single monitor
with a multi-point sampling system should be used. Airflow patterns
must always be considered.
2-3
Page 32

Figure 2-2
option have one sampling port; those with sequencer have four or eight ports)
. Typical Monitor Installation (Monitors without sequencer
2-4
Page 33

Activity in the Room
The expected activities in the room must also be considered when
determining the sensing point. Refrigerants will concentrate near the
floor. Typically, sampling 12-18 inches (30.5-45.7 cm) above the floor
is sufficient for
someone working close to the floor. If it is expected that an occupant’s
breathing zone may be less than 12-18 inches (30.5-45.7 cm) off the
floor, locate the sampling point accordingly.
early warning and to provide adequate protection for
NOTE: S
elect sampling locations which result in the shortest possible
line length in order to reduce transport time.
Consider t
he following guidelines when selecting the location for the
sampling point(s).
1.
Most refrigerants are heavier than air and sink to the floor or
accumulate in low areas.
2.
Ammonia gas is lighter than air and tends to rise to the ceiling.
3.
Place the end of the sampling line in an area that provides the
nstrument with a representative sample; ventilation Smoke Tubes
i
(P/N 458480) are useful in determining air flow patterns in ambient
sampling areas.
4.
Properly exhaust the instrument to a safe area or to outside
mosphere.
at
5.
Ensure the sampling area is free of particulate matter and
ondensing moisture; ensure sample lines will not draw moistur
c
up
into the line.
NOTE: Th
e sample gas must be adequately filtered before
ent
ering the instrument. End-of-sample-line filters must be
used with the unit. These filters must be installed at the
end of all sample lines.
6.
Ensure the end of the sampling line is unobstructed to allow the
ample to flow freely to the instrument.
s
7.
Keep sample lines as short as possible to reduce transport time.
e
Ensure that tubing radii are wide enough to prevent kinking
or bending. Otherwise, an obstruction may occur, preventing
the instrument from sampling the intended area.
CAUTION
2-5
Page 34

8.
DO NOT:
• back-pressure the exhaust line or
• connect it to a vacuum source or
• install a flow meter in the exhaust line.
ALWAYS :
connect an exhaust line that is vented to a safe area or an
outside atmosphere.
Mounting the Unit
The instrument has four mounting lugs (FIGURE 2-1). Securely mount
the unit to a wall or support, using appropriate hardware.
WARNING
Do not mount the unit directly to a chiller; the vibration may
affect the operation of the monitor, resulting in incorrect
readings.
Sample System Installation
1.
Remove all caps on the sample inlets and exhaust of the Chillgard
RT Monitor (FIGURE 2-3).
WARNING
Failure to remove any caps from the unit gas inlet or exhaust
fittings prevents gas sampling and may cause an undetected
toxic and hazardous gas build-up and a flow trouble
indication.
2.
Route the 1/4" (6.4 mm) OD tubing into the areas to be monitored.
NOTE: For
Refrigerant Units:
1/4" (6.4 mm) O
D rigid copper tubing with compression
type fittings is recommended for most refrigerants.
Soldered connections on the sample line(s) should be
avoided due to the possibility of the monitor being
sensitive to the solvents in the soldering flux paste.
For Ammonia Units:
It i
s recommended that stainless steel tubing and filters be
used. Do not use copper or brass for tubing or connection
components as they are not compatible with ammonia.
3.
After the line(s) are installed and BEFORE they are connected to
onitor:
the m
2-6
Page 35

a.
Clean lines with compressed air or nitrogen to remove any
debris.
b.
Perform a leak-check to assure they are free of leaks.
c.
Connect the line(s) to the sample port(s) on the monitor.
d.
Install the end-of-line filters.
NOTE: \All unused sample inlet(s) must be plugged or have an
end-of-line filter installed to avoid debris entering the unit.
To disable these unused lines, refer to the setup screen
shown in FIGURE 3-11.
4.
Install all tubing ends to the inlet fittings of the unit. Mark the
location identity of each individual tubing on the tubing or on the
inside of the instrument itself (FIGURE 2-3).
5.
Connect the exhaust fitting to tubing which is routed to an area
where refrigerant gases may be safely dispersed.
Ensure that each and every sample tubing has an end-of-line
filter on it; otherwise, damage to the internal components
may result.
CAUTION
Wiring Connections
Opening the Unit
All wiring to the Chillgard RT unit is made via the side entries. Open the
unit to provide complete access to all wiring connections.
Ensure that all wiring codes are followed. These codes include, but are
not limited to, the National Electrical Code.
Do not open the Chillgard RT unit door unless the equipment
is protected from splashing, spraying, or dripping water;
otherwise, damage to the internal components may result.
CAUTION
2-7
Page 36

2-8
Figure 2-3a. Mounting Dimensions
Page 37

Figure 2-3b. Mounting Dimensions
2-9
Page 38

Unit Power Wiring
A separate, dedicated power source is recommended for the refrigerant
monitor to ensure that the unit remains powered when other circuits are
shut down for servicing, routine maintenance or shift changes.
The mo
nitor uses a wide range power supply which can accept AC
power from 100 to 240 volts, 50 or 60 Hz. The power wiring should
enter the unit through one of the openings on the right side of the
enclosure. Connections are made to the screw terminals labeled L1, L2,
ACN and GND, located in the upper right side of the unit (FIGURE 2-4).
The maximum wire size that these connectors can accept is #12 AWG.
The i
ncoming power provided to the monitor determines the
configuration of the fuse(s) and wiring to the main power terminal block.
FIGURE 2-4 shows the fuse and wire connections for various voltages.
gure 2-4. Primary Power Wiring
Fi
Power Supply Wiring
1.
Using a screwdriver, loosen the two latches on the enclosure door
(FIGURE 2-1).
2.
Open the front door.
3.
Determine the power requirements for your Chillgard RT unit,
ensuring the power i
current capa
city specifications.)
s clean and reliable. (Refer to TABLE 1-1 for
If unsure of your power available, contact your facility
engineer or safety officer. If incorrect power is applied,
damage may occur to the instrument.
2-10
CAUTION
Page 39

Wiring the Chillgard RT Unit
4.
Route power wiring through one of the entries in the side of
the unit.
NOTE: Power wiring should be separated from relay wiring.
5.
For single fuse 100/120 Volts AC power connection, connect the:
• power wire to L1
• neutral wire to ACN
• ground wire to
6.
For double fuse 220/240 Volts AC power connection, connect
power wires to L1 and L2 and ground wire to
terminal
terminal.
Analog Signal Output Wiring (FIGURE 2-5)
The Chillgard RT unit has two available analog outputs. Each analog
output is software-selectable between 10% or 100% of full scale:
• 4-20 mA, isolated, current sourcing
• 0-10 VDC
These voltage and current outputs are proportional to the displayed
refrigerant concentration. Connections are made to terminal strip J17
located on the lower left side of the main circuit board (FIGURE 2-5).
Analog output wiring should enter the unit through the hole provided on
the left side of the unit. The terminal portion of the connector can be
removed from the circuit board for easier connection. The maximum
wire size that these connectors can accept is Listed #12 AWG; the
maximum cable length is 500 feet (152 m).
It is suggested that Listed #18 AWG, twisted-pair wire be used. If
shielded wire is necessary, ground the shields of all cables at the
receiving end of the signal. Do not ground or connect the shields at the
Chillgard RT Monitor.
4-20 mA
The 4-20 mA output sources current to a separate return. Connections
are made to
terminals 2 (I+) and 3 (RTN) on terminal strip J17.
1-10 VDC
The 0-10 VDC output sources voltage to 2 K ohms maximum load.
Connections are made to terminals 4 (V+) and 5 (COM) on terminal
strip J17.
2-11
Page 40

The voltage output can be programmed to correspond to the channel
presently being sampled. The front-panel screen shows:
1V/PT IF OUT = 1-10V
(indicating one volt per point if output equals one to 8 volts).
When enabled, and the unit is monitoring from:
• channel 1:
the voltage output is one volt
• channel 2:
the voltage output changes to two volts.
RS 232 Output
• See Appendix C for wiring information.
2-12
Figure 2-5. Wiring Connections
Page 41

Ferrite Bead Installation
Some models are shipped with ferrite beads. Follow the instructions
below for proper installation.
• The input and output signals must be connected by using twisted,
shielded wire pairs.
• The shield or its drain wire (FIGURE 2-6) must be connected to the
grounding terminal on the power supply plate.
• Each unit is supplied with Thora-Electronik #16-28-9 or equivalent
ferrite (P/N 10017468).
• The shield must also be connected to ground at the receiving
equipment.
• The RS 485 communications lines to the relay module must be
wired in a similar manner. See Appendix B for more information on
the relay module.
Bundle low voltage wiring together (lower than 30 volts),
separate from high voltage wiring (higher than 30 volts).
CAUTION
Figure 2-6. Ferrite Bead Installation
2-13
Page 42

Opt
ional Alarm Beacon
Your unit may have an optional alarm kit installed. This kit is made up of
a beacon on the top of the unit. It is factory-wired so no additional wiring
is necessary; it lights when any alarm indication is given by the
instrument. This function parallels the audible alarm output (when the
horn sounds, the beacon will light).
Relay Outputs
Alarm Relays
There are three alarm relay outputs:
aution (factory-set to trip at 9 ppm)
• C
• Warning (factory-set to trip at 29 ppm)
• Alarm (factory-set to trip at 700 ppm)
elay can be set up as latching/non-latching and/or normally-
Each r
energized/normally de-energized. Contacts are Form C at 240 Volts AC
8 amps resistive. Connect wiring to Terminal Strip J29. User can adjust
alarm trip points via the front panel (see Section 3, FIGURE 3-13).
NOTE: R
esponse time equals 90% of a step change and alarm
condition within 110 seconds.
Alarm R
Three r
are Form C, SPDT relays which can be
elay Connections Wiring
efrigerant level alarm relay outputs are provided. All alarm relays
wired to either closed or opened
contacts in an alarm condition.
elay has contacts for:
Each r
• N
ORMALLY OPEN (NO)
• COMMON (COM)
• NORMALLY CLOSED (NC)
The f
unction of each relay connector terminal is shown on FIGURE 2-5.
Relay w
iring should enter the unit through one of the openings on the
right side of the unit. Connections are made at the internal terminal strip
labeled J29, located on the right side of the circuit board (FIGURE 2-5).
The terminal portion of the connector can be unplugged from the circuit
board for easier wire connections.
NOTE: Th
e maximum wire size that these connectors can accept is
#12 AWG.
2-14
Page 43

Trouble Relay
There is one relay (the Trouble relay) within the unit that indicates that a
trouble or start-up condition exists. This relay is configured from the
factory and operates differently than the alarm relays. It operates in a
normally-energized mode.
This relay is energized when the instrument is:
• normally operating,
• in the calibration mode, or
• in the setup condition.
The relay is de-energized when:
• a fault is detected,
• the unit is in the start-up state, or
• the main power is lost.
This means that power is no longer provided to the relay coil. It is not
possible to change the configuration of the Trouble relay.
The relay connector function or identification:
• NORMALLY OPEN (NO),
• COMMON (COM),
• NORMALLY CLOSED (NC)
as marked in FIGURE 2-5 refers to the relay contacts as if the relay is
de-energized or in the trouble condition. A relay contact is provided
between the Normally Closed (NC) and Common (COM) position. This
contact will be made in the event that main power to
any other trouble condition exists.
the unit is lost or
Trouble Relay Connection Wiring
The Trouble relay wiring should enter the unit through one of the entries
on the right side of the unit. Connections are made at the internal
terminal strip labeled J29, positions 1, 2 and 3 (located on the right side
of the circuit board - FIGURE 2-5). The terminal portion of the connector
can be unplugged from the circuit board for easier wire connections.
The maximum wire size that these connectors can accept is #12 AWG.
Remote Reset
The audible alarm and latched refrigerant level alarms can be remotely
2-15
Page 44

reset through a switch that has a momentary contact opening (normally
closed set of contacts). Connections are made to terminal strip J16,
terminals 1 and 2 with the wiring entering the enclosure through the
hole on the left side of the instrument. The switch must have signallevel contacts, typically gold plated. The maximum distance from the
reset switch to the monitor, using 18 AWG wire, is 250 feet (76 m). The
maximum wire size that these connectors can accept is #12 AWG.
Audible Alarm Output
An output is provided to drive the piezo-electric horn on the bottom of
the unit (FIGURE 1-5). This output is available for customer use,
provided that the beacon is not installed.
Auxiliary Input - Use UL Listed Devices
A 4-20 mA analog input can be made to the monitor from another
device such as another refrigerant monitor or an oxygen monitor. The
input wiring should be brought into the enclosure through the hole on
the left side of the instrument and connected to terminals 3 (AUX) and 4
AWG,
(GND) on terminal strip J16. It is recommended that Listed #18
twisted pair wire be used; maximum wire length is 250 feet (76 m). The
maximum wire size that these connectors can accept is Listed #12
AWG. Shielded wire is necessary. Ground the shields of all cables at the
transmitting end of the signal. Do not ground or connect the shield at
the Chillgard RT Refrigerant Monitor.
All field wiring must be done in accordance with national and
local electrical codes.
CAUTION
Initial Calibration
Calibrate after installation; otherwise, false or erroneous
readings can result.
The initial calibration is the same as the routine calibration. Refer to
Section 4 for this procedure.
2-16
WARNING
Page 45

Multipoint Sequencer Operation
In the sequencer setup screens, unneeded points can be de-activated
by using the RIGHT ARROW key and selecting the point to be deactivated.
• When the change key is pressed, the number in the display
goes blank.
• After pressing OK, the display shows a dark diamond to indicate
which points are de-activated (see FIGURE 3-11).
In the sequencer setup screens, the monitor can be locked on a single
point by pressing CHANGE before the RIGHT ARROW key.
• After pressing the RIGHT ARROW key and OK, only the selected
point is indicated.
• After an hour (if no buttons are pushed), the monitor returns to
normal sequencer operation (see FIGURE 3-12).
When calibrating:
• the gas inlet point can be selected.
• an inactive point can be selected.
After leaving calibration:
• the monitor returns to the previous sequencer setup (FIGURE 3-4).
Chillgard RT operation with a sequencer has a normal dwell time of 30
seconds per sample line, or four measurement cycles.
To improve monitor performance in noisy environments and eliminate
false alarms
was established.
• The factory value for this threshold is 30%.
• The threshold value is used with the Caution Alarm setpoint to
due to high noise, a user-selectable parameter "threshold"
determine when additional readings must be made on the
current sample line to confirm actual concentration at the
sample point.
• The allowable adjustment range for the threshold value is
30% to 70%.
• If this value is greater or equal to the product of the threshold and
the Caution Alarm value, the monitor dwells for an additional 60
seconds or eight more measurement cycles.
• Raising the threshold above 30% prevents false alarms but also
requires greater gas concentrations to cause the Caution Alarm to
trip (see FIGURE 2-7).
2-17
Page 46

Chapter 3
Start-up and Initial Adjustments
Before applying power to the Chillgard RT Refrigerant Monitor, follow
the Appendix A check list. This will help ensure that the instrument is
properly configured for operation.
nstrument operation is performed via the front panel which consists
All i
of four keys and a two-line by 20-character vacuum fluorescent display.
There is no reason to open the unit for set-up, calibration or diagnostic
testing of the instrument. The most commonly used, self-explanatory
screens appear on the following pages. Simply follow the on-screen
menus. The step-by step approach guides you through each operation.
• Th
e Display Screen Flow Overview (FIGURE 3-1a and 3-1b)
shows a general system function flow. See the following FIGURES
ecific Display Screen details:
for sp
• Star
• Calibration Screens (FIGURES 3-4 through 3-6)
• I
• Set-up Screens (FIGURES 3-3 and 3-11 through 3-22).
t-up and Normal Operation Screens
(FIGURE 3-2a and 3-2b)
nformation Screens (FIGURES 3-7 through 3-10 and
IGURES 3-23 and 3-24)
F
3-1
Page 47

Figure 3-1a. Display Screen Overview
3-2
Page 48

Figure 3-1b. Display Screen Overview Continued
3-3
Page 49

Figure 3-2a. Start-up and
Normal Operation Screens
3-4
Page 50

3-5
Figure 3-2
b. Start-up and
Normal Operation Screens Continued
Page 51

Figure 3-3a. Setup Screens
3-6
Page 52

3-7
Fi
gure 3-3b. Setup Screens Continued
Page 53

Figure 3-4. Span Calibration
3-8
Page 54

3-9
Fi
gure 3-5. Zero Calibration
Page 55

Figure 3-6. Check Calibration
3-10
Page 56

3-11
Figure 3-7
. Diagnostic Screens
Page 57

Figure 3-8. Diagnostic Screens
3-12
Page 58

3-13
Figure 3-9
. Diagnostic Screens
Page 59

Figure 3-10. Data Screens
3-14
Page 60

Figure 3-11. S
3-15
equencer Set-up Screen
Page 61

Figure 3-12. Sequencer Set-up Screen
3-16
Page 62

3-17
Figure 3-13. A
larm Level Screen
Page 63

Figure 3-14. Alarm Latching Screen
3-18
Page 64

3-19
Figure 3-15. A
larm Latching Screen
Page 65

Figure 3-16. Audio Alarm Screen
3-20
Page 66

3-21
Figure 3-17. A
nalog Output Screen
Page 67

Figure 3-18. Aux Alarm Screen
3-22
Page 68

3-23
Figure 3-19. A
uxiliary Alarm Screen
Page 69

gure 3-20. Setup Time
Fi
3-24
Page 70

3-25
Figure 3-2
1. Setup Log
Page 71

Figure 3-22. Setup Password
3-26
Page 72

3-27
Fi
gure 3-23. Review Log
Page 73

Figure 3-24. Review Data
3-28
Page 74

Chapter 4
Calibration
Introduction
As with any type of gas monitor, the only true check of its performance
is to apply gas directly to the sensor. The frequency of the calibration
gas test depends on the operating time and exposures of the sensors.
New monitors should be calibrated more often until the calibration
records prove stability. The calibration frequency can then be reduced to
the schedule set by the safety officer or plant manager.
Perform t
calibration adjustments. Calibration frequency may increase for a variety
of reasons. If calibration cannot be performed at any step, STOP;
consult MSA at 1-800-MSA-INST.
he calibration procedure regularly and maintain a log of
4-1
Page 75

Calibration Equipment
Equipment needed:
• Calibration Kit (MSA ATO #50; FIGURE 4-1)
• A SPAN gas cylinder
• Optional ZERO gas cylinder.
• A ZERO gas cylinder may not be needed.
• For ammonia units, zero gas cylinder must be used.
Item 1 - Tube and Tee Assembly
(P/Ns 603806 and 636866)
- Connector Assembly
Item 3
(P/N 711533)
NOTE: When used with older models
of Chillgard Monitors, the nut
end of the connector must be
cut off to fit into the Chillgard
sample inlet.
- Zero Gas Scrubber (P/N 803873)
Item 5
NOTE: Replace protective caps after use.
Item 2 - 1.5 LPM Flow Controller
(P/N 478358)
Item 4 - Span Gas Scrubber
(P/N 803874)
NOTE: Replace protective caps
after use.
Figure 4-1. Kit Components
4-2
Page 76

alibration Kit contains a ZERO gas scrubber which can be used in
The C
place of a ZERO gas cylinder if the ambient air around the Chillgard RT
contains little or no refrigerant.
CAUTION
The zero gas scrubber must be replaced periodically. The
frequency of replacement depends on the concentration of
the ambient refrigerant vapors.
The SPAN or ZERO cylinders (if needed) may be included with the
Calibration Kit; cylinders shown in TABLE 4-1 are available from MSA:
Table 4-1. RP C
DESCRIPTION CONCENTRATION PART NO.
R-11 in Nitrogen 100 PPM 803499
R-12 in Nitrogen 100 PPM 804866
R-123 in Nitrogen 100 PPM 803498
R-134A in Nitrogen 100 PPM 803500
R-22 in Nitrogen 100 PPM 804868
R-113 in Nitrogen 100 PPM 804870
Pentane in Nitrogen 0.75% 804532
substitute for Ammonia
Zero Air for CHILLGARD RT only 100% 10028042
R-11 in Nitrogen 30 PPM 812785
R-12 in Nitrogen 30 PPM 812823
R-113 in Nitrogen 30 PPM 813368
R-114 in Nitrogen 30 PPM 813369
R-123 in Nitrogen 30 PPM 812784
R-134a in Nitrogen 30 PPM 812787
R-22 in Nitrogen 30 PPM 812786
R-500 in Nitrogen 30 PPM 813370
R-502 in Nitrogen 30 PPM 813371
Nitrogen as substitute)
alibration Gases
100 PPM 803500 R-404a (use R-134a in
Become familiar with the Calibration Kit components (FIGURE 4-1).
Chillgard RT identification
You must identify your unit as a single-point monitor or a multi-point
monitor for proper calibration gas connection. Refer to FIGURE 4-2 to
help identify your unit.
4-3
Page 77

Figure 4-2. Chillgard RT Models
4-4
Page 78

Calibration Procedures
Table 4-2. Calibration Sequence Screens
#
PRESS
RESULT
1
ANY KEY
BRINGS UP MENU
2
CAL
BRINGS UP CAL MENU
3
USER
ALLOWS ADJUSTMENTS
4
ZERO
ALLOWS ZERO CALIBRATION
5
NEXT
PROMPT: ALARMS ARE NOW OFF
6
NEXT
PROMPT: SAMPLE POINT 1 TO BE USED
7
NEXT
PROMPT: APPLY ZERO GAS
8
NEXT
PROMPT: ADJUST OR OK READING
9
OK
PROMPT: REMOVE ZERO GAS
10
SPAN
PROMPT: GO INTO SPAN CALIBRATION
11
NEXT
PROMPT: ALARMS ARE OFF NOW
12
NEXT
PROMPT: SAMPLE POINT 1 TO BE USED
13
NEXT
PROMPT: APPLY SPAN GAS
14
NEXT
PROMPT: ADJUST OR OK READING
15
OK
PROMPT: REMOVE SPAN GAS
16
NEXT
PROMPT: ALARMS ARE NOW ACTIVE
Before calibrating the Chillgard Monitor, leak-check the sample line(s)
connected to the monitor:
1.
Temporarily block the sample inlet at the end-of-line filter(s) and
rify that the monitor gives a trouble alarm.
ve
• If the monitor is a Multipoint Sequencer, the trouble alarm
will not activate until the blocked sampling point is selected by
the Sequencer.
2.
After checking for leaks, remove the sampling line for the
hillgard inlet.
C
• On Multipoint Monitors, use sample inlet Point 1.
3.
Attach the Calibration Kit connector assembly to the inlet.
4.
Before applying gases, familiarize yourself with the calibration
screens by stepping the monitor through the whole sequence.
Press the keys in the following order:
17 NEXT RETURNS TO NORMAL OPERATION
• When this sequence is done with zero and span gases, adjust
the zero and span readings (if necessary) in TABLE 4-2 steps
#9 and #15, respectively.
4-5
Page 79

• I
f adjustments are needed, press ADJ to access the UP, DOWN
and ENTER keys; enter the zeroing and spanning adjustments.
4.
Zeroing the Monitor:
When zero gas is required, attach a zero gas scrubber or zero gas
cylinder to the connector as shown in FIGURE 4-3.
NOTE: U
5.
Spanning the Monitor:
se only the zero gas cylinder on monitors calibrated
f
or ammonia.
When span gas is required, a span gas cylinder must be attached
to the connector as shown in FIGURE 4-4.
Figure 4-3a
. Zero Calibration
4-6
Page 80

N
OTE: The span gas must be appropriate for monitor calibration.
For many applications, a span gas cylinder of the
refrigerant of interest is available from MSA. If a span gas
cylinder of the specific refrigerant is not available, MSA has
determined an appropriate synthetic span gas. See
TABLE 4-1 for calibration cylinders available from MSA. If
a synthetic span gas is used (such as pentane for
ammonia monitors or use R134a for 404a calibration),
refer to the calibration label on the inside of the monitor
door (FIGURE 4-5).
he unit to the value given on the "synthetic span" label shown
Set t
in FIGURE 4-5.
4-7
Figure 4-3b. Zero Calibration Continued
4-7
Page 81

Figure 4-4. SPAN Calibration
Figure 4-5. Ammonia or R-404a Unit Calibration
4-8
Page 82

6.
Perform the TABLE 4-2 sequence.
a.
Apply zero gas when requested.
• Allow enough time for a stable reading.
b.
Accept (OK) or adjust ("ADJ") and enter a zero reading.
c.
Apply span gas when requested.
• Allow enough time for a stable reading.
d.
Accept (OK) or adjust ("ADJ") and enter the correct span
reading.
7.
Remove the connector assembly and re-attach the sampling line to
onitor inlet.
the m
WARNING
If the sampling line is not re-attached, the monitor cannot
sample from the remote location. During calibration, the
alarm relays do not activate; ensure that a hazardous
condition does not exist when calibrating the CHILLGARD
RT system.
4-9
Page 83

Chapter 5
Maintenance
General Maintenance
Under normal operation conditions the Chillgard RT Monitor requires
minimal maintenance. The end-of-sample-line filter(s) should be
examined regularly for dirt/dust build-up and replaced when necessary.
If the filter(s) become severely clogged with dust, the flow rate will
eventually fail and a flow alarm will occur. If the end-of-sample-line
filters are used and serviced correctly, the filters installed inside the
monitor should rarely require replacement; however, these internal
filters must be inspected periodically.
Obtaining Replacement Parts
To obtain replacement parts, address the order or inquiry to:
MSA Corporate Center
1000 Cranberry Woods Drive
Cranberry Township, PA 16066
or call, toll-free, 1-800-MSA-INST.
WARNING
Use only genuine MSA replacement parts when performing
any maintenance procedures. Failure to do so may seriously
impair unit performance. Repair or alteration of the Chillgard
RT Monitor, beyond the scope of these instructions or by
anyone other than authorized MSA service personnel, could
cause the product to fail to perform as designed and
persons who rely on this product for their safety could
sustain serious personal injury or death.
5-1
Page 84

Ta
ble 5-1. Replacement Parts
PART PART
NO.
Internal Filter, Single Point 711561
Internal Filters, all Multipoint and single-point Ammonia 655533
Filter, End-of-Line 711561
Ammonia Unit, Filter, End-of-Line 655652
2.0 amp, 250 volt Fuse 638091
Display 655786
Front Panel Printed Circuit Board Assembly (grey ribbon cable) 10014705
Power Supply 637394
Pump Assembly 711479
Low Flow Switch 637824
Polyurethane Tubing, 1/4" (6.4 mm) OD, 1/8" (3.2 mm) ID 603806
Polyethylene Tubing, 1/4" (6.4 mm) OD, 0.17" (4.3 mm) ID 29264
Nylon Tubing, 1/4" (6.4 mm) OD, 0.180" (4.6 mm) ID 29207
*Teflon®-Lined Tubing 603876
Equalization Valve 711371
Strobe, Beacon Assembly 634674
Gasket, Beacon Assembly 711168
Connector, Beacon Assembly 637523
Sonalert 629693
Zero Gas Scrubber 803873
Span Gas Scrubber 803874
Front Panel Printed Circuit Board Assembly (black/orange cable) 711386
Printed Circuit Board, Membrane Switch, Keypad 711340
Label, Keypad 711374
*Trademark of E. I. DuPont Co.
5-2
Page 85

Troubleshooting Guidelines (see TABLE 5-2)
Unit will not turn ON
No power
1.
Check AC power to unit.
on power supply if necessary.
Table
5-2. Troubleshooting Guidelines
TROUBLE DESCRIPTION SOLUTION
2. Verify AC power to unit is wired properly.
3. Replace L1 and/or L2 fuse.
4.
Check for loose wi
5.
6.
7.
8. Move the DVM positive lead to TPSPD3.
wiring to the unit power supply.
Check
Remove pow
replace if
Check
power supply.
Check for 12 VD
Connect the DVM negative lead to TP5
and the positive lead to TPSPD1. Adjust Volt 2
pot on the power supply if necessary.
Th
necessary.
input cable to main board on left side of
e voltage should be 5 VDC. Adjust Volt 1 pot
res on terminal barrier input.
er supply cover and check fuse;
C power supply output.
Beacon will not light
Under-range failed Zero limit is 1. Adjust display zero to 0.0 via the keypad
Calibration failed Coefficients 1. Replace zero scrubber or change zero air supply.
Beacon
alar
m
minus 10 ppm with zero air or zero scrubber applied.
out of range
1.
Check that plug is connected
to circuit board J10.
2. Verify audio option is used in the setup screens.
3. Replac
2. Check z
3. Check
2.
3.
4.
5.
6. Return
e beacon assembly.
ero air cylinder; replace if necessary.
the zero scrubber; replace if necessary.
Check span gas supply.
Check all tubing, filters and fittings for leaks.
For sequencer units, make sure unit is locked
on the selected sample port used for calibration.
Leak test the flow system.
to MSA for service.
5-3
Page 86

TROUBLE DESCRIPTION SOLUTION
Bypass flow failed
Leaky or
1.
Remove all input lines to unit.
4.
Check operation of all bypass valves
in manifold.
blocked
bypass line
Start bypass flow Leaky or 1. Same as bypass flow failure.
failed blocked Check as above, turn unit OFF and restart uni
Sensor flow failed Leaky or 1. Remove all input lines to the unit.
Start sensor flow Leaky or 1. Same as sensor flow failure. Check as above;
failed blocked turn unit OFF and re-start unit.
Case temperature Main board 1. Return to MSA for service.
failed component
Case temperature Case 1. Return to MSA for service.
range failed temperature
bypas
s line at
t startup 2. Leak test the flow system and restart unit.
uni
blocked Attach one line at a time to check for sample
s
ample line input. Check all end-of-line sample filters.
sample flow
line at
t startup
uni
s 0 to 90 °C
i
Attach one line at a time to check for bypass
input. The line that causes flow failure is the
problem; check the line’s end-of-line filter.
Check inlet fitting, tubing, orifices, bypa
2.
pr
essure switch, and bypass manifold tubing.
k pressure switch for 4 VDC ON and OFF
Chec
3.
switching (i
be ON constantly. Check cable terminals and
plug end at BP/SCN. Replace the bypass
pressure switch if necessary.
5. Leak test the flow system.
Sample flow failure is always the pres
poi
2.
Remove the optical bench cover. Check the
inlet fitting, tubing, sample filter, tubing to the
opti
opti
ample manifold tubing.
s
3.
Check the sample pressure switch for 4 VDC
ON and OFF switching. Check the cable
ter
minals and plug end at press/sample con-
nector. Replace pressure switch if necessary.
4.
Check operation of all manifold sample valves.
Check the optical bench inlet and outlet valves.
5.
Check the optical bench inlet and outlet valve
c
onnectors on J22 and J21.
6. Leak tes
2. Leak tes
f sequencing); if single-point, it will
nt being sampled.
cal bench inlet fitting, outlet fitting from
cal bench, sample pressure switch, an
t the flow system.
t the flow system.
ss
ent
the
d
t.
5-4
Page 87

TROUBLE DESCRIPTION SOLUTION
Thermostat
failed optical bench requires MSA service
Sensor temperature Checks for 1. Replacement requires MSA service.
range failed temperature
Humidity sensor failed Checks H2O 1. Return to MSA for service.
Infrared source failed Checks the I 1. Return to MSA for service
Photo synchro failed Checks the 1. Return to MSA for service.
PA IR sensor failed Checks the 1. Return to MSA for service.
Memory protect Checks 1. Return to MSA for service.
External reset failed Checks the 1. If not used, check for jumper between RST
Display failure Display 1. Check RS485 connector on J15,
Audio alarm failure Audio alarm 1. Check output terminals 6 and 7 on J17.
sensor Controls 1. Replacement of optical bench
inside
tem
perature
range of 45
to
90 °C
s
ensor output
of source
sembly
as
chopper for
oper
sensor
microphone
for output
ecksum
ch
external minus and RST plus on J16.
reset button
commu- terminals 1 and 2.
nications
ation
2. If used, verify switch is wired normally closed.
2.
Check for broken or cracked display.
3.
Remove rear panel cover and check cables
bet
ween the display and the display board.
2. Chec
k for faulty horn buzzer.
5-5
Page 88

Chapter 6
Data Logging
Log Size
The Chillgard RT unit allows 1,078 sets of data and events to be
logged. This data is either the maximum or average of the "last" data
calculated.
Last Values
The maximum value is taken from the ’last’ data; this is not always the
highest value displayed, but the last valid data taken from a point. The
average is an average of ’last’ data values. Usually, the last data is the
fourth reading during normal operation (or the twelfth reading if the
monitor is in an extended dwell). Invalid (blank) and under-range data
are not recorded. Over-range is recorded as 1000 ppm.
Number of Data Points Used
If the unit is only a single point monitor or all but one point is inactive,
the value is recorded every sixteenth reading; this is 30 values per hour.
With four points active, 15 values per point are recorded every hour.
The number of values can be considerably lower if the monitor enters
extended dwell because of high gas concentrations.
User Setup Options
When the monitor enters the Ready State, the data array is cleared.
Then, four valid concentration values are needed before any data is
recorded. Concentrations are recorded either every 15 minutes or
hourly. If the logging function is turned OFF, the clock/calendar chip is
stopped to save battery energy.
• Before the logging is turned ON, the clock/calendar must be set.
Setting any v
skipped or repeated. The log can be cleared in the Setup Menu.
alue starts the clock/calendar. Hours or days may be
Viewing Alarms/Events and Data
From the Review Events Screen, the user can view just alarms, just
events, or both. The latest event is presented first. When the memory is
filled, the entries wrap around.
he Review Data Screen, the user can view the recorded
From t
concentrations. The particular point must be selected. Again, the latest
data is presented first; when the memory is filled, the entries
wrap around.
6-1
Page 89

Appendix A
Check List
Before applying power to the Chillgard RT Refrigerant Monitor, check
for all items in the following table:
ITEM CHECK FOR: CHECKED OR
1 Proper mounting of Chillgard RT Refrigerant Monitor on
2 Correct electrical connections and wiring to Chillgard RT
3
4 Removal of all caps and plugs at sample line inlets
5
6
7 Possession of proper calibration kit and check gases
8 An established routine calibration schedule.
a non-vibrating surface which does not block the front
panel.
Mounting must be away from direct solar heating.
Refrigerant Monitor. Wiring must be done for proper
voltage.
Proper tubing for sample line.
exhaust.
and
Proper end-of-line filters installed.
Disabling of unused sampling points.
for cal
ibration.
INITI
ALED
A-1
Page 90

A-2
Page 91

A-3
Page 92

Appendix B
Relay Module
This accessory module has not be evaluated by Underwriters
Laboratory, Inc.
General Description
The Chillgard RT Relay Module is intended to provide discrete relay
outputs for the Chillgard RT Refrigerant Monitor equipped with a multipoint sequencer.
hillgard RT Refrigerant Monitor has three alarm threshold levels
The C
(CAUTION, WARNING, and ALARM), each with a corresponding form C
relay output. The user can obtain alarm level information via the set of
three relay contacts.
B-1
gure B-1. Relay Module
Fi
Page 93

The Chillgard RT Refrigerant Monitor relays do not convey point-wise
alarm level information. These relays provide information at the monitor
level only, one set of relay contacts (CAUTION, WARNING and ALARM)
per sequencer point. Used as intended, the Chillgard RT Relay Module
enables the user to obtain point-wise alarm level information.
hillgard RT Relay Module monitors the current state of the
The C
Monitor and sets its installed relays according to information received.
While the Chillgard RT Relay Module receives its information from the
Chillgard RT Refrigerant Monitor, it is important to note that the Relay
Module operates independently with respect to the Reset Switch and
Audio operation. Refer to "Operation" later in this appendix for details.
NOTE: Th
Chillgard RT Refrigerant Monitor third alarm threshold level.
e use of ALARM in capital letters refers to the specific
Figure B-2. M
ounting the Relay Module
B-2
Page 94

Specifications
Table B-1. Specifications
TEMPERATURE OPERATING 0 to 50°C
RANGE
POWER 85 - 264 Volts @ 40 Watts max.
MAXIMUM 30 seconds
WARM-UP TIME
HUMIDITY 0 to 99% RH non-condensing
SYSTEM
COMMUNICATION RS-485
RELAYS
HORN 80 db (2 feet [61 cm] at ambient
DIMENSIONS 12.5" wide x 6.5" deep x 15" high
WEIGHT
STO
COMMON TROUBLE
AND HORN RELAY
CAUTION, WA
AND ALARM RELAYS
T
ERMINAL BLOCK can accept up to 12 AWG wire
RAGE -20 to 60°C
10 Amps @ 125, 250 VAC
10 Amps @ 30 VDC
RNING
4 Amps, 1/20 H.P. @ 125, 250 VAC
3 Amps @ 30 VDC
temperature and pressures)
(31.8 cm wide x 16.5 cm deep
x 38.1 cm high)
Approximately 25 lbs. (12 kg)
Figure B-3. Relay Module Main Power Connector and
Communication Cable Connector Locations
B-3
Page 95

Figure B-4. Chillgard RT Relay Module Power Wiring
Diagrams for 120 Volts and 240 Volts AC
Figure B-5. Chillgard RT Refrigerant Monitor
Communication Cable Connections
B-4
Page 96

B-5
gure B-6. Typical Interface Modules
Fi
Page 97

UNIT P/N RELAY P/N
QUANTITY DESCRIPTION
DEFAULT
OF RELAYS
RELAY
ASSIGN-
Unpacking the Shipping Carton
The shipping carton should contain the Chillgard RT Relay Module.
Identifying the Unit
Each bank of relays (see FIGURE B-3) is assigned to a particular alarm
level. Chillgard RT Relay Modules can be purchased with one, two, or
three internal relay banks (TABLE B-2).
Table B-2. Part Numbers and Supplied Relays
MENT
710847 COMPLETE UNIT N/A 1 BANK OF RELAYS ALARM
710847 490558 1 2 BANKS OF RELAYS WARNING
ALARM
710847 490558 2 3 BANKS OF RELAYS CAUTION
WARNING
ALARM
The default relay assignment may be changed. Consult the factory for
more information.
Mounting Your Unit
Mount the Chillgard RT Relay Module adjacent to the controlling
Chillgard RT Refrigerant Monitor using the four mounting holes as
shown in FIGURE B-2 (hardware not supplied).
Electrical Connections
for the Chillgard RT Relay Module
Follow all applicable practices and local codes. Use appropriate conduit
and cable glands when installing the Chillgard RT Relay Module and
Chillgard RT Refrigerant Monitor.
Main Power Connections
Ensure that all primary power is turned OFF at the circuit breaker or
fuse. Do not wire the Chillgard RT Relay Module with power ON.
Wiring the Chillgard RT Relay Module with the power ON
may result in electrocution which may cause injury or death.
CAUTION
B-6
Page 98

I
dentify the main power voltage that will power the Chillgard RT Relay
Module; if unsure of your primary power, consult an electrician or local
power utility.
WARNING
Application of improper power to the Chillgard RT Relay
Module will result in damage to the unit.
Refer to FIGURES B-3, B-4 and B-5 to identify the location of the main
power connections within the Chillgard RT Relay Module.
1.
Locate the power wiring entry on the lower left hand side of the unit
and remove the hole plug.
2.
Route the power wiring through the hole using proper
hardware/conduit (not supplied).
3.
Strip the power wiring conductors.
4.
Insert each stripped conductor into its proper location in the power
cable connector (FIGURE B-4).
5.
Tighten each screw within the connector to secure each wire.
6.
Pull on each wire to ensure that it will remain in place. If a wire
comes out of the connector, loosen the screw, reinsert the wire,
and re-tighten the screw.
7.
The Relay Module must have the same electrical ground as the
onitor unit.
M
Communication Cable Connections
Use the factory-recommended RS485 communication cable. Low
capacitance wire for RS485 communications, such as Beldon #9841, is
recommended.
Maximum length of the communication cable is 1000 feet
(305 m); otherwise, the Chillgard RT Relay Module will not
operate properly.
Use only the recommended cable. Using inferior or wrong
communication cable causes improper operation of the
Chillgard RT Relay Module.
Do not exceed the maximum length of communication cable
listed; otherwise, the Chillgard RT Relay Module may not
operate properly and may not indicate a trouble condition.
B-7
CAUTION
WARNING
Page 99

Communication Cable Connections
to the Chillgard RT Relay Module
1.
Locate the RS-485 communication cable inside the Chillgard RT
Relay Module enclosure.
2.
Locate the eight cable entries on the right side of the relay module
(FIGURE B-2). From these eight cable entries, choose one of the
three bottom entries and remove the hole plug.
3.
Route the communication cable through the hole using proper
hardware (not supplied) to secure the cable. A 30 mm distance
must be maintained between this communication cable and the
electronic assembly or power line feeds.
Communication Cable Connections
to the Chillgard RT Refrigerant Monitor
1.
Route the communication cable to the Chillgard RT Refrigerant
Monitor.
2.
Find an unused entry in the Chillgard RT Refrigerant Monitor
enclosure and remove the hole plug.
3.
Route the communication cable through the hole using proper
hardware (not supplied) to secure the cable.
4.
Strip each communication cable conductor.
5.
Insert each stripped conductor into its proper location on the
communication cable connector (Refer to FIGURE B-5 for
connector location and function designation). The connector
labeled "+" on the Relay Module must be connected to the RS485
connector labeled
"+" on the Refrigerant Monitor. Likewise, the
connector labeled "-" on the Relay Module must be connected to
the RS485 connector labeled "-" on the Refrigerant Monitor.
6.
Tighten each screw within connector to secure each wire.
7.
Pull on each wire to ensure that it will remain in place. If a wire
comes out of the connector, loosen the screw, reinsert the wire,
and re-tighten the screw.
Relay Wiring
Before installing any wiring to the relays within the Chillgard RT Relay
Module, refer to the manual for the specific equipment being connected
to the relays for wiring procedures and requirements. If your unit is a
four-point Chillgard RT model, use the first four relays. The remaining
four relays within the bank are not used.
B-8
Page 100

WARNING
Use the proper size wire to any equipment connected to the
Chillgard RT Relay Module relay; otherwise, a fire or
electrical damage may result.
1.
Refer to FIGURE B-2 for the relay wiring entries into the Chillgard
Relay Module.
RT
2.
Remove the hole plug(s) required and route the relay wiring
through the hole(s) using proper hardware/conduit (not supplied).
3.
Strip each relay wiring conductor.
4.
Determine the relay functions necessary (see front door label for
ocations and contact information). Insert each stripped relay
relay l
wiring conductor into the connector for the desired function.
5.
Tighten each screw within the connector to secure each wire.
6.
Pull on each wire to ensure that it will remain in place. If a wire
comes out of the connector, loosen the screw, reinsert the wire
re-t
ighten the screw.
7.
Once wiring is complete, close and secure the front panel of the
hillgard RT Relay Module.
C
CAUTION
Do not allow the front panel of the Chillgard RT Relay
Module to remain open during use.
and
Operation
Front Panel Indicators
(see FIGURE B-1).
Power Indicator
The power indicator shows that power is properly applied to the unit.
f this indicator is not ON when power is applied, refer to the
• I
ction 4, Troubleshooting Guidelines.
Se
Troubl
The Trouble Indicator turns ON and remains ON when a trouble
condition is detected. The trouble condition may exist at the controlling
Chillgard RT Refrigerant Monitor or it may exist locally at the Chillgard
RT Relay Module.
e Indicator
B-9
 Loading...