

MRSTEAM STEAMLINX A, STEAMLINX B Installation Instructions Manual
1 1.1
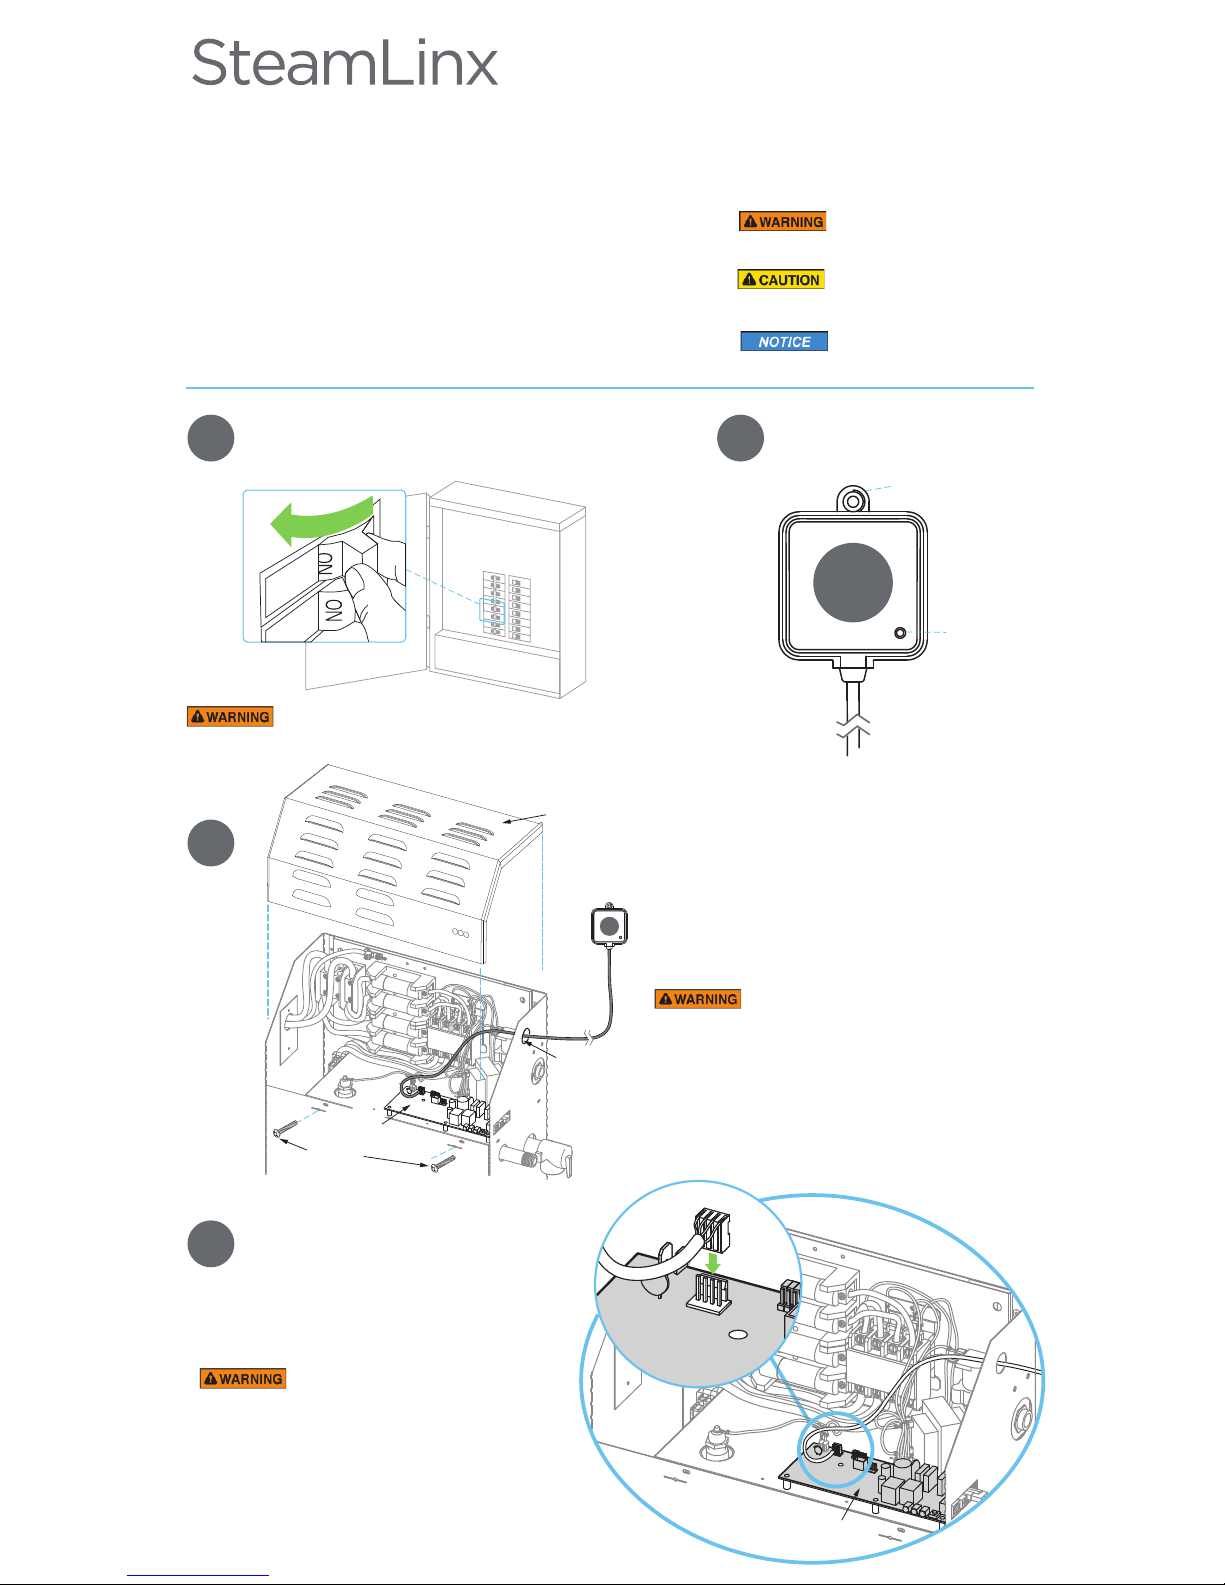
Locate the SteamLinx A
(with the integral cable).
1.2
Mounting Tab
Indicator Light
SteamLinx A
1.3
Circuit Board
ELECTRICAL SHOCK HAZARD.
MrSteam steam generators are connected to
240V line voltage and contain live electrical
components. All installation and service must be
performed by a licensed and qualified electrician.
A
––––––––––––
GENERATOR
Connecting SteamLinx A to the Steam Generator
• Disconnect power to the generator at the breaker box.
• Remove knock-out.
• Remove generator cover.
• Route the SteamLinx A cable through
the knockout.
Cover
Screws
Generator
Cover
Knock-out in
the Generator
Jacket
A
––––––––––––
GENERATOR
INSTALLATION INSTRUCTIONS
SteamLinx Module and Mobile App allows for seamless
control of time and temperature using your smart phone
or mobile device. SteamLinx works with all MrSteam
controls (for MS generators SN 1174000 and up).
Indicates a potentially hazardous
situation, which, if not avoided, may result in
death or serious injury.
Indicates a potentially hazardous
situation, which, if not avoided, may result in
minor or moderate injury or product damage.
is used to address practices not
related to physical injury.
These instructions contain safety alert symbols and panels. These alert symbols
and panels identify potential safety hazards and provide important information
for the installation and use of SteamLinx.
Read the Installation, Operation and Maintenance Manual for Steambath Generator
Systems (PUR100472) before installation of SteamLinx to insure safety and proper
installation of the steam Generator. A free replacement manual is available by
calling MrSteam Customer Service, or it can be downloaded from
mrsteam.com
All drawings for schematic purposes only.
Package Contents:
• SteamLinx A with Integral Cable
• SteamLinx B and Ethernet Cable
• Power Supply and Cable
• Instructions
To prevent shock hazard, disconnect power
at the breaker box before removing generator cover.
ELECTRICAL SHOCK HAZARD.
MrSteam steam generators are connected to
240V line voltage and contain live electrical
components. All installation and service must be
performed by a licensed and qualified electrician.
Circuit
Board
• Locate the circuit board.
• Plug the SteamLinx A into the white
connector located at the far left side
of the circuit board.
• Replace cover and screws.
• Restore power.
2
3
4
5 6
Troubleshooting: Blinking LED
Tech Service Contact Warranty
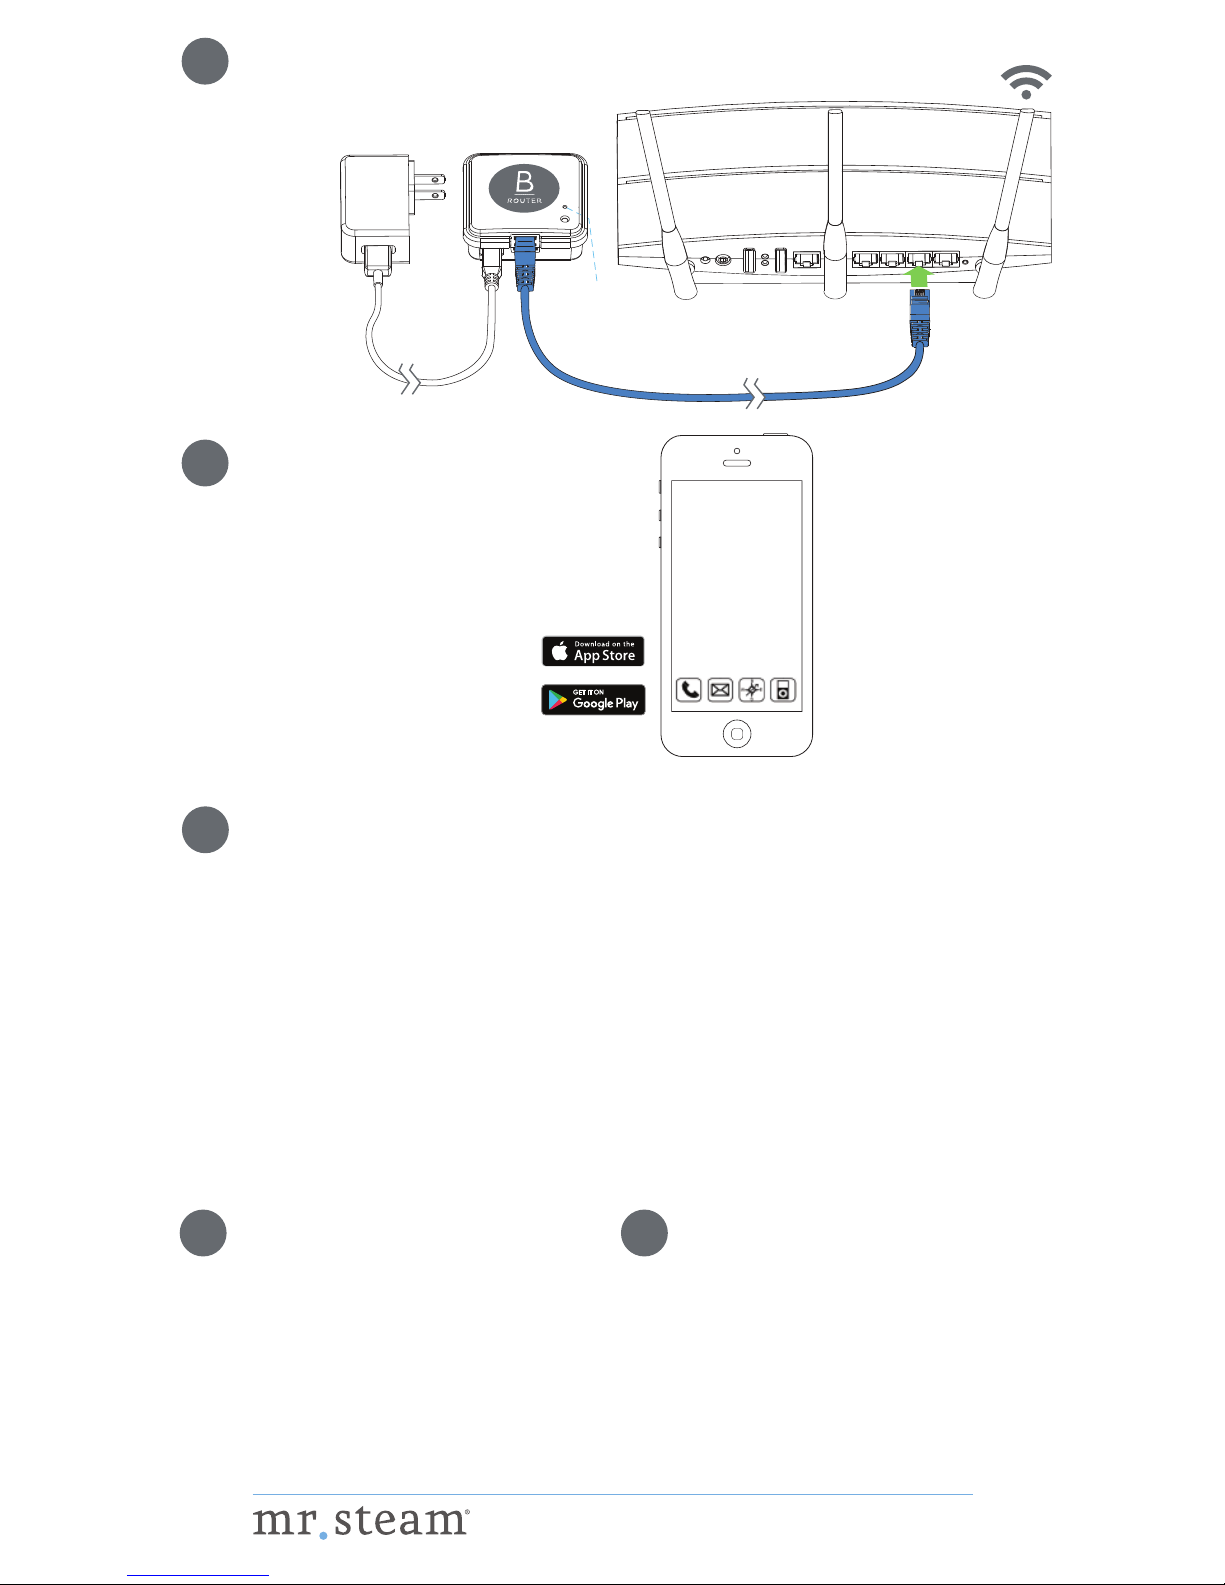
Home Router
Power
Supply
Ethernet
Cable (3’)
Reset
Button
(troubleshooting
only)
Connecting SteamLinx B to the Home Router
• Plug the blue ethernet cable provided, into an
ethernet slot on the back of the home router.
• Plug the power supply into a 120V outlet.
Connecting SteamLinx to the Internet
• Insure the mobile device is on the WiFi network.
• Download the SteamLinx App from the Apple
Store or Google Play by following prompts.
Sussman-Automatic Corporation® I hello@mrsteam.com I www.mrsteam.com
43-20 34th Street, Long Island City, NY 11101 800 76 STEAM
PUR 100518 10.17
CUSTOMER and TECH SUPPORT
Web:
Visit mrsteam.com for additional
informaton including product
specifications, locating a device,
sizing calculator, technical downloads
and other resources.
Call:
Mon.– Fri.: 8 am - 7 pm
East Coast: 1.800.767 STEAM (8326)
West Coast: 1.800.727 STEAM (8326)
Worldwide: 1.718.937.4500
To view or download the SteamLinx
warranty and register, go to
blog.mrsteam.com/wr
Troubleshooting: Indicator Lights
LEDs
Yellow Blinking units are in pairing mode.
Red Router not detected: problem with
connections, router configuration
or steam generator circuit board.
Green SteamLinx B: router is detected but
is not connecting to the internet.
The indicator light on SteamLinx A
will not be illuminated.
Blue Units are connected correctly.
Units are out of range or not paired
• Turn breaker off.
• Insure SteamLinx A is connected to the steam generator.
• Use a paperclip or similar blunt end object to press the
reset button (above the LED) on SteamLinx B.
• The LED will flash yellow (it stays in pairing mode until it
is paired or powered off).
• Turn the breaker to the steam generator ON, if the two
transmitters are functioning correctly and within range
the LEDs will turn blue.
• If the Blue, Green or Red LEDs are blinking the units are
not pairing because they are out of range. Using an extension cord for power, move the SteamLinx B closer to
SteamLinx A. Disconnect the ethernet cable (the router
connection is not required for this test). If the LEDs stop
blinking this confirms the units were out of range.
3’ Cable
SteamLinx B
 Loading...