

Page 1
®
mr.steam
______________________________________________________________________________________________________________________
Recessed LED Light Installation
Model LEDLITE
This fixture is suitable for use in damp locations. When using this fixture in a damp
location, it must be recess mounted in a ceiling where it is protected from moisture.
This fixture is IC rated for direct contact with insulation. This fixture is a Type IC fixture.
This fixture is rated and approved for direct contact with insulation.
Installation to be performed by a qualified and licensed electrician.
WARNING
!
Ratings:
120 VAC 230 mA
3000K color temperature
600 Lumens
1
Maximum ceiling thickness 1
/
4
”
Rough-In
We recommend using the Rough-In Bracket provided.Before installing the ceiling backer board, lay out your
light locations and securely fasten the rough-in plate to your joists at each light location. The rough-in brackets
have convenient slots in them allowing you to make minor adjustments to the bracket positioning after you’ve
mounted them.
• Run your Wire to the Light Location
Run your electrical wire from the switch/dimmer location to your light fixture. Be sure to check your local
code for which type of wire to run, most electrical codes require NM (also called Romex), BX, or MC wire.
Leave about 12-16” of wire sticking out of your hole, which will give you enough wire to connect to your
driver box.
Before installing the ceiling backer board, double check the location of each light. Once the ceiling is closed
you won’t be able to adjust the positioning.
Install finished ceiling, cut out the holes for each light using the rough-in bracket as a template. Once the ceiling
is finished, install your lights by following the remainder of the installation instructions below.
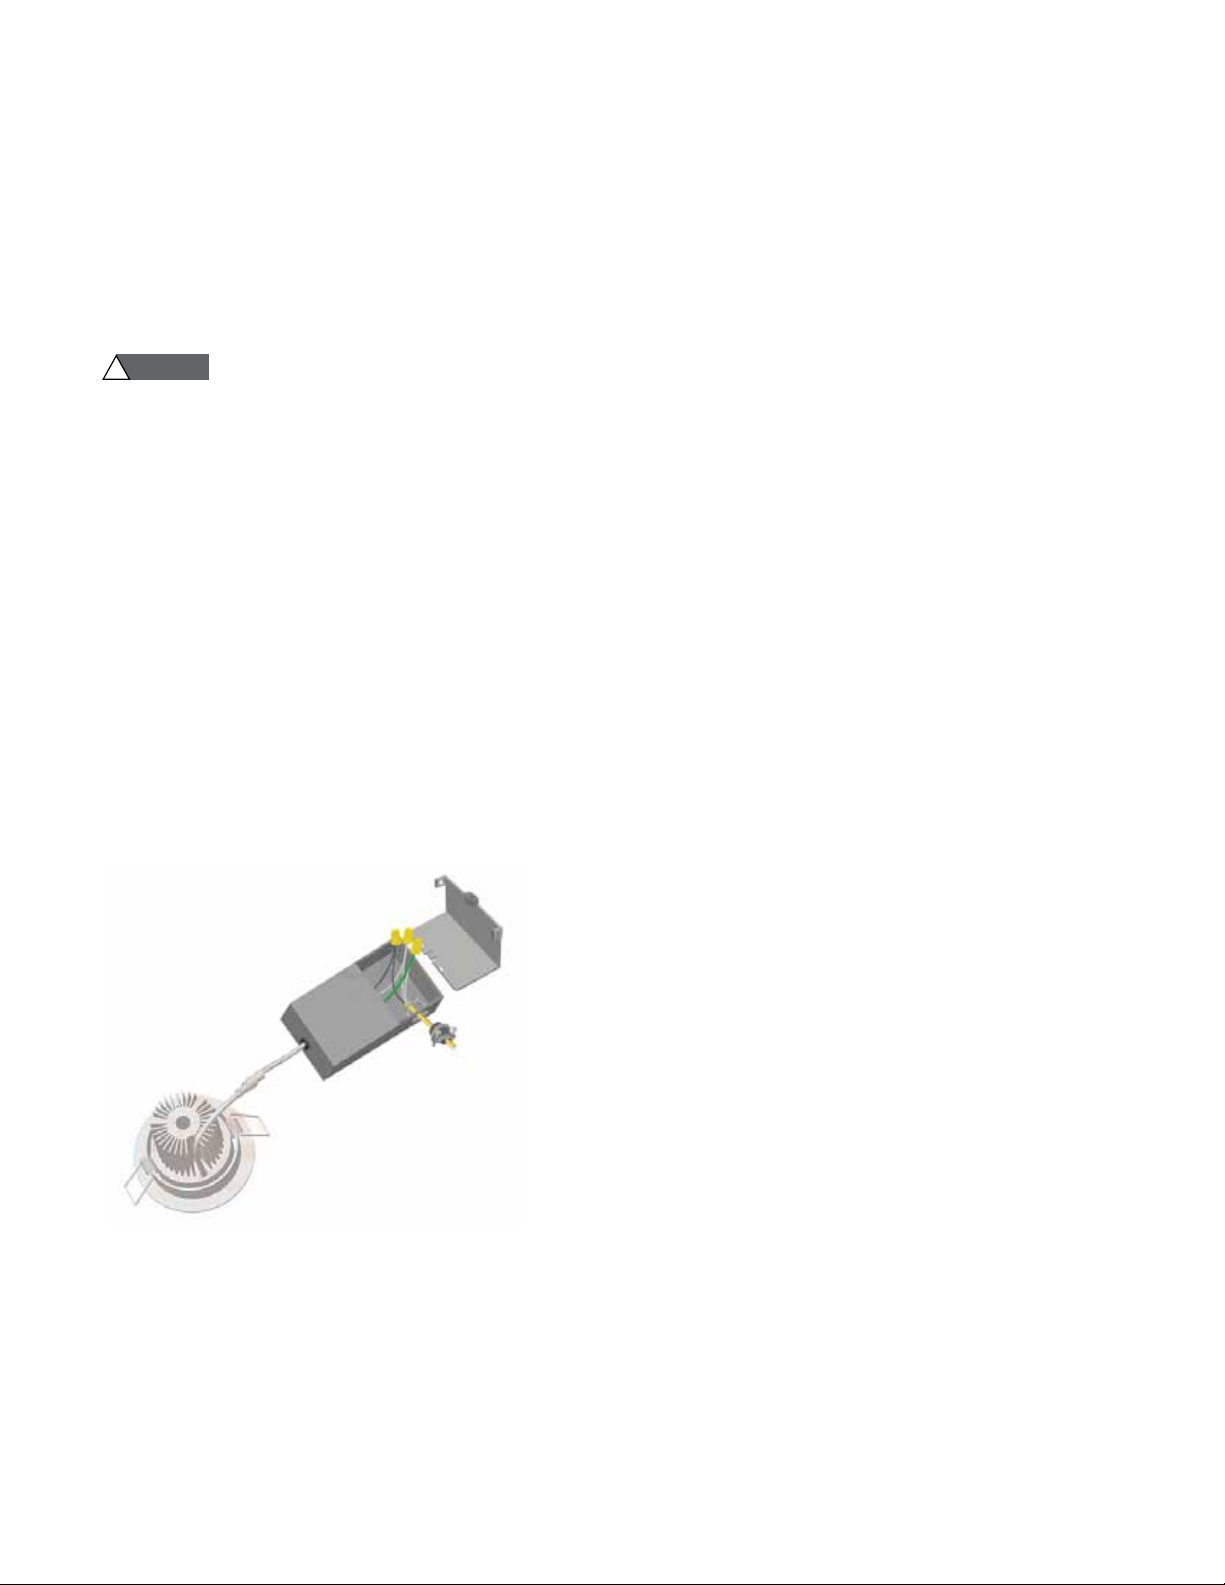
• Make your Electrical Connections
Remove the wiring compartment plate on your junction box.
Make a knockout on your junction box and install the appropri-
ate type of connector. For NM/Romex wire, you will typically
use a NM/clamp connector. For BX or MC, you’ll use a connector specific to the wire that you’ve used.
Bring your incoming wire into the junction box and strip the
black and white wires. Be sure to ground the driver box by
connecting the green ground wire on your driver box to your
incoming ground wire using UL listed wire nuts/connectors.
Connect the black wire in your driver box to the incoming hot/
line wire (usually black). Connect the white wire in your driver
box to the incoming neutral wire (usually white). Be sure to only make connections using UL Listed wire
nuts/connectors.
Once you’ve finished making your electrical connections, install your wiring compartment cover and snap it
shut.
• Connect the Driver to the Light
Connect the driver cable plug to the plug on your light. Be sure to pay close attention to the arrows located on plug (there is one small arrow molded into the plug on the light side of the cable and one small
arrow molded into the plug on the driver side of the cable). These arrows must point towards each other.
Page 2
mr.steam
®
__________________________________________________________________________________________________________________________________________
Also, if you look inside the plug, you’ll notice a groove on the light side and a bump/key on the driver side.
Be sure that the bump/key fits nicely into the slot. Screw the connectors together.
It is important to remember that each model light has its own specific driver and drivers are NOT interchangeable between different model lights.
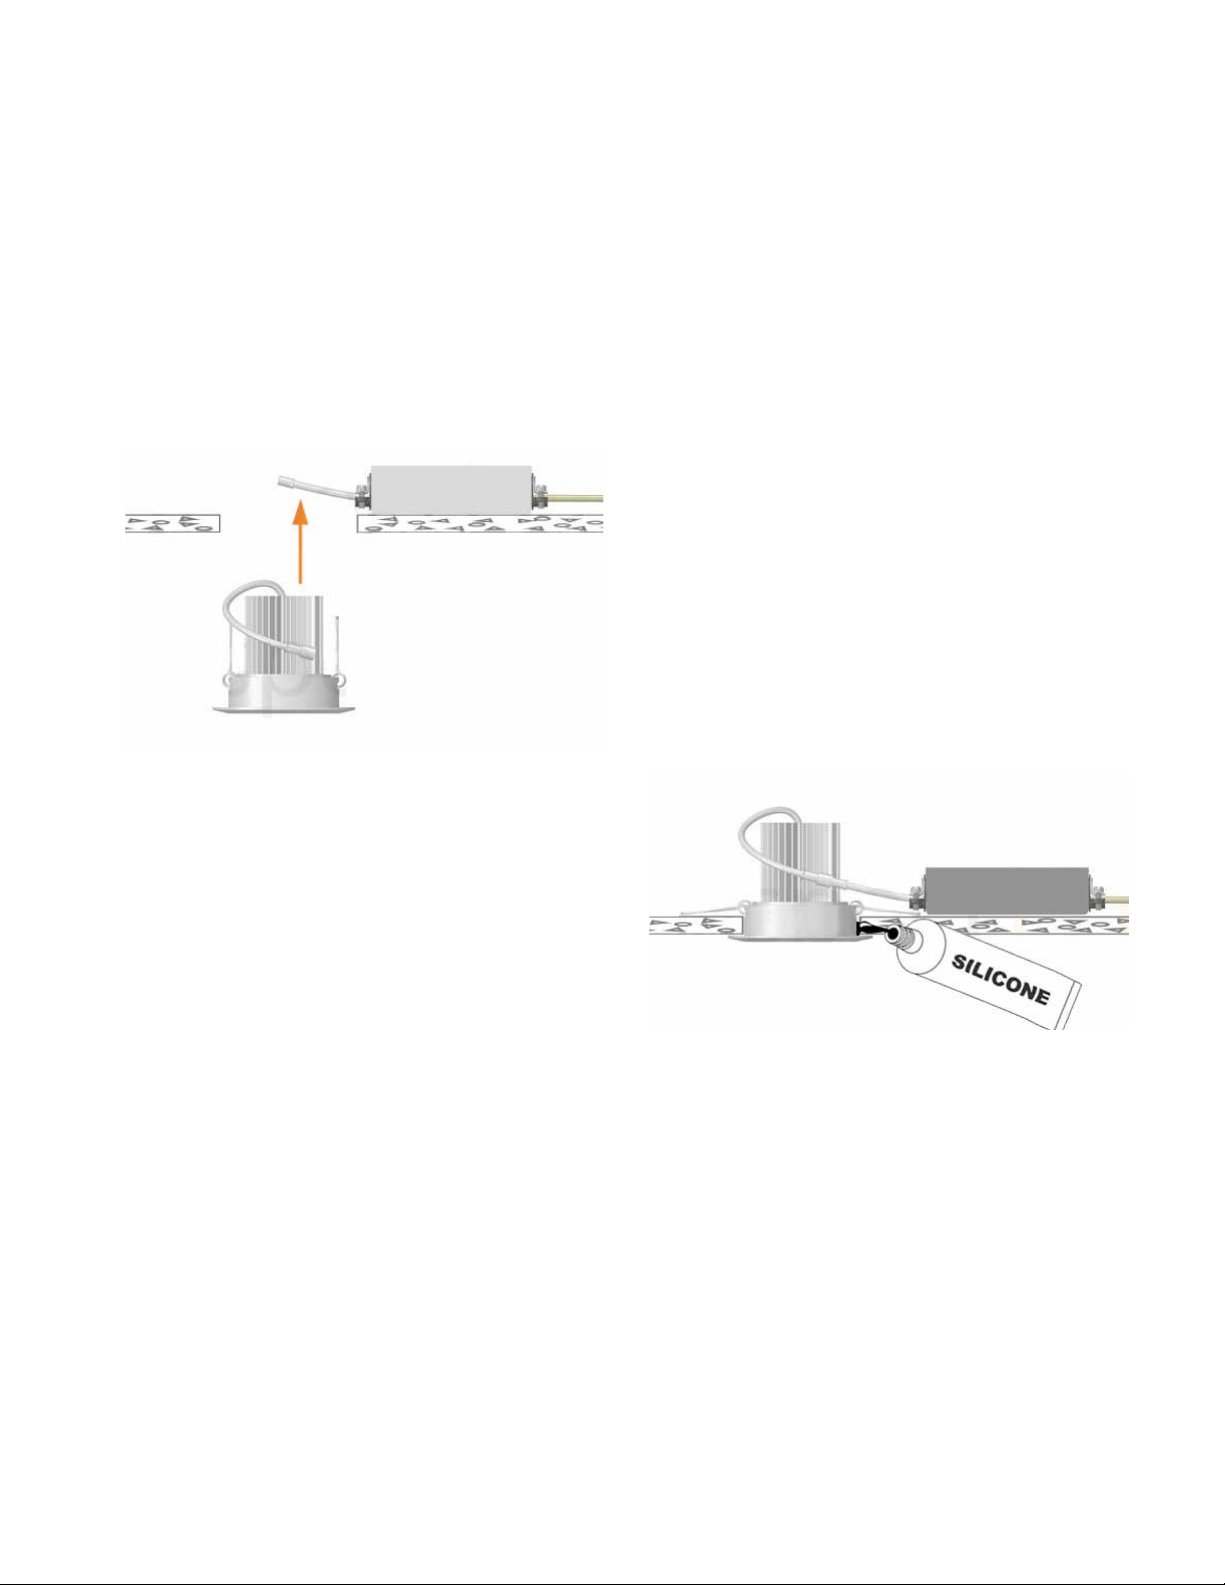
• Tuck the Driver Box through the Hole
Carefully tuck the driver box up through the hole and allow it to sit on the ceiling at or near the light location. If your code/jurisdiction requires you to fasten the driver box to a nearby truss, stud, structural component, or other approved member using the keyhole slots provided on the back of the driver box.
• Install Your Light Into the Hole
After you’ve verified that your light cord is connected
to the driver output cord, gently lift upwards on the
retention clips on each side of your light fixture and
carefully push it into your cut-out hole. Once the light
fixture is in the hole, allow the spring-loaded retention clips to come down, holding the light firmly in
place against the drywall or ceiling material. The maximum ceiling material thickness that these lights are
designed to work in is 1
around the perimeter of the light where it meets the
ceiling as required for sealing.
If you ever need to remove the light in order to access
your driver box , simply grab hold of the sides of the
light and gently pull downwards until the light comes
about 1/2” down out of the hole. Before pulling the
light all the way out of the hole, be sure to get a firm
grip on the retention clips, so you can hold them upwards in order to avoid them snapping closed. Then,
pull the light the rest of the way out of the hole and
gently let the retention clips back down.
Recessed LED Light Installation
”
1
/
. Apply a bead of silcone
4
• Dimming
LEDLITE is dimmable, make sure to use an ELV style (LED) dimmer switch.
This will be reverse phase dimming.
A few popular dimmers that we have thoroughly tested are:
• Eaton DAL06P • Eaton Toggle AL TAL06P1
• Eaton SAL06P • Eaton AAL06
• Lutron Caseta ELV+ (PD-5NE) • Lutron Maestro MAELV-600
• Lutron Skylark SELV-300P • Leviton Vizia VRE06-1LZ
• Devine Slide Dimmer - DE06P • Lutron Diva DVELV-300P
mr.steam
43-20 34th Street, Long Island City, NY 11101 1 800 76 STEAM I 9410 S. La Cienega Blvd. Inglewood CA 90301 1 800 72 STEAM
®
2
 Loading...