

MRKT-IT RTA-888 User Manual

Directory
I. FUNCTIONAL CHARACTERISTIC ....................................................... - 1 -
1.1 PRODUCT OVERVIEW ......................................................................... - 1 -
1.2 PRODUCT FEATURES ........................................................................... - 2 -
1.3 TECHNICAL PARAMETERS ................................................................... - 3 -
II. PRODUCT DIAGRAM ................................................................... - 4 -
III. ICON IDENTIFICATION ................................................................. - 6 -
IV. OPERATING INSTRUCTIONS ......................................................... - 7 -
4.1 LIGHTING ........................................................................................... - 7 -
4.2 SIGNAL LIGHT .................................................................................... - 7 -
4.3 BOOT.................................................................................................. - 8 -
4.4 TOUCH SCREEN ................................................................................ - 10 -
4.5 LOCK UP THE SCREEN ....................................................................... - 12 -
4.6 INSTALL SIM CARD, USIM CARD OR UIM CARD (SUPPORTED ONLY BY
4G EDITION) ........................................................................................... - 12 -
4.7 MOBILE NETWORK (SUPPORTED ONLY BY 4G EDITION) .................... - 13 -
4.8 WIFI ................................................................................................ - 13 -
4.9 BLUETOOTH ..................................................................................... - 14 -
4.10 GPS ............................................................................................... - 16 -
4.11 NFC ............................................................................................... - 17 -
4.12 STORAGE ........................................................................................ - 18 -
4.13 TURN OFF THE DEVICE .................................................................... - 20 -
4.14 EQUIPMENT AND DATA MANAGEMENT ........................................... - 20 -
4.15 DEVICE UPDATE ............................................................................. - 21 -
V. APPLICATIONS ............................................................................... - 21 -
5.1 TAKE PICTURES ................................................................................ - 22 -
5.2 CAMERA ........................................................................................... - 27 -
5.2.1 Tagged important files ............................................................. - 31 -
5.2.2 Auto focus and fixed focus........................................................ - 32 -
5.2.3 Simultaneous sound recording ................................................. - 32 -
5.2.4 Capture ..................................................................................... - 33 -
5.2.5 File storage location ................................................................. - 33 -

5.2.6 Naming Rules for the files ........................................................ - 33 -
5.3 PHOTO .............................................................................................. - 34 -
5.4 AUDIO AND VIDEO ............................................................................ - 37 -
5.5 AUDIO .............................................................................................. - 43 -
5.6 TELEPHONE (ONLY SUPPORTED BY 4G VERSION) .............................. - 44 -
5.7 CAR NO. ........................................................................................... - 46 -
5.8 SETTING ........................................................................................... - 46 -
5.8.1 Upload files............................................................................... - 47 -
5.8.2 Language setting ...................................................................... - 50 -
5.8.3 Setting date and time ............................................................... - 51 -
5.8.4 Displaying Local IMEI ............................................................... - 52 -
5.8.5 Displaying the Local IP Address ................................................ - 53 -
5.8.6 About Devices ........................................................................... - 53 -
5.9 VISUAL POSITIONING PLATFORM (REQUIRES DEVICES SUPPORTING
VISUAL POSITIONING PLATFORM) .......................................................... - 54 -
VI. OPERATION INSTRUCTIONS OF PC SETTING SOFTWARE ............ - 55 -
VII. REFERENCE TABLE OF FILE OCCUPANCY MEMORY ..................... - 57 -
7.1 REFERENCE TABLE OF CAMERA FILE MEMORY OCCUPANCY .............. - 57 -
7.2 REFERENCE TABLE OF MEMORY OCCUPANCY OF VIDEO FILES ........... - 57 -
VIII. BATTERY AND CHARGE .......................................................... - 58 -
8.1 BATTERY .......................................................................................... - 58 -
8.2 CHARGE ............................................................................................ - 58 -
IX. ATTENTION ............................................................................... - 59 -
9.1 WARNING ......................................................................................... - 59 -
9.2 FLAMMABLE AND EXPLOSIVE ZONES ................................................ - 59 -
9.3 OPERATING ENVIRONMENT .............................................................. - 59 -
9.4 ENVIRONMENTAL PROTECTION......................................................... - 60 -
9.5 PRECAUTIONS FOR EXPLOSION PROTECTION .................................... - 60 -
9.6 STORAGE .......................................................................................... - 61 -
X. TROUBLESHOOTING ...................................................................... - 62 -

Introduction
This equipment is applicable to workplaces such as railway, oil field, power,
machinery, petrochemical, gas overhaul, military use, fire, police, urban management,
industrial and mining enterprises, etc. It is efficient, practical and intelligent
equipment integrating the functions of lighting, video, photography, positioning, and
Netcom 4G networking for patrol records, maintenance, security, and patrol.
This equipment complies with the standards as stipulated in the GB3836.1-2010
Explosive Environment Part 1: Equipment General Requirements, as well as the
GB3836.4-2010 Explosive Environment Part 4: Equipment Protection by Intrinsically
Safe" I ". The explosion-proof sign is: EX ibⅡC T4 Gb, which is deemed as qualified
by the inspection carried out by the Supervision and Inspection Center of the
Explosion-Proof Quality of Oil and Chemical Industry Electrical Products, therefrom
an explosion-proof certificate has been obtained, which is applicable to all
IIA-IIC-contained 1 and 2 sectors, as well as the sites containing the mixture of T1-T4
explosive gases.
This equipment is divided into two versions: WIFI version and 4G version.
Except for part of the functions that are attached with the special note of "4G
version only", other features all support both WIFI version and 4G version.

- 1 -
I. Functional characteristic
1.1 Product Overview
● Operating system of Android 6.0
● 64-bit 8-core processor, CORTEX-A53 architecture design, and 1.5GHz basic
frequency
●Netcom support: 4G:TD-LTE B38/B39/B40/B41;FDD-LTE B3/B7;3G:WCDMA
B1/2/5;TD-SCDMA B34/39;2G:GSM 850/900/1800/1900 (supported by 4G
only)
●WIFI network supports IEEE 802.11 n/b/g
●Standard V4.0 blue tooth
●Multi-point touch screen of industrial capacitive type, which can be operated with
gloves on.
● Equipped with CMOS image sensor chip, and 1.54 inch HD IPS screen display. In a
dark environment, the installed lights can be automatically turned on; thereby clear,
complete, and all-weather recording of the equipment’s situation can be perfectly
conducted.
●The latest LED of Cree is adopted; excellent optical design, intense light, soft light
spot without blemish, long-distance night irradiation scope, and all the basic
functions of power flashlight
●Using selectable5000mAh/10000mAh lithium battery with ultra Large capacity,
featuring long life, low self-discharge rate, economic and environmental protection;
the battery is equipped with the protection of explosion-proof level, which can
effectively ensure the safe use of batteries
●The shell is finely processed by the aviation grade aluminum material CNC; the
barrel wall is thick, and the material is solid, which are earthquake-proof; the
surface is processed with hard anodizing treatment, with strong impact resistance
and decent corrosion resistance.

- 2 -
1.2 Product features
● Highly support 128GB T-Flash Card (file format of FAT32)
●Built-in 20 million HD CMOS camera
●1.54 inch IPs HD display, shooting files can be played back at any time
●Photos can be superimposed with date, time watermark, GPS (latitude and
longitude), Car No. and device code, which is easy to be managed
●The names of stored files of photo, video and audio files are automatically marked
with Car No., serial number, date, time and other important information
●3W LED of high brightness, whose night illumination scope is up to 100 meters
●Supported video resolution: 1080P, 720P, and 480p/30 frame
●Video file format: MP4 format
●Audio file format: WAV format
●Photo JPG format; highest resolution 20m:5184*3888
●For photo and video, flash mode can be set according to uses’ needs; shooting light
is even and free from any high light point
●Pictures and video files can be downloaded on computer
●4G, 3G, 2G multi bands (only supported by 4G version); WIFI access network
●FTP manual and bulk upload of files
●Transmission of GPS location and video to service platform in real-time
●Red and green lights
●Installed with speaker; video playback and hands-free phone call functions are
equipped

- 3 -
1.3 Technical parameters
Image sensor: 1/3 CMOS
Effective pixels: 20 million
LENS: 3.6mm
Effective angle: 120 degree
Encoding: H.264
Video resolution: 1920*1080/30fps 1280*720/30fps 720*480/30fps
Photo Resolution: 20M:5184*3888 13M:4096*3072
8M:3264*2448 5M:2560*1920
Video file format: MP4
Photo format: JPG
Recording format: WAV
Supply Battery: RTA29785A/5000mAh, RTA29140F/10000mAh
Working duration of LED Flashlight along: about 24 hours
Working duration of LED flashlight and video at the same time: about 8 hours
Working duration of video: about 16 hours
Charge time: about 6 hours
Working voltage: 3.7V
Maximum operating current: 2A
Operating temperature: 50 degrees
Ambient temperature for usage: -20℃~+40℃
Relative humidity: ≤95%
Dimensions: 37mm (head 58mm) *258mm (diameter * length)
Weight: 530g
- 4 -
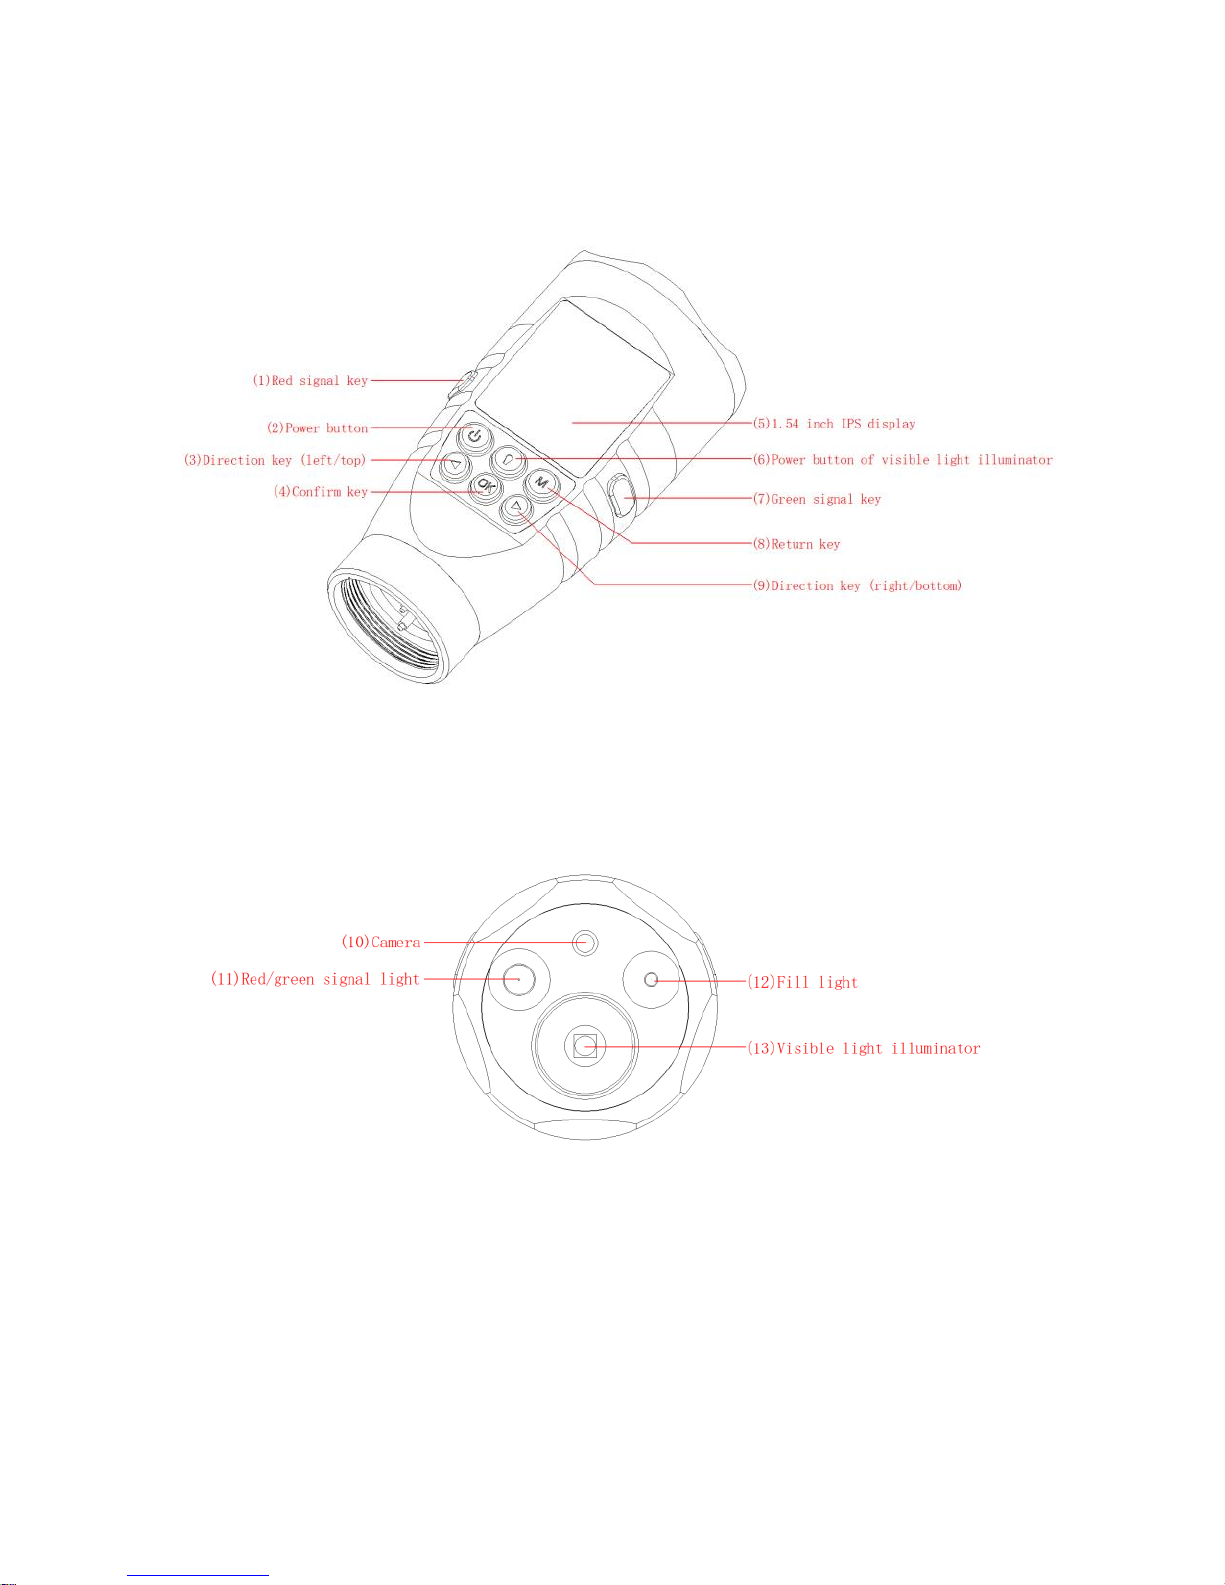
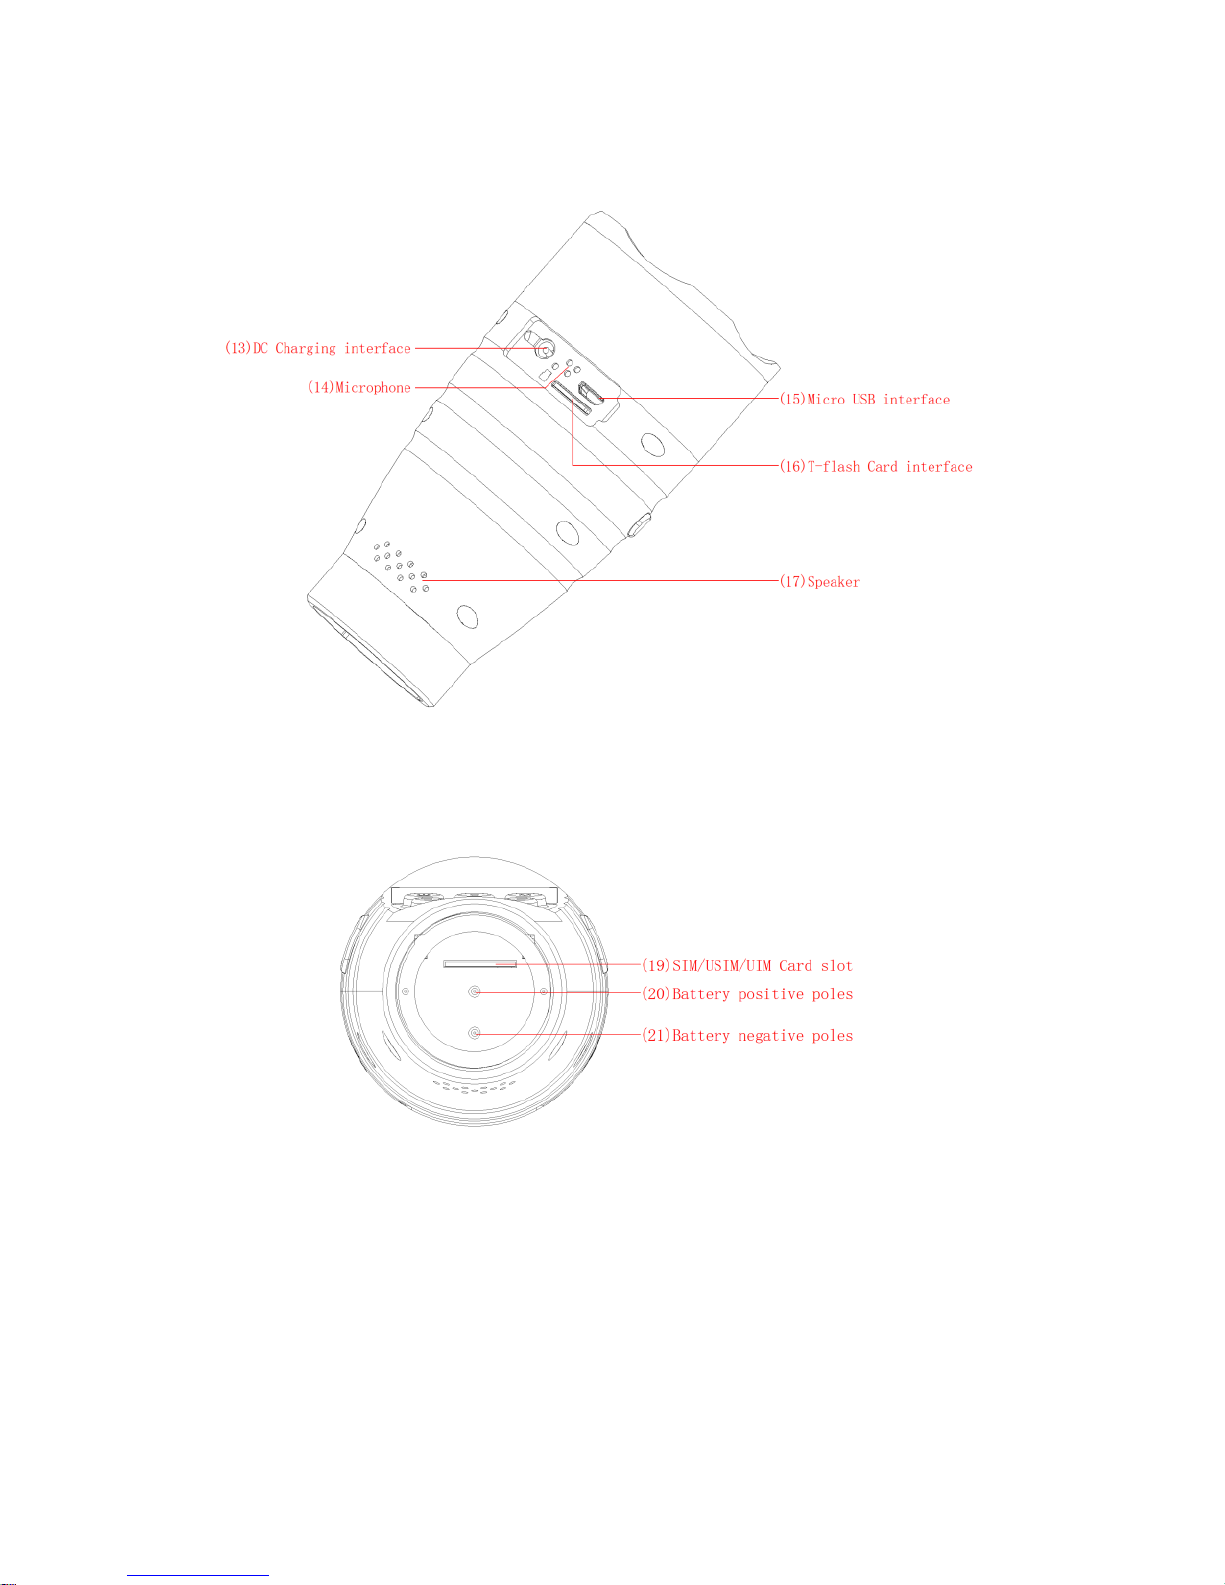
II. Product diagram
- 5 -
- 6 -
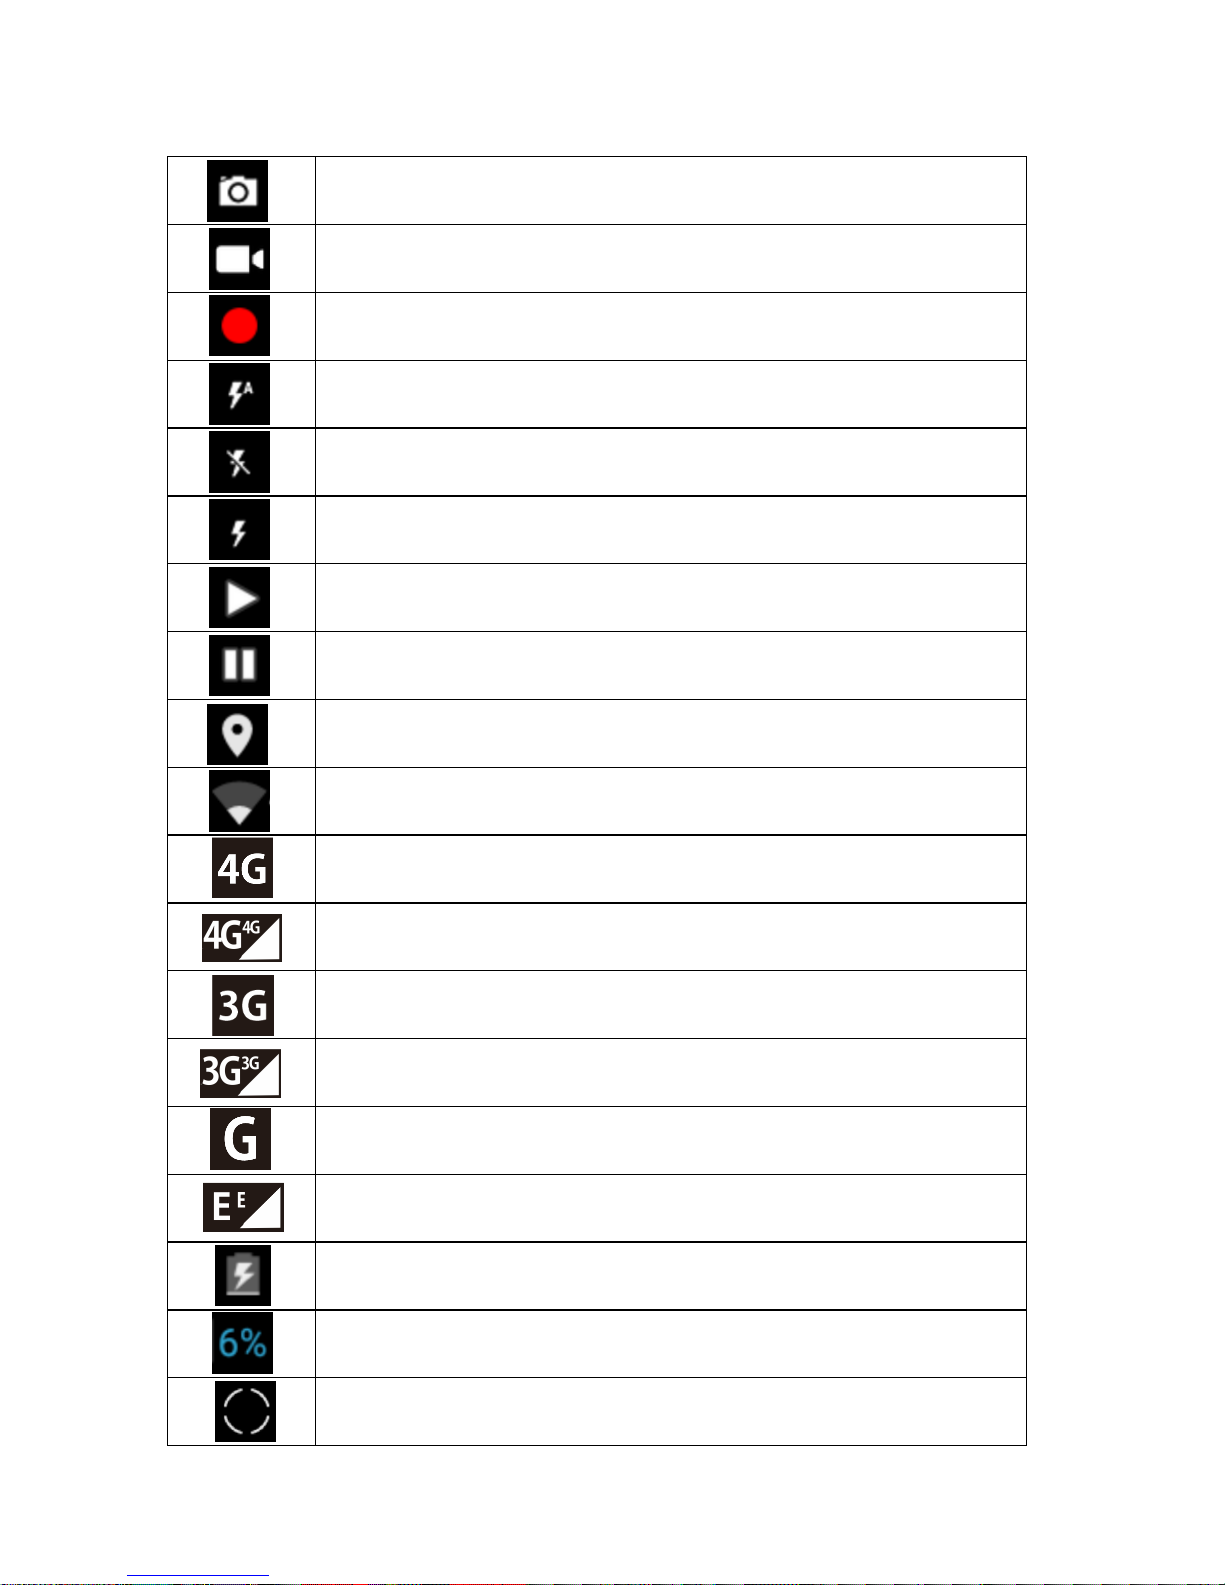
III. Icon identification
Photo preview mode
Video preview mode
Videoing
Automatic flash
Flash off
Flash on
Play file
Pause
GPS on
WIFI Signal Strength
4G network currently (supported by 4G version)
4G network and 4G mobile data currently (supported by 4G version)
3G network currently (supported by 4G version)
3G network and 3G mobile data currently (supported by 4G version)
2G network currently (supported by 4G version)
2G network and EDGE mobile data (supported by 4G version)
Charging.
Current battery 6%
Focus frame

- 7 -
IV. Operating Instructions
4.1 Lighting
Short click the key of "(6) strong lighting"; then turn on the strong lighting mode,
as shown in the following figure:
Click again and switch the bright lighting to the dim light mode, as shown in the
following figure:
Click again, the strong light will be turned off
4.2 Signal Light
Long click "(1) Red Signal Key", and the corresponding red signal light will be
turned on; then short click "(1) Red Signal Key", and the corresponding red light will
be turned off.
Long click "(7) Green Signal Key", and the corresponding green signal will be
turned on; then short click "(7) Green Signal Key", and the corresponding green light
will be turned off.
Note: red and green lights cannot be turned on at the same time, only one of
the lights can be turned on at a time. Under the condition that one of the lights is
turned on, the turned on signal light will be automatically off when another
- 8 -
signal is turned on.
Note: operation method of the keys:
If not specifically stated, the keys shall be operated as follows;select the
directions (up/down/left/right) through "(3) direction key (left/top)" and "(9)
direction key (right/bottom), then click "(4) Confirm key" to confirm, or click "
(8) Return key " to go back.
4.3 Boot
Long click "(2) power button" to boot up; the device will be started up after
waiting for a few seconds.
Note: the first start-up of the equipment may take longer; after the first
time start-up and shutdown, the reboot in a short period of time will take less
time. After been shut down, cutting off the power and rebooting the device
shortly after will also shorten the boot time.
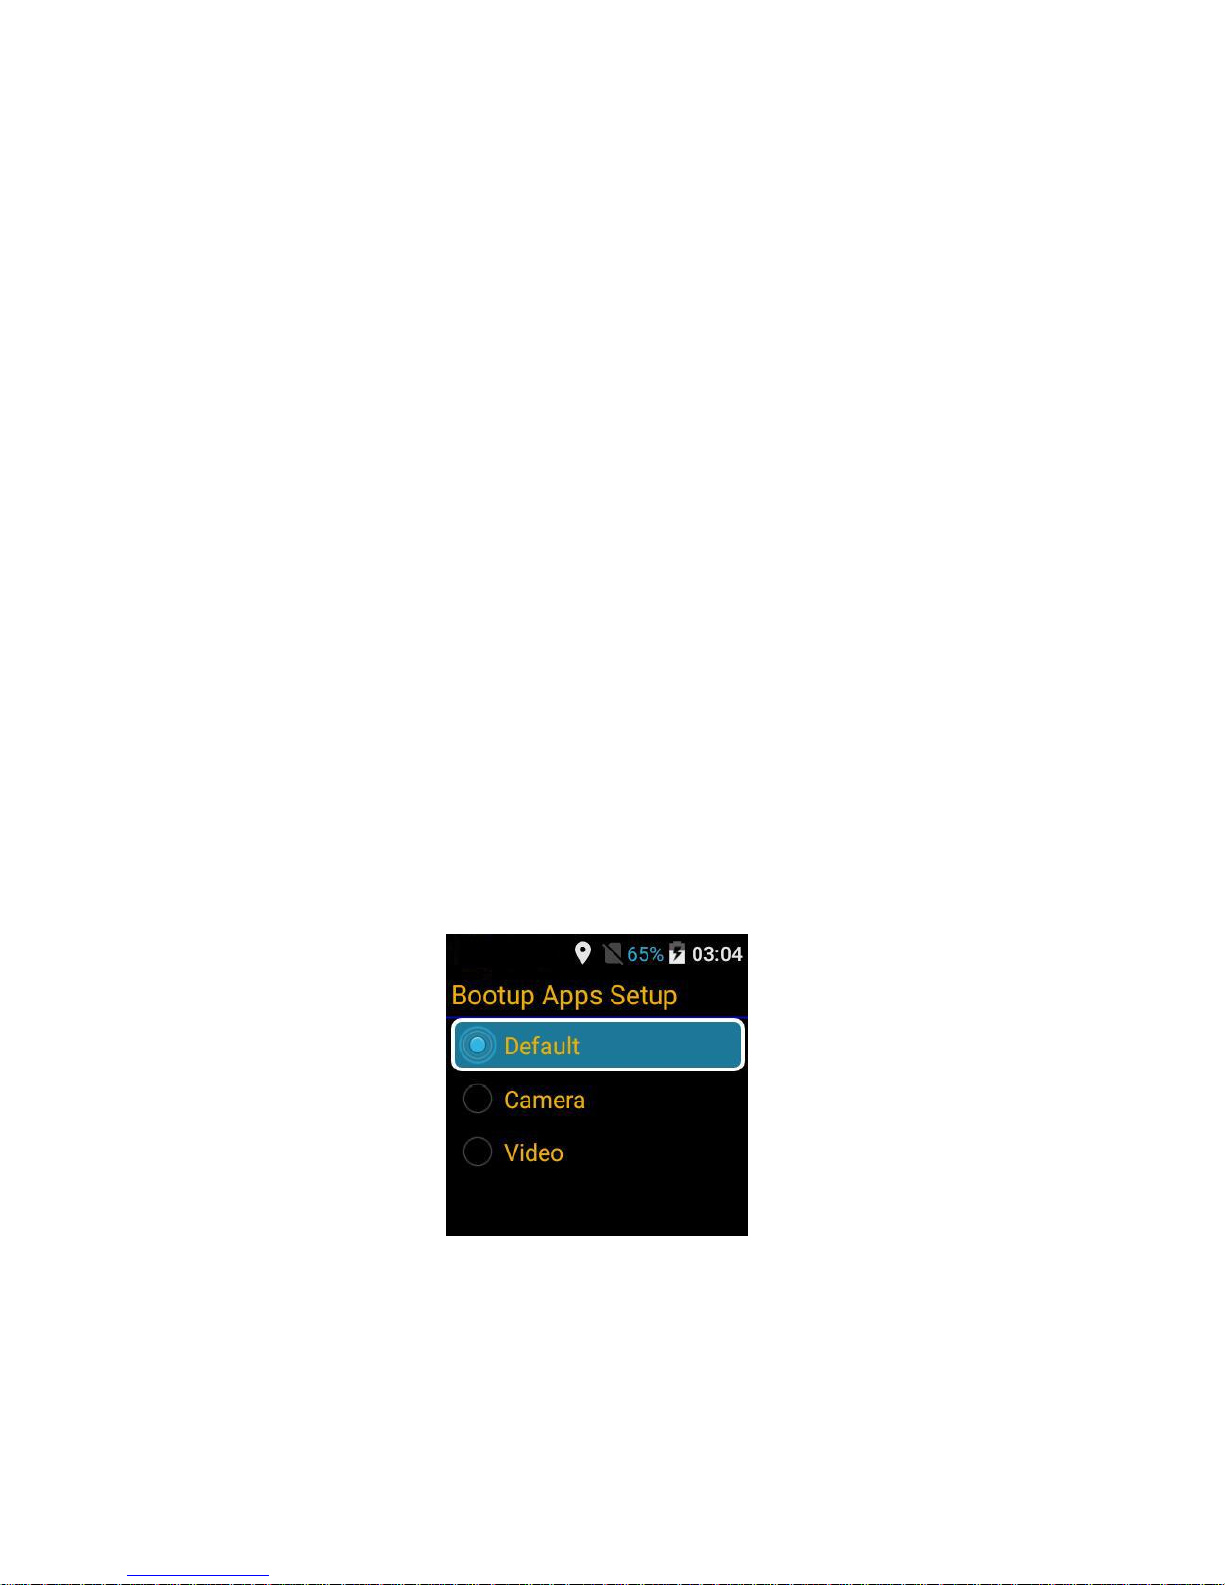
After been turned on, this device can be set in three kinds of default program as
follows:
(I) After the boot, carry out the following operation on the screen: set up→
power-on application settings → default; the boot mode is set to the
default mode, as shown in the following figure:
After the boot, the device will enter into the main page, as shown in the following
figure:
- 9 -
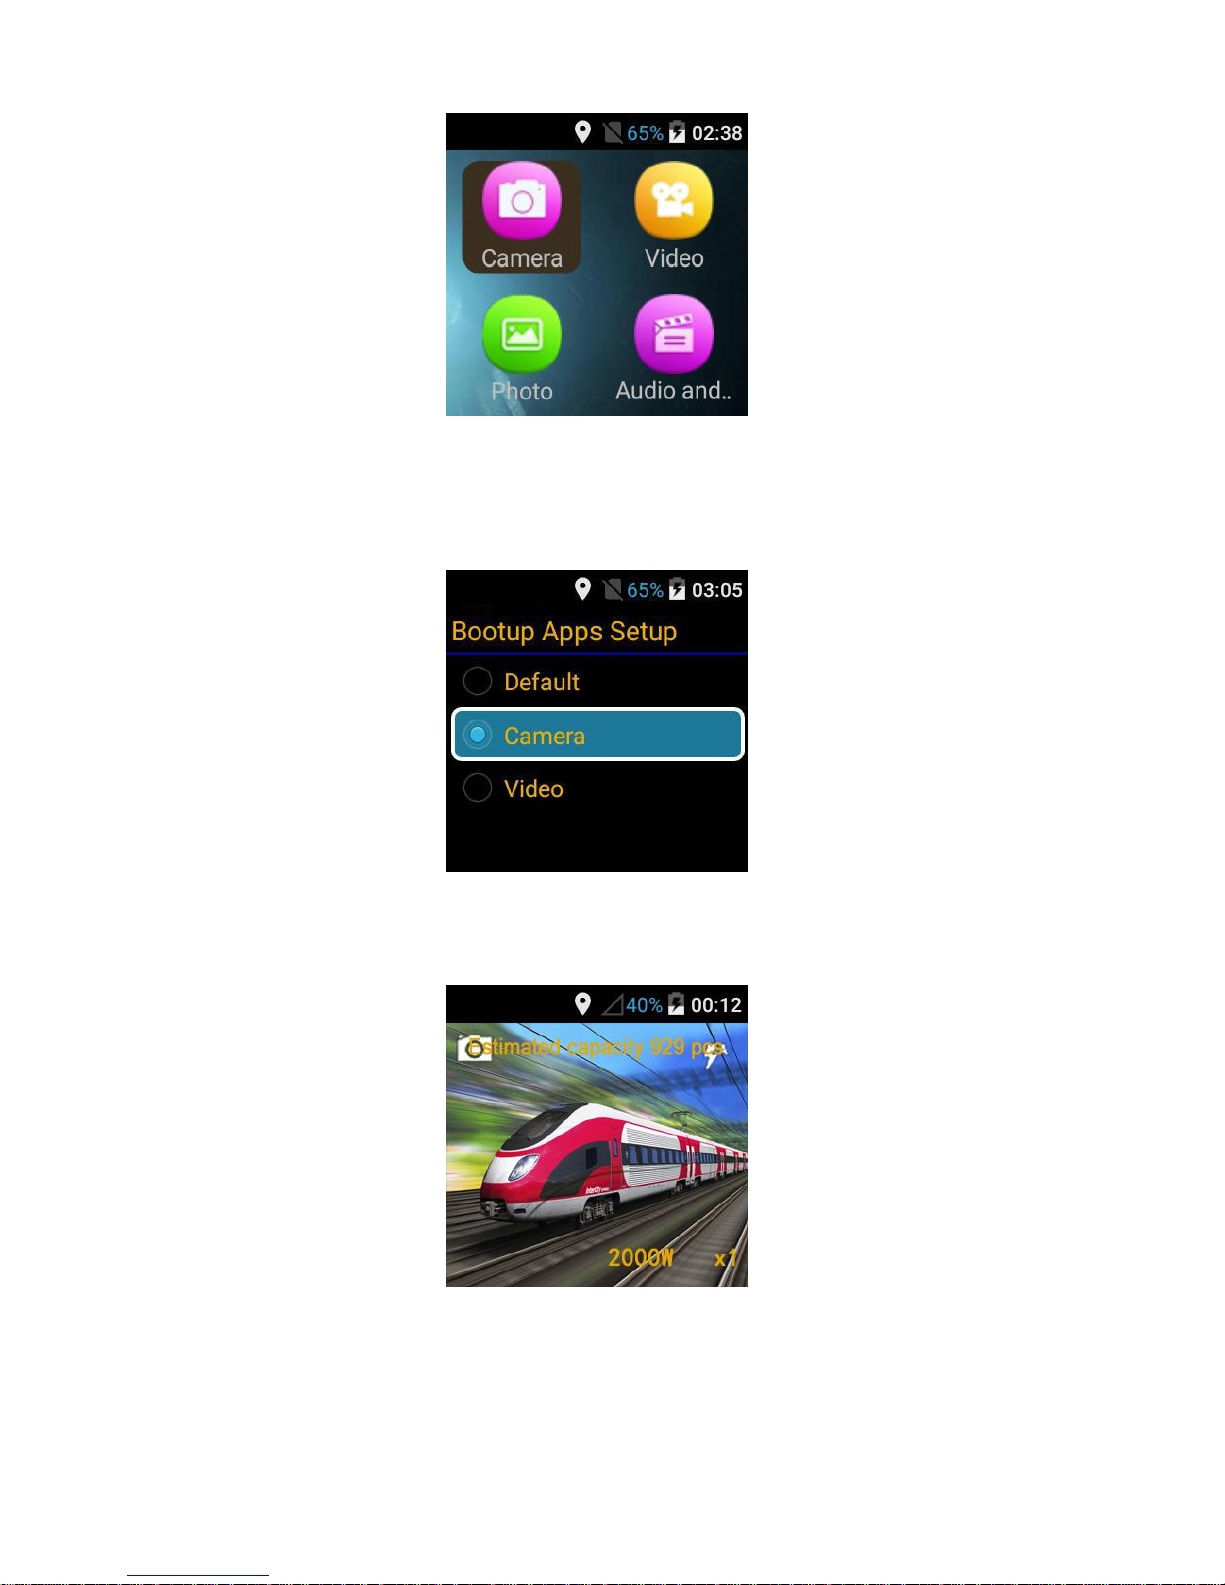
(II). After the boot, carry out the following operation on the screen: Setting →
power-on application settings → camera, wherein the boot mode is set to the camera
mode, as shown in the following figure:
After the boot up, the device will directly enter into the camera interface, as shown in
the following figure:
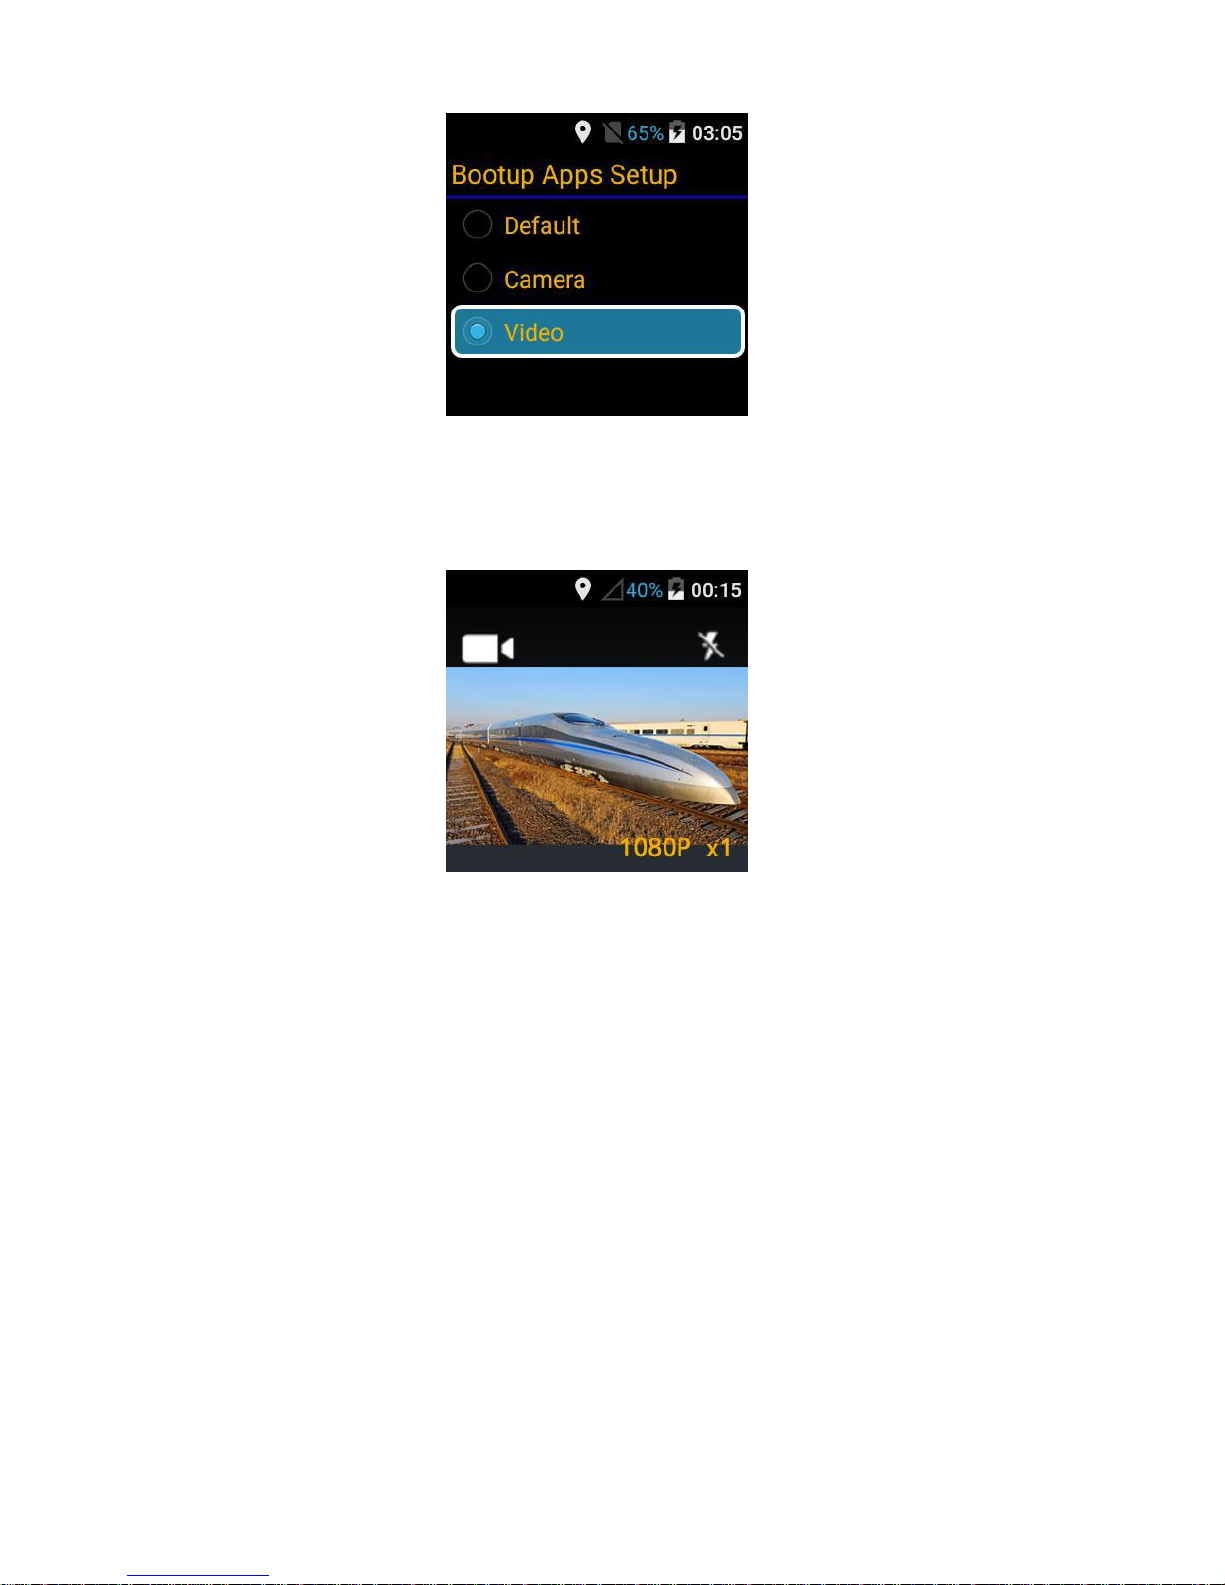
(III). After the boot up, carry out the following operation: Setting → boot
application set → camera; the boot mode shall be set to the camera mode, as shown in
the following figure:
- 10 -
After the boot up, the device will directly enter into the camera interface, as shown in
the following figure:
4.4 Touch Screen
(5) 1.54-inch IPS display is a multi-touch capacitive screen of industrial level,
which can be normally operated by finger with gloves on. Please avoid letting the
touch screen contact with other electronic equipment; electrostatic discharge will
cause failure to the touch screen.
To avoid damaging the touch screen, please do not use any sharp objects to touch
the screen, or to touch the screen with your fingertips forcefully and fiercely.
The device may not be able to respond to the input operations by touch near the
edge of the screen because it is not within the scope of the touch input area.
Making the touchscreen standby for a long time may produce a residual image
(screen aging) or a ghost image.
It is recommended that you use your finger to touch the screen and turn off the
touchscreen when you are not using the device.

- 11 -
(I) Click
To open the application, select the menu options, click the button on the screen or
use the input function on the keyboard appeared on the screen; it only takes a simple
click to operate, as shown in the following figure:
(II) Double-click
Double-click the image to enlarge it, and double-click again to go back, as shown in
the following figure:
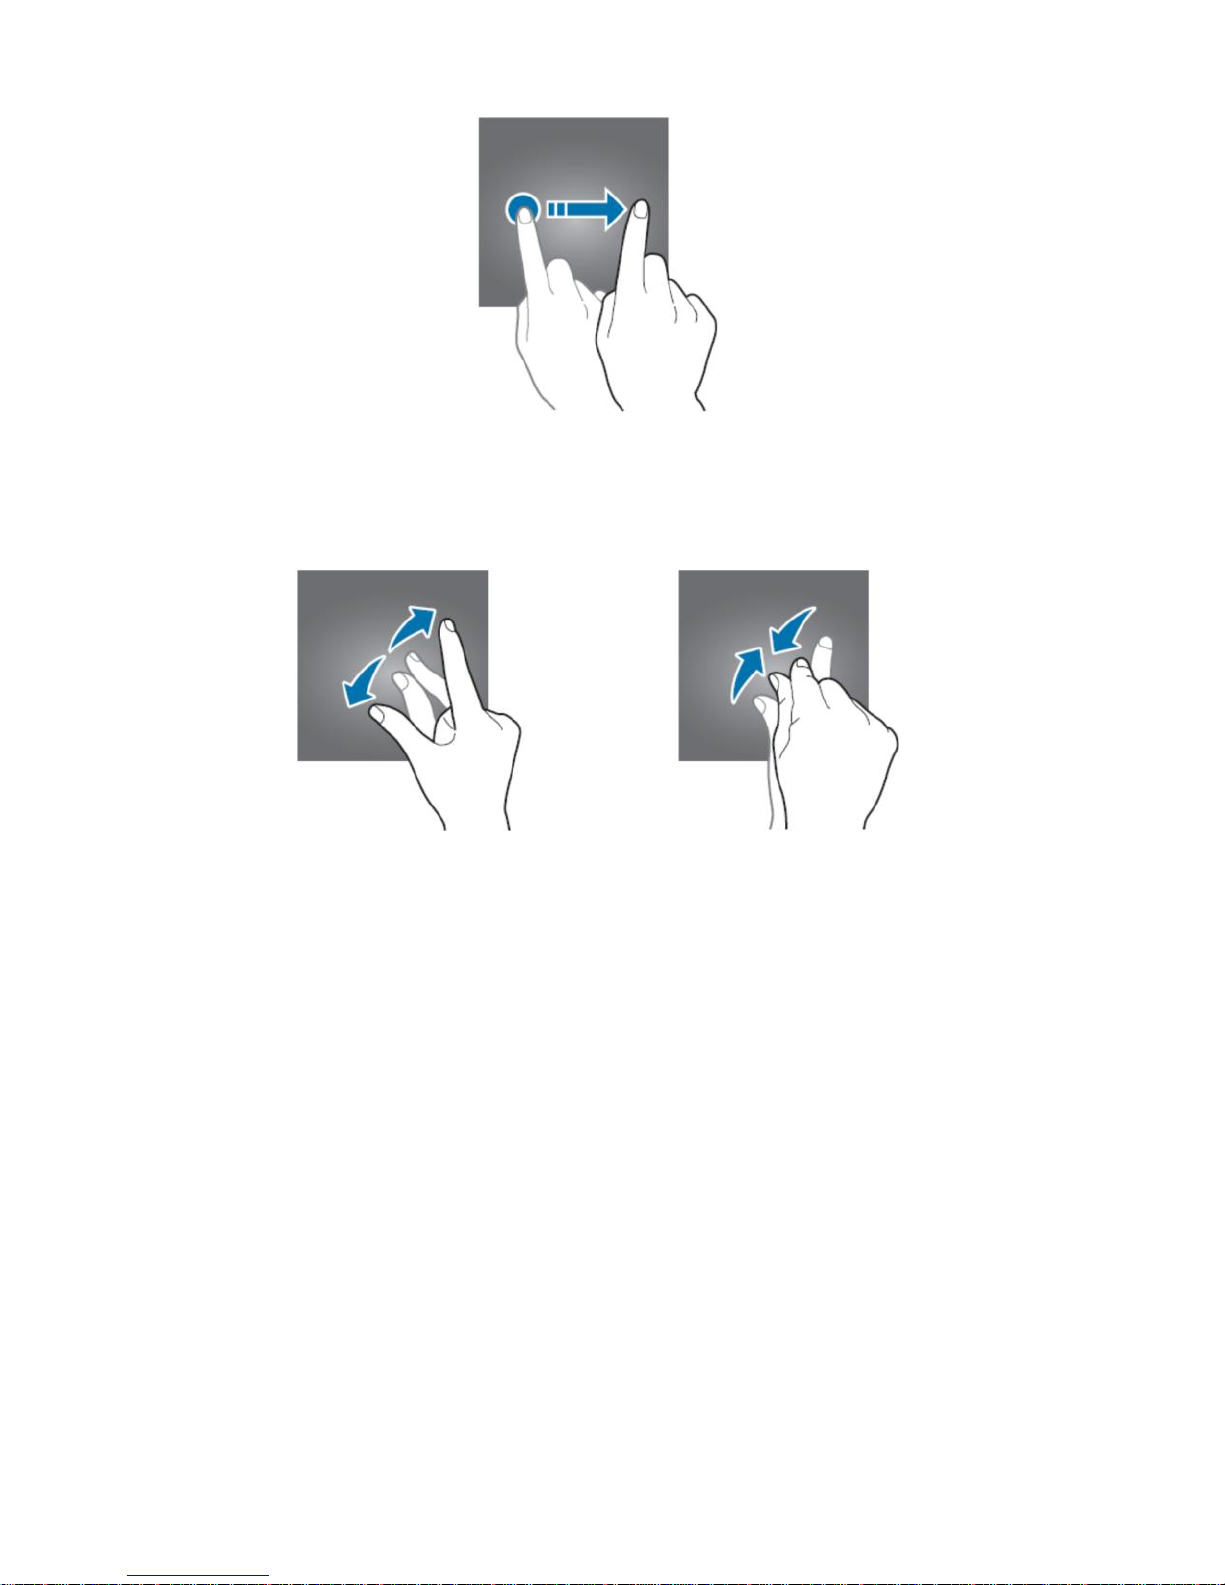
(III) Sliding
Slide on the main screen from the left to right, so as to view other panels, as shown
in the following figure:
- 12 -
(IV) Opening and closure
Separating two fingers on the image can enlarge a part of the image, and closing
up two fingers can shrink the image, as shown in the following figure:
4.5 Lock up the screen
Click "(2) power button" to close the screen and to lock it up. In addition, if the
device is not going to be used for a specified period of time, the screen will close and
lock itself automatically. Once the screen is closed and locked, click the “(2) power
key” again to unlock and open the screen.
4.6 Install SIM card, USIM card or UIM card (supported only by 4G edition)
Insert SIM card, USIM card, or UIM card provided by the mobile phone service
provider in the card slot for SIM, USIM, and UIM according to the direction indicated.
Be careful not to lose or let others use SIM, USIM or UIM cards, so as to avoid any
damage or inconvenience caused by lost or stolen cards.
Some LTE services may not be available, which depends on the different service
providers. For more information about service availability, please contact your service
provider.

- 13 -
4.7 Mobile network (supported only by 4G edition)
After the boot up, carry out the following operation on the screen: Setting →
mobile network →click "OK" →turn on or turn off cellular data; only under the state
where the mobile’s cellular data is on, the device will start to search the signal of
mobile data, as shown in the following figure:
4.8 WIFI
After powering up, carry out the following operation on the screen: Setting→
WI-FI Status→ click "OK"→ turn on or turn off WIFI. When WIFI is turned on, set
up the account and password to connect WIFI through "PC Setup Software (VI)" ,
then the device will normally display the available WIFI, as shown in the following
figure:
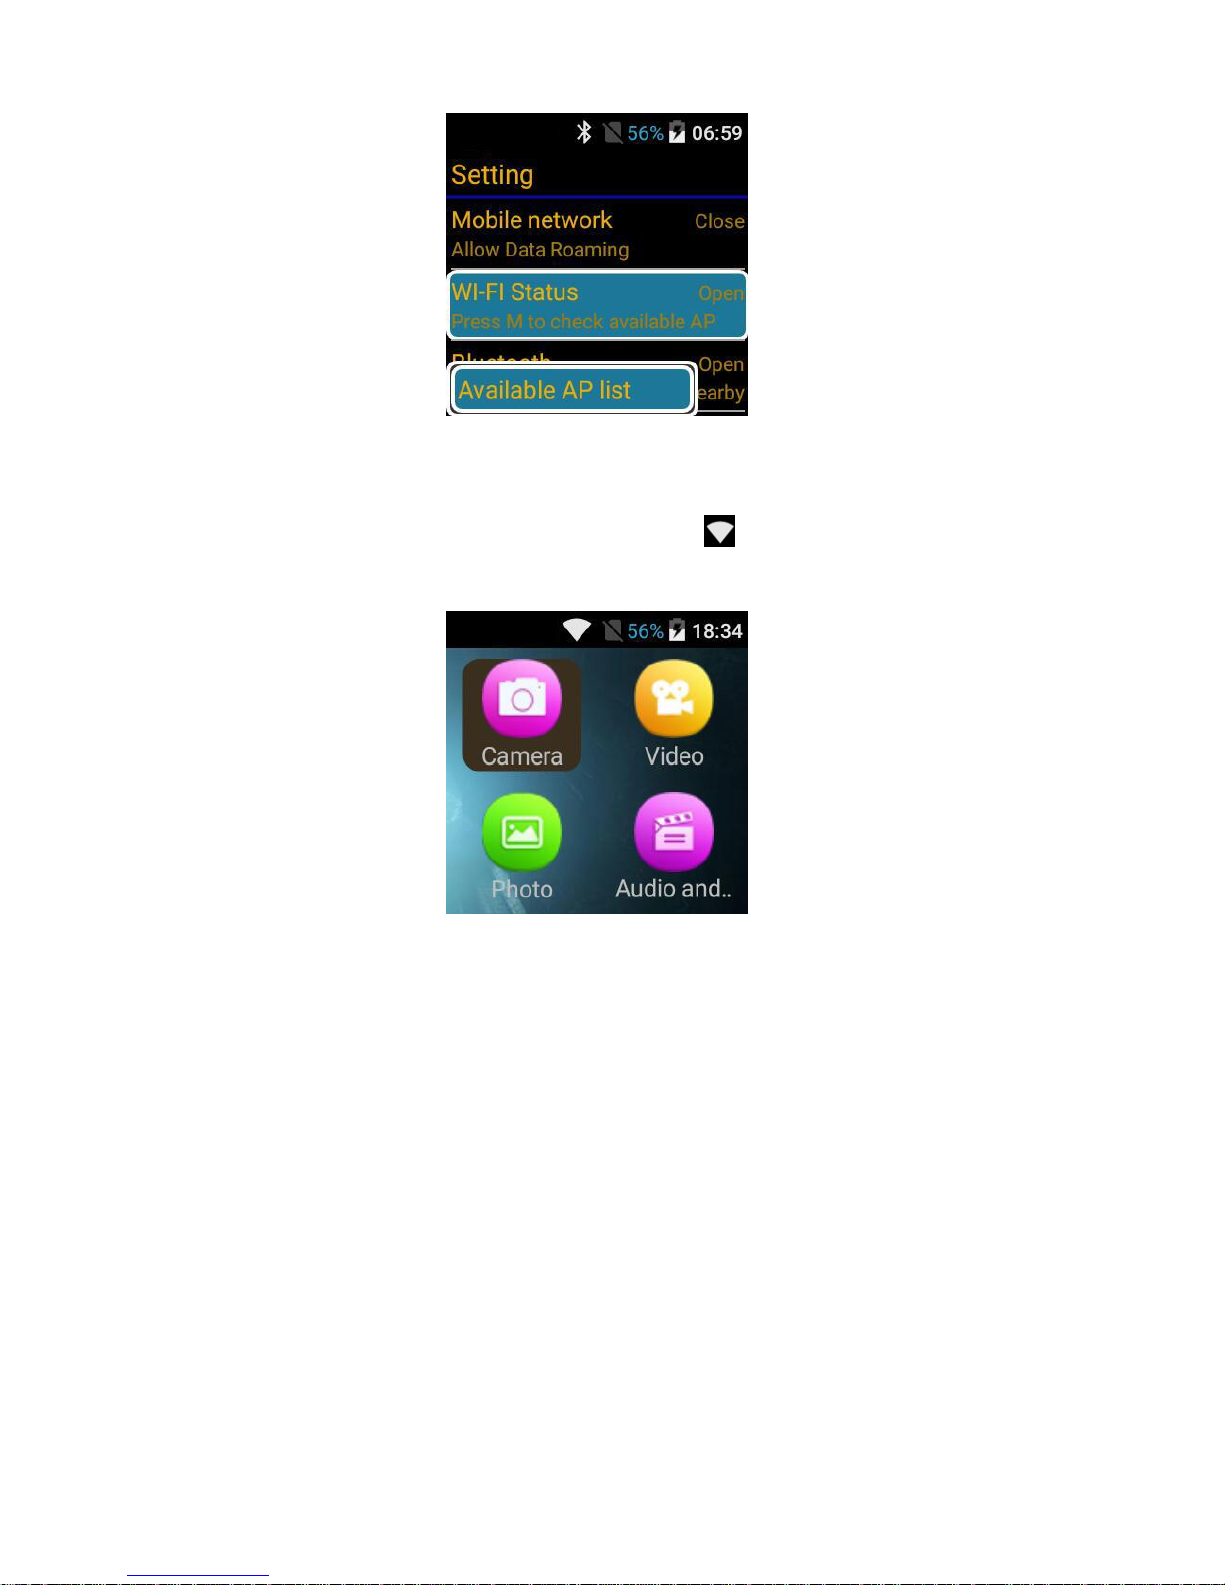
When the Wi-Fi status is turned on, long click the "M" key, then the "Available
AP List" Menu will be displayed; please select the menu bar of "Available AP List",
and click the "OK", then the list of currently available AP list will be shown, as in the
following figure:
- 14 -
Select the currently available WIFI, and click the "OK" key, then the device will
automatically connect the selected WIFI; after the connection is successful,
"Connected" will be shown and the WIFI signal icon “ ” will appear above the
screen, as shown in the following figure:
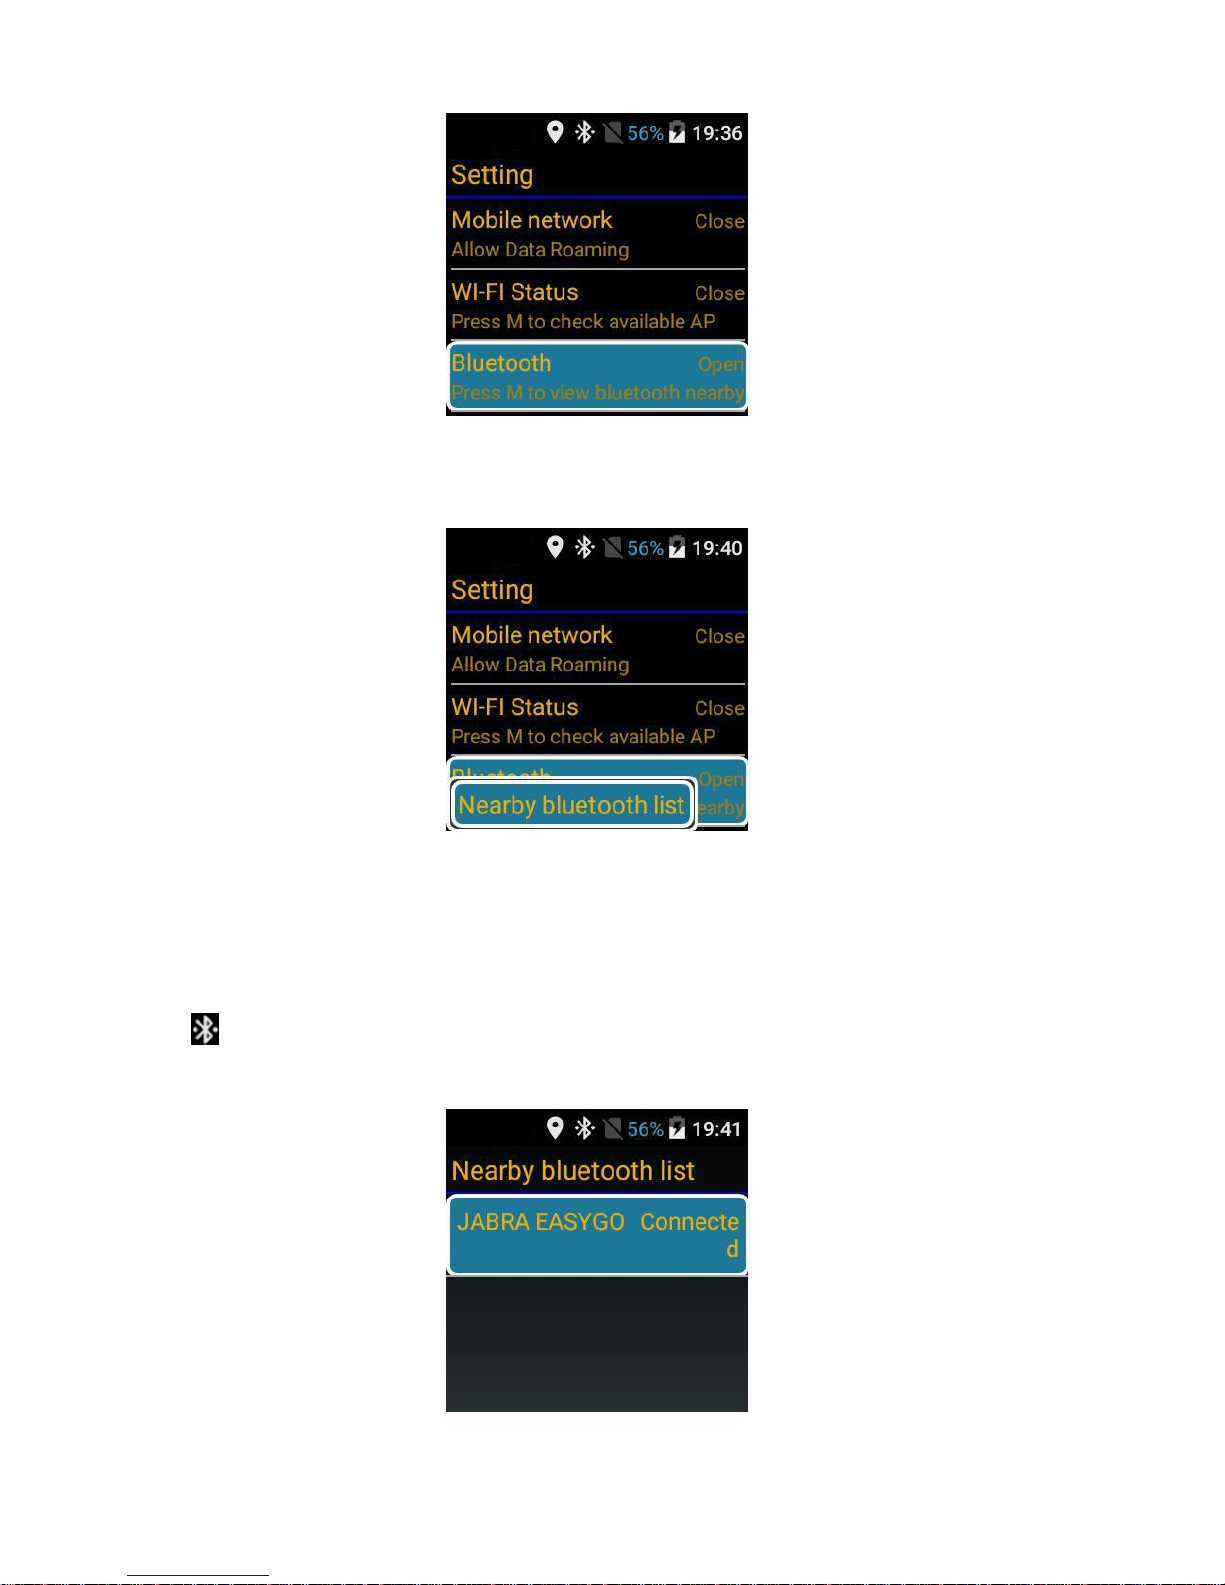
4.9 Bluetooth
After the boot, carry out the following operation on the screen: Setting →
Bluetooth →click the "OK" key →turn on or turn off the Bluetooth, as shown in the
following figure:
- 15 -
When the Bluetooth is turned on, long click "M" key and the "Nearby
Bluetooth list" will be displayed, as shown in the following figure:
Select the menu bar of "Nearby bluetooth list", and click "OK" key, then it will
display the list of the current nearby Bluetooth; select the current visible Bluetooth
device, click "OK", and the device will automatically connect the selected Bluetooth;
after the connection is successful, "connected" will be shown, and the Bluetooth icon
" " will appear above the screen, as shown in the following figure:

- 16 -
4.10 GPS
After the boot, carry out the following operation on the screen: Setting the
→GPS Function→ click the "OK" key→ turn on or turn off the GPS Function; only
in the state where GPS Function is on, the device will begin to search GPS signal, as
shown in the following figure:
The symbol appearing in the middle of the screen indicates that the GPS
Function has been turned on, otherwise the GPS Function is off.
In order to ensure that the equipment can find the GPS signal as soon as
possible, the operator shall carry the equipment to go outside and choose an open
space as far as possible, while turning on WIFI or mobile data. Under the situation
where the location and related conditions can be met, the device will spot GPS signals
about 30 seconds after the boot. GPS signal might be weakened when it comes to
the locations where signals are obstructed, such as between buildings, in low-lying
areas or in harsh weather conditions.
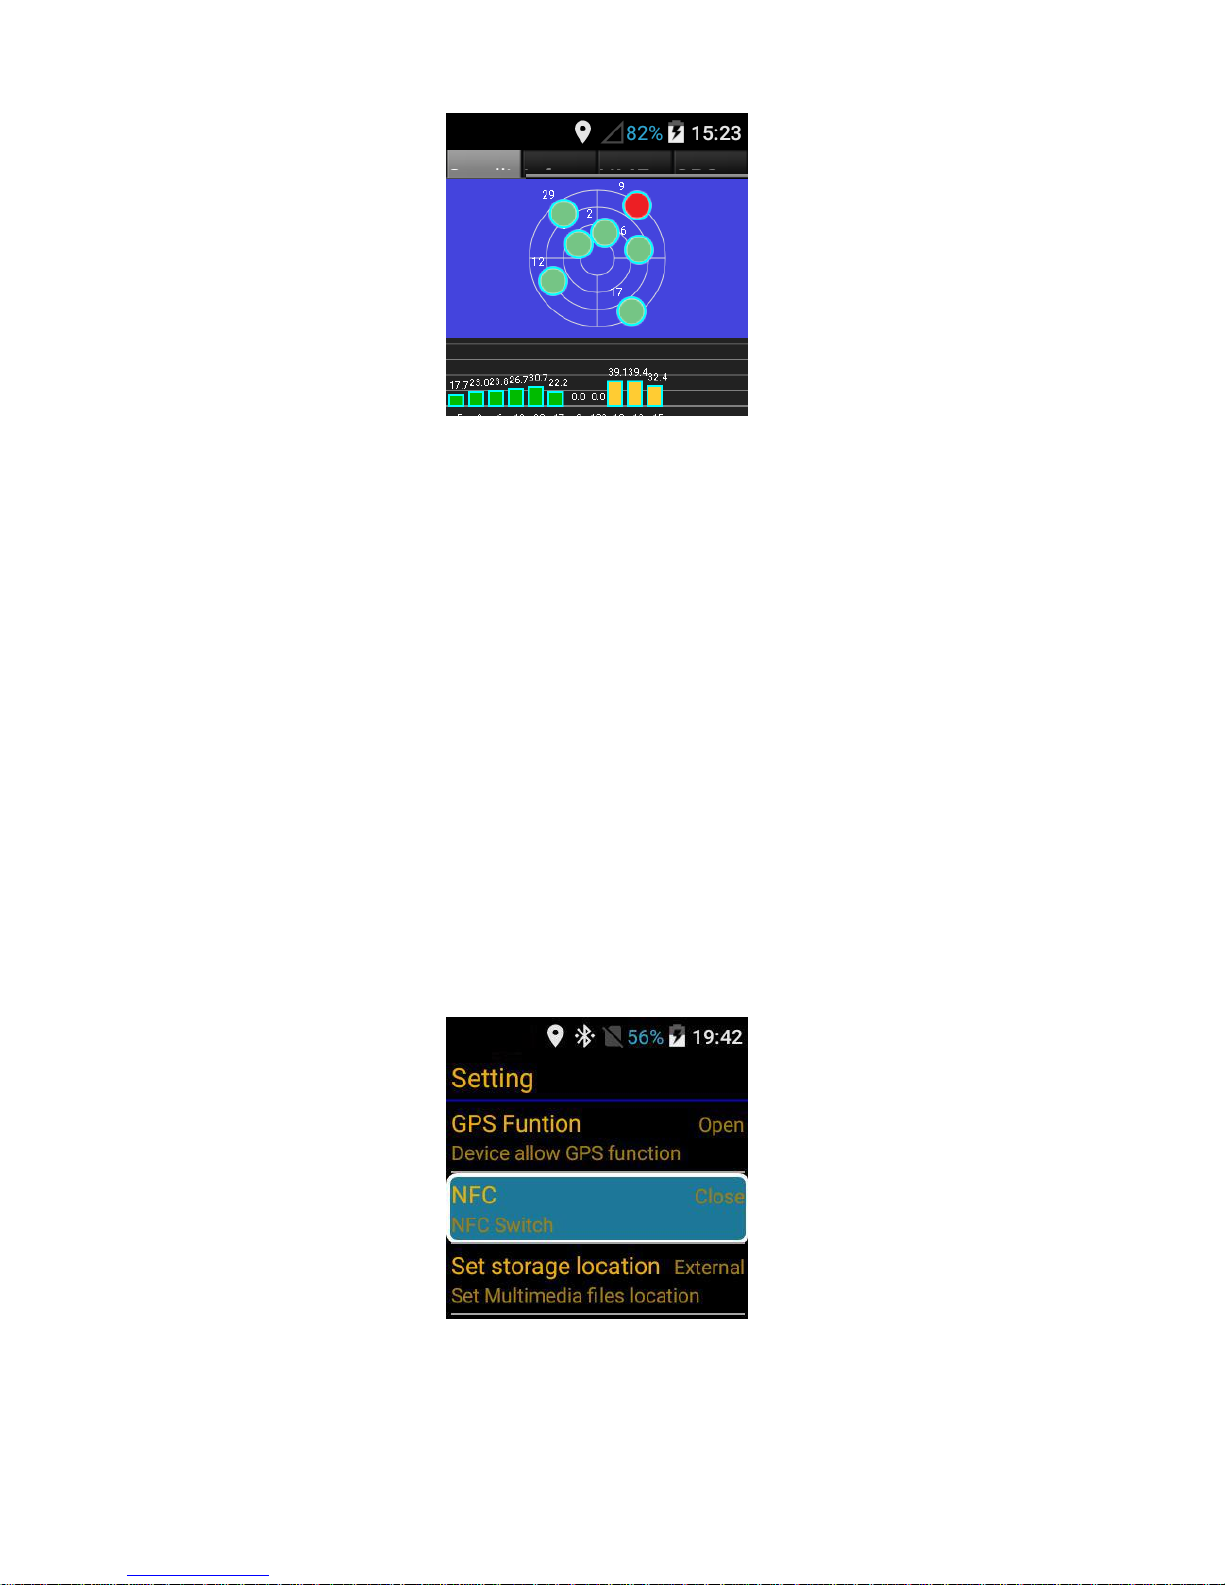
(I) GPS status
After the boot, carry out the following operation on the screen: Setting →GPS
Function→ select "GPS Function"→ click "M" key; it will display the menu of "GPS
Status”; select the menu bar of "GPS Status", and click "OK" key; then the status of
current GPS satellite can be displayed, as shown in the following figure:
- 17 -
The green section of the figure represents the satellite data that has been spotted,
and the values on the green vertical bars indicate the signal strength of the current
satellite.
Note: when mobile networks, WIFI and GPS services are turned on, the
battery consumption will be increased. Therefore, please turn them off when
these services are not needed, which can save a certain amount of power, so as to
extend the battery life.
4.11 NFC
After the boot, carry out the following operation on the screen: Setting
→NFC→ click the "OK" key→ turn on or turn off NFC; open or close, as shown in
the following figure:
 Loading...