

Page 1
Model #
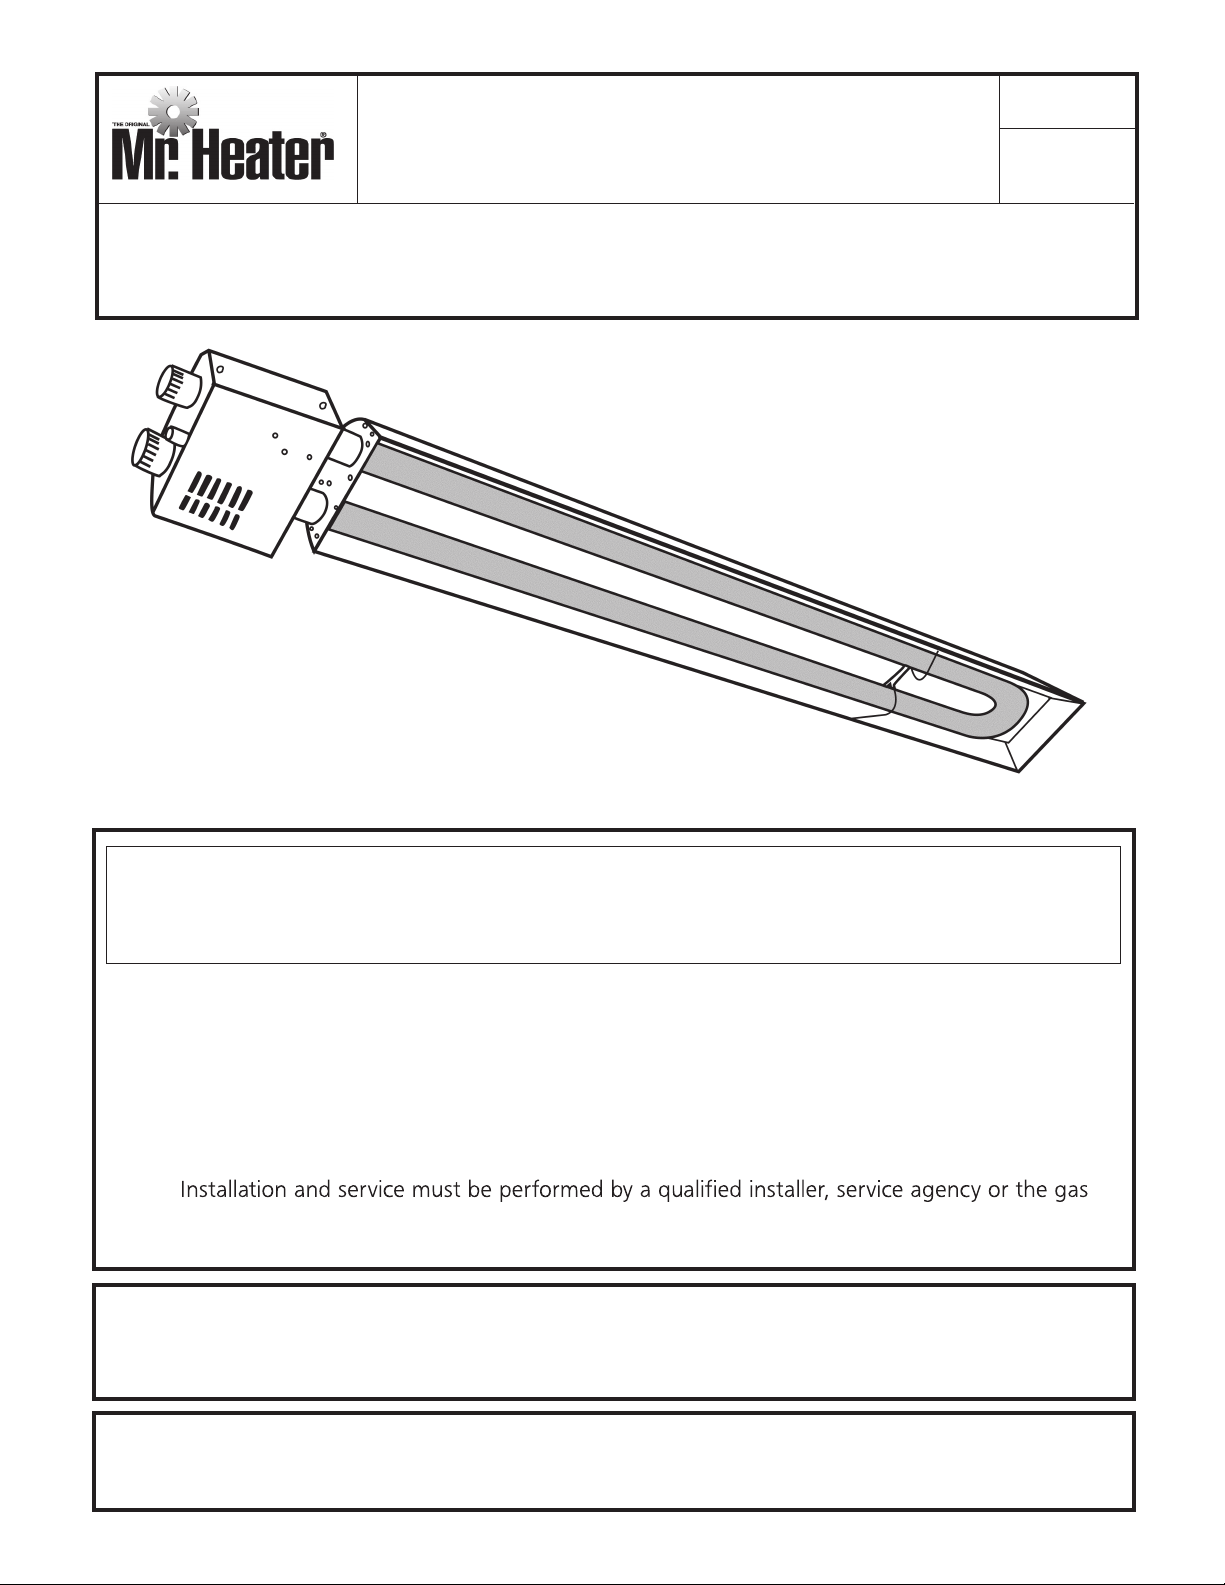
OPERATING INSTRUCTIONS
MHT 45
AND OWNER’S MANUAL
READ INSTRUCTIONS CAREFULLY: Read and follow all instructions. Place instructions in a safe place
for future reference. Do not allow anyone who has not read these instructions to assemble, light,
adjust or operate the heater.
Gas-Fired, Low-Intensity Infrared Heaters
approved for residential Garage/Commercial Applications
WARNING:
can cause injury or property damage. Refer to this manual. For assistance or
additional information consult a qualified installer, service agency or the gas supplier.
— WHAT TO DO IF YOU SMELL GAS
• Open Windows
• DO NOT try to light any appliance.
• DO NOT use electrical switches.
• DO NOT use any telephone in your house. Immediately call your local gas supplier from a
neighbor’s telephone. Follow the gas supplier’s instructions.
• Do not touch any electrical switch; do not use any phone in your building.
•
supplier.
• If you cannot reach your gas supplier, call the Fire Department.
FOR YOUR SAFETY:
Do not store or use gasoline or other flammable vapors and liquids in the vicinity of this or any other appliance.
Improper installation, adjustment, alteration, service or maintenance
WARNING: If the information in these instructions are not followed exactly, a fire or
explosion may result causing property damage, personal injury or loss of life.
Enerco Group, Inc., 4560 W. 160TH ST., CLEVELAND, OHIO 44135 • 216-916-3000
01/05 Revision L1 #02853
Page 2
WARNING:
YOUR SAFETY IS IMPORTANT TO YOU AND TO OTHERS,
SO PLEASE READ THESE INSTRUCTIONS BEFORE YOU
OPERATE THIS HEATER.
L’AVERTISSEMENT:
Votre surete est importante a vous et donc s’il vous
plait lire ces instructions avant d’operer cet appareil de
chauffage.
GENERAL HAZARD WARNING:
FAILURE TO COMPLY WITH THE PRECAUTIONS AND
INSTRUCTIONS PROVIDED WITH THIS HEATER, CAN
RESULT IN DEATH, SERIOUS BODILY INJURY AND
PROPERTY LOSS OR DAMAGE FROM HAZARDS OF FIRE,
EXPLOSION, BURN, ASPHYXIATION, CARBON MONOXIDE POISONING, AND/OR ELECTRICAL SHOCK.
ONLY PERSONS WHO CAN UNDERSTAND AND FOLLOW
THE INSTRUCTIONS SHOULD USE OR SERVICE THIS
HEATER.
IF YOU NEED ASSISTANCE OR HEATER INFORMATION
SUCH AS AN INSTRUCTIONS MANUAL, LABELS, ETC.
CONTACT THE MANUFACTURER.
WARNING:
FIRE, BURN, INHALATION, AND EXPLOSION HAZARD.
KEEP SOLID COMBUSTIBLES, SUCH AS BUILDING
MATERIALS, PAPER OR CARDBOARD, A SAFE DISTANCE
AWAY FROM THE HEATER AS RECOMMENDED BY THE
INSTRUCTIONS NEVER USE THE HEATER IN SPACES
WHICH DO OR MAY CONTAIN VOLATILE OR AIRBORNE
COMBUSTIBLES, OR PRODUCTS SUCH AS GASOLINE,
SOLVENTS, PAINT THINNER, DUST PARTICLES OR UN-
KNOWN CHEMICALS.
L’AVERTISSEMENT:
Le feu, les brulures, le danger d’inhalation et explosion
garder combustibles solide tel que les materiels de
papier ou le carton.
Une distance sure eloigne de l’appareil chauffage
comme recommande.
Par les instructions, ne utiliser l’appareil de chauff-
age dans les espaces qui forme contenir combustibles
volatiil ou aeroporte, ou les produit qu’essence, les dissolvants, peindre plus mines, les particles de poussiere
ou les produits chimiques inconnus
L’AVERTISSEMENT GENERAL DE DANGER:
L’Echec pour se conformer aux precautions et aux in-
structions a fourni avec cet appareil de chauffage, avoir
pour resultat la mort blessure et la perte de propriete
ou les dommages physiques serieuses du danger de feu,
l’explosion, la brulure l’asphyxie, monoxide de carbone
empoisonant, et/ou le choc electrique.
Seulement les personnes qui peuvent comprendre et
peut suibre les instructions doivent utiliser ou doivent
entretenir cet appareil de chauffage.
Si vous avez besoin de l’information d’assistance ou ap-
pareil de chauffage telle qu’un manuel d’instruction, les
etiquettes,etc, contactez le fabricant
CONTENTS
Section 1 INTRODUCTION .............................................................. 3
Section 2 PLANNING ..................................................................... 6
Section 3 INSTALLATION ................................................................ 8
Section 4 VENTING .......................................................................12
Section 5 OPERATION .................................................................. 18
Section 6 MAINTENANCE ............................................................ 19
Section 7 TROUBLESHOOTING ..................................................... 20
Section 8 ILLUSTRATED PARTS ..................................................... 22
WARRANTY ................................................................................. 24
INSTRUCTIONS FOR ORDERING PARTS ......................................... 24
WARNING:
The State of California requires the following warning:
COMBUSTION BY-PRODUCTS PRODUCED WHEN USING THIS PRODUCT CONTAIN CARBON MONOXIDE, A
CHEMICAL KNOWN TO THE STATE OF CALIFORNIA TO
CAUSE CANCER AND BIRTH DEFECTS (OR OTHER REPRO-
DUCTIVE HARM).
L’AVERTISSEMENT:
L’etat de Californie exige les avertissement siuvants.
Derives de combustion ont produit en utilisant ce produit
contient monoxide de carbone, un chimique/gaz connu
dans l’etat de californie pour causer les defauts de cancer
et naissance (ou autre le mal reproducteur)
Mr. Heater | Gas-Fired Low-Intensity Infrared Heater Operating Instructions and Owner’s Manual
2
Page 3
BEFORE YOU BEGIN
Read this manual carefully before installing or servicing this
equipment. Improper installation, servicing or maintenance will
cause death, injury or property damage. Check the minimum
required safe distances from combustibles given on the outside
of each burner to make sure that the product is suitable for your
application. The minimum required safe distances from combustibles
is also found on page 9 of this manual. Installer must be a licensed
contractor of representative. After the installation is complete, check
product operation as provided in these instructions.
Unpacking the Heater
Manpower Requirements
To prevent personal injury and damage to the heater, two persons
will be required to remove the heater from the carton. Both ends of
the heater should be lifted from the carton at the same time. The
burner box should be lifted by gripping the bottom of the box. The
reector end of the heater should be lifted using the rear moveable
hanger.
Safety
Thin sheet metal parts, such as the reector portion of the heater
and the various venting components, have sharp edges. To prevent
injury, the use of work gloves is recommended. The use of gloves
will also prevent the transfer of body oils from the hands to the
surface of the reector.
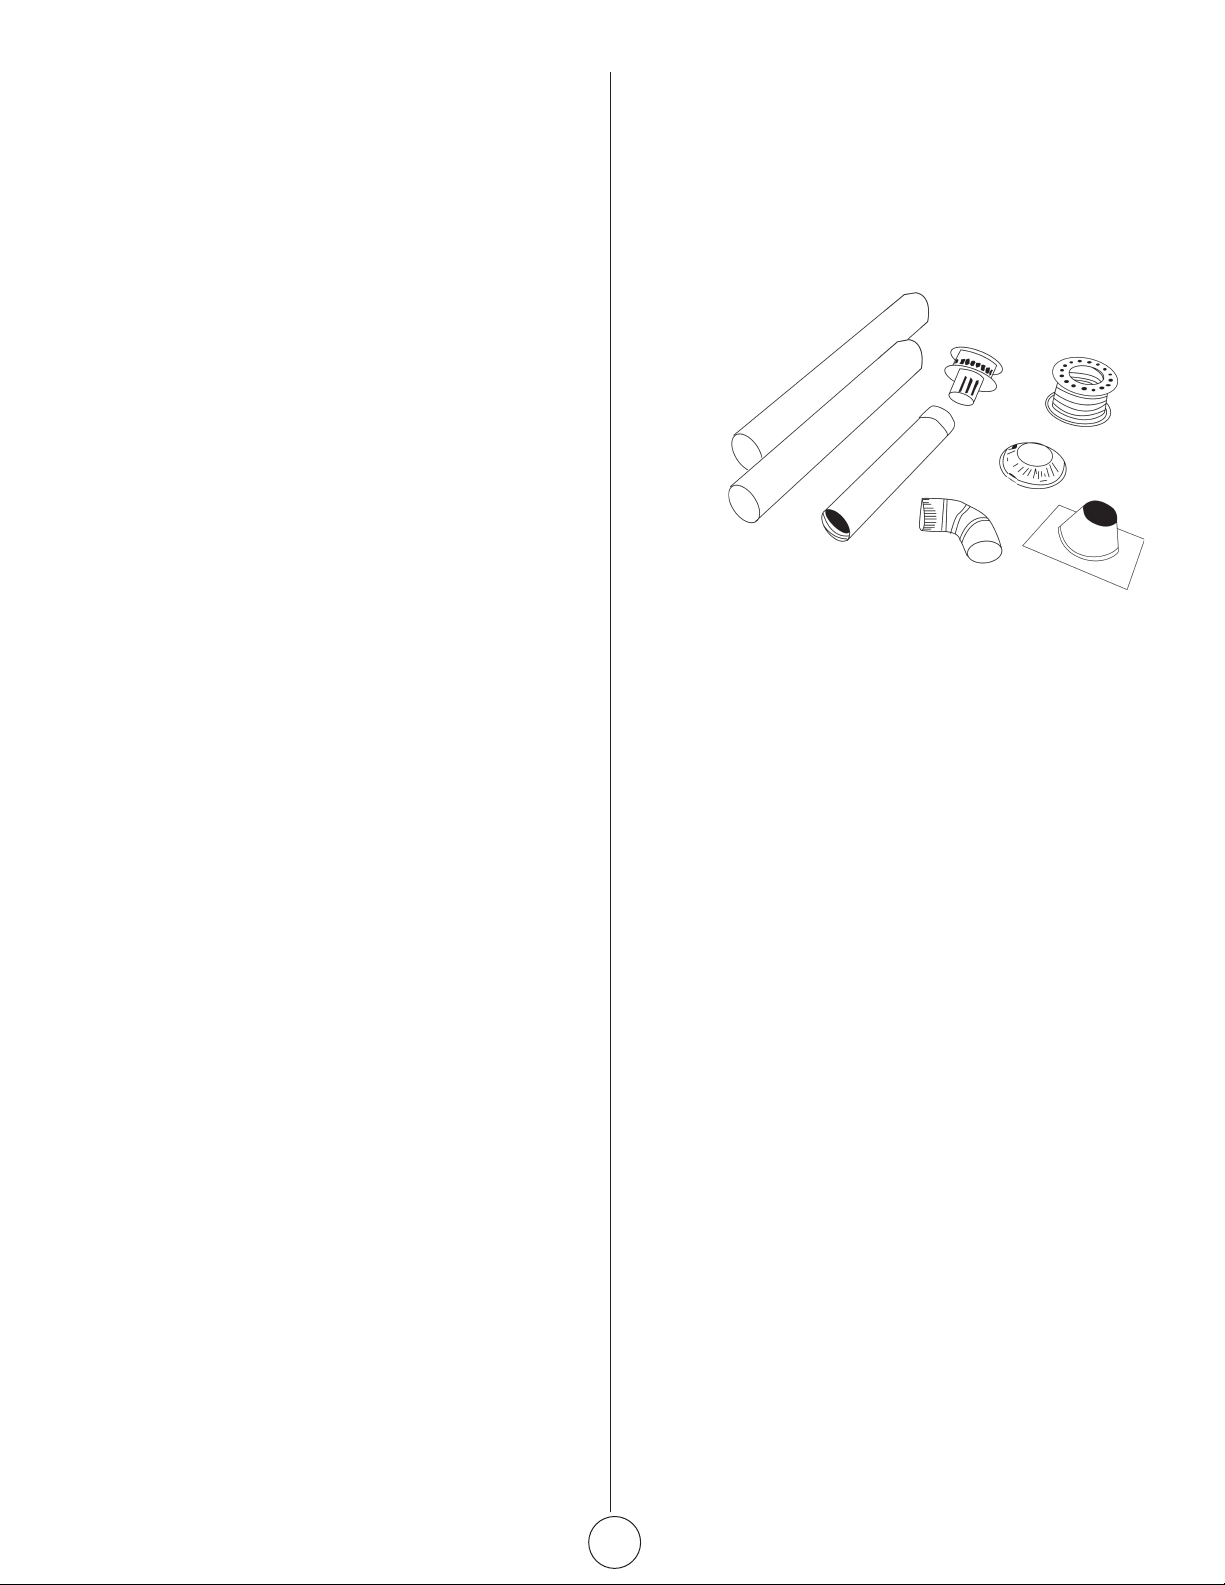
Available Accessories
Vent Kit (F102840)
1. (2) 3" x 2' Pipe 26GA.
2. (1) 36" x 3" B-Vent
3. (1) Gas Vent Top 3"
4. (1) Adj. Wall Thimble
5. (1) Storm Collar
6. (1) 3" Elbow
7. (1) Adj. Roof Flashing
1
2
3
4
5
6
7
Section 1 INTRODUCTION
About The Heater
The MHT 45 is a factory-assembled, gas red, low-intensity heating
system. The system has been designed for easy installation and will
provide years of economical operation and trouble-free service. Not
only is infrared heat efcient, it also provides the most comfortable
conditions in open areas, such as garages.
Gas-Fired means it uses clean-burning Natural or LP gas.
Low-Intensity means that the radiant surface of the heat exchanger
tube does not glow red. Instead, it operates at a lower temperature
(less than 1000 F) and radiates energy at a lower intensity per square
foot of radiating surface. The lower temperature and intensity
levels are within a range that is most effective in establishing and
maintaining personal comfort levels. An aluminum reector directs
the radiant energy downward to the occupied area.
Radiant refers to the energy radiated by the tube heater. Because
the energy is in the form of infrared rays, it does not directly heat the
air. Instead, the rays heat objects such as the oor, cars, machines
and people. The warm objects, in turn, heat the air. These combined
features are the key to the exceptional comfort and fuel efciency
provided by the tube heater.
Operating Instructions and Owner’s ManualMr. Heater | Gas-Fired Low-Intensity Infrared Heater
3
Page 4
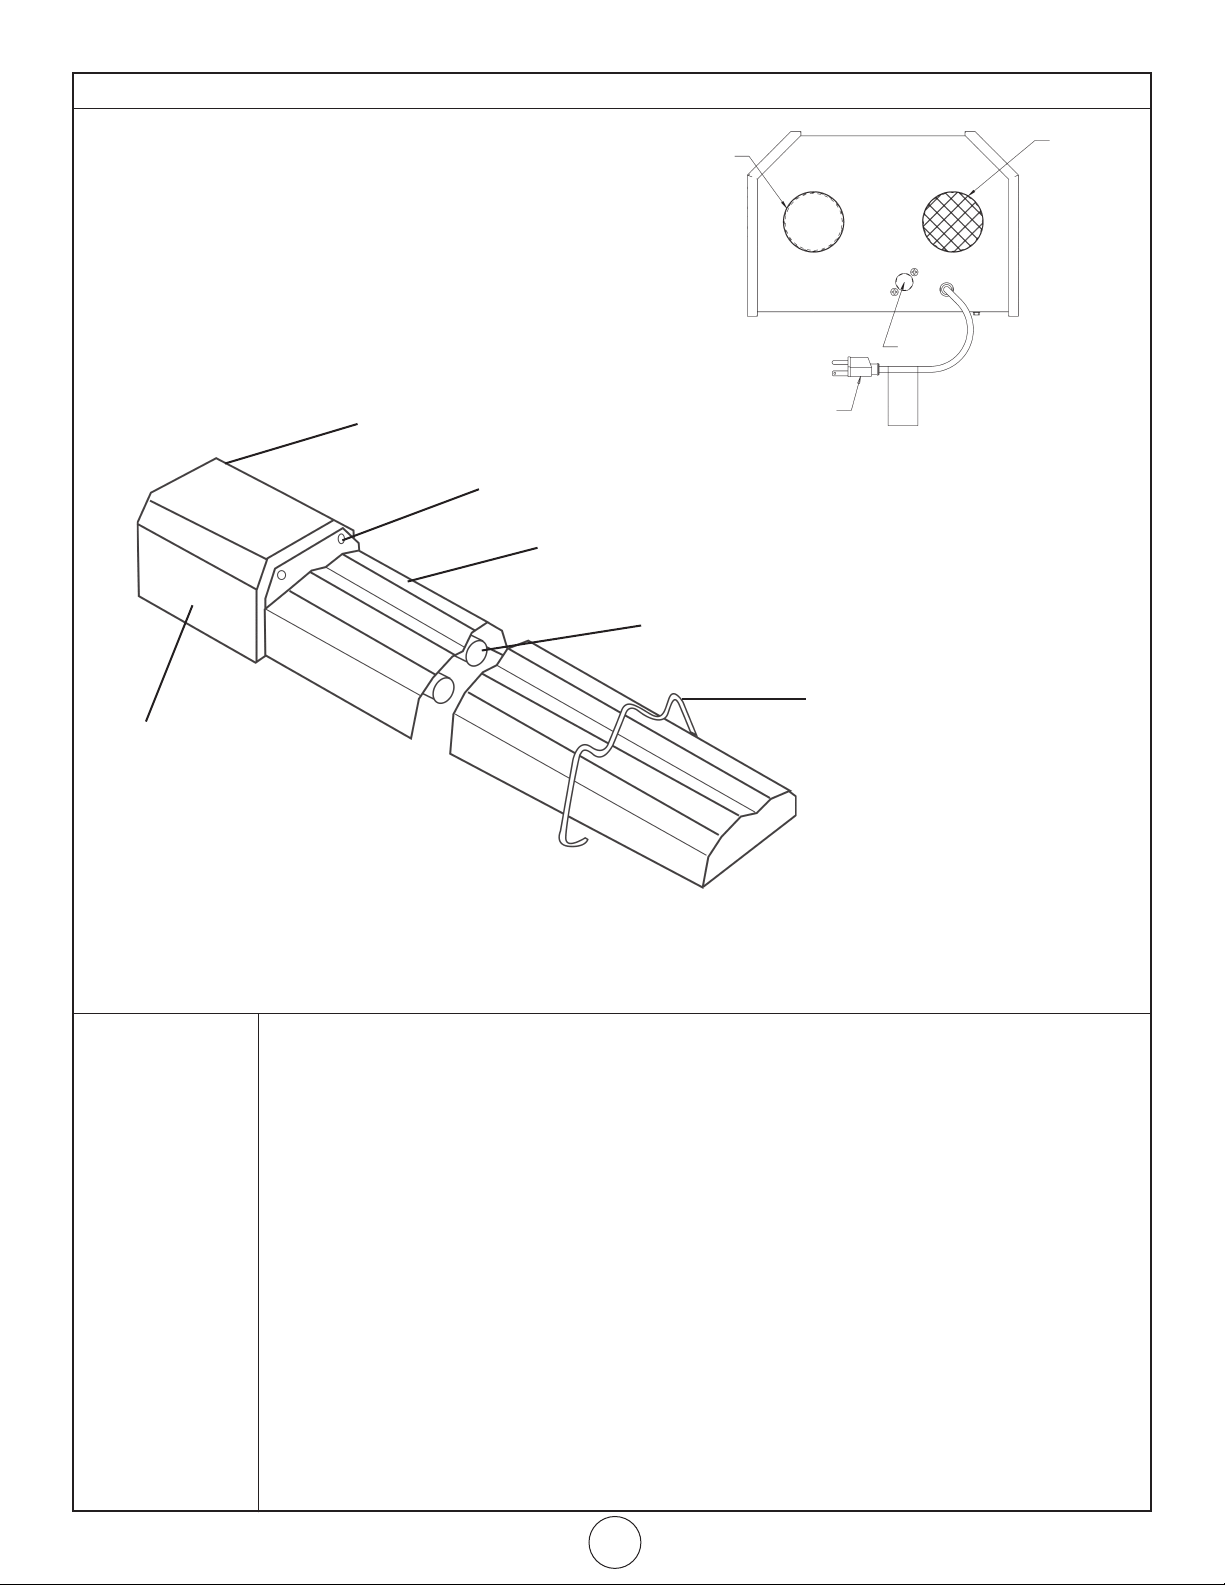
About The Heater
Burner Box
Front Fixed Hanger
Reflector
Exhaust Vent
Heat Exchanger
Intake Vent
1/2" NPT
Power Cord
- Rear View -
Rear Movable Hanger
Control Side
Access
Burner Box Contains the electrical components (i.e. blower motor, power transformer, etc.) and gas distribution components
(i.e. gas valve, etc.) that make the heater work. There are no owner serviceable items contained in this box.
Front Fixed Hanger Provides rigid support and mounting surface for the reector. Holes are provided in the upper corners of the
bulkhead to accommodate suspension hardware required for installation of the heater.
Reector The reector is made from formed aluminum and reects the radiant energy downward to the space to be
heated.
Heat Exchanger A U-shaped tube through which the heated products of combustion pass.
Rear Movable Hanger Provides support for the heat exchanger and reector at the end that is furthest from the burner box. The
support may be moved (within limits) to accommodate hanging of the unit.
Service Door To be removed only by a licensed contractor. Removal of this service door provides access to the electrical and
gas distribution components.
Intake Vent Accomondates a 3" diameter combustion air inlet duct that delivers fresh air to the burner.
Exhaust Vent Accomondates the air-venting duct that carries the products of combustion to be vented outdoors.
Nipple – ½ NPT Point at which the gas supply is connected to the heater.
Power Cord Includes a three prong plug that must be connected to a dedicated and properly grounded three prong ceiling
outlet.
Mr. Heater | Gas-Fired Low-Intensity Infrared Heater Operating Instructions and Owner’s Manual
4
Page 5
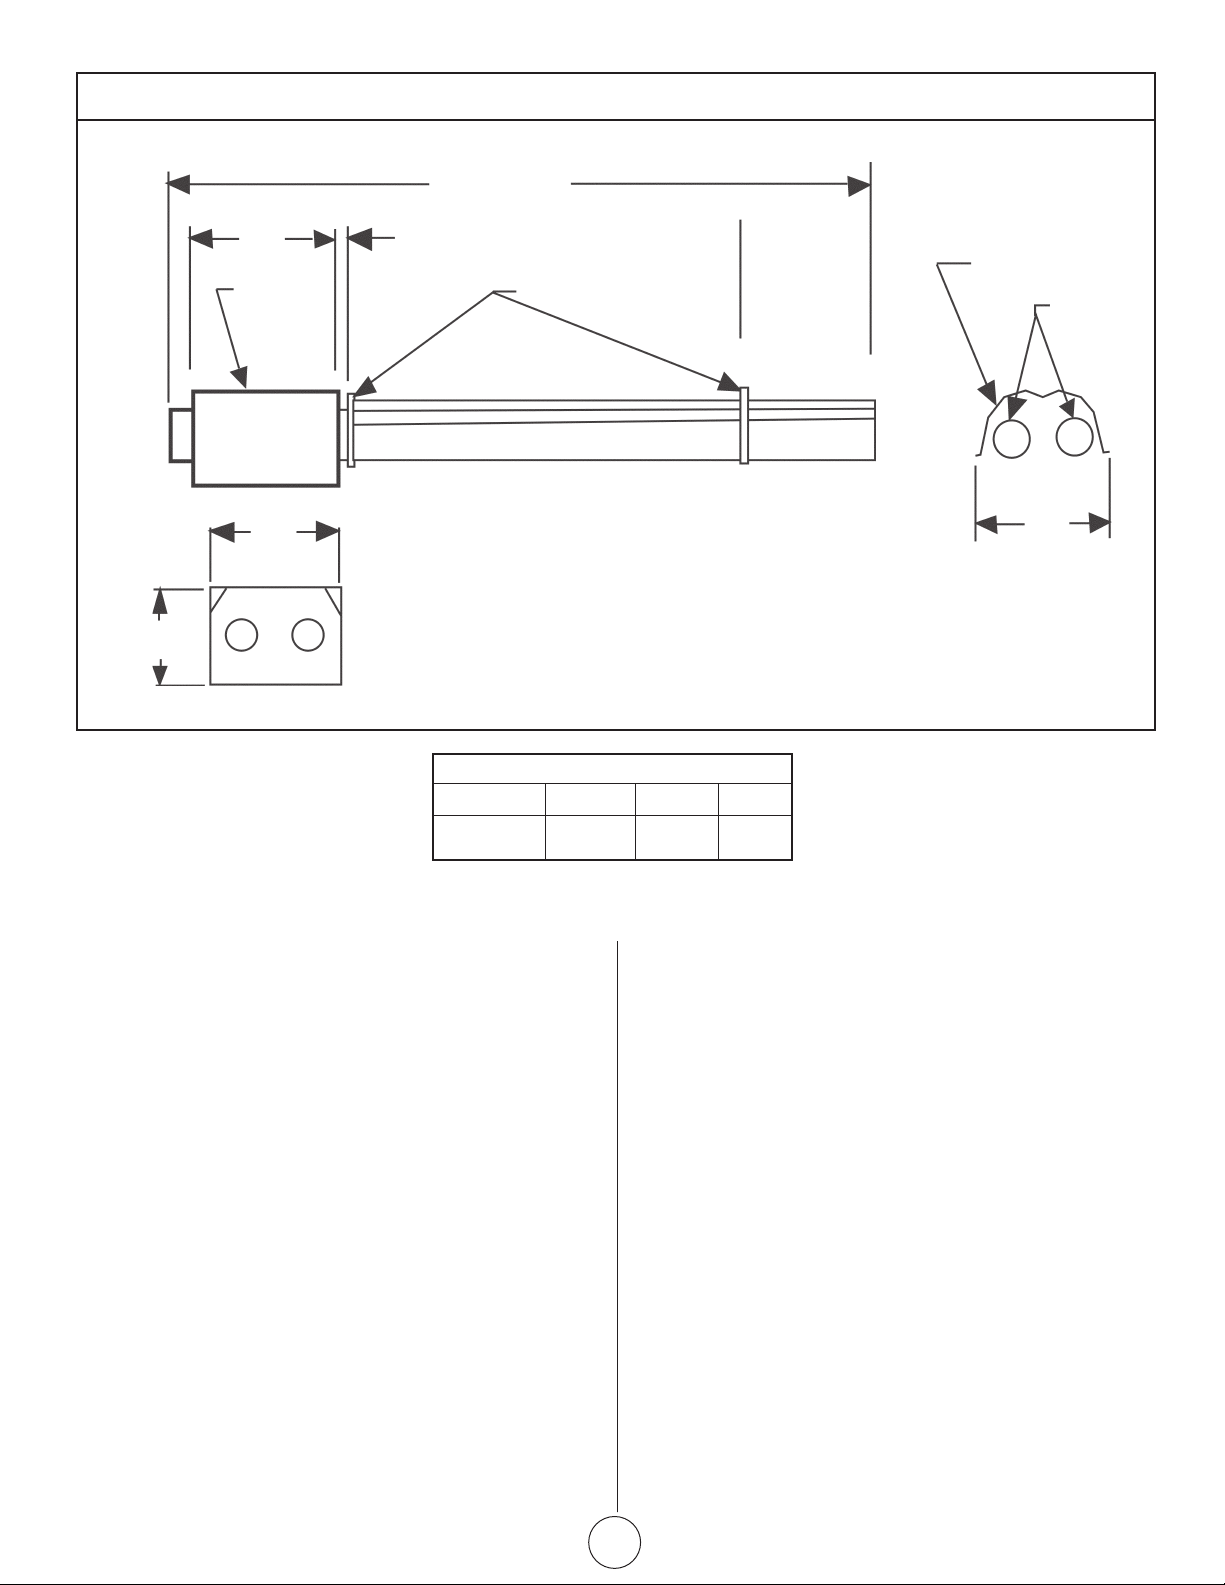
Technical Specifications:
1/2"
11
Burner Box
Length
1" Max.
Reflector
Suspension Points
Heat
Exchanger
13
1/2
"
- Side View -
9"
Leading Particulars
Model No. BTU/hr Weight Length
MHT-45 45,000 96 lbs. 10’
HEATER SPECIFICATIONS
Electrical
Rating: 120VAC, 60Hz, single phase, 1 amp
Connection: 3 pin molded plug
Gas Inlet Connection
Connection ½” Male NPT
Gas Inlet Pressure
The minimum inlet gas supply pressure for the purpose of input
adjustment.
Natural Gas:
Minimum - Inlet 5.0” w.c.
Maximum - Inlet 10.5” w.c.
LP Gas (propane):
Minimum - Inlet 11.0” w.c.
Maximum – Inlet 13.0” w.c.
Manifold Pressure
Natural Gas: 4.0” w.c.
LP Gas (propane): 10.0” w.c.
VENTING SPECIFICATIONS
Vent/Flue
Length – 25 feet (Maximum)
5 feet (Minimum)
Flue Pipe – 3.0” diameter
Vent Pipe – 3” diameter
- End View -
Operating Instructions and Owner’s ManualMr. Heater | Gas-Fired Low-Intensity Infrared Heater
5
Page 6
Where can the heater be installed?
The MHT tube heater is intended for installation in the following
areas:
• Residential applications, such as:
Section 2 PLANNING
General
This section provides the following information:
— garages
— greenhouses
— workshops
• Light industrial/commercial applications, such as:
— entranceways
— lobby areas
— Lunch rooms
— aircraft hangars (see Section 2 for restrictions)
— public garages ( see Section 2 for restrictions)
Where can’t the heater be installed?
The MHT tube heater is not intended for installation in the
following areas:
•Residential living or sleeping areas
•Basements
Installer’s responsibility
The MHT tube heater , as well as the gas and electrical supply,
and the venting of the heater must be installed in accordance with
applicable specications and codes. Only rms (or individuals) well
qualied in this type of work should install the system. Consult local
Building Inspectors, Fire Marshals for further guidance.
Use the information given in this manual together with the cited
codes and regulations to perform the installation. The installer must
furnish all needed materials that are not furnished as standard
equipment. It is also the installer’s responsibility to see that the
materials and installation methods used, result in a job that is
workmanlike in appearance and is in compliance with all applicable
codes and requirements to this manual. The installer must give this
manual to the owner.
•Denes the gas, electric and venting requirements for the
MHT tube heater.
•Species the national standards and applicable codes that
apply to the gas, electric and venting requirements.
•Species the national standards and applicable codes that
apply to non-residential installations.
Gas Service Requirements:
System Requirements
Inlet Connection
Connection: ½” Male NPT
Inlet Pressure
Natural Gas:
Minimum - Inlet 5.0” w.c.
Maximum – Inlet 10.5” w.c.
LP Gas (propane):
Minimum – Inlet 10.5” w.c.
Maximum – Inlet 13.0” w.c.
Manifold Pressure
Natural Gas: 4.0” w.c.
LP Gas (propane): 10.0” w.c.
Type of Gas
The type of gas appearing on the nameplate must be the type
of gas used. Installation must comply with local codes and
recommendations of the local gas company. United States: Refer
to National Fuel Gas Code, ANSI Z223.1 – latest revision, (same as
NFPA Bulletin 54). Canada: Refer to Can 1-B149.1: Installation Codes
for Gas Burning Appliances.
Gas Supply Lines
The size of the gas supply lines must comply with local codes and
recommendations of the local gas company. United States: Refer
to National Fuel Gas Code, ANSI Z223.1 – latest revision, (same as
NFPA Bulletin 54). Canada: Refer to CAN 1-B149.1: Installation Codes
for Gas Burning Appliances.
A 1/8” NPT plugged tap must be installed in the gas line connection
immediately upstream of the heater that is farthest from the gas
supply meter. The tap is required for checking system gas pressure.
Meter and Service
Meter and service must be large enough to handle all the heaters
being installed plus any other connected load. The gas line which
feeds the system must be large enough to supply the required gas
with a maximum pressure drop of ½” w.c. When gas piping is not
included in the layout drawing, the local gas supplier will usually help
in planning the gas piping.
Mr. Heater | Gas-Fired Low-Intensity Infrared Heater Operating Instructions and Owner’s Manual
6
Page 7

Electrical Service Requirements:
System Requirements
The MHT tube heater requires a grounded three-prong electrical
outlet to be installed within 18 inches of the rear surface of the
heater’s burner box. It is recommended that the outlet for the heater
be ceiling-mounted and should be on a dedicated circuit. DO NOT
use an electrical extension cord to operate the heater.
Heater Rating: 120 VAC, 60 Hz, Single Phase, 1 Amp
WARNING
Electrical Shock Hazard
Plug heater into grounded three-prong ceiling receptacle.
Do not cut or remove the grounding prong from this plug.
Do not use with an extension cord.
Failure to follow these instructions will result in death or
electrical shock.
ATTENTION
Risque d’electrocution
Brancher le cordon du radiateur sur un socie a 3 broches
et a la masse, situe au plafond.
Ne pas sectionner ou retirer la broche de masse de cette
prise.
N’utilliser aucun cable de rallonge.
Le non-respect de ces consignes peut entrainer mort ou
electrocution.
Grounding
The heater must be electrically grounded in accordance with the
following codes: United States: Refer to National Electrical Code
ANSI/NFPA-70 – latest revision. Wiring must conform to the most
current National Electrical Code and local ordinances. Canada: Refer
to Canadian Electrical Code, CSA C22.1 Part 1 – latest revision.
Venting Requirements:
System Requirements
The MHT tube heater must be installed with venting or with one
of the optional venting kits available from Enerco. DO NOT connect
this heater to a separate chimney. Gas appliances must not be
connected to a chimney ue serving a seperate solid-fuel burning
appliance. DO NOT common vent with any other fuel burning
appliance.
Maximum Length: 25 feet
Minimum Length: 5 feet
WARNING
Carbon Monoxide Hazard
Heater must be exhausted outside.
Use materials supplied.
Failure to follow these instructions will result in death or
injury.
ATTENTION
Risque de monoxyde de carbone
L echappement du radiateur doit s’effectuer a l’exterieur.
Utillisez le materiel fourni.
Le non-respect de ces consignes peut entrainer mort ou
blessures.
Venting Codes
The location, size, installation and termination of vents, as well as
the minimum required safe distances when penetrating combustible
walls, must comply with local codes and recommendations of the
local gas company. United States: Refer to National Fuel Gas Code,
ANSI Z223.1 – latest revision, (same as NFPA Bulletin 54). Canada:
Refer to Can 1-B149.1 : Installation Codes for Gas Burning Appliance.
Non-residential Installations:
Aircraft Hangars
The MHT tube heater may be used in certain areas of aircraft
hangars. Installation in aircraft hangars must be in accordance with
the following codes: United States: Refer to Standard for Aircraft
Hangars, ANSI/NFPA-409 – latest revision. Canada: Refer to Standard
CGA B149-1M91.
Heaters in aircraft storage or service areas must be installed a
minimum of 10 feet above the upper surface of wings or engine
enclosures of the highest aircraft which may be housed in the
hangar. (This should be measured from the bottom of the heater to
the top of the wing, or engine enclosure, whichever is highest from
the floor).
In other sections of aircraft hangars, such as shops or ofce, heaters
must be installed a minimum of 8 feet above the oor.
Heaters installed in aircraft hangars shall be located so as not to be
subject to damage by aircraft, cranes, movable scaffolding or other
objects.
When installed over hoists, the minimum required safe distances to
combustibles must be maintained from the uppermost point of the
combustible materials placed on the hoist.
Public Garages
The MHT tube heater may be used in public garages. Installation
in public garages must be in accordance with the following codes:
United States: Standard for Parking Structures NFPA-88A – Latest
revision, or the Standard for Repair Garages, NFPA-88B – latest
revision. Canada: Refer to Can 1-B149.1: Installation Codes for Gas
Burning Appliances.
Heaters must be installed a minimum of eight feet above the
oor. Minimum required safe distances to combustibles must be
maintained from vehicles parked below the heater.
When installed over hoists, the minimum required safe distances to
combustible must be maintained from the uppermost point of the
combustible materials placed on the hoist.
Hazardous Locations
Where there is the possibility of exposure to combustible airborne
material or vapor, consult the local Fire Marshal, the Fire Insurance
Carrier or other authorities for approval of the proposed installation.
Operating Instructions and Owner’s ManualMr. Heater | Gas-Fired Low-Intensity Infrared Heater
7
Page 8
Section 3 INSTALLATION
WARNING
Several steps are involved in the installation of the heater.
DO NOT attempt to operate the heater until ALL steps of
the installation have been accomplished. Failure to follow
this warning will cause death, injury or property damage.
ATTENTION
Plusieur étapes sont impliquées dans l’installation de
l’appareil de chauffrage. PAS la tentative pour opérer
l’appareil chauffrage jusqu’à ce que TOUTES étapes de
l’installation ont été accomplies. L’echec pour suivre cet
avertissement causera la mort, les dommages de blessure
ou propriété.
Safety Equipment
Use of the following safety equipment is recommended for
installation of the MHT tube heater:
Installation Materials
Materials required for the installation of theMHT tube heater include
at a minimum the following:
• High temperature silicone sealant
• Suspension hooks (capable of supporting 150 pounds
each)
• Sheetmetal screws
The following items may be required for your particular installation:
• Plastic drain hose
• Additional vent pipe
• Roof ashing
• Rain collar
• Chain – 2/0, or equivalent
• S-hooks (as required)
• Work gloves
• Safety glasses
Installation Tools
Tools required for the installation of the MHT tube heater include at
a minimum the following:
• Tape measure
• Electric drill (with an assortment of drill bits)
• Pipe wrenches – 2 required
• Screwdriver
• Tin snips
• Hacksaw
• Wire strippers
• Staple gun
• Level
• Pliers
Choose Location for Heater
When selecting a suitable mounting location for the MHT tube
heater it is important to consider the following:
1. The heater must meet the minimum mounting height
requirement of 7 feet above the oor. For aircraft hangars and
public garages, the heater must meet the minimum mounting
height requirement of 8 feet above the oor.
2. The proposed mounting location allows for the minimum
required safe distances from combustibles (combustibles include
vehicles, wood gasoline and ammable objects, liquids and
vapors)
3. The proposed mounting location of the heater will not restrict
motion of passageway doors or windows.
4. The proposed location will not interfere with operation of the
overhead garage door.
5. The proposed location will provide the best coverage of the
total area to be heated.
6. The proposed location must provide for adequate combustion
and ventilation air.
7. The proposed location must provide for adequate accessibility
clearance for service and proper operation.
8. Consideration be given to the types of vehicles that will be
parked in the garage (cars, vans, boats, RV’s etc.).
9. The proposed location will allow for the minimum required safe
distances from combustibles with respect to the vehicles parked
in the garage.
10. The proposed location will allow the required utilities (i.e.: gas
and electric) and venting to be installed (maximum vent length
is 25 feet).
11. Sufcient clearances will exist to allow for maintenance.
12. Overhead structural members (rafters, beams, etc.) are
accessible for attaching the heater.
13. Location must allow for adequate clearance around air openings
into the combustion chamber.
Mr. Heater | Gas-Fired Low-Intensity Infrared Heater Operating Instructions and Owner’s Manual
8
Page 9

General Guidelines (Residential)
Regardless of the venting arrangement that will be connected to the
heater, the following general guidelines for venting must be followed:
1. The installation must conform with local codes or in the absence
of local codes with the National Fuel Gas Codes, ANSI Z223.1/
NFPA 54, Natural Gas and Propane Installation Code, CSA BI49.1
for Canada.
2. Appliance input ratings are based on sea level operation and
need not be changed for operating up to 2,000 feet (609.9m)
elevation. For operation at elevations above 2,000 feet (609.9m)
manufactured to specied deration condition for Canada and the
United States.
3. The appliance and its appliance main gas valve must be
disconnected from the gas supply piping system during any
pressure testing of that system at test pressures in excess of ½
psi. (3.5kPa.).
The appliance must be isolated from the gas piping system by
closing equipment shutoff valve during pressure testing of the gas
supply piping system at test pressures equal to or less than ½ psi.
(3.5kPa.).
(WARNING) Materials and items, when stored under this heater,
will be subjected to radiant heat and could be seriously damaged.
4. All horizontal venting sections must slope away from the heater at
a rate of ¼” per foot.
5. The total length of vent pipe (horizontal and vertical runs
combined, plus the length of the exterior termination) must not
exceed 25 feet, and must not be less than 5 feet.
6. The vent terminal, mounted outside of the building, should not be
located above walkways. Condensate produced during operation
of the heater could drip onto the walkway and could form ice
during cold weather.
7. Be sure that the venting installation is in accordance with all
applicable local codes and recommendations of the local gas
company.
8. DO NOT connect this heater to a separate chimney, and DO
NOT common vent with any other fuel burning appliance. Gas
appliances must not be connected to a chimney ue serving a
separate solid-fuel burning appliance.
9. Maintain a minimum of 1-inch clearance from combustibles
around all vent pipes.
10. Seal all vent pipe connections with high temperature silicone
sealant and secure each connection with three sheet metal
screws.
Minimum Required Safe Distances from
Combustibles
In all situations, the minimum required safe distances from
combustibles must be maintained. Combustibles are materials which
may catch on re and include many common items such as wood,
paper, rubber, fabrics, etc. Combustible materials such as those
noted, and any other combustible materials must not be placed closer
to any base or side of the MHT tube heater than the distances noted
in the diagrams on the following page. If you have any questions
about the minimum required safe distances from combustibles,
or the associated diagrams, please contact your installer, Enerco
representative or distributor, of Enerco Technical Products during
normal business hours which are Monday through Friday, 8:15 a.m. to
4:45 p.m., Eastern Time.
Telephone: (800) 251-0001 or (216) 916-3000
It is important to keep the minimum required safe distances from
combustibles at all times to avoid death, personal injury or property
damage. Clearances from vehicles parked beneath heaters must
be maintained. Signs should be posted to identify any possible
violation of the clearance distances form the heater in the vehicle
areas. Maximum allowable stacking height in storage areas should
be identied with signs or appropriate markings. The illustrations
and Table on the adjoining page specify the minimum required safe
distances from combustibles.
Horizontal Installations
A
B
C
F
B
Note: Dimension “C” indicates the minimum required safe
distances from combustibles, it DOES NOT indicate
the required mounting height. The minimum mounting
height is 7 feet, except for aircraft hangars and public
garages.
45° Tilted Installations
24" Min
Approx. 45°
D
Note: Dimension “E” indicates the mini-
mum required safe distances from
combustibles, it DOES NOT indicate
the required mounting height. The
minimum mounting height is 7
feet, except for aircraft hangars and
public garages.
MINIMUM REQUIRED SAFE DISTANCES
Model BTU/Hr A B C D E F G
MHT-45 45,000 5" 24" 54" 38" 36" 6" 4"
A
G
F
E
Operating Instructions and Owner’s ManualMr. Heater | Gas-Fired Low-Intensity Infrared Heater
9
Page 10

Hang the Heater
Residential garages come in a variety of sizes, shapes, styles and
methods of construction. Because of all these variables, it is not
possible to include mounting hardware with the Mr. Heater MHT
heater. Although wooden rafters and joists are the most common
overhead structural members in residential garage applications, other
structural congurations are also illustrated below.
In the typical suspension methods shown below, lengths of chain
are shown as a means of lowering the heater. However, for most
residential applications it may not be necessary to lower the heater.
Instead, it may be possible to screw hook-type hardware into the
underside of a beam. The exposed hook could directly engage one
of the two mounting holes in the front xed hanger, while another
hook could engage in one of the three suspension loops of the rear
movable hanger.
Whichever method of suspension is selected, the two required
suspension points must be capable of supporting a minimum
of 150 pounds each.
Horizontal Installation
1. Using S-hooks, attach two equal lengths of 2/0 chain, or
equivalent, to the two uppermost holes in the front xed hanger.
2. Slip the free end of both chains onto another S-hook, as shown.
3. The uppermost S-hook can now be installed on the suspension
hardware that you have installed for suspension of the unit. An
additional length of chain may also now be installed, if required,
to lower the heater.
NOTE: The hook portion of hook-type suspension hardware
may directly engage the two holes in the front xed
hanger and the center loop of the rear moveable
hanger.
Wood Beam
Most common for
residential
applications
Threaded Hook
min. 3/8" (10 mm)
Locknut
Washer
Wood Beam
Screw Hook
Washer
Beam Clamp
I-Beam
Bar Joist Clip
Truss
As Req'd
S-Hook
Most common for non-residential applications
Concrete Beam
Anchor
Front Fixed Hanger
Rear Movable Hanger
45° Tilted Installation
1. Determine if the heater is going to be tilted left, or tilted right.
The front and rear suspension points selected must be on the
same side (left or right) of the heater as shown below.
2. Attach suspension hooks and/or chains to the selected suspension
points of the heater.
Heater Orientation
The MHT tube heater may be installed in any of the three
orientations indicated below. Select the heater orientation that is
best suited for the location that you have chosen for your heater.
• Horizontally
• Tilted 45° Right
• Tilted 45°° Left
NOTE: If the heater is going to be vented through the roof,
be sure to carefully review the roof option installation portion of this section. Ensure that the selected
mounting site will satisfy the measurement parameters (vent length not to exceed 25 feet) described in
that section. Horizontal Installation
Mr. Heater | Gas-Fired Low-Intensity Infrared Heater Operating Instructions and Owner’s Manual
10
Use these two suspension
points for Tilted 45° Right
Installation
Use these two suspension points for Tilted
45° Left Installation
Tilted Left
Tilted Right
Page 11

MHT HEATER ASSEMBLY INSTRUCTIONS
1. Place gaskets from Gasket kit (02885) on each side of the burner
box. Use the four mounting studs around each of the three-inch
holes for location.
2. Slide the tube anges over the studs as was done in the prior step
with the gaskets. The tube ends extend through the anges to
help with alignment.
3. Using the four long and four short nuts from the bolt kit (02876)
secure the tube set to the burner box. As shown in the diagram,
use the four long nuts in the center and the four short nuts on
the outside.
4. Slide the bulkhead and reector assembly forward until it stops on
the long nuts. Using the (4) 5/16-18 X 1/2" long screws form the
(02876) bolt kit secure the bulkhead to the burner box.
USE CAUTION AS NOT TO
OVERTIGHTEN ASSEMBLY AS IT
MAY CAUSE DAMAGE TO PARTS
OF ASSEMBLY
11
Operating Instructions and Owner’s ManualMr. Heater | Gas-Fired Low-Intensity Infrared Heater
Page 12

Typical Installation
The Illustration below shows a typical installation of the MHT tube
heater. The installation drawing shown has a straight horizontal
venting arrangement and species the minimum space required for
maintenance, as well as the allowable range of distances between
the two suspension points.
Detailed venting arrangements are illustrated in following portions of
this section.
24"
Minimum
Recommended
for servicing
15"
1" Max.
X
Suspension
Points
6" Min
Section 4 VENTING
This appliance is certied under the ANS/CSA Standard for Vented
Gas-Fired Space Heating Appliances. In accordance with these
standards all sidewall venting must conform to the supplied diagram
for Vent Terminal Clearances, which are stated for both U.S. and
Canadian installations. These clearances should be compared
to but not less than those specied in the current ANSI Z223.1/
NFPA 54, National Fuel Gas Code, or CSA B149.1, Natural Gas and
Propane Installation Code. Clearances not covered in the table or
above listed codes must comply with local installation codes and the
requirements of your local gas supplier.
Vent terminal
Exterior Wall
Burner Box
Outside wall thickness 10" max. 1/2" min.
Reflector
Minimum Mounting
Height- 7 feet*
X Dimension
Model Min. Max.
MHT-45 102" 114"
(*) For minimum mounting height in aircraft hangars and public
garages.
Canadian Installations1 US Installations2
A= Clearance above grade, 12 inches (30 cm) 12 inches (30 cm)
veranda, porch, deck or
balcony
B= Clearance to window or door 6 inches (15 cm) for appliances < 6 inches (15 cm) for appliances <
that may be opened 10,000 Btuh (3 kW), 12 inches (30 10,000 Btuh (3 kW), 9 inches (23
cm) for appliances > 10,000 Btuh cm) for appliances > 10,000 Btuh
(3 kW) and < 100,000 Btuh (30 (3 kW) and < 50,000 Btuh (15
kW), 36 inches (91 cm) for kW), 12 inches (30 cm) for
appliances > 100,000 Btuh (30 kW) appliances > 50,000 Btuh (15 kW)
C= Clearance to permanently * *
closed window
D= Vertical clearance to ventilated * *
soft located above the
terminal within a horizontal
distance of 2 feet (61 cm) from
the center line of the terminal
E= Clearance to unventilated soft * *
F= Clearance to outside corner * *
G= Clearance to inside corner * *
H= Clearance to each side of 3 feet (91 cm) within a height 15
center line extended above feet (4.5 m) above the *
meter/regulator assembly meter/regulator assembly
I= Clearance to service regulator 3 feet (91 cm) *
vent outlet
J= Clearance to nonmechanical air 6 inches (15 cm) for appliances < 6 inches (15 cm) for appliances <
supply inlet to building or the 10,000 Btuh (3 kW), 12 inches (30 10,000 Btuh (3 kW), 9 inches (23 cm)
combustion air inlet to any cm) for appliances > 10,000 Btuh (3 for appliances > 10,000 Btuh (3 kW)
other appliance kW) and < 100,000 Btuh (30 kW), and < 50,000 Btuh (15 kW), 12
36 inches (91 cm) for appliances inches (30 cm) for appliances >
> 100,000 Btuh (30 kW) 50,000 Btuh (15 kW)
K= Clearance to a mechanical air 6 feet (1.83 m) 3 feet (91 cm) above if within 10 feet
supply inlet (3 m) horizontally
L= Clearance above paved 7 feet (2.13 m) + *
sidewalk or paved driveway
located on public property
M= Clearance under veranda, 12 inches (30 cm) ++ *
porch deck, or balcony
1 In accordance with the current CSA B149.1, Natural Gas and Propane Installation Code.
2 In accordance with the current ANSI Z223.1/NFPA 54, National Fuel Gas Code.
+ A vent shall not terminate directly above a sidewalk or paved driveway that is located between two single family dwellings and serves both dwellings.
++ Permitted only if veranda, porch, deck, or balcony is fully open on a minimum of two sides beneath the oor.
* For clearances not specied in ANSI Z223.1/NFPA 54 or CSA B149.1, one of the following shall be indicated:
a) A minimum clearance value determined by testing in accordance with section 2.19.6, or;
b) A reference to the following footnote:
“Clearance in accordance with local installation codes and the requirements of the gas supplier.”
Mr. Heater | Gas-Fired Low-Intensity Infrared Heater Operating Instructions and Owner’s Manual
12
Page 13

BASIC FLUE VENTING (Residential Only)
• Venting must be in compliance with the latest edition of the
National Fuel Gas Code (ANSI. Z223.1 latest edition: or the
authority having jurisdiction.
• Uninsulated single-wall metal pipe shall not be used outdoors in
cold climates for venting of these heaters as specied by Section
7.8 of the ANSI Z223.1/NFPA 54 National Fuel Gas Code-latest
edition.
• For the installation of a single-wall metal pipe through an
exterior combustible wall, refer to the latest edition of the
National Fuel Gas Code or the authority having jurisdiction.
• In regions of the country where prevailing winds are consistently
higher than 40 mph, it may be necessary to terminate the vent
system above the roof level.
Other venting references can be found in equipment volume of the
ASHRAE Handbook.
A. SINGLE HEATER VENTING
a) Vertical Through the Roof
NOTE: For residential applications, the heater must
not be connected to a separate chimney,
but must be installed using the venting
system as specified below.
1. When venting the heater to outside of building through a roof,
use 3 inch O.D. single-wall metal pipe. This is to be constructed
of galvanized sheet metal or other approved noncombustible,
corrosion-resistant material as indicated by state and/or local
codes.
2. A vent passing through a combustible roof shall extend through
a 2-inch clearance roof thimble. Double-wall, Type B vent must
be used for the portion of the vent system which passes through
the roof. An approved vent cap (such as Leslie “VersaCap” Type
B) must be attached to the end of the ue.
3. The maximum equivalent length of vent pipe should be carefully
observed. A safety switch in the heater is designed to shut
the heater off before excessive ue restriction causes bad
combustion.
Minimum Equivalent Length = 5 feet of Pipe
Maximum Equivalent Length = 25 feet of Pipe
Use the following correction factors to obtain the equivalent
length:
a) Subtract 15 feet if the run is horizontal.
b) Subtract 10 feet for an approved vent cap.
c) Subtract 10 feet for each elbow beyond 15 feet from the
heater.
d) Subtract 15 feet for each elbow within 15 feet of the heater.
4. Limit the quantity of 90° elbows to two. When vent pipe is in a
horizontal run, it must rise not less than ¼ inch per foot from
the start of the vent system towards the vent terminal.
5. Joints between sections of piping shall be fastened by sheet
metal screws or other approved means.
The seams along the length of the piping and the joints
between sections of piping should be sealed to prevent a
potential leakage of ue gas into building. Use 100% RTV
Silicone Rubber Adhesive sealant suitable for 500°F.
6. All portions of the vent pipe shall be supported to prevent from
sagging.
7. When the vent pipe passes through areas where the ambient
temperature is likely to induce condensation of the ue gasses,
the vent pipe should be insulated and a condensation drain
should be provided.
8. The minimum clearance to combustible materials for singlewall ue pipe shall be 6 inches. This may be reduced when the
combustible material is protected as specied in the National
Fuel Gas Code or the authority having jurisdiction.
9. Single-wall metal pipe shall not originate in any unoccupied attic
or concealed space and shall not pass through any attic, inside
wall or concealed space, or through any oor.
10. A venting system shall terminate at least 3 feet (0.9m) above any
forced air inlet located within 10 feet (3.1m).
Vent Cap
(Leslie VersaCap)
Type B
2' Min.
10'
or less
Flashing
2" Clearance Thimble
Seal joint &
annular space.
VERTICAL
THROUGH THE ROOF
2' Min.
(when no wall or
parapet exist)
4"
Vent
Dia.
2' Min.
(when no wall or
parapet exist)
Total Vent
Height
(5' Min.)
SINGLE HEATER VENTING
¼ per ft. rise
Lateral
b) Vent Termination (Residential Installations)
1. The vent terminal shall terminate above the roof line so that no
discharge opening is less than 2 feet (0.6m) horizontally from
the roof surface. The lowest discharge opening will be no closer
than the minimum height specied in the following table. These
minimum heights may be used provided the vent is not less than
8 feet (2.4m) from any vertical wall or similar obstruction.
Not less than 8ft.
2ft. min.
H (Min.)
Vertical Wall
a) Be sure that method selected for venting heater complies with all
Operating Instructions and Owner’s ManualMr. Heater | Gas-Fired Low-Intensity Infrared Heater
13
Page 14

MINIMUM HEIGHT FROM ROOF
TO LOWEST DISCHARGE OPENING
Roof Pitch H (Min)
Flat to 6/12 1.0 Feet
Over 6/12 to 8/12 1.5 Feet
Over 8/12 to 10/12 2.5 Feet
Over 10/12 to 12/12 4.0 Feet
Over 12/12 to 16/12 6.0 Feet
Over 16/12 to 20/12 7.5 Feet
2. All other gas vents shall terminate not less than 2 feet (0.6m)
above the highest point where they pass through the roof and at
least 2 feet (0.6m) higher than any portion of a building located
within 10 feet (3.1m) as shown in the following illustration.
Vent Cap
Type B
Vent Pipe
Type B
(Double Wall)
10ft. or less
2ft. min.
NOTE: To minimize problems associated with
condensation in long runs, vent pipe can be
insulated.
3. The horizontal venting system approved with this heater consists
of the Side Wall Vent Kit (02840) shown are page 3.
4. Limit the quantity of 90° elbows to two. When vent pipe is in a
horizontal run, it must be pitched downward ¼ inch per foot
towards the vent terminal. The heater must be installed level.
5. The horizontal venting system shall not terminate:
a) Less than 4 feet (1.2m) below, 4 feet (1.2m) horizontally from,
or 1 foot (30cm) above any door, window or gravity air inlet into
any building. The bottom of the vent terminal shall be located
at least 7 feet (2.1m) above grade or above snow accumulation
levels as determined by local codes.
b) Less than 3 feet (0.9m) from a combustion air inlet.
c) Less than 3 feet (0.9m) from any other building opening or any
gas service regulator.
d) Directly over areas where condensate or vapor could create a
nuisance or hazard or be harmful to the operation of gas utility
meters, regulators, relief valves, or other equipment. Building
materials should be protected from ue gases and condensate.
6. In regions of the country where prevailing winds are consistently
higher than 40 mph, it may be necessary to terminate the vent
system above the roof level.
Storm Collar
Boot Flashing
2" Clearance
Seal joint &
Vent Pipe
(Single Wall)
annular space.
c) Horizontal Through the Sidewall
This heater, when horizontally vented, must be installed with the
approved venting system.
When venting the heater horizontally through a combustible
outside wall, the same requirements listed previously for Venting
Through the Roof apply except as follows:
1. When venting the heater to the outside of the building through
a sidewall, use 3 inch O.D. single-wall metal pipe. This is to
be constructed of galvanized sheet metal or other approved
noncombustible, corrosion-resistant material as indicated by state
and/or local codes.
2. For horizontal venting, the vent lengths may be as follows:
Minimum Equivalent Length = 5 feet of Pipe
Maximum Equivalent Length = 25 feet of Pipe
Use the following correction factors to obtain the equivalent
length:
a) Subtract 15 feet if the run is horizontal
b) Subtract 10 feet for an approved vent cap.
c) Subtract 10 feet for each elbow beyond 15 feet from the heater.
d) Subtract 15 feet for each elbow within 15 feet of the heater.
Vent Cap
Type “B” Vent
Single-Wall
18"
Wall
Vent Pipe
Wall Thimble
Venting/Ducting
For Commercial and Industrial Installations
Only
General Requirements
Use aluminum or teon tape suitable for 550°F (3M Company tapes
#433 or #363) or RTV silicone sealant.
Heater must be vented in accordance with specication ANSI Z223.1
- latest revision. Partial information relating to this specication is
provided in this section with regard to size and congurations for
venting arrangements. For complete information consult ANSI
Z223.1 - latest revision and applicable local codes. Use the following
guidelines to help insure an adequate, safe ventin arrangement.
Mr. Heater | Gas-Fired Low-Intensity Infrared Heater Operating Instructions and Owner’s Manual
14
Page 15

codes as required for each particular location.
b) Exhaust end of heater will accept a three (3") inch ue pipe using
the ue pipe adapter.
c) Heater may be vented to the outdoors either vertically or
horizontally.
d) If heater is to be vented horizontally:
1) Vent must exit building not less than seven (7') feet above
grade when located adjacent to public walkways.
2) Vent must terminate at least three (3') feet above any forced
air inlet located within ten feet (10').
3) Vent must terminate at least four (4') feet below, for (4') feet
horizontally from, or one (1') foot above any door, window, or
gravity inlet into any building.
4) Vent terminal shall be located at least twelve (12") inches
from any opening through which vent gases could enter the
building.
e) Vent terminal opening must be beyond any combustible
overhang.
f) If condensation in the ue is a problem, the ue length should
be shortened or insulated.
g) For vent specications all of the following conditions must be
met:
The maximum equivalent length of vent pipe should be carefully
observed. A safety switch in the heater is designed to shut
the heater off before excessive ue restriction causes bad
combustion.
Minimum Equivalent Length = 5 feet of Pipe
Maximum Equivalent Length = 25 feet of Pipe
Use the following correction factors to obtain the equivalent
length:
1) Subtract 15 feet if the run is horizontal.
2) Subtract 10 feet for an approved vent cap.
3) Subtract 10 feet for each elbow beyond 15 feet from the
heater.
4) Subtract 15 feet for each elbow within 15 feet of the heater.
Limit the quantity of 90º elbows to two. When vent pipe is in a
horizontal run, it must rise not less than 1/4 inch per foot from
the start of the vent system towards the vent terminal.
Single Wall
Single wall vent run
Single wall terminal end
Double Wall
Double wall vent run and
Double wall terminal end
Alternative Arrangements /Optional
Equipment for Venting
Horizontal Venting
a) In combustible or noncombustible walls, use vent kits on
page (3). Follow vent manufacturer's instructions for proper
installation.
b) Three (3") inch O.D. ue pipe is required. Twenty ve (25') feet
maximum length is recommended.
c) All ue joints should be sealed using suitable product such as
General Electric RTV 106 or Permatex Form-A-Gasket Red High
Temperature Silicone Adhesive Sealant.
d) Vent terminal should be installed at a height sufcient to prevent
blockage by snow.
e) Building materials should be protected from degradation by ue
gases.
Vertical Venting
a) Three (3") inch O.D. ue pipe, maximum twenty ve (25') feet in
length may be used as shown with approved vent cap.
b) An insulated thimble may be required to pass through
combustible structures (check local codes).
c) All ue joints should be sealed using suitable products (see
recommendation for horizontal venting).
Operating Instructions and Owner’s ManualMr. Heater | Gas-Fired Low-Intensity Infrared Heater
15
Page 16

Vertical Venting
3' Min.
Flashing
VERTICAL THROUGH THE ROOF
Vent Cap
(Leslie VersaCap)
3" Dia.
Single-Wall Pipe
6" Min.
Air For Combustion (Residential)
If indoor combustion air is to be supplied for a tightly enclosed area,
one square inch of free area opening shall be provided below the
heater for each 1,000 Btu/hr of heater input.
When outside air is used, the opening below the heater shall be one
square inch of free area for each 4,000 Btu/hr of heater input. In
contaminated atmospheres or high humidity areas, optional outside
air for combustion is recommended.
Adequate clearances around the perforated fresh air plate must be
maintained at all times. In larger open areas of buildings, inltration
normally is adequate to provide air for combustion.
Direct Outside Air For Combustion (Residential)
Outside combustion air should be supplied directly to the heater
when the building is subject to negative pressure or contaminants
are present in the building air. These contaminates include paints,
solvents, corrosive vapors or any other foreign particles that may
cause damage to the heater or result in poor combustion.
Outside combustion air can be brought directly to the heater by a
3 inch diameter duct less than 25 feet long or equivalent. This is
attached to a 3 inch starting collar that is tted on inlet side of the
control cabinet. An approved vent cap must be placed directly to the
end of the outside combustion air inlet pipe. The combustion air
inlet should be a minimum of 3 feet, either vertically or horizontally,
from the ue vent termination. The air intake terminal must be
located not less than one foot above grade. It is good installation
practice to supply combustion air from the same pressure zone as
the vent outlet.
In colder climates, where necessary, insulate the fresh air duct. Avoid
locating the fresh air duct directly above the control box. Provide a
capped cleanout T as necessary.
3" Starting Collar
¼” per ft.
downwards
Intake Vent
Outside Combustion Air Supply
The MHT tube heater is approved for installation with an outside air
supply system. Some compounds such as halogenated hydrocarbons
or other corrosive chemicals in the air can be drawn into the
equipment and cause an accelerated rate of corrosion of some of the
heater components. The use of such chemical compounds near the
enclosure should be avoided.
IMPORTANT: If the building has a slight negative pressure or
contaminants are present in the air, an outside combustion air supply
to the heaters is strongly recommended.
For an outside air supply a three (3") inch O.D. single wall pipe may
be attached to the heater. The duct may be up to twenty ve (25')
feet maximum length or two (2') feet minimum length with no more
than two (2) elbows.
The air supply duct may have to be insulated to prevent
condensation on the outer surface. The outside air terminal should
be securely fastened to the outside wall by drilling four (4) holes in
the outside ange; wood screws or bolts and expansion sleeves may
be used to fasten terminal.
Non-Pressurized Outside Air Supply Duct
Mr. Heater | Gas-Fired Low-Intensity Infrared Heater Operating Instructions and Owner’s Manual
16
Page 17

Electrical Service Installation:
System Requirements
The MHT tube heater requires a grounded three-prong electrical
outlet to be installed within 18”of the rear surface of the heater’s
burner box. It is recommended that the outlet for the heater be
ceiling-mounted and should be on a dedicated circuit. DO NOT use
an electrical extension cord to operate the heater.
In order to control the heater thermostatically, it is necessary that
the grounded three-prong electrical outlet be controlled with a
on/off switch or a line voltage thermostat. Please consult with an
electrician or follow all local electrical codes.
Heater Rating: 120 VAC, 60Hz, Single Phase, 1 Amp
CAUTION Label all wires prior to disconnection when
servicing controls. wiring errors can cause improper and
dangerous operation. Verify proper operation after servicing.
Grounding
The heater must be electrically grounded in accordance with the
following codes: United States: Refer to National Electrical Code,
ANSI/NFPA-70 – latest revision. Wiring must conform to the most
current National Electrical Code and local ordinances. Canada: Refer
to Canadian Electrical Code, CSA C22.1 Part 1– latest revision.
WARNING Electrical Shock Hazard
Plug heater into grounded three prong ceiling receptacle.
Do not cut or remove the grounding prong from this plug.
Do not use with an extension cord. Failure to follow these
instructions will result in death or electrical shock.
ATTENTION Risque d’électrocution
Brancher le cordon du radiateur sur un socle à 3 broches
et à la masse, situé au plafond. Ne pas sectionner ou
retirer la broche de masse de cette prise. N’utilliser aucun
cable de rallonge. Le non-respect de ces consignes peut
entrainer mort ou electrocution.
The appliance, when installed, must be electrically grounded in
accordance with local code, or in the absence of local codes, with
the National Electrical Code (ANSI/NFPA 70) or Canadian Electrical
Code (CSA 22.1), if an external electrical source is utilized.
Gas Service Installation
Install Gas Supply Lines
A ½” gas supply connection is required as shown below. To check
system pressure, a plugged 1/8” NPT tapping is required upstream
of the manual gas shut-off valve supplied with the heater.
Before connecting the heater to the supply system, verify that all
high pressure testing of the gas piping has been completed.
DO NOT HIGH PRESSURE TEST THE GAS PIPING WITH THE
BURNER CONNECTED.
Follow these instructions to ensure a safe gas supply system
installation:
1. Support all gas piping with suitable pipe hanging materials.
2. Use wrought iron or wrought steel pipe and malleable iron
ttings. The use of copper tube and brass ttings is acceptable
Operating Instructions and Owner’s ManualMr. Heater | Gas-Fired Low-Intensity Infrared Heater
17
Page 18

when such use is in compliance with local codes. All pipe, tube
and ttings should be new and free from defects. Carefully ream
the pipe and tube ends to remove obstructions and burrs.
3. Use LP-resistant joint compound on all threads.
4. Check the pipe and tube connections for leaks before placing
heating equipment into service. When checking for gas leaks,
use a soap and water solution; never use an open ame.
NOTE: A plugged 1/8” NPT tapping must be provided upstream of
the gas supply to the heater. The gas supply line connecting
to the heater appliance should be such that it allows for
some movement of the unit. The appliance will go through
expansion and contraction during a heating cycle.
Section 5 OPERATION
Supplied
by others
Heater
Flex Pipe
Mr. Heater | Gas-Fired Low-Intensity Infrared Heater Operating Instructions and Owner’s Manual
18
Page 19

Operation of the Heater
CHILDERN AND ADULTS SHOULD BE ALERTED TO THE HAZARDS OF
HIGH SURFACE TEMPERATURES AND SHOULD STAY AWAY TO AVOID
BURNS OR CLOTHING IGNITION.
YOUNG CHILDERN SHOULD BE CAREFULLY SUPERVISED WHEN
THEY ARE IN THE SAME SPACE AS THE HEATER.
CLOTHING OR OTHER FLAMMABLE MATERALS SHOULD NOT BE
HUNG FROM THE HEATER, OR PLACED ON OR NEAR THE HEATER.
ANY GUARD OR OTHER PROTECTIVE DEVICE REMOVED FOR
SURVICING THE HEATER MUST BE REPLACED PRIOR TO OPERATING
THE HEATER.
INSTALLATION AND REPAIR SHOULD BE DONE BY A QUALIFIED
SERVICE PERSON. THE HEATER SHOULD BE INSPECTED BEFORE
USE AT LEAST ANNUALLY BY A QUALIFIED SERVICE PERSON.
MORE FREQUENT CLEANING MAY BE REQUIRED AS NECESSARY.
IT IS IMPERATIVE THAT THE CONTROL COMPARTMENT, AIR
PASSAGEWAYS AND BURNER (S) OF THE HEATER ARE KEPT CLEAN.
1. Turn the thermostat up. When the thermostat calls for heat, the
blower motor will energize.
2. When the motor approaches nominal running speed, the air
proving switch closes and activates the ignition module which in
turn initiates the purge.
3. The ignition module then energizes the spark igniter.
4. When sparking begins, the gas valve is energized.
5. If a ame is detected, the gas valve remains open. When the
call for heat is satised, and the system control mechanism deenergizes, the burner line voltage supply and the gas valve are
turned off.
6. If no ame is detected, the gas valve is closed, and a purge
period begins. After the purge period, the ignition module
energizes the spark igniter and the gas valve. If a ame is still not
established, a third and nal purge/ignition sequence is begun.
After three failed attempts, the system control mechanism will
lock out for a period of one hour, or until the unit is reset. Reset
is accomplished by removing power from the heater for at least
ve seconds.
7. With a three-try module, when the ame is established and then
lost on the rst or second trial, the gas valve will automatically
turn off. A purge and trial for ignition will then occur.
8. Periodic visual check of burner ame while unit is in operation
through sight glass in bottom of unit.
1. A qualied service agency should be contacted for service other
than routine maintenance.
WARNING Turn off the gas and electrical supplies to
the heater before performing any service or maintenance.
Failure to observe this warning will cause death, injury or
property damage.
ATTENTION le virage du gaz et les provisions élec-
triques à l’appareil de chauffrage l’avant d’exécuter service
de anr ou l’entretien. L’échec pour observer que cet
avertissment causera la mort, les dommages de blessure
ou propriété.
2. Check condition of blower scroll and motor. Dirt and dust may
be blown out with compressed air, or a vacuum cleaner may be
used.
3. Check the condition of the burner cup. Carefully remove any dust
or debris form inside burner cup.
4. Inspect the igniter. Replace igniter if there is excessive carbon
residue, erosion of electrodes of other defects.
5. Check to see that the burner observation window is clean and
free of cracks or holes. Clean or replace as required.
6. Check the ue pipe for soot, dirt or obstructions. The ow of
combustion and ventilation air should not be obstructed. After
cleaning as necessary, re-attach the ue pipe to the heater.
7. Outside surfaces of heater reector may be cleaned by wiping
with a damp cloth.
8. Check vent terminal and outside air inlet to see that they have
not become blocked during the non-heating season. If either
pipe is restricted, the air switch won’t close, resulting in a no-
heat situation.
9. Verify proper operation after service.
Proper Operating Flame
Section 6 MAINTENANCE
Pre-Season Maintenance
Heater area to be kept clear and free form combustible materials,
gasoline and other ammable vapors and liquids.
Do not use this appliance if any part has been under water.
Immediately call a qualied service technician to inspect the
appliance and replace any part of the control system and any gas
control, which has been under water.
(CAUTION) Label all wires prior to disconnection when servicing
controls. wiring errors can cause improper and dangerous operation.
For best performance, the following maintenance procedures should
be performed by a qualied service agency before each heating
season:
19
Operating Instructions and Owner’s ManualMr. Heater | Gas-Fired Low-Intensity Infrared Heater
Page 20

Section 7 TROUBLESHOOTING
General
This troubleshooting quide has been designed to assist you in locating and correcting minor problems that may occur with the MHT tube heater.
BLOWER DOES NOT COME ON
Possible Cause Try This….
Power cord is not plugged in. Plug power cord into a grounded three prong Outlet.
Thermostat setting is too low. Increase thermostat temperature setting.
DSI module needs to be reset. Unplug heater power cord from the electrical Outlet: wait for a
minimum of ve seconds. Plug heater cord back into outlet.
No power at electrical outlet. Replace fuse or reset circuit breaker
Faulty blower motor Replace blower motor.
IGNITER DOES NOT SPARK
Possible Cause
DSI module needs to be reset.
Try This…..
Unplug heater power cord from the electrical outlet: wait for a
minimum of ve seconds. Plug heater cord back into outlet.
Faulty igniter or ignition wire.
Air switch does not operate.
Igniter spark gap incorrect.
Unplug heater power cord from the electrical outlet; check igniter and
ignition wire for damage. If damaged, replace igniter and/or ignition
cable.
Check ue/air supply duct for obstructions; remove obstructions as
required. Check for loose/leaky air hoses to the air switch; repair/
replace/tighten hoses as required. Check for 24V across the secondary
terminals 4 and 5 (red and yellow wires) of the transformer. IF NO:
Check for 120V across the primary terminals 1 and 3 (black and white
wires) of the transformer. If 120V is present, replace transformer. If 120V
is not present, check wiring between power cord, blower motor and
transformer. IF YES: Connect a jumper wire across air switch terminals;
if jumper wire allows blower to operate, replace pressure switch (see
replacement parts list for part number that applies to your unit rating).
Reset spark gap to 1/8’ (0.125”).
Mr. Heater | Gas-Fired Low-Intensity Infrared Heater Operating Instructions and Owner’s Manual
20
Page 21

BURNER DOES NOT LIGHT
Possible Cause
Air in the gas line.
Try This….
Purge gas lines.
Improper gas inlet pressure.
Gas valve does not open.
Low gas outlet pressure.
Check gas inlet pressure at the 1/8” NPT plugged tap. Gas inlet
pressure should be as follows:
Natural Gas: 5.0”w.c. min.; 10.5” max.
LP Gas: 11”w.c. min.; 13.0” max.
If gas inlet pressure does not meet inlet pressure requirements
contact the gas company.
Check for 24V across valve terminals.
Check Shutoff On Valve.
IF NO: Check wiring between the ignition module and the valve.
Repair/replace wires as required. If wiring is OK, replace ignition
module. IF YES: Replace gas valve.
Check gas manifold pressure. Measure manifold pressure at the
pressure tap on the gas valve.
Check gas manifold pressure. Measure manifold pressure at the
pressure tap on the gas valve. Natural Gas: 4.0” w.c. LP Gas: 10.0”
w.c. If manifold pressure does not meet requirements, adjust valve
outlet pressure with the adjustment screw on the valve. NOTE:
Proper inlet gas pressure must be veried before performing outlet
pressure testing.
BURNER DOES NOT STAY LIT
Possible Cause
Damaged wires between DSI module and electrode.
Faulty DSI module
Damaged Electrode
Try this…..
Replace wires as required.
Replace DSI module.
Replace Electrode
21
Operating Instructions and Owner’s ManualMr. Heater | Gas-Fired Low-Intensity Infrared Heater
Page 22

Section 8 ILLUSTRATED PARTS
Illustrated Parts
This section provides the part numbers and pictorials for components
of the MHT tube heater. Callout letters on the illustrations are keyed
to the associated parts list.
I
J
F
B
H
G D
A
C
E
ITEM PART NUMBER DESCRIPTION HST-35 HST-45
A 02808 Spark Electrode 1 1
B 02837 Ignition Wire 1 1
05795 Orice (MHT 45 NG) * 1
05747 Orice (MHT 45 LP) * 1
D 02795 Sight Window 1 1
E 02814 Blower Motor 1 1
F 02810 Ignition Module 1 1
G 08364A Transformer 1 1
H 02806 Manifold 1 1
I 02822 Pressure Switch (HST35/45) 1 1
J 02812 Gas Valve (N.G.) 1 1
02811 Gas Valve (L.P.) 1 1
Mr. Heater | Gas-Fired Low-Intensity Infrared Heater Operating Instructions and Owner’s Manual
22
Page 23

Mr. Heater • Model #MHT 45 Tube Heater
A
E
D
B
C
REPLACEMENT PARTS LIST FOR HEATER MODEL MHT TUBE HEATER
REF.# ITEM# DESCRIPTION
A F202850 MHT-45NG Burner Box for (F208850)
F202851 MHT-45LP Burner Box for (F202851)
B F106250 MHT45 Tube Set (Long)
C 06014 Hanger
D 06016 Hanger Clamp
E 06008-9 MHT-45 Reector (Long)
F 06009 Reector End Cap
F
ALL WARRANTY CL AIMS REQUIRE PROOF OF PURCHASE
Operating Instructions and Owner’s ManualMr. Heater | Gas-Fired Low-Intensity Infrared Heater
23
Page 24

OPERATING INSTRUCTIONS
Model #
MHT 45
AND OWNER’S MANUAL
WARNING:
USE ONLY MANUFACTURER’S REPLACEMENT PARTS. USE OF ANY OTHER PARTS
COULD CAUSE INJURY OR DEATH. REPLACEMENT PARTS ARE ONLY AVAILABLE
DIRECT FROM THE FACTORY AND MUST BE INSTALLED BY A QUALIFIED SERVICE
AGENCY.
FOR INFORMATION REGARDING SERVICE OR PARTS:
Contact your local heating service technician or dealer.
FOR ADDITIONAL INFORMATION:
Please call Toll-Free 800-251-0001—www.mrheater.com
Our ofce hours are 8:30 AM — 5:00 PM, EST, Monday through Friday.
Please have the model number, serial number and date of purchase ready.
LIMITED WARRANTY
The company warrants this product to be free from imperfections in material or
workmanship, under normal and proper use in accordance with instructions of The Company,
for a period of one year from the date of delivery to the buyer. The Company, at its option,
will repair or replace products returned by the buyer to the factory, transportation prepaid
within said one year period and found by the Company to have imperfections in material or
workmanship.
If a part is damaged or missing, call our Customer Service Department at 800-251-0001.
Address any Warranty Claims to the Customer Service Department, Mr. Heater, 4560 W.
160TH ST., CLEVELAND, OHIO 44135. Include your name, address and telephone number and
include details concerning the claim. Also, supply us with the purchase date and the name
and address of the dealer from whom you purchased our product.
The foregoing is the full extent of the responsibility of the Company. There are no other
warranties, express or implied. Specically there is no warranty of tness for a particular
purpose and there is no warranty of merchantability. In no event shall the Company be liable
for delay caused by imperfections, for consequential damages, or for any charges of the
expense of any nature incurred without its written consent. The cost of repair or replacement
shall be the exclusive remedy for any breach of warranty. There is no warranty against
infringement of the like and no implied warranty arising from course of dealing or usage of
trade. This warranty will not apply to any product which has been repaired or altered outside
of the factory in any respect which in our judgment affects its condition or operation.
Some states do not allow the exclusion or limitation of incidental or consequential damages,
so the above limitation or exclusion may not apply to you. This Warranty gives you specic
legal rights, and you may have other rights which vary from state to state.
CSA REQUIREMENT 7-89
ANSI Z21.86B 2002
ANS Z83.20 • CSA 2.34-2003
Mr. Heater | Gas-Fired Low-Intensity Infrared Heater Operating Instructions and Owner’s Manual
Mr. Heater reserves the right to make changes at any time, without notice or obligation, in colors, specications, accessories, materials and models.
Mr. Heater Corporation, 4560 W. 160TH ST., CLEVELAND, OHIO 44135 • 216-916-3000
© 2003, Mr. Heater. All rights reserved
24
 Loading...