

Page 1
Français p. 14
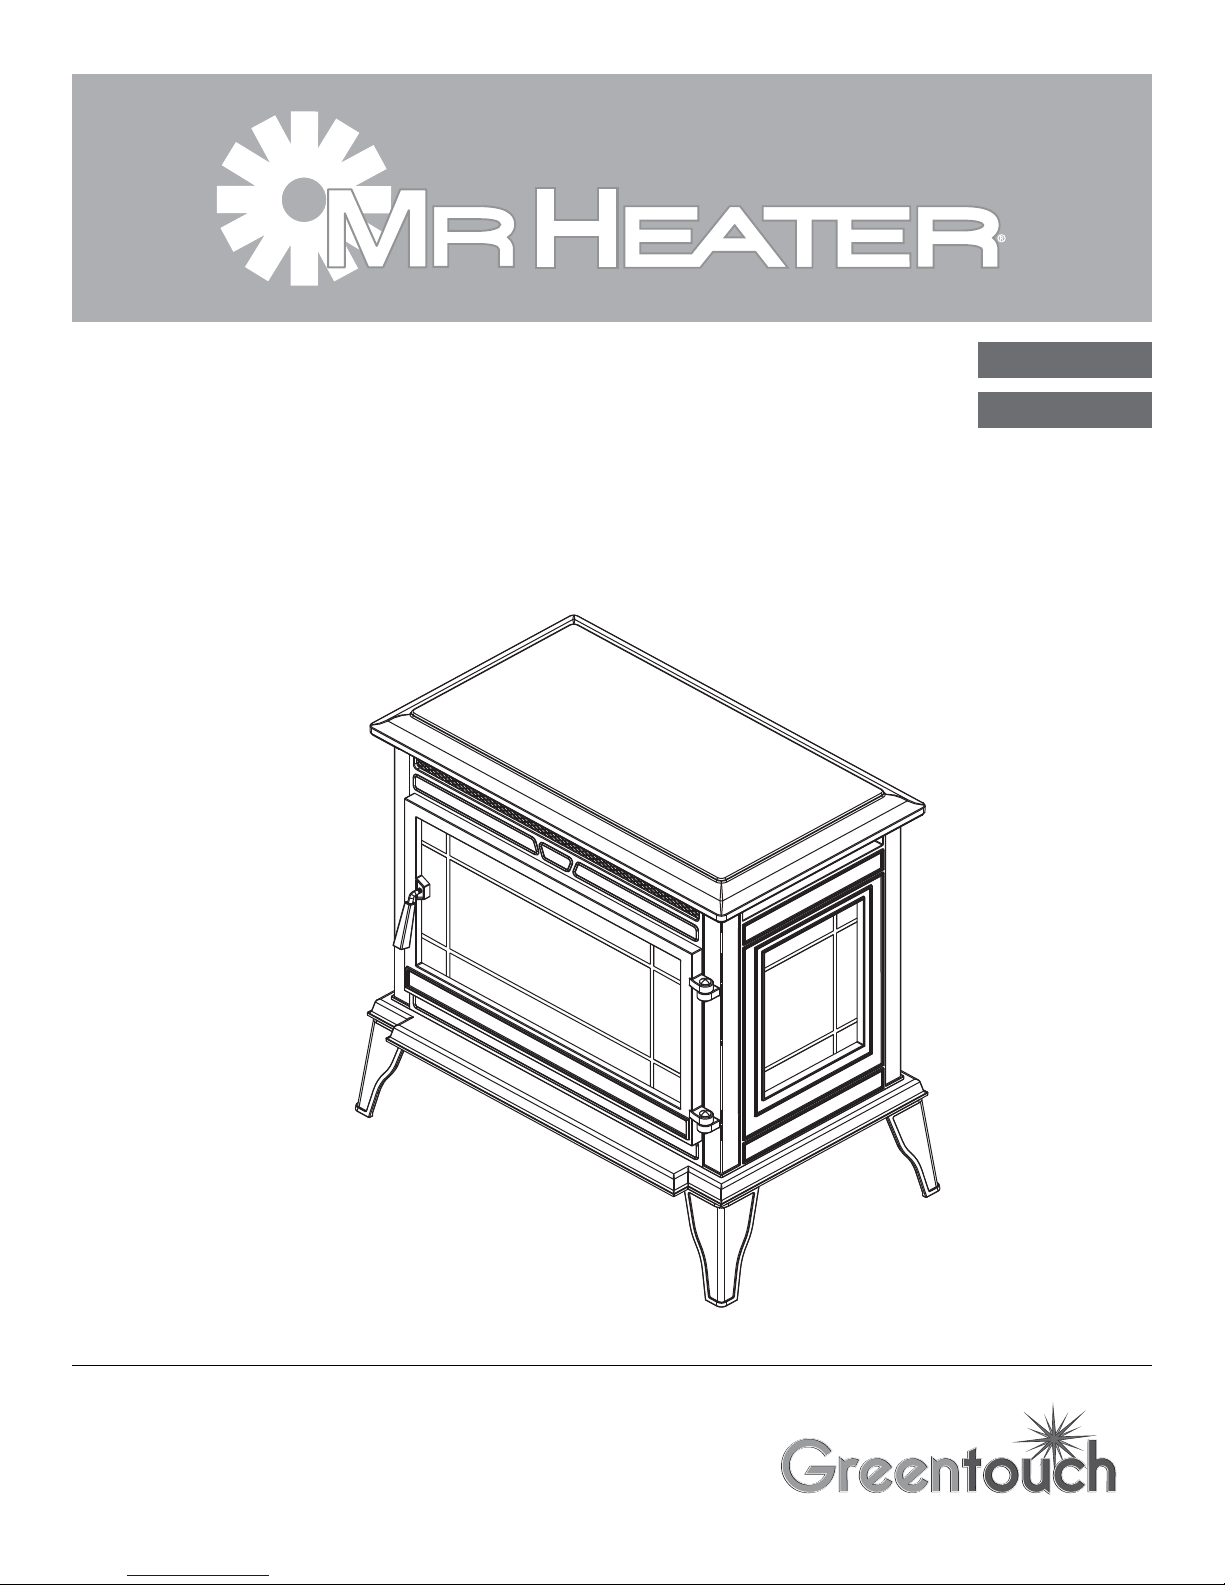
Electric Stove
Español p. 26
Infrared Heater
ASSEMBLY, CARE & USE INSTRUCTIONS
MODEL # 1008ST-24-102
ITEM # 0781472
Date Purchased _______________________
Questions, problems, missing parts?
Before returning to your retailer,
call our customer service department at
1-855-571-1044
www.greentouchchinaltd.com
8 a.m. - 8 p.m., EST, Monday - Friday.
Page 2
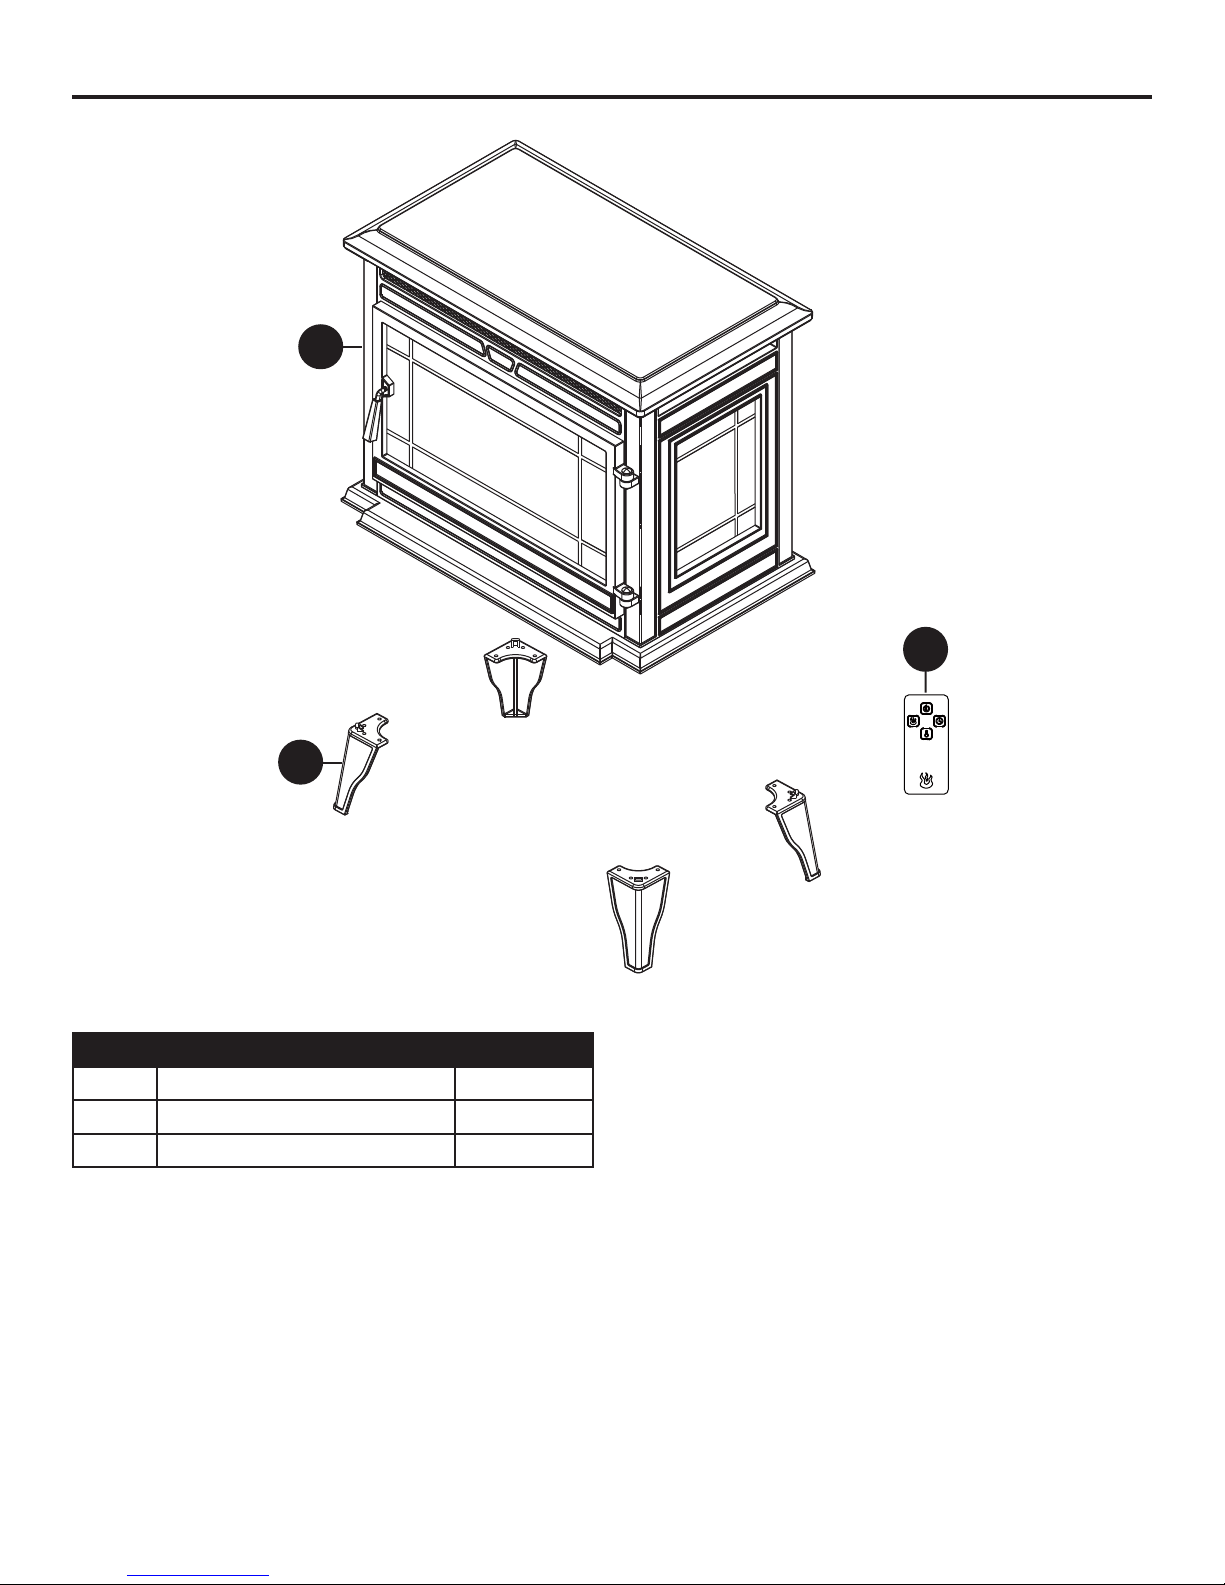
PACKAGE CONTENTS
A
C
B
PART DESCRIPTION QUANTITY
A Body 1
B Leg 4
C Remote Control 1
2
Page 3
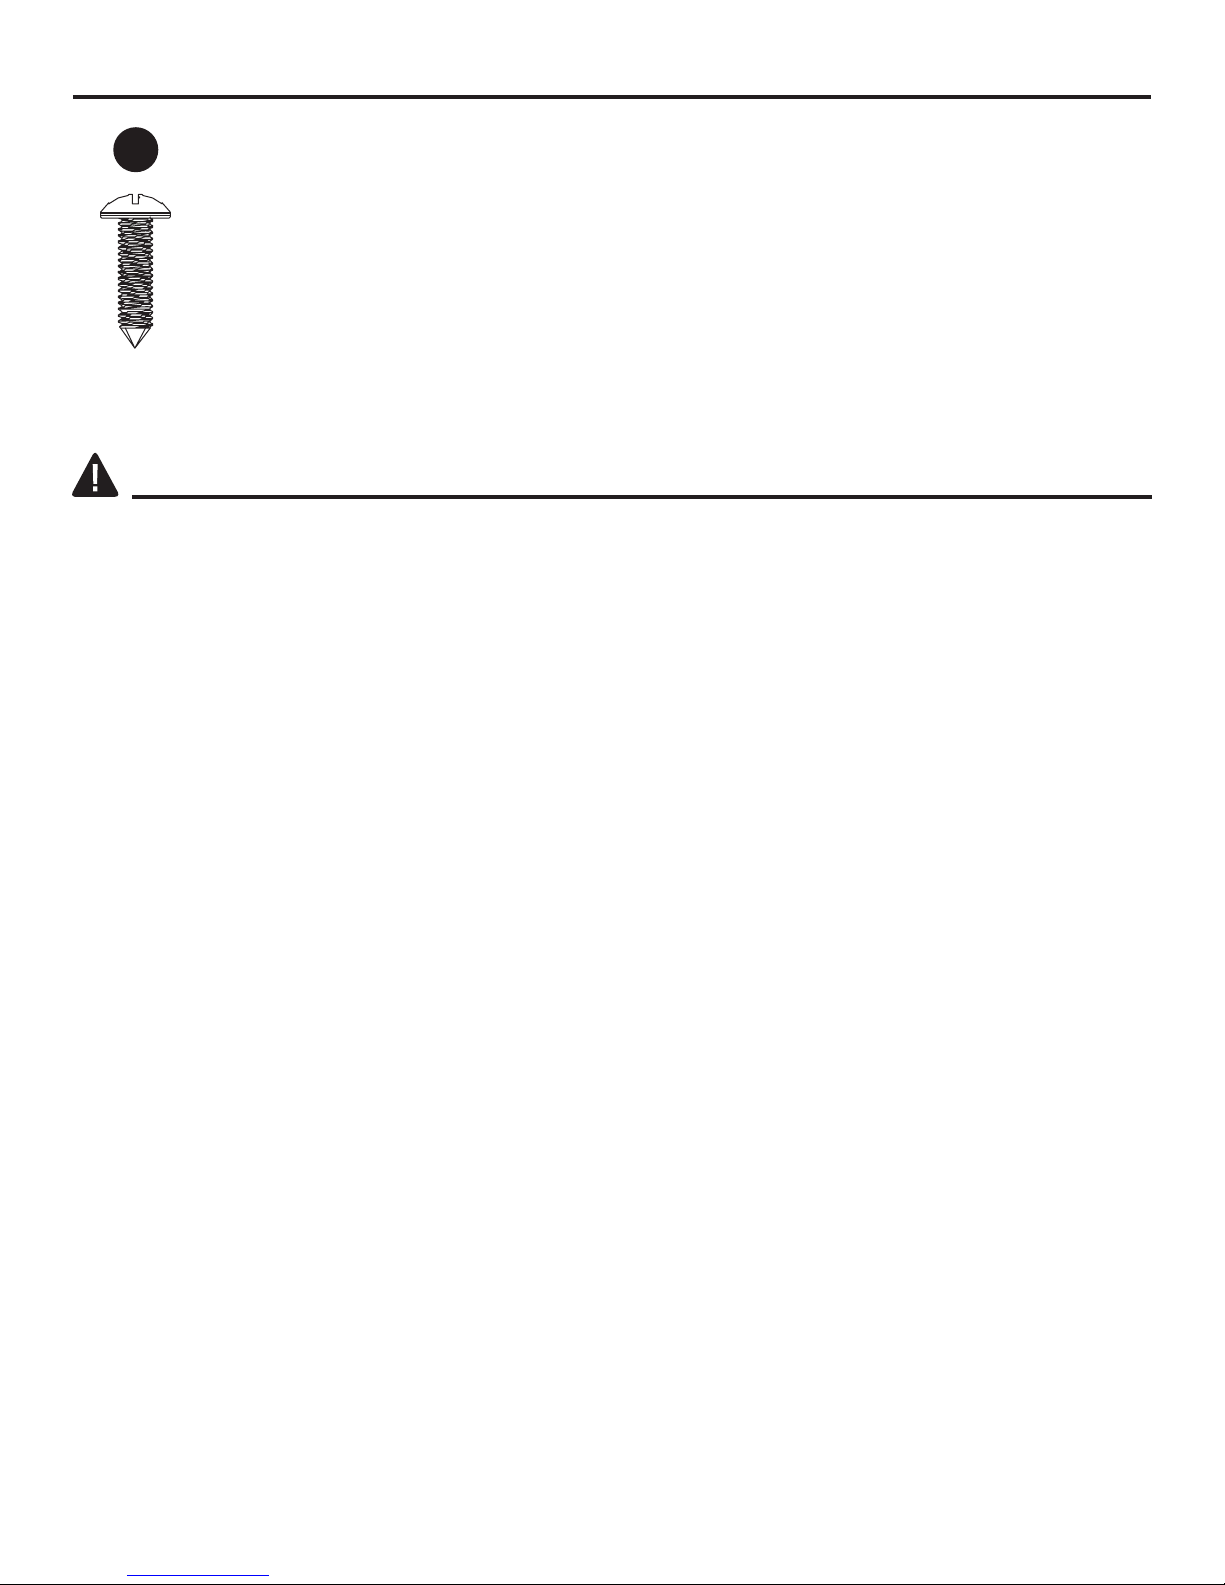
HARDWARE CONTENTS (not shown actual size)
AA
Screw
Qty. 12
SAFETY INFORMATION
Please read and understand this entire manual before attempting to assemble, operate or install the
product.
This equipment has been tested and found to comply with the limits for Class B digital devices,
pursuant to part 15 of the FCC rules. These limits are designed to provide reasonable protection
against harmful interference in a residential installation. The equipment generates, uses and can
radiate radio frequency energy and, if not installed and used in accordance with the instructions, may
cause harmful interference to radio or television reception, which can be determined by turning the
equipment off and on. The user is encouraged to try and correct the interference by one or more of
the following measures:
• Reorient or relocate the receiving antenna
• Increase the separation between the equipment and the receiver
• si reviecer eht hcihw ot taht morf tnereffid tiucric a no teltuo na otni tnempiuqe eht tcennoC
connected.
• .pleh rof naicinhcet VT/oidar decneirepxe na ro relaed eht tlusnoC
This device complies with Part 15 of the FCC rules. Operation is subject to the following two
conditions:
1. This device may not cause harmful interference, and
undesired operation.
Modifications not approved by the party responsible for compliance could void user’s authority to
operate the equipment.
This Class B digital apparatus complies with Canadian ICES-003.
esuac yam taht ecnerefretni gnidulcni ,deviecer ecnerefretni yna tpecca tsum ecived sihT .2
3
Page 4
SAFETY INFORMATION
IMPORTANT INSTRUCTIONS
When using electric appliances, basic precautions should always be followed to reduce the risk of
fire, electric shock, and injury to persons, including the following:
WARNING
• .retaeh siht gnisu erofeb snoitcurtsni lla daeR
• ,kcohs lacirtcele ro gnitrats detcepxenu morf yrujni diova oT DO NOT plug the power cord into a
source of power during unpacking and assembly. The cord must remain unplugged whenever you
are adjusting / assembling the item.
• ,degamad ro gnissim si trap yna fI DO NOT attempt to use or plug in the power cord until
the missing or damaged part is correctly replaced. To avoid electric shock, use only identical
replacement parts, and when servicing use double-insulated tools.
• ro nerdlihc fi yrassecen si noituac emertxe ,dednettanu dna gnitarepo tfel si meti eht revenehW
invalids are nearby.
• ot snoitaluger elbacilppa rehto dna sedoc gnidliub lacol htiw ylpmoc tsum gniriw teltuo lacirtcelE
reduce the risk of fire, electric shock and injury to persons.
•
Disconnect power before attempting any maintenance or cleaning to reduce the risk of fire,
electrical shock or personal injury.
• This appliance is hot when in use. To avoid burns, DO NOT let bare skin touch hot surfaces. If provided,
use handles when moving this heater. Keep combustible material, such as furniture, pillows, bedding,
papers, clothes and curtains at least 3 feet from this appliance and keep them from the sides and rear.
• latnem ro yrosnes ,lacisyhp decuder htiw snosrep
capabilities, or lack of experience and knowledge, unless they have been given supervision or
instruction.
• DO NOT run cord under carpeting. DO NOT cover cord with throw rugs, runners or similar coverings.
DO NOT route cord under furniture or appliances. Arrange cord away from traffic areas and where it
will not be tripped over.
• DO NOT insert or allow foreign objects to enter any ventilation or exhaust opening as this may cause
an electric shock or fire, or damage the appliance.
• This appliance has hot and arcing or sparking parts inside. DO NOT use it in areas where gasoline,
paint or flammable vapors or liquids are used or stored. This item should not be used as a drying
rack for clothing. Christmas stockings or decorations should not be hung in the area of it.
• Use this appliance only as described in the manual. Any other use is NOT recommended by the
manufacturer and may cause fire, electric shock or injury to persons.
CAUTION
• Cold climate installation recommendation: When installing this unit against a non-insulated
exterior wall or chase, it is mandatory the outer walls be insulated to conform to applicable
insulation codes.
• lacirtcele ynA .ecnanetniam rotom htiw gnideecorp erofeb ffo denrut si rewop eht erus ekaM
repairs or rewiring of this unit should be carried out by a licensed electrician in accordance with
national and local codes.
• gnidoc roloc ,gnituor eriw lanigiro eht ,gniriw ro tnenopmoc lacirtcele yna gnicalper ro gniriaper fI
and securing locations must be followed.
• DO NOT
technician to inspect the item and replace any part of the electrical system.
• ,erif elbissop a tneverp oT DO NOT block air intakes or exhaust in any manner. DO NOT use on soft
surfaces, like a bed, where openings may become blocked.
• ”FFO“ eht ot hctiws rewop niam eht nrut tsriF .ecnailppa siht g
position. Then remove the electrical plug from the wall outlet.
use this item if any part of it has been under water. Immediately call a qualified service
nicivres nehw ffo rewop eht nruT
ro nerdlihc yb desu eb ot ton si ecnailppa ehT
4
Page 5
SAFETY INFORMATION
If possible, ALWAYS unplug this appliance when not in use.
DO NOT use outdoors.
This item is not intended for use in bathrooms, laundry areas and similar indoor locations.
NEVER place heater where it may fall into a bathtub or other water container.
To disconnect this appliance, turn controls to the off position, then remove plug from outlet.
ONLY connect to properly grounded outlets.
This appliance, when installed, must be electrically grounded in accordance with local codes, with
the current CSA C22.1 Canadian Electrical Code or follow U.S.A. Installations, follow local codes
and the National Electrical Code, ANSI/NFPA N0.70.
There is a thermostat limiter inside the item. When the inner temperature overheats or abnormal
heating occurs, the thermostat protective device would cut off power supply to prevent damage or
risk of fire.
To prevent a possible fire,
DO NOT block air intakes or exhaust in any manner. DO NOT use on soft
surfaces, like a bed, where opening may become blocked.
The heaters MUST NOT be located immediately below a socket-outlet.
Do not operate any heater with a damaged cord or plug or after the heater malfunctions, has been
dropped or damaged in any manner. Discard heater, or return to authorized service facility for
examination and/or repair.
Electrical Connection
SPECIFICATIONS
Voltage Amps Watts (max.)
120 VAC, 60 Hz 12.5 Amps 1500 Watts
A 15-amp, 120-volt, 60 Hz circuit with a properly grounded outlet is required. Preferably, the item
will be on a dedicated circuit as other appliances on the same circuit may cause the circuit breaker
to trip or the fuse to blow when the heater is in operation. The unit comes standard with 6-ft.
three-wire cord, exiting from the rear of the heater. DO NOT exceed the current rating of the current
tap. ALWAYS plug heaters directly into a wall outlet/receptacle. NEVER use with an extension cord
or relocatable power tap (outlet/power strip).
SAVE THESE INSTRUCTIONS
GROUNDING INSTRUCTIONS
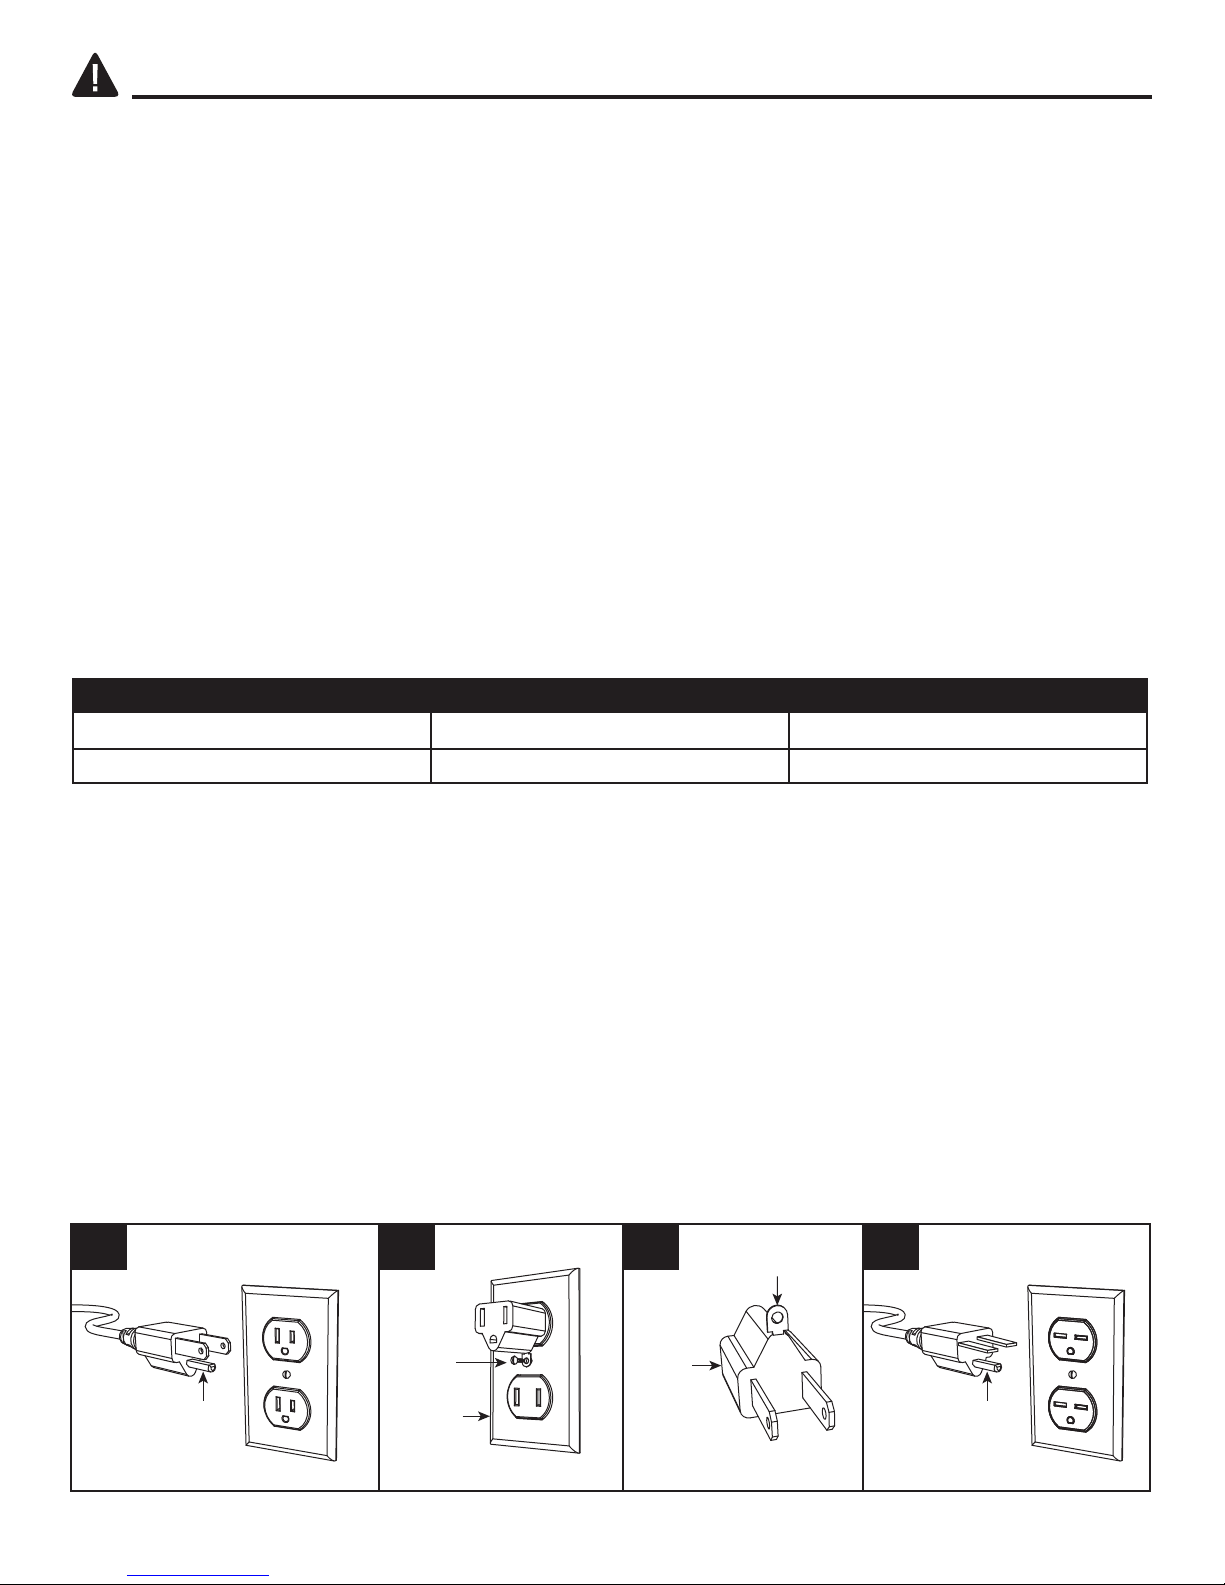
This heater is for use on 120 volts. The cord has a plug as shown below. See illustration for
grounding instruction. An adapter as shown at C is available for connecting three-blade grounding
type plugs to two-slot receptacles. The green grounding lug extending from the adapter must be
connected to a permanent ground such as a properly grounded outlet box. The adapter should not
be used if a three-slot grounded receptacle is available.
A B C D
Metal
Screw
Grounding Pin Grounding Pin
Cover of
Grounding
Grounding Means
Adapter
Box
5
Page 6
PREPARATION
2
Screw
Qty. 12
Before beginning assembly of product, make sure all parts are present. Compare parts with package
contents list and hardware contents list. If any part is missing or damaged, do not attempt to
assemble the product.
Estimated Assembly Time: 15 minutes
Tools Required for Assembly (not included): Phillips screwdriver
ASSEMBLY INSTRUCTIONS
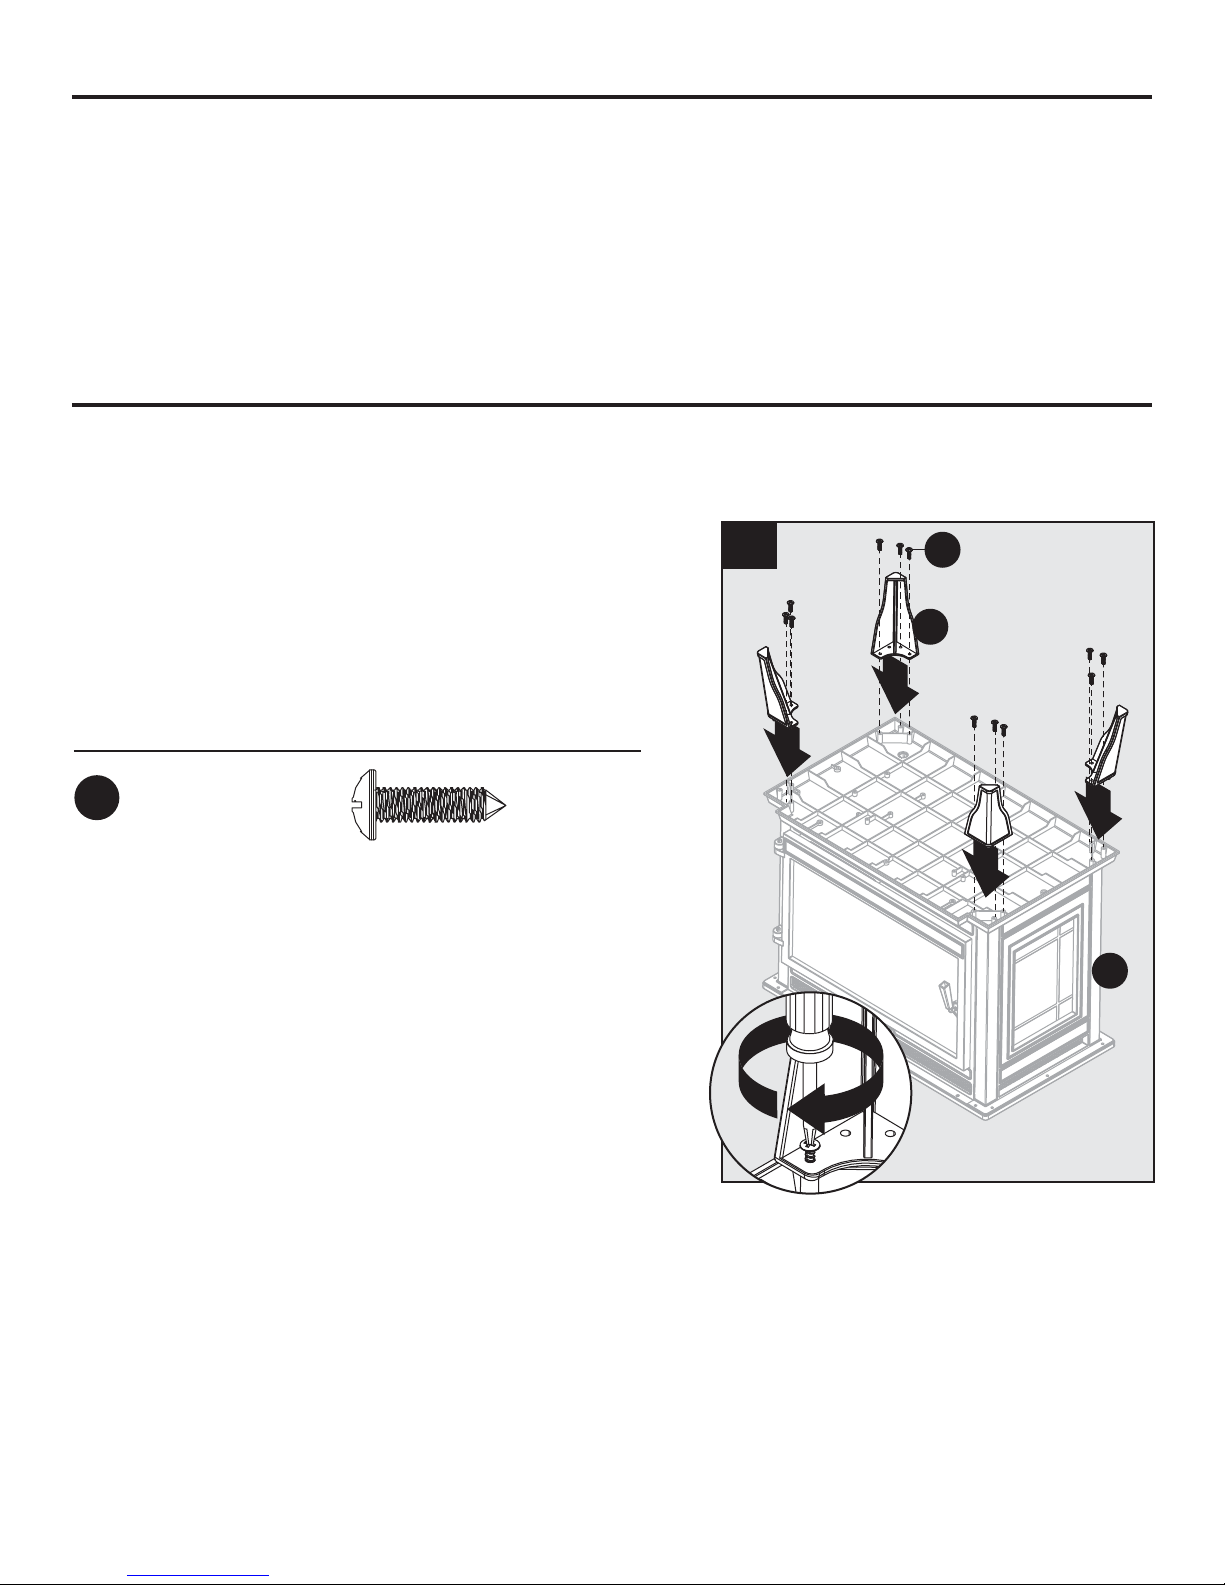
CAUTION:
With the help of another person, rest the unit upside down on a soft, flat, level surface.
Be careful not to scratch the top surface of stove.
1. Insert the legs (B) into the holes on the base of the
body (A). Secure each leg with three screws (AA).
Assembly is complete. With the help of another
person, flip the unit back right-side up.
Hardware Used
AA
Screw
x 12
1
AA
B
1
1
1
1
A
6
Page 7
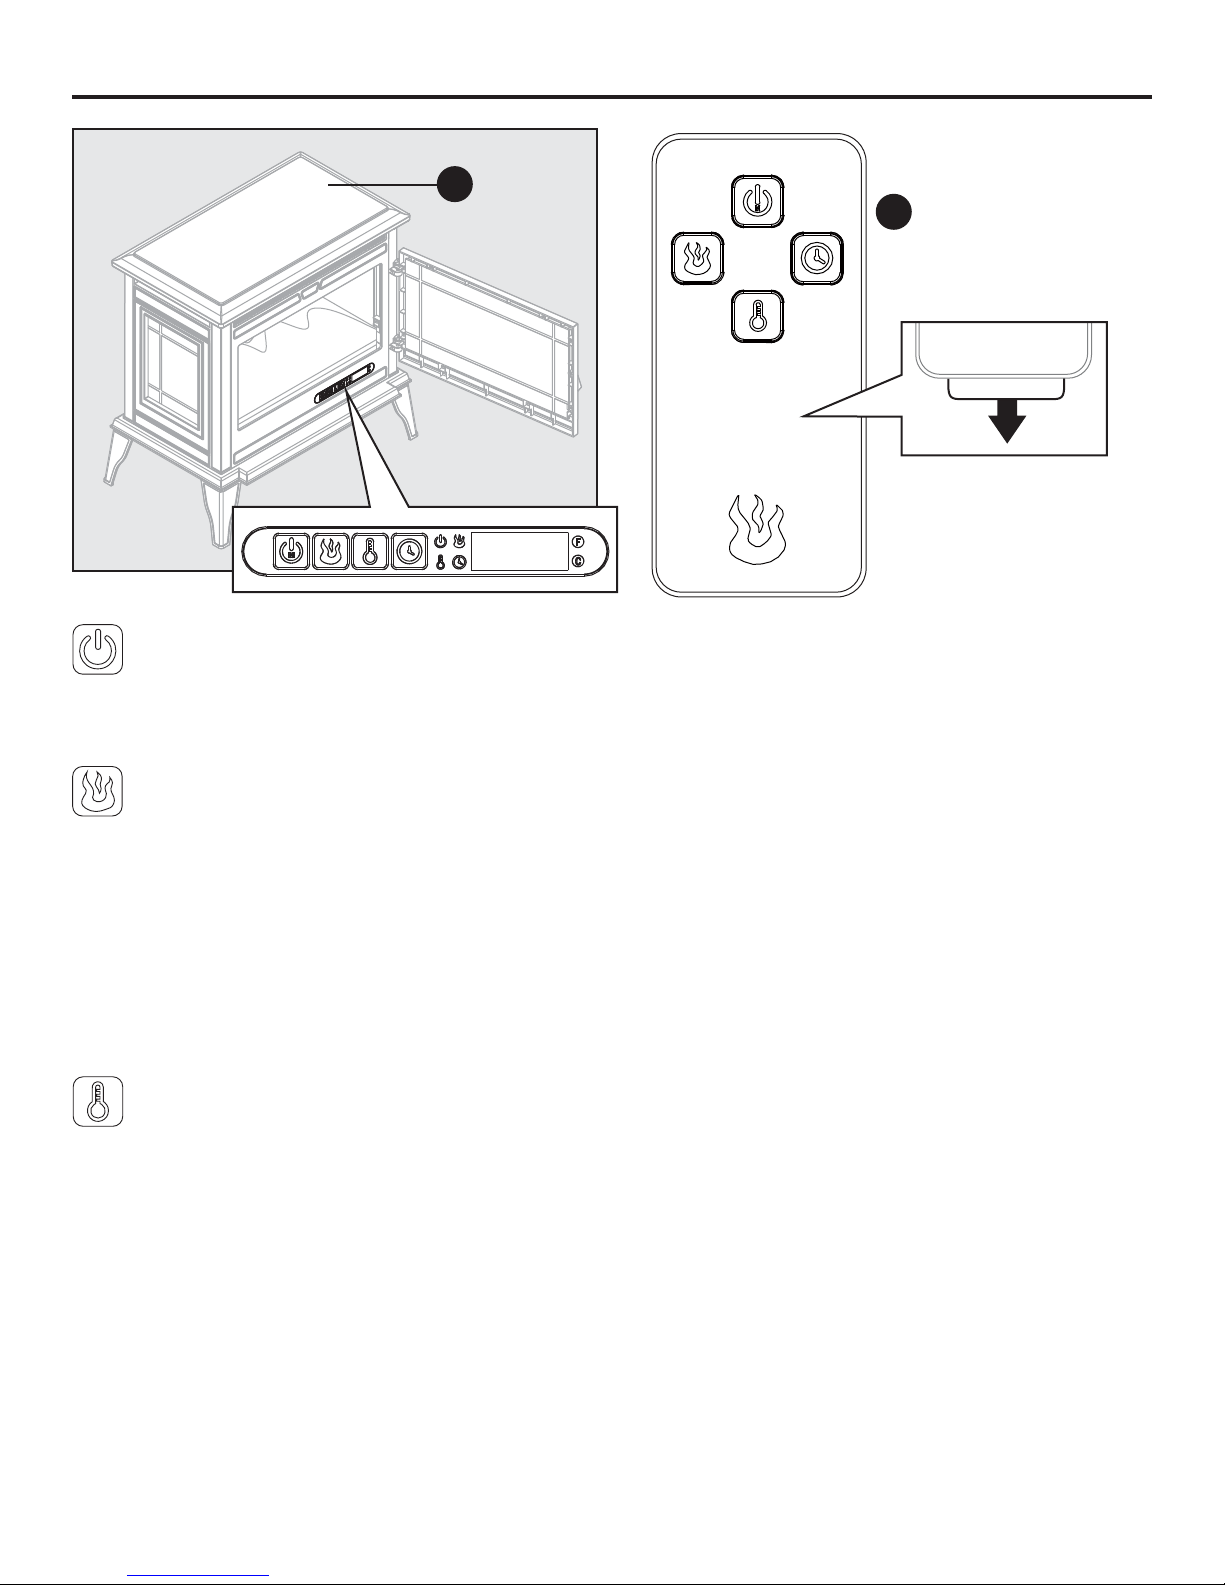
OPERATING INSTRUCTIONS
M
M
Power Button
M
A
Body
C
Remote Control
To use the remote
control, first remove
the plastic tab by
gently pullling it out
of remote control (C).
Press the power button to turn the main power to the unit ON or OFF.
When the unit is turned ON, the lights under the emberbed will light to indicate the unit has power.
Flame Brightness Button
ehT .tinu eht NO rewop ot nottub ssenthgirb emalf eht sserp nac uoy ,FFO derewop si tinu eht fI
emberbed will glow at the brightest setting unless a different setting was saved in the
memory.
Press the button again to scroll through the flame brightness settings, 1, 2, 3, 4, 5 and OFF.
Hold down the flame button for 5 seconds to toggle between 5°F (3°C) increments and 1°F (1°C)
increments when setting the temperature. The unit will beep to indicate that the change has taken
place. The factory default temperature is 5°F (3°C) increments.
Temperature Button
.tatsomreht retaeh eht slortnoc nottub erutarepmet ehT
ehT .tinu eht NO rewop ot nottub erutarepmet eht sserp nac uoy ,FFO derewop si tinu eht fI
emberbed will glow at the brightest setting unless a different setting was saved in the
memory.
The thermostat setting range is 65ºF(18ºC) to 90ºF(32ºC), HI(High) and OFF
5 rof nottub erutarepmet eht nwod dloH
seconds to toggle between Fahrenheit and Celsius. A
small “F” or “C” will display next to the temperature.
Press and hold the button for 10 seconds again to engage the heater function. (See
.noitcnuf retaeh eht egagnesid ot sdnoces 01 rof nottub ERUTAREPMET eht dloh dna sserP
HEATER OVERRIDE section below for more details).
7
Page 8

OPERATING INSTRUCTIONS
Timer Button
.rewop niam s'tinu eht rof nwodtnuoc eht tes ot desu eb dluohs nottub remit ehT
debrebme ehT .tinu eht NO rewop ot nottub remit eht sserp nac uoy ,FFO derewop si tinu eht fI
will glow at the brightest setting unless a different setting was saved in the memory.
,h5 ,h4 ,h3 ,h2 ,h1 ,03 :era hcihw ,sgnittes remit eht hguorht llorcs ot niaga nottub remit eht sserP
6h, 7h, 8h, 9h and OFF. (30 means 30 minutes)
ni sgnittes eht niatniam lliw dna rewop niam eht FFO nrut lliw ti ,orez sehcaer remit eht nehW
memory.
Memory Function
.devas eb lliw )remit gnidulcxe( sgnittes noitcnuf lla ,FFO derewop si tinu eht nehW
etomer eht no ro lenap lortnoc tresni eht no ecno nottub rewop eht gnisserp ,FFO si tinu eht nehW
control will turn the unit ON and "wakeup" the saved function settings.
tsal eht ta noitcnuf laudividni eht "puekaw" ot nottub noitcnuf yna sserp ,FFO si tinu eht nehW
saved setting. Press the button again to adjust it and press the main power button on the insert or
on the remote control to turn the unit OFF and save the new setting into memory.
repmet a fI .gnittes erutarepmet devas eht wohs lliw tuodaer DEL eht ,NO derewop si tinu eht nehW
-ature setting was not saved, it will show the flame brightness setting saved in memory. If neither
one has a setting saved to memory, then only the emberbed will glow (as a power light indicator).
siht nehW .emit yna ta sdnoces 5 rof nottub rewop niam eht nwod dloh ,yromem eht teser oT
happens, the LED readout will blink with four zeros three times.
.llaw eht morf tinu eht gulpnu ot si yromem eht teser ot yaw rehtonA
HEATER OVERRIDE
The power to the heater can be disengaged to prevent the heater from being accidentally or
unintentionally powered on. This feature is primarily added to help prevent children from powering
on the heater when it is not desired.
.sdnoces 01 rof nottub erutarepmeT eht dloh dna sserp noitcnuf edirrevo retaeh eht egagne oT
The symbol E3 will display and then go blank while beeping 3 times. The heater function is now
locked. If the heater incon is pressed again E3 will appear then fade. The Flame, Downlight and
Timer functions will operate normally. Only the heater and blower are disengaged.
To unlock the heater function, press and hold the Temperature button for 10 seconds. The symbol
E3 will display and then go blank while beeping 3 times. The heater function is now engaged.
By pressing the Temperature button again you will be able to adjust the heat temperature to your
desired temperature.
8
Page 9
CARE AND MAINTENANCE
0DNHVXUHWKHXQLWLVWXUQHG2))XQSOXJJHGDQdWKHKHDWLQJHOHPHQWVRI(OHFWULFVWRYHDUHFRRO
ZKHQHYHU\RXDUHFOHDQLQJWKHKHDWHU
.htolcnaelc,tfosdenepmad-retawagnisumirtlatemehtnaelC DO NOTXVHEUDVVSROLVKRU
KRXVHKROGFOHDQHUVDVWKHVHSURGXFWVZLOOGDPDJHWKHPHWDOWULP
7KHPRWRUVXVHGRQWKHIDQDQGWKHIODPHJHQHUDWRUDVVHPEO\DUHSUHOXEULFDWHGIRUH[WHQGHG
EHDULQJOLIHDQGUHTXLUHQRIXUWKHUOXEULFDWLRQ+oweverSHULRGLFFOHDQLQJYDFXXPLQJRIWKHIDQ
KHDWHUDQGDLULQWDNHRXWSXWYHQWVLVUHFRPPHQGed.
:KHQWKHVWRYHLVQRWLQXVHWKHKHDWHUVKRXOGEHVWRUHGLQDGU\ORFDWLRQDZD\IURPSRVVLEOH
GDPDJH7KHSRZHUFRUGVKRXOGEHVWRUHGSURSHUO\WRDYRLGFRQWDFWZLWKKRWRUVKDUSREMHFWV
$Q\RWKHUVHUYLFLQJVKRXOGEHSHUIRUPHGE\DQaXWKRUL]HGVHUYLFHUHSUHVHQWDWLYH
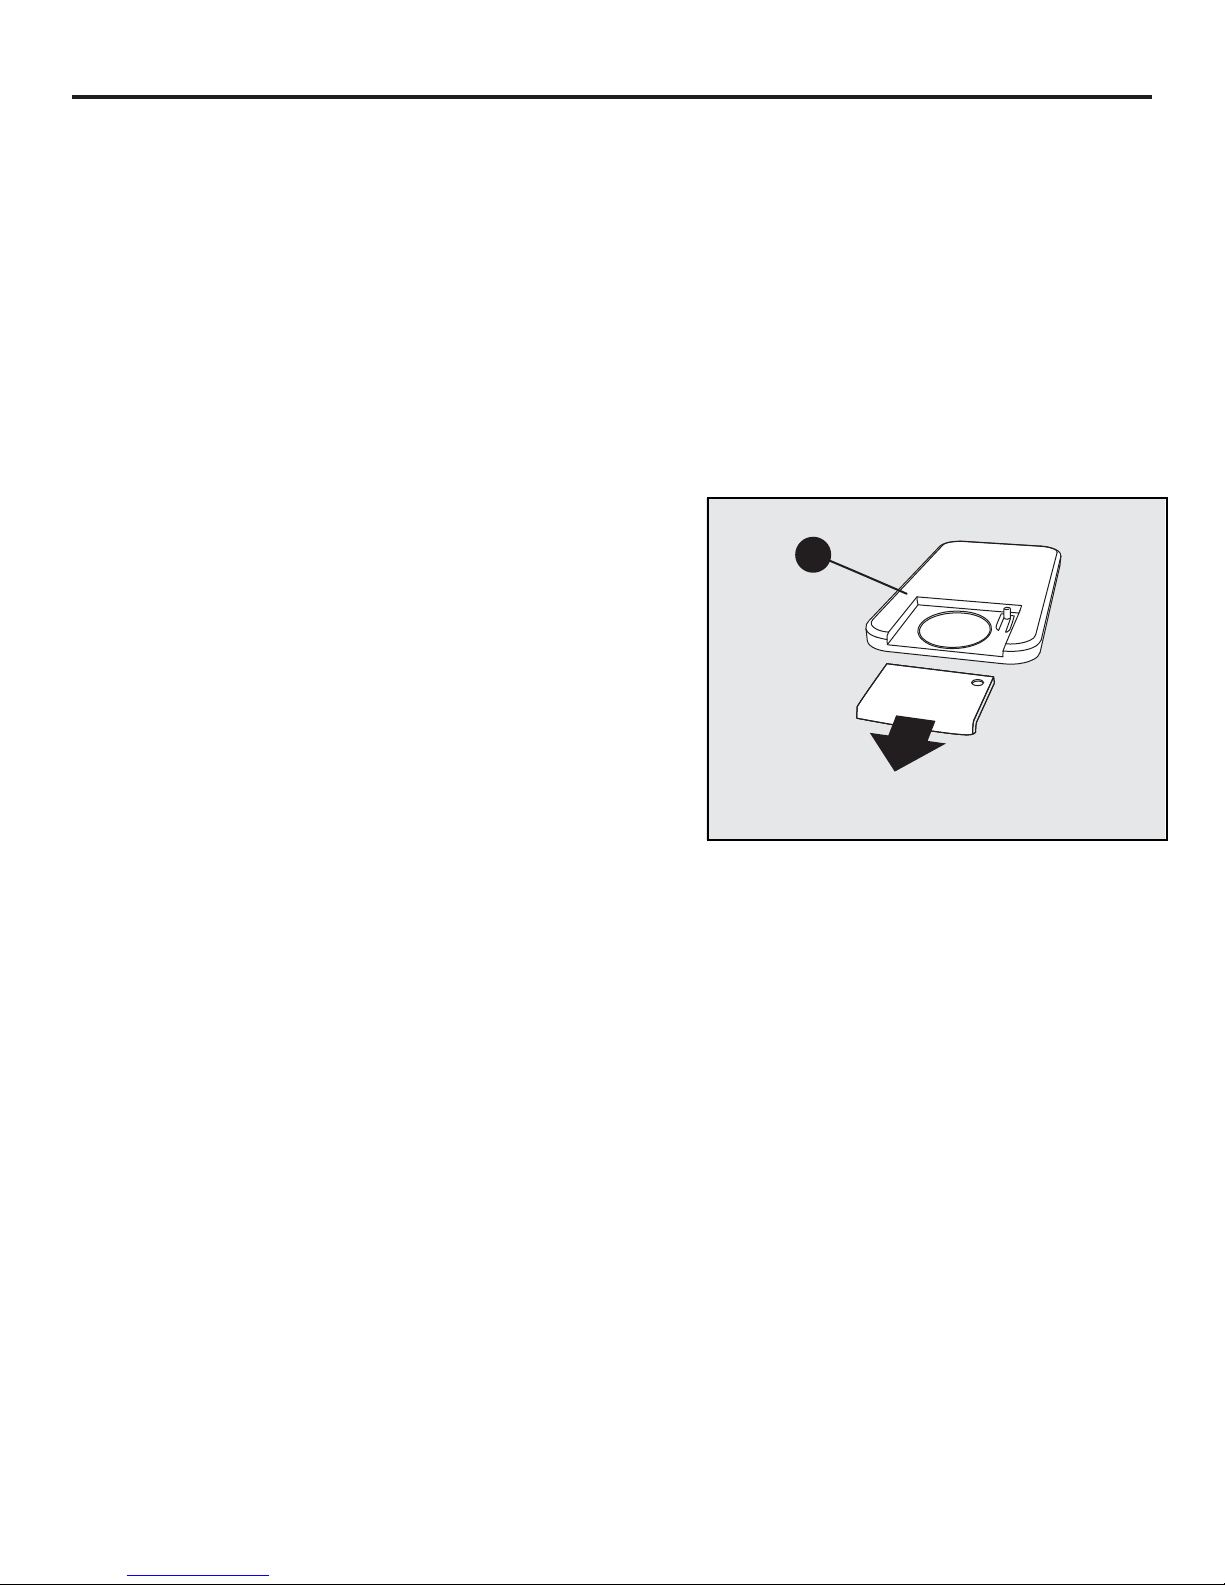
Replacing the Remote Control Battery
:KHQWKHUHPRWHFRQWURO&VWRSVRSHUDWLQJRULWV
UDQJHVHHPVUHGXFHGLWLVWLPHWRUHSODFHWKH
C
EDWWHU\Note: 7KHEDWWHU\VKRXOGEHUHPRYHGLIWKH
SURGXFWLVWREHOHIWXQXVHGIRUDORQJWLPH
BATTERY
dneNcaEehtnodetacolsitnemtrapmoc\rettaEehT.1
RIWKHUHPRWHFRQWURO&
'HSUHVVDQGKROGWKHUHOHDVHWDERQWKHEDWWHU\
.2
FRPSDUWPHQWDQGVOLGHWRRSHQ
3.
5HPRYHWKHROGEDWWHr\.
,dedulcniton\rettaEmuihtil5202RCwenatresnI.4
FKHFNLQJWKDWWKHDQGVLGHVRIWKHEDWWHU\PDWFK
WKHLQVLGHRIWKHEDWWHU\FRPSDUWPHQW
5HLQVHUWWKHEDWWHU\GRRr
9
Page 10
CARE AND MAINTENANCE
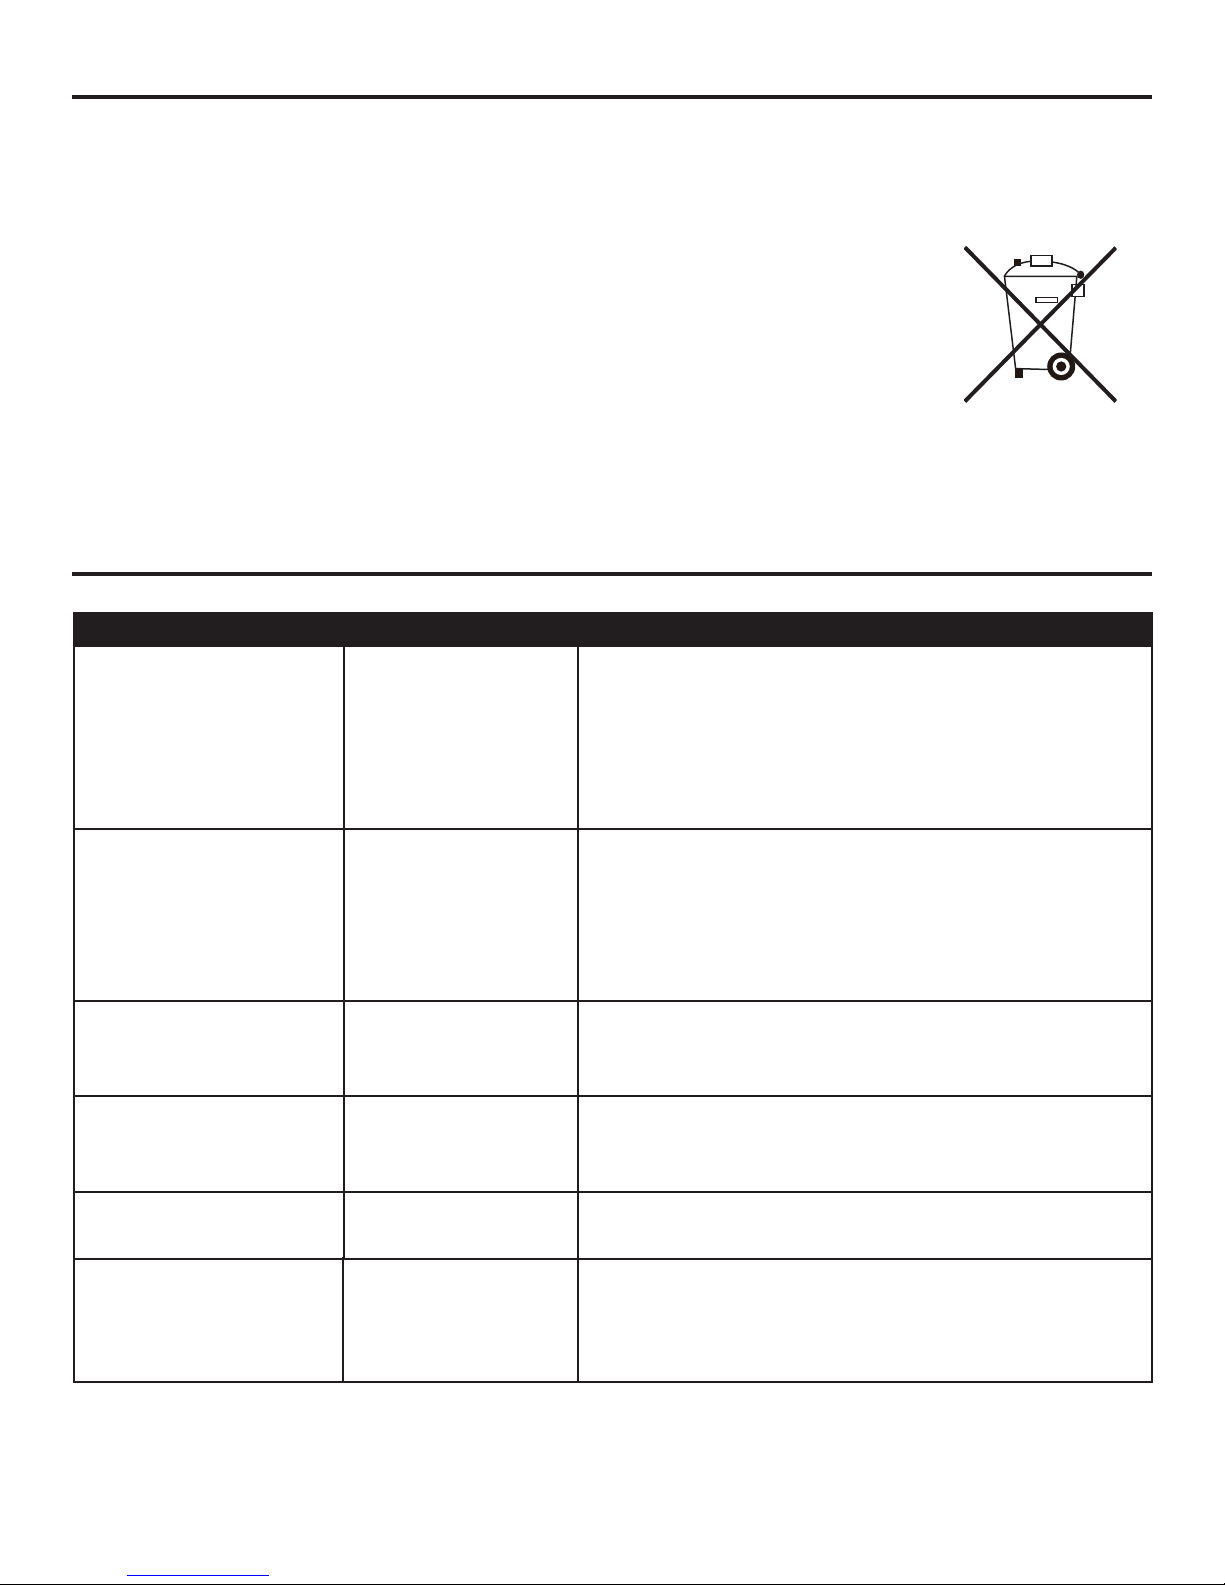
Disposal of Used Battery
A battery may contain hazardous substances that could be endangering to environment and
human health.
yrettab desu taht setacidni gnigakcap ro/dna yrettab eht no dekram lobmys sihT
shall not be treated as municipal waste. Instead it shall be left at the appropriate
collection point for recycling.
tneverp pleh lliw uoy ,yltcerroc fo desopsid si yrettab desu eht gnirusne yB
potential negative consequences for the environment and human health. The
recycling of materials will help to conserve natural resources.
For more information about collection and recycling of used battery, please contact your local
municipality, your waste disposal service or the point of sale where you purchased this point.
TROUBLESHOOTING
PROBLEM POSSIBLE CAUSE CORRECTIVE ACTION
Error E1 displayed on
control panel.
The overheat
sensor has been
engaged.
Unplug unit, wait 15-20 minutes, then the sensor will
reset itself. Plug the unit back in and turn on the
heater. If the problem persists, call customer service.
Note: The other functions will work normally excluding
the heater. Until the problem is solved, the error will
only appear/sound when the heater button is pressed.
Error E2 displayed on
control panel.
Error E3 displayed on
control panel.
No power; logs do not
glow.
No flame effect but logs
are glowing.
Heater and blower
do not power on but
rest of functions are
working.
The thermostat
sensor is broken
or not working
correctly.
Heater override
function is engaged
The unit does not
have power.
The flame effect is
powered off.
Heater override
function is engaged
Unplug unit, wait 15-20 minutes, then the sensor will
reset itself. Plug the unit back in and turn on the
heater. If the problem persists, call customer service.
Note: The other functions will work normally excluding
the heater. Until the problem is solved, the error will
only appear/sound when the heater button is pressed.
To unlock the heater, simply press and hold the
temperature button for 10 seconds (See page 8
Heater Override Section for more details).
Check that the power cord is securely plugged into a
standard 120V outlet. Then check to make sure the
unit is powered on.
Push the flame brightness button until desired level
is acheived.
To unlock the heater, simply press and hold the
temperature button for 10 seconds (See page 8
Heater Override Section for more details).
10
Page 11
TROUBLESHOOTING
PROBLEM POSSIBLE CAUSE CORRECTIVE ACTION
Power cord gets warm
to the touch.
Normal operation. This is normal for a heater appliance as it requires
more current to operate. Check the connections of
the appliance cord and the outlet. Make sure the
plug and outlet frequently to determine if it is HOT;
if so, discontinue use of the appliance and consult
overheating outlet(s).
Remote control does
not work.
Weak or failing
battery.
Replace with a new battery. (See page 9
for more information.)
Remote control
signal is weak and only
works sometimes.
Fan motor continues
to blow after unit is
powered of.
Pressing the buttons
too quickly.
Using the remote
control too far away
or at an off angle.
Press the buttons slowly and steadily to ensure the
transmitter recognizes the request.
Move closer to the insert; the remote control will only
work within a distance of 20 feet and 45 degrees to
either side from the front of the heater.
Normal operation. This is a standard feature; the blower runs for
additional time to cool off the heater tubes.
11
Page 12

ONE-YEAR LIMITED WARRANTY
The manufacturer warrants that your new Electric Stove is free from manufacturing and material
defects for a period of one year from date of purchase, subject to the following conditions and
limitations.
Install and operate this Electric Stove in accordance with the installation and operating instructions
furnished with the product at all times. Any unauthorized repair, alteration, willful abuse, accident, or
misuse of the product shall nullify this warranty.
This warranty is non-transferable, and is made to the original owner, provided that the purchase was
made through an authorized supplier of the product.
The warranty is limited to the repair or replacement of part(s) found to be defective in material or
workmanship, provided that such part(s) have been subjected to normal conditions of use and
service, after said defect is confirmed by the manufacturer’s inspection.
The manufacturer may, at its discretion, fully discharge all obligations with respect to this warranty by
refunding the wholesale price of the defective part(s).
Any installation, labor, construction, transportation, or other related costs/expenses arising from
defective part(s), repair, replacement, or otherwise of same, will not be covered by this warranty, nor
shall the manufacturer assume responsibility for same.
The owner/user assumes all other risks, if any, including the risk of any direct, indirect or
consequential loss or damage arising out of the use, or inability to use the product, except as
provided by law.
All other warranties – expressed or implied –with respect to the product, its components and
accessories, or any obligations/liabilities on the part of the manufacturer are hereby expressly
excluded.
The manufacturer neither assumes, nor authorizes any third party to assume on its behalf, any other
liabilities with respect to the sale of the product.
The warranties as outlined within this document do not apply to non accessories used in conjunction
with the installation of this product.
This warranty is void if:
The Electric Stove is subjected to prolonged periods of dampness or condensation.
2. Any unauthorized alteration, willful abuse, accident, or misuse of the product.
3. You do not have the original receipt of purchase.
12
Page 13

REPLACEMENT PARTS LIST
For replacement parts, call our customer service department at 1-855-571-1044, 8 a.m. - 8 p.m., EST,
Monday - Friday.
B C D E F
G H I
PART DESCRIPTION PART #
B Leg (with
screws)
C Remote Control PH-1008ST-24-RC
D Door and hinge
pins (2)
E Door Glass PH-1008ST-24-003
F Door Handle PH-1008ST-24-004
PF-1008ST-24-102-001
PF-1008ST-24-102-002
J
PART DESCRIPTION PART #
G Thermostat PH-1008ST-24-005
H Heater/ Blower
Assembly
I Spinner Motor PH-1008ST-24-007
J PCB Board PH-1008ST-24-008
PH-1008ST-24-006
13
Page 14

English p. 1
POÊLE ÉLECTRIQUE AVEC
Español p. 26
CHAUFFAGE INFRAROUGE
INSTRUCTIONS D’UTILISATION,
D’ASSEMBLAGE ET DE MAINTENANCE
MODÈLE # 1008ST-24-102
ARTICLE # 0781472
Des questions, des problèmes, des pièces manquantes?
Avant de retourner l’article au détaillant,
appelez notre service à la clientèle au
1-855-571-1044, entre 8 h et 20 h (HNE), du lundi au vendredi.
www.greentouchchinaltd.com
_______________________ tahca’d etaD
Page 15

CONTENU DE L’EMBALLAGE
A
B
PIÈCE DESCRIPTION QUANTITÉ
A Corps 1
B Pied 4
C Télécommande 1
C
15
Page 16

QUINCAILLERIE INCLUSE (non représentés en taille réelle)
AA
Vis
Qté : 12
CONSIGNES DE SÉCURITÉ
Assurez-vous de lire et de comprendre l’intégralité du présent manuel avant de tenter d’assembler,
d’installer ou d’utiliser l’article.
Cet article a été testé et déclaré conforme aux limites imposées aux dispositifs numériques de
classe B, conformément à l’alinéa 15 du règlement de la FCC. Ces limites sont destinées à assurer
une protection raisonnable contre les interférences nuisibles dans un environnement résidentiel. Cet
article génère, utilise et peut émettre de l’énergie radiofréquence et, s’il n’est pas installé et utilisé
conformément aux instructions, risque de provoquer des interférences nuisibles lors de la réception
, d’allumer et d’éteindre successivement
l’article). L’utilisateur devra prendre les mesures nécessaires suivantes pour tenter d’éliminer ces
interférences :
sRÏORIENTEROUDÏPLACERLANTENNERÏCEPTRICE
sACCROÔTRELADISTANCEENTRELAPPAREILETLERÏCEPTEUR
sBRANCHERLAPPAREILSURUNEPRISEDECOURANTAPPARTENANTÌUNAUTRECIRCUITQUECELUIDURÏCEPTEUR
sOBTENIRDELAIDEAUPRÒSDUDÏTAILLANTOUDUNTECHNICIENENradio ou en télévision expérimenté.
Cet appareil est conforme à l’alinéa 15 du règlement de la FCC. Son utilisation est soumise aux deux
conditions suivantes :
CETAPPAREILNEDOITPROVOQUERAUCUNEINTERFÏRENCENUISIBLE et
2. cet appareil doit accepter toute interférence reçue, y compris des interférences susceptibles de
causer un fonctionnement non désiré.
annuler le droit de l’utilisateur de se servir de cet appareil.
Cet appareil numérique de classe B est conforme à la norme NMB-003 du Canada.
16
Page 17

CONSIGNES DE SÉCURITÉ
CONSIGNES IMPORTANTES
Lors de l'utilisation d'appareils électriques, des précautions de base devraient toujours être suivies
pour réduire le risque d'incendie, de décharges électriques ou de blessures à des personnes,
incluant les suivantes :
AVERTISSEMENT
s
Lisez toutes les instructions avant d'utiliser cet appareil de chauffage.
s ous tension imprévue ou d’un choc
électrique, ne branche
et l’installation. Le cordon ne doit pas être branché pendant le réglage ni l’assemblage de l’article.
s S’il y a des pièces manquantes ou endommagées, n’essayez PAS d’utiliser l’appareil ni de brancher le
cordon d’alimentation avant que ces pièces ne soient remplacées
n’utilisez que des pièces de rechange identiques à celles d’origine et n’utilisez que des outils à double
isolation pour l’entretien.
s Faites preuve d’une extrême prudence lorsque vous laissez l’article en marche sans surveillance à
proximité d’enfants ou de personnes handicapées.
s Le câblage de la prise électrique doit être conforme aux codes du bâtiment locaux et à tout autre
s Coupez l’alimentation électrique avant de tenter de réparer ou
risques d’incendie, de choc électrique ou de blessure.
s
Cet appareil est chaud lors qu'il est utilisé. Pour éviter des brûlures, ne LAISSEZ PAS la peau dénudée
toucher les surfaces chaudes. Si fournies, utilisez les poignées lorsque vous déplacez cet appareil de
chauffage. Gardez les matériaux combustibles comme les meubles, les oreillers, les draps, les papiers,
les vêtements et les rideaux à au moins 3 pieds de cet appareil et gardez-les loin des côtés et de l'arrière.
s Cet appareil ne doit pas être utilisé par les enfants, les personnes atteintes d’une défaillance
physique, sensorielle ou intellectuelle, ou les personnes n’ayant pas l’expérience et les connaissances
nécessaires, à moins qu’une personne ne les supervise ou ne leur donne les instructions nécessaires.
PAS
s NE faites
avec des carpettes, des paillassons ou d'autres couvertures similaires. Ne faites
d'alimentation sou des meubles ou des appareils. Mettez le cordon d'alimentation à l'écart des zones
achalandées à un endroit où on ne s'y accrochera pas.
s N’insérez JAMAIS un objet, quel qu’il soit, dans les ouvertures de ventilation ou
s Cet appareil renferme des pièces chaudes qui produisent des arcs électriques ou des étincelles.
N’utilisez PAS l’appareil là où de l’essence, de la peinture, de la vapeur ou
sont utilisés ou entreposés. Cet article ne doit pas être utilisé pour faire sécher les vêtements. Ne
suspendez pas de bas de Noël ou d’autres décorations à proximité du foyer.
s N’utilisez cet appareil que pour l’usage prévu dans ce manuel. Toute autre utilisation n’est PAS
recommandée par le fabricant et peut provoquer un incendie, un choc électrique ou des blessures.
passer le cordon d'alimentation sous un tapis. NE couvrez
z PAS le cordon d’alimentation sur une prise de courant pendant l’assemblage
ue ou de blessure.
PAS
le cordon d'alimentation
PAS
passer le cordon
de sortie d’air de
e choc électrique et d’incendie.
ATTENTION
s Recommandations pour l’installation en climat froid : Lors de l’installation de cet appareil contre
un mur extérieur non isolé
en respectant les normes en vigueur relatives à l’isolation.
s Assurez-vous que l’alimentation électrique est coupée avant de
électriques et tout nouveau câblage de cet appareil à un électricien agréé qui respectera les codes
nationaux et locaux.
s En cas de réparation ou de remplacement d’un composant ou d’un câble électrique, respectez
l’acheminement des câbles, les codes de couleur et les emplacem
s N’utilisez PAS cet article si une de ses pièces a été immergée. Appelez immédiatement un technicien
s Afin de prévenir les risques d’incendie, nebloquez
d’air de quelque façon que ce soit. Ne placez
cela pourrait bloquer ses ouvertures.
ou un mur de service, il est essentiel que les murs extérieurs soient isolés
circuit électrique.
JAMAIS
PAS
l’appareil sur une surface molle, comme un lit, car
17
les ouvertures de ventilation ou de sortie
Page 18

CONSIGNES DE SÉCURITÉ
s Éteignez l’appareil lorsque vous procédez à son entretien. Placez d’abord l’interrupteur principal en
murale.
s Dans la mesure du possible, débranchez TOUJOURS cet appareil lorsqu’il n’est pas utilisé.
s N’utilisez pas cet article à l’extérieur.
s Cet article n’est PAS conçu pour être utilisé dans une salle de bains, une salle de lavage ou tout autre
endroit humide semblable. Ne placez JAMAIS l’article dans un endroit où il pourrait tomber dans une
baignoire ou un autre contenant rempli d’eau.
s Pour débrancher cet appareil, tournez les commandes en position
s Branchez UNIQUEMENT
s Lors de l’installation, veillez à ce que l’appareil soit mis à la terre conformément aux codes locaux, à la
plus récente version du Code canadien de l’électricité, CSA C22.1 ou, dans le cas des installations aux
États-Unis, aux codes locaux et au code national de l’électricité, ANSI/NFPA NO 70.
s À l’intérieur de cet appareil se trouve un limiteur. Lorsque l’appareil surchauffe ou que sa température
devient anormalement élevée, le dispositif de protection du thermostat coupe l’alimentation électrique
s JAMAIS les ouvertures de ventilation ou de sortie
d’air de quelque façon que ce soit. Ne placez PAS l’appareil sur une surface molle, comme un lit, car
cela pourrait bloquer ses ouvertures.
Ne placez PAS l’appareil directement sous une prise de courant.
N'utilisez aucun appareil de chauffage ayant un cordon d'alimentation ou une prise abimée ou après un
mauvais fonctionnement de l'appareil de chauffage, ou après qu'il ait subi une chute ou ait été
endommagé de quelconque façon. Dans ce cas, jetez l'appareil de chauffage, ou retournez-les à un centre
de service autorisé pour un examen et/ou une réparation.
Branchement électrique
CARACTÉRISTIQUES TECHNIQUES
Tension Ampères Puissance maximale
120 V c.a., 60 Hz 12,5 A 1500 watts
s Un circuit de 15 A, 120 V et 60 Hz avec une prise correctement mise à la terre est nécessaire. Il est
recommandé de réserver un circuit à l’article, car d’autres appareils alimentés par le même circuit
pourraient causer le déclenchement du disjoncteur ou faire sauter le fusible lorsque le foyer est en
fonction. L’appareil est muni d’un cordon à trois broches d’une longueur de 1,82 m se trouvant à l’arrière.
Ne dépassez PAS le courant nominal de la prise de courant. Branchez TOUJOURS l’article directement
sur une prise murale. N’utilisez JAMAIS une rallonge ni une prise mobile (barre d’alimentation).
CONSERVEZ CES INSTRUCTIONS
INSTRUCTIONS DE MISE À LA TERRE
s Cet appareil est conçu pour être utilisé sur un circuit de 120
illustrée ci-dessous. Consultez l’illustration pour connaître les instructions de mise à la terre. L’adaptateur
is broches avec mise à la terre aux prises à
oit être branchée sur une mise à la terre
permanente comme une prise correctement mise à la terre. Ne vous servez pas de l’adaptateur si une
prise à trois fentes avec mise à la terre est disponible.
A B C D
Dispositif de mise
à la terre
métallique
Broche de mise
à la terre
Couvercle
broche de
mise à la terre
Vis
de la
Adaptateur
18
Broche de mise
à la terre
Page 19

PRÉPARATION
Screw
Qty. 12
2
Avant de commencer l’assemblage de l’article, assurez-vous d’avoir toutes les pièces. Comparez le
contenu de l’emballage avec la liste des pièces et celle de la quincaillerie incluse. S’il y a des pièces
manquantes ou endommagées, ne tentez pas d’assembler l’article.
Temps d’assemblage approximatif : 15 minutes.
Outil nécessaire pour l’assemblage (non inclus) : tournevis cruciforme.
INSTRUCTIONS POUR L’ASSEMBLAGE
MISE EN GARDE : Avec l'aide d'une autre personne, déposez l'appareil à l'envers sur une surface lisse,
plane et nivelée. Faites attention de ne pas égratigner la surface du poêle.
1. Insérez les pieds (B) dans les trous de la base du
corps (A). Fixez chaque pied à l’aide de trois vis
(AA). L’assemblage est terminé. Avec l’aide d’une
autre personne, retournez l’appareil à l’endroit.
Quincaillerie utilisée
AA
Vis
x 12
1
AA
B
1
1
1
1
A
19
Page 20

MODE D’EMPLOI
M
M
Interrupteur
M
A
Corps
C
M
Télécommande
Pour utiliser la télécommande, enlevez
d’abord la languette
en plastique en la
tirant délicatement
hors de la
télécommande (C).
Appuyez sur l’interrupteur pour allumer ou éteindre l’appareil.
que l’appareil est sous tension.
Si l'appareil est ETEINT, vous pouvez appuyer sur le bouton de luminosité de la flamme pour
ALLUMER l'appareil. La braise brillera selon le réglage le plus lumineux à moins qu'un autre réglage
ne soit enregistré dans la mémoire.
Appuyez une fois de plus sur le bouton pour faire défiler les réglages de luminosité de la flamme,
1, 2, 3, 4, 5 et OFF.
Maintenez le bouton de la flamme pendant 5 secondes pour changer entre les incréments
de 5°F (3°C) et de 1°F (1°C) lorsque vous ajustez la température. L'unité fera bip pour indiquer que le
changement a été effectué. L'incrémentation par défaut de la température est de 5°F (3°C).
Bouton de température
Le bouton de température contrôle le thermostat du radiateur.
Si l'appareil est ETEINT, vous pouvez appuyer sur le bouton de luminosité de la flamme pour
ALLUMER l'appareil. La braise brillera selon le réglage le plus lumineux à moins qu'un autre
réglage ne soit enregistré dans la mémoire.
La plage de réglage du thermostat va de 65ºF(18ºC) à 90ºF(32ºC), H(Haut) et ETEINT.
reuqidni ruop tnoremulla’s sesiarb ed til el suos seéutis serèimul sel ,émulla tse lierappa’l euqsroL
5 tnadnep erutarépmet ed notuob el écnofne zenetniaM
Fahrenheit aux degrés Celsius, et vice-versa. Un petit « f » ou un petit « c
température.
Appuyez et maintenez le bouton TEMPERATURE enfoncé pendant 10 secondes pour désactiver la
fonction chaufage. Appuyez et maintenez le bouton TEMPERATURE enfoncé pendant 10 secondes
pour activer la fonction chauffage. (Voir la section COMMANDE MANUELLE DE L'APPAREIL DE
CHAUFFAGE ci-dessous pour plus de détails).
secondes pour passer des degrés
20
Page 21

MODE D’EMPLOI
Bouton de la minuterie
compte à rebours pour la mise hors tension
de l’appareil.
Si l'appareil est ETEINT, vous pouvez appuyer sur le bouton de luminosité de la flamme pour
ALLUMER l'appareil. La braise brillera selon le réglage le plus lumineux à moins qu'un autre réglage
ne soit enregistré dans la mémoire.
1 h, 2 h, 3 h, 4 h, 5 h, 6 h, 7 h, 8 h, 9 h et arrêt.
(30 signifie 30 minutes)
ler les réglages de minuterie : 30 min,
Lorsque la minuterie atteint zéro, l’appareil est mis hors tension et les autres réglages sont conservés en
mémoire.
Mémoire
Lorsque l’appareil est mis hors tension (« OFF ») tous les réglages sont enregistrés (à l’exception de la
minuterie).
Lorsque l’appareil est hors tension, vous pouvez l’allumer en appuyant une
fois sur l’interrupteur du foyer
encastrable ou de la télécommande; il se mettra en marche avec les réglages enregistrés.
Lorsque l’appareil est hors tension, appuyez sur n’importe quel bouton de fonction pour démarrer cette
fonction seulement, selon le dernier réglage enregistré.
A ppuyez de nouveau sur le bouton pour régler la fonction désirée, puis appuyez sur l’interrupteur du foyer
écommande pour mettre l’appareil hors tension et enregistrer le nouveau réglage
encastrable ou de la
tél
dans la mémoire.
EL indiquera le réglage d’intensité de la
seul le lit de braises scintillera (à titre de voyant d’alimentation).
P our réinitialiser la mémoire, maintenez enfoncé l’interrupteur durant 5 secondes à n’importe quel
Une autre façon de réinitialiser la mémoire est de débrancher l
’appareil de la prise murale.
COMMANDE MANUELLE DE L'APPAREIL DE CHAUFFAGE
L'alimentation de l'appareil de chauffage peut être désactivée pour éviter que l'appareil de chauffage soit
allumé par accident ou par inadvertance. Cette fonctionnalité est principalement présente pour aider à
prévenir que les enfants allument le chauffage lorsque cela n'est pas voulu.
Pour activer la fonction de commande manuelle de l'appareil de chauffage, appuyez et maintenez le
bouton température enfoncé pendant 10 secondes. Le symbole E3 s'affichera et ensuite disparaîtra tout
en faisant « bip » 3 fois. La fonction chauffage est maintenant verrouillée. Si le bouton chauffage est
appuyé de nouveau, E3 apparaîtra et ensuite disparaîtra. La flamm
e, la lumière et le minuteur
fonctionneront normalement. Seulement le chauffage et le ventilateur sont désactivés.
Pour déverrouiller la fonction chauffage, appuyez et maintenez le bouton température enfoncé pendant
10 secondes. Le symbole E3 s'affichera et ensuite disparaîtra tout en faisant « bip » 3 fois. La fonction
chauffage est maintenant activée. En appuyant de nouveau sur le bouton température, vous pourrez
ajuster la température de
chauffage à celle que vous désirez.
21
Page 22

ENTRETIEN
Assurez-vous que l'appareil est désactivé, débranché et que les éléments chauffants du poêle
électrique sont froids lorsque vous nettoyez l'appareil de chauffage.
ed SAP zesilitu’N .étcemuh tnemerègél xuod egnil nu’d edia’l à euqillatém erutinrag al zeyotteN
produits pour polir le laiton ni de nettoyants à usage domestique, car ces produits endommageront
la garniture métallique.
pour prolonger la durée des roulements; il n’est pas nécessaire de les graisser de nouveau.
Toutefois, nous recommandons de nettoyer le ventilateur et le radiateur et d’y passer l’aspirateur
périodiquement.
Lorsque le poêle n'est pas utilisé, il devrait être entreposé dans un emplacement sec, loin des
dommages potentiels. Le cordon d'alimentation devrait être entreposé correctement afin d'éviter
tout contact avec des objets chauds ou tranchants.
Tout autre entretien devrait être effectué par un représentant de service autorisé.
Remplacement de la pile de la télécommande
Lorsque la télécommande (C) ne fonctionne plus ou si sa portée semble réduite, il est temps de
remplacer la pile. Remarque : Retirez la pile si vous ne prévoyez pas utiliser la télécommande
pendant une période prolongée.
al ed erèirra’l à evuort es elip à tnemitrapmoc eL .1
télécommande (C).
Abaissez et maintenez l'onglet de dégagement sur le
.2
C
compartiment de la pile, et glissez pour ouvrir.
3. Retirez la vieille pile.
BATTERY
non( 5202RC muihtil ua elip ellevuon enu zerésnI .4
incluse) et assurez-vous que les polarités positive et
négative sont placées de la façon indiquée dans le
compartiment.
5. Remettez le couvercle du compartiment à pile.
Élimination de la pile usagée
Une pile contient des substances dangereuses qui peuvent être nocives pour l’environnement ou
votre santé.
eénimilé ertê sap tiod en elip al euq euqidni egallabme nos rus uo elip enu rus ésoppa elobmys eC
de la même manière que les déchets ménagers. Elle doit être apportée à un point de collecte
approprié pour être recyclée.
retivé à zeubirtnoc suov ,eéirporppa noçaf al ed eégasu elip al renimilé’d tnarussa suov nE
de possibles conséquences négatives sur l’environnement et la santé des
êtres humains. Le recyclage des matériaux aide à conserver des ressources
naturelles.
Pour en savoir davantage sur la collecte et le recyclage des piles usagées,
veuillez communiquer avec votre municipalité, votre service d’élimination des
déchets ou le point de vente où vous avez acheté les piles.
22
Page 23

DÉPANNAGE
PROBLÈME CAUSE POSSIBLE MESURE CORRECTIVE
Le panneau de
message « Error E1 »
(erreur E1).
Le détecteur de
surchauffe s’est
déclenché.
Débranchez l’appareil et attendez de 5 à 10 minutes; le
détecteur se réinitialisera. Rebranchez l’appareil et allumez
le radiateur. Si le problème persiste, communiquez avec
le service à la clientèle. Remarque : Tout fonctionnera
normalement à l’exception du radiateur. L’erreur ne sera
signalée que lorsque vous appuierez sur le bouton du
radiateur, et ce, jusqu’à ce que le problème soit résolu.
Le panneau de
message « Error E2 »
(erreur E2).
Le panneau de
message « Error E3 »
(erreur E3).
L’appareil n’est pas
alimenté; les bûches ne
scintillent pas,
Il n’y a pas d’effet de
scintillent.
ne s’allument pas, mais
les autres fonctions
fonctionnent.
Le cordon d’alimentation
est chaud au toucher.
Le détecteur du
thermostat est brisé
ou ne fonctionne pas
correctement.
Débranchez l’appareil et attendez de 5 à 10 minutes; le
détecteur se réinitialisera. Rebranchez l’appareil et allumez
le radiateur. Si le problème persiste, communiquez avec
le service à la clientèle. Remarque : Tout fonctionnera
normalement à l’exception du radiateur. L’erreur ne sera
signalée que lorsque vous appuierez sur le bouton du
radiateur, et ce, jusqu’à ce que le problème soit résolu.
La fonction de
commande manuelle
de l'appareil de
chauffage est activée.
L’appareil n’est pas
alimenté.
Pour déverrouiller l'appareil de chauffage, appuyez et
maintenez le bouton de température enfoncé pendant 10
secondes (Voir page 21, section commande manuelle de
l'appareil de chauffage pour plus de détails).
Assurez-vous que le cordon d’alimentation est branché
convenablement sur une prise standard de 120 V. Assurezvous ensuite que l’appareil est mis sous tension.
désactivé. niveau désiré.
La commande
d’interruption du
radiateur est activée.
Repérez la commande d’interruption du radiateur située
à l’arrière de l’appareil et réglez-la à la position « OFF »
(arrêt). Le radiateur fonctionnera correctement maintenant.
(Consultez la page 21 pour plus de renseignements.)
Fonctionnement
Cela est normal pour un radiateur; cet appareil utilise
normal.
raccords du cordon de l’appareil et de la prise. Assurez-
La télécommande ne
fonctionne pas.
Le signal de la
télécommande est faible
et ne fonctionne pas
La pile est faible ou
défectueuse.
Vous appuyez trop
rapidement sur les
boutons.
toujours bien.
Vous utilisez la
télécommande d’un
endroit trop éloigné ou
de biais.
Le moteur du ventilateur
continue de fonctionner
Fonctionnement
normal.
après la mise hors
tension de l’appareil.
Si c’est le cas, cessez d’utiliser l’appareil et faites appel
prises qui surchauffent.
Remplacez-la par une nouvelle pile. (Consultez la
page 22 pour plus de renseignements.)
de vous assurer que l’émetteur reconnaît la demande.
Approchez-vous du foyer encastrable. La télécommande
ne fonctionne que dans un rayon de 6,09 m et dans un
angle maximal de 45 degrés de chaque côté du foyer
encastrable lorsque vous vous trouvez devant celui-ci.
Il s'agit d'une fonction standard; le ventilateur fonctionne
pendant un temps supplémentaire pour refroidir les tubes
de chauffage.
23
Page 24

GARANTIE
Cet article est garanti par le fabricant contre les défauts de matériaux et de fabrication pour une
période de un an à compter de la date d’achat. La présente garantie est assujettie aux restrictions et
aux conditions suivantes :
Ce meuble doit être installé et utilisé conformément aux instructions pour l’installation fournies avec
volontaire ou tout usage inapproprié de l’article invalidera cette garantie.
Cette garantie n’est pas transférable et n’est offerte qu’à l’acheteur d’origine, tant que l’achat a été
effectué chez un fournisseur ou un revendeur autorisé de l’article.
La présente garantie est limitée à la réparation ou au remplacement des pièces qui présentent des
défauts de matériaux ou de fabrication. Elle s’applique à condition que les pièces aient fait l’objet
fabricant.
Les frais de transport, de construction, de main-d’œuvre et les frais connexes découlant de la
réparation, du remplacement, des pièces défectueuses ou d’une intervention du même type ne sont
pas couverts par cette garantie et le fabricant n’en assume pas le coût.
Le fabricant peut, à sa discrétion, s’acquitter de toute obligation au titre de cette garantie en
remboursant le prix de gros des pièces défectueuses.
Le propriétaire ou l’utilisateur assume tous les risques, le cas échéant, y compris le risque de pertes
ou dommages directs, indirects ou consécutifs découlant de l’utilisation de l’article ou de l’incapacité
à utiliser l’article, à l’exception de ce qui pourrait être prévu autrement par la loi. Toutes les autres
garanties, explicites ou implicites, sur l’article, ses composants et ses accessoires, ainsi que toute
autre obligation ou responsabilité du fabricant sont expressément exclues par les présentes.
Le fabricant n’assume aucune autre responsabilité quant à la vente de l’article, et il n’autorise aucun
tiers à assumer en son nom une telle responsabilité.
Les garanties énoncées dans le présent document ne couvrent pas les accessoires utilisés lors de
l’installation de cet article.
Cette garantie vous confère des droits précis. Il est possible que vous disposiez également d’autres
droits qui varient d’un État ou d’une province à l’autre.
Cette garantie sera annulée si :
1. Le poêle électrique est soumis à des périodes prolongées d'humidité ou de condensation.
2.
inapproprié, ou a subi un accident.
3. Vous n’avez pas le reçu original.
24
Page 25

LISTE DES PIÈCES DE RECHANGE
Pour obtenir des pièces de rechange, communiquez avec notre service à la clientèle au 1 855 5711044, entre 8 h et 20 h (HNE), du lundi au vendredi.
B C D E F
G H I
PIÈCE DESCRIPTION No DE PIÈCE
B Pieds (avec vis) PF-1008ST-24-102-001
C Télécommande PH-1008ST-24-RC
D Porte et charnière
broches (2)
E Porte vitrée PH-1008ST-24-003
F Poignée de porte PH-1008ST-24-004
G Thermostat PH-1008ST-24-005
PF-1008ST-24-102-002
J
PIÈCE DESCRIPTION No DE PIÈCE
H Ensemble du
radiateur et du
I Moteur de la roue PH-1008ST-24-007
J Carte de circuit
imprimé
PH-1008ST-24-006
PH-1008ST-24-008
25
Page 26

English p. 1
ESTUFA ELÉCTRICA CON
Français p. 14
CALENTADOR INFRARROJO
INSTRUCCIONES DE ENSAMBLAJE,
CUIDADO Y USO
MODELO # 1008ST-24-102L
ARTÍCULO # 0781472
¿Preguntas, problemas, piezas faltantes?
Antes de volver a la tienda, llame a nuestro Departamento de Servicio al
Cliente al 1-855-571-1044 de lunes a viernes de
8:00 a.m. a 8:00 p.m., hora estándar del Este.
www.greentouchchinaltd.com
_______________________ arpmoc ed ahceF
Page 27

CONTENIDO DEL PAQUETE
A
C
B
PIEZA DESCRIPCIÓN CANTIDAD
A Cuerpo 1
B Pata 4
C Control remoto 1
27
Page 28

CONTENIDO DE HARDWARE (no se muestran en tamaño real)
AA
Tornillo
Cant. 12
INFORMACIÓN DE SEGURIDAD
Lea y comprenda completamente este manual antes de intentar ensamblar, usar o instalar el
producto.
digitales clase B, conforme a la parte 15 de las reglas de la FCC. Estos límites se han diseñado
para proporcionar una protección razonable contra la interferencia perjudicial en una instalación
residencial. El equipo genera, utiliza y puede irradiar energía de radiofrecuencia y, si no se instala y
usa de acuerdo con las instrucciones, puede causar interferencia perjudicial a las comunicaciones de
radio o televisión, la que se puede determinar al encender y apagar el equipo. Se insta al usuario a
tratar de corregir la interferencia con una o más de las siguientes medidas:
s2EORIENTAROREUBICARLAANTENADERECEPCIØN
s Aumentar la separación entre el equipo y el receptor
s#ONECTARELEQUIPOAUNTOMACORRIENTEDEUNCIRCUITODISTINTO al que usa el receptor.
s3OLICITARAYUDAALCONCESIONARIOOAUNTÏCNICOCONEXPERIENcia en radio/TV.
Este dispositivo cumple con la Parte 15 de las reglas FCC. El funcionamiento está sujeto a las
siguientes dos condiciones:
1. Este dispositivo no debe causar interferencia perjudicial y
2. Este dispositivo deberá aceptar cualquier interferencia recibida, incluyendo la interferencia que
pudiese causar la operación no deseada.
anular la autorización del usuario para utilizar el equipo.
Este instrumento digital clase B cumple con el ICES-003 de Canadá.
28
Page 29

INFORMACIÓN DE SEGURIDAD
INSTRUCCIONES IMPORTANTES
Cuando se utilizan aparatos eléctricos, hay ciertas precauciones que se deben seguir para reducir el riesgo
de incendio, descarga eléctrica y lesiones a personas, incluyendo lo siguiente:
ADVERTENCIA
s Lea todas las instrucciones antes de usar el calentador.
s Para evitar lesiones por arranque inesperado o descarga eléctri
en la fuente de alimentación durante el desembalaje y el ensamblaje. El cable debe permanecer
desenchufado mientras ajusta o ensambla el artículo.
s Si alguna pieza falta o está dañada, no intente
o reemplazar la pieza correctamente. Para evitar una descarga eléctrica, utilice solo piezas de repuesto
idénticas a las del fabricante y, cuando haga reparaciones, utilice una herramienta con doble aislamiento.
s Cada vez que el artículo se deje funcionando sin supervisión, se debe tener extrema precaución si se
encuentran niños o personas discapacitadas cerca.
s El cableado del tomacorriente debe cumplir c
que correspondan para reducir el riesgo de incendio, descarga eléctrica y lesiones a personas.
s Desconecte la electricidad antes de realizar el mantenimiento o la limpieza para reducir el riesgo de
incendio, descarga eléctrica o lesiones personales.
s Este aparato se calienta cuando está en uso. Para evitar quemaduras, NO permita que la piel desnuda
toque las superficies calientes. Si se proporcionan, use las manijas al mover el calentador. Mantenga los
materiales combustibles, como muebles, papeles,
alejados de los lados y la parte posterior.
s El electrodoméstico no debe ser usado por niños o personas con capacidades físicas, sensoriales o
mentales reducidas o sin experiencia ni conocimientos, a menos
seguridad les brinde supervisión o capacitación.
s NO coloque el cable por debajo de alfombras. NO cubra el cable con tapetes, guías o cubiertas similares.
NO coloque el cable debajo de muebles o electrodomésticos. Coloque el cable lejos de áreas de tráfico y
donde alguien no se pueda tropezar.
o introduzca objetos extraños ni permita que estos entren en las aberturas de ventilación o escape, ya
s N
que podrían provocar descargas eléctricas, incendios o daños en el electrodoméstico.
s Este electrodoméstico tiene en su interior piezas calientes y piezas que forman arcos eléctricos o qu
echan chispas. No lo use en áreas donde se use o almacene gasolina, pintura o vapores o líquidos
o las decoraciones no deben colgarse en esta área.
s Utilice este electrodoméstico solo como se describe en el manual. El fabricante no recomienda ningún otro
uso porque puede causar incendios, descargas eléctricas o lesiones personales.
usar ni enchufar el cable de alimentación hasta reparar
on los códigos de construcción locale
ropa y cortinas, a un mínimo de 3 pies del aparato, y
ca, no enchufe el cable de alimentación
s y con otras normas
que una persona responsable de su
e
e secado para la ropa. Las botas navideñas
PRECAUCIÓN
s Recomendaciones para la instalación en climas fríos: Al instalar esta unidad en una pared o conducto
exterior no aislado, es obligatorio que las paredes exteriores
aislamiento correspondientes.
s Asegúrese de que la unidad esté apagada antes de proceder con el mantenimiento del motor. Toda
reparación eléctrica o nuevo cableado de esta unidad solo deben ser realizados por un electricista
s Si se repara o reemplaza cualquier componente eléctrico o cableado, se deben seguir las rutas originales
s No utilice este artículo si alguna de sus piezas estuvo sumergida en agua. Llame de inmediato a un
sistema eléctrico.
s Para evitar incendios, NO bloquee las entradas ni salidas de aire de ninguna manera. NO use sobre
superficies blandas, como una cama donde las aberturas se puedan bloquear.
s
Desactive la alimentación eléctrica cuando realice el mantenimi
gire el interruptor de alimentación principal a la posición de "APAGADO". Luego retire el enchufe del
tomacorriente de pared.
n.
rtículo y reemplace cualquier pieza del
ento de este electrodoméstico. Primero,
29
Page 30

INFORMACIÓN DE SEGURIDAD
s Si es posible, siempre desenchufe este electrodoméstico cuando no lo use.
s No lo use en exteriores.
s Este artículo no se debe usar en baños, cuartos de lavado o en espacios húmedos similares interiores.
Nunca coloque el radiador donde se pueda caer dentro de una bañera u otro contenedor de agua.
s Para desconectar este electrodoméstico, gire los controles a la posición de apagado y luego retire el
enchufe del tomacorriente.
s Conéctelo SOLO a tomacorrientes con la debida puesta a tierra.
s Cuando está instalado, este electrod
oméstico debe presentar una puesta eléctrica a tierra conforme a los
códigos locales, a los Códigos de Electricidad de Canadá CSA C22.1 o seguir las instalaciones en los EE.
UU., seguir los códigos locales y el Código Nacional de Electricidad, ANSI/NFPA NO. 70.
s Hay un limitador de termostato dentro del artículo. Cuando la temperatura interna s
ocurre un calentamiento anormal, el dispositivo de protección del termostato desconecta
e sobrecalienta u
el suministro de
electricidad para evitar que se produzcan daños o incendios.
s Para evitar incendios, no bloquee las entradas ni salidas de aire de ninguna manera. No use sobre
n bloquear.
No ubique los calentadores inmediatamente debajo de un tomacorrien
No opere ningún calentador con un cable o enchufe dañado, o después de que haya fallado, se haya
caído o dañado de alguna manera. Deseche el calentador o devuélvalo a un centro de servicio autorizado
para su revisión y/o reparación.
Conexión eléctrica
ESPECIFICACIONES
Voltaje Amperios Vatios (máx.)
120 VCA, 60 HZ 12,5 amperios 1500 vatios
s Se requiere un circuito de 15 amperios, 120 voltios y 60 Hz con un tomacorriente con la debida puesta
a tierra. De preferencia, el artículo debe estar en un circuito dedicado, ya que la conexión de otros
electrodomésticos al mismo circuito puede provocar que el interruptor de circuito se desconecte o que
el fusible se funda cuando el calentador está en funcionamiento. Se incluye como estándar con la
unidad un cable de tres conductores de
1,82 m de largo, que sale de la parte posterior de la chimenea.
re enchufe el calentador directamente
en un tomacorriente/receptáculo de pared. Nunca use con extensiones eléctricas ni tomacorrientes de
alimentación reubicables (tomacorrientes/enchufes múltiples).
GUARDE ESTAS INSTRUCCIONES
INSTRUCCIONES DE ATERRIZAJE:
s Este calentador fue diseñado para su uso en 120 voltios. El cab
a continuación. Consulte la ilustración para ver las instrucciones de puesta a tierra. Hay disponible
un adaptador, como se muestra en C,
para conectar enchufes con puesta a tierra de tres clavijas a
receptáculos de dos ranuras. El enchufe verde de puesta a tierra que sale del adaptador se debe conectar
de manera permanente a tierra, como a través de una caja de salida correctamente puesta a tierra. El
adaptador no se debe usar si hay disponible un receptáculo de tres ranuras puesto a tierra.
le tiene un enchufe como se muestra
A B C D
Clavija con puesta
a tierra
Tapa de la
clavija con
puesta a tierra
Tornillo
de metal
30
Adaptador
Medios de puesta
a tierra
Clavija con puesta
a tierra
Page 31

PREPARACIÓN
2
Screw
Qty. 12
Antes de comenzar a ensamblar el producto, asegúrese de tener todas las piezas. Compare las
piezas con la lista del contenido del paquete y la lista del contenido de aditamentos. No intente
ensamblar el producto si falta alguna pieza o si estas están dañadas.
Tiempo estimado de ensamblaje: 15 minutos
Herramientas necesarias para ensamblar y realizar la prueba de fugas (no se incluyen):
Destornillador Phillips
INSTRUCCIONES DE ENSAMBLAJE
PRECAUCIÓN: Con la ayuda de otra persona, coloque la unidad boca abajo sobre una superficie
suave, plana y nivelada. Tenga cuidado de no rayar la superficie superior del calentador.
1.
cuerpo (A). Fije cada pata con tres tornillos (AA).
El ensamblaje está listo. Con la ayuda de otra
persona, vuelva a colocar la unidad en su posición
normal.
Aditamentos utilizados
AA
Tornillo
x 12
1
AA
B
1
1
1
1
A
31
Page 32

INSTRUCCIONES DE FUNCIONAMIENTO
M
M
A
Cuerpo
Botón de encendido
M
C
M
Control remoto
Para utilizar el control
remoto, primero retire
la lengüeta plástica.
Para ello retírela
jalándola suavemente
hacia afuera del control
remoto (C).
Presione el botón de encendido para girar la alimentación principal a la unidad de ENCENDIDO o
APAGADO.
Cuando la unidad está ENCENDIDA, las luces debajo del lecho de brazas se encenderán para
indicar que la unidad tiene electricidad.
Botón de brillo de la llama
Si la unidad está apagada, puede presionar el botón de brillo de llama para encenderla. El lecho
de brasas resplandecerá con el brillo máximo a menos que se guarde en la memoria una
configuración diferente.
Presione el botón nuevamente para desplazarse por los ajustes de brillo de la llama, 1, 2, 3, 4, 5
y OFF.
Mantenga presionado el botón de llama durante 5 segundos para cambiar entre incrementos
de 5 °F (3 °C) y de 1 °F (1 °C) al ajustar la temperatura. La unidad emitirá un pitido para indicar que el
cambio se ha realizado. La temperatura predeterminada de fábrica está en incrementos de 5 °F (3 °C).
Botón de temperatura
El botón de temperatura controla el termostato del calentador.
Si la unidad está apagada, puede presionar el botón de brillo de llama para encenderla. El lecho
de brasas resplandecerá con el brillo máximo a menos que se guarde en la memoria una
configuración diferente.
El rango de ajuste del termostato se encuentra entre 65 °F (18 °C) y 90 °F (32 °C), HI (Alto) y
APAGADO.
Mantenga presionado el botón TEMPERATURE (temperatura) durante 10 segundos para
desactivar la función de calentador. Mantenga presionado el botón durante 10 segundos
nuevamente para activar la función de calentador. (Consulte la sección ANULACIÓN DE
CALENTADOR a continuación para obtener más detalles.)
32
Page 33

INSTRUCCIONES DE FUNCIONAMIENTO
Botón del temporizador
egresiva de la alimentación principal de la
unidad.
Si la unidad está apagada, puede presionar el botón de brillo de llama para encenderla. El lecho de
brasas resplandecerá con el brillo máximo a menos que se guarde en la memoria una configuración
diferente.
del temporizador. 30, 1h, 2h, 3h, 4h, 5h, 6h, 7h, 8h, 9h y apagado. (30 significa 30 minutos)
Cuando el temporizador llega a cero, apagará la alimentación principal pero guardará las demás
Función de memoria
se guardarán en la memoria.
Cuando la unidad esté APAGADA, presione el botón de encendido del control remoto o del panel de control
Cuando la unidad esté APAGADA, presione cualquier botón de función para "recordar" las funciones
guración de brillo de la llama guardada
n la memoria, entonces solo brillará el
lecho de brazas (como un indicador de encendido).
Para restablecer la memoria, mantenga presionado el botón de encendido durante 5 segundos en cualquier
momento. Cuando esto ocurra, la lectura LED titilará con cuatro ceros tres veces.
Otra forma de restablecer la memoria es desenchufar la unidad de la pared.
ANULACIÓN DE CALENTADOR
Es posible desactivar la alimentación eléctrica del calentador para evitar que se encienda accidentalmente.
Esta función se añade principalmente para ayudar a evitar que los niños enciendan el calentador cuando no
se desea.
Para activar la función de anulación del calentador, mantenga presionado el botón Temperature (temperatura)
durante 10 segundos. Se mostrará el símbolo E3 y luego se pondrá en blanco mientras suena 3 veces. La
función de calentador ahora está bloqueada. Si presiona el ícono de calentador nuevamente, aparecerá E3 y
luego se desvanecerá. Las funciones de llama, luz descendente y temporizador funcionarán normalmente.
Solo el calentador y el ventilador se desactivan.
Para desbloquear la función de calentador, mantenga presionado el botón Temperature durante 10 segundos.
El símbolo E3 se mostrará y luego se pondrá en blanco mientras suena 3 veces. La función de calentador
ahora está activada. Al presionar el botón Temperature nuevamente, podrá ajustar la temperatura de
calor a
la temperatura deseada.
33
Page 34

CUIDADO Y MANTENIMIENTO
Asegúrese de que el aparate esté APAGADO, desenchufado y los elementos de calentamiento estén
fríos cada vez que limpie el calentador.
Limpie el polvo de la chimenea regularmente con un paño suave sin pelusa o con un producto de
limpieza doméstico.
Los motores usados en el ventilador y el conjunto del generador de llamas vienen lubricados
previamente para prolongar la vida útil de los rodamientos y no necesitan lubricación adicional. Sin
embargo, recomendamos limpiar/aspirar el ventilador/calentador periódicamente.
Cuando el calentador no esté en uso, se debe guardar en un lugar seco y lejos de posibles daños.
El cable de alimentación se debe guardar adecuadamente para evitar el contacto con objetos
calientes o afilados.
Cualquier otro servicio lo debe realizar un representante de servicio autorizado.
Reemplazo de las baterías del control remoto
Cuando el control remoto (C) deja de funcionar o el rango parece haberse reducido, es momento
de reemplazar las baterías. Nota: La batería debe retirarse si el producto no será utilizado por un
período prolongado.
1. El compartimiento de las baterías está ubicado en el
C
extremo posterior del control remoto (C).
2. Presione y sujete la pestaña de liberación en el
compartimiento de las pilas y deslice para abrir.
BATTERY
3. Retire la pila antigua.
4. Inserte una nueva batería de litio CR2025 (no se
incluye). Asegúrese de que los lados + y – coincidan
con el interior del compartimiento de la batería.
5. Vuelva a insertar la cubierta de la batería.
Eliminación de las baterías usadas
La batería puede contener sustancias peligrosas que podrían poner en peligro al medio ambiente y a
la salud humana.
Este símbolo marcado en la batería o el paquete indica que la batería usada
no se debe considerar parte de los residuos municipales. En cambio, debe
eliminarse en el punto de recolección apropiado para el reciclaje.
Si se asegura de que la batería se elimine de forma correcta, evitará posibles
consecuencias negativas para el medio ambiente y la salud humana. El
reciclado de materiales contribuirá a conservar los recursos naturales.
Para obtener más información sobre la recolección y el reciclaje de baterías usadas, póngase en
contacto con su municipalidad local, su servicio de eliminación de desechos o el punto de venta
donde las compró.
34
Page 35

SOLUCIÓN DE PROBLEMAS
PROBLEMA CAUSA POSIBLE ACCIÓN CORRECTIVA
El panel de control
muestra un mensaje de
error E1.
El panel de control
muestra un mensaje de
error E2.
El panel de control
muestra un mensaje de
error E3.
No hay alimentación, los
leños no arden.
Los leños arden pero no
hay efecto de llama.
El sensor de
sobrecalentamiento
se activó.
El sensor del
termostato está
roto o no funciona
correctamente.
La función de
anulación de
calentador está
activada
El equipo no tiene
alimentación.
El efecto de la llama
está apagado.
Desenchufe la unidad, espere de 5 a 10 minutos y el
sensor se restablecerá automáticamente. Vuelva a
enchufar la unidad y encienda el calentador. Si el problema
persiste, póngase en contacto con Servicio al Cliente.
Nota: Las demás funciones operarán normalmente
excepto por el calentador. Hasta que se solucione el
problema, el error aparecerá/sonará cuando se presione el
botón del calentador.
Para desbloquear el calentador, simplemente mantenga
presionado el botón Temperature (temperatura) durante
10 segundos (consulte la página 33 de la sección
Anulación de calentador para obtener más información).
manera segura a un tomacorriente estándar de 120 V.
Luego revise la unidad para asegurarse de que está
encendida.
Presione el botón del brillo de la llama hasta lograr el nivel
deseado.
El calentador y el soplador
no encienden pero el resto
de las funciones están
funcionando.
El cable de alimentación
se calienta al tacto.
El control remoto no
funciona.
La señal del control
remoto es débil y solamente funciona a veces.
El motor del ventilador
sigue soplando luego de
que se apaga la unidad.
El interruptor de
anulación del
calentador está
encendido.
Funcionamiento
normal.
La batería está baja o
no funciona.
Presiona los botones
muy rápido.
Utiliza el control
remoto demasiado
lejos o fuera de
ángulo.
Funcionamiento
normal.
Ubique el interruptor de anulación del calentador en la
parte trasera de la unidad y cambie la posición a apagado.
Ahora el calentador funcion
ará correctamente. (Consulte la
página 33 para obtener más información).
Es normal para un electrodoméstico calentador ya
las conexiones del cable del electrodoméstico y del
enchufe. Asegúrese de que el enchufe se ajuste
correctamente en el tomacorriente. Durante el uso,
para determinar si está CALIENTE. Si es así, interrumpa
el uso del electrodoméstico y consulte a un electricista
sobrecalentados.
Reemplace con una batería nueva. (Consulte la página
34 para obtener más información).
asegurarse de que el transmisor reconoce la orden.
Acérquese al accesorio. El control remoto solo funciona
dentro de una distancia de 6,09 m y a 45 grados
de cualquier costado del frente del accesorio de la
chimenea.
Esta es una función estándar; el ventilador funciona
tiempo adicional para enfriar los tubos del calentador.
35
Page 36

GARANTÍA
El fabricante garantiza que este producto no presentará defectos de materiales o de fabricación
por un período de un año a partir de la fecha de compra original. Esta garantía está sujeta a las
siguientes condiciones y limitaciones:
Esta repisa se debe instalar y operar de acuerdo con las instrucciones de instalación y operación
proporcionadas con el producto. La reparación no autorizada, alteración, el abuso deliberado,
accidente o uso inadecuado del producto anulará esta garantía.
Esta garantía no es transferible y solo está disponible para el propietario original, siempre y cuando
la compra se haya realizado a través de un proveedor o un revendedor autorizado del producto.
La garantía se limita a la reparación o el reemplazo de las piezas que se establezca que poseen
defectos en los materiales o la fabricación. Siempre que las piezas hayan estado sometidas a
y concuerden en que existe un defecto.
Esta garantía no cubre ningún costo que surja del transporte, la fabricación, mano de obra, o de otro
tipo que surja de la reparación, reemplazo, piezas defectuosas u otra situación y el fabricante no
asume ninguna responsabilidad por las mismas.
El fabricante podrá, bajo su criterio, eximirse de toda obligación respecto de esta garantía al
reembolsar el precio al por mayor de las piezas defectuosas.
El propietario/usuario asume todos los riegos, si los hay, incluidos los riesgos de daños o pérdidas
directos, indirectos o resultantes que surjan del uso del producto, o de la incapacidad para usarlo,
salvo que la ley estipule lo contrario. Mediante el presente, se excluye expresamente cualquier otra
garantía, expresa o implícita, respecto del producto, sus componentes y accesorios, o cualquier otra
obligación o responsabilidad de parte del fabricante.
El fabricante no asume, ni autoriza a ningún tercero a asumir en su nombre, ninguna otra
responsabilidad respecto de la venta del producto.
Las garantías descritas en este documento no se aplican a accesorios que no sean del fabricante y
que se usen junto con la instalación de este producto.
varían según el estado.
Esta garantía es nula si:
1. El calentador eléctrico se somete a períodos prolongados de humedad o condensación.
2. Se produce cualquier alteración no autorizada, abuso deliberado, accidente o uso indebido del
producto.
3. Usted no tiene el recibo original de compra.
36
Page 37

LISTA DE PIEZAS DE REPUESTO
Para obtener piezas de repuesto, llame a nuestro Departamento de Servicio al Cliente all 1-855-5711044, de lunes a viernes de 8 a.m. a 8 p.m., hora del Este.
B C D E F
G H I
PIEZA DESCRIPCIÓN PIEZA #
B Patas (con
tornillos)
C Control remoto PH-1008ST-24-RC
D Puerta y bisagra
pasadores (2)
E Vidrio de la puerta PH-1008ST-24-003
F Manija de la
puerta
G Termostato PH-1008ST-24-005
PF-1008ST-24-102-001
PF-1008ST-24-102-002
PH-1008ST-24-004
J
PIEZA DESCRIPCIÓN PIEZA #
H Ensamblaje
del calentador/
soplador
I Motor de disco
giratorio
J Panel PCB PH-1008ST-24-008
PH-1008ST-24-006
PH-1008ST-24-007
37
 Loading...