

Page 1
Installation Guide
Model 744
Double Handle Faucet with Optional Side Spray
Certifications & Information
• ADA Approved
• Limited Lifetime Warranty
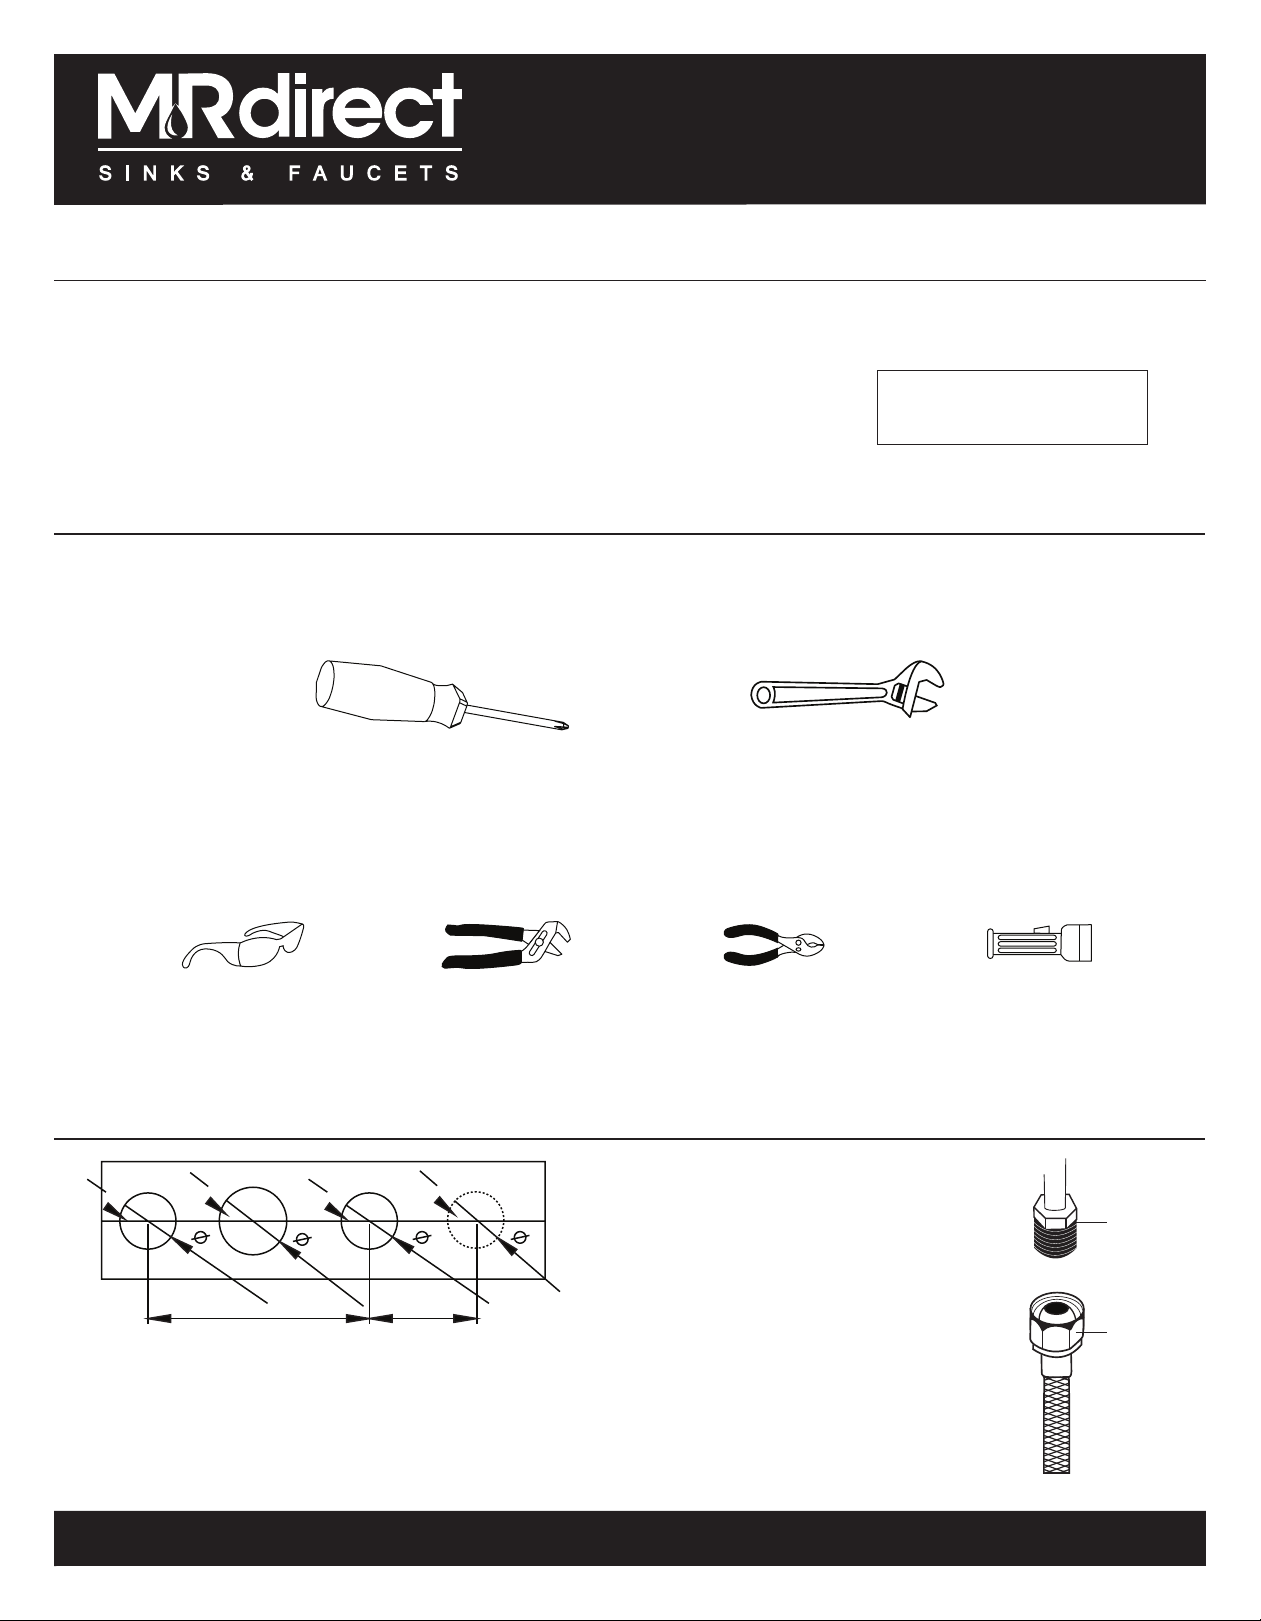
Tools
Gather the necessary tools as shown to complete the installation of this faucet.
Flow Rate
1.91gpm at 60PSI
The following tools are optional:
Safety Glasses
Conguration
1 1/16"
Faucet
24" MAX
Three-hole Installation
Sir
Four-hole Installation with available side spray
1 1/4"
24" MAX Centerset
Channel Lock
1 1/16"
8"
Adjustable WrenchPhillips Screwdriver
Pliers
1"
Connect to water supply lines with TWO
3/8" Compression Faucet Connectors
Flashlight
Water supply
Connector
* This measurement is only suggestive and may vary
according to the sink model.
Installation Guide 1
Page 2
Installation Guide
Faucet Installation
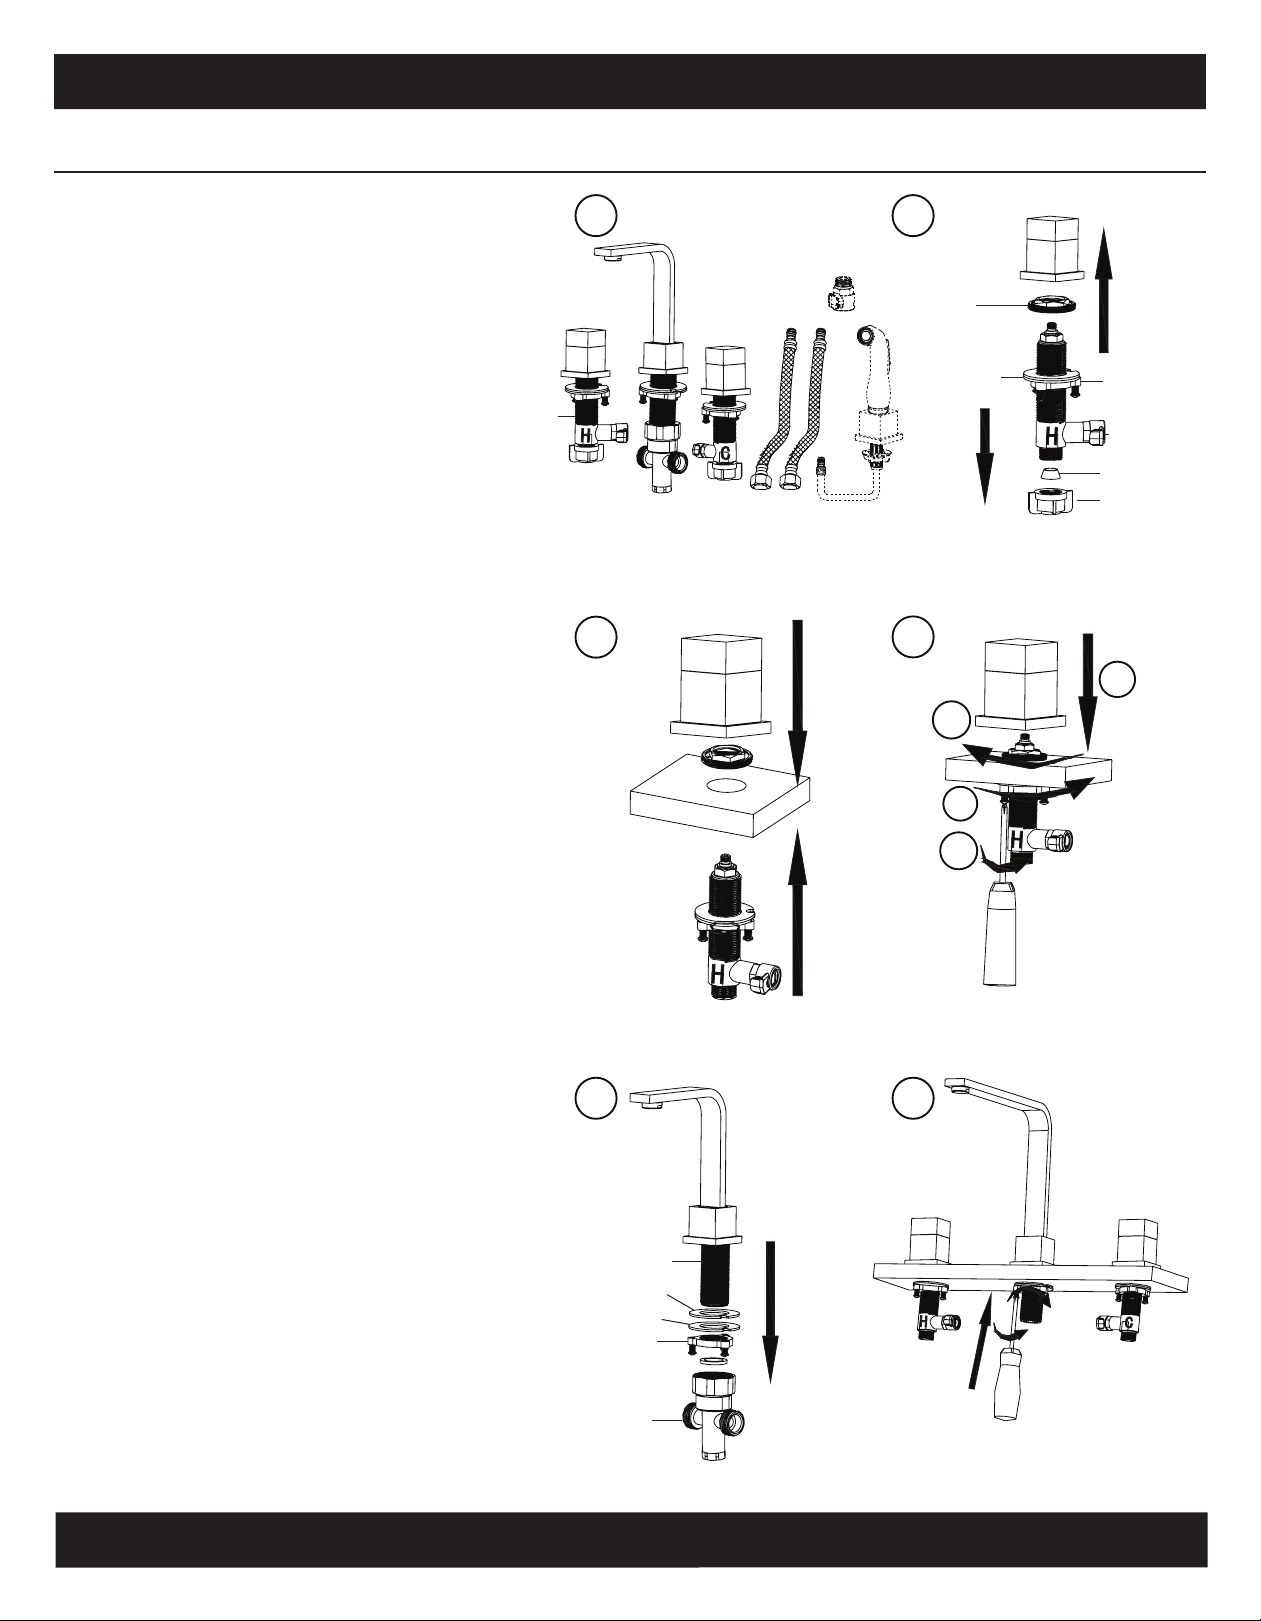
A. Turn o the water supply. Remove the
faucet with the mounting
hardware attatched from
the package.
*An optional matching side spray is also available.
B. Remove all mounting hardware from
the faucet handle shanks.
*Coupling nut and cone washer are optional for
this installation depending on your waterline
connection.
C. Insert the shank of the faucet handle
body into the hole of the sink deck.
From the underside of the sink or
mounting surface, attach the gasket
and washer, followed by the lock nut,
onto the shank.
shank
A
C
B
lock nut
D
washer
3
lock nut
quick connect
*cone washer
*coupling nut
4
D. (1) Using a phillips screw driver (2)
tighten the mounting screws untill
secure. (3) Lower the the lock nut
to onto the mounting surface (4)
followed by the faucet handle.
Repeat above steps for second faucet
handle.
E. Remove all mounting hardware from
the faucet shank.
F. From the underside of the sink or
mounting surface, attach the gasket
and washer, followed by the
lock nut, onto the shank.
Tighten mounting screws until secure.
E
shank
gasket
washer
lock nut
tee tting
1
2
F
2
Page 3
Faucet Installation Continued
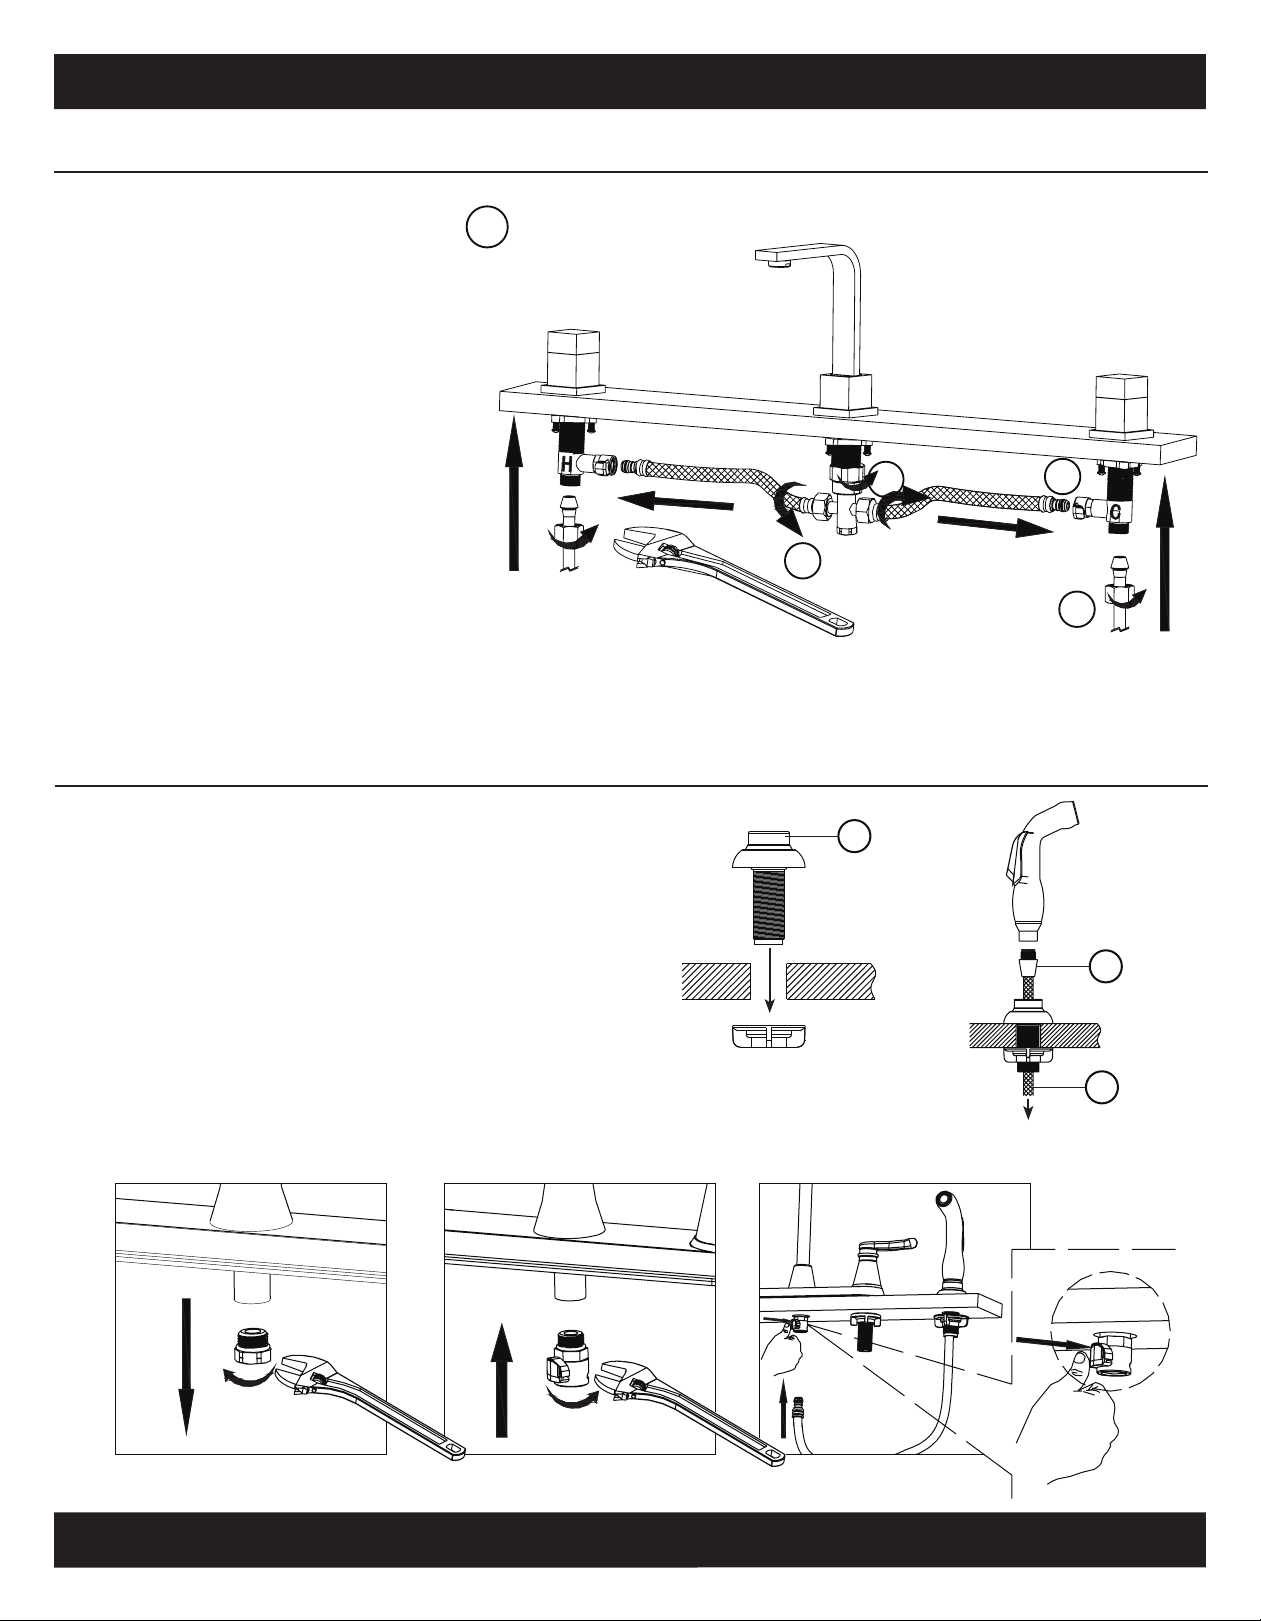
G. (1) Tighten the tee tting on to
faucet shank (2) Attach the hot
and cold supply lines to the Tee
tting at the faucet base.
(3) Attach the opposite end of
each hose to the corresponding
quick connect ttings by
tightening the 3/8” compression
ttings onto the lines.
Secure all ttings with a 1/4 turn
of a wrench.
G
2
1
Installation Guide
3
(4) Secure water line connections
to each corresponding faucet
handle shank base. Secure
all ttings with a 1/4 turn of a
wrench.
Side Spray Installation
Side Spray Installation
A. Insert spray hose assembly (1) to far right hole on the
sink, hand tighten with lock nut from underneath.
B. Insert spray hose (2) down hose assembly.
C. Connect male end (3) with spray and hand tighten.
Replacing plug with supplied Quick Connect connection for side spray installation.
4
1
3
2
3
Page 4
Important
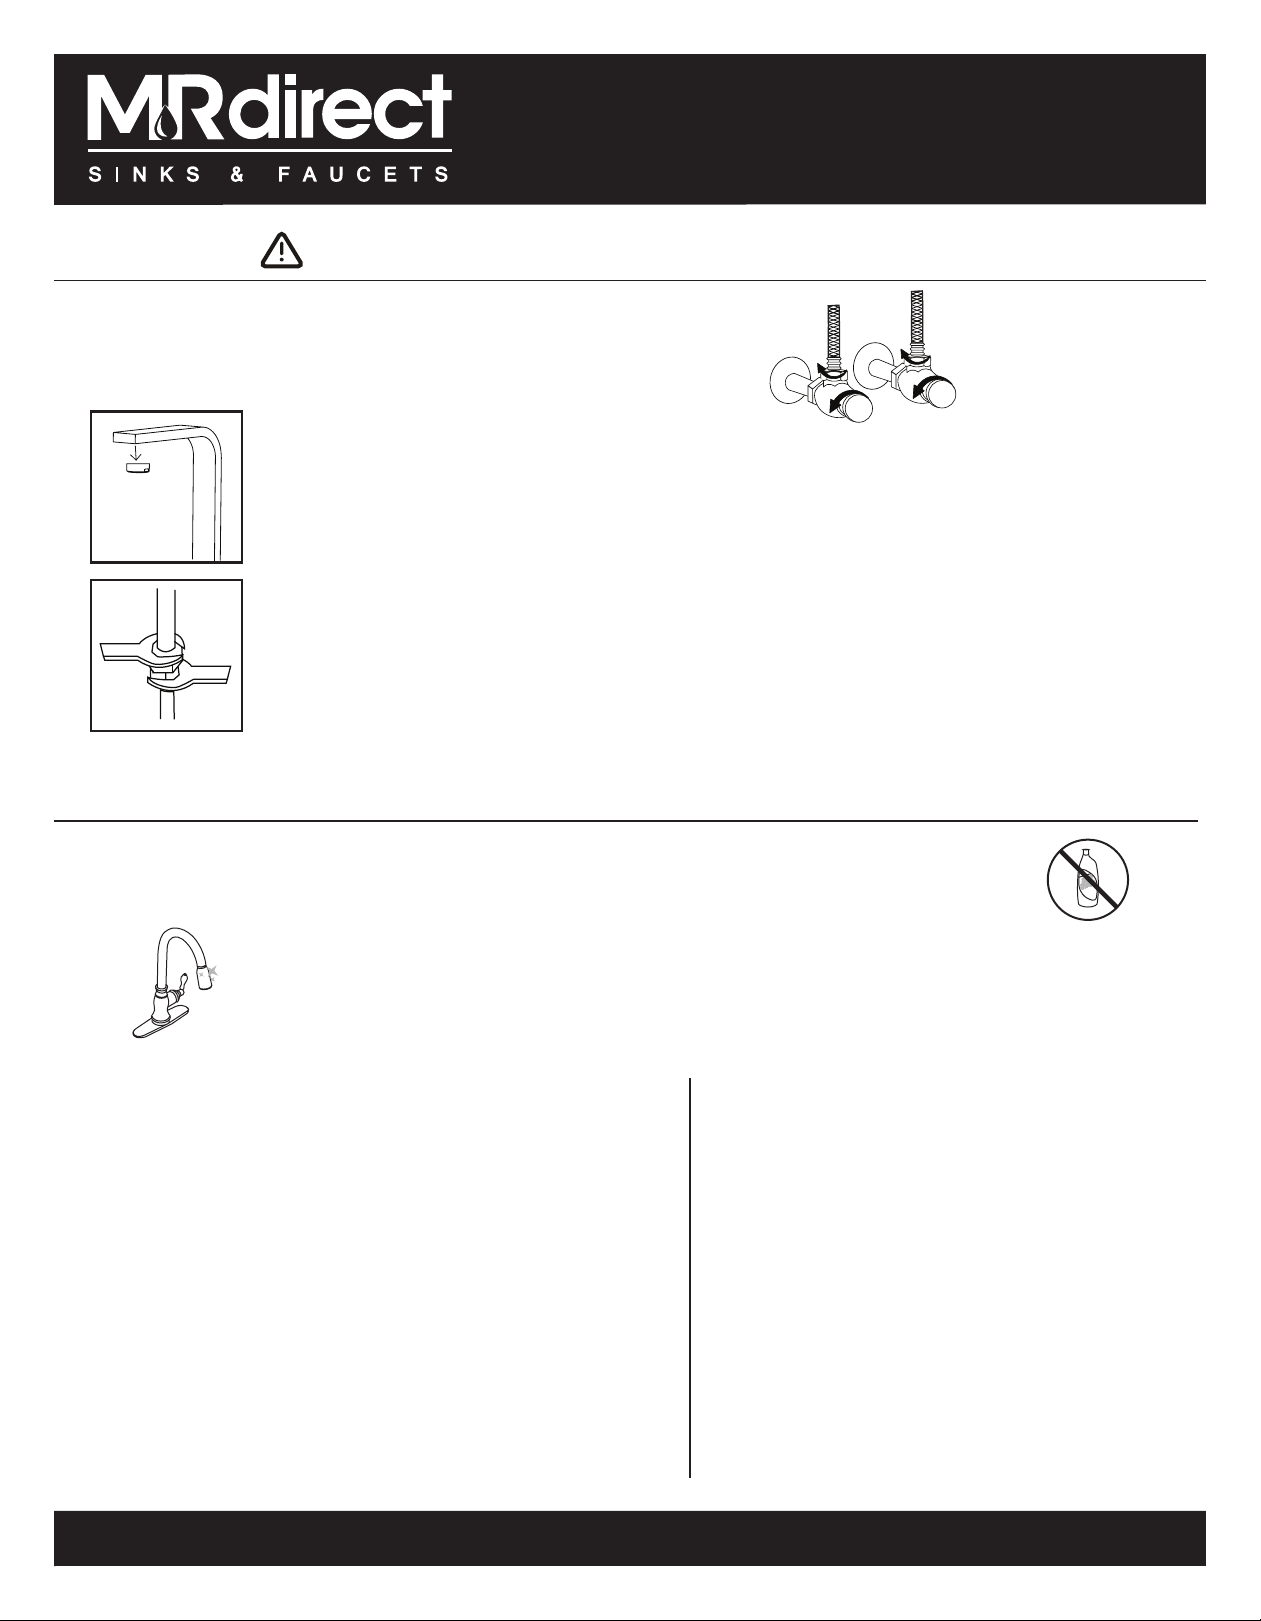
Turn on the water supply SLOWLY, to test for leaks
before completely opening the water lines.
Remove the aerator from the end of the faucet by carefully unscrewing it.
Let hot and cold water run through both water lines for at least one minute
before replacing the aerator. This will help to clear any debris in the line,
which could otherwise clog the system.
To prevent damage to the tube body, tighten the connections by carefully using two
wrenches as shown. Use caution to not bend the stem.
Check for leaks.
www.mrdirectint.com
1-877-946-5725
Cleaning Information
Simply rinse and dry faucets with a soft towel every week to prevent mineral deposits from forming. Clean spills
and splatters as they happen. Do not let soap, toothpaste or other contaminates dry on the faucet, this can
stain or pit the nish. Use a mild soap and soft sponge or towel to remove residue. Rinse and dry thoroughly.
Never use an abrasive cleaner or rough sponge to clean or dry your faucet. Harsh cleaners could dull
or scratch the nish. Use only a soft disinfectant that does not contain bleach or chlorine and apply
with a soft towel.
Warranty Information
MR Direct warrants to the original consumer purchaser that our sinks and faucets will be free from
defects in material and workmanship under normal use for the lifetime of the product. MR Direct may
elect to repair or replace any defective MR Direct product covered by our warranty.
Our warranty does not cover defects caused by misuse, abuse, negligence, alterations, environmental
conditions, improper installation, storage and handling; nor any labor expenses.
From time to time we will change design specications and materials as conditions require and
improvements are developed. We have no obligation to incorporate such changes in products we
previously manufactured.
This warranty is in lieu of any and all other warranties, express or implied, including any warranties of
merchantability and of tness for a particular purpose; and excludes any incidental or consequential
damages. No representative has the authority to change or enlarge the above warranty.
This warranty is only valid in the United States of America. Some states do not allow limitations on how
long an implied warranty lasts or the exclusion or limitation of incidental or consequential damages, so
the above limitations or exclusion may not apply. This warranty gives you specic legal rights, and you
may also have other rights which vary from state to state.
One-Year Accessory Warranty
MR Direct warrants to the original purchaser that all of our accessories will be free from defects in
material and workmanship under normal use for one full year.
Our warranty does not cover defects caused by misuse, abuse, negligence, alterations, environmental
conditions, improper installation, storage and handling; nor any labor expenses. MR Direct may elect to
repair or replace any defective MR Direct accessory covered by our warranty.
Notes
Installation Guide 4
 Loading...