

Page 1
INSTRUCTION SHEET
811B626-RTA Bamboo Side Chair
Thank you for purchasing this quality product. Before beginning, please check the packing material
carefully for small parts which may have come loose inside the carton during shipping. Please do not
discard any packing material until all parts have been located. If any parts are missing, please contact your
dealer for prompt replacement.
Caution:
assistance of one or more persons in order to prevent personal injury and to insure parts are not
damaged during the assembly process. If dirty, clean finished parts with mild dishwashing liquid and
water solution applied on damp cloth. Cloth should not be excessively wet. Polish finish with soft cloth
and an industry recognized furniture polish.
furniture for stain residue and rough surfaces and also check for staples or nails left after removing the
packaging material. The manufacturer will not be held responsible if preventative steps are not taken
prior to installation.
During normal use every day, screws, bolts, nuts and wooden plugs may loosen up. They should be
periodically inspected and re-tightened to prevent damage to the furniture and (or) personal property or
cause injury. Always check to be sure all hardware on this list and the below mentioned components are
attached to the furniture properly and kept tightened.
(1) These parts are cumbersome and heavy. This product can best be assembled with the
(2) To prevent damage to your floor or carpet, please check the bottom of each piece of
Parts & Hardware List:
PARTS LIST
A SEAT PANEL WITH WOOD FRAME 1 PC #1
B CHAIR BACK FRAME 1 PC #2
C STRECHER FRAME 1 PC #3
D FRONT LEG, LEFT 1 PC # 4
E FRONT LEG, RIGHT 1 PC # 5
Assembly Procedures:
Tools required: Wrench #5 (see hardware list).
Note: First read the chair leveling instructions. This is an additional assembly sheet found inside the carton.
Place all chair parts on a clean, cushioned area to prevent scratching the furniture. Make sure the feet
are free of stain, staples, screws and nails.
Assembly Steps:
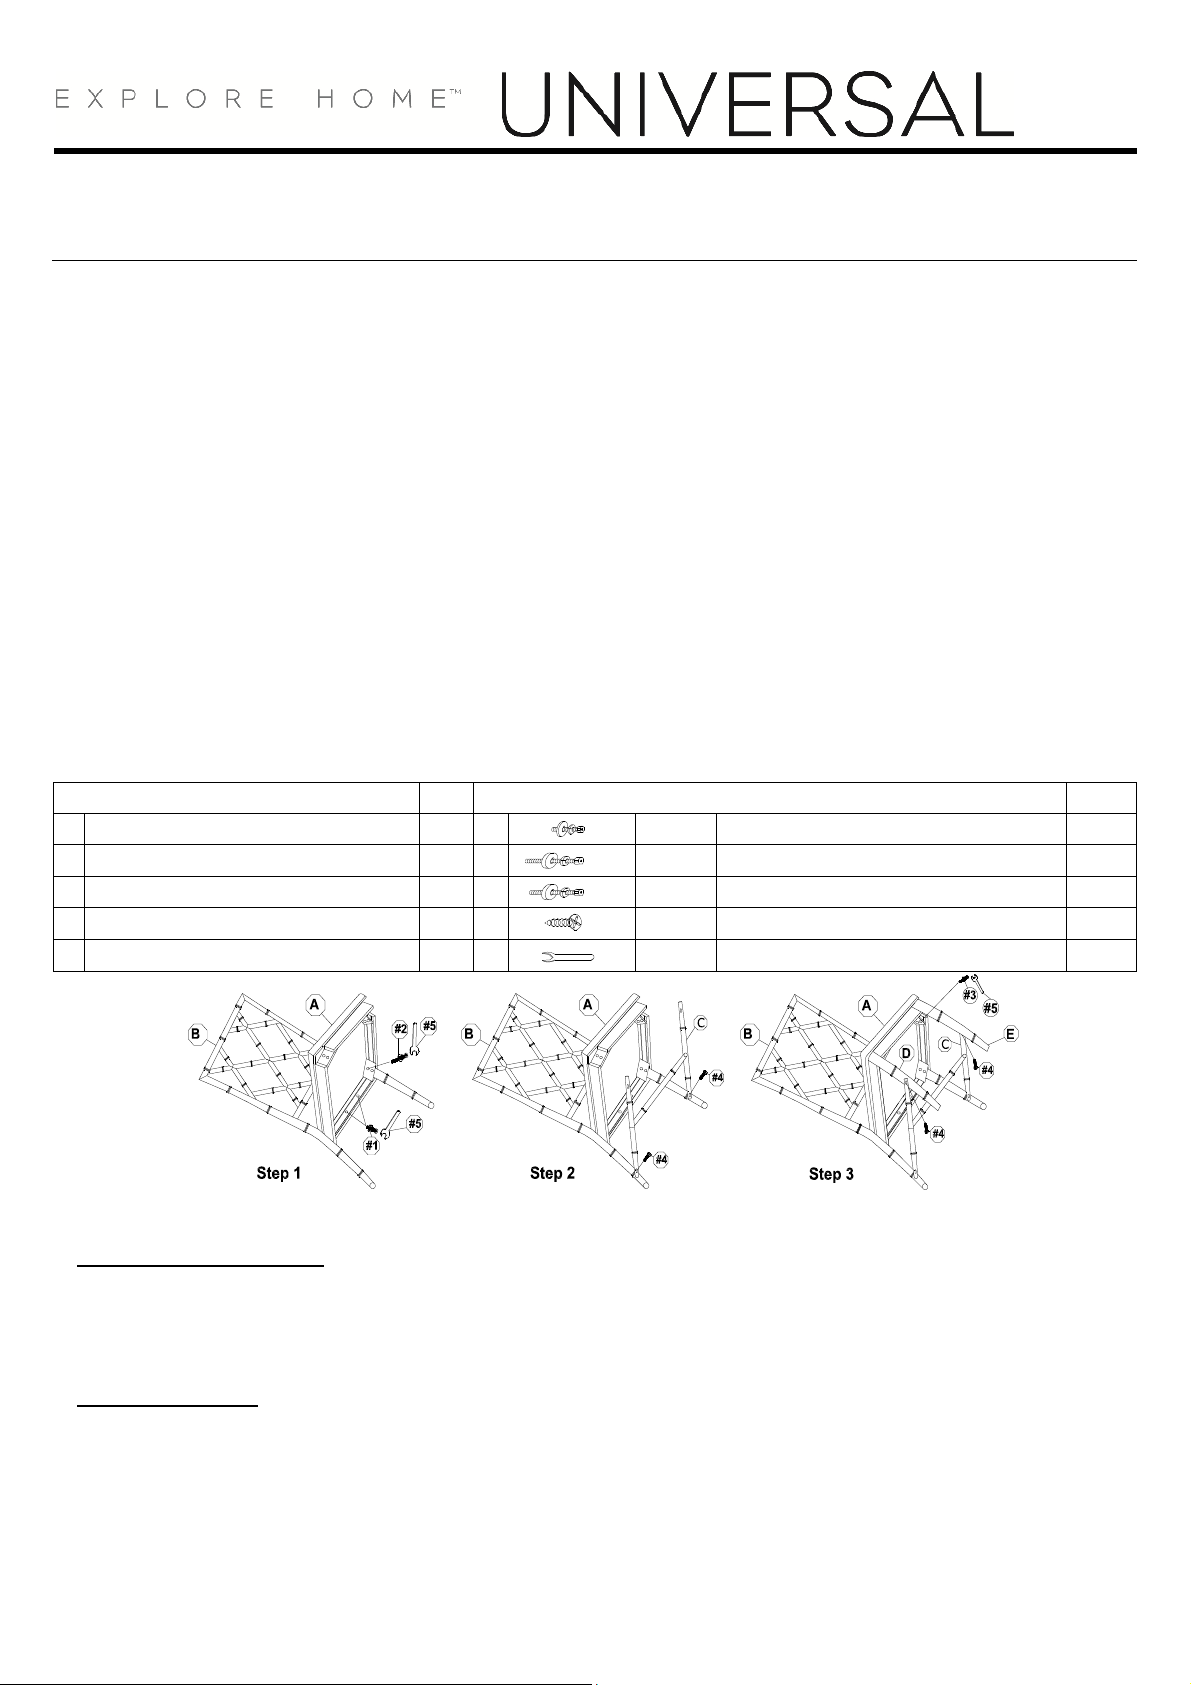
Step 1: Remove the plastic cover on seat. Assemble the seat frame (A) to the back frame (B).
Step 2: Assemble the stretchers (C) to the back frame (B).
Step 3: Assemble the front legs (D, E) to the seat frame (A) and the stretchers (C).
Note: Do not tighten all the bolts until the chair has been put on a flat surface to adjust & level all the legs so
that they do not wobble. Once adjusted then tighten all the bolts. Do not over tighten.
QTY
HARDWARE LIST
1-1/2’’ L BOLT + LOCK WASHER + FLAT WASHER ----- 5/16” Dia 2 SETS
3’’ L BOLT + LOCK WASHER + FLAT WASHER ----- 5/16” Dia 4 SETS
2-1/2’’ L BOLT + LOCK WASHER + FLAT WASHER ----- 5/16” Dia 4 SETS
8*1-1/4”L WOOD SCREW 4 PCS
12*85mmL WRENCH 1 PC
QTY
 Loading...