

Page 1
Easy Do-It-Yourself installation
with our Quick Connect
Control your unit from anywhere
with our Smartphone App
7 Year Compressor &
®
line set
DIY
®
E Star
™
Series
5 Year Parts Warranty
3RD GEN Do-It-Yourself Ductless Mini-Split Heat Pump A/C
SMART CONTROLLER
Note: This guide is for convenience.
Please refer to the more detailed installation
instructions in the manual as needed.
www.mrcool.com
Page 2
STEP 1 - inside STEP 3 - inside
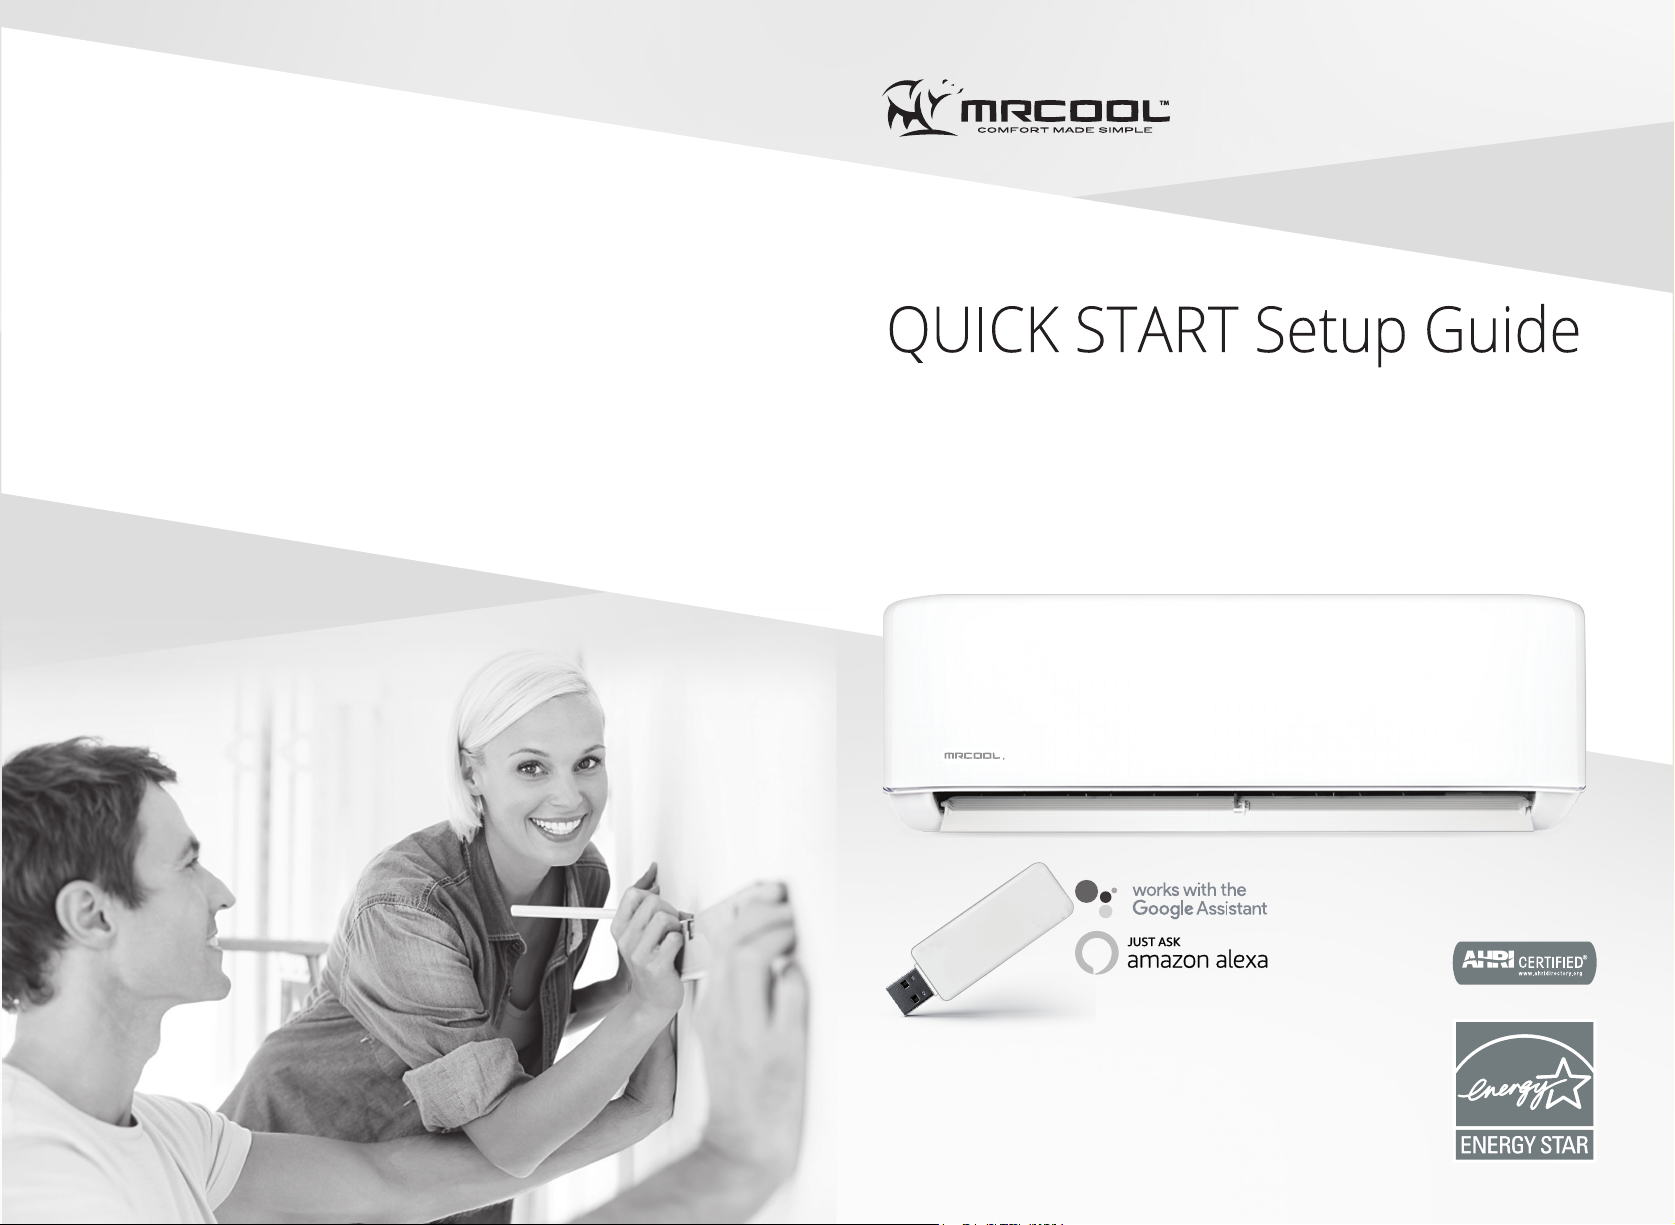
1. Locate the wall template.
2. Place the template on the wall at the installation
location.
3. Use the template
to mark the drill
points and wall hole
site.
4. Remove the template.
STEP 2 - inside
1. Drill screw holes at the indicated points into
studs.
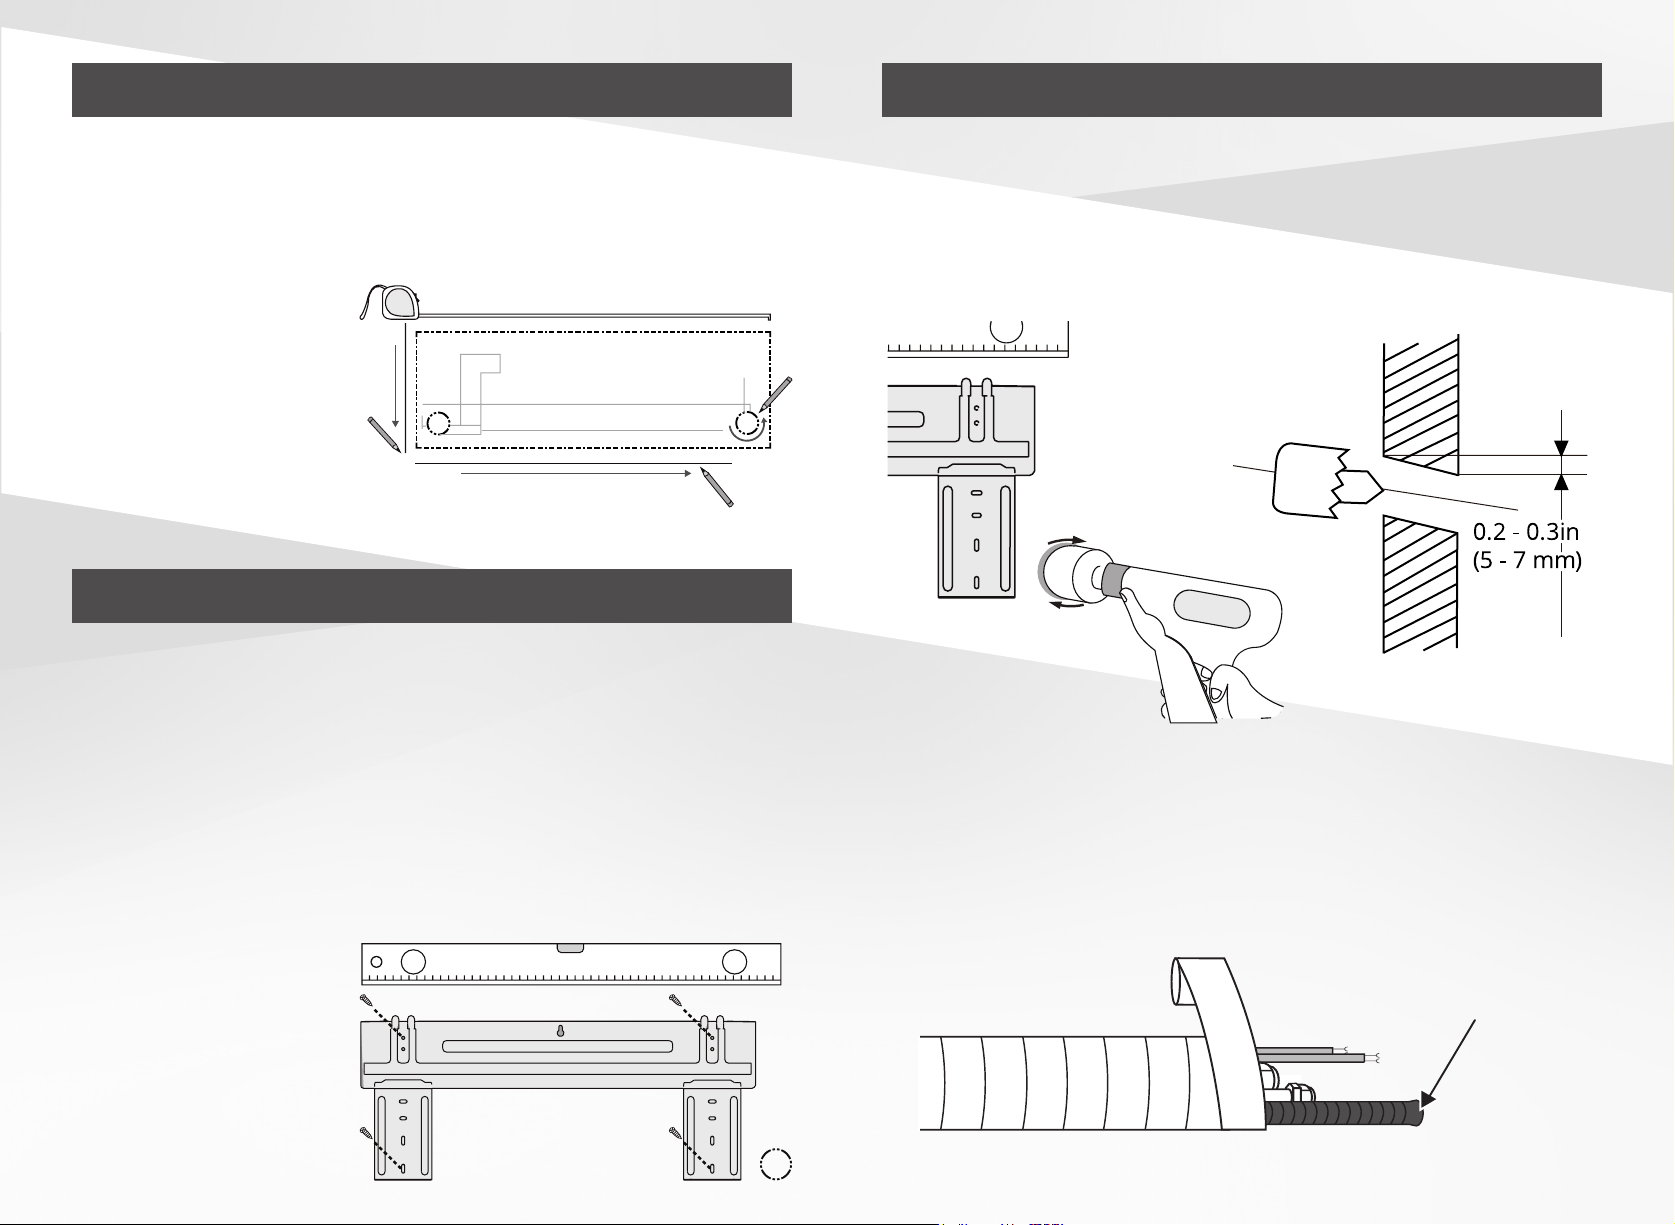
1. Drill a 3.5 inch diameter hole through the wall, at
a slightly downward angle, to accommodate the
line set, condensate drain line and communication
cable to the exterior condenser.
Wall
Indoor Outdoor
0.2 - 0.3in
(5 - 7 mm)
2. Remove the bracket from the rear of the interior
air handler.
3. Screw the metal bracket to the wall according to
the template.
4. Use a level to
ensure the
mounting plate is
flush and level.
2. Use the vinyl tape to wrap the line set,
condensate drain line and communication cable
into a bundle. The drain MUST be on the bottom.
3. Push the bundle through the wall hole.
condensate
drain line
Page 3

STEP 3 - continued
STEP 4 - continued
4. Snap the air handler onto the wall bracket.
STEP 4 - outside
1. Place outside condenser unit firmly on the
ground or attach it to a secure metal wall bracket
or pad. Drain pipe is not required and can be
2. Remove the plastic seals from the indoor
handler refrigerant lines.
3. Carefully unroll the amount of Quick Connect®
line set needed to connect the indoor handler
fittings and the outside condenser. Leave the coiled
portion stored near the condenser.
4. Align the Quick Connect® refrigerant lines to the
matching indoor handler fittings. Tighten the first
few threads by hand.
5. Using open ended wrenches (i.e. crescent or
adjustable): hold the points marked “1” and turn
the nuts only at the points marked “2” (Select the
appropriate wrench according to the dimensions of
the connector).
installed as necessary only if elevated.
24in (60cm)
above
79in (200cm)
in front
12in (30cm)
on left
Ground Installed:
12 in (30 cm)
Bracket Installed:
6 in (15 cm)
clearance between
back and wall
6. Ensure that the screw connectors do not skew
while working quickly to tighten them.
1 2
24in (60cm)
on right
Page 4

STEP 5 - outside
STEP 6 - outside
1. Carefully roll the excess tubing and place it
behind the condenser.
2. Attach the bundle connections to the outside
condenser.
Carefully unroll to indoor
handler connection
Radius
Keep excess coiled
Connect directly to
exterior condensor
3. Using two crescent or adjustable wrenches,
screw the quick connect components together. Use
1. Remove the brass caps from the valves on the
exterior condenser unit.
2. Use an Allen Wrench to open the valve until it
stops turning. Be sure not to exert excessive force
on the valve. You may hear a soft hissing sound as
a slight amount of R-410a refrigerant exits the
condenser.
3. Apply soapy water or leak detection spray to the
Quick Connect
®
fittings. If you see bubbles, this
indicates there is a leak. Tighten the connection
accordingly until the bubbles are gone.
one to hold the valve and keep it from twisting and
the other to
tighten the fitting.
4. See manual for
tool and torque
requirements .
Improper
connection can
void warranty.
Page 5

STEP 7 - outside
1. Remove the electrical cover.
WARNING
BEFORE PERFORMING ANY ELECTRICAL WORK, TURN OFF ALL
POWER TO THE SYSTEM.
1. Wire colors of this series / model may differ from previous
models, other series and general conventions.
2. All wiring must be performed in accordance with the
wiring diagrams shown here and all municipal, state and
federal regulations.
4. Be sure whether your unit is 115 volt (12K only) or 208/230
volt (all other sizes). Incorrect voltage can cause serious
damage to the system and void the warranty.
5. A certified electrician is required to supply power from a
disconnect of an appropriate rating - see manual.
WIRE CONNECTING DIAGRAM
OUTDOOR UNIT TERMINAL
32 L N1
GREEN
RED
WHITE
L N
3
21
TO INDOOR UNIT
WIRE CONNECTING DIAGRAM
OUTDOOR UNIT TERMINAL
32 L1L21
GREEN
Y/G
115V
POWERSUPPLY
Y/G
12K
models
only
all
other
models
2. Wires and terminals that are numbered should
be matched and connected accordingly.
3. If the unit is a 115 volt system (12K), hook to
terminals _L1_ and __N and Ground.
4. If the unit is a 208/230 volt system (all other
sizes), hook to terminals _L1_ and _L2_ and Ground.
Refer to the diagrams / photo at the bottom left.
STEP 8 - outside
wrapped from
inside unit
Quick Connect
connections
wrap the Quick Connect®
connections with the black
sound deadening pads.
®
wrap from
bottom to top
to ensure tape
overlap sheds
water
keep line excess
bundled and coiled
then wrap together
RED
WHITE
21
TO INDOOR UNIT
BLACK
L1L2
3
208/230V
POWERSUPPLY
Page 6

STEP 8 - continued
1. To protect Quick Connect® connections and
reduce vibration, wrap them with the black sound
deadening pads. Pack tightly before wrapping the
connections with the white pipe insulation. Refer to
the diagram on the following page.
2. To protect pipe insulation, use the vinyl tape to
wrap the Quick Connect® lines and communication
cable snugly together from bottom to top (to shed
water). Wrap excess line set together in a coil
beside the condenser. Refer to the diagram on the
following page.
3. To further improve overall appearance and long
term durability it is recommended to install using
®
MRCOOL
STEP 9 - inside
1. Place the provided batteries in the remote
control.
2. Press the Power button on the remote control.
3. The MrCool
LineGuard
®
DIY® Series should activate
®
®
DIY
3RD GEN Do-It-Yourself Ductless Mini-Split Heat Pump A/C
E Star
™
Series
automatically.
4. To use the MRCOOL
the Smart Controller Module instructions included
in the box.
®
Smartphone App refer to
 Loading...