

Mr Coffee Concepts TC80, TCX80, TC81, TCX81, TC83 User Manual
...
On
Start
PM
Hour Min Auto
Auto
Start
On
TC Series /
Serie de TC
User Manual

IMPORTANT SAFEGUARDS
When using electrical appliances, basic safety precautions should always be followed to reduce
the risk of fire, electric shock and/or injury to persons, including the following:
1. READ ALL INSTRUCTIONS BEFORE USING THE MACHINE.
2. Do not touch hot surfaces. Use handles or knobs.
3. To protect against electric shock, do not immerse cord, plugs, or machine in water or other liquid.
4. Close adult supervision is necessary when this appliance is used by or near children.
5. Turn control, push button or switch to OFF and unplug from outlet when Coffeemaker or clock
are not in use and before cleaning. Allow to cool before putting on or taking off parts and before
cleaning the appliance.
6. Do not operate any appliance with a damaged cord or plug or after the appliance malfunctions,
or has been damaged in any manner. Return this appliance only to the nearest Authorized Service
Center for examination, repair or adjustment.
7. The use of accessory attachments not recommended by
S
UNBEAM
®
may cause hazards or injuries.
8. Do not use outdoors.
9. Do not let cord hang over edge of table or counter, or touch hot surfaces.
10. Do not place this appliance on or near a hot gas or electric burner or in a heated oven.
11. To disconnect, turn any control to "OFF", then remove plug from wall outlet.
12. Do not use appliance for other than intended use.
13. Use on a hard, flat level surface only, to avoid interruption of air flow underneath the appliance.
14. T
HERMAL CARAFE USE AND CARE
Breakage may occur if the following instructions are not followed:
Use only Thermal Carafe specifically designed for
MR. COFFEE
®
models.
A. This Thermal Carafe is designed for use with your
MR. COFFEE®Coffeemaker and therefore must
never be used on a rangetop or in any oven, including a microwave.
B. Do not use a cracked Thermal Carafe.
C. Do not clean the Thermal Carafe with cleansers, steel wool pads, or other abrasive materials
(See instructions for “Thermal Carafe Cleaning” on Page 7).
D. Avoid sharp blows, scratches, or rough handling.
E. Avoid sudden temperature changes for the glass liner. If the glass liner is hot,
do not add cold water. If the glass liner is cold, do not add hot water.
F. Do not disassemble the Thermal Carafe.
G. Do not place in dishwasher.
C
AUTION
:
To avoid risk of cuts or other injury, discard the Thermal Carafe immediately
if glass liner breaks. Do not push hand or fingers into Thermal Carafe, or force any objects
into carafe opening.
15. WARNING: To reduce the risk of fire or electric shock, do not remove any service
covers. No user serviceable parts inside. Repair should be done by authorized
personnel only. Opening the bottom service cover will void the warranty.
1. A 3-foot power supply cord is provided with this unit.
2. An extension cord may be purchased and used if care is exercised in its use.
3. If an extension cord is used, the marked electrical rating of the extension cord must be
at least 10 amps and 120 volts. The resulting extended cord must be arranged so that
it will not drape over the countertop or tabletop where it can be pulled on by children
or tripped over accidentally.
This appliance has a polarized plug (one blade is wider than the other)
along with a “third prong” ground terminal
To reduce the risk of electric shock, this plug will fit in a polarized outlet
only
If it still
in any way.
IFS
TO ASSIST USINSERVING YOU, PLEASE HAVE THE
(TC80, TC81, TCX80, TCX81, TC83, TC83D, TCX83,
PLEASE DO NOT RETURN THIS APPLIANCE TO YOUR STORE.
All repairs must be made an Authorized Sunbeam Service Center. Please call us for assistance
or for the location of the nearest Authorized Sunbeam Service Center.

S
PECIAL
C
ORD
S
ETINSTRUCTIONS
1. A 3-foot power supply cord is provided with this unit.
2. An extension cord may be purchased and used if care is exercised in its use.
3. If an extension cord is used, the marked electrical rating of the extension cord must be
at least 10 amps and 120 volts. The resulting extended cord must be arranged so that
it will not drape over the countertop or tabletop where it can be pulled on by children
or tripped over accidentally.
This appliance has a polarized plug (one blade is wider than the other)
along with a “third prong” ground terminal
(for Model CBTC80 only)
.
To reduce the risk of electric shock, this plug will fit in a polarized outlet
only
one way. If the plug does not fit fully in the outlet, reverse the plug.
If it still
does not fit, contact a qualified electrician. Do not modify the plug
in any way.
IFS
ERVICE
ISR
EQUIRED
, DON
OT
R
ETURN TOYOUR
S
TORE
For Service, Call 1-800 MR COFFEE (1-800-672-6333)
TO ASSIST USINSERVING YOU, PLEASE HAVE THE
MODEL NUMBER
(TC80, TC81, TCX80, TCX81, TC83, TC83D, TCX83,
TCX85, CBTC80)
AND DATE OF PURCHASE AVAILABLE.
PLEASE DO NOT RETURN THIS APPLIANCE TO YOUR STORE.
All repairs must be made an Authorized Sunbeam Service Center. Please call us for assistance
or for the location of the nearest Authorized Sunbeam Service Center.
We welcome your questions, comments or suggestions.
Please include your complete name, address and telephone number
so we can reach you if necessary.
SAVE THESE INSTRUCTIONS
BEFORE FIRST USE
Before using your Coffeemaker for the first time, wash Thermal Carafe, lid and removable
brew basket using a mild, non-abrasive detergent and water. Rinse each thoroughly.
Follow steps 4-6 (Brewing Coffee) using water, to clean the inside of your Coffeemaker.
If the clock display is flashing, refer to section (setting the clock) before continuing.
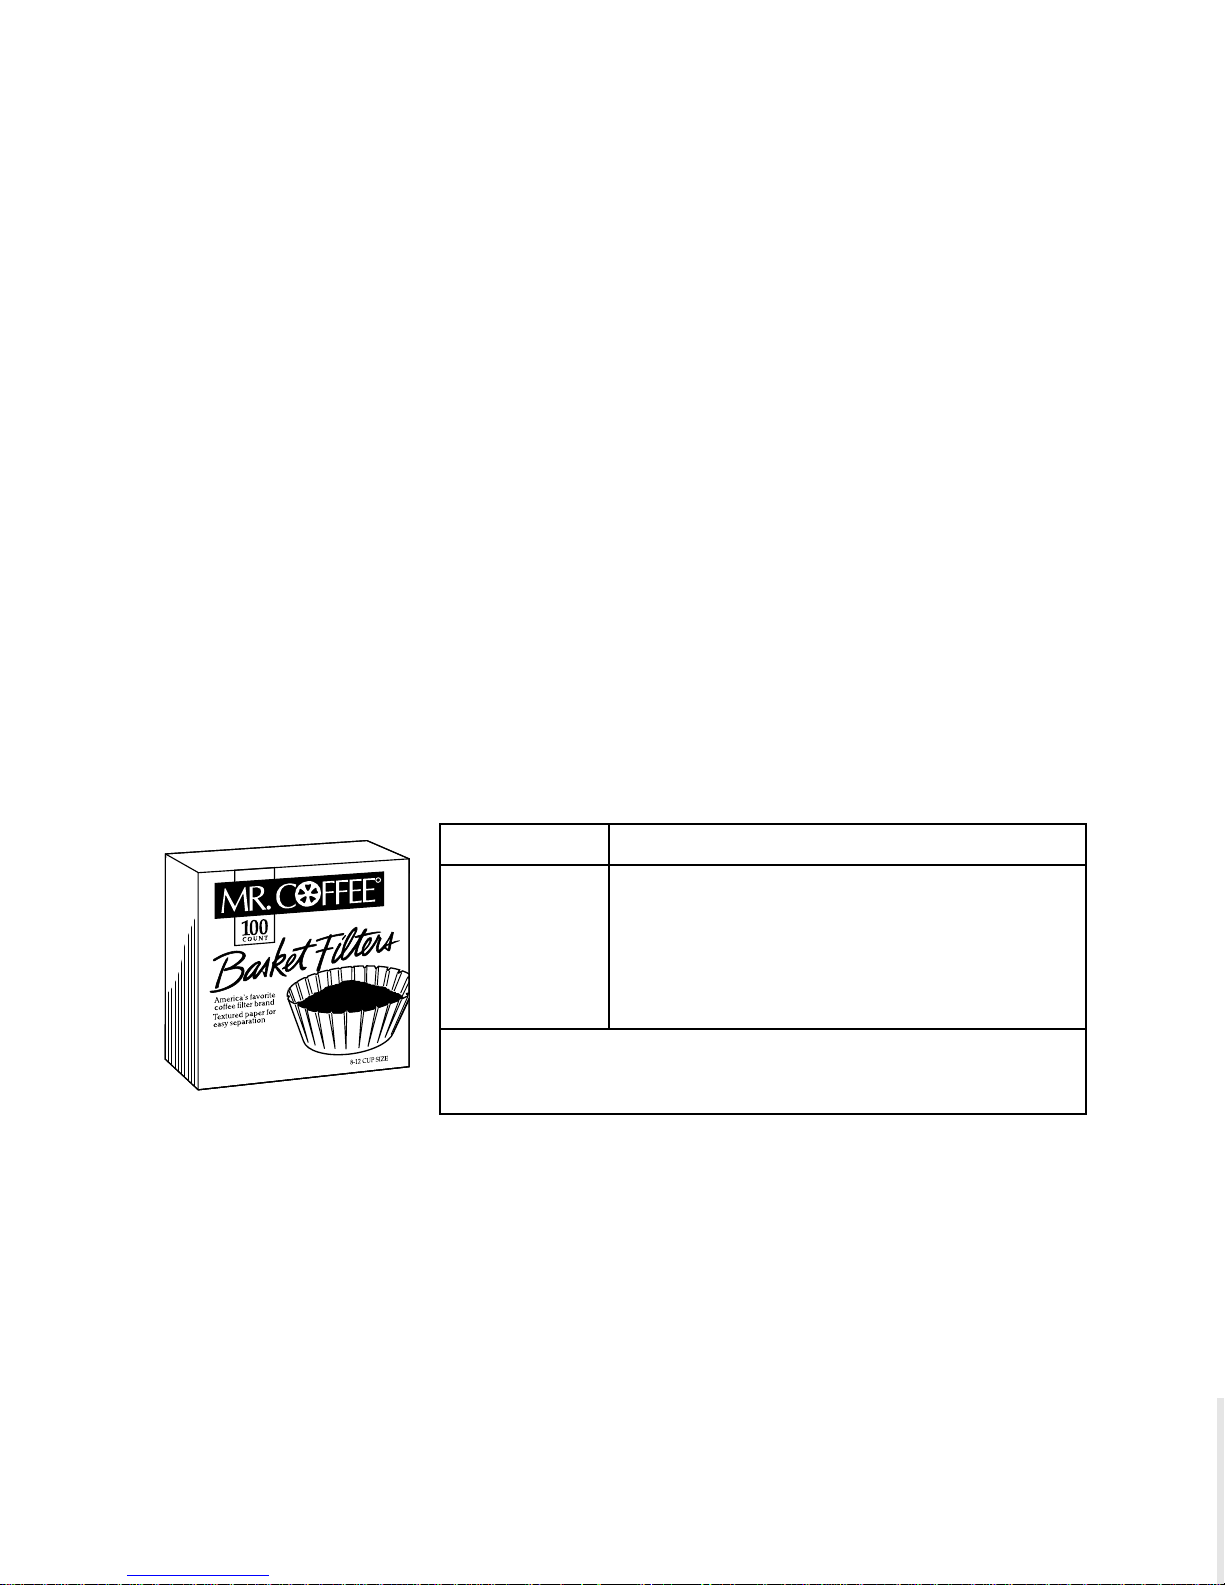
1.
Open the swivel filter basket holder to your right and remove the black inner filter basket.
Insert a M
2. Add desired amount of coffee according to the coffee measurement chart found on
Page 6. Shake lightly to level coffee, and return the black inner filter basket to the
swivel basket filter holder, and swing closed.
3.
Be sure the paper filter is properly centered before closing the swivel filter basket holder.
4. Fill the water reservoir with cold tap water to desired capacity as indicated by the water
window on the side of the Coffeemaker. (1 cup equals 5 ounces)
To achieve the best performance of the Thermal Carafe, rinse the Thermal Carafe
with HOT tap water before brewing. This will yield a HOTTER cup of coffee.
5. While brewing, the brew through lid must be on the Thermal Carafe, and you must
have the BREW and POUR arrow aligned with the spout. Place the empty Thermal
Carafe onto the warmer plate.
6. Plug the power cord into an outlet. For a push button model, to start the brew cycle
press and release the select button firmly until the red “ON” light is lit. For a clock
model, just press the select button and the red “ON” light will go on.
7. When coffee stops flowing, the brewing cycle is complete.
8. When the brewing cycle is completed, the push button
and clock models will shut-off automatically.
The indicator light will go out to let you know
the brewing cycle is completed.
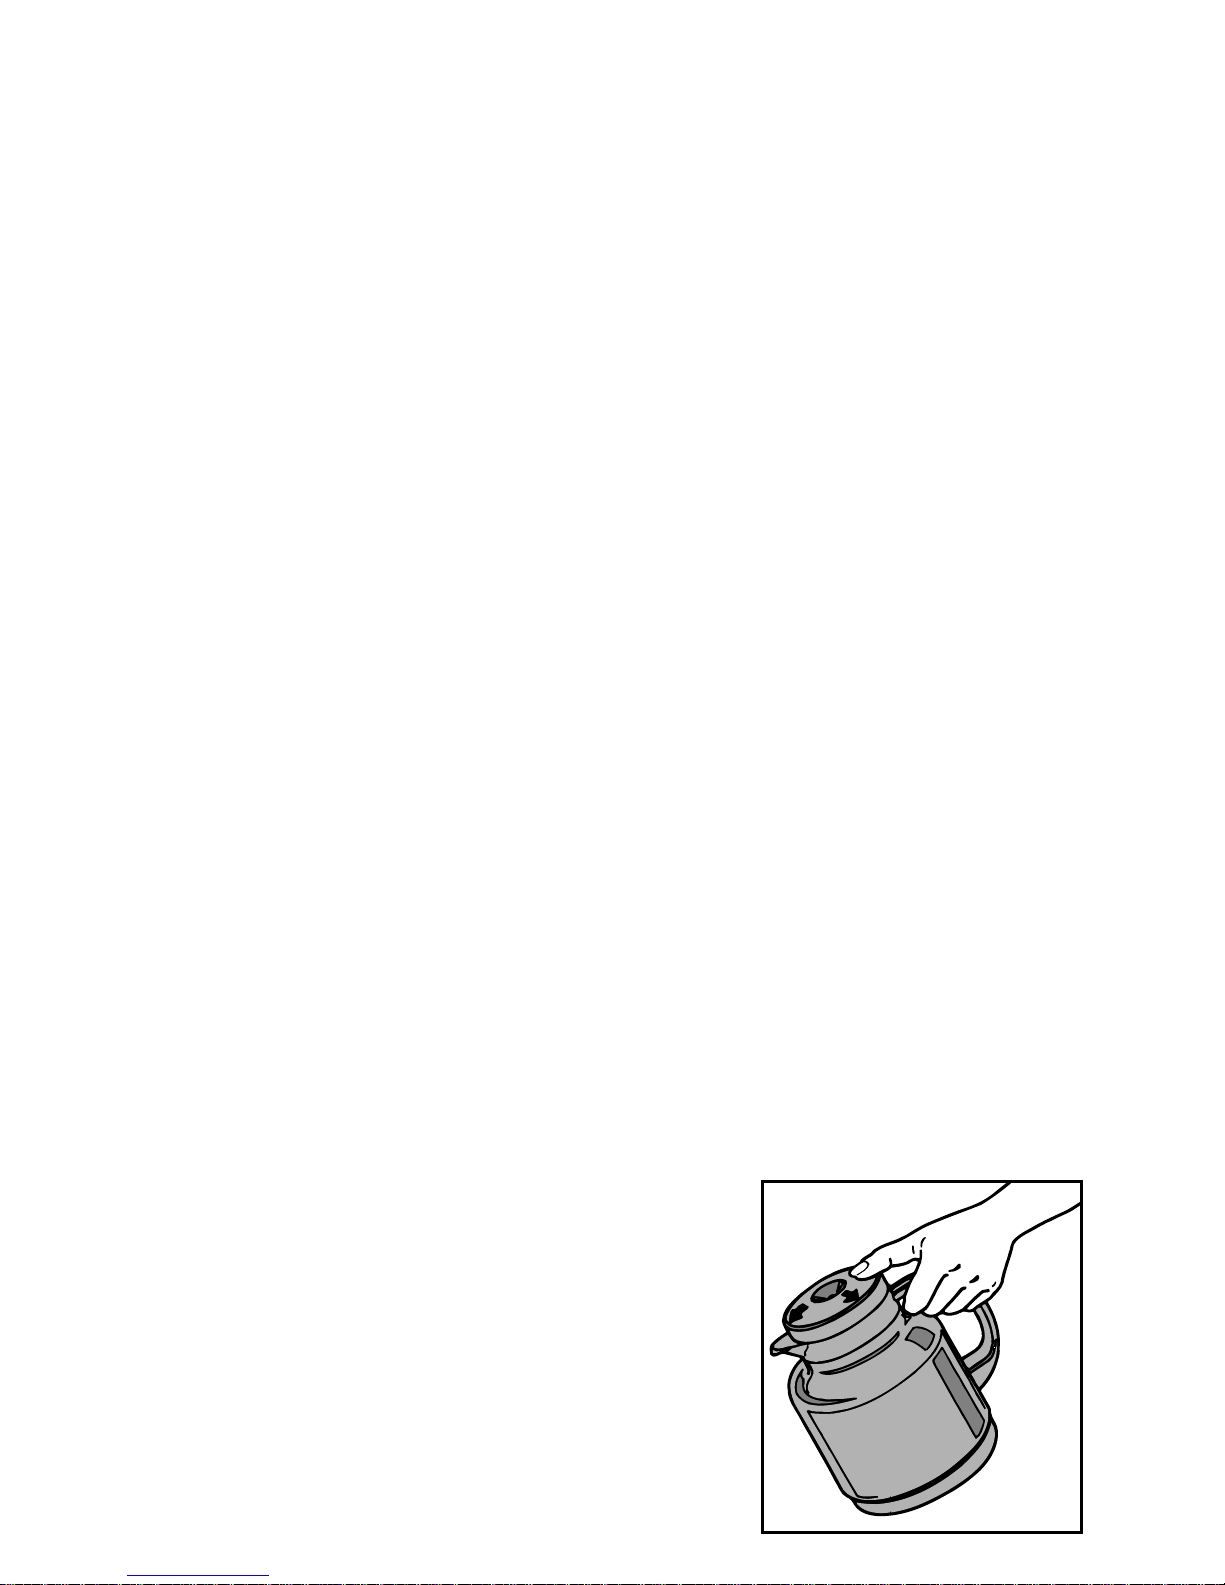
9. To pour coffee once the brewing process is complete,
make sure the BREW and POUR arrow of the lid is
aligned with the spout. Place thumb on the thumb
tab area of the lid and pour. Once pouring is complete
align the closed arrow of the lid to the spout of the
Thermal Carafe (See Figure 1).
10. When cooled, carefully remove the black inner filter
basket and discard the used grounds and filter.
Rinse the filter basket and replace.
INTRODUCTION
CONGRATULATIONS!
You are the owner of a
MR. COFFEE®THERMAL GOURMET™, 8-Cup Thermal Carafe
Coffeemaker.
The Thermal Carafe allows coffee to stay hot and fresh for up to four hours. The portable
Thermal Carafe can go from countertop to tabletop and will not mar or burn surfaces.
A Thermal Carafe-activated Pause ‘n Serve drip-stop valve allows you up to 30 seconds to sample a cup
while the coffee is still brewing.
The TCX83 Model features a Programmable Timer.
Please read all of the instructions in this booklet carefully before you begin to use this appliance.
Proper care and maintenance will ensure the long life of this appliance and its trouble-free operation.
Save these instructions and refer to them often for cleaning and care tips.
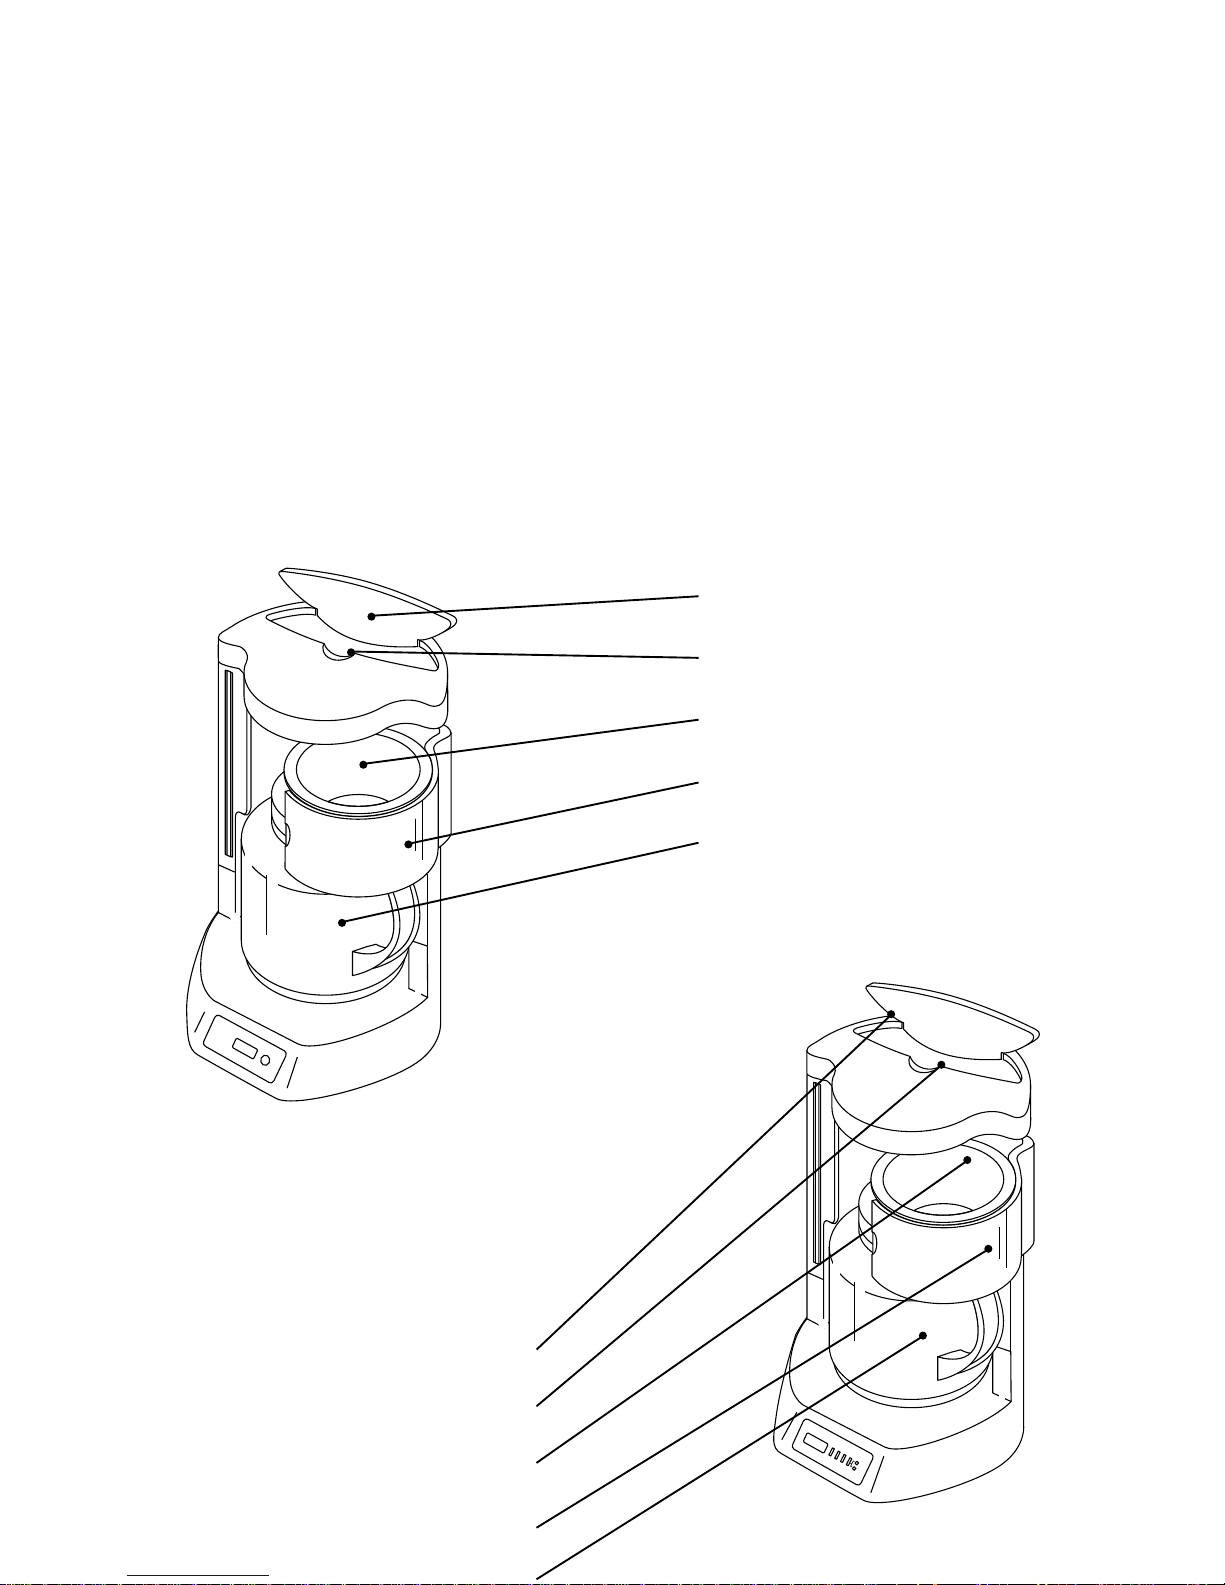
DIAGRAM OF
PARTS
D
USTCOVER
W
ATERRESERVOIR
R
EMOVABLEFILTERBASKET
S
WIVELFILTERBASKETHOLDER
D
USTCOVER
W
ATERRESERVOIR
R
EMOVABLE
F
ILTERBASKET
S
WIVEL
F
ILTER
B
ASKETHOLDER
T
HERMALCARAFE
C
LOCKMODEL
TCX83/B
LACK/CHROME
TCX85/B
LACK/STAINLESSSTEEL
TCX80/W
HITE
/W
HITE
P
USHBUTTONMODELS
TC80/W
HITE
TC81/B
LACK
TC83/B
LACK/CHROME
TC83D/B
LACK
CBTC80/W
HITE
OPERATION AND USE
BEFORE FIRST USE
Before using your Coffeemaker for the first time, wash Thermal Carafe, lid and removable
brew basket using a mild, non-abrasive detergent and water. Rinse each thoroughly.
Follow steps 4-6 (Brewing Coffee) using water, to clean the inside of your Coffeemaker.
BREWING COFFEE
If the clock display is flashing, refer to section (setting the clock) before continuing.
1.
Open the swivel filter basket holder to your right and remove the black inner filter basket.
Insert a MR. C
OFFEE
®
brand 8-12 cup basket paper filter into the black inner filter basket.
2. Add desired amount of coffee according to the coffee measurement chart found on
Page 6. Shake lightly to level coffee, and return the black inner filter basket to the
swivel basket filter holder, and swing closed.
3.
Be sure the paper filter is properly centered before closing the swivel filter basket holder.
4. Fill the water reservoir with cold tap water to desired capacity as indicated by the water
window on the side of the Coffeemaker. (1 cup equals 5 ounces)
IMPORTANT:
To achieve the best performance of the Thermal Carafe, rinse the Thermal Carafe
with HOT tap water before brewing. This will yield a HOTTER cup of coffee.
5. While brewing, the brew through lid must be on the Thermal Carafe, and you must
have the BREW and POUR arrow aligned with the spout. Place the empty Thermal
Carafe onto the warmer plate.
6. Plug the power cord into an outlet. For a push button model, to start the brew cycle
press and release the select button firmly until the red “ON” light is lit. For a clock
model, just press the select button and the red “ON” light will go on.
7. When coffee stops flowing, the brewing cycle is complete.
8. When the brewing cycle is completed, the push button
and clock models will shut-off automatically.
The indicator light will go out to let you know
the brewing cycle is completed.
9. To pour coffee once the brewing process is complete,
make sure the BREW and POUR arrow of the lid is
aligned with the spout. Place thumb on the thumb
tab area of the lid and pour. Once pouring is complete
align the closed arrow of the lid to the spout of the
Thermal Carafe (See Figure 1).
10. When cooled, carefully remove the black inner filter
basket and discard the used grounds and filter.
Rinse the filter basket and replace.
PLACE THUMB ON THUMB TAB
BEFORE POURING
FIGURE 1
11. To make another Thermal Carafe of coffee, repeat steps 1 through 9.
12. Be sure to turn your clock Coffeemaker OFF when the Thermal Carafe is empty and
you are no longer using your Coffeemaker. Unplug the power cord when not using
the Coffeemaker or clock.
W
ARNING: To avoid risk of personal injury or damage to property as a result of overflow,
be sure the Thermal Carafe is squarely centered under the brew basket during the
brewing cycle.
W
ARNING
: Brewed coffee and grounds, both in brew basket and Thermal Carafe, are very hot.
Handle with care to avoid scalding. If brew basket overflows, or if brew basket fails to drain
into Thermal Carafe during brew cycle, do not open or handle basket. Unplug Coffeemaker
and wait for contents to cool before handling.
C
OFFEE
M
EASUREMENT
C
HART
FOR BEST RESULTS, USE DRIP GRIND RECOMMENDED FOR AUTOMATIC DRIP COFFEEMAKERS.
A
UTOMATIC BREWING PAUSE ’N SERVE
Our Brewing Pause ‘n Serve feature allows you up to 30 seconds to pour a cup while the
coffee is still brewing. It also prevents any remaining coffee in the brew basket from
dripping onto the warmer plate once brew cycle is complete.
W
ARNING: To prevent injury from hot overflow, replace Thermal Carafe within 30 seconds
if removed during brewing. If the Thermal Carafe is not replaced within
30 seconds, the filter basket will fill with water and overflow.
S
WITCH
When the brewing cycle is completed, the push button models will shut-off automatically.
The indicator light will go out to let you know the brewing cycle is completed.
P
ROGRAMMABLE
Your Coffeemaker is designed to automatically shut-off after coffee has brewed.
NOTE:
The Thermal
without a warmer plate on both the Clock Model and the Push Button Model.
Your Coffeemaker must be cleaned when you begin to notice excessive steaming or the
brewing time increases considerably. This condition is caused by a build-up of lime and
mineral deposits from your water. If the pumping action stops before all the water has been
pumped out of the machine, the appliance requires cleaning.
1. Pour one quart of undiluted white household vinegar into your Coffeemaker.
2. Place a paper filter into the filter basket and close the filter basket.
3. Place the empty Thermal Carafe on the warming plate and turn the Coffeemaker ON.
When approximately three cups have flowed through, turn the Coffeemaker OFF
and let stand for 1/2 hour.
4. After 1/2 hour, pour the vinegar back into the Coffeemaker.
5. Place the empty Thermal Carafe on the warming plate. Turn the Coffeemaker ON
and let all of the vinegar flow through.
6. Discard the vinegar and the paper filter.
7. To flush out all traces of vinegar, fill the water reservoir full of tap water, turn
Coffeemaker ON, and allow it all to cycle through.
8. Discard the water and turn the Coffeemaker OFF. Repeat Steps 7 and 8.
T
HERMAL
Do not shock glass liner by filling with water that is too hot or too cold. Use warm soapy
water to clean inside of Thermal Carafe and air dry. Do not immerse in water. Do not
remove glass liner for cleaning or any purpose. Thermal Carafe is not dishwasher safe.
The frequency of cleaning depends on the hardness of water used.
The following table gives a suggested cleaning schedule.
To Brew Use This Amount of Ground Coffee
8 cups 7 tablespoons or 3-1/2 scoops
6 cups 6 tablespoons or 3 scoops
4 cups 5 tablespoons or 2-1/2 scoops
2 cups 3 tablespoons or 1-1/2 scoops
• two level tablespoons = one level scoop
• one cup = five ounces brewed coffee
 Loading...