

Page 1
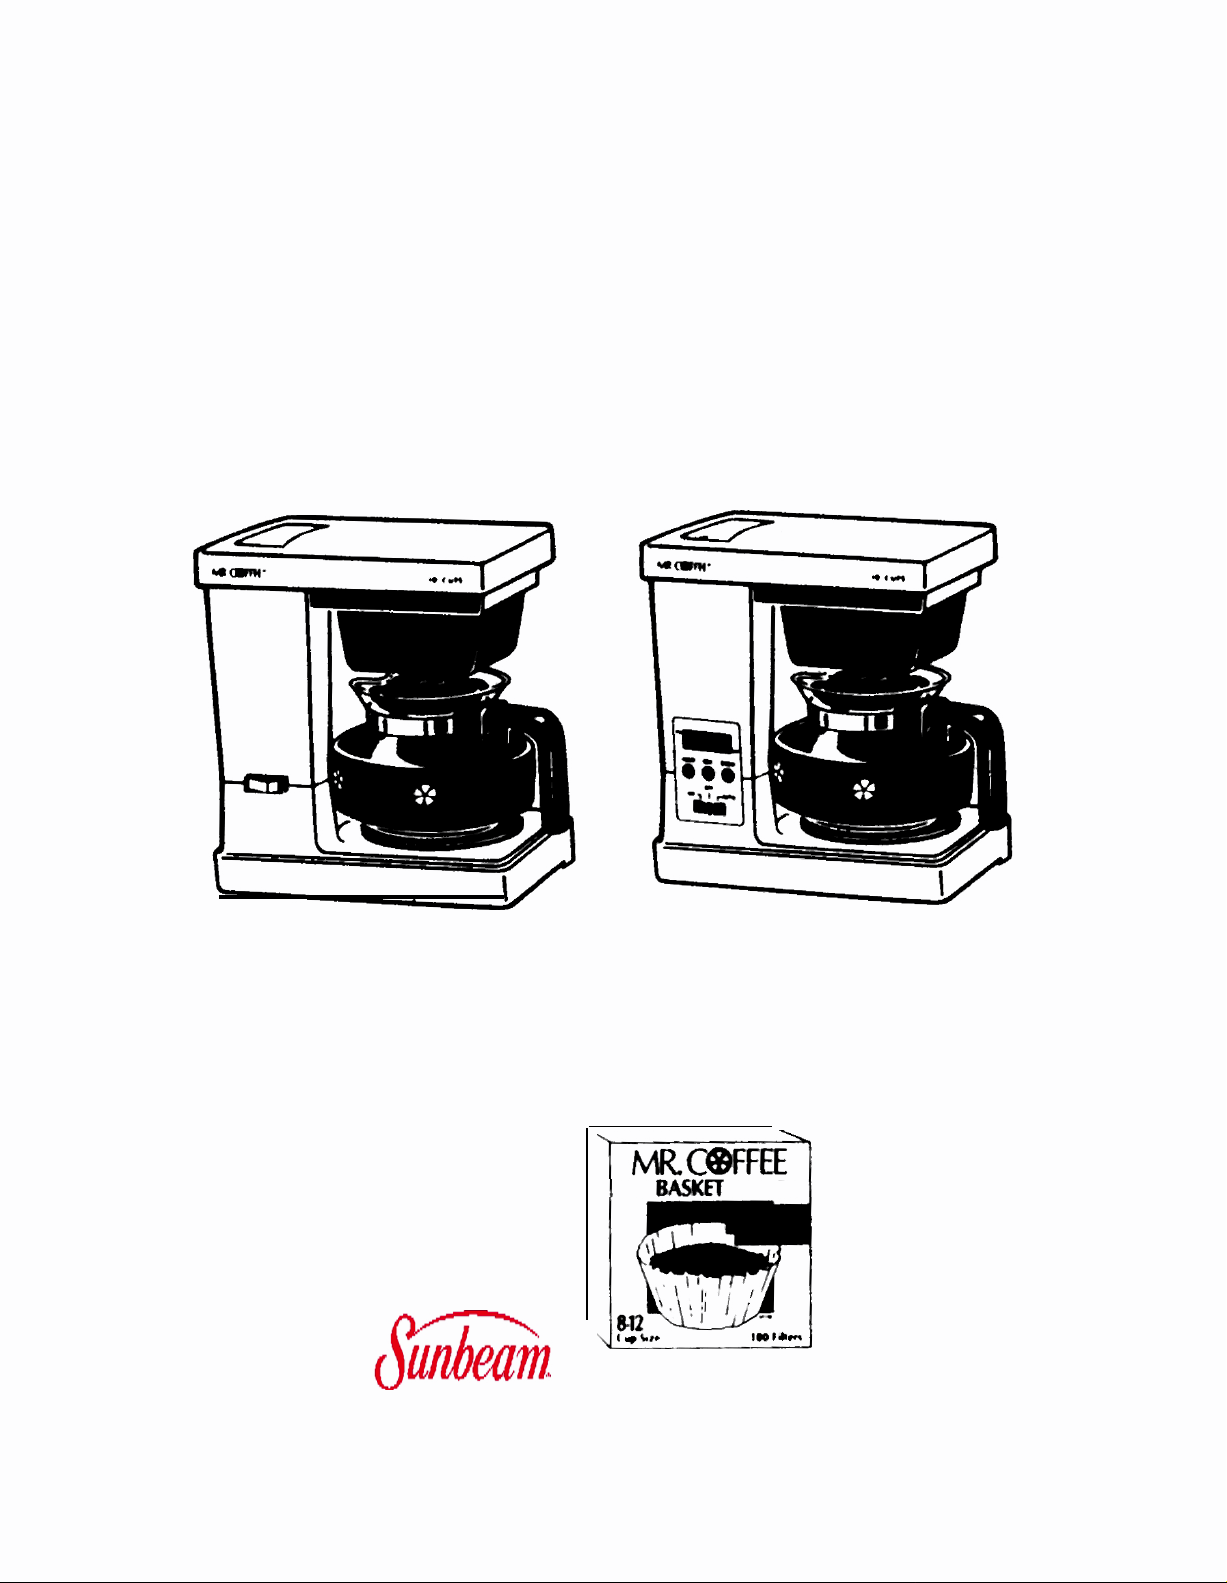
OPERATING INSTRUCTIONS FOR
THE MR. COFFEE SR SERIES
10 CUP COFFEEMAKERS
MODELS SRI0 AND
MODEL
SR10
SRX55
MODEL
SRX55
100
BASKFT
For better tasting tea
and coffee, use Mr. Coffee
brand filters.
FOR HOUSEHOLD USE ONLY
FOR SERVICE OR QUESTIONS, CALL l-800-321 -0370
FILTERS
Page 2

IMPORTANT SAFEGUARDS
When using electrical appliances, basic safety precautions should always be
followed to reduce the risk of fire, electric shock, and/or injury to persons,
including the following:
1.
Read all
2.
Do not touch hot surfaces. Use handles or knobs.
3.
To protect against electric shock, do not immerse cord, plugs, or
machine in water or other liquid.
4.
Do not permit children to use this machine without close adult super-
vision.
5.
Turn control switch to OFF and unplug from outlet when not in use
and before cleaning. Allow to cool before putting on or taking off
parts, and before cleaning.
6.
Do not operate any appliance with a damaged cord or plug or after
the appliance malfunctions, or has been damaged in any manner.
Return this appliance only to the nearest authorized service center
for repair.
7.
The use of accessory attachments not recommended by MR. COF-
FEE, inc., may cause hazards or injuries.
8. Do not use’outdoors.
9.
Do not let cord hang over edge of table or counter, or touch hot sur-
faces.
10.
11.
12.
13.
14.
Do not place this appliance on or near a hot gas or electric burner or
in a heated oven.
To disconnect, turn any control to “off”, then remove plug from wall
outlet.
Do not use appliance for other than intended use.
Use on a hard, flat level surface only, to avoid interruption of air flow
underneath the appliance.
Decanter Use and Care
Breakage may occur if the following instructions are not followed:
a. Use only decanters specifically designed for Pause ‘N Serve mod-
els. (Mr. Coffee replacement decanter model
b. This decanter is designed for use with your Mr. Coffee
maker and therefore must never be used on a range top or in any
oven,
c.
Do not set a hot decanter on a wet or
d. Do not use a cracked decanter or a decanter’having a loose or
weakened handle.
e. Do not clean the decanter with cleansers, steel wool pads, or
other abrasive materials.
f.
Discard decanter immediatelv if it is ever boiled
instructions before using
jncludia
the machine.
D7.)
coffee-
. ,
cold surface.
dry.
SAVE THESE
INSTRUCTlONS
2
Page 3

g. Avoid sharp blows, scratches, or rough handling.
15.
WARNING:
To
reduce
the risk of fire or electric shock, do not remove
any service covers. No user serviceable parts inside. Repair should
be done by authorized personnel only.
SPECIAL CORD SET INSTRUCTIONS
1.
A short power supply cord is provided to
from becoming entangled in or
2.
An extension cord may be purchased and used if care is exercised in
tripping
its use.
3.If an extension cord is used, the marked electrical rating of the extension cord must be at least 10 amps and 120 volts. The resulting
extended cord must be arranged so that it will not drape over the
counter top or table top where it can be pulled on by children or
tripped over accidentally.
l
This
otir).
appliance
has a
polarized plug
As a safety feature,
this
plug
only one way. If the plug does not fully
the plug. lf lt
still
does not
fit,
contact a
not attempt to defeat this safety feature.
reduce
the hazards resulting
over a longer cord.
(one blade is larger than the
will fit in
fit
qualified electrician.
a polarized
outlet
in the outlet, reverse
Do
PRECAUTIONS WHEN USING THIS MACHINE
Do’,...
.
Avoid areas of the coffeemaker which may become
when the machine is
‘on’, particularly
the filter basket and the water
hot.or
emit steam
reservoir.
l
Avoid jerking or straining the power cord when unplugging. Grasp the
molded plug to unplug.
n
Unplug the unit when not in use.
l
Unplug the unit and allow to cool before wiping the exterior. Use only a
damp cloth to wipe.
l
Place machine well back from edge of counter.
Don%...
n
Do
NOT place a cloth or otherwise restrict airflow beneath the appli-
ance.
.
Never reheat a beverage by passing it through the brewing system.
l
Do not use abrasive or caustic cleaning compounds to clean the
exterior of the unit.
*
Do not store the machine until warmer plate has cooled.
l
Do not place your
contact
l
Do not permit children to use this machine without close adult supervi-
with
any fluid.
hand
underneath the brew funnel, in order to avoid
sion.
3
Page 4
Introduction
Congratulations! You are the owner of a Mr. Coffee SR
feemaker. This appliance has been designed to provide you with delicious
fresh brewed coffee quickly and conveniently, whenever you want it.
SRX55
Our
The automatic brew feature allows you to preset your brewing time
wish, you can awaken to the aroma of freshly brewed coffee or enjoy a cup
the moment you return home from your outside activities.
Please read all of the instructions in this booklet carefully before you begin to
use this appliance. Proper care and maintenance will ensure the long life of
this appliance and its trouble-free operation. Save these instructions and
refer to them often for cleaning and care tips.
model offers a digital timer with Two Hour Automatic Shut-Off.
Table of Contents
Important
Cord
Precautions . . . . . . . . . . . . . . . . . . . . . . . . . . . . . . . . . . . . . . . . . . . . . . . . . . . . . . . . . . . . . . . . . . . . . . . . . . . . . . . . . . . . . . . . . . . . . . . . . . . . . 4
Introduction . . . . . . . . . . . . . . . . . . . . . . . . . . . . . . . . . . . . . . . . . . . . . . . . . . . . . . . . . . . . . . . . . . . . . . . . . . . . . . . . . . . . . . . . . . . . . . . . . . . . 5
Clean Your Mr. Coffee
DiagramofParts.. . . . . . . . . . . . . . . . . . . . . . . . . . . . . . . . . . . . . . . . . . . . . . . . . . . . . . . . . . . . . . . . . . . . . . . . . . . . . . . . . . . . . . . . . . . . 6
Brewing Coffee . . . . . . . . . . . . . . .
Automatic
Cleaning
Decanter
If
ServiceisRequired
Limited Warranty
Safeguards . . . . . . . . . . . . . . . . . .
Set
Instructions . . . . . . . . . . . . . . . . . . . . . . . . . . . . . . . . . . . . . . . . . . . . . . . . . . . . . . . . . . . . . . . . . . . . . . . . . . . . . . . . . . . . . . 3
Before
.._...................._...................................................
Pause‘NServe . . . . . . . . . . . . . . . . . . . . . . . . . . . . . . . . . . . . . . . . . . . . . . . . . . . . . . . . . . . . . . . . . . . . . . . . . . . . . . 8
Instructions . . . . . . . . . . . . . . . . . . . . . . . . . . . . . . . . . . . . . . . . . . . . . . . . . . . . . . . . . . . . . . . . . . . . . . . . . . . . . . . 9
Cleaning . . . . . . . . . . . . . . . . . . . . . . . . . . . . . . . . . . . . . . . . . . . . . . . . . . . . . . . . . . . . . . . . . . . . . . . . . . . . . . . . . . . . . . . . 10
. . . . . . . . . . . . . . . . . . . . . . . . . . . . . . . . . . . . . . . . . . . . . . . . . . . . . . . . . . . . . . . . . . . . . . . . . . . . . . . . . . . 10
. . . . . . . . . . . . . . . . . . . . . . . . . . . . . . . . . . . . . . . . . . . . . . . . . . . . . . . . . . . . . . . . . . . . . . . . . . . . . . . . . . . . . . . . . . 1
y”..............“..........................................
Using the
First Time . . . . . . . . . . . . . . . . . . . . . . . . . . . . . . . . . . . . . . . 6
series
10 cup
-
so if you
cof-
Page
2-3
7 - 8
-
10
#
1
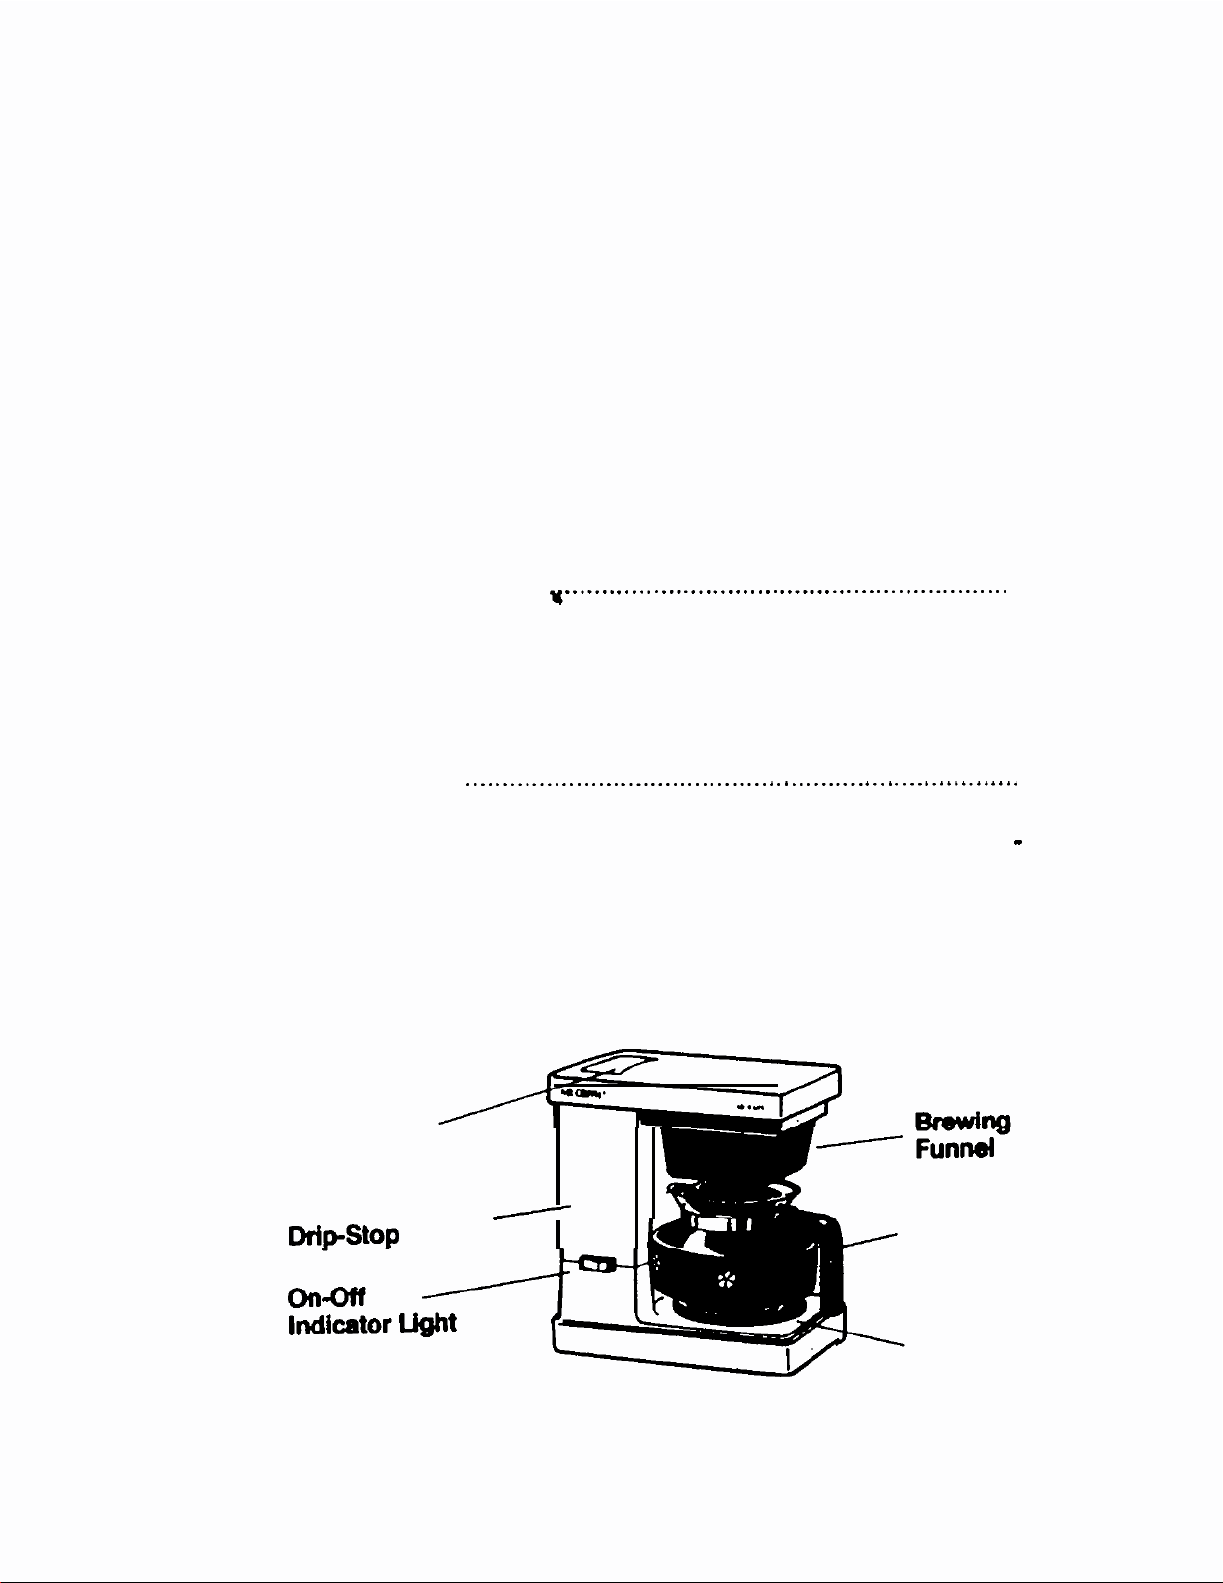
Product Features and Diagram of Parts
Model
Automatic Pause ‘N Serve Drip-Stop Valve
Allows you to sneak a cup while the coffee is still brewing. Prevents
dripping on the warmer plate once the brewing cycle is completed.
SR10
Coffeemaker
water Tank
Door/Dust Cover
Pause ‘N Serve
Drip-Stop
Valve
-.+----
------
4
I
Glass
Decanter
Warmer
Plate
Page 5
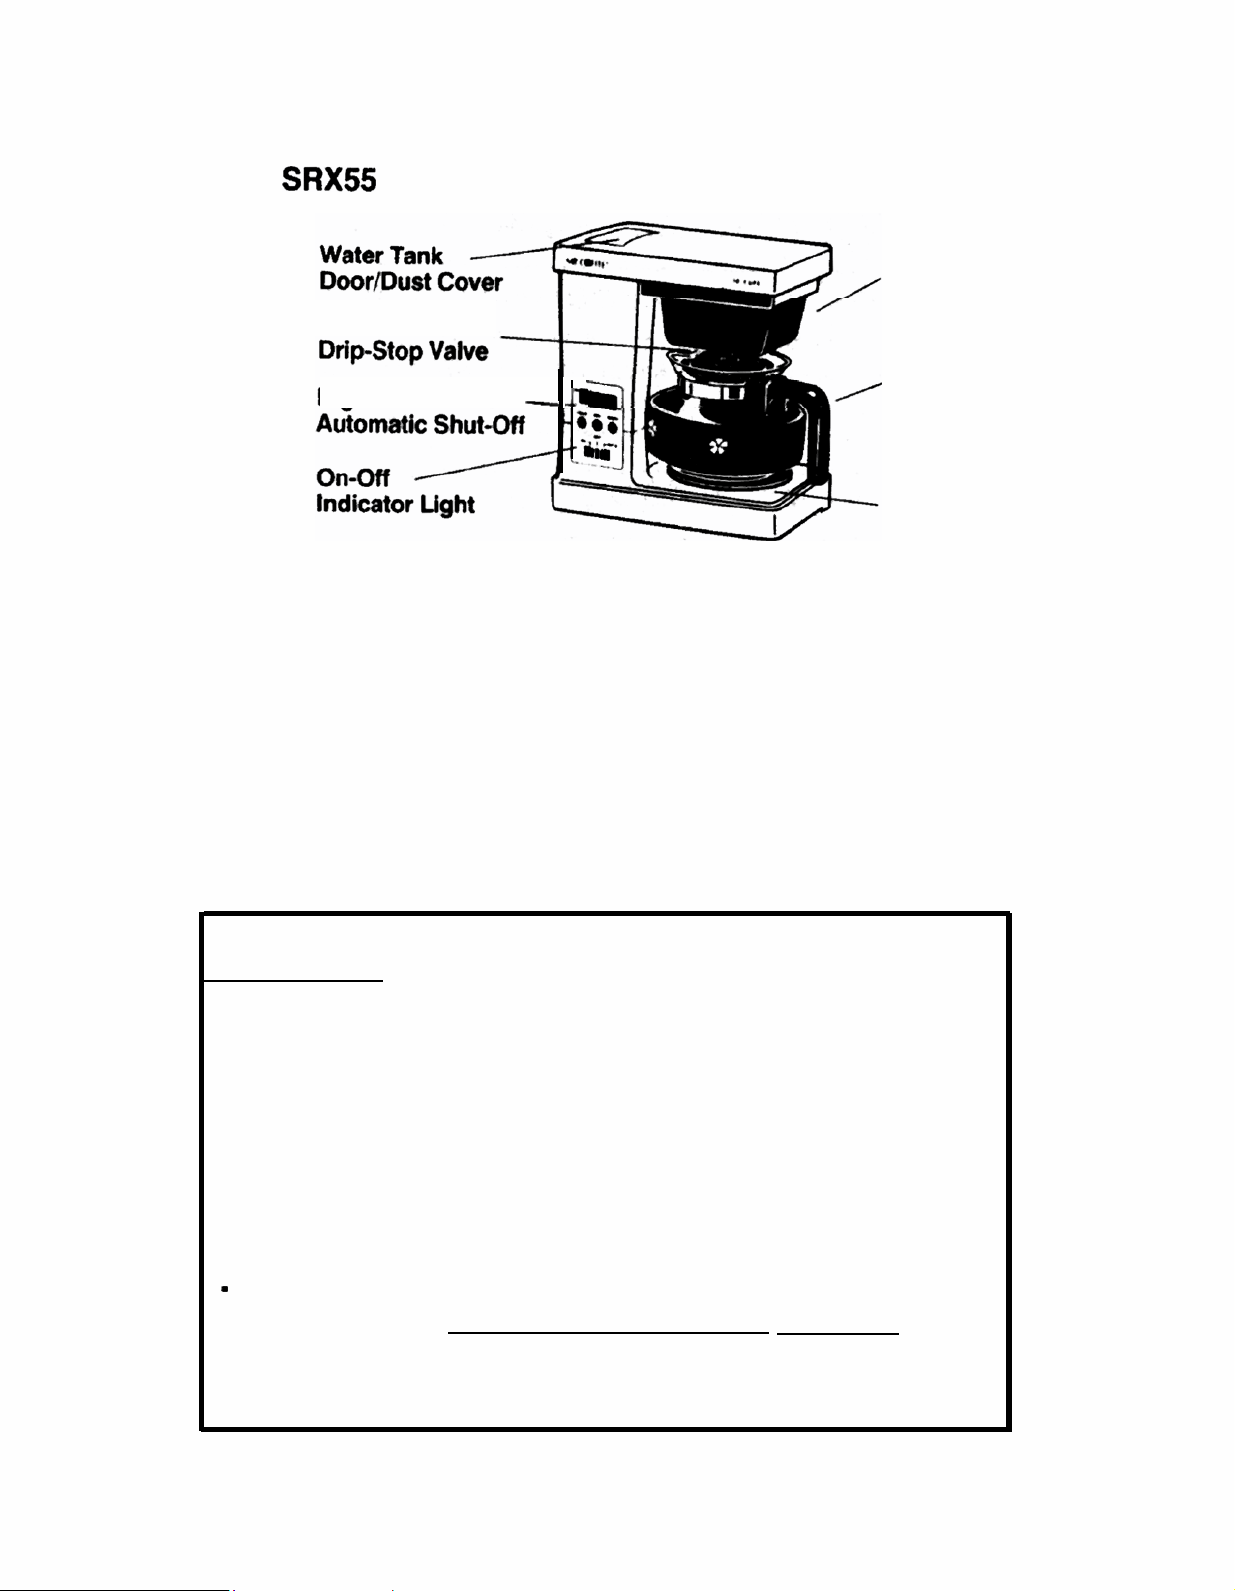
Product Features and Diagram of Parts
Model
Two Hour Automatic Shut-Off
Coffeemaker shuts off automatically in two hours.
Automatic Pause ‘N Serve
Allows you to sneak a cup while the coffee is still brewing. Prevents
dripping on the warmer plate once the brewing cycle is completed.
24 Hour Digital Clock/Timer
Lets you preset your coffeemaker to brew coffee automatically. As an additional safety feature, an automatic lock-out feature keeps the coffeemaker
from repeating the brew cycle in 24 hours unless the timer is reset to
Automatic Brew setting again.
33x55
Coffeemaker
Pause ‘N Serve
Digital Timer with-
-3
Drip-Stop
Brewing
Funnel
Glass
Decanter
Warmer
Plate
Valve
Important, Please Read Before First Use
l
THE SPECIAL PAUSE ‘N SERVE FEATURE WILL OPERATE
ONLY WHEN THE DECANTER IS IN CONTACT WITH THE
PAUSE ‘N SERVE DRIP-STOP VALVE ON THE
THE BREWING FUNNEL.
warmer plate and touching the bottom of the brewing funnel. The
movement of the decanter opens and
the decanter is not completely on the warmer plate, coffee will
build up in the brewing funnel and begin to overflow onto the
warmer plate.
=
AUTOMATIC PAUSE ‘N SERVE ALLOWS YOU TO REMOVE
THE DECANTER FOR NO LONGER THAN 30 SECONDS
sneak a cup while the coffee is brewing. If the decanter is removed
for more than 30 seconds, the brewing funnel will overflow.
Be sure the decanter is in place on the
closes
5
the drip-stop valve. If
BOTTOM
OF
to
Page 6
Model
SRX55
Digital Clock Timer Coffeemaker
Important, Please Read Before First Use
n
THE CLOCK ON THIS MODEL MUST BE SET FIRST,
BEFORE THE COFFEEMAKER WILL OPERATE.
to setting the clock instructions, below.
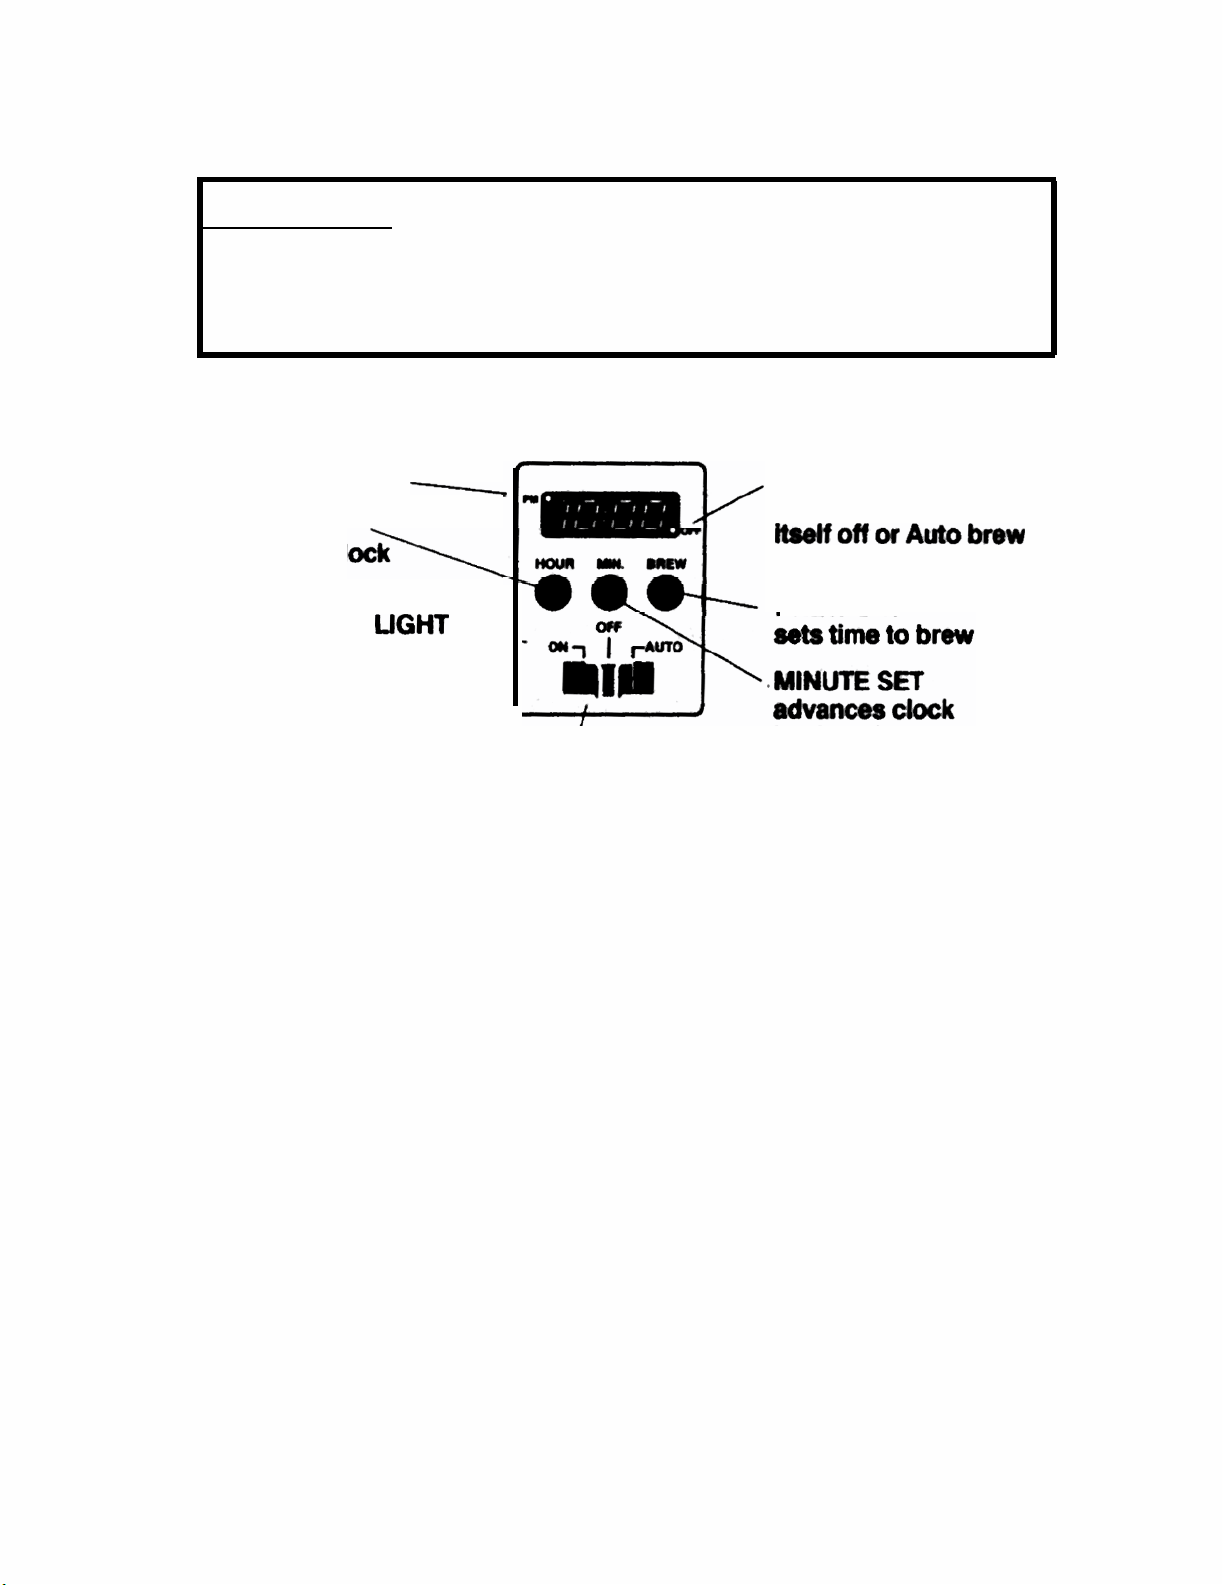
Setting the Clock and Timer
Please refer
PM INDICATOR
HOUR SET
advances cl
by the hour
SIGNAL
indicates when
coffeemaker
on
-
UGHT
is
TO SET CLOCK
1.
Move the CONTROL SWITCH to OFF
2.
Plug the power cord into your electrical outlet. The display on the
clock will flash until you set the time.
3.
Alternately press and hold the HOUR and MINUTE buttons until you
reach the current time. A red dot will appear in the upper left display
comer for PM time.
---
CONTROL.
ON -
OFF-
AUTOMATIC
SWlTCH
AUTO OFF LIGHT
indicates
ltsdfofforAutobrew
needs
BREW SET
by the minute
machine shut
to be reset
TO PRESET THE BREWING TIME
Simply press and hold the BREW SET button while setting the brew time
with the HOUR and MINUTE buttons. Please pay attention to PM INDICATOR light.
TO AUTOMATICALLY BREW AT PRESET TIME
1.
Follow steps #l through #5 in “How to Brew Coffee.”
2.
Always slide the control switch to OFF and then to AUTO
3.
Brewing will begin at the time you have preset and the coffee will
remain hot in the decanter for two hours. If more keep warm time is
needed, turn the switch to ON for an additional two hours keep warm
time.
6
Page 7

Important, To Reset Auto Brew at Preset Time
This coffeemaker will NOT automatically come on again
day if you leave the switch in the AUTO position after its last use.
This is a safety feature. Each time you choose to use Auto brew,
you must slide the switch to OFF and
To make sure Auto brew is set, check the Auto Off light. If the light
is off, Auto brew is set. If it is on, slide the switch to OFF and then
to AUTO.
Before Using Your
Make sure your fist cup of coffee is as good as can be by cleaning your Mr.
Coffee coffeemaker before you use it the first time. Just follow these simple
steps:
1.
Wash the decanter, lid and brewing funnel in a mixture of mild detergent
and water. Rinse each thoroughly.
2.
If you have a clock model, set the clock. The digital clock on the SRX55
model must be set
instructions for setting the clock.
3.
Slide the brewing funnel into place and then follow steps #4 through
in the “HOW TO BREW COFFEE’ section. This will clean the inside of
your coffeemaker.
4.
When the brew cycle is finished, turn your coffeemaker off. Discard
water in the decanter and rinse the decanter and brewing funnel.
Your coffeemaker is now ready to use.
first,
Mr.
Coffee
before
the
coffeemaker will operate. See
then
to AUTO.
the
next
#6
the
Brewing Coffee
If the display on the
clock has not been set and the cof’feemaker will not operate. See page
6
for setting
1.
Remove the brewing funnel. Place one Mr. Coffee filter inside.
2.
Place coffee into the paper filter according to the coffee measurement
chart found on the next page.
3.
Se sure the paper filter is properly centered before sliding the brew
funnel back into position.
4.
Fill the decanter with tap water to desired capacity as marked on the
side of the decanter. (1 cup equals 5 ounces.) To brew 10 cups of
coffee, fill the decanter
5.
Lift the water tank door and pour the water into the tank. Close the water
tank door and place
CAUTION: Tb
The position of the decanter controls the flow of coffee into the decanter.
If it is not in place, the coffee in
warmer
the
plate.
digltal
clock.
decanter
clock timer, model
to
the bottom of the sifver band.
the
empty decanter onto
must be fully In
tie
brewing funnel
7
SRX55
the
place
Is flashing, the
warmer plate.
on the warmer
will overflow
pbte.
onto
the
Page 8
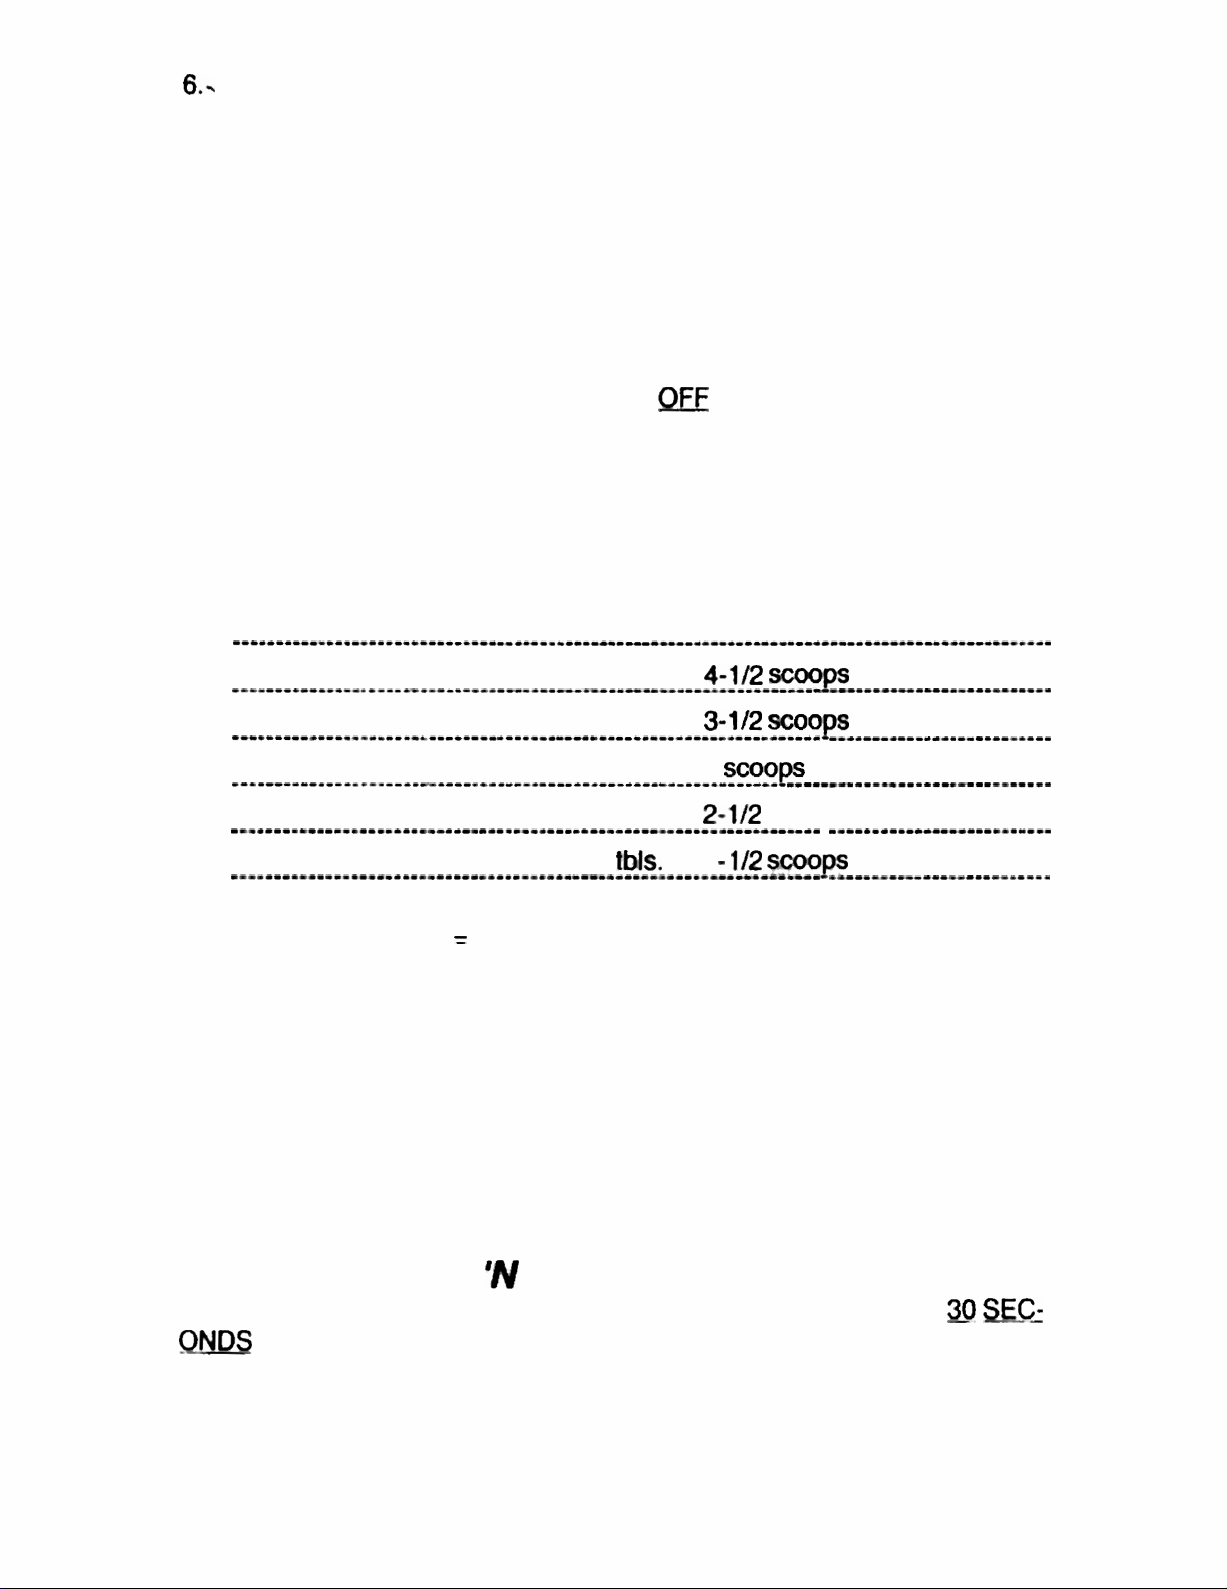
6.%
Move the CONTROL switch to ON. When coffee stops flowing, the
brewing cycle is complete.
7.
Discard the used grounds and filter. Rinse the brewing funnel and slide it
back into place.
Note: The wanner plate on model
hot for two hours and then, as a safety feature, the coffeemaker will shut
off automatically. For an additional two hours of keep-warm time, move
the CONTROL switch to ON.
8.
To make another pot of coffee, turn the coffeemaker off and repeat steps
#l
through
9.
Se sure to turn the CONTROL switch
and you are no longer using your coffeemaker.
For the best results. use level tablespoons (tbls.) or level coffee scoops of
drip grind recommended for automatic drip coffeemakers.
#7.
SUGGESTED COFFEE MEASUREMENT CHART
SRX55
pEE
will keep your coffee piping
when the decanter is empty
----_---__---._-__-_--------------------------------------------------------------------------
--_____-____--_.__.__________________I__-------------------------
---_----_-_--_-^-___--.--------------.-------------------------------
--___---____-__.-_-_--------------------------------------------
_-_____-____-_-____-____________________-----------------------------
--_-___-___--______-------------------.------------------------------
l
Use more or less coffee to suit your taste.
2 level tablespoons = 1 level scoop
TO BREW
10 cups
8 Cups
6 Cups
4 cups
2 cups
Automatic Shut-Off (Model
1.
Once your coffeemaker is turned on, the coffee in the decanter will stay
hot for two hours. Then, as a safety feature, the coffeemaker will shut
itself off.
2.
To keep your coffee hot for an additional two hours, simply move the
CONTROL switch to OFF and then to ON.
3.
Move the CONTROL switch to OFF if you empty the decanter before
the end of the two hour period.
USE THIS MUCH GROUND COFFEE:
9 tbls. or
7 tbls. or
6 tbls. or 3
5 tbls. or
3
Ms.
4-l/2 sc~
3-112
2-l/2
or 1 -
scoops
scoops
______--___--___-___-----------
scoops
l/2
scoops
_________-________________
__-________-_-____-_______
_--_._____--___-____------
--___--________-____------
.
SRX55)
Automatic Pause ‘U Serve Drip Stop Valve
For your convenience, our Pause ‘N Serve feature allows you up to
Cm
remaining coffee in the filter basket from dripping onto the warmer plate once
the brew cycle is completed.
TO PREVENT
30
to sneak a cup while the coffee is still brewing. It also prevents any
INJURY
SECONDS, IF REMOVED DURING BREWING.
FROM HOT OVERFLOW, REPLACE DECANTER WITHIN
8
3Jl EC:
Page 9
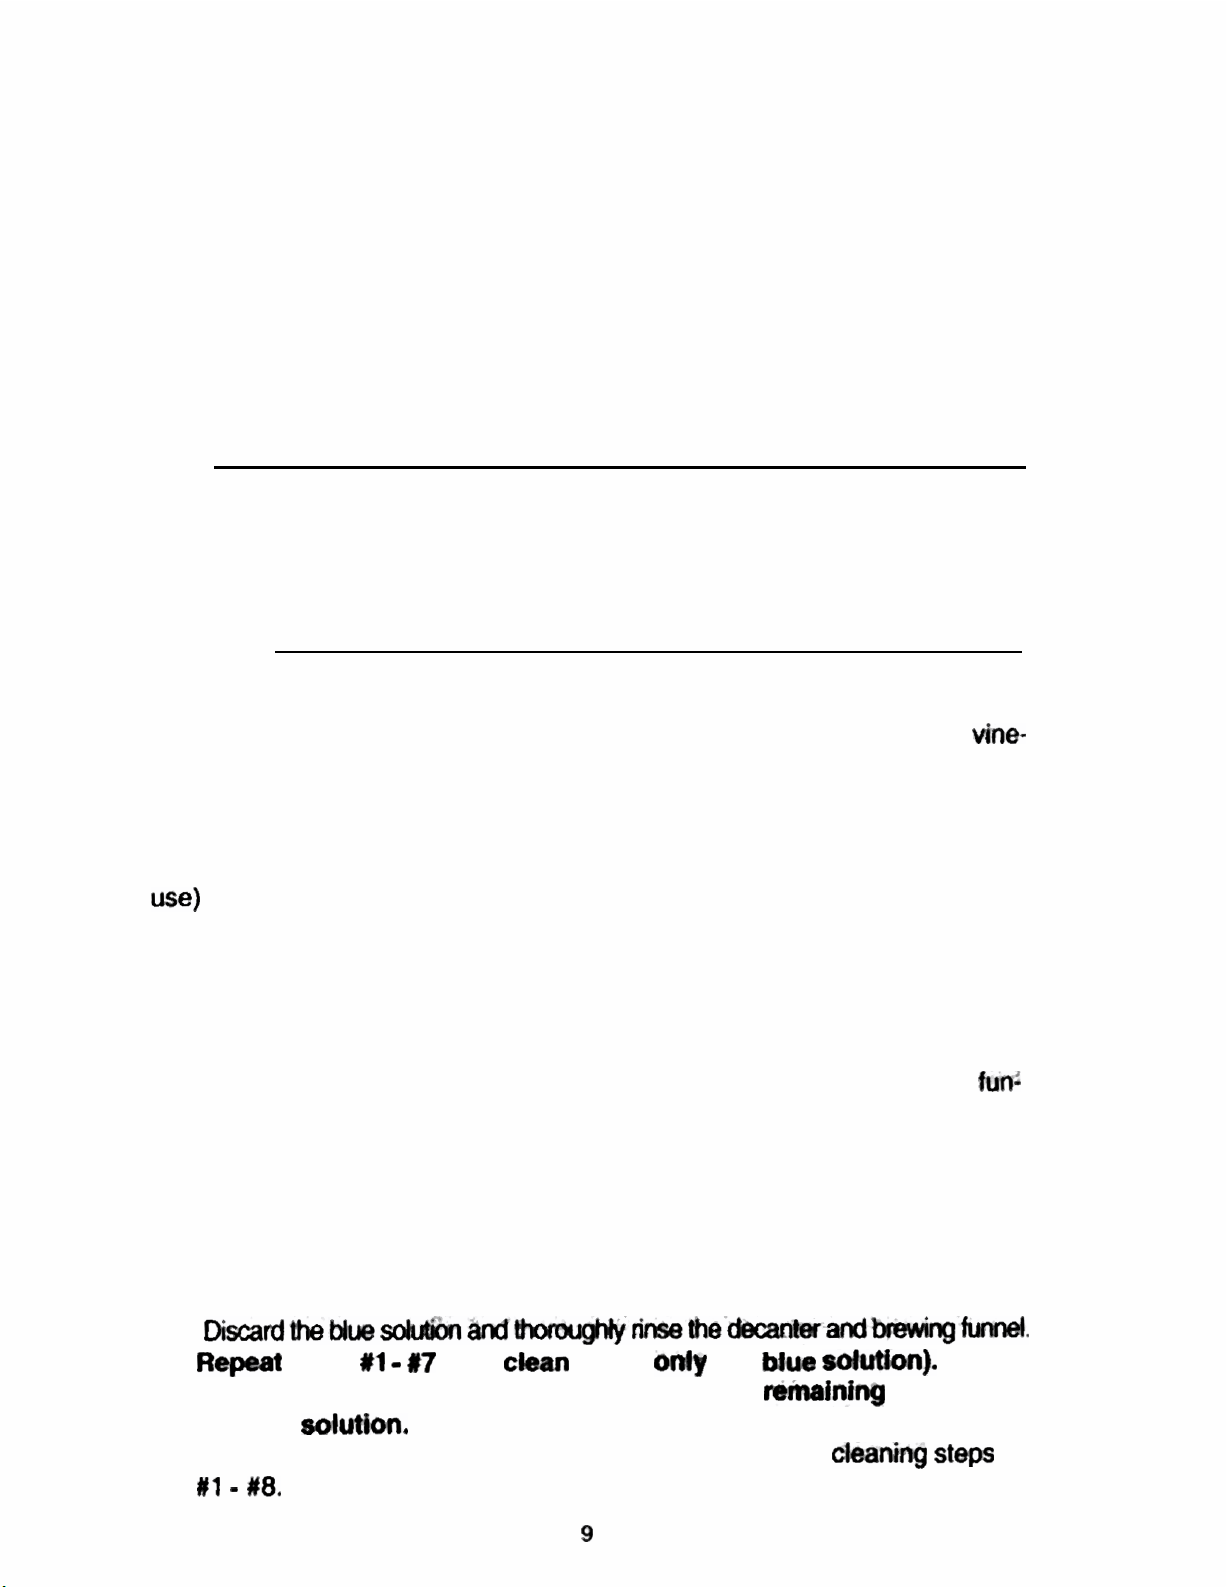
Cleaning
Instructions
Your coffeemaker
steaming or the brewing time
caused by a buildup of lime and
pumpmg action stops before all the water has been pumped out of the
machine.
The frequency of cleaning depends on the hardness of water used. The
lowing table
Your coffeemaker may be cleaned by using MR. COFFEE CLEANER or
vinegar. For best results, use MR. COFFEE CLEANER. It is superior to
gar and has no unpleasant odor.
then the appliance requires cleaning.
gives the suggested
--
must
be
cleaned
SUGGESTED CLEANING INTERVAL
Type of Water
Soft Water
Hard Water
when you
increases
mineral
cleaning intervals.
Cleaning Frequency
every 80 brew
every 40 brew cycles
begin
considerably. This condition is
deposits from your water. If the
to notice excessive
fol-
cycles
vfne-
Using Mr. Coffee Cleaner
(Read caution statement on side panel of Mr. Coffee Cleaner box before
u=4
1.
Fill the decanter with 4-5 decanter cups of warm water.
2.
Empty contents of one packet of MR. COFFEE CLEANER into the
decanter and stir with a plastic or wooden spoon until the cleaner is completely dissolved.
3.
Pour the blue solution into the coffeemaker.
4.
Place
net into place
CAUTION:
when
the bottom of the brewing funnel. If it is not in
in the brewing funnel will overflow onto the warmer
5.
Turn your coffeemaker on.
6.
When the Mue solution has stopped flowing, turn your coffeemaker off.
7.
8.
Repael
Continue to rinse out the unit until you see no
the blue
9.
If a normal brewing flow rate is not achieved, repeat the
Wl - 118.
the empty decanter on the warmer plate and slide the brewing
The special PAUSE ‘N SERVE drip-stop valve works only
the
decanter is fully in place on the warmer
DiscardtheMuecioh.hmandthoroughlyrlrtsethedecanlwandbrewingfumel.
steps Xl - X7
s4dution.
with
dean
water
only
plate
place.
(no
blue
mmalnlng
and is touching
the cleaning solution
plate.
mhtiOn).
traces of
dean@ steps
fun:
9
Page 10
lkING
1.
2. Place a filter into the
3.
4.
5.
6.
7.
VINEGAR:
Pour 1 quart of undiluted white household vinegar into your coffeemaker
filter
Place the empty decanter on the warmer plate and
maker on. When three cups have
maker
Turn
Discard the vinegar and the paper filter.
To flush
into the coffeemaker, turn it on. and allow it all to cycle through.
Discard the water and turn the
#7..
off and
the coffeemaker on and let
let
out all
stand
traces of
Decanter Cleaning
basket and slide into place.
turn
for
l/2
vinegar,
flowed
hour.
all
coffeemaker
through,
of the vinegar flow through.
pour
a decanter full of tap water
off. Repeat steps #6 and
turn
the coffee-
the coffee-
Hard water can leave a
and tea discolor these deposits, sometimes leaving a brownish stain inside
the decanter. To remove these stains, follow these simple steps:
1.
Use a hot white vinegar solution and let it soak.
2.
Let
it stand for about 20 minutes and then discard.
3.
Wash and rinse the decanter thoroughly using a soft
harsh abrasive cleaners. These will cause scratches which can lead
to breakage.
wfWrih
mineral deposit inside the decanter. Coffee
cloth.
Do not use
Helpful Hints
The use of chemically softened water can inhibit proper filtration. This will
affect the beverage flavor and will cause a long drip time from the brewing
funnel. Avoid using chemically
If Service Is
All repairs must be made
Please do not return this appliance to your store. To locate the Mr.
Coffee Service Center nearest you. call our Toll Free Number: l-800-321-
0370.
Requhd,
softened
water.
Do Not Return to Your Store
at’an
authorized Mr. Coffee Service Center.
Our office hours are
through Friday.
Please
description of problem in
If you have any questions or comments, please write:
in&de
Consumer Affairs Department
MR. COFFEE, inc.
24700 Miles Road
Bedford Heights, Ohio 44146
model number
830
a.m. to
all
communications.
5:OO
(SRlO
p.m. Eastern Standard
or
SRX55),
10
date of purchase, and
.time,
Monday
Page 11

Notes
Page 12
Mr. Coffee, inc. warrants to the purchaser that Mr. Coffee’s
Automatic Drip Coffeemaker, SR Series, (except for cord set
and glass parts) is free from manufacturer defects in material
and workmanship for a period of one year from the date of original purchase when used in compliance with directions as outlined in the manufacturer’s instructions, which will constitute
reasonable and necessary maintenance by the consumer.
In case of manufacturer defects in material or workmanship,
Mr. Coffee, inc. agrees to repair (remedy) a defective
feemaker
without charge. The purchaser’s exclusive remedy
cof-
against Mr. Coffee, inc. shall be for the repair or replacement of
a defective Mr. Coffee Product.
All repairs must be made at an authorized Mr. Coffee Service
Center. To locate a Mr. Coffee Service Center, call l-800-321
-
0370. As the purchaser, you assume all cost incurred in transporting your Mr. Coffee machine to and from the authorized Mr.
Coffee Service Center. Mr. Coffee, inc. shall not be responsible
for any repairs performed at any
faci/ity
which is not an autho-
rized Mr. Coffee Service Center.
This warranty gives you specific legal rights, and you may
also
have other rights which vary from state to state. Any
implied warranty is limited in duration to
the
one year provided
in this, the only, expressed warranty. Some states do not allow
limitations on how long an implied warranty lasts, so the above
limitation may not
apply
to you.
In no event shall Mr. Coffee, inc. be responsible for
dental or consequentid
damages, nor damage due to misuse
inci
or the use of any unauthorized attachment; nor assumption of
responsibility for damage caused by use of an electrical circuit
not specified on t he Mr. Coffee, inc. product. Some states do
not
allow the
tial damages, so
exclusion or
the
above limitation or
IimitatiMl
of incidental or consequen-
exclusion
may not apply
to you.
24700
Miles
Road,
Mr. Coffee,
Bedford Heights,
inc.
PnlNlED Iy USA
Ohio
44146-1399
am
 Loading...