

Page 1
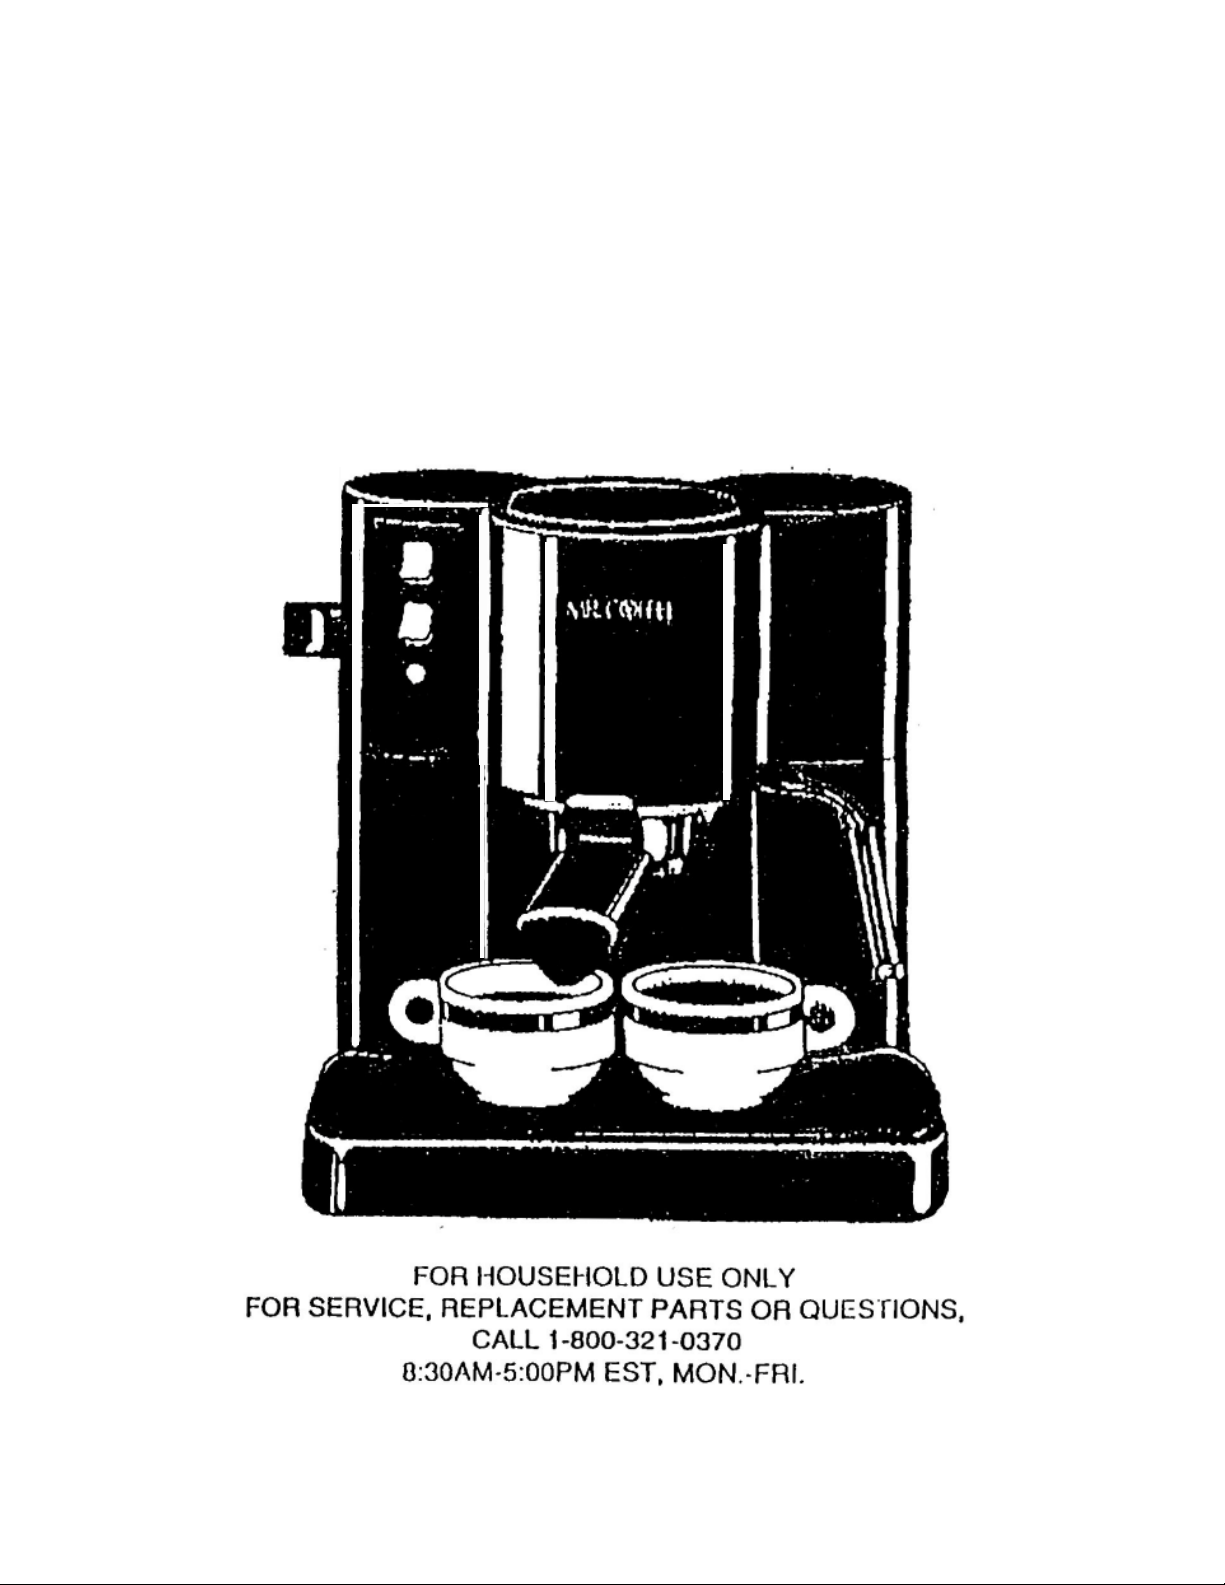
OPERATING INSTRUCTIONS FOR THE
PUMP ESPRESSO/CAPPUCCINO MAKER
MODEL ECMP2
BY MR. COFFEE
Page 2

IMPORTANT SAFEGUARDS
When using electrical appliances, basic safely precautions should always
followed to reduce
including the
1. Read all
2.
Do not touch
3.
To
machine
This product is not recommended for use by children.
4.
Turn control
5.
and before cleaning. Allow to cool before pulling on or taking
parts,
6.
Do
the
Return this appliance only to
for
7
The use of accessory
. .
following:
protect
and
not
operate any appliance with a damaged cord or plug or alter
appliance
repair.
the
risk of
lnstructions
hot
surfaces. Use handles or knobs.
against electric shock, do
in water or other liquid.
switch
before
to OFF and unplug from
cleaning.
malfunctions,
fire.
electric shock, and/or injury to persons,
before using the machine.
or has been damaged in any manner.
the
attachments
not
Immerse cord, plugs, or
outlet
nearest authorized
not recommended by MR.
when
service
not in
center
use
off
be
8.
9.
10.
1 I.
12.
13.
14.
COFFEE, Inc., may cause hazards or injuries.
Do not use outdoors.
let
Do not
faces.
Do
not
In a heated oven.
To disconnect,
outlet.
Do not use appliance for other than Intended use.
Use on a hard,
underneath the
WARNING: To reduce the risk of fire or electric shock, do
any service covers. No user
should
cord hang over edge of table or counter, or touch
place this
be done by authorized personnel only.
appliance
turn
any control to OFF, then remove plug from wall
flat
level
appliance.
on or near a hot gas or electric burner or
surface
only, to avoid lnterruption of air flow
serviceable parts
Inside. Repair
hot
sur-
not
remove
SAVE THESE INSTRUCTIONS
2
Page 3

SPECIAL CORD SET INSTRUCTIONS
1.
A short power supply cord is provided to reduce the hazards
from becoming entangled in or tripping over a longer cord.
2.
An
extension
Its use.
3.
If an
sion cord must be at least 10 amps and 120 volts. The resulting
extended cord must be arranged so that It will not drape over
counter top or table top where It can be pulled on by children or
tripped over accidentally.
This appliance has a polarized
extension
Note:
other). As a safety feature,
only one way. If the plug does not fully fit in the outlet, reverse
the plug. If it
not attempt to defeat this safety feature.
cord may be purchased and used if care Is exercised in
cord is used, the marked electrical rating of the
plug
(one blade is larger than the
this
plug
still
does not fit, contact a electrician. Do
will
fit in a polarized bullet
resulting
exten-
the
CAUTION:
1) Do not remove the filter holder at any
the brewing process.
2) Do not let the pump run with an empty water container.
This can damage the pump permanently.
3) Use caution removing the
head. The metal parts may
may be hot water floating on the top of the filter basket.
4) When using the frothing tube make sure the
tube is submerged In
selector control knob to the “ON”
liquid
time during
filter
still
before turning the steam
holder from the brew
be very hot.
position.
Also, there
tip
of the
Page 4

Introduction
Congratulations! You are the owner of a Details by Mr Coffee model ECM7 Steam Espresso/
Cappuccino Maker. This unique appliance has been designed to provide you with an excellent
tasting cup of espresso or cappuccino quickly and conveniently.
Espresso is a unique method of coffee brewing in which hot water is forced through
finely ground espresso coffee. Popular in Europe, it is a far richer and more full-bodied
brew than regular American coffee. Because of its richness, espresso is usually served
in l-1
/2
to 2 ounce portions, in demitasse cups.
Most espresso drinkers outside Europe prefer cappuccino a drink made of about
third espresso, one-third hot milk and one-third f oam milk. Preparing espresso or
cappuccino is very different than brewing regular automatic drip coffee.
To ensure your safety and long life of this appliance, please read all instructions, cautions,
notes, and attentions.
Table of Contents
Important
Special
Introduction...........
Product Features and Diagram of parts.....................................................................
How to
Before
How
How
Problems and Causes.. ........................................................................................... .-9
If Service is Required ..
Cleaning after each use........................................................................................
Deliming
Recipes........... ........................................................................................................
Limited Warranty
Safeguards
Cord Set
Prepare Espresso and Cappuccino at
Using
to
to
Your Espresso/Cappuccino
Brew
Espresso
Make
Cappuccino..
...............................................................................................................
..............................................................................................
Instructions & Cautions.................................................................
......................................................................................................
Home
Maker..
..........................................................................................
.
.............
.........................................................................................
.....................................................................................................
.......................................................................
...............................................
....................................................
one-
Page
.2
.3
3
.5
.5
.6
.6-7
.-8
-9
-10
10 -11
.12
.12
Page 5
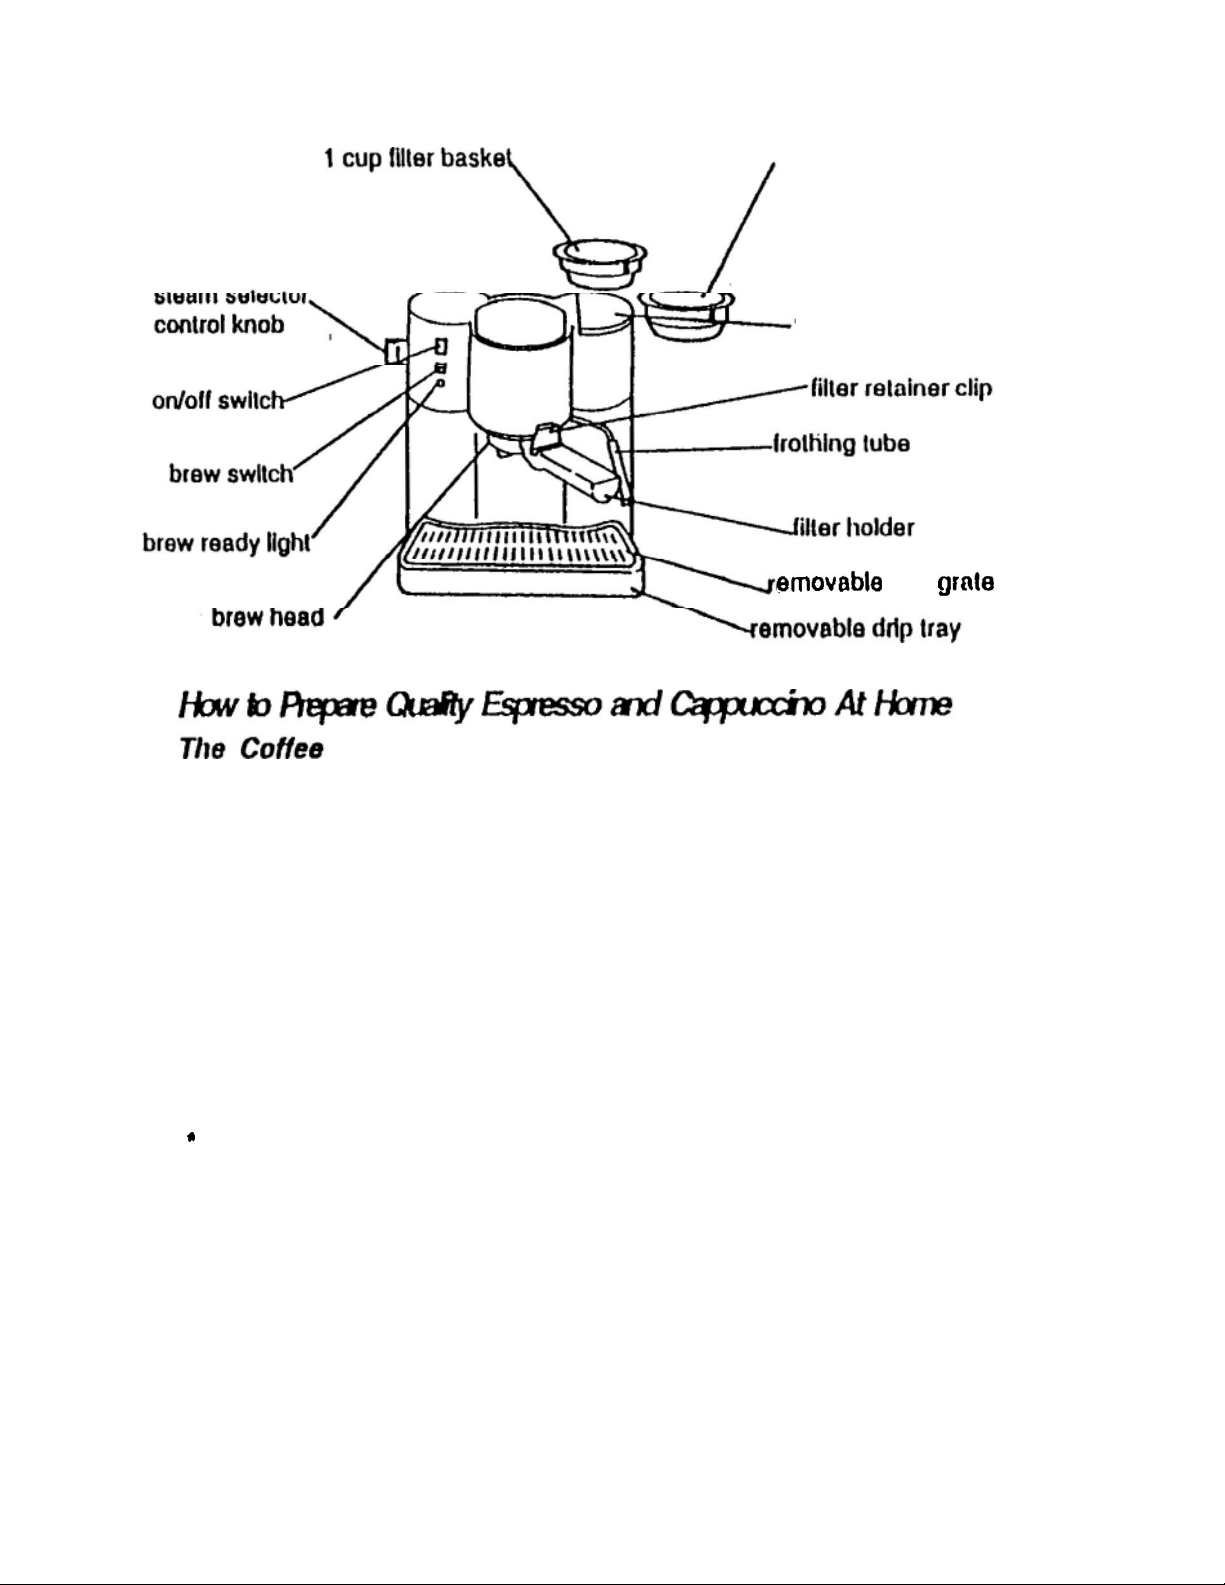
Product Features
and Diagram
of Parts
2 cup filter
water reservoir lid
basket
drip
The coffee should be freshly ground, dark roasted
to try a French or
for
7-8
days, provided it is stored In an air tight container, In a cool, dark
area. Do not store in refrigerator or freezer.
Whole beans
beans stored In an alr tight
begin to lose
The
Grind
Having
fee musl be ground fine,
The correct grind should look
! If the grlnd is too fine, the water will not flow through the coffee even
under pressure. This grind looks
rubbed between fingers.
! If the grlnd Is too coarse, the water flows through the coffee too fast,
preventing a full flavored extraction.
Be sure to use a quality grinder or mill for uniform consistancy In your
espresso grind. Oval shaped coffee mills are not recommended because
the grind is not consistant. We recommend using the Mr. Coffee Burr
Mill.
the
right grind is vital to making a good cup of espresso. The cof-
ltalian
are
recommended, to be ground Just before use. Coffee
their flavor.
roast. Pre-ground coffee will only
container will
but
not too fine.
gritty, like
keep up to 4 weeks before they
salt or sand.
like
powder and feels like flour when
variety.
You may
retain its
want
flavor
Page 6
Before Using Your
Please refer to page 5 for diagram of parts.
1.
2.
Wash the water reservoir, filter basket and filter holder in a mixture of
mild
machine.
3.
To rinse
Espresso” on pages 6-7, using waler only.
power
detergent and water. Rinse each thoroughly and replace into
the
switch
Inside of the machine, follow steps for “How to Brew
Mr. Coffee Espresso
off and unplug the machine from the electrical
Maker
How To
Please refer to page 5 for diagram of parts.
from
Filling the Water Tank...
2.
the bottom 0f
Make sure
1.
the machine OFF and make sure the brew switch is
tion.
Remove
handle. Fill
reservoir (29 ounce capacity).
Never fill
reservoir.
reservoir is not Inserted properly
bottom of the reservoir
lid will close only
opened. Do not
machine.
The
3.
first
pump
plug the power cord Into an eteclric
4.
PIace
5.
water under
the water.
Turn-the machine ON. Leave the brew switch in
6.
Turn
seconds a
Allow one cup of water to flow through the frothing tube.
Shut
7.
Your espresso/cappuccino maker is now
primed.
Pre
paring the Coffee...
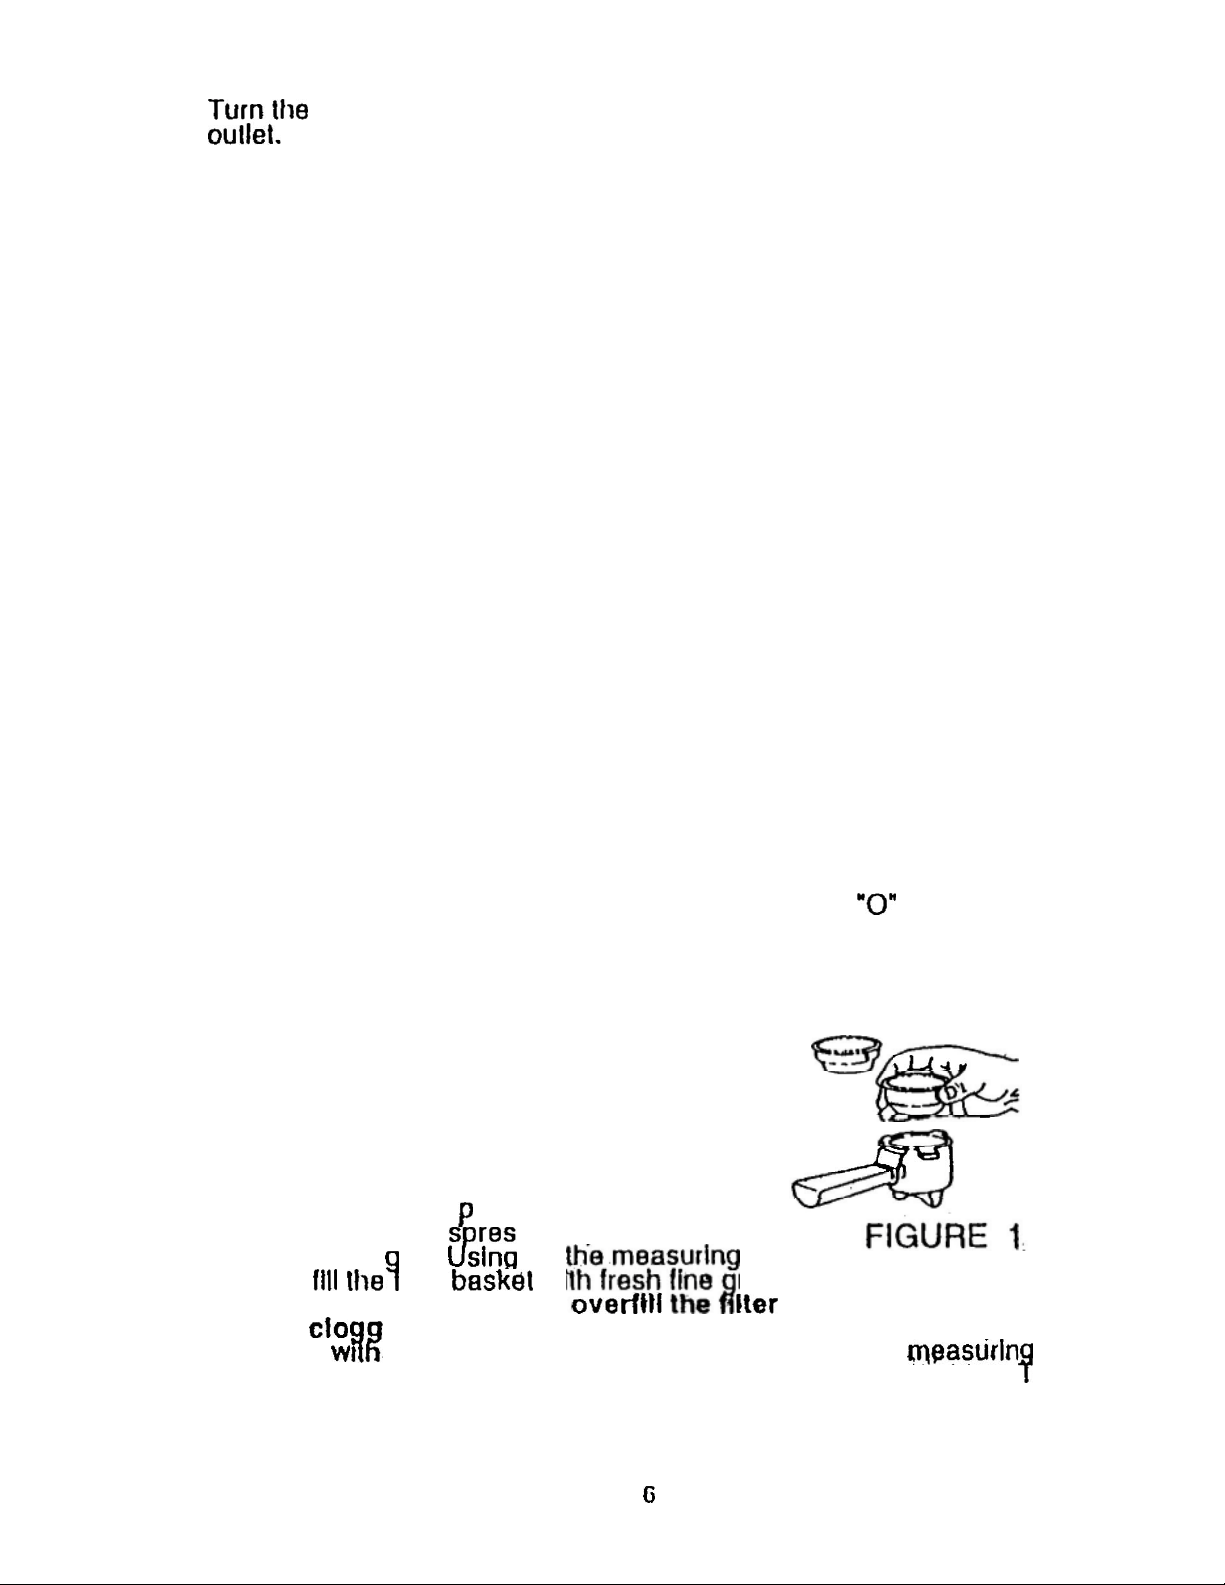
Remove
1.
handle and
holder will now release.
Place
2.
one
1-1/2
holder. See ure 1.
spoon,
flat spoon per cup). Do not
cause
grounds
spoon. Clean any excess coffee from
will
Make sure
3.
Brew
the
below the minimum line level indicated on
Insert the water
pump must be primed whenever
time
or if not used In a long
and fills the
a frothing
the
steam selector control nob to the ON position. After a few
HOT
the steam
the
either
l-1/2
ounce cu
ounce cups o
assure proper
Espresso
First
your machine.
the
steam selector control knob is in
water reservoir by opening
the
water reservoir
reservoir
will
If the reservoir is prop
force the water container In any other way into
water boiler with
pitcher
the
frothing tube.
stream of water will emerge
selector control knob OFF.
filter holder b y
sliding
one of the filter b
ilter wtlh fresh fine
Ing
or over flow. Tamp (tap
-the flat disc at the end of the handle of the
filter
retainer clip Is away from
or large cup
l/4
to the
of espresso:
es
resso) lnto the filter
fit
under the brew head.
with fresh,
not be activated.
time.
Sub
grabbing
left.
askets (1
the
lid and lifting up the reservoir
cold water to
into
the machine. If the water
Into
the machine, the valve on the
erly Inserted and the valve is
the
machine is being
This procedure prepares the
water.
outlet.
(with 16 ounce capacity) half full of
merge
the filter
Th
e
2=for
the
the
from
ilter
f
=for
two
round espresso coffee (one
the
rim of the filter holder.
the
unwind
the
tip of the
the frothing tube.
basket. This
lightly, but do
filter basket.
The electrical
OFF position. Turn
in the
the,
The water reservoir
the
OFF
“0” OFF
the
top of the
outside of
used
frothing
not pack)
the
the
for
tube
position.
might
cord
posi-
the
in
the
hls
Page 7
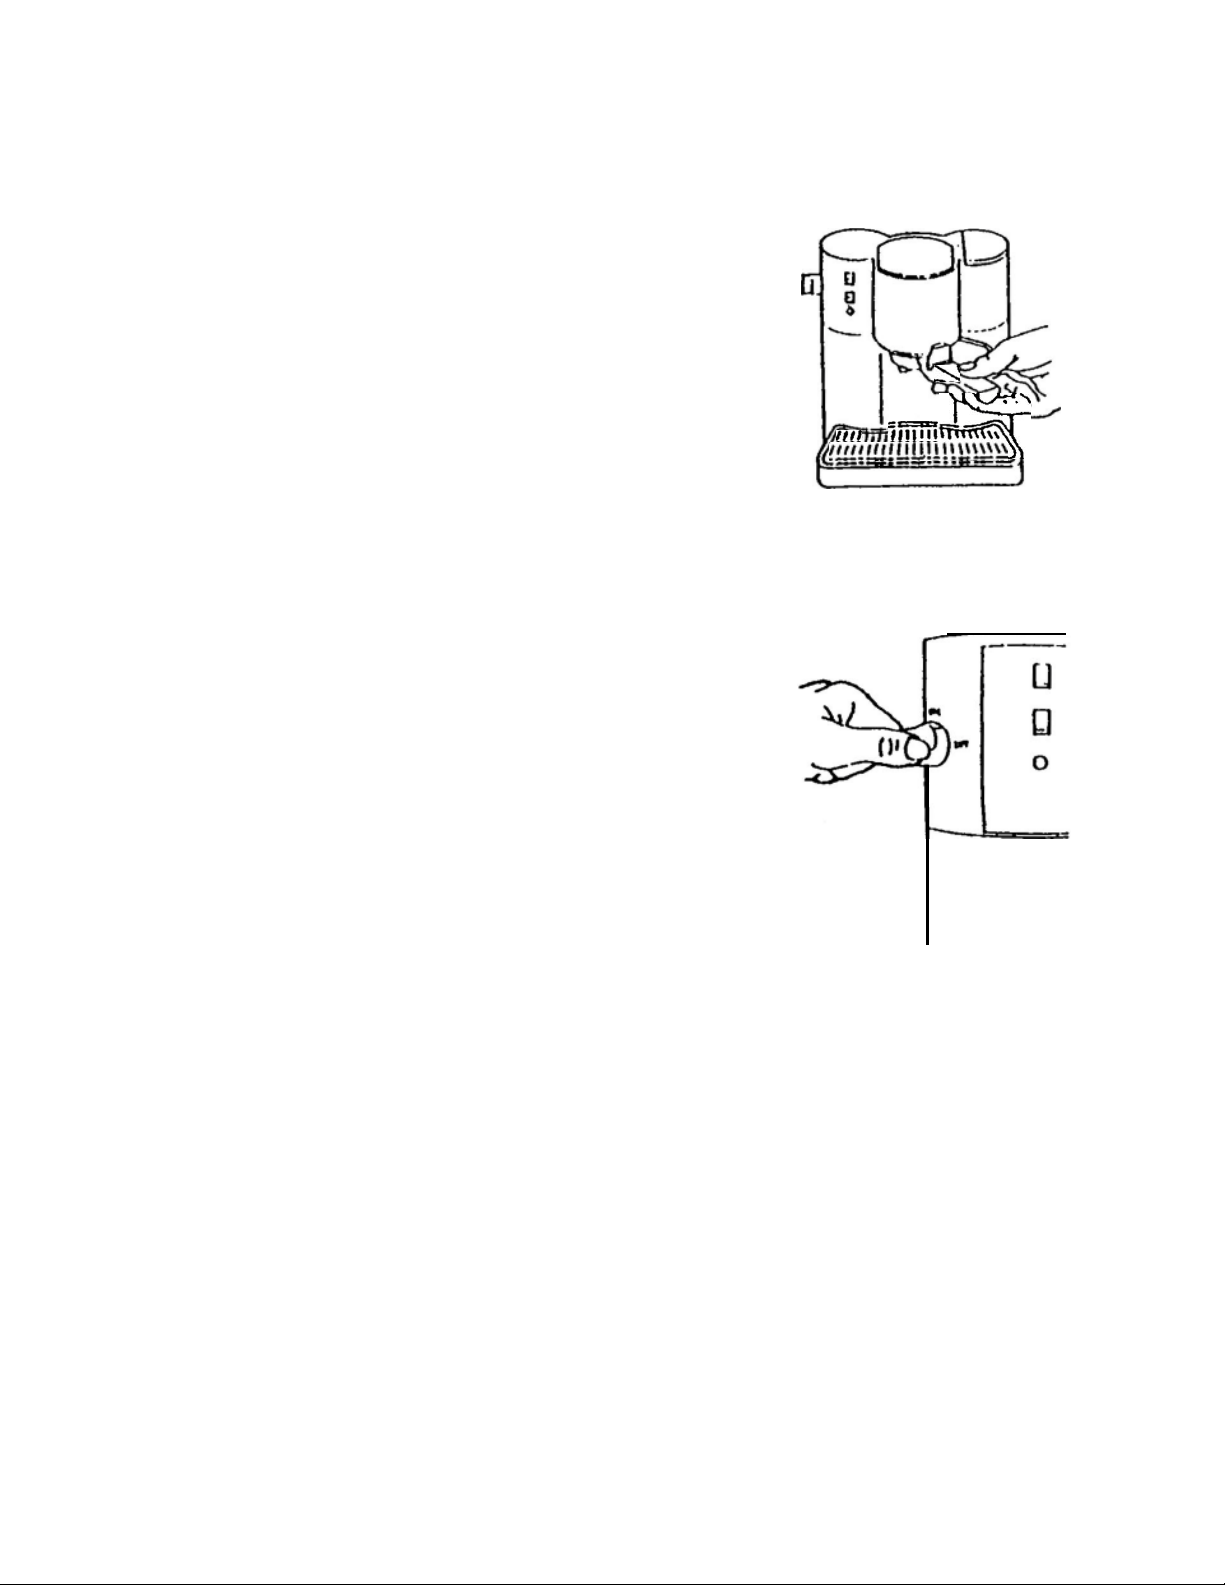
4.
Place
positioned
brew head and
to the
secure. See figure 2.
Brewing Espresso...
Remove
1.
the
and place into
2.
Make sure the drip grate on the drip tray is in --
place.
3.
Align either one or two demitasse cups under
the filter
4.
Make sure the steam control knob is
the
and
See figure 3.
5.
Plug
Turn
illuminate to let you know
When
switch to
ready to brew espresso. Espresso will begin to
flow in a few seconds. Do not remove the filter
holder at any time during the brewing
process. Do not let
empty water container.
pump permanently.
When
Turn the on/off switch OFF. If you are making cappuccino leave
on/off
7.
8.
,
8.
excess water.
9.
10. See for cleaning on page 10.
the
filter
right of
the
water reservoir capacity (29 ounce capacity)
holder
OFF position,
the
brew switch is on the “0” OFF
the
power cord
the on/off
the
the demitasse
(about
Unplug
To make additional cup(s) and
remove
parts
hot water
steady; Using the filter retainer clip to secure
filter holder, turn
basket and holder
Remove the water reservoir using the
Carefully remove
espresso
l-1/2
switch ON to froth
the
of the
holder underneath the brew head so that the handle
to the left off
turn
the “min” (minimum)
water reservoir and
the
on the
switch ON. The brew light will
brew light shuts off, turn
the
CUP position. The machine is now
ounces) press the brew switch to
power cord and allow the machine to cool.
the filter
filter
floating
that
has accumulated.
center. Lift
to the right.
tank securely. Close
drip
tray.
the on/off
Into
the
cup(s) are about half full
holder from the brew head CAUTION: The metal
holder might
on the top
the filter
with
drip
switch is OFF
an electrical
the
pump run with an
This
milk.
holder upside down to empty
cold water.
tray and grate and clean any excess water or
the
filter
Make sure the filter holder is
mark. The filter holder
fill
to the top of
in
machine is on.
the
can damage the
(See page 8 for
after the machine
still
of the filter
holder
Iid.
position.
outlet.
brew
be
very hot.
basket. Hold the filter holder
attached handle. Discard
is
up and
FIGURE
the
OFF
making
has cooled down,
Also there may be
the
filter basket in
Insert
must
FIGURE 2
I
,
3
“0’
position.
cappuccino).
Rinse
into
positioned
be
the
the
the
the filter
any
7
Page 8
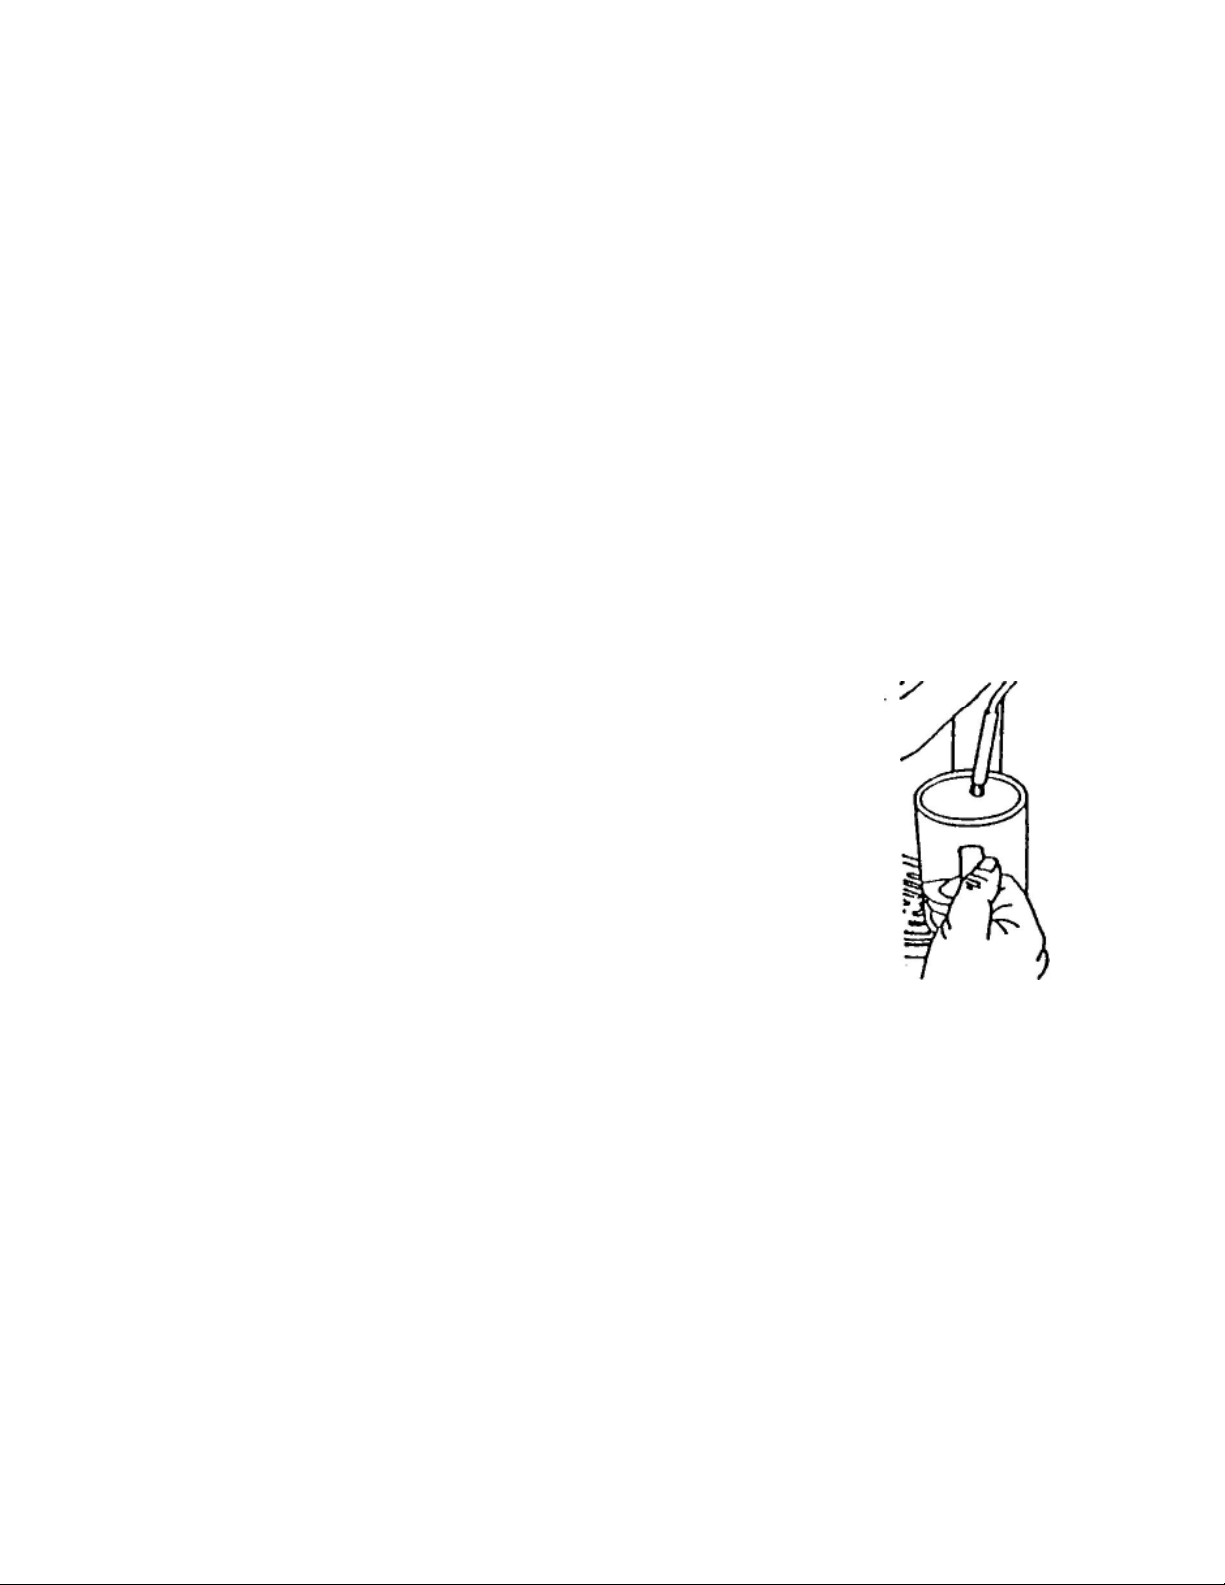
How to Make Cappuccino
Capp
mach
take a few times before you
couraged if It is not
For
and
cold. Do not
uccino
ine has ample pressure to
best
pouring the milk into your coffee.
is espresso topped with steamed milk. This
make
aid frothing
results, we
use
a
perfect the
recommend
pitcher which
first time.
frothing the
has just been washed in warm water.
perfect froth. However, It may
like a “pro’
milk in
The
milk and pitcher should be
pump
Do not be
a separate pitcher
style
disc-
When
hand.
1.
2.
3.
4.
5.
6.
preparing cappuccino,
The
first
step in making cappuccino is to make espresso. Therefore,
fill
to the top of the water reservoir (29 ounces cap acity and place
into
the
tank securely.
Page 6).
Foll
ow step
Fill a
with cold milk and set next to
or 2% will be the easiest to froth.
While
frothinq
milk. Flotate the steam selector control knob
from
start flowing.
motion around the steam nozzle. Because warm
milk does not froth, the milk should be frothed from
just
When the milk has doubled in volume, insert the
steam nozzle
7.
8
9.
small
the
the OFF position to the ON position, steam wiII
below the surface.
milk.
To avoid splatlering of hot milk, do not
steam nozzle above the surface of the milk until the
steam selector control knob is
After the milk is frothed, set
allow the milk
Clean the steam nozzle
frothing pitcher
water under the
seconds will
nozzle with
nozzle can be unscrewed In a counter-clockwise
end of the measuring spoon and then It can be cleaned. The nozzle
must be screwed on again
reasonable
Turn
and spoon on
and milk
milk plus
Unplug
Continue to
s 1-6
stainless steel or ceramic pitcher 1/3 full
machine is ON hold the pitcher below the
tube,
Gently
a needle If
force with
the on/off switch
is
to taste; in Italy It is normally 1
the
the
power cord and allow the machine too cool.
on
with
the tip
farther
.to settle.
or
Iarg
frothi
clear
the nozzle. Wipe nozzle with a damp cloth. Clean
the frothed
froth.
follow
we recommend having all Ingredients on
(see step 2 “Filling the water
“Brewing Espresso” on page
machine.
slightly
move the pitcher in a circular
down into milk to
immediately after
e cup
ng
tub
it is
the end of the measuring
OFF. Add
milk. The proportion between espresso
steps
8-9
submerged into the
in
the OFF position.
the
pitcher
(with
a 16 ounce capacity) half full with
e.
Producing steam for another 1-2
still
blocked. If necessarv.
in a clockwise direction. Tighten using
the
on Espresso
Skim milk
further
aside
steamed milk to the espresso
tank
7.
on
FIGURE
slowly
heat the
lift the
and
frothing milk. Place a
the
steam
direction
spoon provided.
part
espresso and 2 parts
on page 7.
using the
4
8
Page 9

Problems and Causes
Problem
Coffee does not
come out
Coffee comes out
too quickly
Coffee comes out
around the edge of
the filter holder
No steam is generated
Coffee is splattering
out of frothing tube
Milk is not foamy after
frothing
Causes
!
No water in tank
!
Ground coffee is too fine
!
Too much coffee in the filter
!
Soiler cap is not secure, steam is escaping
!
Machine was not turned on, or plugged in
!
Ground coffee is too coarse
!
Not enough coffee in filter basket
!
Filter holder is not inserted in the brew head properly
!
Coffee grounds around the filter basket rim
!
Too much coffee in the filter basket
!
Coffee has been packed too tightly
!
Water tank is empty
!
Too much water in the tank, no room for steam
!
Machine is not turned on
!
Water tank is empty or low, not enough pressure
!
Ran out of steam
!
Milk is not cold enough
If Service Is Required, Do Not Return to Your Store
For service, call l-800 MR COFFEE (l-800-672-6333)
8:30
a.m. to
All repairs must be made by Mr. Coffee or an authorized Mr. Coffee Service Center. Please
call us for assistance or for the location of the nearest authorized Mr. Coffee Service Center.
Please do not return
We welcome your questions, comments or
Please
To
assist
number
this
include
5:00
p.m. Eastern Standard Time, Monday through Friday.
us in serving you,
ECMP2,
and date of purchase available.
please
have the model
appliance to your store.
suggestions.
your complete name, address and telephone number and
description of problem in
all
communications.
Consumer Affairs Department
MR. COFFEE
24700
Miles
Road
Bedford Heights, Ohio 44146-1399
A Division of
health
o Meter Inc.
9
Page 10
Cleaning Y
I.
Unplug the
2.
After the machine has cooled down, remove the filter holder from the
brew head. CAUTION:
o u r Espresso/ Cappuccino
appliance power cord.
the metal
parts of the
filter
holder
might
still
be very
filter
to secure the
down to empty.
3.
Clean
the brew head. (the underside area of the machine where
er rests securely.)
4.
The filter holder, filter basket, and
water or placed on the top rack only of your dishwasher.
CAUTION: Do
5.
Always empty the water tank of any water between uses.
6.
Wipe
scouring pads
7.
Do not store
the
seal
espresso.
hot
Also there may be
hot
water
floating
basket. Hold the filter holder steady. Using
brew
housing
head by
between the
filter basket in the
Rinse the
not
Immerse machine In water.
with
a soft damp cloth. Do not use abrasive cleaners or
as
they
the filter
wiping
filter basket and holder
away coffee grounds
will scratch the finish.
holder in the brew head. This can adversely affect
brew head and
filter holder, turn
drip
tray can be washed
the
filter holder while brewing
on the top of the
the
filter retainer clip
the
filter holder upside
with
cold water.
that
may be stuck to
the
filter hold-
with
soapy
Deliming
Mineral deposit build-up in the espresso maker will affect
machine. Your espresso maker must be delimed when you begin to notice
an increase in the time to brew espresso, or when there is additional steaming. Also, you
brew
The frequency of cleaning depends upon the hardness of the water
The following
head.
Your espresso maker may be delimed using white household vinegar.
Follow steps
I. Make sure the steam selector
will
notice a build up of while deposits on the surface of the
table
3-8
gives the suggested cleaning Intervals.
SUGGESTED CLEANING
Type of Water
Soft
Water every 80
Hard Water every 40 brew cycles
on pages 10-11.
control
Clenning Frequency
knob is in
INTERVAL
brew
the
the
operation of the
used.
cycles
OFF position and
that
the plug is
2.
If
the
machine is cool pour 29 ounces of
vinegar
3.
Place water reservoir back into the machine.
into
disconnected
the water
from the electrical outlet.
reservoir.
undiluted
white household
Page 11

4.
lnsert the filter holder
into the brew head and place a mug
on the
drip
tray. Do not
5. Plug
ON.
6.
Place a cup with cold water under
tip
knob to
by turning
clean any residue left
brew switch to
7.
the
of the steam tube in
the
filter. Let
reservoir reaches the
When
the
turn
remaining
all the vinegar
water
the on/off switch to OFF. Allow
fill
filter holder
machine into the electrical
the
the
On position. After a few seconds close
the
selector control knob to the OFF
in
the
the
CUP
this
process continue
minimum
has been pumped
reservoir,
vinegar from the water reservoir by
turn the brew switch to the “0” OFF position
with
coffee.
outlet
the
steam nozzle.
water. Slowly turn
nozzle
position.
from frothing
Vinegar will begin to
until
the vinegar in
line on
the
the
machine to cool.
and turn
water reservoir.
out
to
the on/off
the
selector control
the
position.
milk.
the
minimum level of
lifting the lid
switch
Submerge the
steam nozzle
This will
Next
flow
the
water
Empty
and
turn the
through
and
the
removing the water reservoir. Pour the remaining vinegar down
sink.
8
Repeat
vinegar
machine
steps. 1-8 using
out
of the machine. Repeat
to cool and pressure to be
only tap water to rise any remaining traces of
this
process twice, allowing
released
before repeating.
your
the
Page 12

RECIPE IDEAS THAT YOU WILL LOVE TO
San
Francisco
espresso, hot steamed chocolate,
brandy, topped with whipped
cream and cinnamon
Cappuccino
Cafe Tia
espresso, Tia Maria liqueur lopped
with frothed milk
TRY!
Maria
Cafe Irish
espresso, Irish whiskey, topped
with whipped cream
Cafe Grand Marnier
espresso,
topped with whipped cream and grated
Grand Mamier
liqueur,
orange peel
Cafe Tuaca
espresso.Tuaca liqueur, topped
with whipped cream
Cafe Vienna
espresso, brandy, topped with
Mexican Cafe
espresso, Kahlua, tequila, topped
with whipped cream
Cafe Romano
espresso, brandy and lemon twist
whipped cream
Limited
Warranty
Mr. Coffee. warrants to the purchaser that the EC MP 2 by Mr. Coffee, (except
for cord
period of one year from
set)
is free
from
manufacturer defects in
the
date of origlnal purchase when used in compliance with
material
and workmanship for a
directions as outlined in the manufacturer’s instructions, which will constitute reason-
able and necessary maintenance by the purchaser.
In case of manufacturer defects in material or workmanship, Mr. Coffee,
agrees to repair (remedy) a defective espresso/cappuccino maker without charge.
The purchaser’s exclusive remedy. against Mr. Coffee, inc. shall be for
a
replacement of
defective Mr. Coffee product.
the
repair or
All repairs must be made at an
a Mr. Coffee Service Center, call
authorized
l-800-MRCOFFEE
Mr. Coffee Service Center. To locate
(l-800-672-6333). As the pur-
chaser, you assume all cost incurred in transporting your Mr. Coffee machine to and
from the
for any repairs
Service Center.
rights
authorized
This warranty gives you
Mr. Coffee Service Center. Mr.
performed
at any facility which is not an authorized Mr. Coffee
specific
legal
Coffee,
rights.
and you may also have other
shall
not be responsible
which vary from state to state. Any Implied warranty Is limited in duration to the
one year provided in this, the only, expressed warranty. Some states do not allow
limitations on how long an implied warranty lasts, so the above limitation may not
apply to you.
In no event shalt Mr. Coffee, be
tia/
damages,
ment; nor
nor damage due to misuse or the use of any unauthorized
assumption
of responsibility for damage caused by use of an
cuit not specified on the Mr. Coffee, product. Some states do not allow
or limitation of incidental or consequential damages, so the above
not
sion may
apply to you.
Mr. Coffee, a
24700
Miles
Road, Bedford
responslble for lncidental
division
of
Health
o meter,
Heights, Ohio
or
limtiation
Inc.
44146-1399
consquen-
attach-
electrical
the
exclusion
or exclu-
cir-
FORM
5753
Rv0
PRINTED IN
 Loading...