

Page 1
PLEASE READ THIS MANUAL CAREFULLY BEFORE OPERATION
3, Hagavish st. Israel 58817 Tel: 972 3 5595252, Fax: 972 3 5594529 m
rc@mrclab.com
MRC.VER.02-11.10
INSTRUCTION MANUAL FOR
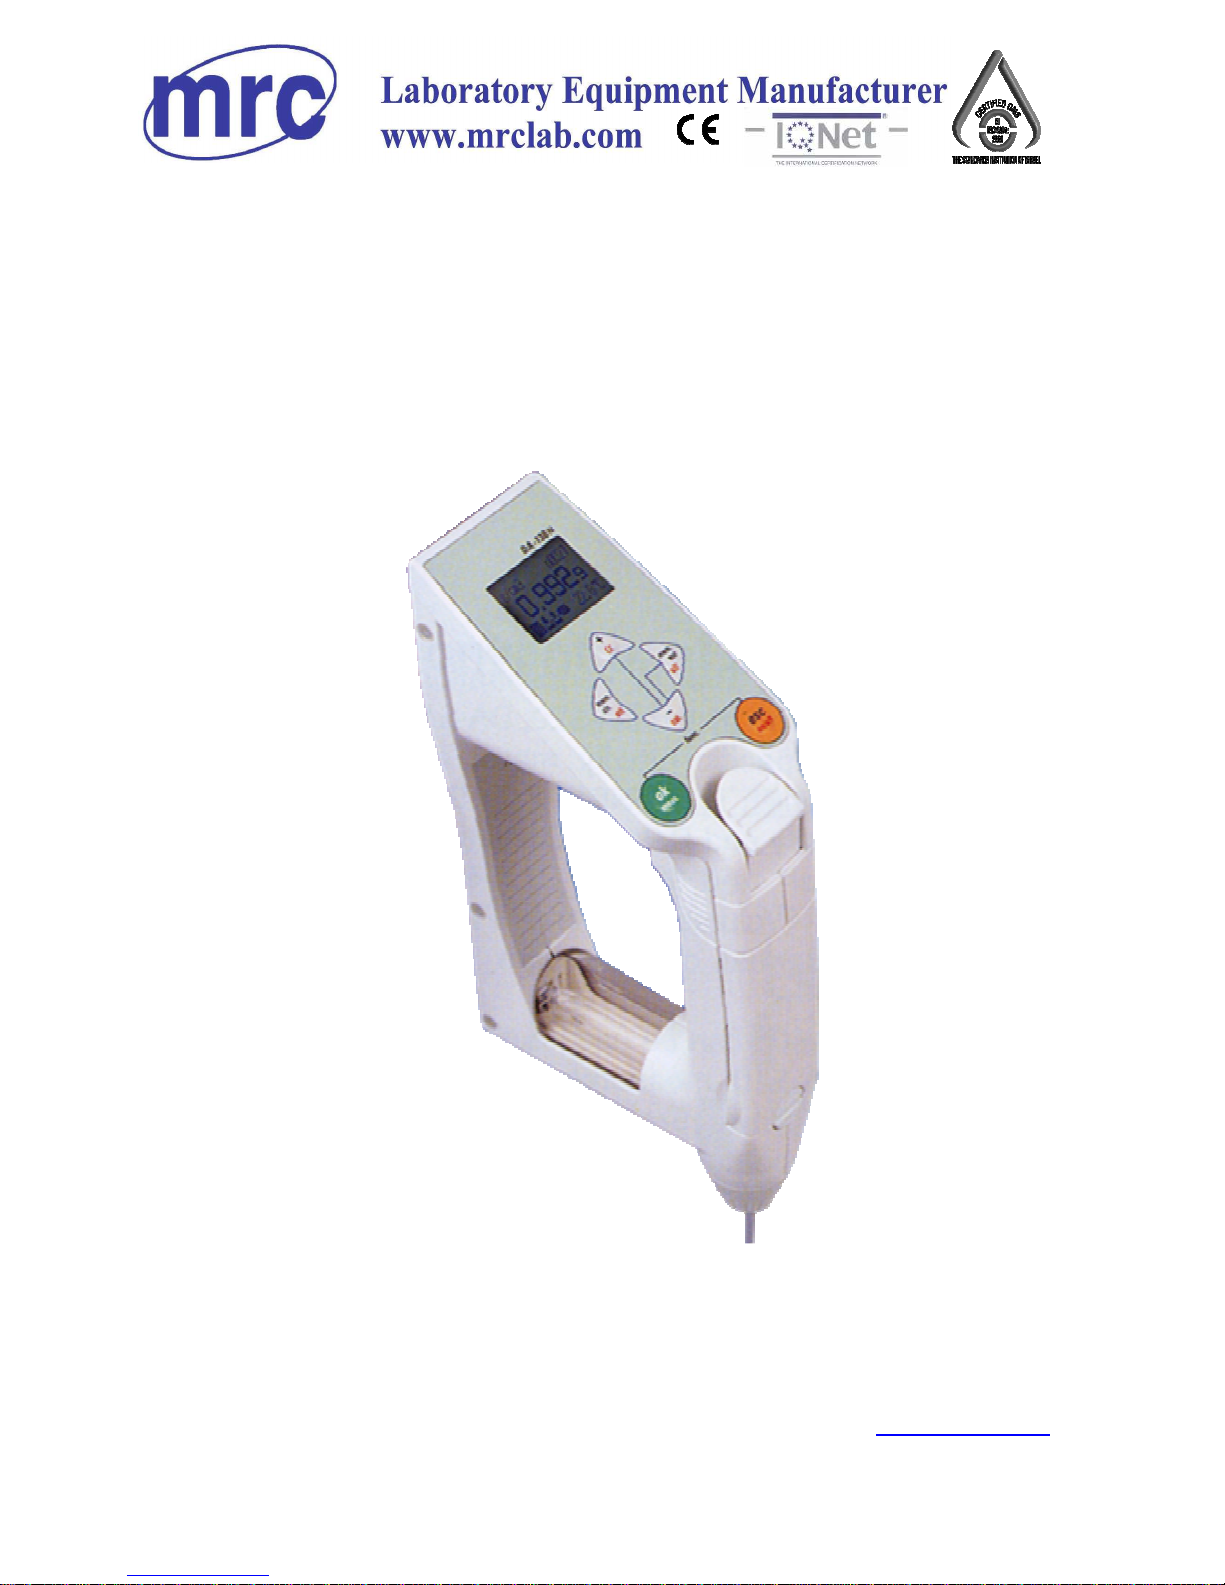
DA-130N
Portable Density/Specific Gravity Meter
Page 2

Page 3

Table of contents Page
Safety Precautions......................................................................................................................................................... 1
1. Introduction............................................................................................................................................................... 3
2. About the manual ...................................................................................................................................................... 4
3. Supplied parts............................................................................................................................................................ 5
4. Parts configuration .................................................................................................................................................... 6
4.1 Front view........................................................................................................................................................... 6
4.2 Side view............................................................................................................................................................. 6
4.3 Rear view ............................................................................................................................................................ 7
4.4 Display window .................................................................................................................................................. 8
4.5 Operating unit ..................................................................................................................................................... 9
5. Preparation for measurement by DA-130N............................................................................................................. 10
5.1 Loading the battery ........................................................................................................................................... 10
5.2 Setting the sampling nozzle .............................................................................................................................. 11
5.3 Setting the memo pad........................................................................................................................................ 11
5.4 Preliminary test ................................................................................................................................................. 12
6. Setting temperature unit, measuring unit and mode................................................................................................ 13
6.1 Temperature unit ............................................................................................................................................... 13
6.2 Measuring unit .................................................................................................................................................. 13
6.3 Configuration of measurement mode................................................................................................................ 17
7. Actual measurement ................................................................................................................................................ 18
7.1 Cautions on measurement................................................................................................................................. 18
7.2 Sample measurement ........................................................................................................................................ 19
7.2.1 When the built-in syringe is used............................................................................................................... 19
7.2.1.1 Sampling test materials....................................................................................................................... 19
7.2.1.2 Start measurement .............................................................................................................................. 19
7.2.1.3 Hold measurement data ...................................................................................................................... 19
7.2.1.4 Saving measurement data ................................................................................................................... 19
7.2.2 The use of commercially available plastic syringe .................................................................................... 20
7.2.2.1 Sampling............................................................................................................................................. 20
7.2.2.2 Start measurement .............................................................................................................................. 20
7.2.2.3 Hold measurement data ...................................................................................................................... 20
7.2.2.4 Saving measurement data ................................................................................................................... 20
8. Calibration of measuring cell .................................................................................................................................. 21
8.1 Calibration with pure water............................................................................................................................... 21
8.2 Calibration with standard liquid........................................................................................................................ 22
8.2.1 Calibration with standard liquid of which density is known...................................................................... 22
8.3 Calibration with air ........................................................................................................................................... 22
8.3.1 Calibration with air .................................................................................................................................... 22
8.3.2 How to dry the cell..................................................................................................................................... 23
8.3.3 Procedure of calibration with air................................................................................................................ 24
8.4 Calibration of displayed temperature................................................................................................................ 25
8.5 Recalibration..................................................................................................................................................... 25
Page 4

9. Application of data processing.................................................................................................................................26
9.1 Storage of measuring data..................................................................................................................................26
9.1.1 Auto saving .................................................................................................................................................26
9.1.2 Manual storage ...........................................................................................................................................26
9.2 Making saved data.............................................................................................................................................26
9.3 Deletion of stored data.......................................................................................................................................26
9.4 Display of measurement data and external output.............................................................................................27
9.5 Setting external output.......................................................................................................................................28
9.5.1 Data output to a personal computer via infrared communication...............................................................28
9.5.2 Data output to Printer..................................................................................................................................30
9.5.3 Data output to PC via RS-232C..................................................................................................................31
10. Other useful functions............................................................................................................................................32
10.1 Selection of beep sound...................................................................................................................................32
10.2 Adjust brightness of LC display; Setting of Backlight: on/off.........................................................................33
10.3 Setting Automatic Power Off...........................................................................................................................33
10.4 Version number check......................................................................................................................................33
10.5 Set Date ...........................................................................................................................................................34
10.6 Set ID...............................................................................................................................................................34
11. Power source..........................................................................................................................................................35
11.1 Change the battery...........................................................................................................................................35
11.2 Auto Power Off................................................................................................................................................35
12. Maintenance...........................................................................................................................................................36
13. Cautions in use...............................................................................................................................................37
14. Parts list .................................................................................................................................................................38
15. Troubleshooting .....................................................................................................................................................40
15.1 Error messages and their remedies ..................................................................................................................40
15.2 Exhibit no repeatability on measured value or show deviation on measured value.........................................41
16. Technical data ........................................................................................................................................................42
17. Warranty and After-Sale Service............................................................................................................................43
Appendix 1: Density of pure water (0∼40°C)..............................................................................................................44
Appendix 2: Temperature compensation coefficient for various liquids......................................................................44
Page 5
1
Safety Precautions
Always observe these signs and introductions.
You must observe cautionary messages and warnings in order to protect yourself as well as prevent others
from physical injury or property damages.
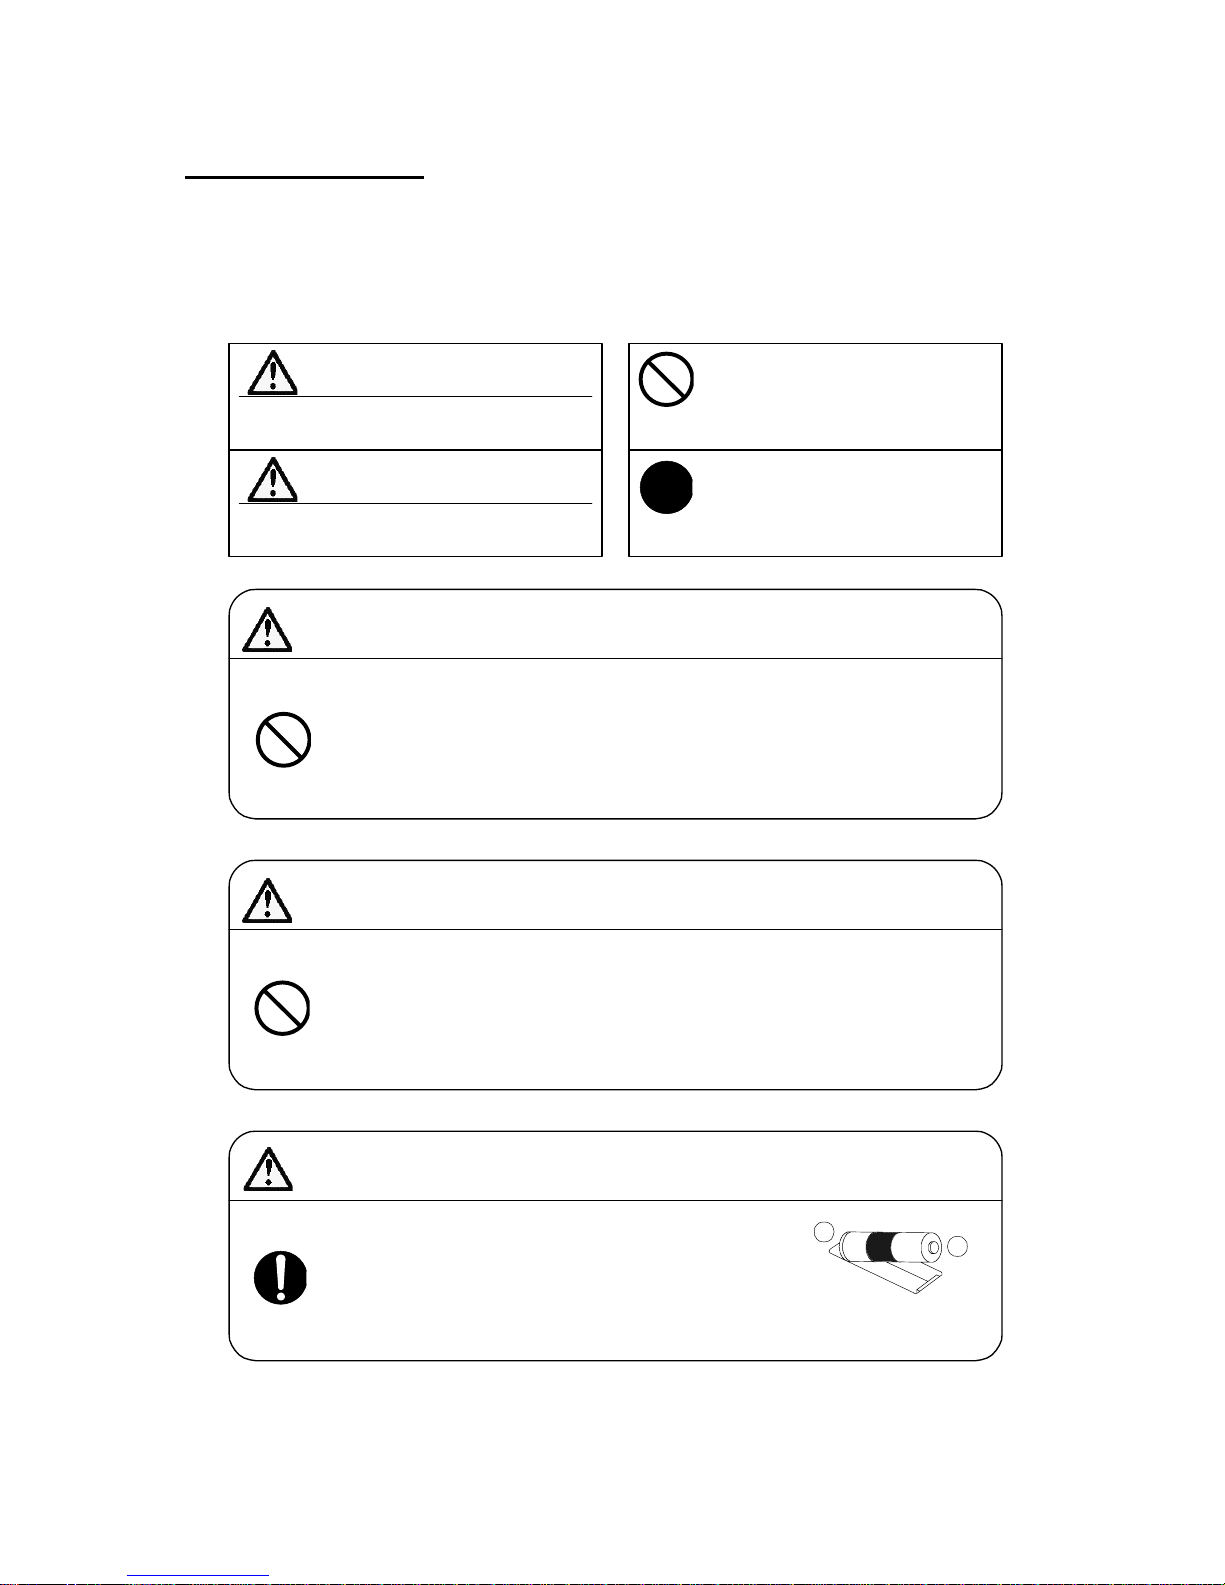
Warning!
This symbol means "Danger of severe injury
or possible death".
Caution!
This symbol means "Danger of injury or
property damage".
This symbol means prohibition of an
act.
This symbol means mandatory.
Warning!
Never overhaul or open the casing the unit except by an authorized KEM service
person.
Danger exists of electric shock, fire or malfunction.
Caution!
Do not use the unit in other way than instructed in the manual.
Danger exists of fire and electric shock, and may damage the unit.
Caution!
Load the battery with correct polarity (plus/minus).
If the battery is loaded with reverse polarity, it will heat up and leak, causing fire, injury
and contamination of the environment.
+
Page 6
2
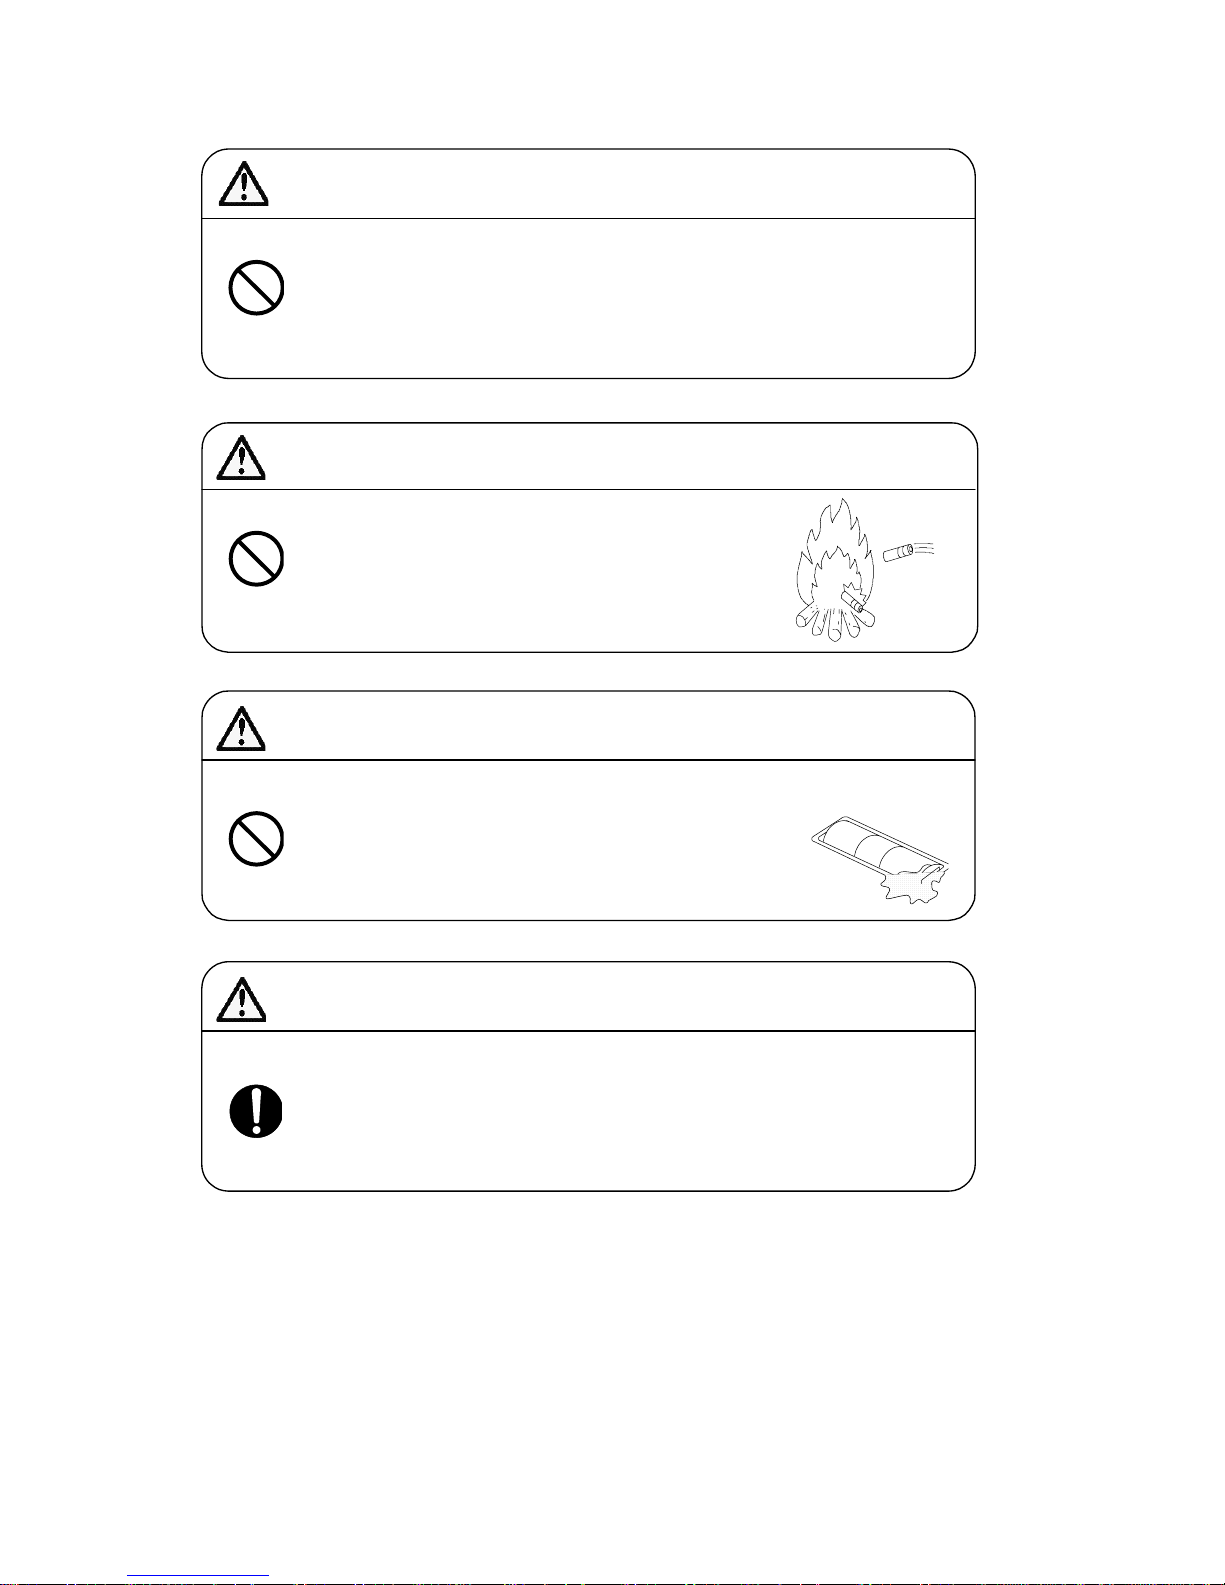
Caution!
Do not use a battery other than specified or mix new and old batteries.
Danger exists of battery heated and leaking, causing fire, burn and contamination of
the enviroment.
Caution!
Do not heat or break the battery or discard it in water or in flame.
Danger exists of battery explosion, causing fire, injury and
contamination of the enviroment.
Caution!
Do not use a leaking battery.
Danger exists of electric short circuit and fire by leaking battery.
Caution!
If battery liquid should touch your skin or clothes, immediately wash away with
running water.
It may cause malfunctioning of the instrument.
Page 7
3
1. Introduction
We appreciate your patronage purchasing 05& product the DA-130N Portable Density Specific Gravity
Meter. By easy operation, you can obtain density and relative gravity of liquid as well as various
concentrations. Please read this manual thoroughly before you use for actual measurement.
1. Supplied parts ············································································································ P.5
Check the supplied parts to see if they are correctly shipped in number.
2. Preparation for measurement ····················································································· P.10
Set the supplied battery in the unit.
3. Preliminary test ·········································································································· P.12
Measure water
(1) Prepare pure water for measurement.
(2) Check the measurement results on pure water.
When delivered
<Caution> If the pure water test did not result within 0.001g/cm3, the measuring cell has to be
calibrated.
Calibration of the meter
4. Measurement ············································································································· P.18
Measure a sample. Prepare a sample and measure it.
Sample measurement
5. Calibration of measuring cell ···················································································· P.21
Calibrate the measuring cell. Prepare pure water.
Daily check
Page 8
4
2. About the manual
It is recommended to keep this manual near your system in order for quick reference.
Here in below, some important messages are described for your safety, security and assurance.
1. Where there exists a danger of physical injury or possible death
Warning!
Danger of physical injury or possible death if the
warning is ignored.
2. Were there is a danger of property damage
Caution!
Property may be damaged if the instruction is not
followed.
3. Where the instrument may perform its function correctly
Note!
If handled or operated other than instructed, the
instrument may not work to its specified
performance and not satisfy the warranty term
and conditions.
4. Meaning of mark or symbol in the manual
This symbol means technical tips helpful in
operating the unit or useful advice.
* It is prohibited to copy a part or whole of this manual without consent of copyright.
* If you should find any missing part or doubtful descriptions in this manual, please contact your sales
representative or local dealer.
* Manufacturer will not be liable for any damage or loss based on the data depicted in this manual.
* This manual stipulates operating instruction for the standard model. If your unit is customer ordered,
please refer to the accompanying specification and instructions.
Page 9

5
3. Supplied parts
Make sure you have received all the necessary parts in the carton box. If you should find any missing
part or broken parts, immediately contact your local dealer.
Supplied parts list
Part code Part name Qty Remarks
98-319-0004 (1) Alkaline dry cell
(size “AAA”)
2 pcs LR03G/1.5V
98-319-0005 (2) Battery holder 1 pc
98-560-0021 (3) Sampling nozzle 1 pc Tetrafluoroethylene resin
/with washer
98-560-0103 (4) Nozzle screw 1 pc
98-595-0492 (5) Operation manual 1 copy
98-595-0490 (6) Basic operation manual 1 copy
98-594-0003 (7) Memo pad 1 pc
(8) Warranty
(Inspection card)
1 copy
(9) Carton box 1 pc
• The supplied alkaline dry cell (size “AAA”) is for the purpose of function
test only.
It is recommended to replace them with new ones earlier.
Page 10
6
4. Parts configuration
4.1 Front view
4.2 Side view
(5) Screw stopper
(1) Display window
(2) Operating key
(3) Sample discharging lever
(4) Syringe cover
(7) Sampling nozzle
(6) Nozzle screw
(8) Sample intake lever
(11) Measuring cell
(9) Intake lever stopper
(10) Built-in syringe
Page 11
7
4.3 Rear view
(12) Battery cover
(13) Infra red receiver/transmitter
Page 12
8
4.4 Display window
Results screen Memory clear screen
(1) (2) (3) (4)
(5) (6)(7) (8) (9) (10) (11)
(1)
Shows unit for measurement data.
(2)
Shows measurement data in preset unit.
(3)
Shows sample name (a to z or space)
(4)
Normal display shows sample number.
Error number will appear in case of error.
(5)
Appears when Stability is set at Auto (automatic stability sense mode).
The measurement results are automatically held by the automatic sense.
(6)
Appears when Memory in is set at Auto (saving). When measurement data is held,
the results are automatically stored in the unit. When the data are saved, this
symbol blinks.
(7)
Appears when Memory out is set at Auto (output). When Printer or Personal
computer is connected, the data is automatically output on data being held. This
symbol blinks when data is being output.
(8)
The battery capacity level is shown.
(9)
Shows measurement temperature (Celsius /Fahrenheit)
(10)
Appears in data deletion mode on Memory clear.
(11)
The “*” mark appears when data is marked with [mem. clr/all] key.
This mark is useful for data control to identify unnecessary data of
measurement failure.
Page 13
9
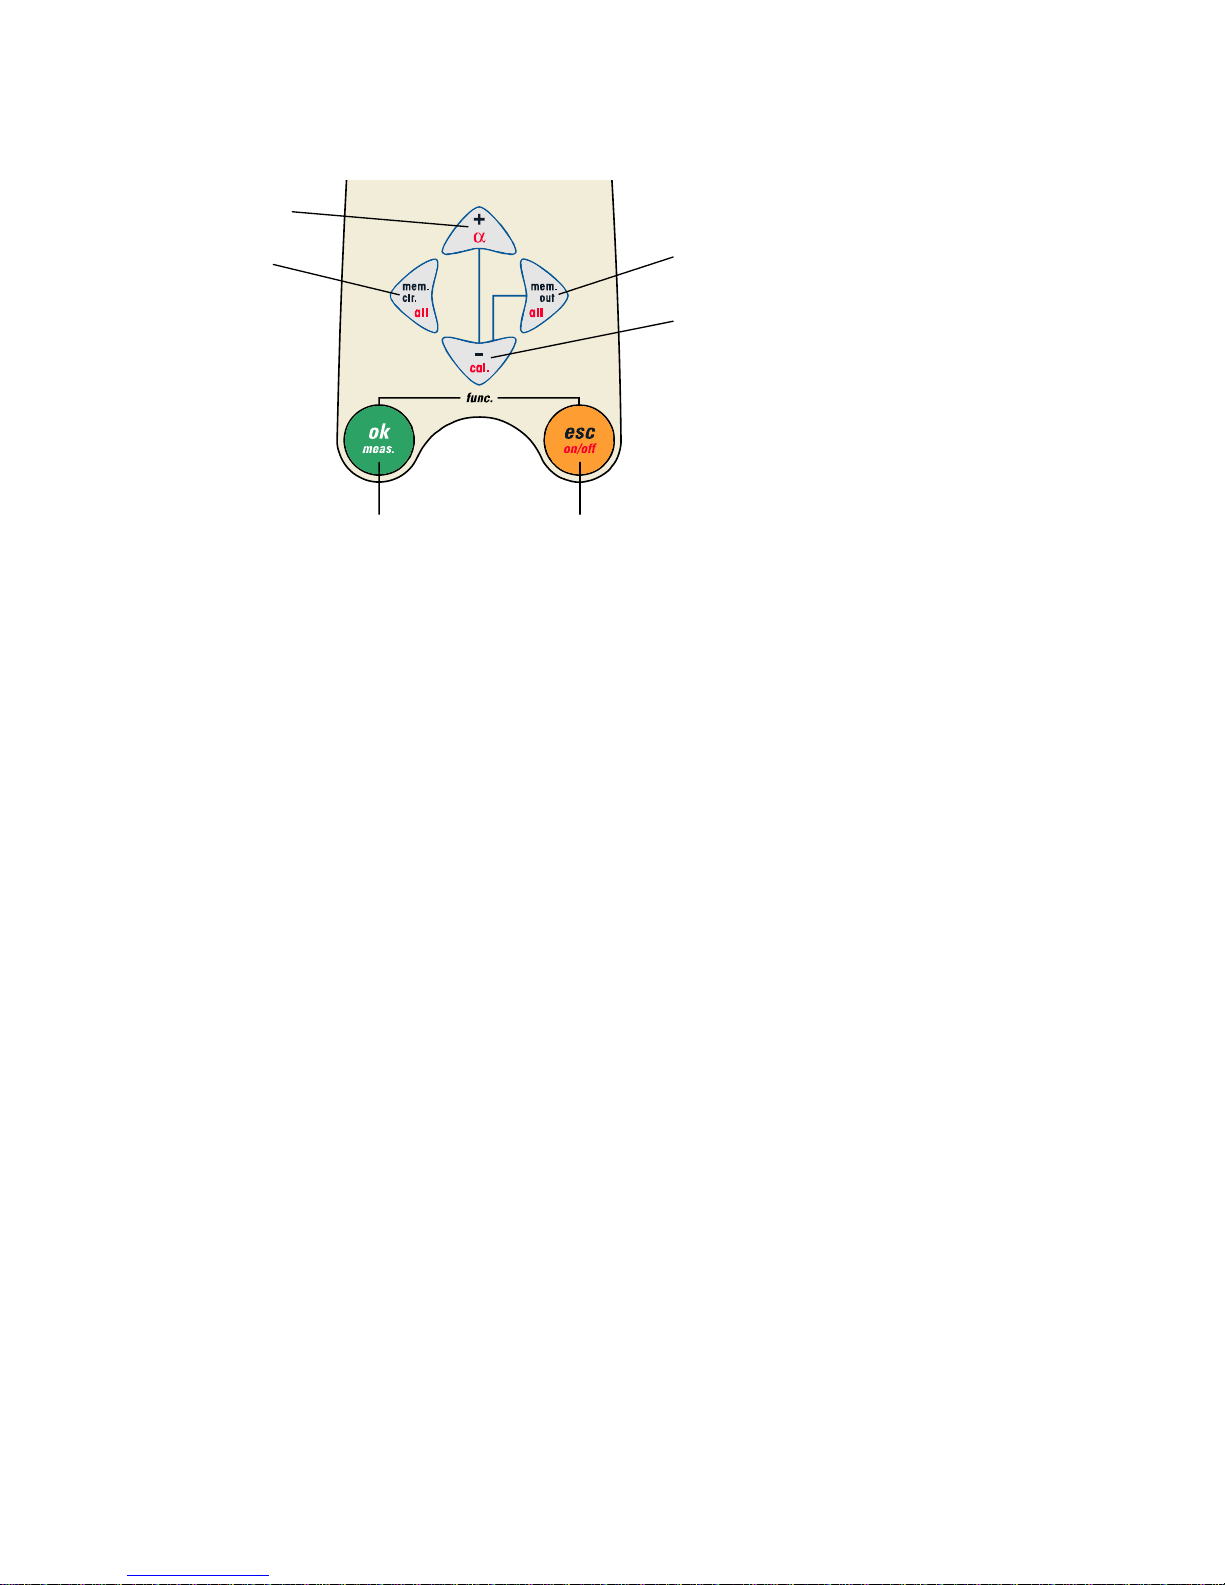
4.5 Operating unit
(3)
(1)
(2)
(4)
(5) (6)
(1)
[mem.clr./all] key: Key to put “*” mark to identify data when data is output externally. When
pressed for more than 2 seconds, all data can be cleared.
Also this key shifts the cursor to the left for numerical entry.
(2)
[+/α] key: Key to move the cursor upward on selection. It selects temperature
compensation coefficient
α by pressing for more than 2 seconds. This key
also increments a number for numerical entry.
(3)
[mem.out/all] key: Key to output data externally. By pressing for more than 2 seconds, all data
or certain data can be output. This key also moves the cursor to the right in
numerical entry.
(4)
[-/cal] key: Key to shift the cursor downward on selection. Pressing for more than 2
seconds turns the mode to calibration. This key also decrements a number on
numerical entry.
(5)
[ok/meas.] key: Key to start measurement or hold data on measuring screen.
When pressed with [esc] key at the same time, it turns the mode to Function.
This key also confirms the selection or numerical entry. This key stores the
measurement data when Memory in is set at Manu and the data is held. This
key executes data clear or data output.
(6)
[esc/on/off] key: Key to return the screen from Function to Measurement. This key also turns
on the unit when pressed for more than 2 seconds while the unit is off, and
turns it off when the unit is on.
Page 14
10
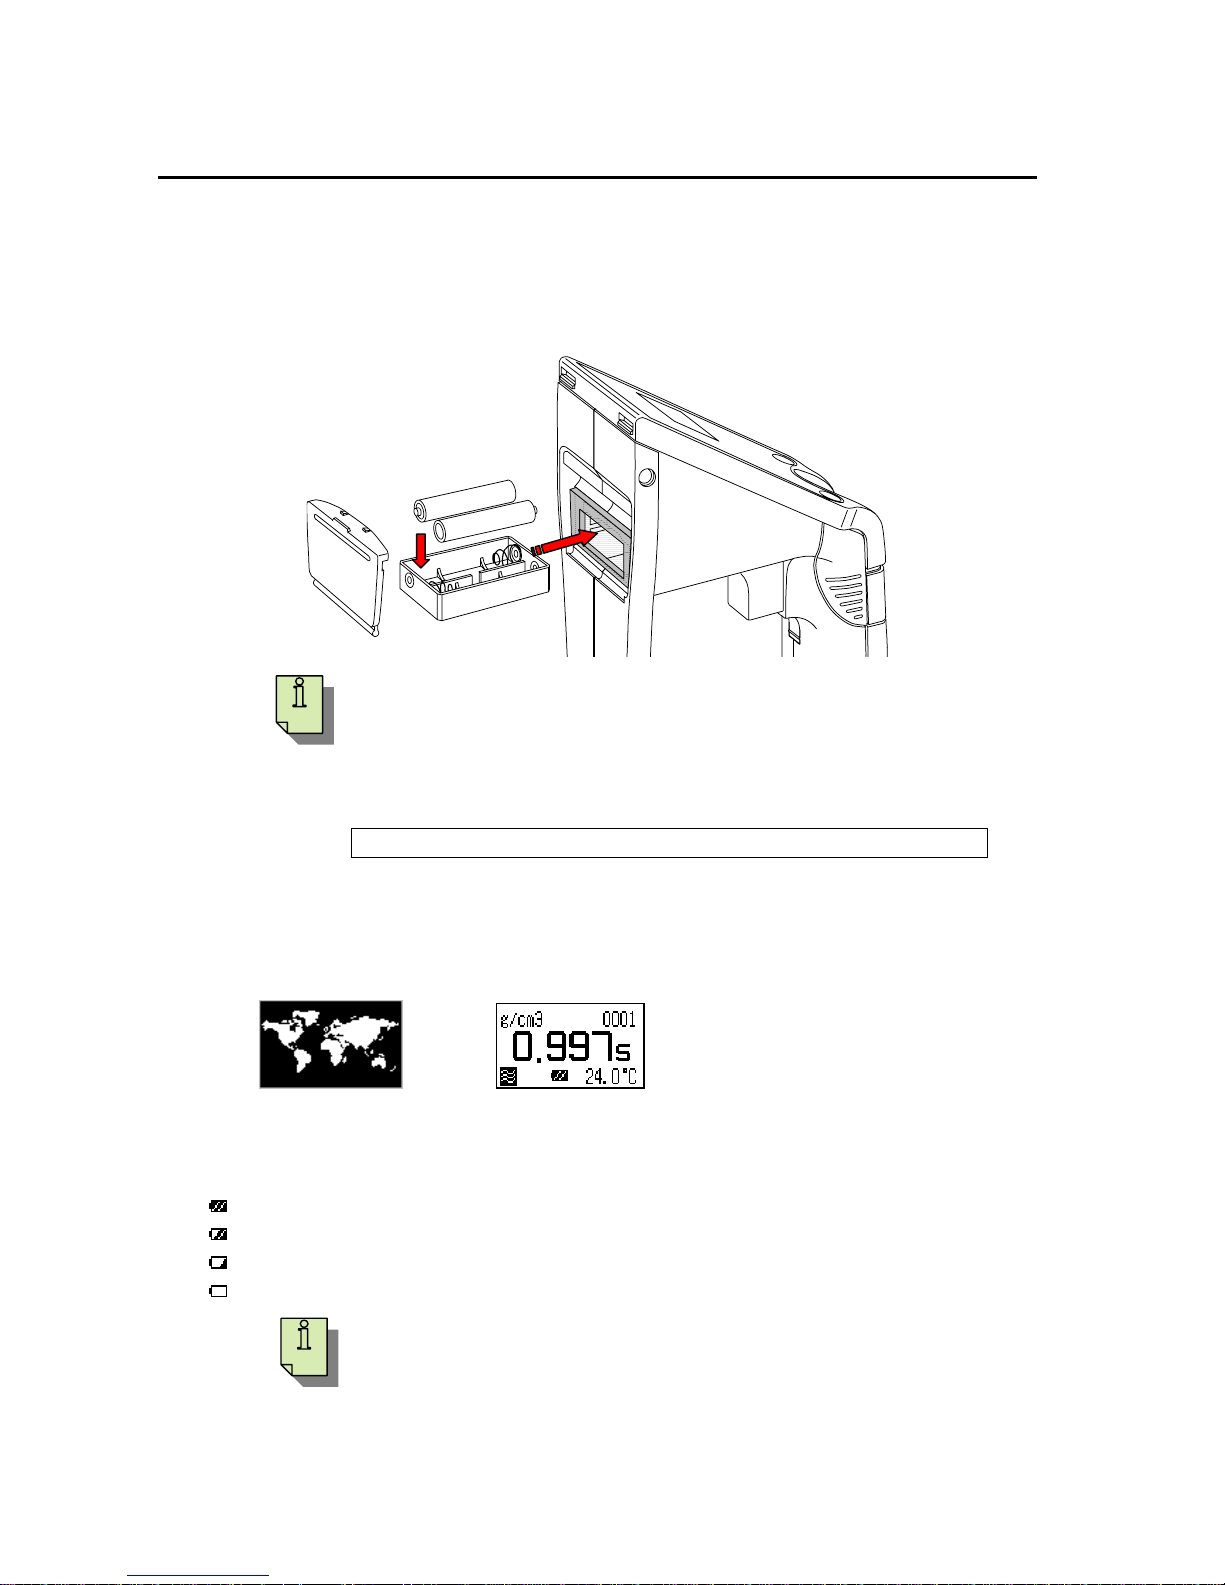
5. Preparation for measurement by DA-130N
5.1 Loading the battery
Set the dry cells in the battery holder. Use alkaline dry cells (size “AAA”). Insert the cell while paying
attention to the polarity direction. Remove the battery cover by pulling it out.
Slide in the battery holder all the way to the end, and put on the cover.
• Insert to see the flat bottom touch the spring.
• Press [On/Off] to check the display. If display does not appear, check the battery
direction.
• When replace the battery, change all of the cell at the same time.
• Always use the same type of dry cell.
(Note) Do not use other dry cell than alkaline “AAA” type, e.g. NiCd dry cell
Press [On/Off] key for more than 2 seconds to turn on the power.
The below initial screen will appear and when it changes to measuring screen, the unit is working in
normal condition.
Initial screen Measuring screen (above is an example)
The battery capacity can be checked on the measuring screen.
: Enough energy is stored (Level 3)
: It is running down. (Level 2)
: Almost no more energy. (Level 1)
: Change the battery. (Level 0) * the alarm will sound.
• The above capacity level is just for as a guide.
• Beep sounds only when the power is turned on.
+
−
+
−
Page 15
11
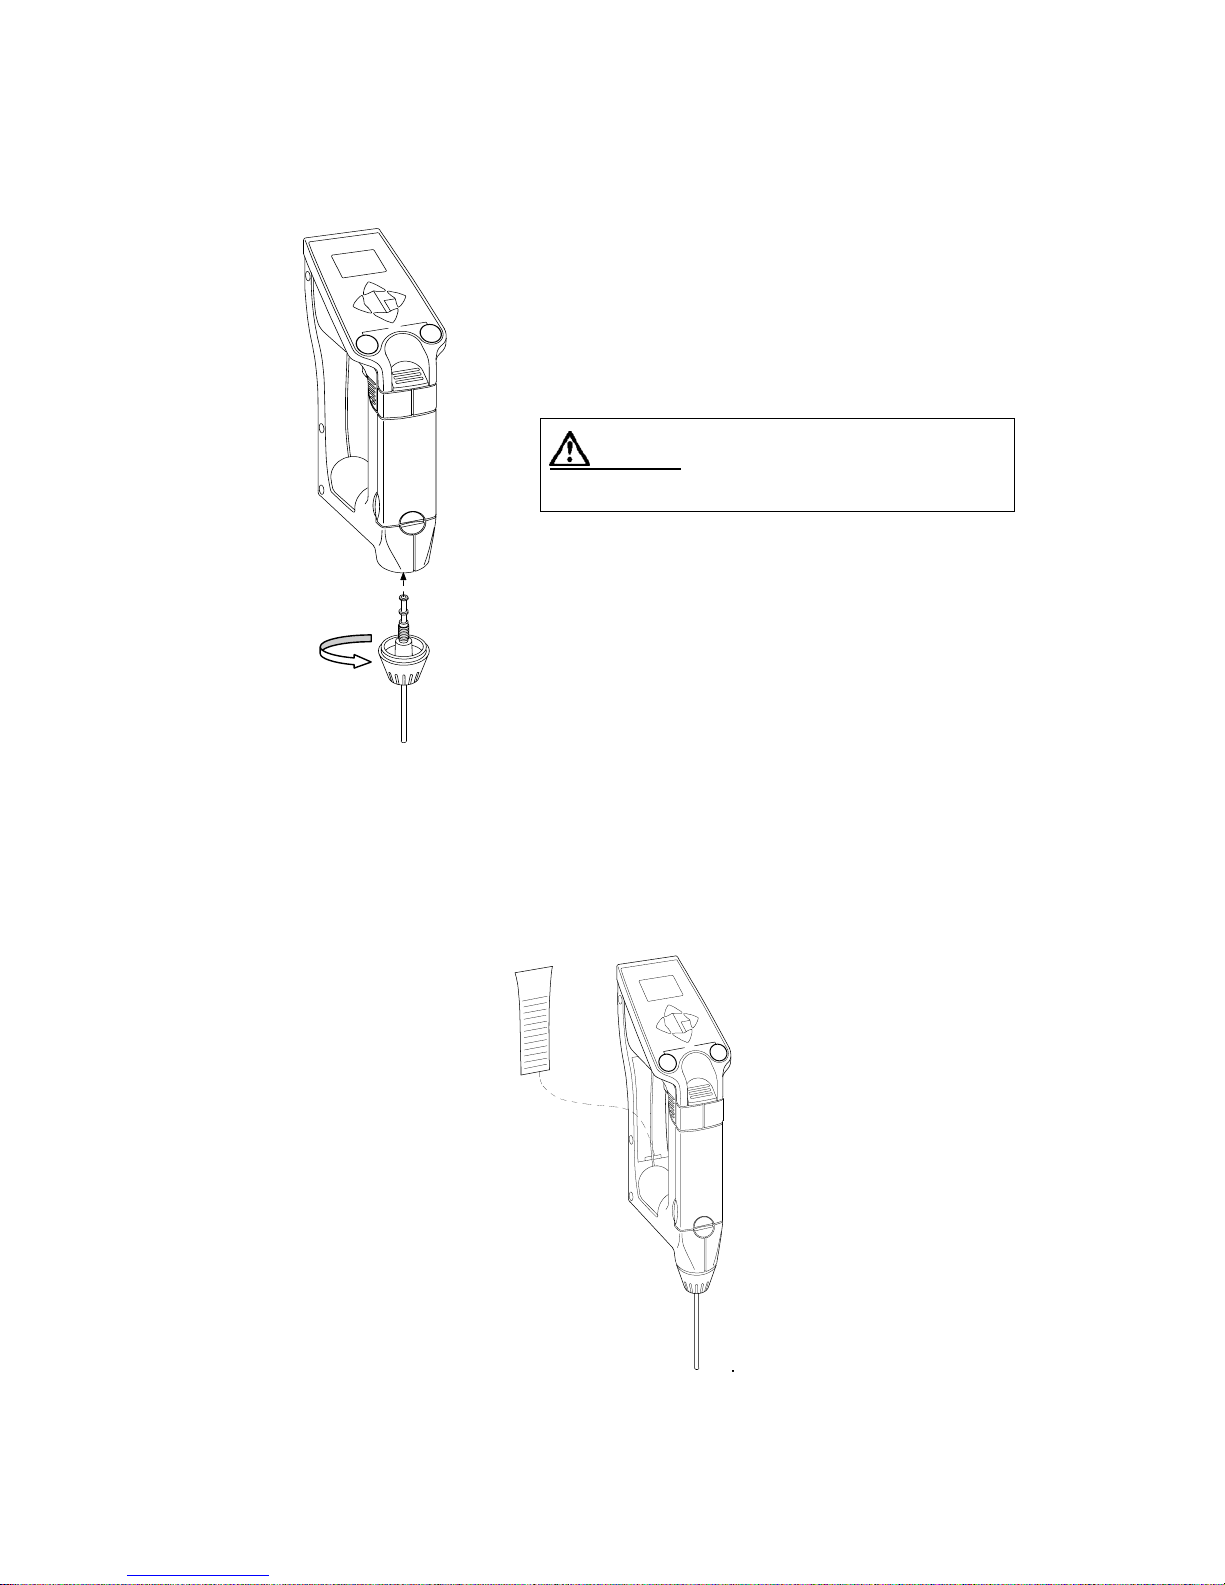
5.2 Setting the sampling nozzle
Attach the supplied sampling nozzle as illustrated:
• Screw the sampling nozzle with the washer into the
nozzle screw, and screw it in clockwise until it is
securely fixed.
• Use your hand to avoid stripping the screw thread.
Caution!
Do not use a tool like pliers.
5.3 Setting the memo pad
Fill necessary items in the memo pad, and put it on the main unit.
Page 16

12
5.4 Preliminary test
Leave temperature unit (Celsius), measurement unit (g/cm
3
) and mode (Field) as initial value.
Sample in pure water using the syringe.
• After the measuring cell is filled with sample liquid,
make sure there is no air bubble in the cell. Even a
small bubble would deviate the results. If any
bubbles are found, repeat sampling from the
beginning.
• Always use the supplied sampling nozzle.
Example:
⇐ Density at current temperature
The display changes as above, and after confirming it is in the automatic stability sense mode, press
[Meas.] key. When the display density is stabilized, the value will automatically change reversed as
shown below. Read the data at this point as well as the temperature degree.
Example:
⇐ The reading changes to reverse display when the value is stabilized.
Look up to the pure water density table (appendix 1). If the results agree within
±0.001g/cm3, you can
go for sample measurement.
Note!
If the results and theoretical value differ more than ±0.001g/cm3,
recalibrate the measuring cell.
Page 17

13
6. Setting temperature unit, measuring unit and mode
6.1 Temperature unit
Select Celsius or Fahrenheit.
While pressing [esc] key, press [ok/meas.] key to show Function screen.
Select <Temp. Unit> by [ + ], [
− ] key.
ok
Select temperature unit with [ + ], [
− ] key and confirm by [ok/meas.] key.
6.2 Measuring unit
While pressing [esc] key, press [ok/meas.] key to show Function screen.
Select <Measure Unit> by [ + ], [
− ] key.
Select measurement data unit by moving the cursor with [ + ], [ − ] key, and confirm by [ok/meas.] key.
Twelve units are selective as below:
(1) Density (5) API (9) Boume
(2) Comp. Density (6) Brix (10) Plato
(3) SG(t/t) (7) Alcohol (11) Proof
(4) SG (8) H2SO4 (12) Conc.
(1) Measurement of density
ok
g/cm3 : Measurement of true density in g/cm3 at temperature on display
lb/gal(US) : Measurement by converting to US unit (1g/cm
3
=8.3454 lb/gal)
lb/gal(IP) : Measurement by converting to British unit(1g/cm
3
=10.0224 lb/gal)
(2) Measurement of temperature compensated density
ok
Measurement of true density in g/cm3 at preset temperature
Page 18

14
It is necessary to configure temperature compensation coefficient of sample and converted
temperature in advance.
10 coefficients for temperature compensation can be stored.
Comp. No. : Select out of 10 stored values.
Comp. Temp : Set compensation temperature.
α×1000 : Set value of (Temp. comp. coefficient of sample ×1000)
The Comp. Density for Comp. Temp is obtained from the following formula based on the Density at
measurement temperature (Temp.):
Comp. Density = Density
× {1 + α × (Temp – Comp. temp)}
On the temperature compensation coefficients for typical solutions and how to determine the
coefficients, refer to Appendix 2.
How to obtain temperature compensation coefficient: (depends on sample)
(1) Using your unit, obtain density at measurement temperature at different ambient condition
(indoor and outdoor), and calculate density change (α×10
3
) per 1°C from density difference at
different temperature.
(2) Temperature compensation coefficient can be obtained, using Hydrometer or Oscilation-type
meter (e.g. KEM’s DA-500), by changing measurement temperature.
The preset α value can be selected on the measuring screen.
While Comp. Density, SG, Conc. is selected, press [
α ] key for more than 2 seconds.
The
α value appears on upper left on the screen. Pressing [ + ], [ − ] key displays α0 to α9 one after
another. Choose desired
α value and confirm by [ok/meas.] key.
(3) Measurement of specific gravity
Measurement of true specific gravity at displayed measurement temperature
(4) Measurement of specific gravity temperature compensated
ok
Measurement of true specific gravity at preset temperature
It is necessary to configure temperature compensation coefficient of sample and two reference
temperature degrees in advance.
10 coefficients for temperature compensation can be stored
On the temperature compensation coefficients for typical solutions and how to determine the
coefficients, refer to Appendix 2.
For how to obtain temperature compensation coefficient, refer to “(2) Density measurement at
temperature compensated.”
Page 19

15
(5) Measurement of API degree
ok
Measurement of density or API degree compensated in temperature to 15
°C or 60°F for the product
group A, B or D.
Selection of temperature, 15
°C or 60°F, will be automatically made when setting the temperature unit.
Product group A: Crude oil
[Measurement of density: API A (Density) Measurement of API degree: API A (Degree)]
Product group B: Fuel, Petroleum products
[Measurement of density: API B (Density) Measurement of API degree: API B (Degree)]
Product group D: Lubricant
[Measurement of density: API D (Density) Measurement of API degree: API D (Degree)]
(6) Measurement of Brix concentration
Measurement of Brix concentration (sucrose concentration expressed in weight %) based on density at
20
°C
(7) Measurement of Alcohol concentration
ok
Measurement of alcohol concentration of Ethanol/Water mixed system in wt % or vol % at 15°C or
20
°C calculated from the density at the measurement temperature.
(8) Measurement of sulfuric acid concentration
Measurement of sulfuric acid concentration in weight % from density measured at 20°C
(9) Measurement of Baume degree
Measurement of Baume degree at converted temperature from density value measured at the
measurement temperature
Set “Comp T” to “15/04
°C” and input “α” in the previous (4), measurement of specific gravity with
temperature compensated, followed by setting the unit at “Baume”.
Page 20

16
(10) Measurement of Plato degree
Measurement of Plato degree at 20°C from density obtained at measurement temperature
(11) Measurement of Proof degree
ok
Measurement of Proof degree at 60°F from density obtained at measurement temperature
Proof degree is one of the units for alcohol content, and there is US Proof and British Proof. Each of
them is different in conversion degree.
Proof (US) : Measure in US Proof unit (100v/v%=200 US Proof)
Proof (IP) : Measure in UK Proof unit (100v/v%=175 British Proof)
(12) Concentration measurement by setting desired concentration conversion formula
Set “Comp. Temp” and “α” in the previous (2), measurement of density with temperature
compensated or in the previous (4), measurement of specific gravity with temperature compensated.
Then, concentration can be calculated using the calculated “Comp D” or “SG”.
User defined concentration conversion formula (Linear expression: y = a + bx)
Conc.(%) Den.(g/cm3) at 20°C Conc.(%) Den.(g/cm3) at 20°C
10.0 0.9820 10.6 0.9842
10.1 0.9824 10.7 0.9845
10.2 0.9827 10.8 0.9849
10.3 0.9831 10.9 0.9852
10.4 0.9835 11.0 0.9855
10.5 0.9838
For example from the above data, a conversion formula can be obtained as follows.
Suppose take y for concentration and x for density, you can obtain y=283.2x–268.1 by the
approximate formula from regression line using commercially available spread sheet software.
Therefore, you input –2.681E+2 for coefficient ‘a’ and 2.832E+2 for coefficient ‘b’.
Example of input: Example of measurement:
(when density is 0.9820 g/cm3)
Page 21

17
6.3 Configuration of measurement mode
Configuration of stability sense and data storage method
While pressing [esc] key, press [ok/meas.] key to show Function screen.
Select <Measure Mode> with [
+ ], [ − ] key.
Press [ok/meas.].
Custom Field Labo
Sample Name : Single alphabet (space, a to z) can be used for identification.
Stability : Setting automatic stability sense mode (Auto, Manu)
[Auto] Checks stability of density of sample automatically. If stabilized, the measurement
data is automatically retained.
[Manu] After measurement, press [ok/meas.] key to hold desired measurement data
Mode : Setting automatic stability sense mode (Custom, Labo, Field)
[Custom] Selection of mode for automatic saving retained measurement results or output
externally.
You can select Memory in or Memory out as follows:
Memory in : Setting storage method of measurement results
[Auto] When measurement results are retained, the value is automatically saved.
[Manu] After measurement results are retained, press [ok/meas.] key to save desired
measurement data
Memory out : Setting output method of measurement results
[Auto] The measurement results are retained and the value is automatically printed out
simultaneously.
[Manu] Press [mem.out/all] key to output the measurement data.
[Labo] The retained data is manually saved with [ok/meas.] key and automatically output
externally.
Memory in to set to “Manu” and Memory out to “Auto” automatically.
[Field] The retained data is manually saved with [ok/meas.] key.
Memory in to set to “Manu” and Memory out to “Auto” automatically.
Page 22

18
7. Actual measurement
7.1 Cautions on measurement
• When sample temperature and ambient temperature differ significantly, the upper left corner on
display blinks.
Here it blinks
When difference in temperature between sample in the cell and ambient comes within
approximately
±5°C, it stops blinking.
If the measurement data is going to be saved manually, not automatically, you have to wait until the
data is stabilized after blinking stops.
• If the difference is significant (more than 20°C) and the sample temperature is low, it will cause
measurement error with the measuring cell blurred. To avoid this, raise sample temperature close up to
the ambient before sampling.
• When different kinds of sample are going to be measured, the measuring cell must be rinse cleaned each
time before a different type of sample is measured.
• For measurement of highly viscous sample (more than 2000mPa⋅s), refer to the sampling method by a
plastic syringe separately sold.
• When the separately available plastic syringe is used for sampling, if you need excessive pressure in
pushing the cylinder, stop injecting, and check the cell to see any solid clogged up and find out the cause
for remedy. If you should give extraordinary force, the joint will come off and the sample or solvent
will be splash out, leading to breaking the cell.
• Before starting a measurement, check the affect on all the sample liquid contact parts.
∗ Sampling nozzle - PTFE
∗ Measuring cell - Borosilicate glass
∗ Built-in syringe - PP polypropylene
Before starting a measurement of whatever kind or nature, be sure to prepare appropriate solvent or
detergent.
• When sampling a test material into the cell, be careful not to allow air bubble blended especially for a
sample of high viscosity. Take your time in sampling slowly and carefully. The possible cause for air
bubble is considered to be: leaking at screw to fasten syringe or sampling nozzle or gas generated in the
sample.
• Fill up the measuring cell completely.
• After a series of measurements is over, clean the system including inside wall of measuring cell to avoid
any residue of sample.
• If the built-in syringe sticks, remove it and rinse clean thoroughly.
Page 23

19
7.2 Sample measurement
7.2.1 When the built-in syringe is used
7.2.1.1 Sampling test materials
1. Make sure the sample discharging lever is pushed down
to the bottom.
2. If not, slowly push it down with your thumb.
3. Dip the sampling nozzle in the sample liquid.
4. Slowly pull the sampling lever with the forefinger.
When the cell is filled with sample, release your finger.
Caution!
Be sure to rinse the built-in syringe by repeating sampling of pure
water after a day’s measurements. Failure can lead to the
solidification of a sample (e.g. Sulfuric acid). If the syringe should be
forced to be moved in this solidification state, it would scratch the
inner surface, causing a possible leakage of a sample inside DA-130N.
7.2.1.2 Start measurement
Only when is displayed (Stability:Auto), start measurement with [ok/meas.] key.
7.2.1.3 Hold measurement data
When is displayed (Stability:Auto), the value will automatically turn to reversed when the reading
stabilizes.
If
is not displayed (Stability:Manu), wait until the reading stabilizes, and press [ok/meas.] key. The
reading will be withheld shown in reversed mode.
7.2.1.4 Saving measurement data
When is displayed (memory in: Auto), the reading will be automatically saved if retained.
If
is not displayed (memory in: Manu), press [ok/meas.] key while the reading is withheld. The data
at this point will be saved.
Page 24

20
7.2.2 The use of commercially available plastic syringe
7.2.2.1 Sampling
1. Lower the sample discharging lever to the bottom.
2. Push the intake lever stopper upward to lock it.
3. Remove the screw stopper with a coin. Do not lose
the screw stopper.
4. After fixing optional grommet (98-561-0005), squeeze
in the syringe adapter (98-581-0057).
5. Leave dipped the tip of sampling nozzle in the waste
bottle.
6. Inject sample liquid into the cell with the syringe.
7. When the cell is filled with sample, leave the syringe as
it is.
Caution!
When filling the sample with a syringe, push it as slowly as possible.
If it is abruptly pushed, the unit can be broken as the result of
detachment of the sample discharging lever.
7.2.2.2 Start measurement
Only when is displayed (Stability:Auto), start measurement with [ok/meas.] key.
7.2.2.3 Hold measurement data
When is displayed (Stability:Auto), the value will automatically turn to get reversed when the reading
stabilizes.
If
is not displayed (Stability:Manu), wait until the reading stabilizes, and press [ok/meas.] key. The
reading will be held in reversed mode.
7.2.2.4 Saving measurement data
When is displayed (memory in: Auto), the reading will be automatically saved when retained.
If
is not displayed (memory in: Manu), press [ok/meas.] key while the reading is held. The data at
this point will be saved.
Page 25

21
8. Calibration of measuring cell
8.1 Calibration with pure water
(1) Set STD Calib. Mode at “Off” on Function <Calib.Mode>.
ok
(2) Press [esc] key 2 times to return to Main screen.
(3) Sample pure water
Note: Make sure that there is no air bubble in the measuring cell.
(4) The measuring cell with pure water can be calibrated automatically with the key entry as follows:
Press [cal.] key for more than 2 seconds to show inversed CALIB(Water) on display, showing
calibration with pure water is in progress.
(5) All calibrations are automatically stability sensed.
(6) After calibration is over, the deviation from theoretical value will be shown so that you can check if
the calibration has been successfully completed.
If the deviation from theoretical value falls within
±0.001g/cm3, calibration is in success. Choose
Execute?(Yes) and store the factor value in the unit.
If the deviation is more than
±0.001g/cm3, select (No) and do not renew factor value. If a wrong
value is stored, correct measurement data cannot be obtained.
When the deviation is more than
±0.001g/cm3, recalibrate the measuring cell with pure water. If the
deviation still differs significantly from theoretical value, there is a possibility of the measuring cell
contaminated. Clean the cell thoroughly for recalibration with pure water.
If the deviation persists even with repeated rinsing of the cell, select “Execute?” --> ‘Yes’ after
carrying out calibration, followed by checking to see if correct measurement results can be obtained
with a standard liquid.
Note!
Be sure to set the ‘STD Calib. Mode’ to “Off” in the Function menu
(Calib. Mode) before performing calibration with pure water.
Page 26

22
8.2 Calibration with standard liquid
8.2.1 Calibration with standard liquid of which density is known
The measurement precision of DA-130N as specified can be usually maintained with pure water, however,
if more precision is preferred, calibrate with standard liquid of which density is known within the range.
While pressing [esc] key, press [ok/meas.] key to show Function screen.
Choose <Calib. Mode> with [
+ ], [ − ] key.
ok ok
Off : With [
α ] key pressed, press [cal.] key to calibrate with air.
(not calibrate with standard)
On : With [
α ] key pressed, press [cal.] key to calibrate with standard.
Select “On” to configure density and temperature compensation coefficient of standard
liquid.
Density : Set density (g/cm3) of standard liquid
Temp : Configure degree Celsius of density preset on Density
α ∗ 1000 : Set the value of (temp comp value of standard × 1000)
For details, refer to the section “6.2 Measuring unit (2) Measurement of temperature
compensated density.”
Note!
Be sure to set the ‘STD Calib. Mode’ to “Off” in the Function menu
(Calib. Mode) before performing calibration with pure water.
8.3 Calibration with air
8.3.1 Calibration with air
Note!
The measurement precision of DA-130N as specified can be usually
maintained with pure water, however, for the following condition,
calibrate with air:
When there exists difference between the density value of dry air and
the true value.
• The density of dry air in room temperature (10 to 35°C) is 0.0012 g/cm
3
.
• If there exists difference in value, calibration only with pure water will lead to a
measurement error.
• For example; if the density of test sample is within the range 0.8 to 1.2 g/cm3, and
the density of air is 0.0001 to 0.0058 g/cm3, measurement can be made within
±
0.001 g/cm3 of precision.
• You can determine whether calibration with air is necessary or not from the
density of the sample you are going to test.
Page 27

23
8.3.2 How to dry the cell
Preparation : a set of simple equipment is necessary as follows:
Air pump : Air discharge rate 1 to 2L/min
(a pump for tropical fish can be used)
Desiccant tube : silica gel 5 to 10g in tube
Connect the above to DA-130N as illustrated below:
Empty container
Air pump
Desiccant tube
For 4mm tubes of inside diameter
(1) Thoroughly clean the measuring cell with pure water.
(2) Clean with ethyl alcohol.
(Ethyl alcohol gets rid of dirt which cannot be removed with pure water, and hastens dry
cleaning. If ethanol is unavailable, clean the cell thoroughly)
(3) Purge air to dry the cell thoroughly and completely.
(4) When the measuring cell is cleaned routinely:
Only cleaning with pure water : ca. 5 to 10 minutes to complete drying
Additional cleaning with ethanol : ca. 3 to 5 minutes to complete drying
(5) Once purging air is stopped, leave the cell for more than 30 minutes.
(Calibrating before the cell temperature equilibrates with room temperature will result in
failure)
Page 28

24
When the optional manual pump is used to dry the cell.
(1) Before connecting the kit, clean the cell with pure water and ethylalcohol.
(2) Press the sample discharging lever all the way down, and push the sample intake lever upward to lock
it.
(3) With the adapter for the syringe attached, connect the kit as illustrated below, and feed air forcefully
and manually.
Squeeze here to
pump in air.
8.3.3 Procedure of calibration with air
When the measuring cell is in dried state, follow calibrating steps as below:
(1) Set STD Calib. Mode at “Off” on Function <Calib.Mode>.
ok
(2) Press [esc] key 2 times to return to Main screen.
(3) With
[ α ] key pressed, press [cal.] key. The display shows CALIB(Air) in reverse mode, indicating
calibrating with air.
When the display returns to Main, it means the calibration has been completed.
Normally, calibration will be completed within 2 minutes.
(4) Proceed to calibration with pure water or reference solution.
See “8.1 Calibration with pure water” or “8.2 Calibration with standard liquid.”
Page 29

25
Note!
Be sure to set the ‘STD Calib. Mode’ to “Off” in the Function menu
(Calib. Mode) before performing calibration with air.
8.4 Calibration of displayed temperature
Ordinarily, there is no need for calibration since the instrument has been calibrated in plant before
shipment. If you should observe difference in temperature between actual and displayed, follow the
below steps for calibration:
Make sure that the automatic stability sense mode is set at ‘manu’ and ‘memory in’ at ‘manu.’ After
confirming the display reaches equilibrium with ambient temperature, press [ok/means.] key to reverse the
reading on display and hold. Record the difference between displayed and actual temperatures.
With [cal.] key pressed, press [mem.out/all] key to blink the upper most digit on displayed temperature.
Input temperature with [
+ ], [ − ] key. While shifting the digit with [mem.clr.], [mem.out] key, enter
“(actual temp – displayed temp) = difference with [
+ ], [ − ] key. When confirmed with [ok/meas.], the
hold status is canceled, and the calibration on the displayed temperature will be completed.
• The displayed temperature can be calibrated manually with key entry only
when automatic stability sense mode is set at ‘manu’ and ‘memory in’ at
‘manu.’
8.5 Recalibration
• Before you measure another kind of sample, you must clean the system.
• Insufficient clean will leave residue in the measuring cell, leading to incorrect density results.
• To check any residue in the cell, measure pure water.
• If measured value deviates more than ±0.001g/cm3, recalibration must be carried out.
Page 30

26
9. Application of data processing
9.1 Storage of measuring data
The maximum number of data which can be stored in DA-130N memory is 1100 samples.
9.1.1 Auto saving
Set ‘Memory In’ for “Custom” mode at “Auto” of Function <Meas. Mode>.
symbol appears on the lower-left on the screen display.
The measurement results are retained and at the same time saved automatically.
9.1.2 Manual storage
Select “Field” or “Labo” mode on Function <Meas. Mode>, or set Memory in to “Manu” in “Custom”
mode.
Measurement results can be withheld and saved by pressing [ok/meas.] key.
Whether the resulting data may be saved either automatically or manually, the sample
number at the upper-right corner on the display will increment.
9.2 Making saved data
This mark is useful for data management to identify unnecessary data or various different
kinds of sample when switching to another.
1. Press [mem.clr] key to blink the latest sample number on upper right corner and turn on mark at
the bottom line.
2. Change sample number with [
+ ], [ − ] key, and display measurement data of each sample number.
Press [ok/meas.] key for the data you want to put the mark.
3. The “
∗” symbol is marked under the selected sample number, and this mark will appear while the
data is printed out. This is useful for data management.
4. To erase “
∗” mark, press [ok/meas.] key on the screen of the data you want to eliminate.
ok
9.3 Deletion of stored data
• Clear all data at once
1. When [mem.clr] key is pressed for more than 2 seconds, the message, “Memory All Clear
Execute? (Yes/No)” will appear.
2. Choose “Yes” and press [ok/meas.] key to erase all the data, and bring back the sample number to
‘0001.’
Page 31

27
9.4 Display of measurement data and external output
You can recall the stored measurement data on display again, or output to the optional printer or PC.
• How to recall a measurement data on display
1. Press [mem.out] key to blink the sample number on upper right corner.
Here it blinks
2. Change the sample number with [
+ ], [ − ] key, and you can recall the stored data of specific
sample number.
• How to output single sample measurement data
1. While a data is shown on display with [mem.out] key pressed, press [ok/meas.] key to blink
symbol and print out or output to PC.
• How to output a series of sample measurements or all of the data
1. With [mem.out] key pressed for more than 2 seconds, the message ‘Memory Out’, Execute? (All)
will appear at the upper-left corner on the display.
2. Select “All” and press [ok/meas.] key to blink
, and all the stored data will be printed out or
output to PC.
3. After the data are output, the below message will be prompted asking whether to erase or not. If
you want to erase it, choose “Yes” and execute with [ok/meas.] key.
4. If you output a series of sample measurements, select “Range” and press [ok/meas.] key, the range
where you can make entry will appear as shown below. After entering the data that you want to
output, execute with [ok/meas.] key.
ok
After the output is completed, the display will return to the initial screen display (meas. mode).
Page 32

28
9.5 Setting external output
9.5.1 Data output to a personal computer via infrared communication
The DA-130N can transmit data to a personal computer with an infrared optical communication feature.
For this purpose, install the data acquisition computer software (Mini Term). (It can be reached from our
website (
ZZZPUFODEFRP). C
lick “PRODUCT,” then click “DA-130N
(Portable M
odel)” in the Density/Specific Gravity Meter section. The “Data communication Software
for Portable Analyze” (98-439-0062) can be downloaded from there.)
You need to refer to the instruction manual for your computer as well as this manual.
Follow the instructions below for the setup to connect DA-130N to PC:
(1) Preinstall the IrDA driver of Microsoft if the OS of your PC is ‘Windows95’ with the infrared
feature.
When the preinstalled program is activated, the dialog box below will appear.
(2) Make sure that the infrared port matches COM port on the option box screen of infrared monitor.
Select COM7 for Mini Term communication port.
(Set COM port No. and transmission rate at 9600
baud rate on ‘Mini term’. No other settings are
necessary.)
IrDA protocol: Data length 8 bit
Parity none
Stop bit 1
(These parameters are fixed.)
After you finish setting on this screen, activate Mini
Term for further setting.
Page 33

29
(3) Setting the infrared interceptor for DA-130N and PC
Place the optical interceptor of DA-130N to face PC’s receiver within. The maximum effective
angle of DA-130N infrared receiver both left/right and up/down is 15 degree.
within 20cm
The infrared ray lined PC
(4) Select “IrDA”(infrared transmission) on Function-<Interface> of DA-130N.
ok
(5) Press [mem.out] key on DA-130N to show the measurement results, and press [ok/meas.] key to
blink
. The data will be output to PC as well as appear on the screen display.
While the data is being output, the monitor screen
shows the left messages.
Page 34

30
9.5.2 Data output to Printer
In order to output data to an external printer, it is necessary to connect the optional infrared RS converter
(98-029-0007) and polar converter (98-404-0007). The optional stand (98-029-0006) will help you
easily set up infrared receiving unit of DA-130N. An example of setting the stand and an IDP-100
printer is described here in this manual. Install the main unit and infrared RS converter onto the stand as
shown, and connect the polar converter (98-404-0007) to IDP-100 Printer, and then, connect the infrared
RS converter.
Stand
(98-029-0006)
Infrared RS converter
(98-029-0007)
Polar converter
(98-404-0007)
Printer
(IDP-100)
Select “PRN”(printer) on <Interface> of Function screen to make communication settings.
ok
• The optional infrared RS converter (98-029-0007) works only at 9600 baud.
Therefore, “Baud Rate” must be set at “9600.”
• Communication with IDP-100 printer also works only at 9600 baud.
Printout Sample of Measurement Results:
The marked data will
appear with "*" symbol
as a suffix to sample
number.
Sample No. 0001
Date : 2003/10/28 14:03
0.9972 g/cm3
25.1 C
ID : SAMPLE-001
Sample No. 0002
Date : 2003/10/28 14:08
0.9965 g/cm3
25.3 C
ID : SAMPLE-001
Sample No. a0003
Date : 2003/10/28 14:13
0.9977 g/cm3
24.8 C
ID : SAMPLE-001
Sample No. b0004
Date : 2003/10/28 14:18
0.9980 g/cm3
24.5 C
ID : SAMPLE-001
Sample No. b0005*
Date : 2003/10/28 14:23
0.9910 g/cm3
24.5 C
ID : SAMPLE-001
Sample No. b0006
Date : 2003/10/28 14:28
0.9956 g/cm3
24.9 C
ID : SAMPLE-001
Page 35

31
9.5.3 Data output to PC via RS-232C
In order to output data to an external computer via RS-232C, it is necessary to connect the optional
infrared RS converter (98-029-0007) as well as the data acquisition software (Mini Term). (It can be
reached from our website (www.mrclab.com).
Click “PRODUCT,” then click
“D
A-130N (Portable Model)” in the Density/Specific Gravity Meter section. The “Data communication
Software for Portable Analyzer” (98-439-0062) can be downloaded from there.) The optional stand
(98-029-0006) will help you easily set up infrared receiving unit of DA-130N.
An example of using the stand is described here in this manual. Install the main unit and infrared RS
converter onto the stand as shown below and connect the infrared RS converter to RS-232C of the
computer.
Stand
(98-029-0006)
Infrared RS converter
(98-029-0007)
Computer
Select “RS” on <Interface> of the Function screen to make communication settings.
ok
• The optional infrared RS converter (98-029-0007) works only at 9600 baud.
Therefore, “Baud Rate” must be set at “9600.”
Output format of measurement results are shown as below:
Data *1 Sample No. *2
Data queue STX , , ,
Byte start=0 1 1 1 4 1 1 1
Data Date Time
Data queue / / , : ,
Byte start=10 10 1 5 1
Data Result Unit
Data queue * * * * * * * , * * * * * * * * * * ,
Byte start=27 7 1 10 1
Data Temperature Unit
Data queue * * * . * , ,
Byte start=46 5 1 1 1
Data α *3 α value Identification
Data queue A , * * * * * CR CF EOT
Byte start=54 1 1 1 5 10 1 1 1
*1 : Sample name (Blank, a to z)
*2 : “*” is inserted when data is deleted. Blank except when data is deleted.
*3 : The number of
α (0 to 9)
• Blank from α to α value except when Comp.Density, S.G., Baume, or Conc. is selected for
results unit.
Page 36

32
10. Other useful functions
The DA-130N features various functions such as conversion of data unit or external data output.
With [esc] key pressed, push [ok/meas.] key to show Function screen.
Move the cursor with [
+ ], [ − ] key and confirm by [ok/meas.] key.
Beep : Select for beep or non-beep
LCD : Setting for On/Off switch of the backlight and adjust brightness of LC display
Power : Select for automatic power-off
Version No. : Check version number of Main unit
Date & Time : Set the date and time.
Identification : Set the ID.
10.1 Selection of beep sound
When “On” is chosen, you can confirm every key entry with beep.
With [esc] key pressed, push [ok/meas.] key to show Function screen.
Choose <Beep> with [
+ ], [ − ] key.
Select “On” or “Off” for beep sound.
Off : No beep
On : Beep on
• “On” is selected initially.
• Also no error beep when “Off” is chosen.
Page 37

33
10.2 Adjust brightness of LC display; Setting of Backlight: on/off
• Backlight: on/off
Can set conditions for on/off of backlight.
Auto off : Automatically turn off about 5 seconds after keying in for turning on.
Always off : Keep turning-off status.
• Adjust Displayed Concentration
You can adjust the brightness of display screen as follows:
With [esc] key pressed, push [ok/meas.] key to show Function screen.
Choose < LCD Contrast > with [
+ ], [ − ] key.
The brightness can be adjusted in nine steps with [mem.clr] and [mem.out] keys.
10.3 Setting Automatic Power Off
The auto power-off turns off the power of the unit if no key is pressed some period of time after start-up.
With [esc] key pressed, push [ok/meas.] key to show Function screen.
Choose “On” with [
+ ], [ − ] key on < Auto Power Off > screen.
Note!
When “On” is selected and 15 minutes elapses without pressing any
key, the pow er will be automatically shut down.
10.4 Version number check
A specified software number is input on products in the plant to identify the unit for production
management.
With [esc] key pressed, push [ok/meas.] key to show Function screen.
Choose < Version No. > with [
+ ], [ − ] key.
Press [ok/meas.] key to return to Function screen.
Page 38

34
10.5 Set Date
DA-130N features a date setting and the set date can be output to a printer or a PC with measurement
results.
Display the Function screen display by ‘[esc]+[ok/meas.]’key combination.
Select <Date & Time> using [
+ ] or [ − ] key.
Select the menu option using [→] or [←] key. Select the number using [
+ ] or [ − ] key. Hit [OK] key
to confirm the entry.
10.6 Set ID
DA-130N features ID entry.
Display the Function screen display by ‘[esc]+[ok/meas.]’key combination.
Select <Identification> using [
+ ] or [ − ] key.
Select the position using [→] or [←] key. Select the letter using [
+ ] or [ − ] key. Hit [OK] key to
confirm the entry.
Maximum number of characters for ID is ten.
Page 39

35
11. Power source
This unit is powered by 2 alkaline dry cells of 1.5V LR03 (size AAA).
When the batteries become exhausted, the
mark will appear on the display.
The normal life of the cell is 90 hours. If not in use, turn off the power.
11.1 Change the battery
The two AAA alkaline dry cells are housed in the back of the display unit.
When the batteries are replaced with new ones, make sure the display shows the initial screen display and
changes to Main (measurement) display.
If it does not display as shown above, check if all of the dry cells are replaced or loaded in the correct
direction.
• Remedy for alarm
When
turns on, immediately stop measuring and turn off the power. Then, change the cells.
• Procedure to change the cells
Turn off the power
first, and then replace all of the cells. Use the same kind of cells when replacing
them.
Caution:
Do not use other battery than alkaline AAA dry cell, e.g. NiCd dry cell.
Cautions:
1. Always remove the batteries if the unit is not going to be used for a month or more. Otherwise, the
batteries left in the unit may leak and cause damage.
2. The measurement data and parameters are stored in non-volatile memory. These data will not be
erased even when the batteries are removed.
11.2 Auto Power Off
This function turns off the power of the unit when no key is pressed for 15 minutes after turning on the
unit.
Page 40

36
12. Maintenance
Replacement of the built-in syringe
• Before replacement, repeat sampling to thoroughly clean up the line system.
• The interval of replacement depends on the nature of sample or frequency of
measurements.
How to change the syringe:
1) Press down the sample discharging lever all the way,
and remove the syringe cover by pulling it toward you
as illustrated.
2) Turn the syringe 45
° counterclockwise to release it
from O-ring.
3) Slightly pull the sample drain-out lever toward you to
pull out the syringe from O-ring.
4) Remove the syringe from drain rack, and replace it
with new one.
5) Pull down the drain rack, and insert O-ring, and turn it
clockwise until it stops.
6) After inserting 3 hooks on top of syringe cover into the
main, install the syringe cover.
Replacement of the battery
• Before replacing the batteries, turn off the power with [on/off] key.
•
The measurement data and parameters are stored in nonvolatile memory. These data
will not be erased even when the batteries are removed.
Cleaning the measuring cell
• Use a rinsing solution which will not corrode the liquid contact part.
•
If the measured sample is left in the measuring cell or the cell is not well cleaned, the
residue inside may be solidified within the cell or at the contact part with the syringe, and
the cell may be contaminated with stains and dirt. Always clean the system thoroughly
using a rinsing solution after the day’s work of measurements.
(1) Fill the measuring cell with a rinsing solution using either the attached syringe or a
plastic syringe.
(2) Leave a rinsing solution for some time if so necessary before draining it out.
(3) Repeat the steps, (1) and (2), for cleaning more thoroughly.
Press
Drain rack
Page 41

37
13. Cautions in use
This instrument is designed rigid enough to endure measurement work on site, however, if you handle the
unit under any of the following conditions, it may malfunction or need to be repaired. This unit is not
explosion-proof. Do not use it in such an area.
(1)
The unit has a not-sophisticated drip-proof construction (IP54), however, care must be taken not to
have it drip wet.
(2) The unit is not waterproof. If dipped in water, the inside electronic parts will be damaged.
(3) The liquid contact parts are made of borosilicated glass, tetra ethylene fluoride and polypropylene.
Do not use such sample liquid or solvent as may corrode the measuring cell (made of borosilicated
glass). For example; Hydrogen fluoride acid
(4) Avoid a place for storage under any of the following atmosphere:
• Corrosive gas
•
Direct sunlight
•
Dusty or humid room
•
Too hot or too cold atmosphere
(5)
Never drop or give force to the unit since it is a precision meter with glass-made measuring cell. Also
avoid using corrosive liquid as warned above.
(6) Always well clean the measuring cell after a series of measurement for the day, and store the unit in
dry atmosphere.
(7) Keep the power turned off after use.
(8) Never overhaul the unit since it is close molded structure.
If it should be disassembled, the unit will not be covered by warranty.
If any serious troubles, such as toxic smelling, smokes or water permeating into the unit, should
occur,
immediately turn off the power and contact your local dealer.
Page 42

38
14. Parts list
Consumables · Options
Memo pad
(10sheets/set)
98-594-0003S
Nozzle screw
98-560-0103
Option
Alkali manganese
dry cell
(4pcs/set)
98-319-0004S
Battery case
98-319-0005
Operation manual
Basic operation
manual
98-595-0490
Operation manual
98-595-0492
Sampling nozzle
(with washer)
98-560-0021
Built-in syringe
98-560-0024
Manual pump
kit
98-434-0191
Holding stand
98-029-0006
RS converter
for lnfrared
98-029-0007
Polar converter
98-404-0007
Grommet
98-561-0005
Syringe adapter
98-581-0057
Joint set
98-581-0087
Sample syringe
(10pcs/set)(2mL)
98-500-6411S
Page 43

39
Option
Part code Part name Qty Remarks Sketch
IDP-100-20
IDP-100-21
IDP-100-22
IDP-100
Impact dot printer
1 set
100V
120V
230V
Page 44

40
15. Troubleshooting
15.1 Error messages and their remedies
Error No. Error Remedies
E-01 Calibration error
(1) No filling measuring cell with pure water
(2) Air bubble in the cell
(3) Air leak from joints
(4) Foreign matter in cell
(5) Wrong ‘Calib. Mode’ setting
(6) Reduced sensitivity of cell
(7) Broken measuring cell
⋅ Sample water again
⋅ Sample water again
⋅ Check jointed parts
⋅ Clean with appropriate solvent
⋅ Set ‘Calib. Mode’ to “Off” for
calibration with pure water or to “On”
for calibration with standard liquid,
before performing calibration.
⋅ Contact your local dealer
⋅ Contact your local dealer
E-02 Cell oscillation error
(1) Foreign matter in the cell
(2) Loose contact of cable with cell
(3) Broken measuring cell
⋅ Clean with appropriate solvent
⋅ Contact your local dealer
⋅ Contact your local dealer
E-03 Thermistor error (cell)
(1) Abnormal thermistor to measure sample
temperature
⋅ Broke thermistor
Contact your local dealer
E-04 Thermistor (Ambient air)
(1) Abnormal thermistor to measure ambient
temperature
⋅ Broke thermistor
Contact your local dealer
E-05 Data full error
(1) Maximum number of data: 1100
(‘FULL’ mark appears on ‘Sample No.’)
⋅ Delete sample data
E-06 Memory error
E-07 Limit time over
(1) Measurement takes more than 10 minutes
⋅ Turn on power again and measure again.
⋅ If the error repeats, measure pure water
to determine whether or not the cause is
due to the sample.
⋅ If error arises on water measurement,
contact your local dealer.
Battery alarm
(1) Battery is running down.
⋅ Replace batteries with new ones.
Page 45

41
15.2 Exhibit no repeatability on measured value or show deviation on measured value
START
Is sample uniform?
Stir sample to make it uniform
(Sample with separated lipuid phase
results in deviating measurements)
Yes
No
Has calibration been
performed properly?
Does air leak form the joints?
Are air bubbles
in sample?
Has measureing cell stain?
Take another sample
by proper sampling
Check 'Calib. Mode' and
calibrate again
Check and see
the joints for leakage
Rinse measuring cell well
Yes
Yes
Yes
Yes
No
No
No
No
Contact our sales
representative
Is everything O.K.?
END
Yes
No
Page 46

42
16. Technical data
Type and model DA-130N Portable Density/Specific Gravity Meter
Measuring method Natural Oscillation type
Measurement object Liquid sample test materials
Range 0.0000 ~ 2.0000 g/cm3
Precision
±0.001 g/cm
3
Resolution 0.0001 g/cm3
Temperature range
0 ~ 40.0 °C
Display contents Density and Relative gravity (with/without temperature compensated)
Brix%, Alcohol wt%, Alcohol vol%, Proof, Baume, Plato,
API, %H
2SO4
, Conc. (set by User), Temperature, Sample number,
Stability sense, Data storage, External output, Battery capacity
Temperature compensation Up to 10 entries for temperature compensation coefficient and
converted temperature
Automatic calibration All density values of pure water needed for auto calibration can be
stored.
Number of data 1,100 samples
External output
PC or Printer can be connected. (not both)
• IrDA interface is standard equipped.
• Connection via RS-232C requires optional infrared RS converter
(98-029-0007).
Weight Approximately 360g
Power source DC 3V (two pieces of 1.5V alkaline dry cell (“AAA”))
Battery life Approximately 90 hours
Sampling method Syringe-type hand pump
Page 47

43
17. Warranty and After-Sale Service
(1) We thank you very much for purchasing our product.
The product you have purchased passed strict factory inspection and testing prior to shipment, and
maintenance service is performed under the quality system, however, if any defective parts or
malfunctions should be found due to Manufacturer's craftsmanship, installation or insufficient
description of operating manual, the quality is guaranteed for one year after the date of purchase by
free of charge repair except for consumable parts, provided that the instrument or the parts have been
in normal use and operation. This warranty, however, may not cover damages incurred under some
use conditions even for the warranty period.
(2) Please contact your local dealer for the after-sale services, such as repairing, during or after the
warranty period.
(3) Before asking us to repair the product, please carefully read the section, “15. Troubleshooting”, for
reconfirming the malfunction. Then, when you have to ask us for repairs, please let your local dealer
know the following information:
Product serial number
Symptom of malfunctions
Your name and address / phone number
(4) Please contact your local dealer on the purchase of the parts.
(5) Quality Assurance (This warranty shall not cover any of the following incidents.)
• When splashing water on the unit or submerging it in water
• When operating the unit otherwise described in the sections for sampling and rinsing measuring cell
• When dropping the unit or giving it physical shock
(6) Please keep in mind the following things/instructions for safety operations.
• This warranty shall not cover an accident resulting in injuries or death caused by erroneous
handling or use of the product.
• This warranty shall not cover any damages incurred due to mishandling of measured data.
• Keep away from heat or flame and care should be taken of ventilation, when handling flammable
samples/rinsing solution.
• This warranty shall not cover any accidents derived from work environment.
• Care should be taken not to have eyes and bare skin, face or hands splashed with sample or rinsing
solution when operating the sampling nozzle or the syringe pump.
• Wear appropriate protective cleaning equipment ⎯ gloves, goggles, mask and like ⎯ depending on
samples or rinsing solution.
Page 48

44
Appendix 1: Density of pure water (0∼40°C)
Temp .
(°C)
Density
(g/cm3)
Temp .
(°C)
Density
(g/cm3)
Temp .
(°C)
Density
(g/cm3)
Temp .
(°C)
Density
(g/cm3)
0 0.99984
1 0.99990 11 0.99961 21 0.99799 31 0.99534
2 0.99994 12 0.99950 22 0.99777 32 0.99503
3 0.99996 13 0.99938 23 0.99754 33 0.99471
4 0.99997 14 0.99925 24 0.99730 34 0.99438
5 0.99996 15 0.99910 25 0.99705 35 0.99404
6 0.99994 16 0.99894 26 0.99679 36 0.99369
7 0.99990 17 0.99878 27 0.99652 37 0.99333
8 0.99985 18 0.99860 28 0.99624 38 0.99297
9 0.99978 19 0.99841 29 0.99595 39 0.99260
10 0.99970 20 0.99821 30 0.99565 40 0.99222
Appendix 2: Temperature compensation coefficient for various
liquids
Substance Range (°C) α×103 / °C Substance Range (°C) α×103 / °C
Ethanol 0~30 1.09 Benzene 6~30 1.21
m-Xylene 0~30 0.99 Methanol 6~30 1.18
p-Xylene 15~30 1.02 Acetone 0~30 1.42
Glycerine 15~30 0.49 Bromobenzene 0~30 0.91
Chloroform 0~30 1.26 Cyclohexane 0~30 1.20
Carbon tetrachloride 0~30 1.22 Isopropanol 0~30 1.06
Toluene 0~30 1.07 n-Nonane 0~30 1.08
Note!
The above alpha (α) is the coefficient for temperature compensation to convert
the measured data at 30°C of sample temperature to that at 15°C.
The compensation coefficient will slightly differ if sample temperature or
compensation temperature differs. If a precise temperature-compensated
density is required, such coefficient should be obtained from the following
formula, where temperature compensation coefficient (α) is obtained from the
density (Comp. Density) at compensation temperature and the measured
density (Density) at the measurement temperature (Temp):
tempCompTemp
DensityDensityComp
a
.
1)/.(
−
−
=
Example: in the case of ethanol with 0.79351g/cm
3
at 15°C, 0.78924g/cm3 at
20°C and 0.78495g/cm
3
at 25°C, the temperature compensation coefficient can
be obtained as follows when measured values on the samples at 15°C and
25°C are converted hycompensation to those at 20°C.
 Loading...