

mPower Electronics NEO Quick Start Manual
WARNINGS
Read Before Operating
The NEO’s User’s Guide must be carefully read
by all individuals who have or will have the
responsibility of using, maintaining or servicing this
product. The product will perform as designed only if
it is used, maintained and serviced in accordance with
the manufacturer’s instructions.
Caution
⚫ Change battery only in an area known to be
non-hazardous.
⚫ Use only mPower’s battery pack PN: M011-
3002-000.
Attention
⚫ Changez la batterie uniquement dans une zone
connue pour être non dangereuse.
⚫ Utiliser uniquement la batterie mPower PN:
M011-3002-000.
Warning
• Never operate the monitor when the cover is removed.
• Remove the monitor cover only in area known to be non-
hazardous.
• Use only mPower’s sensor and accessories. Substitution of
components will impair suitability for intrinsic safety and void
warranty.
• It is recommended to bump test with a known concentration
gas to confirm the instrument is functioning properly before
use.
• For maximum safety, the accuracy of the instrument should
be checked by exposing it to a known concentration
calibration gas before each day’s use.
• Ensure that the gas inlet is not blocked.
• When replacing batteries, dispose of old ones properly.
• To achieve the optimal test results, it is recommended to
preheat the unit for 2 minutes after entering the test
interface
• Make sure that the water-trap filter is clean and replaced in
time.
• Don’t remove the sensor. Zero and span calibration is
required once the sensor is moved.
• Before use, ensure that the ESD film on the display is not
damaged or peeling.
Avertissement
• N'utilisez jamais le moniteur lorsque le couvercle est enlevé.
• Retirer le couvercle du moniteur et la batterie uniquement
dans une zone connue comme non dangereuse.
• La substitution de composants compromettra l'aptitude à la
sécurité intrinsèque et annulera la garantie.
• Il est recommandé de tester avec un gaz de concentration co
nnu pour confirmer que l'instrument fonctionne correctemen
t avant de l'utiliser.
• Avant de l’utiliser, assurez-vous que le film ESD sur
l'écran n'est pas endommagé ou épluché.
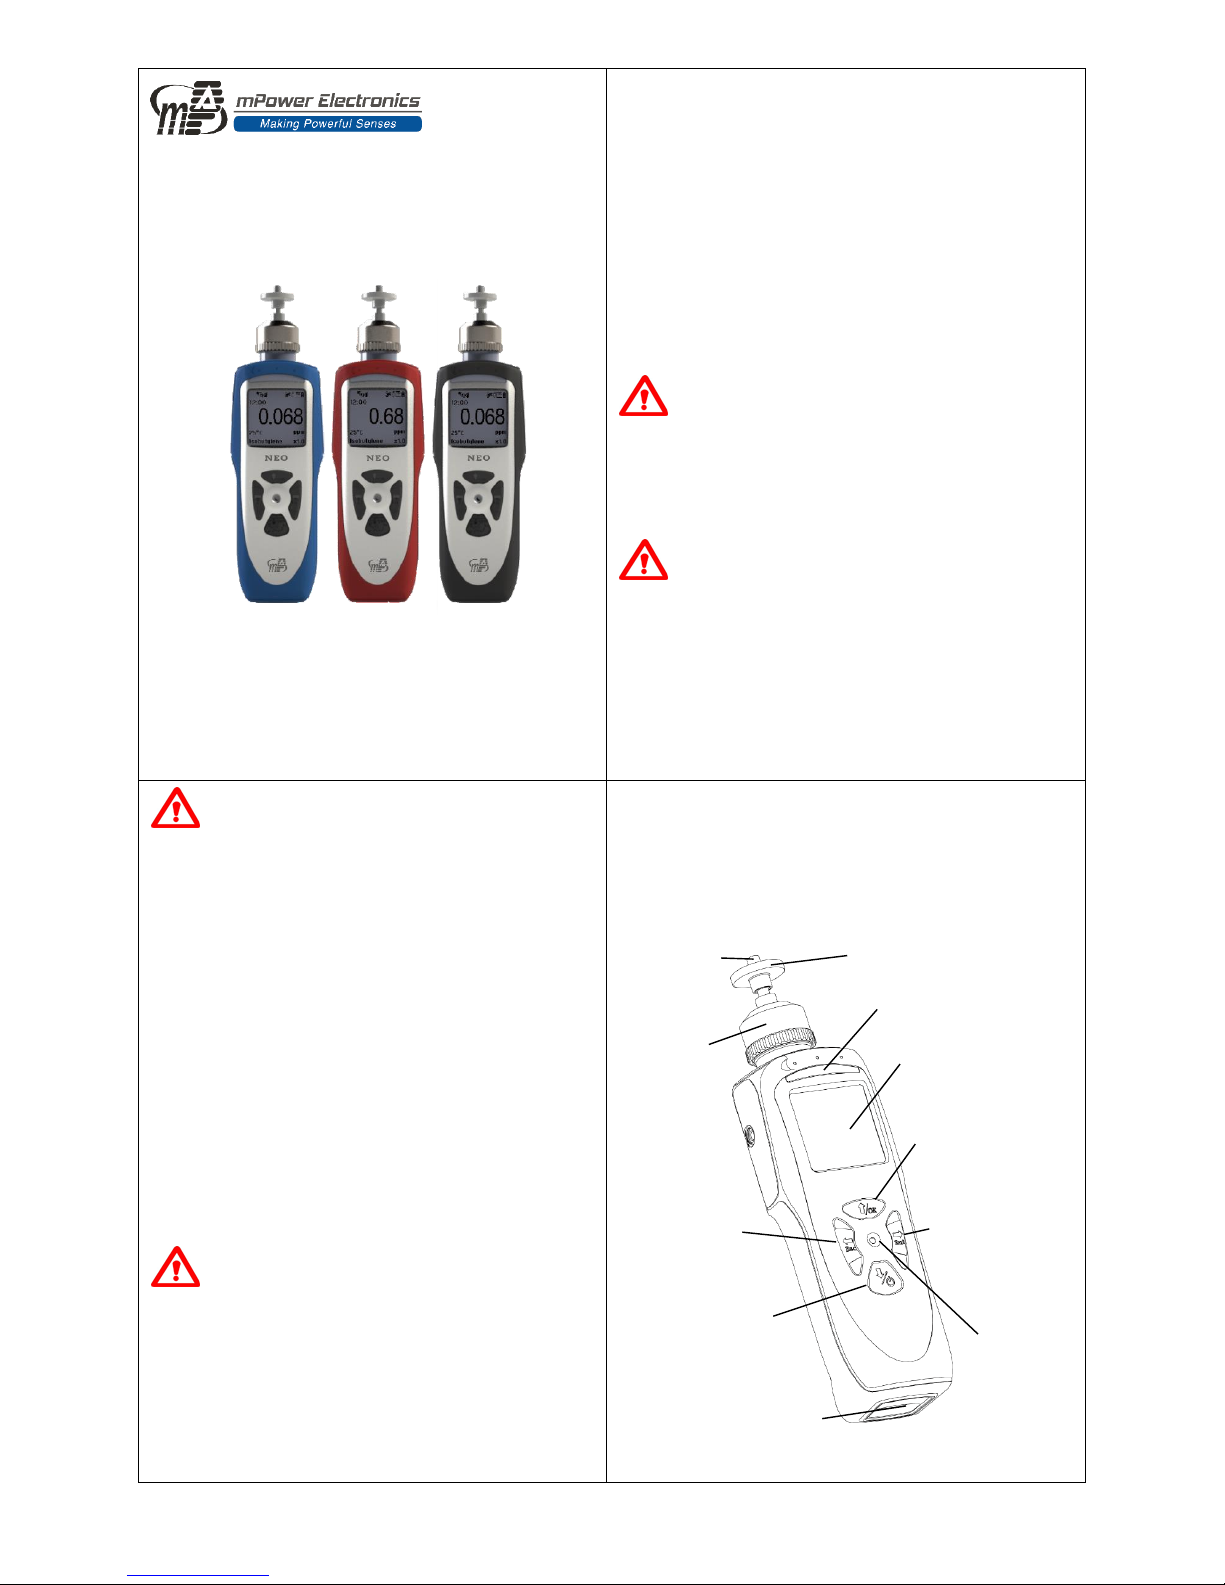
User Interface
The user interface has four-key operation, one big
LCD with LED backlight, four red alarm LEDs, and
one buzzer.
NEO
Quick Start Guide
Buzzer
LED Alarm
LCD
Left Key
(Esc/Cursor
Moving)
Right Key
(Enter/Cursor
Moving)
Up Key
(Confirm/
Number Increase)
Down Key
(Power/Number
Decrease)
Charge/Comm Port
Sensor
Gas Inlet
Water-trap Filter
mPower Electronics Inc.
3046 Scott Blvd. Santa Clara, CA 95054
www.mpowerinc.com
info@mpowerinc.com
PN: M011-4011-000 v1.0
2 3 1
Turning the Unit On
Press and hold the Down Key for 3 seconds, until
the buzzer beeps and the red LED flashes. After a
warm up and self-test sequence, the unit enters
normal reading mode, showing real time gas
concentrations.
Turning the Unit Off
In normal reading mode, press and hold the Down
Key for a 5-second count down, until “Unit Off” is
displayed.
Charging
Always fully charge the battery before use. Plug
charger to the bottom of MP18X. Unit LCD will
show charge status. While charging, the LCD
displays a battery icon cycle from empty to full.
When the battery is fully charged, the LCD displays a
full battery.
Water-trap Filter
Water-trap filters (P/N: M490-0005-010) are used
to protect the sensor from dust and aerosols in dirty
environments. The filter should be twisted on to the
gas inlet before the instrument is used replaced once
its surface is dirty.
Testing the Alarms
Important! Test the alarms prior to performing a
bump or span calibration test. If any alarm does not
respond, check the Alarm Settings in Config Mode to
make sure all alarms are enabled (Config Mode →
Alm Setting → Alarm Settings → Both Enabled). If
any alarms are enabled but are not functional, do not
use the instrument.
Under normal operation mode and non-alarm
conditions, the buzzer, LED and backlight can be
tested anytime by pressing the Right Key once.
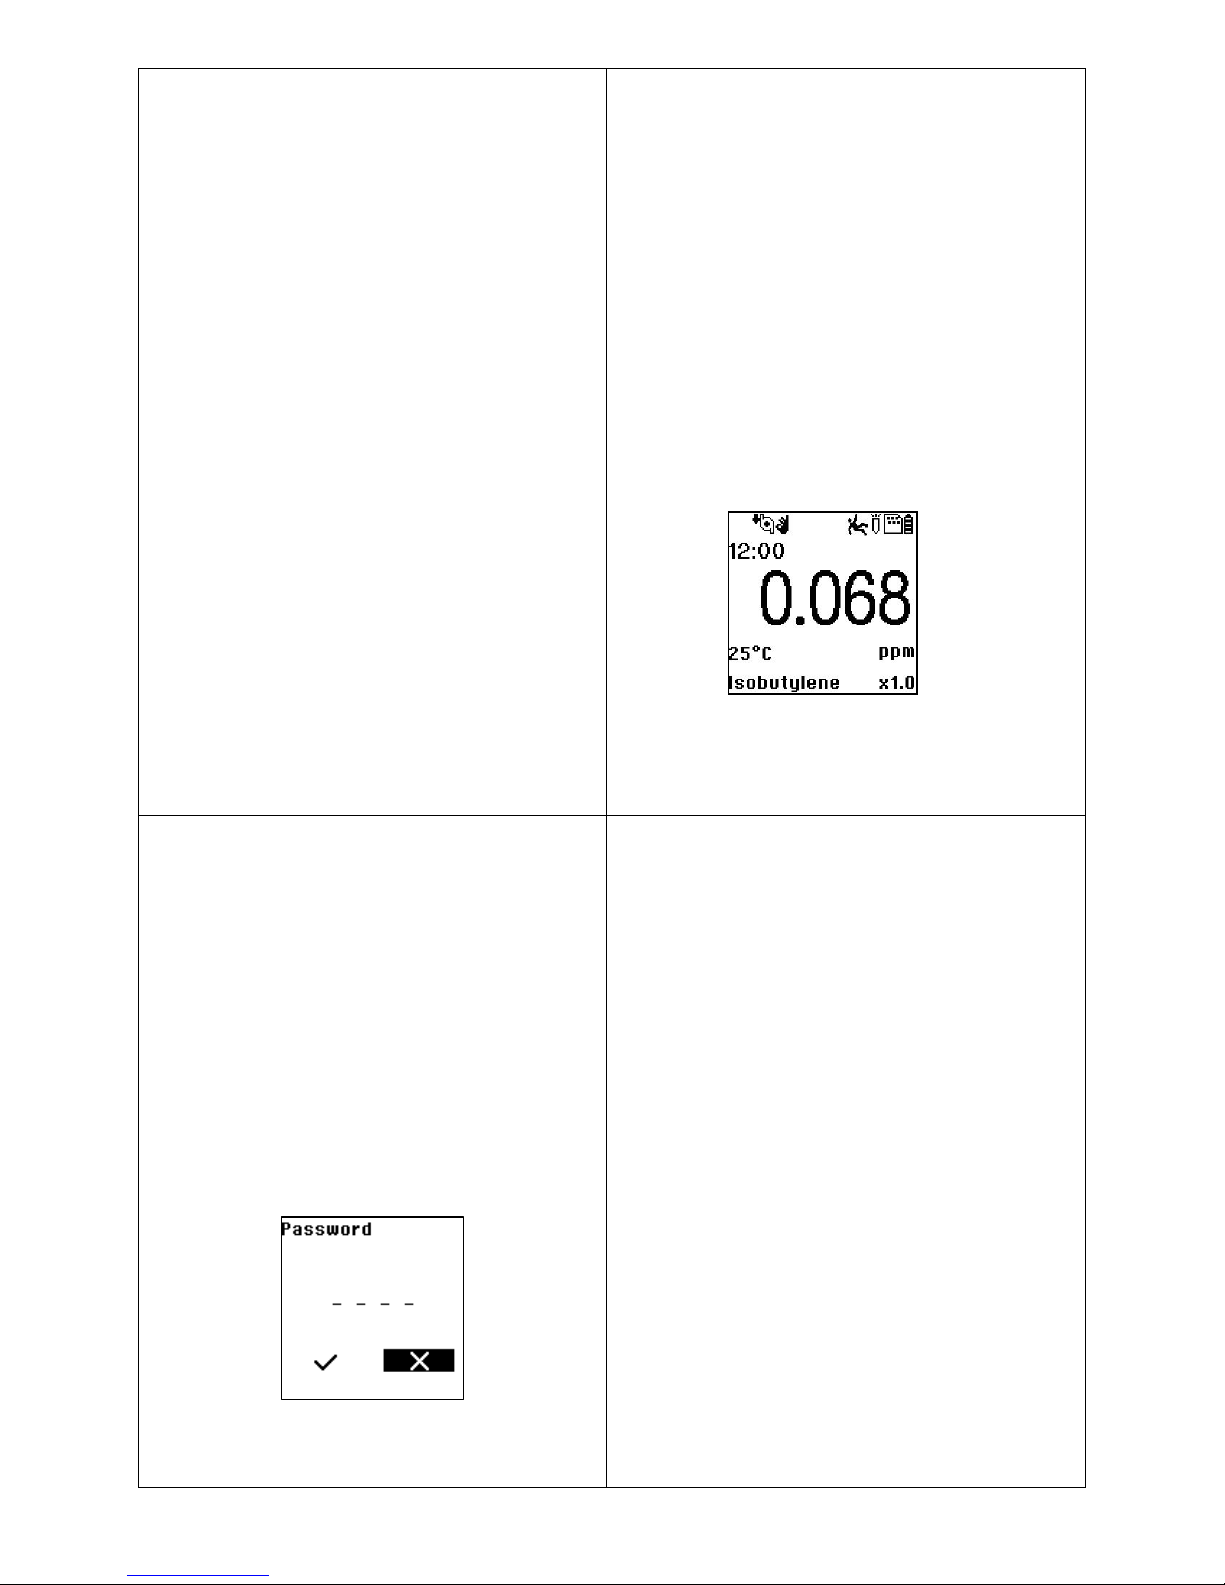
Normal Mode
After warm-up is complete, the unit enters normal
reading mode and displays the instantaneous gas
concentration continuously.
Other values like STEL, TWA, and temperature,
etc. can be checked by pressing the Up/Down Key to
cycle through these screens one by one.
Configuration Mode
In Config Mode, the user can perform a sensor
calibration, change the alarm limits and set up other
parameters.
Enter/Exit Config Mode
Press and hold the Up and Down Keys together
for 3 seconds, to enter Config Mode.
• The Config Mode is password protected.
• The default password is “0000”.
• After all four digits are entered, move the cursor
to √and press the Up Key to enter config mode.
• Press the Left Key to exit Config Mode.
Config Mode Menu
• Calibration:
Zero Calib, Span Calib, Set Cal.Gas, Set Span
Value, Set Span 2 Value
• Meas.:
Measurement Unit, Measurement Gas
• Alm Setting:
Alarm Limits, Alarm Mode, Alarm Settings,
Comfort Beep, Man Down Alarm
• Datalog:
Clear Datalog, Interval
• Mnt (Monitor) Setup:
Data & Time, Display, Pump Speed, Pump Stall,
3-Point Cal., Rolling Graph, Real Time Data,
Language, Self-Zeroing
• Wireless:
Radio On/Off
4 5 6
7
 Loading...