

MPower MP100 User Manual
MP100
User’s Guide
Rev.F
Sep 2018

MP100 User’s Guide
1
Contents
Read Before Operating ................................................................................................................... 2
General Information ....................................................................................................................... 3
User Interface .................................................................................................................................. 3
Display .............................................................................................................................................. 4
Using MP100 .................................................................................................................................... 5
Turn the unit on ....................................................................................................................... 5
Warm up sequence .................................................................................................................. 5
Normal mode ........................................................................................................................... 6
Real time reading ............................................................................................................ 6
STEL screen ..................................................................................................................... 6
TWA screen ...................................................................................................................... 6
Peak screen ...................................................................................................................... 6
Min screen (for Oxygen sensor only) ............................................................................. 7
Turn the unit off .............................................................................................................. 7
Config mode ..................................................................................................................................... 7
Enter Config mode .................................................................................................................. 7
Sensor calibration.................................................................................................................... 8
Calibration adapter ................................................................................................................. 8
Zero calibration ....................................................................................................................... 9
Span calibration ...................................................................................................................... 9
Bump test ............................................................................................................................... 10
Change alarm limit ............................................................................................................... 10
Change bump/cal interval .................................................................................................... 11
Change span value ................................................................................................................ 12
Change display unit .............................................................................................................. 12
Vibrator enable/disable ......................................................................................................... 12
Power on zero enable/disable ............................................................................................... 13
Fast power on enable/disable ............................................................................................... 13
Reset config ............................................................................................................................ 13
Exit Config mode ................................................................................................................... 14
Maintenance .................................................................................................................................. 14
Replace the battery ............................................................................................................... 14
Replace the sensor filter ........................................................................................................ 15
Replace the sensor ................................................................................................................. 15
Ordering information ................................................................................................................... 17
Specifications ................................................................................................................................. 18
Sensor configuration ..................................................................................................................... 19
Alarm signal summary ................................................................................................................. 20
Trouble shooting ............................................................................................................................ 22
MP100 User’s Guide
2
Read Before Operating
This manual must be carefully read by all individuals who have or will have the responsibility of
using, maintaining or servicing this product. The product will perform as designed only if it is
used, maintained and serviced in accordance with the manufacturer’s instructions.
Warning
⚫ Never operate the monitor when the cover is removed.
⚫ Remove the monitor cover and battery only in area known as non-hazardous.
⚫ Use only mPower’s lithium battery part number 1.17.02.0002 (3.6V, 2700mAH, AA size) or
part No. ER14505 cell manufactured by EVE Energy Co., LTD
⚫ This instrument has not been tested in an explosive gas/air atmosphere having an oxygen
concentration greater than 21%.
⚫ Substitution of components will impair suitability for intrinsic safety.
⚫ Substitution of components will void warranty.
⚫ It is recommended to bump test with a known concentration gas to confirm the instrument is
functioning properly before use.
⚫ Before use, ensure that the ESD film on the display is not damaged or peeling.
Avertissement:
⚫ N'utilisez jamais le moniteur lorsque le couvercle est enlevé.
⚫ Retirer le couvercle du moniteur et la batterie uniquement dans une zone connue comme non dangereuse.
⚫ Utilisez uniquement la batterie au lithium de mPower, pièce No. 1.17.02.0002 (3.6V, 2700mAH, taille AA)
ou celle de EVE Énergie Cie., Lté, pièce No. ER14505.
⚫ Cet instrument n'a pas été testé dans une atmosphère explosive gaz / air ayant une concentration en oxygène
supérieure à 21%.
⚫ La substitution de composants compromettra l'aptitude à la sécurité intrinsèque.
⚫ La substitution des composants annulera la garantie.
⚫ Il est recommandé de tester avec un gaz de concentration connu pour confirmer que l'instrument fonctionne
correctement avant de l'utiliser.
⚫ Avant de l’utiliser, assurez-vous que le film ESD sur l'écran n'est pas endommagé ou épluché.
Proper Product Disposal at The End Of Life
The Waste Electrical and Electronic Equipment(WEEE) directive (2002/96/EC) is
intended to promote recycling of electrical and electronic equipment and their
components at end of life . This symbol (crossed-out wheeled bin) indicates
separate collection of waste electrical and electronic equipment in the EU
countries. This product may contain one or more Nickel-metal hydride (NiMH),
Lithium-ion, or Alkaline batteries. Specific battery information is given in this
user guide. Batteries must be recycled or disposed of properly. At the end of its
life, this product must undergo separate collection and recycling from general or
household waste. Please use the return and collection system available in your
country for the disposal of this product.

MP100 User’s Guide
3
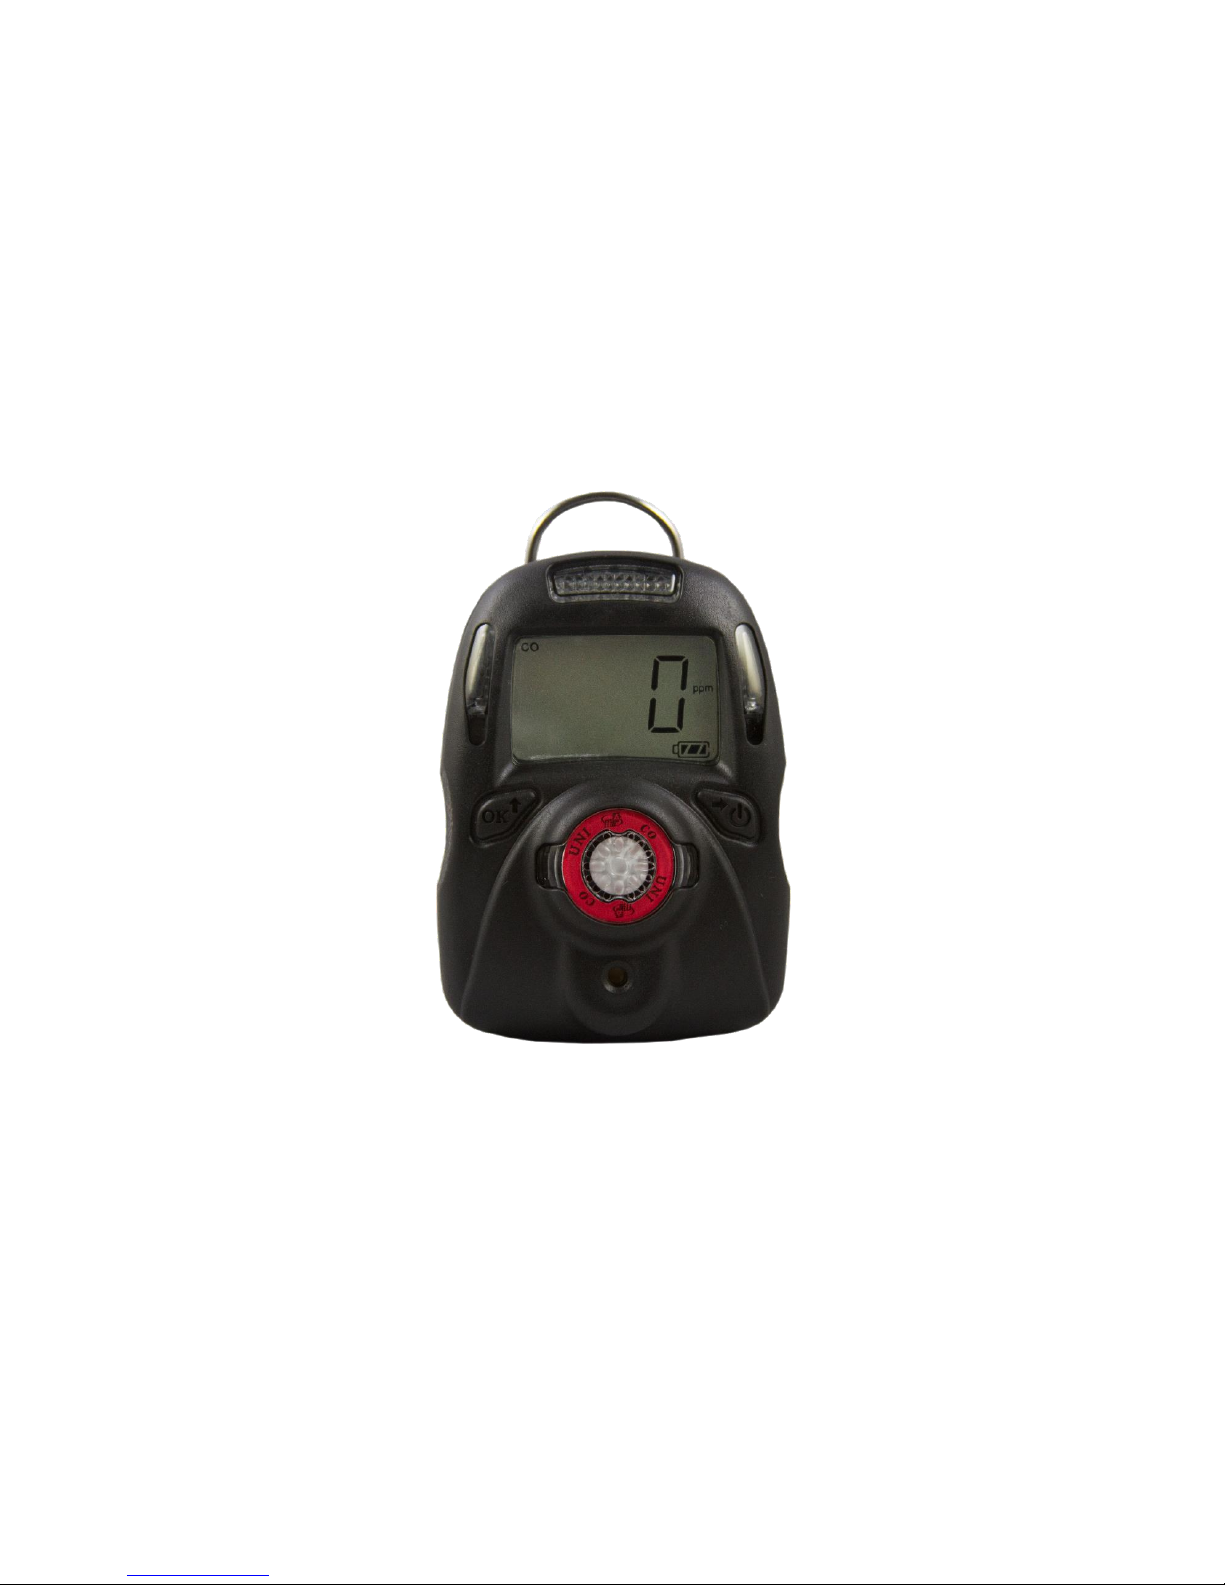
General Information
UNI (MP100) is a single sensor, portable, personal toxic gas monitor. It displays gas
concentration continuously on a big segment LCD. It also monitors STEL, TWA, peak and min
(for O2 only) value of the gas and can be displayed on demand.
High, Low, STEL&TWA alarm threshold values are configurable. The shell is made of high
strength, durable material. Two key operation, simple to use. Sensor and battery can be replaced
easily. Calibration is also very convenient.
User Interface
1. Audible Alarm Port
2. LED alarm window
3. LCD
4. Left Key (Confirm/Number increasing)
5. Right Key (Power/ Cursor moving)
6. Alligator clip
7. Sensor
8. Vibrator

MP100 User’s Guide
4
Display
1. Gas name, includes: CO, H2S, SO2, O2, VOC
2. Question mark
3. OK
4. Gas unit, includes: x10-6, ppm, %, mg/m3, µmol/mol
5. Battery
6. HIGH, LOW, STEL, TWA alarm
7. Span calibration
8. Zero calibration
9. Number

MP100 User’s Guide
5
Using MP100
Turn the unit on
Press and hold the Right Key for 3 seconds, until LCD displays , buzzer beeps,
green LED flashes, then release the button, the unit is powered on.
Warm up sequence
After powered on, the unit enter warm up and self-test sequence, show the firmware version as
follows:
If the sensor is not able to be identified by the instrument or is not installed into the instrument,
then the screen switches between and .Otherwise, the
following values will be shown accordingly:
High alarm threshold value:
Low alarm threshold value:
STEL (short-term exposure limit) alarm threshold value:

MP100 User’s Guide
6
TWA (time-weighted average) alarm threshold value:
Normal mode
Real time reading
The unit enters normal mode, start monitoring gas concentration and display on the LCD screen.
User can check some other values like STEL,TWA, PEAK, and MIN (for O2 only) by pressing the
Right Key.
*Unit will return to real time reading from any other screen when there’s no key action for 60
seconds.
STEL screen
TWA screen
Peak screen
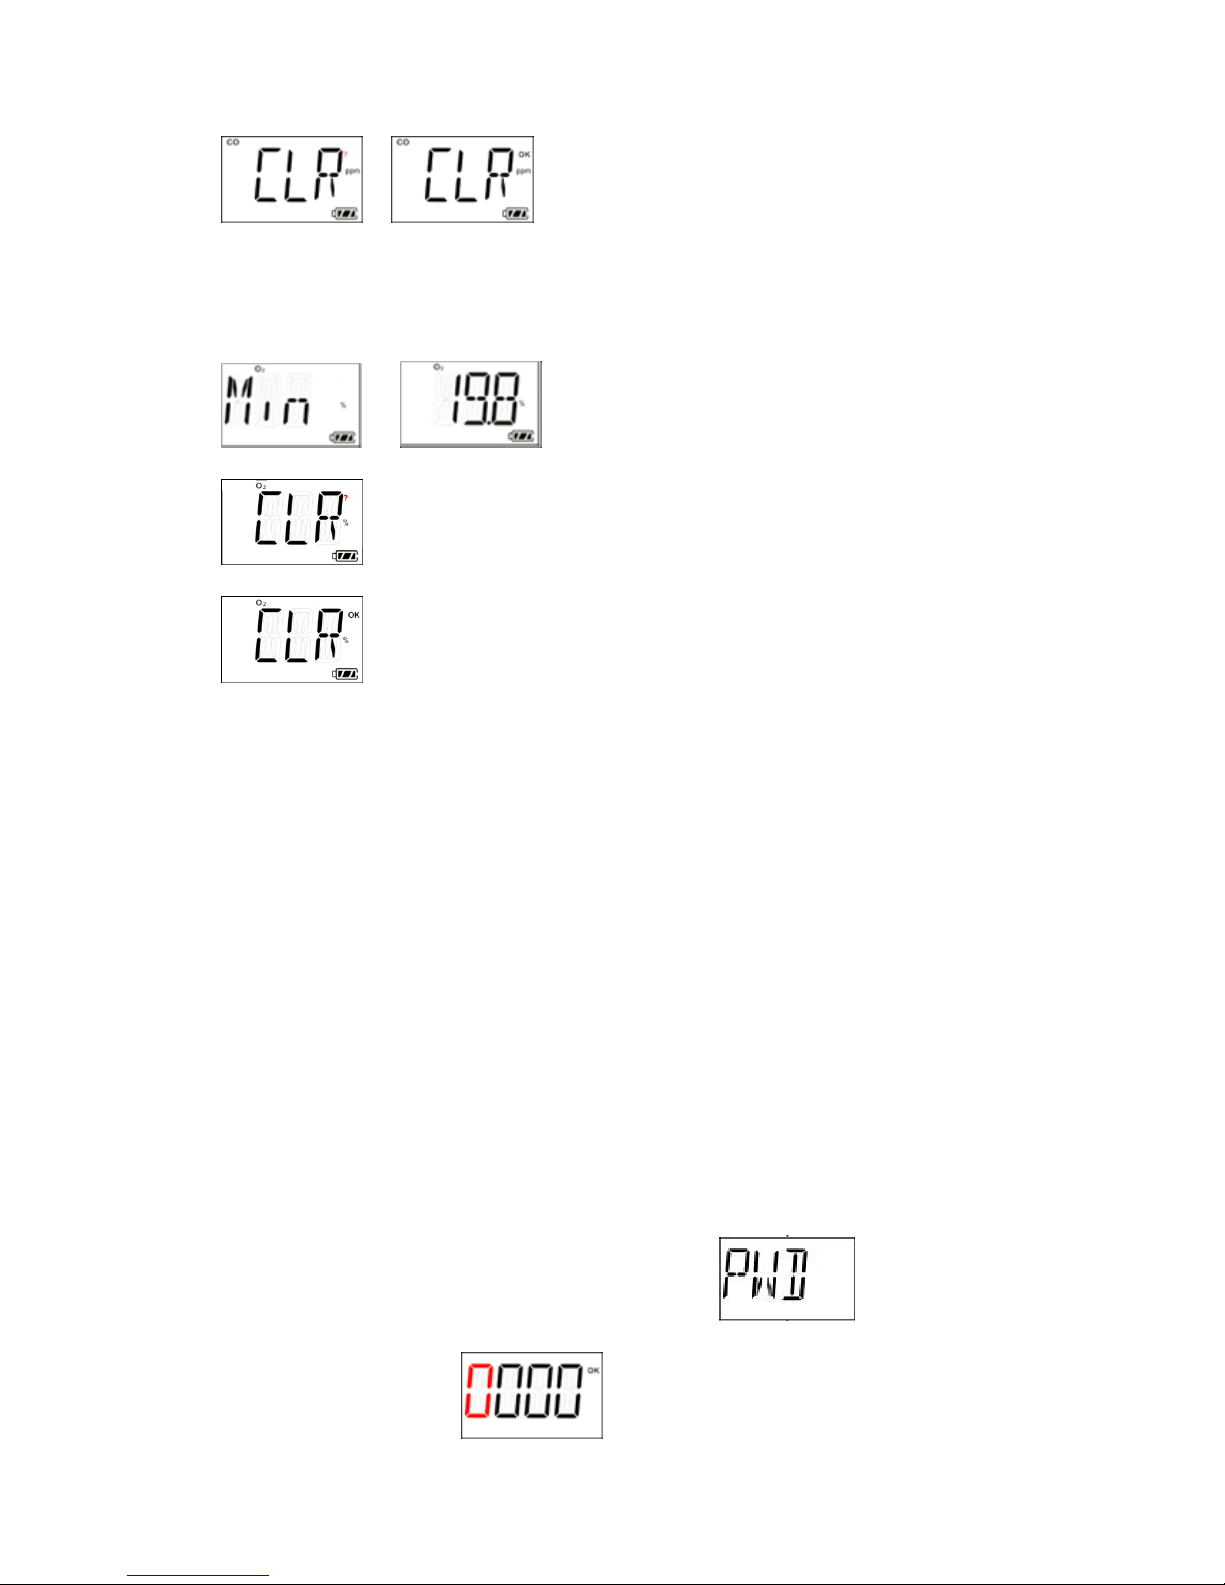
Press the Left Key to clear peak value
MP100 User’s Guide
7
Press the Left Key again, peak value is cleared.
Min screen (for Oxygen sensor only)
Press the Left Key to clear min value
Press the Left Key again, minimum value is cleared
Turn the unit off
In normal display mode, press and hold the Right Key, then the unit will display a 5 second count
down, LEDs will flash and buzzer will beep once per second.
Config mode
In Config mode, user can do calibration & change parameters for the unit. In general, use the Left
Key to increase the number or confirm, use the Right Key to move the cursor or move to the next
programming item.
Enter Config mode
Press and hold the Left Key and the Right Key together for 3 seconds, the unit enters Config
mode.
The Config mode is password protected, LCD displays to prompt enter
password. The screen displays , with one digit flashing.
 Loading...