

Page 1

Micro Hi-Fi System
XRM34
INSTRUCTION MANUAL
Page 2

SA FE T Y PR EC AU T IO NS
To achieve t he u tm os t in e nj oy me nt a nd p er fo rmance, pleas e re ad t hi s ma nu al c ar ef ul ly b efore attempt in g to o pe ra te
the unit i n or de r to b ec am e fa mi li ar w it h it s features, and a ss ur e yo u ye ar s of f ai th fu l, t ro uble free per fo rm an ce a nd
listen in g pl ea su re .
Important Notes
This safety and operating instruction should be retained for future reference.
The apparatus shall not be exposed to dripping or splashing and no objects filled with liquids, such as vases, shall be placed on
apparatus. Avoid installing the unit in locations described below:
* - Places exposed to direct sunlight or close to heat radiating appliances such as electric heaters,
on top of other stereo equipment that radiate too much heat.
* - Places blocking ventilation or dusty places.
* - Places subject to constant vibration, humid or moist places.
No naked flame sources such as lighted candles should be placed on the unit.
Attention should be drawn to the environmental aspects of battery disposal.
Make sure not to obstruct the ventilation openings, a minimum of 10cm should be kept around the apparatus for ventilation.
The ventilation should not be impeded by covering the ventilation openings with items such as newspaper, table-cloths, curtains,
etc.Use apparatus in moderate climates only.
Operate tuning controls and switches as instructed in the manual.
Before turning on the power for the first time, make sure the power cord is properly installed.
The mains plug is used as the disconnect device and it must remain readily operable. To completely disconnect the power input,
the mains plug of the apparatus must be disconnected from the mains.
The normal function of the product may be disturbed by Strong Electro Magnetic Interference. If so, simply reset the product to
resume normal operation by following the instruction manual. In case the function could not resume, please use the product in
other location.
Do not attempt to remove any screws, or open the casing of the unit; there are no user serviceable parts inside, refer all servicing
to qualified service personnel.
CAUTION : TO REDUCE THE RISK OF ELECTRIC SHOCK DO NOT REMOVE COVER(OR BACK), NO USER SERVICEABLE
PARTS INSIDE, REFER SERVICING TO QUALIFIED SERVICE PERSONNEL.
DANGEROUS VOLTAGE
Conductor dangerous voltage, that may be of sufficient magnitude to constitute a risk of electric shock to persons is
present within this product's enclosure.
ATTENTION
The owner's manual contains important operating and maintenance instructions, for your safety, it is necessary to refer
To the manual.
WARNING :TO PREVENT FIRE OR SHOCK HAZARD, DO NOT EXPOSE THIS APPLIANCE TO DRIPPING OR SPLASHING.
Note: This unit will become warm when used for a long period of time. This is normal and does not indicate a problem with the
unit. This unit includes micro-processors which may malfunction as a result of external electrical interference/ noise or electrostatic
discharge. If the unit is not working properly, disconnect the power source and then reconnect it.
earphones and headphones can cause hearing loss.
Assembly Drawing of Unit and speaker
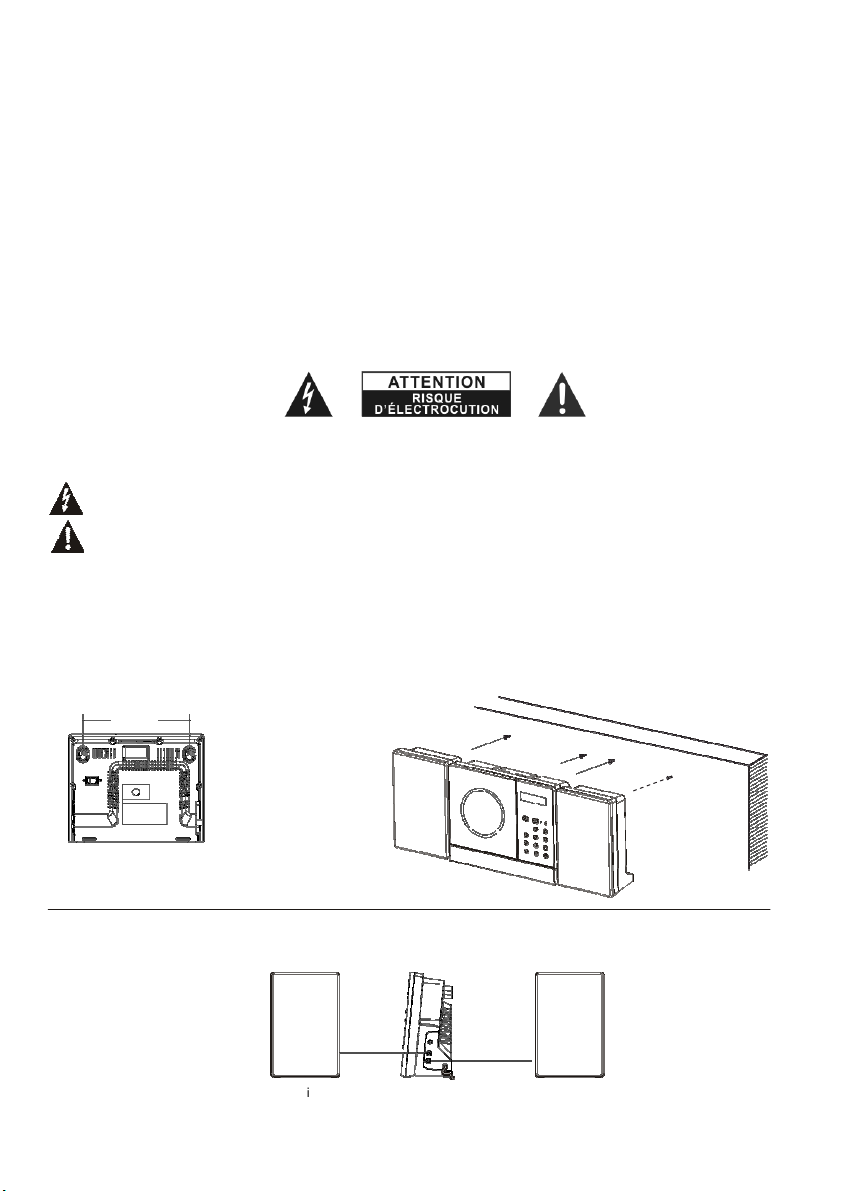
1. fixing th e bo ar d fo r wa ll m ou nt in g
182mm
Excessive sound pressure from
Fix the two na il s( Si ze :3 .5 *2 5B A) i nt o the wall
and they s ho ul d pa ra ll el e ac h ot he r. (T he d istance
betwee n th e tw o na il s sh ou ld b e1 82 mm )
2. Speak er s co nn ec ti on
Max conn ec ti on d is ta nc e is 2 m et re s
UK-1
Page 3
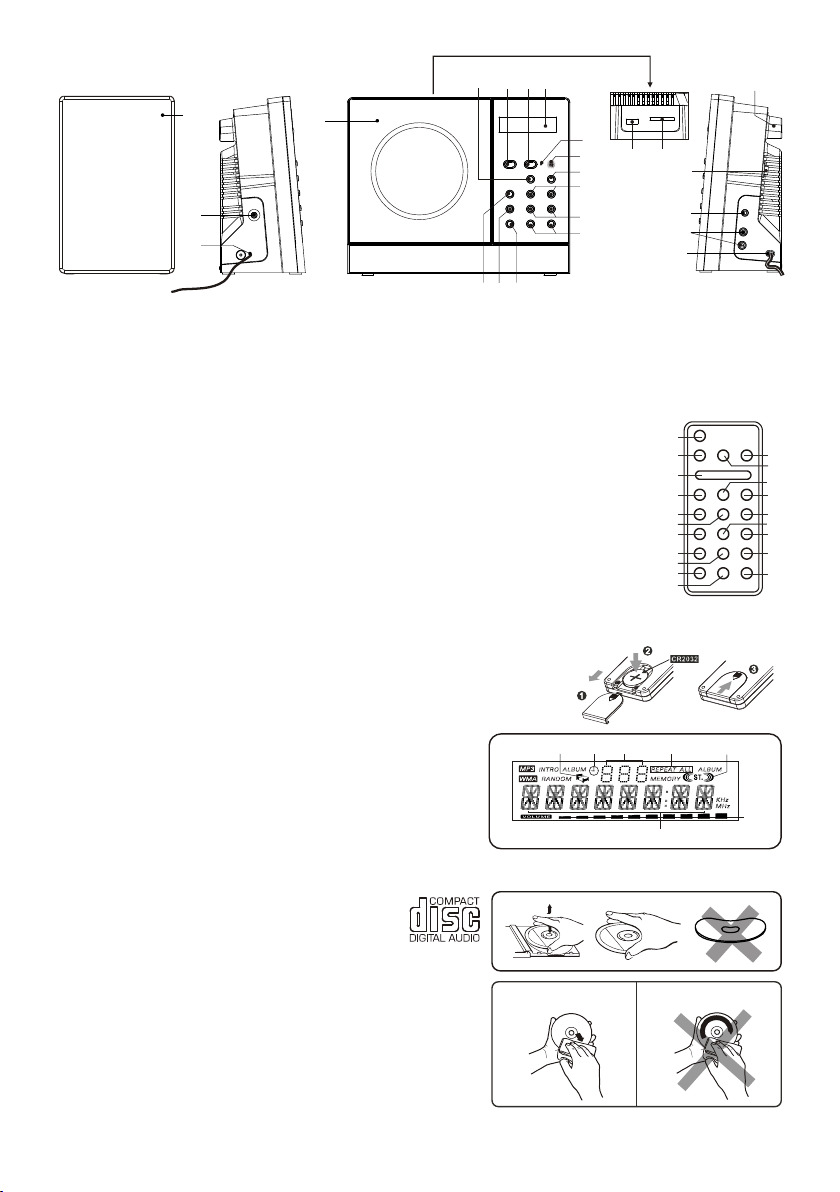
FEATURES AND CONTROLS
1
4
2
3
5 6 7
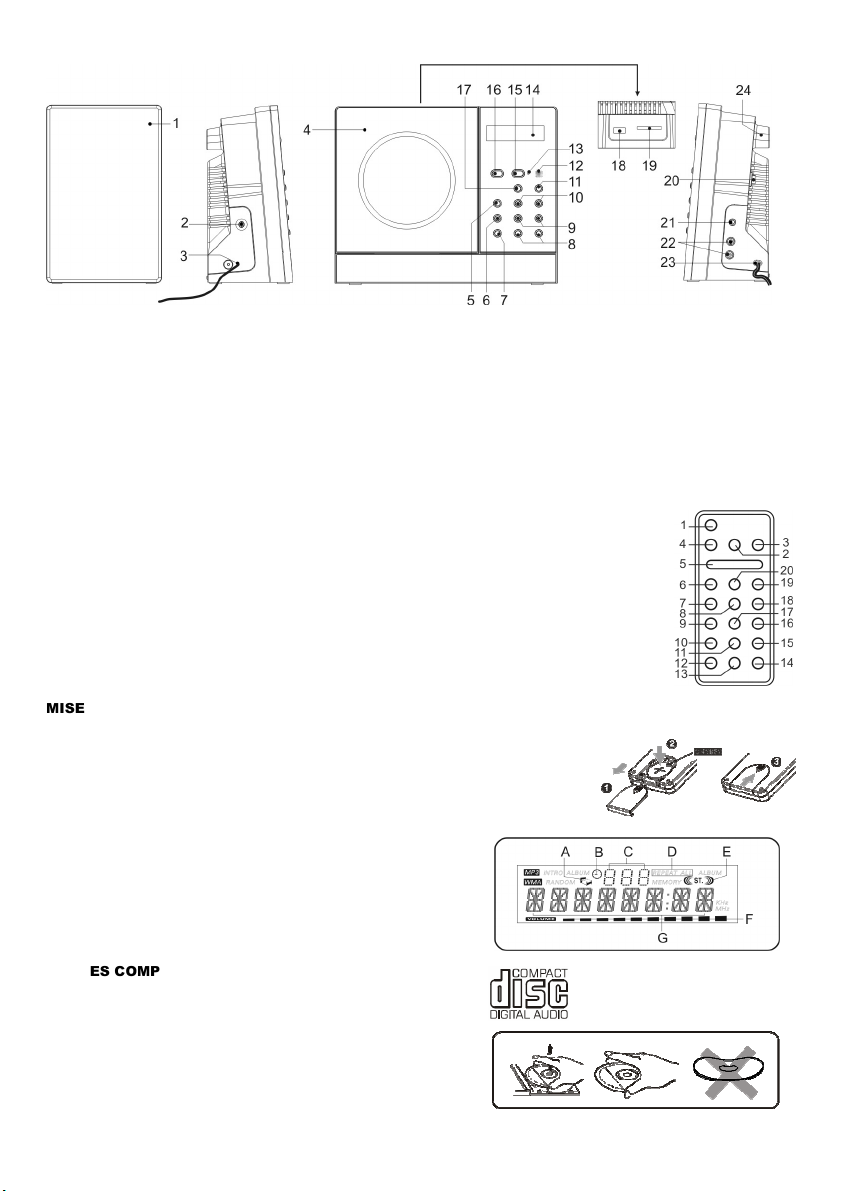
1. SPEAKER
2. LINE IN JAC K
3. FM ANTENNA
4. CD DOOR
5. FUNCTIO N BU TTON
6. MEM/C-A DJ . BU TTON
7. TI ME R
8. VOLUME (+ o r -) B UT TON
9. PRESET/ FO LD ER
RE MO TE C ONT RO L
1. STAND BY /O N BUTTON
2. ID3/ ST BUTTO N
3. OPEN/CL OS E BU TTON
4. TI ME R BU TT ON
5. FUNCTIO N BU TTON
6. MEM/C-A DJ . BU TTON
7. SLEEP BU TT ON
8. SKIP/TU NE S EA RC H DO WN B UT TO N
9. INTRO BUT TON
10.EQ BU TTON
PU TT I NG T HE BATTE RY INTO TH E RE MOTE CO NT ROL U NI T
Press do wn t he c om pa rt me nt c ov er, a nd s li de the cover off t o op en it. Place
the butt on b at te ry ( CR 20 32 ) in to i t ac co rding to the pola ri ty m ar ki ng s wi th
the “+” si gn f ac in g up . Pl ac e th e co ve r ov er t he compartmen t, p us h it
upward u nt il i t sn ap s on .
Note :Do n ot m ix n or ma l ba tt er ie s wi th r ec hargeable bat te ry. When the
batter ie s be co me w ea k, r em ot e co nt ro l will not functi on a nd r ep la ce w it h
new batt er ie s.
LCD DI SP L AY WI ND OW
A. SLEEP IN DICATOR
B. TI ME R IN DI CATOR
C. ALBUM/ RA DI O ME MO RY NU MB ER INDICATO R
D. INDICATO R
E. STEREO IN DI CATO R
F. VOLUME HIGH /L OW I ND IC ATOR
G. TR AC K/ NUMBER/TIME I ND IC ATOR
CO MPA CT D ISC
1. Always u se a c om pa ct d is cs b ea ri ng t he m ar k as shown.
2. Notes on ha nd li ng d is cs
Removing t he d is c fr om i ts s to ra ge c as e an d
loadin g it .
* Do not touch t he r ef le ct iv e re co rd ed s ur fa ce.
* Do not stick p ap er o r wr it e an yt hi ng o n th e su rf ace.
* Do not bend th e di sc .
3. Storage
* Store the di sc i n it s ca se .
* Do not expos e di sc s to d ir ec t su nl ig ht o r hi gh temperatur es ,
high humidi ty o r du st y pl ac es .
4. Clean in g a di sc
* Should the d is c be co me s oi le d, w ip e of f du st , di rt a nd
fing er pr in ts w it h a so ft c lo th .
* The d is c sh ou ld be cleaned f ro m th e ce nt er t o th e ed ge .
* Never use be nz en e, t hi nn er s, r ec or d cl eaner fluid or an ti s ta ti c
s pr ay.
* Be sure to clo se t he C D do or s o th e le ns i s no t co nt am inated
b y du st .
* Do not touch t he l en s.
BUTTO N
MO./ .
REPEAT 1 & ALL
(UP or DO WN ) BUTTON
10. SKIP/T UN E SE AR CH
(UP or DO WN ) BU TTON
11. PL AY/ PAUSE B UT TON
12. IR SEN SO R
13. STAN DB Y LE D IN DI CATOR
14. LCD DI SP LAY
15. STAN DB Y/ ON BUTTO N
BUTTO N16. OPEN /C LO SE
11.R EP EAT B UT TON
12.MUT E BU TTON
13.VOL UM E “- ” BU TTON
14.VOL UM E “+ ” BU TTON
15.RAN DO M BU TTON
16.PRE SE T/ FO LD ER U P BU TTON
17.PRE SE T/ FO LD ER D OW N BU TT ON
18.SKI P/ TU NE S EA RC H UP B UT TON
19.PLAY/ PAU SE B UT TO N
20.STOP B UT TO N
FROM THE CENTRE
CORRECT
UK-2
14151617
24
13
12
18 19
11
10
9
8
20
21
22
23
17. STO P BU TT ON
18.
USB DEVI CE I N PO RT
19.
SD/MMC M EM ORY CAR D IN S LO T
20. AC POWE R MA IN S WI TC H
21.
HEADPH ON ES J AC K
22. SPEA KE R OU T
AC CORD
23.
24.
HITCHI NG H OL E
**BUTTON BATTERY INCLUDED**
Please remove safety strip before using the unit
Change the button
battery
A
B
C
(L & R) J AC K
1
4
5
6
7
8
9
10
11
12
13
D
3
2
20
19
18
17
16
15
14
E
F
G
TO THE EDGE
INCORRECT
Page 4
OP ER ATIN G TH E U NI T
When you f ir st p lu g th e un it i nt o th e AC ou tl et ,
rear of th e un it .
STAN DB Y. Turn o ff t he m ai n sw it ch o f th e un it a nd p ul l the AC plug out of t he w al l so ck et i f yo u wa nt t o sw it ch o ff
comple te ly.
POWE R/ S TAN DBY
1. Press the S TANDBY/ON but to n on t he u ni t or o n th e re mo te c on tr ol to switch the un it o n.
2. Selec t th e so un d so ur ce ( CD , US B, S D CA RD , AUX or TU NE R) b y pr es sing the FUNC TI ON b ut to n. The
correspo nd in g di sp la y wi ll l ig ht u p.
3. Adjust t he v ol um e wi th t he V OL UM E (+ o r -) b ut to n on the unit or VO LU ME ( + or - ) bu tt on o n th e re mo te c on trol.
4. Press the S TANDBY/ON but to n ag ai n to t ur n of f th e un it .
Note:
1. If there is n o si gn al u nd er t he C D/ US B DE VI CES/ SD & MMC CARD mo de , th e ma in u ni t wi ll b e sw it ch ed o ff
within 1 5 mi nu te s au to ma ti ca ll y.
2. Durin g in s ta nd by m od e, p re ss a ny b ut to n/key can make th e di sp la y li gh t fo r 10 s ec on ds .
3. Pleas e tu rn t he m ai n sw it ch o ff t o sa ve e ne rg y, wh en y ou d o no t us e th e un it .
CLOC K SE T TI NG
During i n th e STANDBY mo de .
1. Press a nd h ol d th e ME M/ C- AD J. b ut to n un til the time disp la ys w il l ch an ge t o 12 -h ou r( or 24-hour) dig it a nd f la sh .
2. Press the S KI P/ TU NE S EA RC H( UP o r DO WN ) bu tt on t o ad ju st 1 2-hour or 24- ho ur d ig it .
3. Press the M EM /C -A DJ . bu tt on a ga in , th e HO UR digit will f la sh o n th e di sp la y, pr es s th e SK IP /T UN E SE AR CH
(UP or DO WN ) bu tton to adjus t HO UR d ig it .
4. Press the M EM /C -A DJ . bu tt on o nc e mo re , th e MINUTE digi t wi ll f la sh o n th e di sp la y, pr es s th e SK IP /T UN E
SEARCH (UP or DOWN) button t o ad ju st M IN UT E di gi t.
5. Press the M EM /C -A DJ . bu tt on a ga in t o co nf irm the time.
6. Each en ab le s ta te a s sh ow n ab ov e wi ll b e cl eared if the ke y is n ot p us he d in 10 s ec on ds .
TI ME R S ET TI N G
During i n th e STANDBY OF F/ ON m ode.
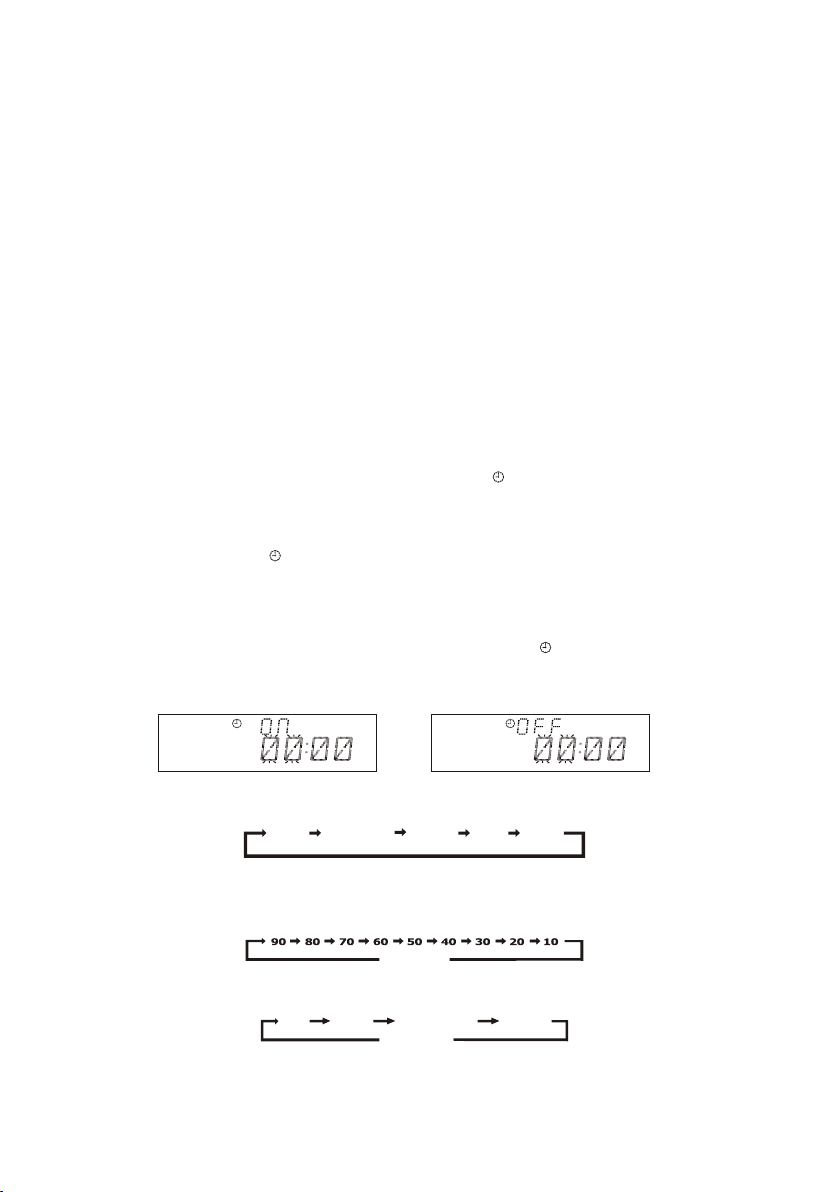
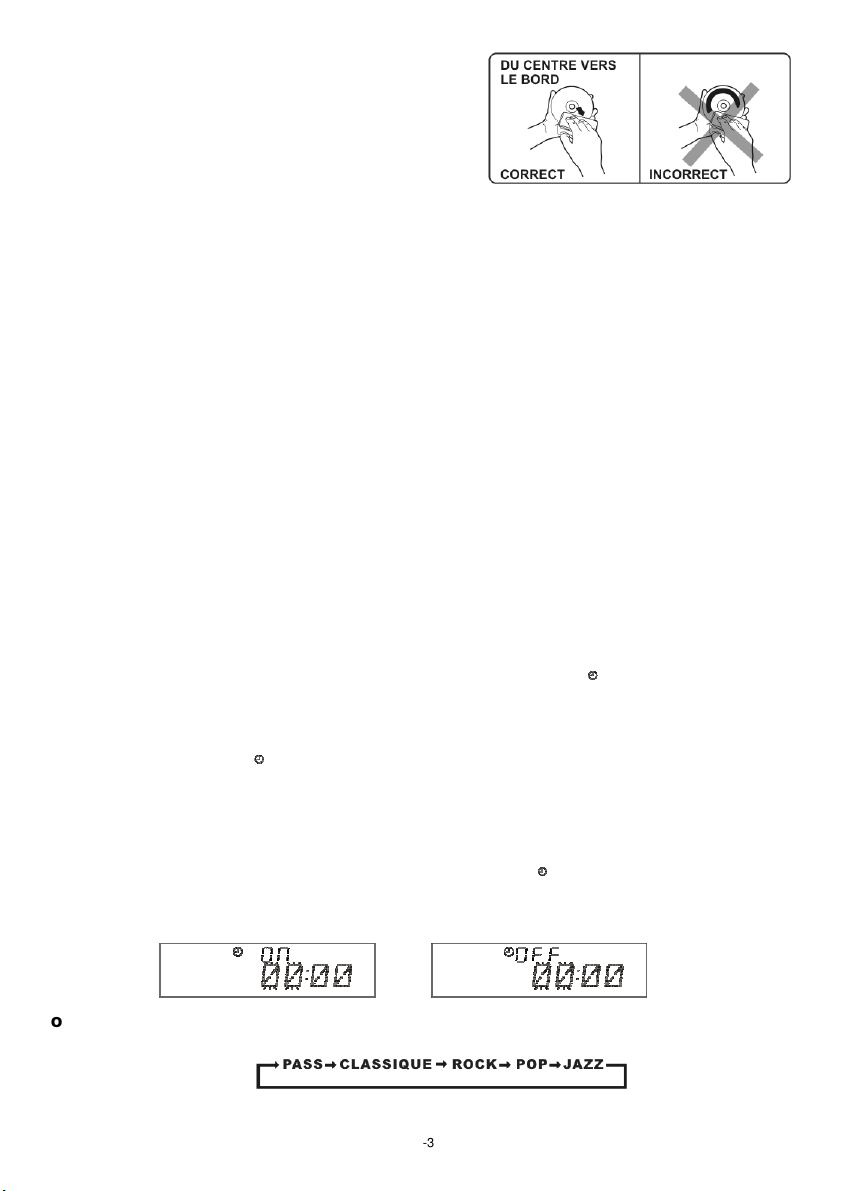
1. After adju st in g cl oc k, p re ss t he T IM ER b ut to n fo r a fe w se co nds, " ON" and "00: 00 " ap pe ar s on t he d is pl ay
and the HOUR d ig it f la sh es .( F1 )
2. Press the S KI P/ TU NE S EA RC H( UP o r DO WN ) bu tt on t o ad ju st i t.
3. Press the TI MER button ag ai n, t he M IN UT E di gi t wi ll s ta rt f lashing, ad ju st i t by p re ss in g th e SK IP /T UN E
SEARCH (UP or D OWN) button .
4. Press the TI MER button on ce m or e to c on fi rm a nd o rd er T IM ER O N ti me .
5. After adju st in g "T IM ER O N" , " OF F" a pp ea rs o n the display a nd t he H OU R di gi t fl as he s. (F 2)
6. Repea t th e ab ov e st ep s 2 to 3 , an d th en p re ss t he T IM ER b ut to n on ce more to conf ir m an d or de r TIME R OF F ti me .
7. Now the "TU NE R" a pp ea rs o n th e di sp la y wi th flashing, ad ju st “ TU NE R, C D, U SB o r SD C AR D " by p re ssing
the SKIP/T UN E SE AR CH (U P or D OW N) b ut to n.
8. Press the TI MER button ag ai n, t he t im er " VO L" i nd ic at or a ppears on the d is pl ay a nd f la sh es , ad ju st t he t imer
volume hig h or l ow b y pr es si ng t he T UN IN G/ SK IP ( UP or DOWN) bu tt on .
9. Each enab le s ta te a s sh ow n ab ov e wi ll b e cl eared if the bu tt on i s no t pu sh ed i n 10 s ec on ds .
10. After a dj us ti ng " TI ME R ON " an d "T IM ER O FF " ,press the TIM ER button, " " appe ar s on t he d is pl ay.
11. Th e un it w il l be s wi tc he d on a utomatica ll y at " TI ME R ON " or de r an d st ar t pl aying, the un it w il l be s wi tc he d of f
automati ca ll y at " TI ME R OF F" o rd er.
Note: If the d is pl ay s ho ws " ER RO R" w hi le y ou set the “TIMER O N” , it m ea ns b ot h “T IM ER O N” a nd “ TI MER OFF” is
the same. In t hi s ca se , pl ea se g o to “ TI ME R OF F” t o set the off ti me f ir st.
You can pres s th e STANDBY/ON bu tt on o n th e un it o r on t he r em ot e co nt rol to switch t he u ni t ON o r
the unit w il l be i n st an db y mo de b ef or e tu rn O N the main swit ch o n th e
F1 F2
EQ C ON T RO L( on th e rem ot e c on tro l)
EQ shows t he p re se nt s ou nd t on e. W he n yo u pr ess the EQ button , t he s ou nd t on e ch an ge s as b el ow :
ROCK CL AS S IC PO P PASS
TO SE T S LE EP FU NC T IO N(o n th e r em ote c on t ro l )
1. If you want t o fa ll a sl ee p to m us ic , pr es s th e SL EEP bu tt on .
2. You may sel ec t th e TUNER, CD/ MP 3, U SB , SD /M MC o r AUX m od e in s le ep f unction to pl ay f ro m 90 , 80 , 70 u p to
10 minutes o f mu si c be fo re s hu tt in g it se lf o ff a ut om at ic ally.
JAZZ
NO RM A L
FU NC T IO N SE L EC T
The func ti on i s th at w he n it p re ss es t he b ut to n the mode is cha ng ed . Di sp la y ch an ge s as b el ow :
US B SD C AR D
CD
RA DI O OPE RAT I ON
1. Press the F UN CT IO N bu tt on o n th e ma in u ni t (o r remote cont ro l) t o se le ct t he T UN ER m od e th at t o se le ct t he F M
operatio n.
2. Selec t th e de si re d fr eq ue nc y wi th t he S KIP/TUNE SEAR CH (U P or DOWN) b ut to n on t he m ai n un it ( or r em ot e
control) .
TU NE R
AUX
UK-3
Page 5
Mono/Ste re o Se le ct
This uni t ca n re ce iv e th e FM m od e on ly.
1. When yo u wa nt t o se le ct F M st er eo s ta ti on , pr ess the ID3/M O. /S T. but to n on ce o n th e re mo te c on tr ol only.
The " " i nd ic at or will appea r on t he d is pl ay t ha t th e re ce pt io n is at its best.
2. When yo u pr es s th e ID 3/ MO ./ ST. bu tt on o nc e ag ain, the FM STE RE O in di ca to r wi ll t ur n of f & sw it ch t o
MONO FM stat us .
Automa ti c Tuning
1. Press the S KI P/ TU NE S EA RC H (U P or D OW N) b ut to n fo r a fe w se co nds, then relea se t he b ut to n. T he t un er
will aut om at ic al ly s ea rc h th e fi rs t st at ion of suffi ci ent signal st re ng th .
2. Repea t ab ov e pr oc ed ur e if y ou w is h to s el ect another sta ti on .
Progra mm in g pr es et s ta ti on s
You ca n al so p re se t st at io ns o f your choice a nd s to re u p 30 F M st at io ns i n it s me mo ry.
1. Tune to th e re qu ir ed s ta ti on .
2. Press the M EM /C -A DJ . bu tt on .
3. Press the P RE SE T/ FO LD ER (U P or D OW N) b ut to n fo r yo ur d es ired station nu mb er.
4. Press the M EM /C -A DJ . Bu tt on a ga in t o co nf irm your sele ct io n.
5. To pro gr am m ore stations in to m em or y, repe at t he a bo ve s te ps 2 t o 4.
6. To cha ng e th e stored preset s ta ti on s, r ep ea t th e ab ov e st ep s 2 to 4.
Notes:
1. Storing a n ew s ta ti on i nt o a pr es et l oc at ion will erase th e pr ev io us ly s to re d st at io n in t hat locatio n.
2. Power o ff will not erase th e me mo ry o f pr es et s ta ti on s. P er form the statio ns p re se tt in g pr oc ed ur es a gain to store
the statio ns .
3. Durin g th e un it i n STANDBY mo de, press and h ol d th e PL AY/PAUS E bu tton to erase a ll p re se t me mo ry.
Select in g th e Pr es et S ta ti on s
1. Press the P RE SE T/ FO LD ER (U P or D OW N) b ut to n to s el ec t th e desired prese t st at io n nu mb er.
2. Th e nu me ric location of t ha t pr es et s ta ti on i s di sp la ye d along with th e co rr es po nd in g fr eq ue nc y.
FM An te nn a
Extend t he F M an te nn a fo r be tt er F M re ce pt io n.
CD /M P3/ WM A O PE RATI ON
Listen in g To Compact Disc ( CD /M P3 /W MA )
1. Press the F UN CT IO N bu tt on o n th e un it t o se le ct the CD mode.
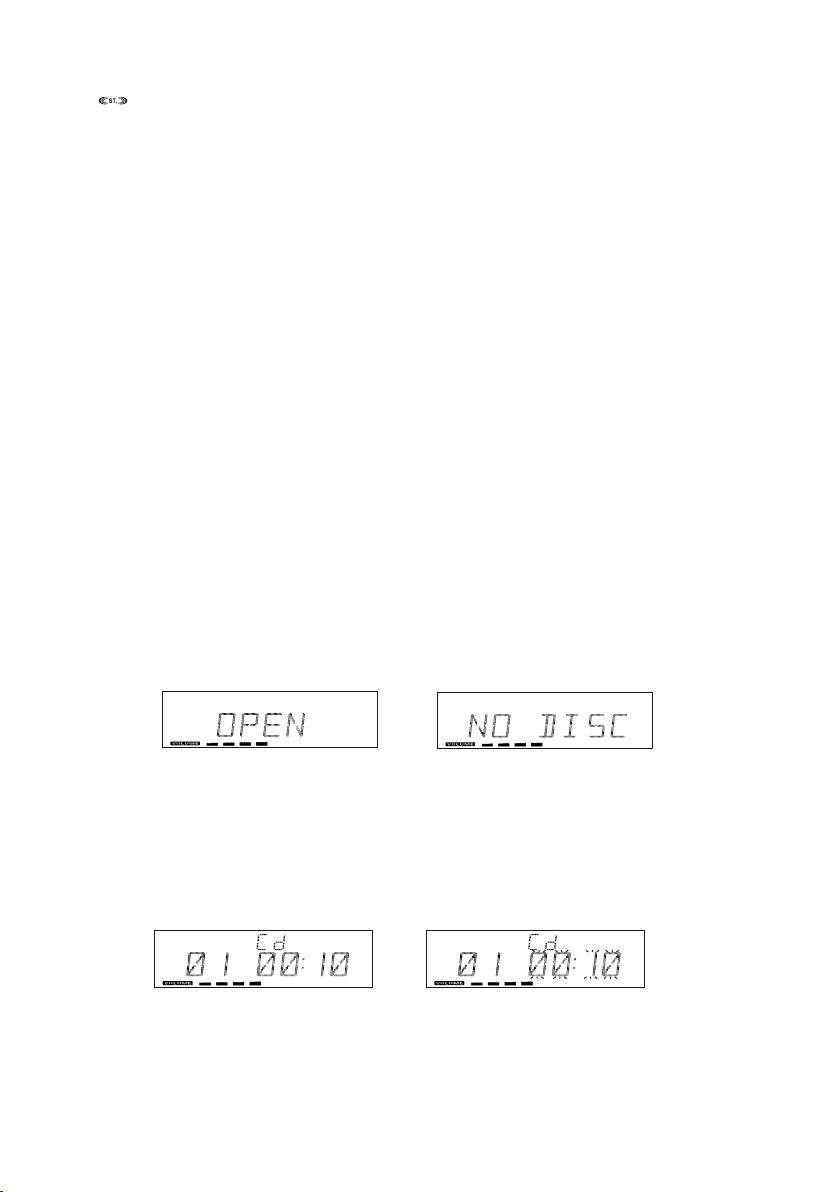
2. Press the O PE N/ CL OS E bu tt on o n th e ma in u ni t , and then t he C D do or w il l op en a ut om at ic al ly.(F 3)
3. Inser t th e CD /M P3 d is c in to t he C D co mp ar tm ent, press th e OP EN /C LO SE b ut to n ag ai n to c lo se the CD
door. Th e ma in unit will read t he C D/ MP 3 di sc a ut om at ic al ly.
NOTE: (1) Thi s unit can play C D, C D- R, C D- RW, M P3 a nd W MA di sc s.
(2) It can rea d " 8 cm " a nd " M ul ti S ec ti on " M P3 D IS C.
(3) The " Pl ay back Transfe r Ra te " in M P3 a nd W MA . (a ). I n MP 3, t ra ns fer bit rate : 8 - 25 6 kb ps . (b ). I n WM A,
transfer b it r at e : 8 - 19 2k bp s.
(4) The " Ma x Re adable 99 fol de rs a nd 9 99 t ra ck s" .
(5) If no disc o r ca n` t re ad TO C, N O DI SC will be disp la ye d. (F 4)
(or remo te c on tr ol )
F3
Playin g Th e En ti re C D/ MP 3/ WM A
- CD
1. Insert th e CD d is c in to t he C D co mp ar tm en t, t he main unit wi ll a ut om at ic al ly r ea d th e to ta l number of the f ol de rs
and tracks a t th e sa me t im e.
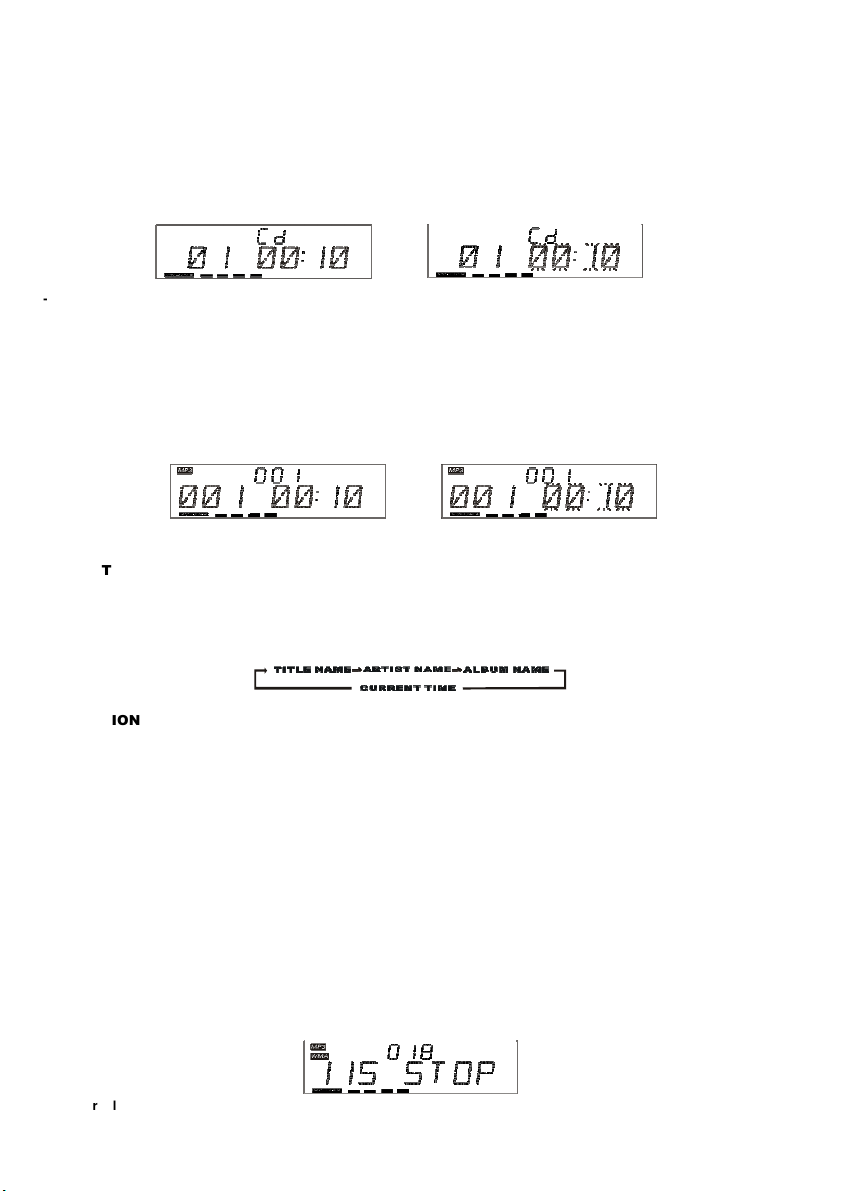
2. Press the P LAY/PAU SE b ut to n, the unit will pl ay t he f ir st t ra ck o f th e CD d is c au to matically.( F5 )
3. Press the P LAY/PAU SE b ut to n once again, the t im e el ap se d in di ca to r wi ll f lash.(F6)
4. Press SKI P/ TU NE S EA RC H( UP o r DO WN ) bu tt on o nc e to c ha ng e Track NO., press a nd h ol d th e SK IP /T UN E
SEARCH (UP or DOWN) button o nc e to s ki p fa st f or wa rd o r ba ck wa rd of each song.
5. To res um e pl ayback, press t he P LAY/PAU SE b ut to n once more aga in .
6. To sto p pl ay back, press the S TOP but to n on ce o n the unit (or remo te c on tr ol ).
F5 F6
- MP3/WMA
1. Insert th e MP 3/ WM A dis c in to t he C D co mp ar tm ent, the main u ni t wi ll a ut om at ic al ly r ea d th e total numbe r of t he
folders an d tr ac ks a t th e sa me t im e.
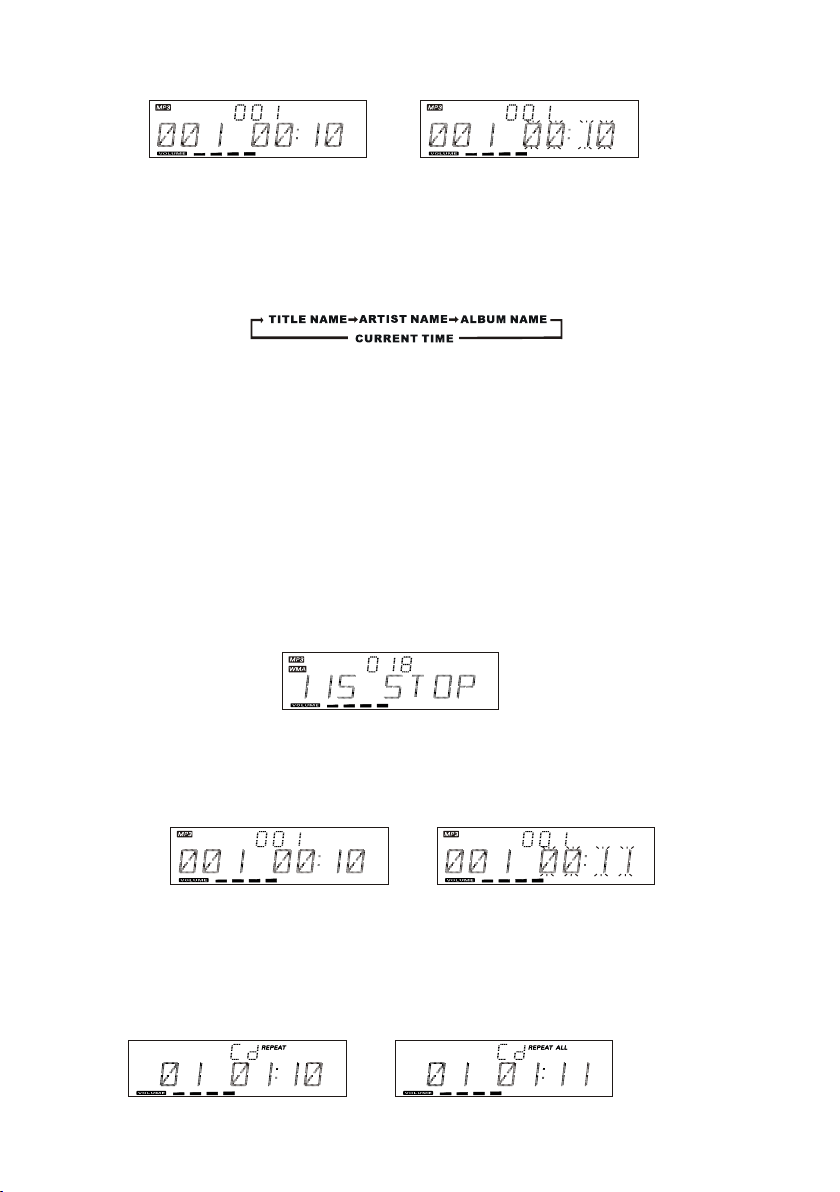
2. Press the P LAY/PAU SE b ut to n, the unit will pl ay t he f ir st t ra ck o f th e CD d is c au to matically.( F7 )
3. Press the P LAY/PAU SE b ut to n once again, the t im e el ap se d in di ca to r wi ll f lash.(F8)
4. To cha ng e Tra ck NO., Press SKI P/ TU NE S EA RC H( UP o r DO WN ) bu tt on o nc e. P re ss a nd h old the SKIP/ TU NE
SEARCH (UP or DOWN) button o nc e to s ki p fa st f or wa rd o r ba ck wa rd each song.
5. To res um e pl ayback, press t he P LAY/PAU SE b ut to n once more aga in .
F4
UK-4
Page 6
6. To cha ng e th e ALBUM NO., press t he P RE SE T/ FO LD ER ( UP o r DO WN ) bu tt on o nc e.
7. To sto p pl ay back, press the S TOP but to n on ce o n the unit (or remo te c on tr ol ).
F7
F8
Note: If the m ai n un it i s no t wo rk in g pr op er ly, dis co nn ec t th e power sourc e an d th en r ec on ne ct i t ag ai n
ID 3 OP E RAT IO N ( on t he re mot e co n tr o l)
During in th e MP 3/ WM A mod e
1. Press the I D3 /M O. /S T. but to n on ce t o op en t he I D3 function .
2. If the MP3/ WM A fil e is w ri tt en “ ID 3” , it w il l au tomatical ly s ea rc h th e in fo rm at io n of “ TI TLE NAME”, “AR TI ST N AM E”
and “ALBUM N AM E” ind ic at ed o n th e display .
3. Press the I D3 /M O. /S T. but to n on t he r em ot e ag ain. The n th e un it will resume to p la y no rm al ly.
US B/ S D CA RD O P ER ATIO N
During in th e STANDBY mo de
1. Insert th e US B DE VI CE o r SD /M MC C AR D, a nd t he n press the STAND BY but to n on t he m ai n unit (or remo te
control) t o po we r" ON " th e un it .
2. Press the F UN CT IO N bu tt on o n th e ma in u ni t (o r remote cont ro l) t o se le ct t he U SB o r SD /M MC m od e. The m ai n
unit wil l au to ma ti ca ll y re ad t he t ot al n umber of the fold er s an d tr ac ks a t th e sa me t im e. ( F9 )
3. If the USB me mo ry d ev ic e mo re t ha n on e fo ld er.
a. Press the P RE SE T/ FO LD ER ( UP o r DO WN ) bu tt on t o se le ct e ac h fo lder.
b. Press the S KI P/ TU NE S EA RC H( UP o r DO WN ) bu tt on t o se le ct c urrent track in d es ir ed f ol de r.
4. If the MP3 an d WM A are w ri tt en i n "I D3 ".
a. During th e un it i n th e MP 3 or W MA pl ay in g. P re ss t he ID3/MO./ ST. bu tt on o nc e. The d is pl ay w il l sh ow
a "ID3 ON", an d th en i t wi ll a ut om at ic al ly s ea rch more than 6 4 le tt er s fo r "T IT LE N AM E" , "A RT IS T NA ME " or
"ALBUM NAM E" w hi ch m ov e fr om t he r ig ht c or ne r to the left corne r on t he d is pl ay c on ti nu ou sl y.
b. Press the I D3 /M O. /S T. but to n on ce a ga in . Th e di sp la y wi ll s how a "ID3 OFF", an d th en t he m ai n un it
will play no rm al ly.
Note:
1. Th e ma in u nit can play MP3 an d WM A onl y in t hi s mo de .
2. Th is u ni t can support mos t of U SB d ev ic es a nd S D/ MM C/ SD HC c ards (up-to 3 2G B me mo ry c ap ac it y fo r SD HC ).
It cannot ac ce ss ( or, n ee d lo ng er t im e to a cc es s) those devi ce s wi th b ig m em or y ca pa ci ty.
3. It can supp or t US B ve rs io n 1. 1 an d 2. 0.
4. Not suppo rt a ll k in ds o f “ du al v ol ta ge -M MC ” card nor “MMC -P lu s” c ar d.
5. Th e ma in u ni t does not supp or t th e WM A fil e wh ic h is p ro te ct ed “ DRM FILE”.
F9
Playing Th e En ti re f la sh d is c
1. Playb ac k wi ll s ta rt b y pr es si ng t he P LAY /PA US E bu tt on . Pl ay ba ck s ta rt s wi th the first tr ac k. The display
shows the cu rr en t tr ac k nu mb er a nd i ts e la ps ed time.(F1 0)
2. To int er ru pt playback , pre ss t he P LAY/PAU SE b ut ton. The t im e el apsed indic at or w il l fl as h. (F 11)
3. To res um e pl ayback, press t he P LAY/PAU SE b ut to n again.
4. To sto p pl ay back, press the S TOP but to n.
F10
Note : In any tim e, t he U SB D EV IC E or S D CA RD m us t be f ix ed w ell under in th e STANDBY mo de t o av oid the main
unit and USB D EV IC E or S D CA RD w er e da ma ge d.
RE PE AT PLAY (o n the r emo te c ont rol )
- CD
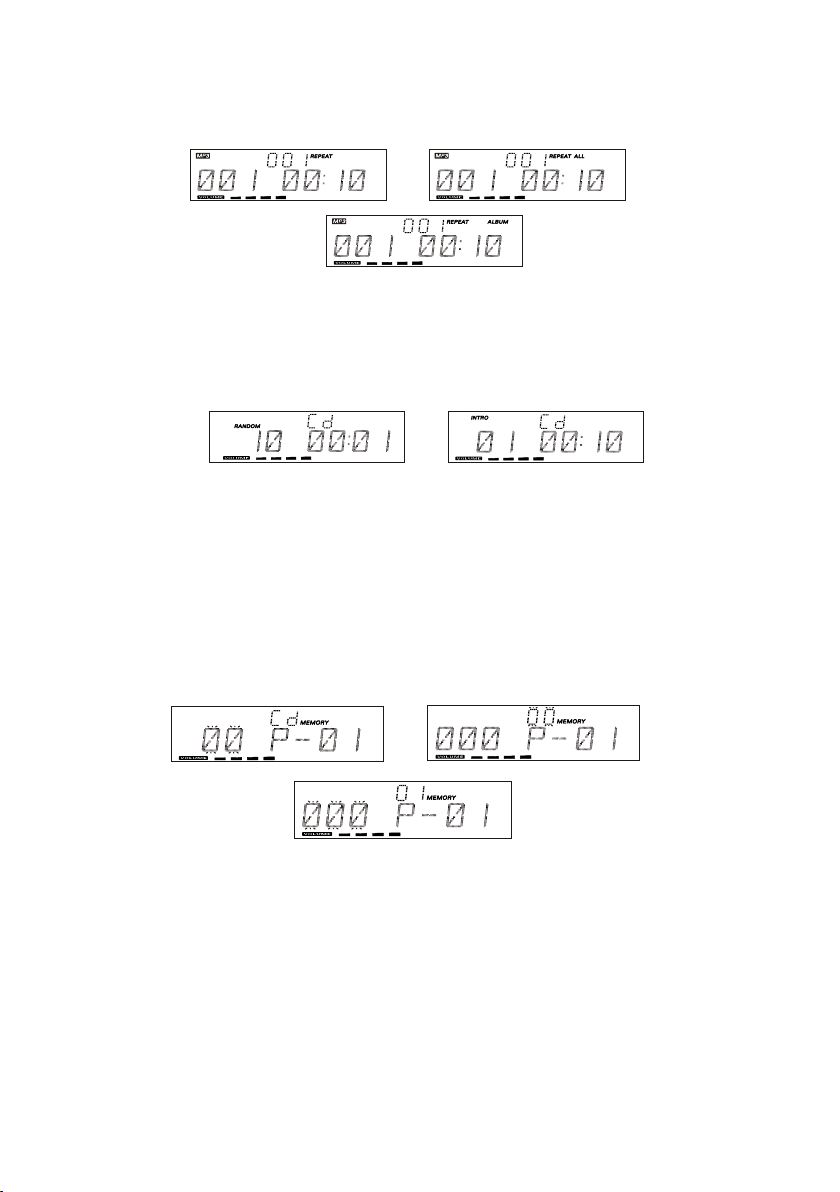
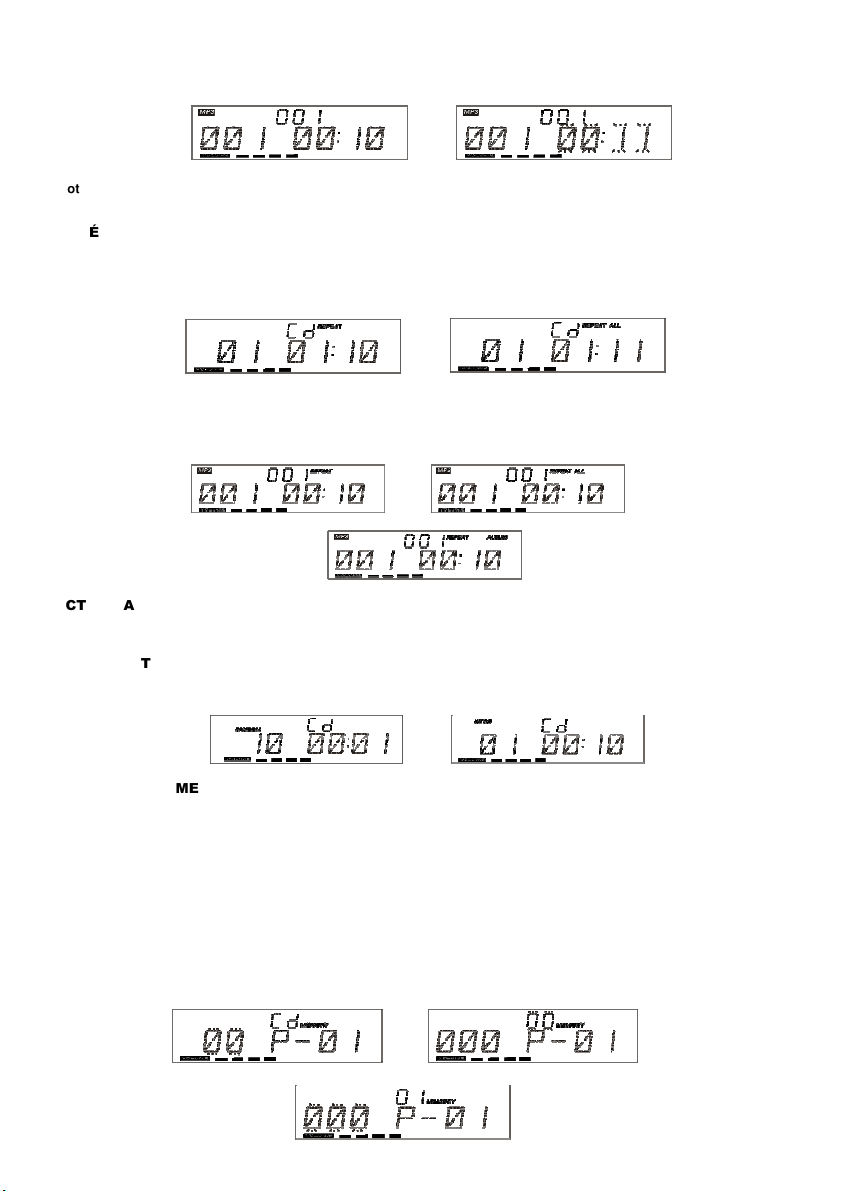
1. Press the R EP EAT bu tt on o nc e , REPEAT is d is pl ay ed . Th e ma in u ni t wi ll p la y th e cu rrent track rep ea te dl y.(F1 2)
2. Press the R EP EAT bu tt on t wi ce, REPEAT ALL is d is pl ayed. Th e ma in u nit will play a ll t ra ck s re pe at ed ly. (F 13 )
3. Press the R EP EAT bu tt on t hr ice, REPEAT fun ct io n wi ll b e of f.
F12
F11
F13
UK-5
Page 7
- MP3/WMA
1. Press the R EP EAT bu tt on o nc e , then REPEAT is di sp la ye d. I t wi ll p lay the current t ra ck r ep ea te dl y.( F1 4)
2. Press the R EP EAT bu tt on t wi ce, REPEAT ALL is d is pl ayed. It will p la y al l tr ac ks r ep ea te dl y.( F1 5)
3. Press the R EP EAT bu tt on t hr ice, then REPEAT ALB UM i s di sp la ye d. It will play r ep ea te dl y th e cu rr en t
album. (F1 6)
4. Press the R EP EAT bu tt on f ou r times, then REP EAT fu nc ti on w il l be off .
F14
F16
RA ND OM PL AY( on th e rem ot e con tr o l)
1. Press the R AN DO M bu tt on o nc e , an d th en R AN DO M is displaye d. (F 17 )
2. Press the R AN DO M bu tt on o nc e ag ai n, a nd t he n resume to nor ma ll y pl ay.
IN TR O PL AY(o n th e r em ote c on t ro l )
1. Press the I NT RO b ut to n on ce , an d th en I NT RO i s displayed . The main unit wi ll p la y th e fi rs t 10 s ec on ds o f ea ch
track.(F 18 )
2. Press the I NT RO b ut to n tw ic e, a nd t he n re su me to normal pl ay.
F17
PROG RA M M OD E
User can m ak e th e pr og ra m up t o 32 t ra ck s in C D mo de or 64 tracks in MP 3/ WM A/ US B/ SD C AR D mo de i n an y
desire d or de r. Pr og ra m mo de i s ac ti va te d while in stop m od e.
1. How to play t he p ro gr am
- CD
1) Press the M EM /C -A DJ . bu tt on , sh if t to P RO GRAM mode.(F1 9)
2) Press the S KI P/ TU NE R SE AR CH (U P or D OW N) b ut to n, t he t ra ck number will be c ha ng ed .
3) Press the M EM /C -A DJ . bu tt on t o co nf ir m th e track numbe r.
- MP3/WMA/ US B/ SD C AR D
1) Press the M EM /C -A DJ . bu tt on , sh if t to P RO GRAM mode. The a lbum number is fl as hi ng . (F 20 )
2) Press the P RE SE T/ FO LD ER b ut to n, t he a lb um number wil l be c ha ng ed .
3) Press the M EM /C -A DJ . bu tt on , t he t ra ck n um ber is flashi ng .( F2 1)
4) Press the S KI P/ TU NE R SE AR CH b ut to n, t he t rack number w il l be c ha ng ed .
5) Press the M EM /C -A DJ . bu tt on t o co nf ir m th e track numbe r.
F19
F15
F18
F20
F21
2. PROGRAM P LAY
Press th e PL AY/PAUS E bu tt on o n the unit (or remo te c on tr ol ), i t wi ll b e pl ay s ta rt ing with the fi rs t tr ac k of t he
progra m. W he n al l tr ac ks h av e be en p la ye d, the unit displ ay w il l sh ow t he n um be r of t ra ck s and the playing t im e of
the CD/M P3 /W MA tr ac ks .
3. CANCE L PROGRAM
1. Press the S TOP but to n on ce , or open the CD tray d oo r an d cl os e it a ga in t he n th e me mory will be eras ed .
2. Set a new pro gr am , th e ex is ti ng o ne w il l be c leared.
Note : Dur in g in t he p ro gr am m od e.
1. Press the " RE PE AT" butto n on ce , th e "R EP EAT " in di ca to r wi ll l ig ht o n th e di sp lay. Th en t he m ai n un it w il l re pe at
the curren t tr ac k.
2. Press the “ RE PE AT" butto n tw ic e, t he " RE PE AT ALL" will light o n th e di sp la y. The n the main unit wil l re pe at a ll
the total nu mb er o f tr ac ks .
3. Press the “ RE PE AT” butto n on ce m or e ag ai n. T he m ai n un it w il l re tu rn t o pl ay t he program norm al ly.
AUX I N P LAY
The AUX inp ut i s lo ca te d of the uni t. U se a 3 .5 mm s te re o ja ck c ab le t o co nn ect audio equ ip me nt
throug h th e LI NE I N ja ck .
on the lef t ha nd s id e
UK-6
Page 8

1. To select the AU X in pu t fu nc ti on , re pe at ed ly press the FUNC TI ON b ut to n on t he u ni t (o r re mo te c ontrol) unt il t he
AUX is indi ca te d on t he d is pl ay.
2. Press the V OL UM E (+ o r -) b ut to n to a dj us t th e so und output le ve l.
Note: LI NE i n ca bl e no t in cl ud ed .
MU TE S E TT ING (o n the r emo te c o nt r ol )
1. When you pr es s th e MU TE b ut to n on ce o n th e re mo te control, t he v ol um e le ve l wi ll f la sh a nd t he a udio output w il l be
temporar il y te rm in at ed .( F2 2)
2. Press the M UT E bu tt on a ga in , th e vo lu me l ev el and the audi o ou tp ut w il l re tu rn t o no rm al .
F22
LI ST E N TO THE M US I C BY U SI N G HE ADP HO N E
Plug you r he ad ph on es ( 3. 5m m mi ni -s te reo plug) int o th e he ad ph on es j ac k on t he r ig ht h and side of the uni t. The sound
will be he ar d th ro ug h th e he ad ph on es , no t the speaker.
SP EC I FI CAT I ON
POWER SU PP LY : AC 230 V ~ 50 Hz
OUTPUT PO WE R : 4. 5 Watt s x 2
UNIT DI ME NSION : 23 2 (W ) x 89.5 (D) x 186 (H ) mm
SPEAKE R BO X DI ME NS IO N : 12 0 (W ) x 80 ( D) x 1 86 ( H) m m
N. W. : 2. 0k g
RADIO SE CT IO N
FREQUE NC Y RANGE : FM 87.5-108 MHz
COMPAC T DI SC S ECTION
OPTICAL PIC KU P : 3 - BEAM L AS ER
FREQUE NC Y RESPONSE : 100Hz - 16k Hz
SPECIF IC ATION SUBJECT TO C HANGE WITHOUT F UR TH ER N OT IC E.
Ventila ti on w ar ni ng : " The n or ma l ve nt il at io n of t he p ro duct shall not be i mp ed ed f or i nt en de d us e. "
www.m pm an europ e. co m
UK-7
Page 9

Micro-chaîne Hi-Fi
XRM34
NOTICE D’EMPLOI
Page 10
CONSIGNES DE SÉCURITÉ
Pour profiter pleinement de votre appareil et de toutes ses performances, lisez attentivement cette présente notice d’emploi
avant de l’utiliser et vous familiariser avec ses caractéristiques de manière à vous assurer des années d’écoute satisfaisantes et
sans panne.
Ces instructions d’utilisation et de sécurité doivent être conservées pour pouvoir les consulter ultérieurement.
L’appareil ne doit pas être exposé aux ruissellements d’eau et aux éclaboussures, évitez de poser des objets remplis de liquide, tels
que des vases, sur cet appareil. Évitez d’installer l’appareil dans les endroits décrits ci-dessous :
- Lieux exposés à la lumière directe du soleil ou près de la chaleur rayonnante des appareils de chauffage tels que les radiateurs
électriques, au dessus d’un autre appareil stéréo qui dégage beaucoup de chaleur.
- Les lieux manquant de ventilation ou poussiéreux.
- Les endroits soumis à une vibration permanente, humides ou mouillés.
Ne déposez pas sur l’appareil des sources de flamme nue telles que des bougies allumées.
Une attention particulière doit être portée eu égard aux aspects environnementaux lors de l’élimination des piles usagées.
Veillez à ne pas obstruer les ouvertures de ventilation ; laissez un minimum de 10 cm d’espace libre autour de l’appareil pour sa
bonne ventilation.
Pour ne pas gêner la ventilation, les ouvertures de ventilation ne doivent pas être couvertes par des objets tels que des journaux, du
linge de table, des rideaux, etc.
Suivez les instructions de la notice d’emploi lors de l’utilisation des commandes et des commutateurs.
Avant d’utiliser l’appareil pour la première fois, assurez-vous que le cordon d’alimentation électrique est bien raccordé.
La prise d’alimentation est utilisée comme dispositif de débranchement de l’appareil, elle doit rester facilement accessible. Pour
débrancher totalement l’alimentation électrique, retirez la fiche de l’appareil de la prise secteur.
Le fonctionnement normal de l’appareil peut être perturbé par des interférences électromagnétiques fortes. Dans ce cas, réinitialisez
simplement l’appareil pour reprendre son utilisation normale en suivant les instructions de la notice. Si le fonctionnement n’a pas lieu,
déplacez l’appareil vers un autre endroit.
Remarques importantes
ATTENTION : AFIN DE RÉDUIRE LES RISQUES D'ÉLECTROCUTION, N’ENLEVEZ PAS LE COUVERCLE (OU LE PANNEAU
ARRIÈRE). NE CONTIENT AUCUNE PIECE RÉPARABLE PAR L’UTILISATEUR. CONFIEZ TOUTE RÉPARATION ET
MAINTENANCE À UN PERSONNEL QUALIFIÉ.
TENSION DANGEREUSE
Présence d’un voltage dangereux non isolé dans l’enceinte de cet appareil d’une magnitude pouvant constituer un
risque d’électrocution.
ATTENTION
Le manuel d’utilisation contient des informations importantes d'utilisation et de maintenance. Pour des raisons de sécurité, il
est nécessaire de se reporter au manuel.
AVERTISSEMENT : POUR ÉCARTER TOUT RISQUE D’INCENDIE OU D’ÉLECTROCUTION, NE PAS EXPOSER CET
APPAREIL AUX RUISSELLEMENTS D’EAU OU AUX ÉCLABOUSSURES. Remarque : L’appareil chauffe lors d’une utilisation
prolongée. Ceci est normal et ne révèle pas de problème. Cet appareil renferme des microprocesseurs qui pourraient mal
fonctionner en cas d’interférences électriques ou de décharges électrostatiques externes. Si l’appareil ne fonctionne pas
correctement, débranchez-le de la prise d’alimentation puis rebranchez-le. Une pression acoustique excessive dans les écouteurs
ou le casque d’écoute peut entraîner une perte auditive.
Plan de montage de l’appareil et des haut-parleurs
1.
Fixation de la platine de montage mural
182 mm
Fixez au mur les deux attaches (taille : 3,5 x 25BA) en
vous assurant qu’elles sont parallèles. (La distance
entre les deux attaches doit être de 182 mm)
2.
Raccordement des enceintes
Distance maximale de raccordement : 2 mètres
FR-1
Page 11
CARACTÉRISTIQUES ET COMMANDES
1. HAUT-PARLEUR
2. PRISE JACK AUX-IN
3. ANTENNE FM
4. VOLET CD
5. TOUCHE DE FONCTION
6. MEM/RÉGLAGE HORLOGE
BOUTON
7. TOUCHE TEMPORISATEUR
8. TOUCHE VOLUME (+ ou -)
9. RÉRÉGLAGE/DOSSIER
TOUCHE UP (haut) ou
DOWN(bas)
TÉLÉCOMMANDE
1. TOUCHE STANDBY/ON (veille/marche)
2. TOUCHE ID3/MO./STÉRÉO
3. TOUCHE OUVERTURE/FERMETURE
4. TOUCHE TEMPORISATEUR
5. TOUCHE DE FONCTION
6. MEM/RÉGLAGE HORLOGE BOUTON
7. TOUCHE DE MINUTERIE SOMMEIL
8. TOUCHE DE SAUT / RECHERCHE BAS
9. TOUCHE INTRO
10. TOUCHE EQ (égaliseur)
MISE EN PLACE DES PILES DANS LA TÉLÉCOMMANDE
Appuyez sur la trappe puis faites-la glisser pour ouvrir le compartiment des piles.
Placez la pile bouton (CR2032) dans la télécommande en respectant les polarités
inscrites à l’intérieur du compartiment, le signe « + » dirigé vers le haut. Remettez la
trappe en la poussant vers le haut jusqu’à ce qu’elle s’enclenche.
Remarque : Ne mélangez pas les piles ordinaires avec les batteries. Lorsque les
piles s’épuisent, la télécommande ne fonctionnera plus. Mettez des piles neuves.
AFFICHEUR LCD
A. VOYANT SOMMEIL
B. INDICATEUR TEMPORISATEUR
C. INDICATEUR NOMBRE D’ALBUMS / MÉMOIRE RADIO
D. INDICATEUR RÉPÉTITION 1 & TOUT
E. INDICATEUR STÉRÉO
F. INDICATEUR VOLUME HAUT / BAS
G. INDICATEUR PISTE / NUMÉRO / DURÉE
DISQUES COMPACTS
1. Utilisez toujours des disques compacts portant le logo indiqué
ci-dessous.
2. Notes à propos de la manipulation des disques
Retirez le disque de son boîtier puis placez-le dans l'appareil.
* Ne touchez pas la surface réfléchissante enregistrée.
* Ne collez pas d'étiquette ni n’écrivez sur la surface du disque.
* Ne pliez pas le disque.
3. Rangement
* Rangez les disques dans leur boîtier.
* N’exposez pas les disques à la lumière directe du soleil, à des
températures élevées, ne les placez pas dans des endroits poussiéreux ou très humides.
10. SYNTONISATION/SAUT
11. TOUCHE DE LECTURE/PAUSE
12. CAPTEUR INFRAROUGE
13. INDICATEUR LED DE
14. ÉCRAN LCD
15. TOUCHE STANDBY/ON
16. TOUCHE
17. TOUCHE D'ARRET
TOUCHE UP (haut) ou DOWN
(bas)
VEILLE
(veille/marche)
OUVERTURE/FERMETURE
11. TOUCHE DE RÉPÉTITION
12. TOUCHE MUTE (coupure son))
13. TOUCHE VOLUME «-»
14. TOUCHE VOLUME «+»
15. TOUCHE LECTURE ALÉATOIRE
16. TOUCHE PRÉRÉGLAGE/DOSSIER MONTÉE
17. TOUCHE PRÉRÉGLAGE/DOSSIER DESCENTE
18. TOUCHE DE SAUT / RECHERCHE HAUT
19. TOUCHE DE LECTURE/PAUSE
20. TOUCHE D'ARRET
FR-2
18. CONNECTEUR PORT USB
19. FENTE D’INSERTION DE CARTE
MÉMOIRE SD/MMC
20. COMMUTATEUR
D’ALIMENTATION SECTEUR
21. PRISE JACK CASQUE
D’ÉCOUTE
22. SORTIE JACK HAUT-PARLEUR
(G/D)
23. CORDON D’ALIMENTATION CA
24. TROU DE FIXATION
** PILE BOUTON FOURNIE **
Retirez la bandelette de sécurité avant l’utilisation.
Remplacement de la
pile bouton
Page 12
4. Nettoyage du disque
* Si le disque devient sale, essuyez la poussière, la crasse et les traces
de doigts avec un chiffon doux.
* Nettoyez le disque en allant du centre vers le bord.
* N’utilisez jamais de benzène, de diluants, de liquide nettoyant pour
disque ou un spray anti-statique.
* Veillez à fermer la trappe du lecteur CD pour éviter que la poussière
extérieure ne s’accumule sur la lentille.
* Ne touchez pas la lentille.
UTILISATION DE L’APPAREIL
Lors de la première mise sous tension de l’appareil, celui-ci est en veille tant que le commutateur situé au dos de ce dernier n’est
pas placé sur ON. Appuyez sur la touche STANDBY/ON de l’appareil ou sur celle de la télécommande pour mettre l’appareil sous
tension (ON) ou en veille (STANDBY). Placez le commutateur d’alimentation sur OFF puis retirez la fiche de la prise secteur pour
débrancher l’appareil.
ALIMENTATION / VEILLE
1. Appuyez sur la touche STANDBY/ON de l’appareil ou sur celle de la télécommande pour mettre l’appareil sous tension (ON).
2. Sélectionnez la source sonore (CD, USB, SD, AUX ou TUNER) en appuyant sur la touché FUNCTION L’affichage correspondant
s’illumine.
3. Réglez le niveau du volume sonore au moyen des touches VOLUME (+ ou -) de l’appareil ou VOLUME (+ ou -) de la
télécommande.
4. Appuyez sur la touche STANDBY pour couper l’alimentation secteur.
Remarques :
RÉGLAGE DE L’HORLOGE
En mode de veille :
1. Appuyez et maintenez la pression sur la touche MEM / CLOCK-ADJ. jusqu'à ce que la durée affichée soit 12 heures ou 24
heures et clignote.
2. Appuyez sur la touche SKIP / TUNE SEARCH (HAUT ou BAS) pour sélectionner un cycle de fonctionnement de 12 heures ou 24
heures.
3. Appuyez de nouveau sur la touche MEM/C-ADJ, l’affichage de l’heure clignote. Appuyez sur la touche SKIP / TUNE SEARCH
(HAUT ou BAS) pour régler l’heure..
4. Appuyez de nouveau sur la touche MEM / C. ADJ, les chiffres des minutes clignotent. Réglez les minutes en appuyant sur la
touche SKIP / TUNE SEARCH (HAUT ou BAS).
5. Appuyez de nouveau sur la touche MEM / C. ADJ pour confirmer le réglage.
6. Chacun des états ci-dessus sera désactivé si les touches ne sont pas sollicitées pendant 10 secondes.
RÉGLAGE DU TEMPORISATEUR
En mode de STANDBY OFF / ON :
1. Après le réglage de l’horloge, appuyez sur la touche TIMER pendant quelques secondes, " ON" et "00:00" apparaissent
sur l’afficheur, les chiffres de l’heure clignotent. (F1)
2. Appuyez sur la touche SKIP / TUNE SEARCH (HAUT ou BAS) pour régler le temporisateur.
3. Appuyez sur la touche TIMER de nouveau, les chiffres des minutes se mettent à clignoter, réglez en appuyant sur la touche
SKIP / TUNE SEARCH (UP ou DOWN).
4. Appuyez sur la touche TIMER de nouveau pour confirmer et activer la durée de temporisation.
5. Après le réglage "TIMER ON", " OFF" apparaît sur l’afficheur et les chiffres de l’heure clignotent. (F2).
6. Répétez les étapes 2 et 3 ci-dessus puis appuyez de nouveau sur la touche TIMER pour confirmer et désactiver la durée de
temporisation.
7. «TUNER » apparaît sur l’afficheur en clignotant, réglez «TUNER, CD, USB ou SD CARD» en appuyant sur la touche SKIP /
TUNE SEARCH (UP ou DOWN).
8. Appuyez de nouveau sur la touche TIMER, «VOL» s’affiche et clignote, réglez la fourchette de temporisation en appuyant sur la
touche TUNING / SKIP (UP ou DOWN).
9. Chacun des états ci-dessus sera désactivé si les touches ne sont pas sollicitées pendant 10 secondes.
10. Après le réglage «TIMER ON» et «TIMER OFF», appuyez sur la touche TIMER, " " apparaît sur l’afficheur.
11. L’appareil est mis sous tension automatiquement par l'ordre "TIMER ON" et commence la lecture, il est coupé automatiquement
par l'ordre TIMER OFF.
Note : Si «ERROR» apparaît sur l’afficheur pendant le réglage du «TIMER ON» cela signifie que «TIMER ON» et «TIMER OFF»
sont pareils. Dans ce cas, réglez d’abord le temps d’arrêt de temporisation.
1. S’il n'y a pas de signal en mode CD / USB DVICES/ SD& MMC l’appareil est arrêté automatiquement dans un
délai de 15 minutes.
2. En mode de veille, l’affichage est illuminé pendant 10 secondes en appuyant un bouton ou une touche quelconque.
3. Lorsque l’appareil n’est pas utilisé, placez le commutateur d’alimentation sur OFF en vue d’économiser l’énergie.
F1
COMMANDE DE L’ÉGALISEUR (sur la télécommande)
EQ affiche la tonalité actuelle. Appuyez sur la touche EQ, le son change de tonalité comme suit :
FR-3
F2
Page 13

RÉGLAGE DE LA FONCTION SOMMEIL (sur la télécommande)
1. Pour vous endormir en musique, appuyez sur la touche SLEEP.
2. Il est possible de choisir entre les modes TUNER, CD / MP3, USB, SD / MMC ou AUX en fonction sommeil pour lire de 90, 80,
70 ou 10 minutes de musique avant que l'appareil ne s'arrête automatiquement.
FONCTION SELECTION
La fonction permet de sélectionner la source sonore. Le cycle d’affichage est le suivant :
FONCTIONNEMENT DE LA RADIO
1. Appuyez sur la touche FUNCTION de l'appareil (ou de la télécommande) pour sélectionner le mode TUNER à modulation de
fréquence.
2. Sélectionnez la fréquence souhaitée au moyen de la touche SKIP / TUNE SEARCH (UP ou DOWN) sur l’appareil ou la
télécommande.
SÉLECTION MONO / STÉRÉO
Cet appareil reçoit uniquement la FM.
1. Pour sélectionner la station FM souhaitée, appuyez une fois sur la touche ID3 / MO / ST. de la télécommande uniquement.
« » s’affiche indiquant que la réception du signal est optimale.
2. En appuyant à nouveau sur la touche ID3 / MO / ST, l’indicateur FM STEREO s’éteint et l’appareil commute en mode FM.
Syntonisation automatique
1. Appuyez sur la touche SKIP / TUNE SEARCH (UP ou DOWN) pendant quelques secondes puis relâchez-la. Le tuner recherche
automatiquement la première station dont le signal est suffisamment fort.
2. Répéter la procédure ci-dessus pour sélectionner une autre station.
Préréglage des stations
Il est possible de prérégler 30 stations de stations de radio FM de votre choix et de les mémoriser.
1. Réglez sur la fréquence de la station choisie.
2. Appuyez sur la touche MEM/C-ADJ.
3. Appuyez sur la touche PRESET / FOLDER (UP ou DOWN) pour entrer un numéro de station.
4. Appuyez de nouveau sur la touche MEM / C. ADJ pour confirmer la sélection.
5. Pour programmer plus de stations dans la mémoire, répétez les étapes 2 à 4 ci-dessus.
6. Pour modifier les stations préréglées stockées en mémoire, répétez les étapes 2 à 4 ci-dessus.
Remarques :
1. Stocker une nouvelle station dans un emplacement mémoire efface la station précédemment stockée dans ledit emplacement.
2. La mise hors tension de l’appareil n’efface pas la mémoire des stations préréglées. Effectuez de nouveau les procédures de
préréglage des stations pour mémoriser les stations de radio.
3. En mode STANDBY (veille), appuyez sans la relâcher sur la touche PLAY / PAUSE pour effacer tout le contenu de la mémoire.
Sélection des stations préréglées
1. Appuyez sur la touche PRESET / FOLDER (UP ou DOWN) pour sélectionner le numéro de la station préréglée souhaitée.
2. Le numéro de cette station est affiché avec la fréquence correspondante.
Antenne FM
Déployez l’antenne FM pour obtenir la meilleure réception possible.
FONCTIONNEMENT CD/MP3/WMA
Écoute des disques compacts (CD/MP3/WMA)
1. Appuyez sur la touche FUNCTION de l’appareil pour sélectionner le mode CD.
2. Appuyez sur la touche OPEN / CLOSE sur l’appareil (ou la télécommande), la trappe du lecteur s’ouvre alors
3. Insérez le disque CD / MP3 dans le compartiment CD, appuyez de nouveau sur la touche OPEN / CLOSE pour fermer la trappe
REMAR QUE
automatiquement. (F3)
du lecteur. L’appareil lit alors le disque CD / MP3 automatiquement.
:
(1) Cet appareil lit des disques CD, CD-R, CD-RW, MP3 et WMA.
(2) Il peut lire des 8 cm et des disques «Multi sessions» MP3.
(3) La vitesse de transfert en lecture MP3 et WMA : (a). Vitesse de transfert en format MP3 : 8 - 2 56 k bp s. (b). En
(4) Le nombre maximal de dossiers lisibles est de 99, le nombre de piste est de 999.
(5) En l’absence de disque ou de lecture impossible TOC, NO DISC est affiché. (F4)
format WMA, la vitesse de transfert : 8 - 19 2k bp s.
F3
FR-4
F4
Page 14
Lecture complète de CD / MP3 / WMA
-
CD
1. Insérez le disque dans le compartiment CD, l’appareil lit alors automatiquement la totalité des dossiers et pistes au même
moment.
2. Appuyez sur la touche PLAY / PAUSE, la lecture commence automatiquement à partir de la première piste du CD. (F5)
3. Appuyez de nouveau sur la touche PLAY / PAUSE, la durée de lecture écoulée s’affiche en clignotant. (F6)
4. Appuyez sur la touche SKIP / TUNE SEARCH (UP ou DOWN) pour changer de numéro de piste. Appuyez sans
relâcher sur la touche SKIP / TUNE SEARCH (UP ou DOWN) pour passer en avance rapide ou recul rapide de chaque
chanson.
5. Appuyez à nouveau sur la touche PLAY/PAUSE pour reprendre une lecture normale.
6. Pour arrêter la lecture, appuyez une fois sur la touche STOP de l’appareil (ou de la télécommande).
- MP3/WMA
1. Insérez le disque MP3 / WMA dans le compartiment CD, l’appareil lit alors automatiquement la totalité des dossiers et pistes
au même moment.
2. Appuyez sur la touche PLAY / PAUSE, la lecture commence automatiquement à partir de la première piste du CD. (F7)
3. Appuyez de nouveau sur la touche PLAY / PAUSE, la durée de lecture écoulée s’affiche en clignotant. (F8)
4. Appuyez une fois sur la touche SKIP / TUNE SEARCH (UP ou DOWN) pour changer de numéro de piste. Appuyez sans
relâcher sur la touche SKIP / TUNE SEARCH (UP ou DOWN) pour passer en avance rapide ou recul rapide de chaque
chanson.
5. Appuyez à nouveau sur la touche PLAY/PAUSE pour reprendre une lecture normale.
6. Appuyez une fois sur la touche PRESET / FOLDER (UP ou OWN) pour changer de numéro d’album.
7. Pour arrêter la lecture, appuyez une fois sur la touche STOP de l’appareil (ou de la télécommande).
Not e : Si l’appareil ne fonctionne pas correctement, débranchez-le de la prise d’alimentation puis reconnectez-le au secteur.
FONCTIONNEMENT ID3 (sur la télécommande)
En mode MP3 / WMA :
1. Appuyez une fois sur la touche ID3/MO/ST pour activer la fonction ID3.
2. Si le fichier MP3 / WMA est écrit en "ID3", l'appareil recherche automatiquement les "TITLE NAME" (titre), "ARTIST NAME"
(nom de l'artiste) et «ALBUM NAME» (titre de l’album) et les affiche.
3. Appuyez de nouveau sur la touche ID3/MO/ST de la télécommande. L’appareil reprend une lecture normale.
F5
F7
F6
F8
FONCTIONNEMENT USB / CARTE SD
En mode de veille :
1. Raccordez le périphérique USB ou insérez la carte SD / MMC puis appuyez sur la touche STANDBY de l’appareil (ou de la
télécommande) pour mettre l’appareil sous tension.
2. Appuyez sur la touche FUNCTION de l'appareil (ou de la télécommande) pour sélectionner le mode USB ou SD / MMC.
L’appareil lit alors automatiquement le nombre total dossiers et des pistes en même temps. (F9)
3. Si la mémoire USB contient plus d’un dossier.
a. Appuyez sur la touche PRESET / FOLDER (UP ou DOWN) pour sélectionner chaque dossier.
b. Appuyez sur la touche SKIP / TUNE SEARCH (UP ou DOWN) pour sélectionner une piste en cours dans un dossier
souhaité.
4. Si le MP3 et WMA sont écrits en «ID3» :
a. Pendant la lecture du MP3 ou du WMA. Appuyez une fois sur la touche ID3/MO/ST. L’afficheur indique «ID3 ON» puis
l’appareil recherche automatiquement les «TITLE NAME», «ARTIST NAME» ou «ALBUM NAME» de plus de 64
caractères qui défilent continuellement de droite à gauche sur l’afficheur.
b. Appuyez à nouveau sur la touche ID3/MO/ST. L’afficheur indique «ID3 OFF» puis l’appareil lit normalement.
Note :
1. L'appareil lit les MP3 et WMA dans ce mode uniquement.
2. L’appareil supporte la plupart des périphériques USB ou des cartes SD / MMC / SDHC (jusqu’à une capacité de
3. L’appareil supporte les versions USB 1,1 et 2,0.
4. Il ne supporte pas tous les types de cartes «MMC double voltage» ni les cartes «MMC – Plus».
5. L’appareil ne supporte pas les fichiers WMA avec protection DRM.
mémoire de 32 GB maximum). L’appareil ne peut accéder (ou seulement après un laps de temps plus long) à des
périphériques disposant d’une plus grande capacité de mémoire.
F9
Lecture flash du disque complet
1. Lancez la lecture en appuyant sur la touche PLAY/PAUSE. La lecture commence par la première piste.
L’afficheur indique le numéro de la piste en cours et la durée écoulée. (F10)
FR-5
Page 15
2. Pour interrompre la lecture, appuyez sur la touche PLAY/PAUSE. L’indicateur de durée écoulée clignote. (F11)
3. Pour reprendre la lecture, appuyez de nouveau sur la touche PLAY/PAUSE.
4. Pour arrêter la lecture, appuyez sur la touche STOP.
F1 5
F11
F1 3
F1 0
Note :
A tout moment, le périphérique USB ou la carte SD doit être bien fixé en mode veille, pour éviter d’endommager
l’appareil, le périphérique USB ou la carte SD.
RÉPÉTITION DE LA LECTURE (sur la télécommande)
- CD
1. Appuyez une fois sur la touche REPEAT, REPEAT s'affiche. La piste en cours est lue de manière répétitive. (F12)
2. Appuyez deux fois sur la touche REPEAT, REPEAT ALL s'affiche. Toutes les pistes sont relues de manière répétitive. (F13)
3. Appuyez trois fois sur la touche REPEAT, la fonction de répétition est désactivée.
-
MP 3/ WMA
1. Appuyez une fois sur la touche REPEAT, REPEAT s'affiche. La piste en cours est lue de manière répétitive. (F14)
2. Appuyez deux fois sur la touche REPEAT, REPEAT ALL s'affiche. Toutes les pistes sont relues de manière répétitive. (F15)
3. Appuyez trois fois sur la touche REPEAT, REPEAT ALBUM s'affiche. L’album en cours est relu de manière répétitive. (F16)
4. Appuyez quatre fois sur la touche REPEAT, la fonction de répétition est désactivée.
LECTURE ALÉATOIRE (sur la télécommande)
1. Appuyez une fois sur la touche RANDOM, RANDOM s'affiche. (F17)
2. Appuyez de nouveau sur la touche RANDOM pour reprendre une lecture normale.
LECTURE INTRO (sur la télécommande)
1. Appuyez une fois sur la touche INTRO, INTRO s'affiche. Les 10 premières secondes de chaque piste sont lues. (F18)
2. Appuyez deux fois sur la touche INTRO pour reprendre une lecture normale.
F1 2
F1 4
F16
F1 7
MODE PROGRAMME
L'utilisateur peut programmer plus de 32 pistes en mode CD ou 64 pistes en mode MP3/WMA/USB/SD CARD dans l’ordre de son
choix. Le mode programme est activé lors du mode d’arrêt.
1.
Comment lire le programme
- CD
1) Appuyez sur la touche MEM/C-ADJ puis passez au mode PROGRAM. (F19)
2) Appuyez sur la touche SKIP / TUNE SEARCH (UP ou DOWN), le numéro de la piste sera modifié.
3) Appuyez sur la touche MEM/C. ADJ pour confirmer le numéro de piste.
- MP 3/ WMA/U SB/S D CARD
1) Appuyez sur la touche MEM/C-ADJ puis passez au mode PROGRAM. Le numéro de l’album clignote. (F20)
2) Appuyez sur la touche PRESET/FOLDER, le numéro de l’album sera modifié.
3) Appuyez sur la touche MEM/C. ADJ, le numéro de piste clignote. (F21)
4) Appuyez sur la touche SKIP / TUNE SEARCH, le numéro de la piste sera modifié.
5) Appuyez sur la touche MEM/C. ADJ pour confirmer le numéro de piste.
F1 9
F1 8
F20
F21
FR -6
Page 16

2.
LECTURE DE PROGRAMME
Appuyez sur la touche PLAY/PAUSE de l’appareil (ou de la télécommande), la lecture commence par la première piste du
programme. Lorsque toutes mes pistes sont lues, l’afficheur de l’appareil indique le nombre de pistes et la durée de lecture des
pistes du CD/MP3/WMA.
3.
ANNULATION DU PROGRAMME
1. Appuyez une fois sur la touche STOP ou ouvrez le plateau tiroir du CD puis refermez-le de sorte à effacer la mémoire.
2. Définissez un nouveau programme, l'existant est alors effacé.
Note : En mode de programme :
1. Appuyez une fois sur la touche «REPEAT», «REPEAT» s’affiche. Puis l’appareil lit la piste en cours de manière répétitive.
2. Appuyez deux fois sur la touche «REPEAT», «REPEAT ALL» s’affiche. Puis l’appareil lit toutes les pistes de manière
répétitive.
3. Appuyez de nouveau sur la touche «REPEAT». L’appareil reprend la lecture normale du programme.
LECTURE AUXILIAIRE
L’entrée AUX est située sur la partie gauche de l’appareil. Utilisez un câble jack stéréo 3,5 mm pour connecter du matériel audio
par la prise jack LINE IN.
1. Pour sélectionner la fonction d’entrée AUX, appuyez à plusieurs reprises sur la touche FUNCTION de l’appareil (ou de la
télécommande) jusqu’à ce que AUX apparaisse sur l'afficheur.
2. Appuyez sur la touche VOLUME (+ ou -) pour régler le volume de son voulu.
Not e : Câble LINE in non inclus.
FONCTION MUTE (silence) (sur la télécommande)
1. Lors d’une pression sur la touche MUTE de la télécommande, l’indicateur de niveau du volume clignote et la sortie audio est
temporairement coupée. (F22)
2. Appuyer de nouveau sur la touche MUTE, le volume et la sortie audio reprennent leur fonctionnement normal.
ÉCOUTE AU CASQUE
Insérez la mini-jack stéréo de 3,5 mm du casque dans la prise pour écouteurs située sur la partie droite de l'appareil. Le
raccordement du casque coupe automatiquement les haut-parleurs externes.
FICHE TECHNIQUE
ALIMENTATION ELECTRIQUE : AC 23 0V ~ 50Hz
PUISSANCE DE SORTIE : 4,5 W x 2
DIMENSIONS DE L’APPAREIL : 232 (l) X 89,5 (P) X 186 (H) mm.
DIMENSIONS ENCEINTES : 120 (l) X 80 (P) X 186 (H) mm.
POIDS NET : 2,0 kg
PARTIE RADIO
GAMME DE FRÉQUENCES : FM 87.5-108 MHz
PARTIE DISQUE COMPACT
PHONOCAPTEUR LASER : LASER 3 FAISCEAUX
RÉPONSE EN FRÉQUENCE : 100 Hz - 16kHz
CARACTERISTIQUES SUJETTES À MODIFICATION SANS AVIS PRÉALABLE.
Mise en garde concernant la ventilation : «La ventilation normale du produit ne doit pas être entravée pour l’utilisation prévue.»
F22
our plus de l'information,visitez notre website: www.mpmaneurope.com
FR-7
Page 17

Mikro-Hi-Fi-System
XRM34
BEDIENUNGSANLEITUNG
Page 18

SI CHE RHE ITS VOR KEH RUN G EN
Um Ihr Gerät bestmöglich mit höchster Leistung zu nutzen, lesen Sie bitte dieses Handbuch sorgfältig, bevor Sie das Gerät in Betrieb nehmen, um
sich mit seinen Funktionen vertraut zu machen und von einer verlässlichen und fehlerfreien Leistung und bestem Hörgenuss zu profitieren.
Diese Sicherheits- und Bedienungsanweisungen sollten zur Information für die Zukunft aufbewahrt werden.
Das Gerät darf keinen Wassertropfen oder Spritzwasser ausgesetzt werden, und es sollten keine mit Flüssigkeiten gefüllten Objekte
wie Vasen auf das Gerät gestellt werden. Platzieren Sie das Gerät nicht an den nachfolgend beschriebenen Orten:
* - Orte, die direktem Sonnenlicht ausgesetzt sind oder sich in der Nähe von wärmeabstrahlenden Geräten wie elektrischen
Heizungen befinden;
auf anderen Stereoanlagen, die zu viel Wärme abstrahlen.
* - Orte ohne Belüftung oder staubige Orte.
* - Orte, die ständigen Vibrationen unterliegen. Feuchte oder nasse Orte.
Stellen Sie keine offenen Flammen wie brennende Kerzen auf das Gerät.
Achten Sie auf die umweltgerechte Entsorgung von Batterien und Akkus.
Achten Sie darauf, die Lüftungsschlitze nicht zu bedecken; um das Gerät herum sollten 10cm für eine ausreichende Belüftung
freigelassen werden.
Die Belüftung sollte nicht durch Verdeckung der Lüftungsöffnungen mit Gegenständen wie Zeitungen, Tischdecken, Vorhängen usw.
behindert werden. Das Gerät sollte nur in gemäßigten Klimazonen genutzt werden.
Bedienen Sie das Gerät so wie in der Bedienungsanleitung vorgegeben.
Überprüfen Sie vor dem ersten Einschalten des Gerätes, ob das Netzkabel richtig angesteckt ist.
Der Hauptstecker wird zum Trennen des Geräts vom Strom verwendet und sollte immer betriebsbereit sein. Um das Gerät
vollständig vom Stromnetz zu trennen, ist der Hauptstecker komplett vom Netz zu trennen.
Die ordnungsgemäße Funktion des Geräts kann durch starke elektromagnetische Interferenzen beeinträchtigt werden. Falls dies
passiert, setzen Sie das Gerät entsprechend den Anweisungen in der Bedienungsanleitung auf seinen Werkzustand zurück, damit
es wieder normal funktioniert. Falls dies nicht hilft, platzieren Sie das Gerät an einem anderen Standort.
Versuchen Sie nicht, Schrauben zu lösen oder das Gehäuse des Geräts zu öffnen. Es gibt keine vom Benutzer zu wartenden Teile
im Inneren. Überlassen Sie sämtliche Wartungsarbeiten qualifiziertem Fachpersonal.
Wichtige Hinweise
VORSICHT: UM DIE GEFAHR EINES ELEKTRISCHEN SCHLAGS ZU VERMEIDEN, ENTFERNEN SIE NICHT DAS GEHÄUSE
(ODER DIE RUCKSEITE); ES BEFINDEN SICH KEINE VOM BENUTZER ZU WARTENDEN TEILE IM INNEREN;
ÜBERLASSEN SIE WARTUNGSARBEITEN QUALIFIZIERTEM FACHPERSONAL.
GEFÄHRLICHE SPANNUNG
Innerhalb des Gehäuses dieses Gerätes besteht eine gefährliche leitende Spannung, die stark genug sein kann,
um eine Gefahr durch elektrischen Schlag für Personen darzustellen.
ACHTUNG
Die Bedienungsanleitung enthält wichtige Bedienungs-und Wartungshinweise für Ihre Sicherheit; bitte lesen Sie diese
Anleitung unbedingt durch.
W
ARNUNG
WASSERTROPFEN ODER SPRITZWASSER AUS
Hinweis: Dieses Gerät wird bei Verwendung über einen längeren Zeitraum warm. Das ist normal und kein Anzeichen für ein
Problem mit dem Gerät. Das Gerät enthält Mikroprozessoren, die infolge von äußeren elektrischen Interferenzen, Rauschen oder
elektrostatischer Entladung Fehlfunktionen aufweisen können. Wenn das Gerät nicht ordnungsgemäß funktioniert, ziehen Sie das
Stromkabel vom Netz und schließen Sie es dann erneut an. Extreme Lautstärken bei Ohr- und Kopfhörern können zu Gehörschäden
führen.
Montageanleitung für das Gerät und die Lautsprecher
1.
: UM FEUER ODER STROMSCHLÄGE ZU VERMEIDEN, SETZEN SIE DIESES GERÄT NIEMALS
Montage der
Wand halterung
182mm
.
Schlagen Si e parallel zwei N ägel (Größ e 3, 5* 25 BA)
in die Wand (der Abstand zwischen ih ne n soll te
182 mm betragen).
2.
Anschließen der Lautsprecher
Maximaler Verbindungsabstand: 2 Meter
DE-1
Page 19

FUNKTIONEN UND BEDIENELEMENTE
1. LAUTSPRECHER
2. LINE-IN-EINGANG
3. FM-ANTENNE
4. CD-FACH
5. FUNKTIONSTASTE
6. MEM/C-ADJ.
7. ZEITSCHALTERTASTE
8. LAUTSTÄRKETASTE
(+ oder -)
9. FAVORITEN/ORDNER
FE RNB EDI ENU NG
1. STAND BY /E IN -T AS TE
2. ID3/MO./ST.-TASTE
3. ÖFFNEN/SCHLIESSEN
4. ZEITSCHALTERTASTE
5. FUNKTIONSTASTE
6. MEM/C-ADJ.
7. EINSCHLAFTASTE
8. ÜBERSPRINGEN/SENDERSUCHE AB
9. INTROTASTE
10. EQ-TASTE
EI NLE GEN DE R B ATT ERI E I N D IE F ERN BED IEN UNG
Drück en S ie die Ab de ck ung des Gehä uses nac h unte n und schieben Sie di e
Abdeckung w eg , um da s Gehäuse z u öf fnen. Setzen S ie die Knopfbatteri e
(CR2032) ents prechend der Polari si erungske nn zeic hnung mi t dem „+“ nach
oben ei n. S et ze n Sie den Deckel des Fachs wie de r auf und dr ücke n Si e ihn
leicht, bis er einrastet. Hinweis: Mi sche n Si e keine no rm al en Ba tt er ien mit
Akkus , we nn d ie Batterie n schwach werd en; da nn wird die Fernbedienung
nicht o rd nung sgemäß funktionieren. Erset ze n Si e si e stattdessen mit neuen
Batterien.
LCD-ANZEIGE
A. EINSCHLAFZEIT
B. ZEITSCHALTERANZEIGE
C. ALBUM/RADIOSPEICHERNUMMER
D. 1 ODER ALLE WIEDERHOLEN
E. STEREOSYMBOL
F. LAUTSTÄRKE LAUTER/LEISER
G. TITEL/NUMMER/SPIELDAUER
CDs
1. CDs müssen immer das CD-Symbol (siehe rechts) haben.
2. Hinweise zur Pflege von CDs
Nehmen Sie die CD aus der Hü ll e. L eg en S ie s ie e in.
* Fassen Sie nicht auf die reflektierende bespielte Seite.
* Kleben oder schreiben Sie nichts auf die Oberfläche.
* Verbiegen Sie die CDs nicht.
3. Aufbewahrung
* Bewahren Sie CDs in ihren Hüllen auf.
* Setzen Sie CDs nicht Sonnenlicht, Hitze, Luftfeuchte oder Staub aus.
4. Reinigung
* Wenn die CD schmutzig ist, wischen Sie Staub oder Fingerabdrücke
mit einem weichen Tuch ab.
* Reinigen Sie die CD von der Mitte nach außen hin.
* Nutzen Sie keine Benzole, Verdünner, Reinigungsflüssigkeiten oder
antistatische Sprays.
* Schließen den CD-Fachdeckel, damit die Linse nicht verstaubt.
* Berühren Sie nie die Linse des Geräts
.
13. STAND BY-L ED-LEUCHTE
14. LCD-DISPLAY
15. STAND BY /E IN -TASTE
16. ÖFFNEN/SCHLIESSEN
11. W IE DE RH OL EN
12. STUMMSCHALTEN
13. LAUTSTÄRKE „-“
14. LAUTSTÄRKE „+“
15. ZUFALL
16. ÖFFNEN/SCHLIESSEN
11. WI ED ER HO LE N
12. STUMMSCHALTEN
13. LAUTSTÄRKE „-“
14. LAUTSTÄRKE „+“
15. ZUFALL
16. FAVORITEN/ORDNER AUFWÄRT S
17. FAVORITEN/ORDNER ABWÄRTS
18. ÜBERSPRINGEN/SENDERSUCHE AUF
19. WIEDERGABE/PAUSE
20. STO PP-TASTE
DE-2
17. STOPP-TASTE
18. USB-GERÄTEANSCHLUSS
19. SD/MMC-SPEICHERKARTENSCHLITZ
20. WECHSELSTROM-HAUPTSCHALTER
21. KOPFHÖRERANSCHLUSS
22. LAUTSPRECHERAUSGANG (L & R)
23. STROMKABEL
24. AUFHÄNGUNGSLOCH
**KNOPFBATTERIE MIT GELIEFERT**
Bitte entfernen Sie zuerst den Sicherheitsstreifen
Batteriewechsel
Page 20

BE DIE NUN G DES GE R ÄTS
We nn Sie das Gerät zum ersten Mal mi t der Steckdose verbinden, i st das Gerät im S tandby-M od us, bevor Si e es
übe r de n Sc ha lter auf der Rückseite ei ns chal te n („ON“) . Sie können die STANDBY/EIN-Taste am Gerät oder a uf d er
Fernb ed ienung zum Ein-/Ausschalten des G er ät s nutzen. Wenn Sie es komplett abschalten wollen, schalten Sie den
Hauptschalter aus und ziehen Sie den Stecker.
EI N-/ AUS SCHALT EN
1. Drücken Sie die Taste STANDBY/EIN am Gerät oder auf der Fernbedienung, um das Gerät einzuschalten.
2. Wählen Sie die Audioquelle (CD , US B, S D-KARTE, AUX oder TU NE R) durch Drücken der FUNKTIONSTASTE. Die
entsprechende Anzeige leuchtet auf.
3. Passen Sie die Lautstärke mit den LAUTSTÄRKETASTEN (+ oder - ) am Gerät oder auf der Fernbedienung an.
4. Drücken Sie die Taste STANDBY/EIN er ne ut, um das Gerät auszuschalten.
Hinw eis:
1. Wird im Modus CD/USB-Gerät/SD- & MMC-Karte kein Signal empfangen, schaltet sich das Gerät nach 15 Min. automatisch
ab.
2. Wenn Sie im Standby-Modus eine beliebige Taste drücken, leuchtet das Display für 10 Sekunden auf.
3. Bitte schalten Sie den Hauptschalter aus, wenn Sie das Gerät nicht benutzen, um Energie zu sparen.
UHRZ EITE INS TELLUN G
Im STAND BY-Modus:
1. Halten Sie die Taste MEM/C-ADJ. gedrückt, bis die Uhrzeit in die 12-Stunden-Anzeige (oder 24-Stunden-Anzeige) wechselt
und blinkt.
2. Drücken Sie die Taste ÜBERSPRINGEN/SE ND ER SU CH E(AUF oder AB), um die Uhrzeit anzupassen.
3. Drücken Sie die Taste MEM/C-ADJ. erneut. Die STUNDEN blinken auf der Anzeige. Drücken Sie die Taste
ÜBERSPRINGEN/SENDERSUCHE(A UF oder AB), um die Stunden einzustellen.
4. Drücken Sie die Taste MEM/C-ADJ. noch einmal. Die MINUTEN blinken auf der Anzeige. Drücken Sie die Taste
ÜBERSPRINGEN/SENDERSUCHE(A UF oder AB), um die Minuten einzustellen.
5. Drücken Sie erneut die Taste MEM/C -A DJ., um die Uhrzeit zu bestätigen.
6. Jeder der obigen Schritte wird automatisch abgebrochen, wenn Sie 10 Sekunden lang keine Taste drücken.
ZE ITS CHAL TER EIN S TELLUN G
Im STAND BY-AUS/EIN-Modus:
1. Drücken Sie nach der Uhrzeiteinstellung die ZEITSCHALTERTASTE für einige Sekunden. Auf der Anzeige erscheint „
ON“ und „00:00“ und die STUNDEN beginnen zu blinken. (Abb.1)
2. Drücken Sie die Taste ÜBERSPRINGEN/SE ND ER SU CH E(AUF ode r AB), um die Stunden einzustellen.
3. Drücken Sie erneut die ZEITSCHALTERTASTE. Die MINUTEN beginnen zu blinken. Stellen Sie sie mit der Taste
ÜBERSPRINGEN/SENDERSUCHE( AU F ode r AB) ein.
4. Drücken Sie zur Bestätigung erneut die ZEITSCHALTERTASTE. Die „TIMER ON“-Zeit wird angezeigt.
5. Nach Anpassen von „TIMER ON“ erscheint „ OFF“ a uf d er A nz ei ge u nd d ie STUNDEN blinken. (Abb.2)
6. Wiederholen Sie Schritte 2 und 3 und drücken Sie dann erneut die ZEITSCHALTERTASTE, um die „TIMER OFF“-Zeit zu
bestätigen.
7. Nun erscheint „TUNER“ blinkend auf der Anzeige. Wählen Sie mit der Taste ÜBERSPRINGEN/SENDERSUCHE(AUF oder
AB) zwischen „TUNER, CD, USB oder SD-Karte“.
8. Drücken Sie erneut die ZEITSCHALTERTASTE. Auf der Anzeige erscheint der LAUTSTÄRKE-Zeitschalter und blinkt. Passen
Sie die Lautstärke (lauter oder leiser) mit der Taste ÜBERSPRINGEN/SENDERSU CH E( AU F oder AB) an.
9. Jeder der obigen Schritte wird automatisch abgebrochen, wenn Sie 10 Sekunden lang keine Taste drücken.
10. Wenn Sie „TIM ER O N“ und „TIMER OF F“ angepasst haben, drücken Sie die ZEITSCHALTERTASTE. Im Display erscheint, "
".
11. Das Gerät wird nun automatisch zur „TIMER ON“-Zeit eingeschaltet und beginnt mit der Wiedergabe. Zur „TIMER OFF“-Zeit
wird das Gerät automatisch abgeschaltet.
Hinweis: Wenn auf der Anzeige „FEHLER“ („ERROR“) erscheint, während Sie „T IM ER ON“ einstellen, dann heißt die s,
dass die Ein- und Ausschaltz ei t id en ti sc h si nd . Stellen Sie in diesem Fall bitt e ei ne a nd er e Au ss ch altzeit
ein.
Ab b. 1
Abb. 2
EQ-STEUERUNG (a uf der Fe rnb edienung)
Mit der EQ-Taste k önnen Sie si ch die a kt uell en Klangeinstellunge n anzeigen lassen und änder n. Beim Drücken der
Taste wird die Auswahl wie folgt durchlaufen:
JAZZ
EINSCHLAFFUNKTION (
1. Wenn Sie mit musikalischer Begleitung einschlafen wollen, drücken Sie die EINSCHLAFTASTE.
2. Sie können dann für den Modus RADIO, CD/MP3, USB, SD/MMC o de r AU X festlegen, wie lange die Musik spielen soll,
bevor sich das Gerät automatisch abschaltet. Diese Zeitdauer kann 90, 80, 70 … bis nur 10 Min. andauern.
BASS KL ASS IK ROCK PO P
auf d er Fernbe die nun g)
FU NKTIONSAUSWAHL
We nn Sie die FUNKT IO NS TA ST E dr ücken, w ird der Modus gewechselt. Die A uswa hl w ird wie folgt durchl aufen:
CD USB SD-CARD AUX
TUNER
DE-3
Page 21

RADIOBENUTZUNG
1. Drücken Sie die FUNKTIONSTASTE am Gerät (oder auf der Fernbedienung) und wählen Sie zur Radiowiedergabe den
TUNER-Modus.
2. Wählen Sie mit der Taste ÜBERSPRINGEN/SENDERSUCHE(AUF oder AB) des Geräts (der Fernbedienung) die
gewünschte Frequenz.
M
ono-/Stereo-Auswahl
Dieses Gerät kann Mono-/Stereosender w iedergeben.
1. Wenn Sie einen Stereosender abspielen wollen, drücken Sie die Taste ID 3/ MO ./ ST. nur einmal auf der Fernbedienung.
Das -Symbol erscheint im Display und zeigt an, dass der Empfang am besten ist.
2. Wenn Sie erneut die Taste ID3/MO./S T. drücken, verschwindet das Symbol und das Gerät wechselt zurück in den Mono-
Modus.
Automatische Sendersuche
1. Drücken Sie die Taste ÜBERSPRINGEN/SE ND ER SU CH E(AUF oder AB) für einige Sekunden und lassen Sie sie dann
los.
Das Radio sucht nun automatisch nach dem ersten verfügbaren Sender mit ausreichender Signalstärke.
2. Wiederholen Sie den Vorgang, wenn Sie einen anderen Sender wählen wollen.
Senderf avo ri ten program miere n
Sie können auch bis zu 30 Ihrer Lieblingssender im internen Speicher des Geräts hinterlegen.
1. Stellen Sie den gewünschten Sender im Radio ein.
2. Drücken Sie die Taste MEM/C-A DJ .
3. Wählen Sie mit der Taste FAVORITEN/OR DN ER(AUF oder AB) ihre gewünschte Sendernummer.
4. Drücken Sie die Taste MEM/C-A DJ . zur Bestätigung Ihrer Auswahl.
5. Wenn Sie weitere Sender im Gerät einspeichern wollen, wiederholen Sie die Schritte 2 bis 4.
6. Um bereits gespeicherte Lieblingssender zu ändern, wiederholen Sie ebenfalls die Schritte 2 bis 4.
Hinweise:
1. Wenn Sie einen neuen Sender auf einem Favoritenspeicherplatz speichern, wird ein eventuell bereits dort gespeicherter
Sender gelöscht.
2. Wenn Sie das Gerät abschalten, werden die gespeicherten Sender nicht gelöscht. Sie können jederzeit über die obigen
Schritte weitere Sender im Speicher hinzufügen.
3. Im STANDBY-Modus können Sie durch Gedrückthalten der Taste WIEDERGABE/PAUSE alle gespeicherten Sender
löschen.
Auswahl ei nes g espei ch erten Liebl ing sse nde rs
1. Drücke n Si e die Taste F AV OR IT EN /O RDNER(AUF oder AB), um die gewünschte Sendernummer zu wählen.
2. Die Sendernummer des gespeicherten Favoritensenders wird zusammen mit seiner Frequenz im Display angezeigt.
FM-Antenne
Ziehen Si e die FM- Antenne voll ständi g hera us, um den bes tm ög lichen Empfang zu gewährlei sten.
CD/MP 3/W MA-BEDIENUNG
CDs a nh ör en (CD/ MP3 /WMA)
1. Drücken Sie die FUNKTIONSTASTE am Gerät und wählen Sie den CD-Modus.
2. Drücken Sie die Taste ÖFFNEN/SCHLIESSEN des Geräts (oder der Fernbedienung). Das CD-Fach öffnet sich
aut om at isch. (Abb.3)
3. Legen Sie eine CD/MP3-Disc in das CD-Fach ein und drücken Sie erneut auf ÖFFNEN/SCHLIESSEN. Das Fach schließt
sich. Das Gerät wird die CD/MP3-Disc nun automatisch einlesen.
HINWEIS:
(1) Dieses Gerät spielt CDs vom Typ CD, CD-R, CD-RW, MP3 und WMA -Discs.
(2) Es kann auch „8-cm“- und „Multi-Section“-MP3-Discs wiedergeben.
(3) Es gibt folgende Wiedergaberaten: ( a) MP 3: Übertragungsrate: 8 - 256 kbps; (b) W MA: Übertragungsrate: 8
- 192 kbps.
(4) Es können maximal 99 Ordner und 999 Titel eingelesen werden.
(5) Wenn keine CD eingelegt ist oder die CD nicht gelesen werden kann, erscheint „NO D IS C“ im Display. (Abb.4)
Wiederg abe einer k omp let ten CD/MP3/ WMA
-
Für
CDs:
1. Legen Sie die CD im CD-Fach ein. Das Gerät liest automatisch die Ge sa mt zahl all er Ordne r und Ti tel ein.
2. Drücken Sie die Taste WIEDERGABE/ PAUSE. Das Gerät gibt nun automatisch den ersten Titel der CD wieder. (Abb.5)
3. Drücken Sie die Taste WIEDERGABE/ PAUSE erneut. Die Spieldauer blinkt im Display. (A bb .6 )
4. Drücken Sie die Taste ÜBERSPRINGEN/ SE ND ERSUCHE(AUF oder AB) einmal, um die Titelnummer zu
5. Um die Wiedergabe fortzusetzen, drücken Sie erneut einmal die Taste WIEDERGABE/PAUSE.
6. Um die Wiedergabe zu beenden, drücken Sie einmal die STOPP-Taste am Gerät (oder auf der Fernbedienung).
ändern. Halten Sie die Taste ÜBERSPR IN GEN/SENDERSUCHE(AUF oder AB ) gedrückt, um innerhalb
eines Titels schnell vor- oder zurückzuspulen.
Abb.3
Ab b. 5
Abb.4
Ab b. 6
DE-4
Page 22

-
Für
MP 3/ WM
A:
1. Legen Sie die MP3/WMA-Disc im CD-Fach ein. Das Gerät liest automati sc h die Ge sa mt za hl a ller Ordner und Ti tel
ein.
2. Drücken Sie die Taste WIEDERGABE/ PAUSE. Das Gerät gibt nun automatisch den ersten Titel der CD wieder. (Abb.7)
3. Drücken Sie die Taste WIEDERGABE/ PAUSE erneut. Die Spieldauer blinkt im Display. (A bb .8 )
4. Um die Titelnummer zu ändern, drücken Sie die Taste ÜBERSPRINGEN/SENDERSUCHE(AUF oder AB). Für den
Schnellvor- und Schnellrücklauf innerhalb von Titeln, halten Sie die Taste ÜBERSPRINGEN/SENDERSUCHE(AUF oder
AB) gedrückt.
5. Um die Wiedergabe fortzusetzen, drücken Sie erneut einmal die Taste WIEDERGABE/PAUSE.
6. Um die Albumnummer zu ändern, drücken Sie die Taste FAVORITEN/ORDNER(AUF oder AB) ei nmal .
7. Um die Wiedergabe zu beenden, drücken Sie einmal die STOPP-Taste am Gerät (oder auf der Fernbedienung).
Ab b. 7
Hinweis: Falls das Gerät nicht ordnungsgemäß funktioniert, trennen Sie es vom Strom und schließen Sie es dann erneut an.
ID 3-BEDIENUNG (auf de r Fernbedi en u ng)
Im M P3/WM
1. Drücken Sie die Taste ID3/MO./ST. einmal, um alle ID3-Funktionen aufzurufen.
2. Wenn die MP3/WMA-Datei im Format „ID3“ vorliegt, erschei nt i m Di splay automati sc h der TI TE LN AM E,
3. Drücken Sie erneut die Taste ID3/MO. /S T. auf der Fernbedienung. Das Gerät setzt die Wiedergabe nun normal fort.
A-Modus:
KÜNSTLER und ALBUMNAME („TITLE NAME“, „ARTIST NA ME “ und „ALB UM NAME“).
Abb. 8
BE TRI EB MIT US B-G ERÄ TEN /SD-KARTEN
Im S TANDBY-Modus:
1. Schließen Sie das USB-Gerät an oder legen Sie die SD/MMC-Karte ein und drücken Sie dann die STANDB Y-Taste am
Gerät (oder auf der Fernbedienung), um das Gerät einzuschalten („ON“).
2. Drücken Sie die FUNKTIONSTASTE am Gerät (oder auf der Fernbedienung), um den US B- oder SD /M MC-Modus zu
wählen. Das Gerät liest nun automatisch die Gesamtzahl alle r Or dner und Tit el e in. (A bb.9)
3. Falls auf dem USB-Gerät mehr als ein Ordner vorhanden ist:
a. Drücken Sie die Taste FAVORITEN/OR DN ER (A UF o der AB), um einen gewünsc hten Ord ner anzuwä hl en.
b. Drücken Sie die Taste ÜBERSPRINGEN/SEND ER SU CH E( AU F oder AB), um den gewünschten Titel im aktuellen
Ordner zu wählen.
4. Falls die MP3- und W MA-Dateien im Format „ID3“ geschrieben sind:
a. Drücken Sie während der Wiedergabe die Taste ID3/MO./ST. einmal. In der Anzeige erscheint „ID3 ON ” und e s
erschei ne n automatisch bis zu 64 Buchstabe n für de n TITE LN AM E, KÜNSTLER und ALBUMNAME. Dieser
Text läuft kontinuierlich von rechts nach links auf dem Display.
b. Drücken Sie erneut die Taste ID3/MO. /S T. Im Display erscheint „ID3 OFF“ und das G er ät k ehrt zur nor ma len
Wiedergabe zurück.
Hinw eis:
1. Das Gerät kann in diesem Modus nur MP3- und W MA-Dateien wiedergeben.
2. Dieses Produkt unterstützt die meisten USB-Geräte und SD/MMC/SDHC-Karten (bis zu 32 GB Speicherkapazität
3. Das Gerät unterstützt USB Version 1.1 und 2.0.
4. Nicht unterstützt werden alle Arten von „Dualspannungs-MMC -Karten“ und „MMC-Plus“-Karte n.
5. Das Gerät unterstützt keine kopiergeschützten WMA-Dateien im DRM-Format.
bei SDHC). Es kann jedoch nicht auf Geräte mit größeren Speicherkapazitäten zugreifen (oder braucht für den
Zugriff sehr viel länger). Übertragen Sie die Daten notfalls auf ein anderes Gerät, das mit diesem hier kompatibel
ist.
Ab b. 9
Wiederg abe de r kompletten Fl ash -Di sc
1. Drücken Sie die Taste WIEDERGABE/PAUSE zum Starten der Wiedergabe. Die W ie de rg ab e begi nnt
mit dem ersten Tit el . Im Displ ay erschei ne n di e aktuel le Titelnummer und die verstr iche ne
Spieldauer. (Abb.10)
2. Zum Unterbrechen der Wiedergabe drücken Sie die WIEDERGABE/PAUSE-Taste. Die Spieldauer blinkt im Display. (Abb.11)
3. Zum Fortsetzen der Wiedergabe drücken Sie die Taste WIEDERGABE/PAUSE erneut.
4. Zum Beenden der Wiedergabe drücken Sie die STOPP-Taste.
Hinw eis:
Schlie ße n Si e USB-Geräte n ur a n und legen Si e SD-Karten nur ein, wenn sic h das Gerät im STAN DB Y-
Modus befindet, damit keine Schäden am Gerät oder dem USB-Gerät bzw. der SD-Karte entstehen
.
Ab b. 10
DE-5
Ab b. 11
Page 23

WI EDE RHO LTE WI EDERGABE ( auf de r F ern bed ien ung )
-
Für
CDs:
1. Drücken Sie einmal die Taste WIEDERHOLEN. Es erscheint REPEAT (WIEDERHOLEN) im Display. Das Gerät wiederholt nun
2. Drücken Sie die Taste WIEDERHOLEN zweimal. Es erscheint REPEAT ALL (ALLE WIEDERHOLEN) im Display. Das Gerät
3. Drücken Sie die Taste WIEDERHOLEN dreimal. Die Funktion WIEDERHOLEN ist damit deaktiviert.
-
Für
1. Drücken Sie einmal die Taste WIEDERHOLEN. Es erscheint REPEAT (WIEDERHOLEN) im Display. Das Gerät wiederholt nun
2. Drücken Sie die Taste WIEDERHOLEN zweimal. Es erscheint REPEAT ALL (ALLE WIEDERHOLEN) im Display. Das Gerät
wiederholt nun alle Titel. (Abb.15)
3. Drücken Sie die Taste WIEDERHOLEN dreimal. Es erscheint REPEAT ALBUM (ALBUM WIEDERHOLEN) im Display. Das
Gerät wiederholt nun das aktuelle Album. (Abb.16)
4. Drücken Sie die Taste WIEDERHOLEN viermal. Die Funktion WIEDERHOLEN ist damit deaktiviert.
ZUFÄL LIGE W IEDE RGABE (
1. Drücken Sie die Taste ZUFALL einmal. Es wird RANDOM (ZUFALL) angezeigt. (Abb.17)
2. Drücken Sie die Taste ZUFALL erneut, um zur normalen Wiedergabe zurückzukehren.
IN TROWIEDERGABE ( auf der Fernbedi enu ng)
1. Drücken Sie einmal die INTROTASTE. INTRO wird angezeigt. Das Gerät spielt nun die ersten 10 Sekunden eines jeden Titels.
2. Drücken Sie zweimal die INTROTASTE, um zur normalen Wiedergabe zurückzukehren.
den aktuellen Titel. (Abb.12)
wiederholt nun alle Titel. (Abb.13)
MP 3/W MA:
den aktuellen Titel. (Abb.14)
(Abb.18)
Ab b. 12
Abb.14
auf d er Fernbe die nun g)
Abb.16
Ab b. 13
Abb.15
Abb.17
PROG RAM M -MO DUS
Sie könne n im Gerät ei n Programm, al so eine Wiedergabeliste, von bis zu 32 Ti teln i m CD-Modus o de r bis zu 6 4
Titeln im MP3/WM A/ US B/ SD-Karten-Modus in beliebiger Reihenfolge festlegen. Den Programm-Modus können Sie aktivieren,
während das Gerät gerade gestoppt ist.
1.
Wiedergabelisten erstellen
-
Bei
CDs:
1) Drücken Sie die Taste MEM/C-A DJ . und wechseln Sie in den PROGRAMM-Modus. (Abb.19)
2) Drücken Sie die Taste WIEDERGABE/ SE ND ERSUCHE(AUF oder AB), um die Titelnummer zu ändern.
3) Drücken Sie die Taste MEM/C-A DJ . zur Bestätigung der Titelnummer. Erstellen Sie so Ihre Wiedergabeliste
-
Bei
1) Drücken Sie die Taste MEM/C-A DJ . und wechseln Sie in den PROGRAMM-Modus. Die Album numm er b linkt. (Abb.20)
2) Drücken Sie die Taste FAVORITEN/ OR DNER zum Ä nd er nd er Albumn um me r.
3) Drücken Sie die Taste MEM/C-A DJ . Die Titelnummer blinkt. (Abb.21)
4) Drücken Sie die Taste ÜBERSPRINGEN/SENDERSUCHE zum Ändern der Titelnummer.
5) Drücken Sie die Taste MEM/C-A DJ . zum Bestätigen der Titelnummer.
MP 3/ WMA/U SB/S D-Karten:
Abb.19
A bb .2 0
2.
Wiedergabelisten abspielen
Drück en S ie die Ta st e WI ED ER GABE/PAUSE des Geräts (der F er nb ed ienung), dami t de r er ste Ti tel ei ne r
Wiedergabeliste ge spielt wir d. Sobal d al le Titel abgespielt wurden, erscheint i m Di splay di e Gesamtzahl aller Titel
und d ie Spieldauer der CD/MP3/W MA-Titel.
DE -6
Abb.21
Abb.18
Page 24

3. Wiedergabelisten löschen
1. Drücken Sie die STOPP-Taste einmal oder öffnen Sie das CD-Fach und schließen Sie es wieder. Dies löscht die
Wiedergabeliste.
2. Wenn Sie eine neue Wiedergabeliste erstellen, wird die bereits vorhandene gelöscht.
Hinw eis: Sie haben folgende Optionen im Programm-Modus.
1. Drücken Sie die Taste WIEDERHOLEN einmal. Im Display erscheint das WIEDERHOLEN-Symbol und das Gerät wiederholt
den aktuellen Titel.
2. Drücken Sie die Taste WIEDERHOLEN zweimal. Im Display erscheint das ALLE-WIEDERHOLEN-Symbol und das Gerät
wiederholt alle Titel.
3. Drücken Sie die Taste WIEDERHOLEN erneut. Das Gerät setzt die Wiedergabe normal, ohne Wiederholung, fort.
AUX-I N-WIEDERGABE
Der AUX-Eingang für zusätzliche Audiogeräte befindet sich links am Gerät. Schließen Sie zusätzliche Audiogeräte über ein 3,5mm-Stereokabel am LINE-IN-Eingang an.
1. Zur Auswahl des AUX-Modus drücken Sie wiederholt die FUNKTIONSTASTE des Geräts (der Fernbedienung) , bis AUX im Display erscheint.
2. Passen Sie die Lautstärke über die Taste LAUTSTÄRKE (+ oder -) nach Bedarf an.
Hinweis: Es ist kein LINE-IN-Kabel im Lieferumfang enthalten.
ST UMM SCH ALT UNG (a uf d er Fe rnb e dienung)
1. Wenn Sie auf die Taste STUMMSCHALTUNG auf der Fernbedienung drücken, blinkt das Lautstärkesymbol auf und der Ton
wird vorrübergehend stummgeschaltet. (A bb . 22)
2. Drücken Sie die Taste STUMMSCHALTUNG erneut, damit die Lautstärke und Tonwiedergabe wieder normal freigegeben
werden.
MUSIK GEN USS ÜBER KOP FHÖRER
Stecken S ie Ihre Kopfhörer (3,5-mm-Ministereoanschluss) in den Kopfhöreranschluss auf der rechten Seite des Geräts. Die
Musik ertönt jetzt über die Kopfhörer, nicht über die Lautsprecher.
SP EZI FIK ATIO NEN
STROMVERSORGUNG: Wechselstrom AC 230V ~ 50Hz
AUSGANGSLEISTUNG: 4,5 Watt x 2
GERÄTEABMESSUNGEN: 232 (B) x 89,5 (T) x 1 86 ( H) m m
LAUTSPRECHERABMESSUNGEN: 120 (B) x 80 (T ) x 186 (H) mm
NETTOGEWICHT: 2,0 kg
RADI O
FREQUENZBEREICH: FM 87,5-108 MHz
CD
OPTISCHE AUFNAHME: 3-STRAHLENLASER
FREQUENZANTWORT: 100 Hz - 16 k Hz
DIE SPE ZIFIKA TIO NEN KÖ NNE N O HNE VO RHERIG E A NKÜ NDI GUNG GEÄ NDERT WERDE N.
Warnung zur Belüftung: „Die ausreichende Belüftung des Geräts darf während der Nutzung nicht behindert werden.“
Abb. 2 2
Fuer mehrere Information besuchen Sie bitte unser Website: www.mpmaneurope.com
DE- 7
Page 25

Si stema di micro Hi-Fi
XRM34
MANU
ALE DI ISTRUZIONI
Page 26

PR ECA UZI ONI SU L LA SI C UR E ZZA
Per ottener e il ma ssim o pi ac ere e rend imento , si prega di leggere att entamente il present e ma nuale p ri ma di
uti lizzar e l’apparecchio i n modo da familiarizzarsi con le sue caratteristi che e di assicur ar si anni di fedele rendi me nto
e piacere di ascol to s enza problemi.
Le presenti istruzioni sulla sicurezza e l’utilizzo dell’apparecchio devono essere conservate per eventuali necessità future.
Non lasciare l’apparecchio esposto a sgocciolamenti o schizzi e non posare sopra di esso recipienti contenenti liquidi (i.e. vasi).
Evitare di installare l’apparecchio nei luoghi delineati qui di seguito:
* - Luoghi esposti alla luce diretta del sole o in prossimità di fonti di calore come ad esempio i caloriferi o sopra ad altre
apparecchiature stereo che emanano producono troppo calore.
* - Luoghi che impediscono la corretta ventilazione dell’apparecchio o luoghi polverosi.
* - Luoghi soggetti a costanti vibrazioni o umidi.
Non posizionare sull’apparecchio oggetti pericolosi quali candele accese.
Lo smaltimento delle batterie deve essere regolato secondo il rispetto ambientale.
Assicurarsi che le aperture previste per la ventilazione non siano ostruite; prevedere almeno 10 cm di spazio intorno all’apparecchio.
Non impedire il funzionamento del sistema di ventilazione coprendo le apposite aperture con oggetti quali giornali, tovaglie, tende,
ecc. Utilizzare l’apparecchio solo in condizioni climatiche moderate.
La spiegazione per la funzionalità dei controlli e dei pulsanti è illustrata nel presente manuale.
Prima di accendere l’apparecchio per la prima volta, assicurarsi di aver collegato correttamente il cavo di alimentazione.
La spina di rete viene utilizzata per scollegare l’apparecchio e deve restare pronta per essere utilizzata. Per completare lo
scollegamento dall’alimentazione, occorre scollegare l’apparecchio dalla rete principale.
Il normale funzionamento di questo prodotto può essere disturbato da interferenze dovute ad un forte campo elettromagnetico. In tal
caso, ripristinare semplicemente il prodotto alle funzioni normali seguendo quanto spiegato all’interno del presente manuale. Qualora
il problema dovesse ripresentarsi, si consiglia l’utilizzo del prodotto in altro luogo.
Non cercare di togliere nessuna vite o di aprire il rivestimento dell’apparecchio; l’apparecchio non contiene pezzi utili; per qualsiasi
controllo, rivolgersi a personale di assistenza qualificato.
Avvertenze importanti
AVVERTENZA
AVVERTENZA
AVVERTENZAAVVERTENZA
POSTERIORE
POSTERIORE)))) DELL’APPARECCHIO
POSTERIOREPOSTERIORE
RIVOLGERSI A PERSONALE DI ASSISTENZA QUALIFICATO
RIVOLGERSI A PERSONALE DI ASSISTENZA QUALIFICATO
RIVOLGERSI A PERSONALE DI ASSISTENZA QUALIFICATORIVOLGERSI A PERSONALE DI ASSISTENZA QUALIFICATO
AVVERTENZA
PIOGGIA O ALL’UMIDITA’
Nota: Il presente apparecchio si riscalda se utilizzato per lunghi periodi di tempo. Ciò è normale e non indica un particolare
problema del dispositivo. L’apparecchio comprende dei micro-processori che possono mal funzionare in seguito ad interferenza
elettrica esterna / rumore o scarica elettrostatica. Qualora l’apparecchio non funzioni correttamente, scollegare il cavo di
alimentazione e ricollegarlo. L’eccessiva pressione sonora provocata da auricolari e cuffie può causare la perdita dell’udito.
Schema di montaggio dell’apparecchio e degli altoparlanti
1.
fissag gi o del p annello p er mo nt aggio a parete
::::
PER RIDURRE IL RISCHIO DI SCOSSA ELETTRICA, NON RIMUOVERE
PER RIDURRE IL RISCHIO DI SCOSSA ELETTRICA, NON RIMUOVERE
PER RIDURRE IL RISCHIO DI SCOSSA ELETTRICA, NON RIMUOVERE PER RIDURRE IL RISCHIO DI SCOSSA ELETTRICA, NON RIMUOVERE
DELL’APPARECCHIO,,,, L’APPARECCHIO NON CONTIENE PEZZI UTILI
DELL’APPARECCHIO DELL’APPARECCHIO
VOLTAGGIO PERICOLOSO
Voltaggio conduttore pericoloso sufficiente a poter causare un rischio di scossa elettrica alle persone.
A
TTENZIONE
Il presente manuale contiene importanti istruzioni sull’utilizzo e la manutenzione dell’apparecchio. Per la vostra sicurezza, far
riferimento al presente manuale.
182 mm
:PER EVITARE IL RISCHIO DI INCENDIO O SCOSSA
.
L’APPARECCHIO NON CONTIENE PEZZI UTILI,,,, PER QUALSIASI CONTROLLO
L’APPARECCHIO NON CONTIENE PEZZI UTILIL’APPARECCHIO NON CONTIENE PEZZI UTILI
....
ELETTRICA, NON ESPORRE L’APPRECCHIO ALLA
IL RIVESTIMENTO
IL RIVESTIMENTO (O
IL RIVESTIMENTO IL RIVESTIMENTO
PER QUALSIASI CONTROLLO
PER QUALSIASI CONTROLLO PER QUALSIASI CONTROLLO
(O LA PARTE
LA PARTE
(O(O
LA PARTE LA PARTE
Fissare i due chiodi ( di me nsioni :3.5 x 2 5 BA ) al la parete
in posizione parallela l’uno dall’altro. (La di stanza tra i due
chi odi deve essere di 18 2 mm )
2.
Collegamento altoparlanti
La distanza m assima di c olle gamento è di 2 metri
IT-1
Page 27

CARATTERISTICHE E COMANDI
1. ALTOPARLANTE
2.
PRESA IN EN TRAT A
3. ANTENNA FM
4. VANO CD
5. PULSANTE FUNZIONE
6. PULSANTE MEM/REG C.
7. PULSANTE TIMER
8. PULSANTE VOLU ME(+o-)
9. PULSANTE PRES EL./FOLDER
(UP o D OW N)
TE LEC OMA NDO
1. PULSANTE STAND BY/ON
2. PULSANTE ID3/MO./ST.
3. PULSANTE OPEN/CLOSE
4. PULSANTE TIM ER
5. PULSANTE FUNZIONE
6. PULSANTE MEM/REG. C.
7. PULSANTE SLEE P
8. PULSANTE RICERCA SKIP/TUNE GIU ’
9. PULSANTE INTRO
10. PULSANTE EQ
IN SER I RE LA BA T TE R IE NEL T E LEC OMA NDO
Spingere verso il ba ss o il c operchio del vano batterie e far scorrere il
coperchio verso il b as so p er togli erlo. Po si zi onare la batteria a botto ne
(CR2032) ne l vano rispettando le pol arità con il “+” posizionato verso l’alto.
Riporre il coper chio d el v ano batter ia e s pi ng erlo con il dito fino ad udire
uno s ca tt o.
Nota: Non mi schiare batteri e normali a b at te ri e ricaricabili. Quando le
batterie si scaric ano, il tele comando no n fu nzio na e occor re s os ti tuirl e.
DISPLAY A C RISTALL I LI QUIDI
A. INDICATORE SLEEP
B. INDICATORE TIMER
C. INDICATORE NUMERO MEMORIA ALB UM/RADIO
D. INDICATORE RIPETI 1 e TUTTI
E. INDICATORE STEREO
F. INDICATORE VOLUME ALTO/BASSO
G. INDICATORE BRANO /NUMERO/ORA
CD
1. Utilizza re i cd rispetta ndo sempre il sens o co me d a istruzioni .
2. Avvertenze s ulla manipol azio ne d ei dischi
Togliere il cd dalla s ua custodia ed i ns er irlo nel lettore.
* Non t oc ca re l a sup er ficie a rifle ssi regi strata.
* Non i nc ol lare etic hette o scri vere sul la sup er ficie.
* Non p iegare il cd.
3. Cons er va zi one
* Conse rv ar e il cd nella p ro pria cus to di a.
* Non e sp or re i cd alla luce di re tt a del sole o all e al te
temperatur e, a ll’umidit à o a luoghi p ol verosi .
4. Pulizia del cd
* Qua lora il cd dovess e es se re s porco, eli mi na re
polvere, sporcizi a e im pr onte digital i co n un panno m or bi do.
* Il cd d eve essere puli to dal centro verso l’esterno .
* Non usare mai benze ne, diluenti, li quidi detergenti o spray anti statici.
* Ass icurarsi di chiudere i l vano CD in mo da da non far entrare la
polvere.
* Non t oc ca re l a parte centrale.
10. PULSANTE RICERCA
SKIP/TUNE (UP o D OW N)
11. PULSANTE PLAY/PAUSE
12. SENSORE IR
13. INDICATORE LED STANDBY
14. DISPLAY LCD
15. PULSANTE STANDBY/ON
16. PULSANTE OPEN/CLOSE
17. PULSANTE STOP
18. PORTA INGRESSO USB
11. PU LS AN TE R EP EAT
12. PULSANTE MUTE
13. PULSANTE VOLUME “-”
14. PULSANTE VOLUME “+”
15. PULSANTE RANDOM
16. PULSANTE PRESEL./FOLDER SU
17. PULSANTE PRESEL./FOLDER GI U’
18. PULSANTE RICERCA SKIP/TUNE S U
19. PULSANTE PLAY/PAUSE
20. PULSANTE STOP
IT-2
19. FESSURA SCHEDA MEMORIA
SD/MMC
20. INTERRUTTORE PRINCIPALE
CORRENTE
21. PRESA CUFFIE
22. PRESA IN USCITA (S e D)
23. CAVO AC
24. FORO SUONO
** BATTERIA A BOTTONE INCLUSA **
Rimuovere la linguetta protettiva prima di utilizzare
l’apparecchio.
Sostituire la
batteria a bottone
Page 28

FU NZI ONA MEN TO DEL L ’U NIT A ’
Qua nd o lo collegate alla p re sa elettri ca p er l a prima volta, l’apparecc hi o è in modalità standb y pr ima di posizionaresu
ON l’interrut tore posto sul retro de l di sp os itivo. Per passare dalla modalità ON a STANDBY è sufficiente premere il pulsante
STAN DB Y/ ON d irettamente sull’ ap pa recchi o o sul te lecomando. Spegnere l’ interr uttore p ri nc ipale dell’ ap pa re cc hi o e
estrarre il filo d alla p re sa elettri ca a muro se s i desidera spegnere tutto compl etamente .
PO WER /STA N DB Y
1. Premere il pulsante STANDBY/ON sull’ apparecchi o o sul telecomando per attivar e l’ ap pa recchi o.
2. Selezionare la sorgente (CD, USB, S D CA RD , AUX o TUNER) p re mendo il pulsante F UN CT IO N. Si ill um iner à il
display corrispondente.
3. Regolare il volume con i l pulsante VOLUME (+ o -) sull ’a pp ar ec chio o con i l tasto VOLUME (+ o -) del tel ec om ando.
4. Premere nuov amente il p ul sa nte STANDBY/ON per sp eg ne re l ’apparecchio.
Nota:
1. In modalità CD/USB DEVICES/ SD e MMC CARD in mancanza di s eg nale , l’unità principale si s pe gnerà
automati cament e do po 1 5 minuti.
2. In modal ità standby, premendo qualsi asi pulsante/t as to s i il luminerà il display per 1 0 se co ndi.
3. Si prega di posizionare l’i nterruttore princi pa le su off per ec onomiz zare e nerg ia, quando non s i utili zza
l’apparecchi o.
IM P OS T AZ I ONE D E LL’ ORO LOG IO
In mo da lità STANDBY.
1. Tenere p re muto i l pul sa nte MEM/C-ADJ. fi no a c he l ’o rario visualizza to non lampeggi i n form at o 12 -o re ( o 24-ore).
2. Premere il pulsante SKIP/TUNE S EA RC H (UP o DOWN) per impostare le ci fr e in for ma to 1 2 o 2 4 ore.
3. Premere nuov amente il p ul sa nte ME M/C-ADJ., sul display lampeggeranno le cifre dell’ORA, premer e il p ul sa nte
SKIP/TUNE SEARCH (UP o DOWN) per i mp os ta re l ’ORA.
4. Premere di nuo vo il p ul sa nte MEM/C-ADJ., s ul d ispl ay lampeggeranno l e cifre c or ri sp ondenti ai MINUTI, premere il
pulsante S KI P/ TU NE SEARCH (UP o DOWN) per impostare i MINUTI.
5. Premere nuov amente il p ul sa nte ME M/C-ADJ. per confe rm are l’orari o.
6. Ogni passaggio sopra ci ta to s ar à di sattivato se non viene p re muto nes sun tasto entro 10 secondi.
IM P OS T AZ I ONE T I ME R
In mo da lità STANDBY OFF/ ON.
1. Dopo aver regolato l’ or a, p re me re il pulsante T IM ER p er qualche s ec ondo, appariranno sul display le icone "
ON" e "00 :0 0" e l e cifre d ell’ OR A lamp eg ge ra nno.(F1)
2. Premere il pulsante SKIP/TUNE S EA RC H (UP o DOWN) per regolare.
3. Premere nuov amente il p ul sa nte TI MER, inizieranno a lampeggia re l e ci fr e corrispond enti ai MINUTI, impostarle
premendo i l pulsante SKIP/TUNE SEARCH (UP o DOWN).
4. Premere nuov amente il p ul sa nte TI MER per conf er ma re e d impostare l ’orari o di attivazione TIMER ON.
5. Dopo aver impostato "TIME R ON ", apparirà sul display l’icona " OFF" e le cifre corrispond enti a ll e ORE
lampeggeranno. (F 2)
6. Ripetere i passaggi 2 e 3 quindi premere ancora una volta il pulsante TIMER per confermare e im po st ar e l’orario di
TIMER OFF.
7. Sul display appare ora la s crit ta "TUNER" che l ampeggia, regolare “T UNER, CD, USB o SD CARD " p remendo il
pulsante S KI P/ TU NE SEARCH (UP o DOW N).
8. Premere nuov amente il p ul sa nte TI MER, sul display apparirà l’indi ca tore "VOL" l ampeggiante, regolare il volume
del timer alto o basso premendo il puls ante TUNING/SK IP (UP o DOWN).
9. Ogni passaggi o so pr a ci ta to sarà di sattivato se non v iene p re muto nessun tasto entro 10 seco ndi.
10. Dopo aver impostat o "T IM ER O N" e " TI ME R OF F", p remere il p ul sa nte TIME R, sul display apparirà l’icona " ".
11. L’ ap pa re cc hi ò si accenderà automati cament e al segnale impostato con "TIMER ON" ed inizie rà l a ri produzio ne ,
l’unità si spegnerà automaticamente al se gnal e di "TIMER OFF".
Nota: Se sul display app ar e la s critta "ERRO R" m entr e si i mposta “TIMER ON”, sig ni fi ca che i l “TIMER ON” e il “TIMER
OFF” sono uguali . In tal caso, si pr eg a di modificare il “T IM ER O FF ” per impostare nuovamente i l segnale di fine
del timer.
F1
F2
CO NT R OL L O E Q CON T RO L(s ul tel e co m an d o)
L’EQ definisce l’e ff et to s onoro predef init o. Q ua ndo si preme il pulsante EQ, l ’effetto sonoro cambia come segue:
JAZZ
IM P OS T AR E L A F U NZ I ONE S L EEP ( sul te lec o ma ndo )
1. Se si desidera addormentarsi co n la mus ica, premere i l pulsante SLEEP.
2. E’ possibile selezionare la modalità T UNER, CD/M P3 , US B, S D/ MM C o AU X in funzione sl ee p pe r riprodurre 90, 80, 70 fino
a 10 minut i di musica p ri ma di spegnersi da s ol o automaticamente.
PASS CL ASS I C RO CK PO P
SE LEZ I ON A RE FU N ZI O NE
Si parla di funzione quando premendo i l pulsante si cambia la modalità. Il displa y si modifica come segue:
IT -3
Page 29
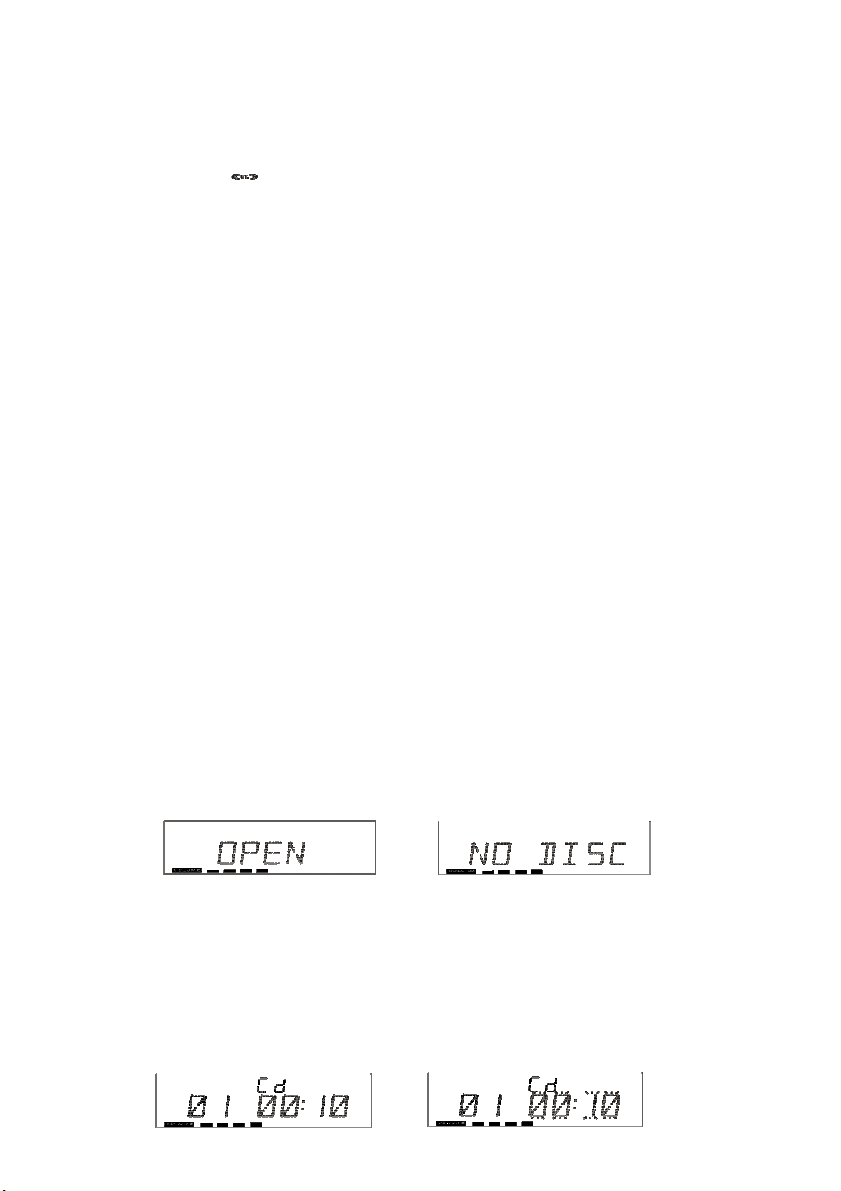
FU NZI ONI RA DIO
1. Premere il puls ante FUNCTION sull’uni tà principale ( o sul telecomando) per s el eziona re la modalità TUNER e
l’opzi one FM .
2. Selezionare la fre quenza desiderata co n il pul sante SKIP/TUNE SEARCH (UP o DOW N) sul l’unità principale
(o sul telecomando).
Sele zio ne M
Que st o ap pa re cc hio può ricevere unicamente la m od al ità FM.
1. Quando s i desidera sele zi onare una stazione s te re o FM, p remere una vo lta il pulsante ID3/MO./ST. solo sul
2. Premendo nuovamente il pulsante I D3 /MO./ST., l’indicatore FM STER EO s i di sattiverà passando allo stato
Sin tonizzazione au to ma tica
1. Premere il pulsante SKIP/TUNE S EA RC H (UP o DOW N) per qualche second o, q ui ndi rilascia re . Il
2. Ripetere la procedura sopra i ndicata se s d es idera selezionare un’a ltra stazione.
Progra
Si possono anche selezionare le s ta zi oni radio predefinite di vo st ra s celta e me mo ri zzare fi no a 3 0 stazioni FM.
1. Sintonizzarsi sulla stazione desiderata.
2. Premere il puls ante MEM/C-ADJ..
3. Premere il puls ante PRESET/FO LDER (UP o DOWN) per il numero di stazione desid er at a.
4. Premere nuovamente il pul sant e MEM/C-ADJ. per confermare la sele zione.
5. Per memorizzare più sta zi oni, ripetere i passaggi da 2 a 4 s op ra i ndicati.
6. Per modificare le s ta zi oni predefinite memorizzat e, r ipetere i p as sa ggi da 2 a 4.
Note:
1. Memorizzando una nuova stazio ne i n una po si zi one predefinita cancell erà la stazi one precedente me nt e
2. Lo spegnimento dell ’a pp ar ec chio non c ance llerà la me mo ri a dell e stazio ni p re de finite. Effettuare nuo vamente
3. Quando l’apparecc hi o è in m odalità STANDBY, tener e pr emuto il puls ante PLAY/PAUSE per cancellare tut te l a
Sele
1. Premere il puls ante PRESET/FO LDER (UP o DOWN) per selezio nare il numero del la stazi one p re de finita
2. La posizione numeri ca di quella det er mi na ta s tazi one pr ed ef inita è visuali zzato insiem e al la frequenza
Ante nna FM
Allunga re l ’antenna FM per una migli or e ri cezi one.
FU NZI ONI CD /MP 3 /W M A
Ascolta re u n Compact Disc
1. Premere il pulsante FUNCTION su ll ’apparecchio per selezionare l a mo dali tà CD.
2. Premendo i l pulsante OPEN/CLO SE s ul l’unità principale (o s ul t el ec omando) e i l vano C D si apri rà
3. Inserire il disco CD /M P3 nell’ ap posito v ano e premere n uo vamente il pulsante OPEN/CLOS E pe r chiudere il vano
CD. L’ unit à pr incipale riprodurrà automatic am ente a l eggere i l di sco CD/MP3.
NO TA:
ono/Stereo
telecomando. L’icona “ ” appari rà sul displ ay i nd icando il massimo segnale di ri ce zi one.
MONO FM.
sintoni zzat or e ricercherà automati ca me nte la p rima stazione con una p ot enza di s eg nale s ufficiente.
mmazio ne delle st az ioni ra di o pre defi ni te
memorizza ta in quell a de te rminata po si zi one.
le procedure di pr es el ezio ne per mem or izzarl e stazioni .
memoria preselezio nata.
zio ne delle
desiderata.
corrispondent e.
aut om at icamente.(F3)
(1) Questa unità può rip ro durr e dischi CD, CD-R, CD-RW, MP3 e WMA.
(2) Può leggere dis chi MP 3 da " 8 cm " e " Multi Sezione ".
(3) Il " Pl ayback Transfer Rate" su MP3 e W MA . (a). Su MP 3, t as so d i trasferim ento bit: 8 - 2 56 k bp s. (b). Su
(4) "Rip ro duce fino a un m as si mo di 99 fold er e 99 9 br ani" .
(5) In a ss enza di dis co o s e non può leggere TO C, sul display apparirà la scritta NO DISC.(F4)
st azion i radio pre defin ite
(C D/M P3 /WMA)
WMA, tasso di trasfe ri me nto bi t: 8 - 192kbps.
Ripr odu zio ne di CD /MP 3/W MA
-
CD
1. Insere nd o il CD nell’ap po si to v ano, l ’unit à principale leggerà automati camente il numero totale dei folder
e dei brani contemporaneamente.
2. Premendo il pulsa nte PLAY/PAUSE, l’apparec chio rip ro durrà automati ca me nte il primo brano del CD. (F 5)
3. Premendo nuovamente i l pulsante PLAY/PAUSE, l’ indi catore del tempo rimasto la mp eg ge rà .( F6)
4. Premere nuovamente il pul sant e SKIP/TUNE SEARCH (UP o DOW N) per modificare il numero di
brano ., t ener e pr emuto una volta il puls ante SKIP/TUNE S EARCH (UP o D OWN) per avanzare o
retrocedere rapida me nte di una canzone.
5. Per tornare alla riproduzione, preme re anc or a una v ol ta il p ul sa nte PLAY/PAUSE.
6. Per interrompere la riproduzione , premere una vol ta i l pulsante STO P sull ’app arecchio (o sul telecomando).
F3
F5 F 6
IT-4
F4
Page 30

----
MP3/W M
MP3 /W M
1. Inse re nd o il disc o MP 3/WMA nel v ano CD, l ’uni tà principale l eg ge rà a utomaticamente i l numero t ot al e dei
2. Premendo il pulsa nte PLAY/PAUSE, l’apparec chio rip ro durrà automati ca me nte il primo brano del CD. (F 7)
3. Premendo nuovamente i l pulsante PLAY/PAUSE, l’ indi catore del tempo rimasto la mp eg ge rà .( F8)
4. Per modificare il numero del brano, pr emere una volta il pulsante S KI P/ TU NE S EA RCH (UP o D OW N). Tenere
5. Per tornare alla riproduzione, preme re anc or a una v ol ta il p ul sa nte PLAY/PAUSE.
6. Per modificare il n um ero di AL BU M, pr em er e un a volta i l pu ls an te P RESET/FOL DE R (U P o DO WN ).
7. Per interrompere la riproduzione, p re me re u na v ol ta i l pulsant e ST OP su ll ’a pp ar ec ch io ( o sul telecomando).
AAAA
MP3 /W MMP3 /W M
folder e dei brani co ntemporaneamente.
premuto una v olta il p ul sa nte SKIP/TUN E SE AR CH ( UP o DOWN) per avanza re o r et rocedere rapidamente di
una c anzo ne .
F7
Nota: Se l’unità pri ncip al e non funzio na c or re tt amente, sc ol legare l’alim entazione elettrica e ri collegarla.
FU NZI ONE ID 3 ( su l t e le c omand o )
In moda lità MP 3/W MA
1. Premere una volta il puls ante ID3/M O. /S T. per a cc ed ere alla funzione ID3.
2. Se il file MP3/WM A è s cr itto “ ID3”, il sistema ricercherà in aut omatico l ’informazi one “NOME TITOLO”, “NOME
ARTISTA” e “NOME ALBUM” indi cati sul display .
3. Premere nuovamente il pul sant e ID3/MO./ST. sul telecomando. A questo punto l’a pp ar ec chio r iprodurrà
nor ma lmente .
F8
FU NZI ONE US B/S CHE DA S D
In moda lità STANDBY
1. Inseri re il DISPOSITI VO U SB o la SCHEDA SD /M MC, q ui nd i premere il pulsante STANDB Y sull ’unità principale (o
sul telecomando) per accendere l’appar ec chio .
2. Premere il pulsante FUNCTION su ll ’unit à principale (o sul telecomando) per sele zi onar e la modal ità USB o
SD/MMC.
L’uni tà principale l eg ge rà a utomaticam ente i l numero t ot ale di folder e br ani co ntemporaneamente. (F9)
3. Se sul dispositivo di m em oria U SB è prese nte pi ù di u n folder.
a. Premere il pulsante PRESET/FOLD ER ( UP o DOWN) per selezionare ogni fold er.
b. Premere il pulsante SKIP/TUNE S EA RC H (UP o DOW N) per selezionare il br ano in corso nel f ol der
desiderato.
4. Se gli MP3 e WM A sono scri tti in " ID 3" .
a. Mentre l ’apparecchio ri pr od uce MP3 o WMA, premere una volta il pulsante ID3/MO./ST.. Sul displ ay apparirà
la scritta "ID3 ON", e successivamente ricercherà ol tre 64 lettere per il " NO ME TITOLO", "NOME ARTI ST A" o
"NOME
ALBUM " che scorrono di co ntin uo dal l’ angolo destro all’angol o si ni st ro del displ ay.
b. Premere anco ra una volt a il p ul sante ID3/MO./ST.. Sul di splay apparirà la scrit ta " ID 3 OF F" , a questo p unto
l’uni tà principale rip ro durrà normal me nte.
Nota: 1. L’unità principale può riprodurre unica me nte MP3 e WMA in ques ta modali tà .
2
.
Questo apparecchio è compatibile con i principali dispositivi USB e schede SD/MMC/SDHC
(fino a 32GB di capacità memoria per SDHC). Non accede (or ha bisogno di tempi più lunghi
per accedere) a quei dispositivi con una capacità memoria più elevata.
3. Compatibile con le ve rsio ni U SB 1 .1 e 2.0.
4. Non co mp at ibile con tutti i tipi di scheda “doppio v oltaggio MMC” o “MMC-Pl us ”.
5. L’unit à pr inci pale non è c om pa ti bile con il fil e WMA protetto come “DRM FILE”.
F9
Ripr odu rre l ’in tero dis co flash
1. Premendo il pulsa nte PLAY/PAUSE si darà i ni zi o alla riproduzi one. La ri produzi one inizia con i l
primo brano. Sul display appare il numer o de l brano in corso e il tempo di ri produzione.(F10)
2. Per interrompere la riproduzione, preme re il pulsante PLAY/PAUSE. L’indi ca to re del tempo di riproduzione
lampeggerà.(F11)
3. Per proseguire con la riproduzione, prem ere nuov am ente il p ul sa nte PLAY/PAUSE.
4. Per interrompere la riproduzione, preme re il pulsante STOP.
F1 0
F11
NNNN
oooo
ttttaaaa::::
In qu al si as i mo mento, il D IS PO SI TI VO USB o la S CH EDA SD de vo no e ss er e in se rite perf et ta me nt e in
mod al it à STANDB Y per evitare c he l ’u ni tà p ri nc ip al e e il DISP OS IT IV O USB o l a SC HE DA S D si rovi ni no .
IT-5
Page 31

RI PET IZI O NE DE L LA RI P RODUZ I ON E ( s ul te l eco man do)
- CD
1. Premere una volta il puls ante REPEAT, per selezionare sul display la scritta REPEAT. L’u ni tà principale riprodurrà
il brano corrente ripetutamente.(F12)
2. Premere due volte il puls ante REPEAT,per selezionare sul display la scritta REPEAT ALL. L’unità princi pale
riprodurrà tutti i b ra ni ripetutam ente.( F1 3)
3. Premere tre volte il p ul sa nte REPEAT per disattivare la funzione REPEAT.
F1 2
-
MP 3/ WMA
1. Premere una volta il puls ante REPEAT, per selezionare sul display la scritta REPEAT. L’u ni tà principale riprodurrà
il brano corrente ripetutamente.(F14)
2. Premere due volte il puls ante REPEAT,per selezionare sul display la scritta REPEAT ALL. L’unità princi pale
riprodurrà tutti i b ra ni ripetutam ente.( F1 5)
3. Premere tre vol te il puls ante REP EAT, per sel ezio nare s ul display la scrit ta R EP EAT ALBUM. L’unità
principale ripro durrà l’ al bum co rr ente r ipetutamente . (F 16 )
4. Premere il puls ante REPEAT quattro vol te per disattivare la funzione REPE AT.
RI PRO DUZ ION E C ASU ALE (s u l t ele com a nd o )
1. Premere una vo lta il puls ante RANDOM, per se lezi onar e sul display la scritt a RA ND OM. (F 17)
2. Premere nuov amente il p ul sa nte RA NDOM per tornare alla riproduzione normale.
SC ANS ION E D EI BRA NI ( su l t e le c oma ndo )
1. Premere una vo lta il puls ante INTRO, per sel eziona re s ul display la scritta INTRO. L’unità pri ncip al e ri produrrà
i primi 10 secondi di ogni brano.(F18)
2. Premere due vo lte il puls ante INTRO per t or nare all a riproduzione nor male.
F1 4
F1 6
F1 3
F1 5
F1 7
MO DAL I TA ’ P ROG RA MM AZI ONE
E’possibile prog ra mm ar e un massimo d i 32 brani in modalità CD o 64 brani in modalit à MP3/WMA/USB/SD CARD
secondo l ’ordine che si desi dera. La m od al ità programma si attiva dalla m odalit à stop.
1111....
Co me ripr od ur re un
Com e ri pr odurre un
Com e ri pr odurre un Com e ri pr odurre un
---- CCCCDDDD
1) Pre me re il pulsant e ME M/ C- AD J., p assare al la m od al it à PROGRAM. (F19 )
2) Pre me re il pulsant e SK IP /T UNER S EARCH ( UP o DOWN ) per modificare il numero di brano.
3) Pre me re il pulsant e ME M/ C- AD J. p er confer ma re i l nu me ro di brano .
---- MP3 /W M
MP3 /W M
AAAA
/US
MP3 /W MMP3 /W M
1) Pre me re il pulsant e ME M/ C- AD J., p assare al la m od al it à PROGRAM. I l nu me ro di al bu m la mp eg gia. (F20 )
2) Pre me re il pulsant e PR ES ET /F OL DER e si modificherà il numero d i al bu m.
3) Pre me re il pulsant e ME M/ C- AD J., i l numero di b ra no l am peggia.(F 21 )
4) Pre me re il pulsant e SK IP /T UNER S EARCH per cambiare il numero di brano.
5) Pre me re il pulsant e ME M/ C- AD J. p er confer ma re i l nu me ro di brano .
/US
/US/US
BBBB
/S
/S DDDD CCCC
/S/S
pppp
rrrr
og
og
rrrr
aaaa
mmmmma
ma
mama
ogog
AAAA
RRRRDDDD
F1 9
F18
F 20
F2 1
IT-6
Page 32

2222....
RRRRI PR ODU ZI ON E
IPR OD UZION E PRO GRAMMA
IPR OD UZION EIPR OD UZION E
Pre me nd o il p ul sante PLAY /PAU SE s ul l’ ap pa re cc hio (o sul telecomando), si ri pr od ur rà i l pr im o brano d el p ro gr am ma.
Qua nd o so no s tati riprod ot ti t ut ti i b ra ni , il display dell’a pparecchi o vi su al iz ze rà i l nu mero totale d ei b ra ni e d il tempo di
ese cu zi on e to ta le brani pr es en ti s u CD /MP3/WM A.
3.
CA
NC E
1. Premere una volta il p ul sa nte STOP, o apr ire chiude re il vano CD in modo tal e che la memoria venga cancellata.
2. Impostando un nuovo programm a, s i cancellerà quello esist ente.
Nota: In mo dal ità p rog ram ma.
1. Premendo una volta i l pulsante "RE PEAT", l ’indicatore "REPEAT" lampeggerà sul di spla y e l’unità principale
ripeterà il brano corrente.
2. Premendo due volte i l pulsante “REPEAT", l a scritta "REPEAT ALL" l am pe ggerà sul display e l’unità principale
ripeterà il numero totale di brani prese nti.
3. Premere ancora una vol ta i l pulsante “ RE PE AT” per far tornare l’apparecchio al programma normale.
RIPRODUZIONE AU X IN
La presa AUX è si tuata s ul lato sini st ro dell’ apparecchi o. Uti li zzare u n cavo stereo a presa j ac k da 3 .5 m m per
collegare il dis po si ti vo a udio attraverso l’apposito jack LINE IN.
1. Per selezionare la funzione A UX, premere ripetutamente il pulsante FUNCTION sull ’apparecchio (o sul telecomando)
fino a che la scri tt a AU X appaia sul dis pl ay.
2. Premere il puls ante VOLUME (+ o -) p er r eg ol are il livello di uscit a del suono.
Nota: Cavo LINE in non incluso.
IM P OS T AZ I ONE M U TE (s ul tel ec o man do)
1. Premendo il pulsa nte MUTE s ul telecomando, il livello del volume l ampegg er à e l’us cita audio sarà
temporane am ente sospesa.(F22)
2. Premendo nuovamente i l pulsante MUTE, si ripristinerà il livello del vol ume e l’us ci ta output al la normalità.
AS COL TAR E L A M USI C A MED IANTE LE CUFFIE
Collegare le cuffi e (p re sa mini-stereo da 3. 5 mm) nel l’apposita presa ja ck situata sul l ato destro del l’apparecchio. Il
suo no s ar à co sì udibil e me di ante l e cuffie e non dagli altoparlanti.
PRO GRAMM A
PRO GRAMM APRO GRAMM A
LLA PROGRAMMA
F2 2
SP ECI FIC HE
ALIMENTAZIONE: CA 230V ~ 50Hz
CONSUMO ENERGETICO: 4.5 Wat t x 2
DIMENSIONI APPARECCHIO: 232 (L) x 89. 5 (P ) x 186 (A) mm
DIMENSIONI CASSA ALTOPARLANT I: 120 (L ) x 80 (P) x 186 (A) mm
PESO NETTO: 2.0 k g
SEZI ONE RADI O
GAMMA DI FREQUENZA: FM 87.5-108 MHz
SEZI ONE C OMPACT DISC
PICKUP OTTICO: 3 – RAGGIO L ASER
RISPOSTA DI FREQUENZA: 100Hz - 16k Hz
LE S PECI FICHE PO SSO NO SUB IRE MO DIFICH E SENZ A P REA VVI SO.
Avvertenza sulla ventilazione: "Non impedire volontariamente la normale ventilazione del prodotto."
Per i dati di piu, si prega visitare nostro sito web: www.mpmaneurope.com
IT-7
Page 33

Micro Hi-Fi Systeem
XRM34
INSTRUCTIEHANDLEIDING
Page 34

VEILIGHEIDSWAARSCHUWINGEN
Voor het grootste gemak en prestatie, lees deze handleiding goed door alvorens het apparaat in gebruik te nemen, zodat u de
eigenschappen ervan goed kent. Op deze manier verzekert u een betrouwbare prestatie, zonder problemen en heeft u veel
luisterplezier.
Deze veiligheids- en gebruiksinstructies moeten worden bewaard zodat deze in de toekomst kunnen worden nagelezen.
Er mogen geen druppels of spatten op het apparaat komen en er mogen geen voorwerpen met vloeistoffen op worden geplaatst.
Zorg dat het apparaat. niet op onderstaande plaatsen wordt bewaard:
* - Plaatsen die aan direct zonlicht zijn blootgesteld, of in de buurt van warmte-uitstralende bronnen zoals elektrische verwarming.
boven op stereoapparatuur die te veel warmte uitstraalt.
* - Plaatsen die de ventilatie blokkeren of stoffige plaatsen.
* - Plaatsen die aan voortdurende trilling zijn blootgesteld, vochtige of natte plaatsen.
Er mag geen naakte vlam zoals kaarsen op het apparaat worden geplaatst.
Bij het wegwerpen van de batterij moeten de milieuaspecten in acht worden genomen.
Zorg dat de ventilatieopeningen niet geblokkeerd zijn, er moet minstens 10cm rond het apparaat voor ventilatie worden bewaard.
De ventilatie mag niet verhinderd worden door het bedekken van de ventilatieopeningen met voorwerpen zoals kranten, tafelkleden,
gordijnen, etc. Gebruik de apparatuur alleen in matige klimaten.
Gebruik de afstemknoppen en schakelaars zoals in de handleiding beschreven staat.
Alvorens het apparaat voor de eerste keer aan te zetten, zorg dat het elektriciteitssnoer goed aangesloten is.
De hoofdstekker wordt gebruikt om het apparaat van de elektriciteit te halen en moet klaar voor gebruik zijn. O m de elektriciteit naar
het apparaat volledig uit te schakelen, moet de stekker van het apparaat uit het stopcontact worden gehaald.
De normale functie van het product kan verstoord worden door sterke elektromagnetische storing. Als dit het geval is, stel het
product eenvoudigweg opnieuw in voor het hervatten van de normale werking volgens de instructiehandleiding. In geval het apparaat
niet werkt, plaats het product dan elders.
Probeer geen schroeven uit te nemen, of de behuizing van het apparaat te openen; er zijn geen voor de gebruiker vervangbare
onderdelen in het apparaat, voor onderhoud raadpleeg gekwalificeerd onderhoudspersoneel.
Belangrijke aantekeningen
WAARSCHUWING :
WORDEN VERWIJDERD. ER BEVINDEN ZICH GEEN VOOR DE GEBRUIKER VERVANGBARE ONDERDELEN IN HET APPARAAT,
VOOR ONDERHOUD RAADPLEEG HET ONDERHOUDSPERSONEEL.
GEVAARLIJK VOLTAGE
Binnen de behuizing bevindt zich gevaarlijk geleidend voltage dat van voldoende omvang is om risico van
elektrische schokken te geven.
VOORZICHTIG
De handleiding van de gebruiker bevat belangrijke gebruiks- en onderhoudsinstructies, voor uw veiligheid is het noodzakelijk
deze handleiding te raadplegen.
W
AARSCHUWING
DRUPPELEN OF SPATTEN. Opmerking: Dit apparaat wordt warm als het gedurende langere periodes gebruikt wordt. Dit is
normaal en duidt niet op een probleem van het apparaat. Dit apparaat bevat microprocessors die slecht kunnen gaan functioneren
ten gevolge van elektrische slechte werking of als er externe elektrische storing/geluid of elektrostatische ontlading bestaat. Als het
apparaat niet goed werkt, moet de elektrische voeding worden afgesloten en moet het weer opnieuw worden aangesloten hierop.
Overmatige geluidsdruk van koptelefoons en oortelefoons kan gehoorverlies veroorzaken.
Montageschema van apparaat en speaker
1.
Monteren van plaat voor installatie aan de muur
182mm
OM RISICO VAN ELEKTRISCHE SCHOKKEN TE VERMIJDEN MOET HET DEKSEL (OF ACHTERKANT) NIET
: OM RISICO VAN BRAND OF SCHOKKEN TE VERMIJDEN, STEL DIT APPARAAT NIET BLOOT AAN
Bevestig de twee haken (Maat:3.5*25BA) aan d e muur
zij moeten parallel te ge nover el kaar sta an. (De afstand
tus se n de t we e haken moet 182mm zi jn)
2. Aa nslui ting va n speakers
Max. aansluitingsafstand is 2 meter
DU-1
Page 35

KENMERKEN EN KNOPPEN
** BATTERIJ BIJGELEVERD
**
1. SPEAKER
2. KABEL IN ANSLUITING
3. FM ANTENNE
4. CD DEUR
5. FUNCTIEKNOP(OPW AARTS of
NEERW AARTS) KNOP
6. GEH/C-ADJ. KNOP
7. TIMER KNOP
8. VOLUME (+ of -) KNOP
AF STA N DS B ED IEN ING
1. STAND BY/A AN KN OP
2. ID3/MO./ST. K NOP
3. OPEN/SLUITEN KNOP
4. TIMER KNOP
5. FUNCTIE KNOP
6. GEH/C-ADJ. KNOP
7. SLAAP KN OP
8. OVERSLAAN/INSTELLING
ZOEKEN NEERWAARTS KNO P
9. INTRO KNOP
10.EQ KNOP
11. HE RH AA L KNOP
PL AAT SEN VA N D E B ATT ERI J I N D E
AF STA NDS BED I EN I NG
Druk he t de ks el van het compartiment naar be nede n, e n gl ijd
het d ek se l eraf om dit t e op enen. Plaa ts de batterij (CR20 32 ) in
het apparaat volgens de polariteitmarkeringen met het “+” teken naar
boven gekeerd. Plaats het deksel op het compartiment en druk dit
naa r bo ve n to td at het goed past.
Opmerking : Gebruik geen normal e batterijen samen met oplaadbare
batterijen. Als de ba tt erij en zwak word en, zal de afstand sb ed ieni ng
niet werken e n moe te n de batterij en door nieuwe worde n vervange n.
LC D-WEERGAVEVENSTER
A. SLAAPINDICATOR B. TIMER INDIC ATOR
C. ALBUM/RADIO GEHEUGEN NUMMER
INDICATOR D. HERHAAL & ALLES INDICATO R
E. STEREO INDICATOR
F. VOLUME HOOG/LAAG INDICATOR
G. TR AC K/ NU MM ER /TIJD INDICATO R
CO MPACT DI SK
1. Gebrui k altijd co mp ac t di sk s van het aangegeven merk.
2. Aanw ijzingen v oor het hantere n va n di sks
Haal de disk uit d e do os e n pl aats deze in het apparaat.
* Raak het reflectieve opnamevlak niet aan.
* Plaats geen papier o p de dis k en schri jf hier ook nie t op .
* Buig de disk niet.
3. Opslag
* Bewaar de disk in de doos.
* Stel de disks niet bloot aan direct zonlicht of aan hoge temperaturen, hoge vochtigheid of natte plaatsen.
9. INSTELLING VOORAF/MAP
10. OVERSLAAN/INSTELLING
ZOEKEN
(OPWAARTS of NEERW AARTS)
KNOP
11. PLAY/PAUZE KNOP
12. IR SENSOR
13. STAN DB Y LED INDICATOR
14. LCD-WEERGAVE
15. STAN DB Y/ AA N KNOP
16. OPEN/SLUITEN KNOP
12. GELUID UIT KNOP
13. VOLUME “-” KNOP
14. VOLUME “+” KNOP
15. W ILLEKEURIGE KNOP
16. VOORAFINSTELLING/MAP
OPW AARTS KNOP
17 VOORAFINSTELLING/MAP
NEERW AARTS KNOP
18.OVERSLAAN/INSTELLING
ZOEKEN OPWAARTS KNOP
19.PLAY/ PAUZEREN KNOP
20.STOP KNOP
DU-2
17. STO P KNOP
18. USB-APPARATUUR IN POORT
19. SD/MMC GEHEUGENKAART IN
SLEUF
20. AC ELEKTRISCHE
SCHAKELAAR
21. KOPTELEFOONAANSLUITING
22. SPEAKER UIT (L & R)
AANSLUITING
23. AC-KABEL
24. HITCHING HOLE
Neem svp de veiligheidsstrip eraf
alvorens het apparaat te gebruiken
Verwisselen van
de batterij
Page 36

4. Scho onmaken van een dis k
* Als de disk vies wordt, moet stof, vuil of vingerafdrukken met een zachte
doek worden afgeveegd.
* De di sk moet van het midden naar de ra nd toe worde n afgeve eg d.
* Gebruik noo it wasbenzine, verdunne rs, platencleaner of antistatische
spuitbussen.
* Zorg dat u he t CD-deurtje di cht houdt zodat de l ens ni et vui l wordt
door stof.
*
Raak de lens niet aan.
BEDIENING VAN HET APPARAAT
Als u de stekker van het apparaat voor de eerste keer in een AC-stopcontact doet, zal het apparaat in standby-modus gaan,
alvorens de AAN (ON)knop aan de achterkant van het apparaat in te drukken. U kunt op de STANDBY/AAN KNOP op het
apparaat of op de afstandsbediening drukken om het apparaat AAN of op STANDBY te zetten. Zet de elektriciteitsschakelaar van
het apparaat uit en haal de AC-stekker uit het stopcontact in de muur als u het apparaat helemaal uit wilt zetten.
POWER/STANDBY
1. U kunt op de STANDBY/AAN KNOP op het apparaat drukken of op de afstandsbediening om het apparaat AAN te zetten.
2. Selecteer de geluidsbron (CD, USB, SD-KAART, AUX of TUNER) door op de FUNCTIE knop te drukken. Nu gaat
de weergave hiervoor branden.
3. Stel het volume af met de VOLUME (+ of -) knop op het apparaat of de VOLUME (+ of -) knop op de afstandsbediening.
4. Druk opnieuw op de STANDBY/ON knop om het apparaat uit te zetten.
Opmerking:
1. Als er geen signaal onder de CD/USB-APPARATUUR/ SD & MMC KAART modus is, zal het hoofdapparaat automatisch
binnen 15 minuten worden uitgeschakeld.
2. Tijdens de modus stand-by, druk op een willekeurige knop/toets om de weergave 10 seconden te laten branden.
3. Voor energiebesparing schakel de elektriciteit naar het apparaat uit, als u dit niet gebruikt.
KLOKINSTELLING
In de STANDBY modus.
1. Druk op de GEH/C-ADJ. knop en houd deze ingedrukt totdat de tijdweergave wijzigt naar een 12-uur(of 24-uur) cijfer en gaat
knipperen.
2. Druk op de OVERSLAAN/INSTELLING ZOEKEN(OPWAARTS of NEERWAARTS) KNOP om de 12-uur of 24-uur cijfers in te
stellen.
3. Druk opnieuw op de GEH/C-ADJ. knop, het UUR cijfer gaat knipperen op het weergaveschermpje, druk op de
OVERSLAAN/INSTELLING ZOEKEN (OPWAARTS of NEERWAARTS) knop om het UUR cijfer in te stellen.
4. Druk op de GEH/C-ADJ. knop, het MINUTEN cijfer gaat knipperen op het weergaveschermpje, druk op de
OVERSLAAN/INSTELLING ZOEKEN (OPWAARTS of NEERWAARTS) knop om het MINUTEN cijfer in te stellen.
5. Druk opnieuw op de GEH/C-ADJ. knop om de tijd te bevestigen.
6. Iedere mogelijke instelling als hierboven wordt weergegeven zal worden gewist als de toets niet binnen 10 seconden ingedrukt
wordt.
TIMER INSTELLING
In de STANDBY UIT/AAN modus.
1. Na de klok te hebben ingesteld, druk gedurende een paar seconden op de TIMER knop, " ON" en "00:00" verschijnt op het
weergaveschermpje en het UUR cijfer gaat knipperen.(F1)
2. Druk op de OVERSLAAN/INSTELLING ZOEKEN (OPWAARTS of NEERWAARTS) knop om dit af te stellen.
3. Druk nogmaals op de TIMER knop, het MINUUT cijfer begint te knipperen, stel het in door te drukken op de
OVERSLAAN/INSTELLING ZOEKEN (OPWAARTS of NEERWAARTS) knop.
4. Druk nogmaals op de TIMER knop om te bevestigen zodat de opdracht voor TIMER AAN op tijd gebeurt.
5. Na instellen van "TIMER AAN", " verschijnt OFF" op het scherm en begint het UUR cijfer te knipperen.(F2)
6. Herhaal bovenstaande stappen 2 tot 3 en druk vervolgens op de TIMER knop om te bevestigen en TIMER UIT op tijd te laten
gebeuren.
7. Nu verschijnt de "TUNER" op het scherm en begint te knipperen, stel “TUNER, CD, USB of SD KAART" in door te drukken op
de OVERSLAAN/INSTELLING ZOEKEN (OPWAARTS of NEERWAARTS) knop.
8. Druk opnieuw op de TIMER knop, de timer "VOL" indicator verschijnt op het weergaveschermpje en gaat knipperen, stel het
volume van de timer hoog of laag door op de INSTELLING/OVERSLAAN (OPWAARTS of NEERWAARTS) knop te drukken.
9. Iedere mogelijke instelling als hierboven wordt weergegeven zal worden gewist als de toets niet binnen 10 seconden ingedrukt
wordt.
10. Na instelling van"TIMER AAN" en "TIMER UIT" , druk op de TIMER knop, " " verschijnt op het weergavescherm.
11. Het apparaat gaat automatisch aan op de "TIMER AAN" opdracht en begint te spelen, het apparaat wordt automatisch
uitgeschakeld als de opdracht tot "TIMER UIT" wordt gegeven.
Opmerking: Als het weergavescherm "ERROR" (fout) laat zien terwijl de “TIMER AAN” staat, betekent dat zowel “TIMER AAN” en
“TIMER UIT” hetzelfde zijn. In dit geval, ga svp naar “TIMER UIT” en stel eerst de uit-tijd in.
F1 F2
DU-3
Page 37

EQ TOETS( o p d e a f st and s be die nin g )
EQ laat deze geluidsto on zie n. Als u o p de EQ knop drukt, verandert de geluidstoon als hieronder weergegeven:
INSTELLEN VAN SL AAP FUN CTIE(op de af s ta n dsb ed i eni ng )
1. Als u bij muziek in sla ap wil t vall en, dr uk op de SLA AP k no p .
2. U kunt de TUNER, CD /M P3 , US B, S D/MMC of AUX modus in sla ap fu ncti e ze tt en o m va n 90, 80, 70 tot
10 minute n muzi ek te spele n voordat dit automatisch uit gaat.
FU NCT IES E LE C TI E
Deze func ti e houdt in dat wanneer op de knop gedrukt wordt , de m od us g ewij zi gd wordt. Het weergavescherm wijzigt
zich zo al s hi erond er weergegeven:
RA DIOBEDIENING
1. Druk op de FUNCTIE knop op het hoofdapparaat (of afstandsbediening) voor het selecteren van de TUNER modus om de
FM werking in te stellen.
2. Selecteer de frequentie van uw keuze met de OVERSLAAN/INSTELLING ZOEKEN (OPWAARTS of NEERWAARTS) knop op
het hoofdapparaat (of afstandsbediening).
Selectie Mono/Stereo
Dit apparaat kan alleen in FM-modus ontvangen.
1. Als u het FM-stereostation wenst te selecteren, druk eenmaal op de ID3/MO./ST. KNOP op de afstandsbediening.
Nu zal de " indicator verschijnen op het weergavescherm om te tonen dat de ontvangst optimaal is.
2. Als u nogmaals op de ID3/MO./ST. knop drukt, gaat de FM STEREO indicator uit en wijzigt deze naar MONO FM status.
Automatische instelling
1. Druk gedurende enkele seconden op de OVERSLAAN/INSTELLING ZOEKEN (OPWAARTS of NEERWAARTS) knop en laat
vervolgens de knop los. De tuner gaat automatisch het eerste station met voldoende sterk kanaal zoeken.
2. Herhaal bovenstaande procedure als u een ander station wenst te selecteren.
Programmeren van vooraf ingestelde stations
U kunt de stations ook vooraf instellen volgens uw keuze en tot 30 FM stations in het geheugen opslaan.
1. Stel in op het station van uw keuze.
2. Druk op de GEH/C-ADJ. knop.
3. Druk op de VOORAFINSTELLING/MAP(OPWAARTS of NEERWAARTS) knop voor het stationnummer van uw keuze.
4. Druk opnieuw op de GEH/C-ADJ. knop om de selectie te bevestigen.
5. Om meer stations in het geheugen te programmeren, herhaal bovenstaande stappen 2 tot 4.
6. Om de vooraf ingestelde opgeslagen stations in het geheugen te programmeren, herhaal bovenstaande stappen 2 tot 4.
Opmerkingen:
1. Het opslaan van een nieuw station op een vooraf ingestelde locatie, zal het vorige opgeslagen station op die locatie wissen.
2. Uitzetten zal het geheugen van de vooraf ingestelde stations niet wissen. Voer opnieuw de procedures voor voorafinstelling uit
om de stations op te slaan.
3. Als het apparaat in de STANDBY modus staat, druk op de PLAY/PAUZE knop om het vooraf ingestelde geheugen te wissen.
Selecteren van de vooraf ingestelde stations
1. Druk op de VOORAFINSTELLING/MAP(OPWAARTS of NEERWAARTS) knop voor de voorafinstelling van het stationnummer
van uw keuze.
2. De numerieke locatie van dat vooraf ingestelde station wordt weergegeven samen met de overeenkomstige frequentie.
FM ANTENNE
Zet de FM antenne uit voor betere FM ontvangst.
CD/MP3/WMA BEDIENING
Luisteren naar Compact Disk (CD/MP3/WMA)
1. Druk op de FUNCTIE knop op het apparaat voor het selecteren van de CD-modus.
2. Druk op de OPEN/SLUITEN knop op het hoofdapparaat (of afstandsbediening), vervolgens gaat het CD-deurtje automatisch
open.(F3)
3. Plaats de CD/MP3 disk in het CD-compartiment, druk opnieuw op de OPEN/SLUITEN knop om het CDdeurtje te openen. Het hoofdapparaat zal de CD/MP3 disk automatisch lezen.
OPMERKING:
(1) Dit apparaat kan CD, CD-R, CD-RW, MP3 en WMA disks lezen.
(2) Het kan " 8 cm " en " Multi Sectie " MP3 DISK lezen.
(3) Het "Terugspeel overdrachtpercentage" in MP3 en WMA. (a). In MP3, overdracht bitsnelheid : 8 - 256 kbps.
(b). In WMA, overdracht bitsnelheid : 8 - 192kbps.
(4) De "Max leesbare 99 mappen en 999 sporen".
(5) Als geen enkele disk TOC kan lezen, verschijnt de weergave NO DISK (GEEN DISK).(F4)
DU-4
Page 38

Spel en van de v oll edige CD /MP 3/W MA
-
CD
1. Plaats de CD-di sk in het CD-comp ar timent, het hoofdapparaat zal automatisch het totale aantal mappen en tracks
tegelijkertijd lezen.
2. Druk o p de SPEEL/PAUZ E knop, het a pp ar aa t zal de eerste track van de CD-dis k automati sch sp el en . (F5)
3. Druk o pnieuw o p de PLAY/PAUZ E KNOP, de indi ca to r voor de verstreken tijd gaat nu knipperen.(F6)
4. Druk é én k ee r op de OVERSLAAN/ IN ST ELLING ZOEKEN(OPW AARTS of NEERWA AR TS ) knop om het
tracknumm er te wij zi ge n, druk één ke er o p de O VERSLAAN/INSTELLING ZOEKEN( OPWAARTS of
NEERW AARTS) knop om een liedje snel vooruit of achteruit over te slaan.
5. Om het afspelen te hervatten, druk nogmaals op de P LAY/PAUZE knop.
6. Om het afspelen te stoppen, druk één keer op de STOP knop op het apparaat (of a fs tand sb ed iening).
F3
F4
-MP3/WM
1. Plaats de MP3/W MA disk in het C D-co mp artiment, het hoofdapparaat zal automatisch het totale aantal
2. Druk o p de SPEEL/PAUZ E knop, het a pp ar aa t zal de eerste track van de CD-dis k automati sch sp el en . (F7)
3. Druk o pnieuw o p de PLAY/PAUZ E KNOP, de indi ca to r voor de verstreken tijd gaat nu knipperen.(F8)
4. Voor het wijzigen van het Track NO., druk één keer op de OV ER SL AA N/INSTELLING ZOEKEN(OPW AARTS of
5. Om het afspelen te hervatten, druk nogmaals op de P LAY/PAUZE knop.
6. Voor het wijzigen van het ALBUM NO ., druk één keer op de VOORAF I NS TE LL EN/MAP (OPW AA RT S o f NE ERWAARTS)
7. Om het afspelen te stoppen, druk één keer op de STOP knop op het apparaat (of a fs tand sb ed iening).
Opmerking: Als het apparaat niet goed werkt, moet de elektrische voeding worden afgesloten en moet het weer opnieuw
ID 3 BED I EN I NG ( op de afs tan ds b edi eni ng)
Tijd ens de MP 3/ WMA modus
1. Druk é én m aa l op de ID3/MO./ST. KN OP om de ID 3 func tie te openen.
2. Als op het MP3/W MA bestand “ID3” staat geschre ve n, za l deze automatisch zoeken naar de i nformati e van de
3. Druk o pnieuw o p de ID3/MO./ST. knop op de afstandsbediening. He t ap pa ra at zal hervatten en normaal g aa n
spelen.
US B/S D KA A RTB EDI E NI N G
In de STANDBY modus.
1. Plaats het USB-apparaat of SD/MMC-kaart, en druk op de STAND BY knop op het hoofdapparaat (of afsta ndsbedie ni ng )
2. Dr uk op de FU NC TIE knop op het hoofdapparaat (of afstandsbedi ening) voor het selecteren van de USB of SD/MMC
3. Als het USB-geheugenapparaat meer dan een map bezit.
4. Als de MP3 en W MA op "ID3" zijn geschreven.
Opmerking:
A
mappen en t ra cks tegelijkertijd lezen.
NEERW AARTS) knop . Dr uk één keer op de OVERSLAAN/INSTELLEN ZOE KE N (OPW AARTS of NEERWAARTS)
knop om ieder liedje snel voorwaarts of achteruit te laten lopen.
knop .
F7
F8
worden aangesloten hierop.
“TITELNAAM”, “ARTIESTENNAAM” e n “ALBUMNAAM” wo rdt op het we erg ave scherm aang ege ven .
om het apparaat "AAN" te zetten.
modus. Het hoofd apparaat zal auto matisch he t aantal mappen en tracks teg el ij kertijd lezen. ( F9 )
a. Druk op de VOORAFINSTELLING/MA P ( OPWAARTS of NEERW AARTS) knop om iedere map te selecteren.
b. Druk op de OVERSLAAN/INSTELLING ZOEKEN (OPWAARTS o f NE ERWAARTS) knop v oo r he t selecteren van
de huidige track i n de gewenste map.
a. Als het apparaat in MP3 of W MA speelt. Druk één m aa l op de ID3/MO./ST. knop. Het weergavescherm za l
"ID3 AAN" tonen, en vervolgens zal het automatisch meer dan 64 letters zoeken naar "T IT EL NA AM ",
"ARTI ES TENNAAM" of "ALBUMNAAM" wat zich voortdurend zal verplaatsen van de rechterhoek naar de linkerhoek.
b. Druk nog ma als op de ID3/MO./ST. knop. Het weergav es cher m za l een "ID3 OFF"tonen e n het hoofdappar aa t
zal nor ma al gaan spelen.
1. He t ho of da pp ar aa t kan all ee n MP3 en WMA in deze modus spelen.
2. Di t apparaat ondersteunt de meeste USB- ap pa ra tu ur e n SD/M MC/SDHC-kaarten. Tot 32GB capaciteit
for SDHC. Er is geen toegang tot geheuge ncapaciteit (of gedurend e langere t ij d toegang) van m ee r
dan 3 2G B. A nders kunnen andere n hi er toegang t oe heb be n.
DU-5
Page 39

3. Het he ef t ge en toegang tot, of heef t meer tijd om toegang te krijg en tot) ap pa ra tu ur met gro te
geheuge nc ap aciteit.
4. Er is geen ond ersteuning va n “ d ua l voltage-MMC” kaart of “MMC-Plus” kaart.
5. He t ho of da pp ar aa t ondersteunt niet het WMA-bestand dat “DRM-BESTAND” beschermd is.
Spel en van de g ehe le flash dis k
1. Het afspelen zal starten door op de PLAY/PAUZE knop te drukken. Het afspele n begi nt bij de
eerste track. Het afspelen toont het tracknummer dat op di t mo me nt wordt afgespeeld en de
verstreken ti jd.(F10)
2. Om het afspelen te onderbreken, druk op de PLAY/PAUZE knop . De i nd icator voor de verstreken tij d gaat
kni pperen.( F11)
3. Om het afspelen te hervatten, druk opnieuw op de PLAY/ PAUZE k nop.
4. Voor het stoppen van het afspelen, druk op de STOP knop.
Opmerking:
Op ieder moment moet het US B-apparaat of SD-KAART goed vastgezet zijn in de STANDBY modus om
schad e aa n he t toestel en USB-APPARAAT of SD-KAART te vermijden.
F9
F1 0
F11
SP ELE N H ERH ALE N(o p de af st a nds bed ien ing )
- CD
1. Druk é én k eer op de HERHAAL knop, HERHALEN wordt weergegeven. Het hoofdapparaat zal de huidige track
her ha al d afspelen.(F12)
2. Druk t we e ke er op de HERHAAL knop, ALLES HERHALEN wordt weergegeven. Het ho of da pp ar aa t zal all e huidige
tracks he rhaa ld afspel en.(F13)
3. Druk d ri e keer op de HERHAAL knop, de HERHAAL functie zal uit staan.
F1 2
-
MP 3/W MA
1. Druk é én k eer op de HERHAAL knop, HERHALEN wordt weergegeven. De huid ige track wordt herhaa ld
afgespeeld.(F14)
2. Druk t we e ke er op de HERHAAL knop, ALLES HERHALEN wordt weergegeven. Alle huidige tracks w or de n
her ha al d afgespeeld. (F 15 )
3. Druk d ri e keer op de HERHAAL knop, het HERHALEN ALBUM wordt weergegeven. Het huidi ge album
zal her ha al d worden afgespeeld . (F 16)
4. Druk v ier keer op de HERHAAL knop, de HERHAAL functie zal dan uit staan.
F13
F1 4
WI L LE K EU R IG HE R HA L EN ( op de afs t an d sb edi e ni ng)
1. Druk é én k ee r op de WILLEKEURIG knop , en W ILLEKEURIG w or dt nu weergegeven.(F17)
2. Druk nog ma al s op de W ILLEKEURIG knop, e n he t no rm al e afspelen wordt hervat.
IN TRO SP ELE N ( o p d e a fst and sb e die n in g)
1. Druk é én k ee r op de INTRO knop, en INT RO w or dt nu weergegeven.(F17) Het hoofdap pa ra at zal de eerste 10
seconde n va n iedere track spel en.(F18)
2. Druk t we e ke er op de INTRO knop, en het nor ma le afspel en wordt hervat.
F1 6
F1 7
DU-6
F1 5
F1 8
Page 40

PR OGR AM M AMODUS
De gebrui ker kan het programma tot 32 tra ck s in CD-modus of 64 tracks in MP3/WMA/USB/SD KAART modus in
iedere
gewenst e vo lgorde opmake n. De prog rammamodus w or dt g eactiveerd al s de stopm od us geactiv eerd is.
1.
Sp elen van het p rogra mma
- CD
1) Druk o p de GEH/C-ADJ. knop, om van PR OG RA MM A modus te vera nder en (F19)
2) Druk op de OVERSLAAN/INSTELLING ZOEKEN(OPWAART S of NEERWAARTS) knop en het tracknummer verandert
nu.
3) Druk o p de GEH/C-ADJ. knop om het tracknumm er te bevestigen.
- MP 3/ WMA/U SB/S D KA ART
1) Druk o p de GEH/C-ADJ. knop, om van PR OG RA MM A modus te vera nder en. Het alb um nu mm er k nippert. (F20)
2) Druk op de VOORAFINSTELLING/MA P knop, het albumnumer wordt nu gewijzigd.
3) Druk o p de GEH/C-ADJ. knop , het albumnummer knippert.(F21)
4) Druk op de OVERSLAAN/INSTELLI NG ZOEKEN(OPWAART S of NEERWAARTS) knop en het tracknummer verandert
nu.
5) Druk o p de GEH/C-ADJ. knop om het tracknumm er te bevestigen.
F1 9
F20
2.
PROGRAMMA SPELEN
Druk op d e P LAY/PAUZE knop op het apparaat (of afstandsbedie ni ng), de eerste track van het programma zal worden
afgespeeld. Als alle t ra ck s zijn afges pe el d, zal het weergavescher m van het apparaat het aantal t ra ck s en de
speeltijd van de CD/MP3/W MA tr ac ks laten zien.
3.
PROGR AMM A ANNU LEREN
1. Druk één maal op de S TOP knop of open het CD-deurtje en doe deze opnieuw dicht, vervolgens wordt het geheugen gewist.
2. Stel een nieuw programma in, het bestaand e pr og ra mm a wordt gewis t.
Opmerking: In de programmamodus.
1. Druk é én k ee r op de “HERHAAL" knop, de “HERH AA L i ndicator zal op het weergavescherm gaan branden.
Vervolgens he rhaalt het hoofdapparaat de hui dige track.
2. Druk t we e ke er op de “HERHAAL" knop, de “HERHA AL ALLES zal op het weergavescherm gaan branden.
Vervolgens he rhaalt het hoofdapparaat alle tracks.
3. Druk nogmaals op de “HERHAAL” knop. Het h oo fd ap pa ra at zal normaal terug gaan naar het afspel en van het
programma.
AUX I N P LAY
De AUX input bevindt zich aan de linkerkant van het apparaat. Maak gebruik van e en 3.5mm stereo a ansluitingskabel
om de aud io-apparatuur te verbinden door middel van de LINE IN aa nsluit ing.
1. Voor het selecteren van de AUX input functie, druk versc heid ene kere n op d e FUNCTIEKNOP op het apparaat (o f
afstand sb ed ieni ng) totdat AUX op het weergavescherm wordt weergegeven.
2. Druk o p de VOLUME (+ of -) knop om het outputniveau van het geluid in stellen.
Opmerking: LINE in kabel wordt niet bijgeleverd.
GE LUI D U I TZ ETT EN IN S TEL LEN (o p d e af st a nd s be d ie n in g)
1. Als u één ke er op de GELUID UIT ZETTEN kno p op d e af standsbedie ni ng d rukt, ga at het v ol umeniveau
kni pperen e n zal de audio-output tij deli jk worden beё indigd.(F22)
2. Druk o pnieuw o p de GELUID UITZ ET TE N knop, het vo lume ni veau en a ud io-out put zal na ar nor ma al teruggaan.
LU IST E RE N N AAR MU ZIE K M E T B EH U LP VA N D E KO PT E LEF OON
Steek uw ko pt elefoon (3.5mm minis eren pl ug ) in d e ko pt el efoonaansluiti ng rechts op het apparaat. Het geluid zal op
de koptelefoons worden gehoord, en niet door de speaker.
DU-7
F21
F22
Page 41

SP ECI FIC ATIE
VOEDING : AC 230V ~ 50Hz
OUTPUTVERMOGEN : 4. 5 Watts x 2
AFMETINGEN APPARAAT : 232 (B) x 89. 5 (D ) x 186 (H) mm
AFMETINGEN SPEAKER BOX : 120 (W) x 80 (D) x 186 (H) mm
Nom. gewicht. : 2.0 kg
RADI OGEDEELTE
FREQUENTIEBEREIK : FM 87.5-108 MHz
CO MPACT DI SK
OPTISCHE PICKUP : 3 - BEAM LASER
FREQUENTIE-RESPONS : 100Hz - 16kHz
SPECIFI CATIE OND ERHEVIG AAN WIJZ IGI NGE N Z OND ER VOO RAFGAAN DE KEN NISGEVING.
Vent ilatiewaarschuwing : " De norm ale ventilatie van het product zal niet voor andere doeleinden dan het doelmatige gebruik
worden gebruikt."
-GEDEELTE
Wil je meer informatie, bezoek onze website: www.mpmaneurope.com
DU-7
Page 42

Micro System Hi-Fi
XRM34
MANUAL DE INSTRUÇÕES
Page 43

PRECAUÇÕES DE SEGURANÇA
Para alcançar o máximo prazer e desempenho, por favor leia este manual cuidadosamente antes de operar a unidade para
familiarizar-se com suas funções e garantir anos de prazer e desempenho livre de problemas.
Estas instruções de segurança e operação devem ser guardadas para referência futura.
O aparelho não deve ser exposto a pingos ou salpicos, e nenhum objeto cheio de líquido, como vasos, deve ser apoiado no
aparelho. Evite instalar a unidade nos locais descritos abaixo:
* - Locais expostos a luz direta do sol ou próximo a equipamentos radiadores de calor como aquecedores elétricos,
em cima de outro equipamento estéreo que difunde muito calor.
* - Locais bloqueando a ventilação ou locais empoeirados.
* - Locais sujeitos a vibração constante e locais úmidos.
Nenhuma fonte de chamas, como velas acesas, deve ser colocada próximo ao equipamento.
Deve ser dada atenção aos aspectos ambientais para o descarte da bateria.
Certifique-se de não obstruir as aberturas de ventilação, uma distância mínima de 10 cm deve ser mantida ao redor do aparelho
para uma ventilação adequada.
A ventilação não deve ser dificultada cobrindo suas aberturas com itens como jornais, toalhas de mesa, cortinas,
etc. Use o aparelho apenas em climas moderados.
Opere os controles e interruptores de sintonização como instruído no manual.
Antes de ligar a energia pela primeira vez, certifique-se que o cabo de energia está instalado adequadamente.
A tomada principal é usada como o dispositivo de desligamento e deve ser mantida acessível. Para desconectar completamente a
entrada de energia, a tomada principal do equipamento deve ser desconectada dos plugues.
A função normal do produto pode ser alterada por forte interferência eletromagnética. Caso ocorra, apenas reinicialize o produto
para restaurar a operação normal, seguindo o manual de instruções. Caso a função não possa ser restaurada, por favor use o
produto em outro local.
Não tente remover quaisquer parafusos ou abrir a estrutura da unidade; não realize reparos nas peças interiores, envie todos os
reparospara um encarregado de serviço qualificado.
Avisos Importantes
CUIDADO: PARA REDUZIR O RISCO DE CHOQUE ELÉTRICO, NÃO REMOVA A TAMPA (OU PARTE POSTERIOR), NÃO
REALIZE REPAROS NAS PEÇAS INTERIORES, ENVIE TODOS OS REPAROS PARA O ENCARREGADO DE SERVIÇO
QUALIFICADO.
ADVERTÊNCIA: PARA PREVENIR RISCO DE INCÊNDIO OU CHOQUE, NÃO EXPONHA ESTE EQUIPAMENTO A PINGOS
OU SALPICOS DE LÍQUIDOS. Observação:
normal e não indica um problema com o
equipamento. Este equipamento inclui microprocessadores, que devido a uma descarga eletrostática ou ruído/interferência elétrica
pode resultar em mau funcionamento. Se o equipamento não estiver funcionando adequadamente, desconecte e reconecte a fonte
de energia. A pressão excessiva do som nos fones de ouvido pode causar perda auditiva.
Desenho de Montagem do Equipamento e do Alto-falante
1111....
Fixando o quadro para a montagem na parede
TENSÃO PERIGOSA
Condutor de tensão perigosa, que pode ser de tamanho suficiente para constituir um risco de choque elétrico a
pessoas, está presentes dentro da estrutura do produto.
ATENÇÃO
O manual do proprietário contém instruções de manutenção e operação importantes, é necessário consultar o manual
para a sua segurança.
Este equipamento aquecerá quando usado por um longo período de tempo. Isto é
18 2 mm
Prend a os d oi s pregos (Tamanho: 3,5*25 BA ) na parede
e devem estar paralelos um ao outro. (A distância
entre os dois parafusos deve ser de 18,2 cm)
2.
Conexão dos alto-falantes
A distância de conexão máxima é de 2 metros
PR-1
Page 44

FUNÇÕES E CONTROLES
**BATERIA BOTÃO INCLUÍDA**
1. ALTO-FALANTE
2. CONECTOR DA ENTRADA DE
LINHA
3. ANTENA FM
4. PORTA DE ENTRADA DO CD
5. BOTÃO FUNCTION (FUNÇÕES)
6. BOTÃO MEM/C-ADJ.
7. BOTÃO TIMER
(TEMPORIZADOR)
8. BOTÃO DE VOLUME (+ ou -)
9. PRÉ-AJUSTE/PASTA BOTÃO
(PARA CIMA ou PARA BAIXO)
10. PULAR/BUSCA DE
CONTROLE REMOTO
1. BOTÃO STANDBY/ON (RESERVA/LIGADO)
2. BOTÃO ID3/MO./EST.
3. BOTÃO OPEN/CLOSE (ABRIR/FECHAR)
4. BOTÃO TIMER (TEMPORIZADOR)
5. BOTÃO FUNCTION
6. BOTÃO MEM/C-ADJ.
7. BOTÃO SLEEP (DESLIGAMENTO AUTOMÁTICO)
8. BOTÃO SKIP/TUNE SEARCH DOWN (PULAR/BUSCAR SINTONIZAÇÃO ABAIXO)
9. BOTÃO INTRO (INTRODUÇÃO)
10. BOTÃO EQ (EQUALIZADOR)
11. BOTÃO REPEAT (REPETIR)
12. BOTÃO MUTE (MUDO)
13. BOTÃO VOLUME “-“
14. BOTÃO VOLUME “+“
15 BOTÃO RANDOM (ALEATÓRIO)
16. BOTÃO PRESET/FOLDER UP (PRÉ-AJUSTE/PASTA SUPERIOR)
17. BOTÃO PRESET/FOLDER DOWN (PRÉ-AJUSTE/PASTA INFERIOR)
18. BOTÃO SKIP/ TUNE SEARCH UP (PULAR/BUSCAR SINTONIZAÇÃO ACIMA)
19. BOTÃO PLAY/PAUSE (REPRODUZIR/PAUSAR)
20. BOTÃO STOP (PARAR)
COLOCAND O A BATERIA NO APARELHO DE CONT ROL E
REMOT O
Pressione e deslize a tampa do compartimento para abri-la. Insira a bateri a botão
(CR2032) de acordo com as marcas de polaridade, com o sinal + para cima. Insira
a tampa no compartimento, pressionando-a até que estale.
Observação: Não misture baterias normais com baterias recarregáveis. O controle
remoto não funcionará com baterias fracas, portanto substitua com novas baterias.
TELA DE VISUALIZAÇÃO LCD
A. INDICADOR DO DESLIGAMENTO AUTOMÁTICO
B. INDICADOR TEM PO RIZADOR
C. INDICADOR DO NÚMERO DA MEMÓRIA DE RÁDIO/ÁLBUM
D. INDICADOR REPETIR 1 E REPETIR TODOS
E. INDICADOR ESTÉREO
F. INDICADOR DE VOLUME ALTO/BAIXO
G. INDICADOR DE TEMPO/NÚMERO/FAIXA
PR-2
SINTONIZAÇÃO BOTÃO (PARA
CIMA ou PARA BAIXO)
11. BOTÃO PLAY/PAUSE
(REPRODUZIR/PAUSAR)
12. SENSOR DE IV
13. INDICADOR LED DE RESERVA
14. TELA LCD
15. BOTÃO STANDBY/ON
(RESERVA/LIGADO)
16. BOTÃO OPEN/CLOSE
(ABRIR/FECHAR)
17. BOTÃO STOP (PARAR)
18. PORTA DE ENTRADA DO
19. SLOT DO CARTÃO DE
20. INTERRUPTOR PRINCIPAL DE
21. ENTRADA DO FONE DE
22. SAÍDA DO ALTO-FALANTE
23. CABO CA
24. FURO DE ENGATE
Por favor, remova a faixa de segurança antes de
usar o aparelho.
Substitua a bateria
botão
DISPOSITIVO USB
MEMÓRIA SD/MMC
ENERGIA CA
OUVIDO
(ESQ. E DIR.)
Page 45

DISCO COMPACTO
1. Sempre use discos compactos com marcas, como
mostrado.
2. Observações sobre o manuseio de discos
Removendo os discos de sua embalagem e inserindo-
os.
* Não toque a superfície de gravação refletiva.
* Não cole papel ou escreva sobre a superfície.
* Não dobre o disco.
3. Armazenamento
* Armazene o disco em sua embalagem.
* Não exponha os discos a luz do sol direta, altas temperaturas, alta
umidade ou locais empoeirados.
4. Limpando um disco
* Caso o disco esteja sujo, limpe a poeira, sujeira e impressões digitais
com um pano macio.
* O disco deve ser limpo do centro para as extremidades.
* Nunca use benzina, tiner, fluido limpador de gravação ou pulverizador anti-estático.
* Certifique-se de fechar as portas do CD para que as lentes não sejam contaminadas por poeira.
* Não toque as lentes.
OPERANDO O EQUIPAMENTO
Quando você conectar o equipamento pela primeira vez na saída CA, o equipamento estará em modo de reserva antes de LIGAR
o interruptor principal na parte posterior do equipamento. Você pode pressionar o botão STANDBY/ON (RESERVA/ON) no
equipamento ou no controle remoto para LIGAR ou colocar em RESERVA o equipamento. Se deseja desligar completamente,
desligue o interruptor principal do equipamento e retire a tomada CA do plugue da parede.
ENERGIA/RESERVA
1. Pressione o botão STANDBY/ON (RESERVA/LIGAR) no equipamento ou no controle remoto para LIGAR o equipamento.
2. Selecione a fonte de som (CD, USB, SD CARD (CARTÃO SD), AUX ou TUNER (RÁDIO)) pressionando o botão FUNCTION
(FUNÇÃO). A tela correspondente acenderá.
3. Ajuste o volume com o botão VOLUME (+ ou -) no equipamento ou com o botão VOLUME (+ ou -) no controle remoto.
4. Pressione o botão STANDBY/ON (RESERVA/LIGADO) novamente para desligar o equipamento.
Observação:
1. Se não há sinal no modo CD/EQUIPAMENTO USB/CARTÃO SD E MCC, o equipamento principal será desligado
2. Durante o modo standby (reserva), pressionar qualquer botão/tecla pode acender a tela por 10 segundos.
3. Por favor, quando não estiver usando o equipamento desligue o interruptor principal para economizar energia.
AJUSTE DO RELÓGIO
Durante o modo STANDBY (RESERVA).
1. Pressione e segure o botão MEM/C-ADJ. até que a tela de hora mude para o dígito 12 horas (ou 24 horas) e pisque.
2. Pressione o botão SKIP/TUNE SEARCH (UP or DOWN) (PULAR/BUSCAR SINTONIZAÇÃO (PARA CIMA ou PARA BAIXO)
3. Pressione o botão MEM/C-ADJ. novamente, o dígito HORA irá piscar na tela, pressione o botão SKIP/TUNE SEARCH (UP or
4. Pressione o botão MEM/C-ADJ. mais uma vez, o dígito MINUTO irá piscar na tela, pressione o botão SKIP/TUNE SEARCH
5. Pressione o botão MEM/C-ADJ. novamente para confirmar a hora.
6. Cada estado habilitado como exibido acima será cancelado se a tecla não for pressionada em 10 segundos.
AJUSTE DO TEMPORIZADOR
Durante o modo STANDBY OFF/ON (RESERVA LIGADO/DESLIGADO).
1. Depois de ajustar o rel ógio , pr es sione o botão TIMER (TEMPORIZADOR) por alguns segundos, " O N
2. Pressione o botão SKIP/TUNE SEARCH (UP or DOWN) (PULAR/BUSCAR SINTONIZAÇÃO (PARA CIMA ou PARA BAIXO))
3. Pressione o botão TIMER (TEMPORIZADOR) novamente, o dígito MINUTO começará a piscar, ajuste-o pressionando o
4. Pressione o botão TIMER (TEMPORIZADOR) mais uma vez para confirmar e regular o tempo do TIMER ON
5. Depois de ajustar "TIMER ON" (T EM PO RI ZA DOR LIGADO), " OFF (DESLIGA DO )" aparece na tela e o dígito
6. Repita as etapas 2 a 3 acima, pressione o botão TIMER (TEMPORIZADOR) mais uma vez para confirmar e regule o tempo
7. O “TUNER” (SINTONIZADOR) aparece na tela piscando, ajuste “TUNER, CD, USB ou CARTÃO SD" pressionando o
8. Pressione o botão TIMER (TEMPORIZADOR) novamente, o indicador “VOL” do temporizador aparece na tela e pisca, ajuste
9. Cada estado habilitado como exibido acima será cancelado se o botão não for pressionado em 10 segundos.
10. Depois de ajustar o " TI ME R ON " (TEMPORIZADOR LIGADO) e "TIMER OF F" (TEMPORIZADOR DESLIGADO),
11. O equipamento será ligado automaticamente no controle “TIMER ON” (TEMPORIZADOR LIGADO) e iniciará a reproduzir, o
automaticamente dentro de 15 minutos.
para ajustar o dígito 12 horas ou 24 horas.
DOWN)(PULAR/BUSCAR SINTONIZAÇÃO (PARA CIMA ou PARA BAIXO) para ajustar o dígito HORA.
(UP or DOWN)(PULAR/BUSCAR SINTONIZAÇÃO (PARA CIMA ou PARA BAIXO) para ajustar o dígito MINUTO.
(LIGADO)" e "00:00" aparece na tela e o dígito HORA pisca.(F1)
para ajustar.
botão SKIP/TUNE SEARCH (UP OR DOWN) (PULAR/BUSCAR SINTONIZAÇÃO (PARA CIMA ou PARA BAIXO)).
(TEMPORIZADOR LIGADO).
HORA pisca.(F2)
do TIMER OFF (TEMPORIZADOR DESLIGADO).
botão SKIP/TUNE SEARCH (UP OR DOWN) (PULAR/BUSCAR SINTONIZAÇÃO (PARA CIMA ou PARA BAIXO)).
o volume alto ou baixo pressionando o botão TUNING/SKIP (UP or DOWN) (SINTONIZAÇÃO/PULAR (PARA CIMA ou
PARA BAIXO)).
pressione o botão TIMER (TEMPORIZADOR), "
equipamento será desligado automaticamente no controle “TIMER OFF” (TEMPORIZADOR DESLIGADO).
Observação: Se a tela exibe “ERROR” (ERRO) enquanto você ajustar o “TIMER ON” (TEMPORIZADOR LIGADO), significa
" aparece na tela.
PR-3
Page 46

que o “TIMER ON” (TEMPORIZADOR LIGADO) e “TIMER OFF” (TEMPORIZADOR DESLIGADO) são
os mesmos. Neste caso, por favor vá para “TIMER OFF” (TEMPORIZADOR DESLIGADO) para ajustar primeiramente o
tempo de desligamento.
F1
CONTROLE DO EQUALIZADOR (no controle remoto)
O equalizador exibe o tom do som atual. Quando pressionar o botão EQ (EQUALIZADOR), o tom do som muda conforme abaixo:
F2
PARA AJUSTAR A FUNÇÃO SLEEP (DESLIGAMENTO AUTOMÁTICO) (no controle remoto)
1. Se deseja dormir com música, pressione o botão SLEEP (DESLIGAMENTO AUTOMÁTICO).
2. Você pode selecionar o modo SIN TO NI ZA ÇÃ O, CD/MP3, USB, SD/MMC ou AUX na função de desligamento automático
para reproduzir de 10, 70, 80 até 90 minutos de música antes de desligar automaticamente.
FUNÇÃO SELECT (SELECIONAR)
A função é esta, porém quando o botão é pressionado o modo é alterado. A tela muda conforme a seguir:
OPERAÇÃO DE RÁDIO
1. Pressione o botão FUNCTION (FUNÇÃO) no equipamento principal (ou controle remoto) para selecionar o modo TUNER
(SINTONIZADOR) para selecionar a operação FM.
2. Selecione a freqüência desejada com o botão SKIP/TUNE SEARCH (UP or DOWN) (PULAR/BUSCAR SINTONIZAÇÃO (PARA
CIMA ou PARA BAIXO)) no equipamento principal (ou controle remoto).
Selecionar Mono/Estéreo
Este equipamento pode receber apenas o modo FM.
1. Quando desejar selecionar a estação estéreo FM, pressione o botão ID3/MO./ST (ID3/MO./EST.) uma vez, apenas no
controle remoto. O indicador “ " aparecerá na tela, indicando que a recepção está em seu melhor.
2. Quando pressionar o botão ID3/M O. /S T. (ID3/MO./EST.) novamente, o indicador FM STER EO (FM ESTÉREO) irá desligar
e mudar para o estado MONO FM (FM MONO).
Sintonização Automática
1. Pressione o botão SKIP/TUNE SEA RC H (U P or DOW N) (PULAR/BUSCAR SINTONIZAÇÃO (PARA CIMA ou PARA
BAIXO)) por alguns segundos e depois solte o botão. O sintonizador buscará automaticamente a primeira estação com força de
sinal suficiente.
2. Repita o procedimento acima caso deseje selecionar outra estação.
Programação de estações pré-ajustadas
Você também pode pré-ajustar as estações de sua escolha e armazenar até 30 estações FM em sua memória.
1. Sintonize a estação desejada.
2. Pressione o botão MEM/C-ADJ.
3. Pressione o botão PRESET/FOLDE R(UP or DOWN) (PRÉ-AJUSTAR/PASTA (PARA CIMA ou PARA BAIXO) para o
número da sua estação desejada.
4. Pressione o botão MEM/C-ADJ. novamente para confirmar sua seleção.
5. Para programar mais estações na memória, repita as etapas 2 a 4 acima.
6. Para programar mais estações na memória, repita as etapas 2 a 4 acima.
Observações:
1. Armazenando uma nova estação em um local pré-ajustado apagará a estação armazenada anteriormente neste local.
2. Desligar o equipamento não apagará a memória das estações pré-ajustadas. Realize os procedimentos de pré-ajuste das
estações novamente para armazenar as estações.
3. Com o equipamento no modo STANDBY (RESERVA), pre ssione e segure o botão PLAY/PAU SE
(REPRODUZIR/PAUSAR) para apagar todas as memórias pré-ajustadas.
Selecionando as Estações Pré-ajustadas
1. Pressione o botão PRESET/FOLDE R(UP or DOWN) (PRÉ-AJUSTAR/PASTA (PARA CIMA ou PARA BAIXO) para
selecionar o número da sua estação desejada.
2. O local numérico desta estação pré-ajustada é exibido junto com a freqüência correspondente.
Antena FM
Estique a antena FM para melhor recepção FM.
PR-4
Page 47

OPERAÇÃO CD/MP3/WMA
Ouvindo Discos Compactos (CD/MP3/WMA)
1. Pressione o botão FUNCTION (FUNÇÃO) no equipamento para selecionar o modo CD.
2. Pressione o botão OPEN/CLOSE (ABRIR/FECHAR) no equipamento principal (ou controle remoto) e a porta de CD abrirá
automaticamente. (F3)
3. Insira o disco CD/MP3 no compartimento de CD, pressione o botão OPEN/CLOSE (ABRIR/FECHAR) novamente para fechar a
porta de CD. O equipamento principal irá ler automaticamente o disco CD/MP3.
OBSERVAÇÃO:
(1) Este equipamento pode reproduzir discos de CD, CD-R, CD-RW, MP3 e WMA.
(2) Pode ler di sc os M P3 " 8 cm " e " Mult i Section ".
(3) A "Pla yb ac k Transfer Ra te " (Taxa de Transferência de Reprodução) em MP 3 e WMA. (a). Em MP3, a taxa
de transferência bit: 8 - 256 kbps. (b). Em WMA, a taxa de transferência bit: 8 - 19 2k bp s.
(4) A "Max Readabl e 99 folders and 999 tracks" (99 pastas e 9 99 f ai xa s de leitura máxima).
(5) Se não há discos ou não puder ler, será visualizado TO C, N O DI SC (TOC, SEM DISCO).(F4)
Reproduzindo Todo CD/MP3/WMA
-
CD
1. Insira o disco CD no compartimento de CD, o equipamento principal lerá automaticamente o número total de pastas e
faixas ao mesmo tempo.
2. Pressione o botão PLAY/PAUSE (REPRODUZIR/PAUSAR), a unidade reproduzirá a primeira faixa no disco CD
automaticamente. (F5)
3. Pressione o botão PLAY/PAUSE (REPRODUZIR/PAUSAR) novamente, o indicador de tempo decorrido piscará. (F6)
4. Pressione o botão SKIP/TUNE SEA RC H(UP or DOWN) (PULAR/BUSCAR SINTONIZAÇÃO (PARA CIMA ou
PARA BAIXO)) uma vez para trocar o número da faixa, pr es si one e segure o botão SKIP/TUNE SEAR CH ( UP or
DOW N) (PULAR/BUSCAR SINTONIZAÇÃO (PARA CIMA ou PARA BAIXO)) para acelerar ou retroceder em cada
música.
5. Para reinicializar a reprodução, pressione o botão PLAY/PAUSE (REPRODUZIR/PAUSAR) novamente.
6. Para parar a reprodução, pressione o botão STOP (PARAR) uma vez no equipamento (ou controle remoto).
F3
F4
-
MP 3/ WMA
1. Insira o disco MP3/WMA no compartimento de CD, o equipamento principal lerá automaticamente o número total de
pastas e faixas ao mesmo tempo.
2. Pressione o botão PLAY/PAUSE (REPRODUZIR/PAUSAR), a unidade reproduzirá a primeira faixa no disco CD
automaticamente. (F7)
3. Pressione o botão PLAY/PAUSE (REPRODUZIR/PAUSAR) novamente, o indicador de tempo decorrido piscará. (F8)
4. Para mudar o número de faixa, pressione o botão SK IP /T UN E SEARCH(UP or DOWN) (PULAR/BUSCAR SINTONIZAÇÃO
(PARA CIMA ou PARA BAIXO) uma vez. Pr es sione o segure o botão SKIP/TUNE SEARCH (UP or DOWN)
(PULAR/BUSCAR SINTONIZAÇÃO (PARA CIMA ou PARA BAIXO) para acelerar ou retroceder em cada música.
5. Para reinicializar a reprodução, pressione o botão PLAY/PAUSE (REPRODUZIR/PAUSAR) novamente.
6. Para mudar o número de álbum, pressione o botão PRESET/FOLDER (UP or DO WN) (PRÉ-AJUSTE/PASTA (PARA CIMA
ou PARA BAIXO) uma vez.
7. Para parar a reprodução, pressione o botão STOP (PARAR) uma vez no equipamento (ou controle remoto).
F5 F6
F7
Observação: Se o equipamento principal não estiver funcionando adequadamente, desconecte e reconecte a fonte de energia.
OPERAÇÃO ID3 (no controle remoto)
Durante o modo MP3/WMA
1. Pressione o botão ID3/MO./ST. (ID3/MO./EST.) uma vez para abrir a função ID3.
2. Se o arqui vo MP3/WMA está gravado em “ ID3”, pesquisará automaticamente a informação do “T IT LE NAME” (NOME
DO TÍTULO), “ARTIST NAME” (NOME DO ARTISTA) e “ALBUM NAME” ( NOME DO ÁLB UM) i nd i cad o na te l a.
3. Pressione novamente o botão ID3/ MO./ST. (ID3/MO./EST.) no controle remoto. O equipamento iniciará a reproduzir
normalmente.
OPERAÇÃO USB/CARTÃO SD
Durante o modo STANDBY (RESERVA)
1. Insi ra o DISPOSITIVO USB ou CAR TÃ O SD /MMC e pressione o botão STANDBY (RESERVA) no equipamento
principal (ou controle remoto) para LIGAR o equipamento.
2. Pressione o botão FUNCTION (FUNÇÃO) no equipamento principal (ou controle remoto) para selecionar o modo USB ou
SD/MMC. O equipamento principal lerá automaticamente o número total de pastas e faixas ao mesmo tempo. (F9)
PR-5
F8
Page 48
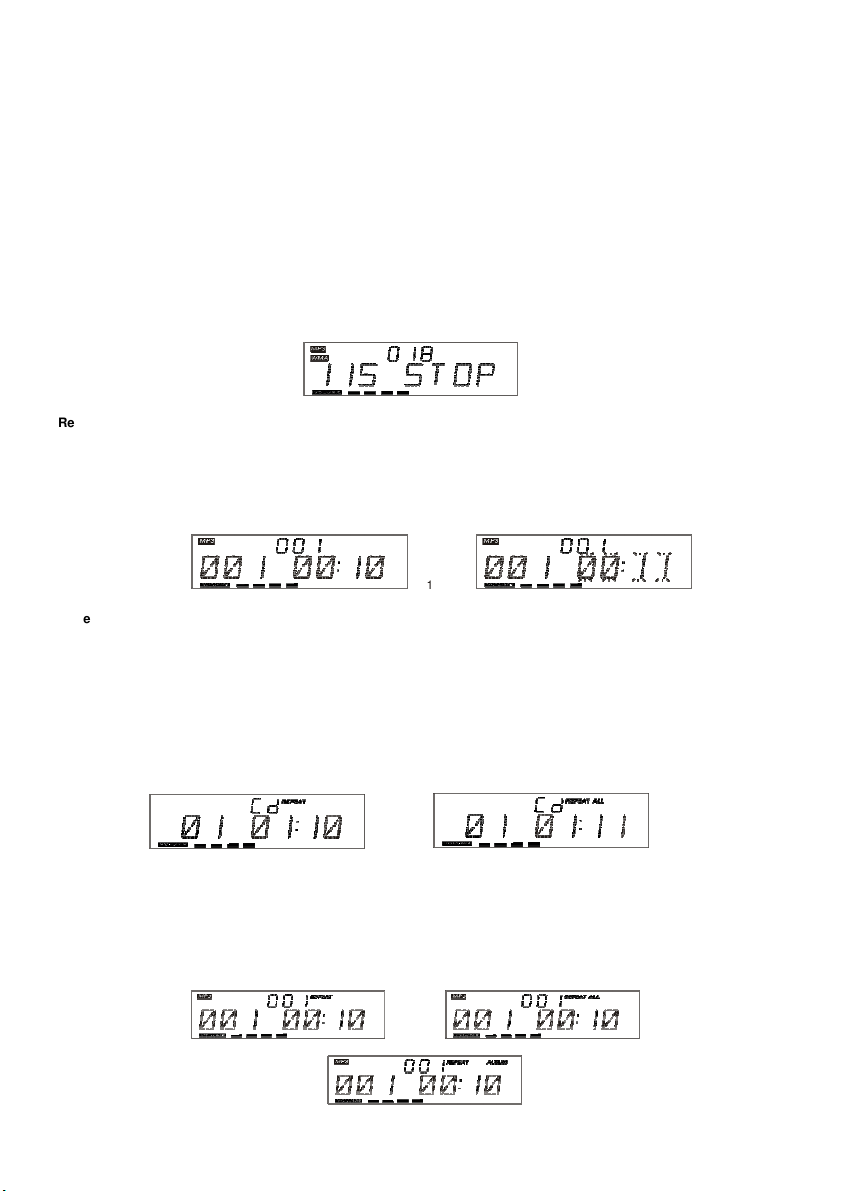
3. Se o dispositivo de memória USB possui mais de uma pasta.
a. Pressione o botão PRESET/FOLDE R (U P or DOW N) (PRÉ-AJUSTE/PASTA (PARA CIMA ou PARA BAIXO) para
selecionar cada pasta.
b. Pressione o botão SKIP/TUNE SEAR CH (U P or DOW N) (PULAR/BUSCAR SINTONIZAÇÃO (PARA CIMA ou PARA
BAIXO) para selecionar a faixa atual na pasta desejada.
4. Se o MP3 e W MA estão gravados em "ID3".
a. Com o equi pamento em reprod uç ão d e MP3 ou W MA. Pressione o botão ID3/MO./ST. (ID3/MO./EST.) uma vez. A
tela
exi birá "ID3 ON" (ID3 LIGA DO ) e busc ará auto ma ti cament e mais de 64 le tr as par a o " TI TL E NA ME " (N OM E
DO TÍTULO), "ARTI ST NAME" (NOME DO ARTISTA) ou
"ALBUM NAME" (NOME DO ÁLBUM) que irá mover-se do lado direito para o lado esquerdo da tela continuamente.
b. Pressione o botão ID3/MO./ST. (ID3/MO./EST.) novamente. A tela exibirá “ID3 OFF” (ID3 DESLIGADO) e o
equipamento principal reproduzirá normalmente.
Observação:
Reproduzindo Todo o Disco Flash
1. A reprodução será iniciada pressionando o botão PLAY/PAUSE (REPRODUZIR/PAUSAR). A
2. Para interromper a reprodução, pressione o botão PLAY/PAUSE (REPRODUZIR/PAUSAR). O indicador de tempo
3. Para reinicializar a reprodução, pressione o botão PLAY/PAUSE (REPRODUZIR/PAUSAR) novamente.
4. Para parar a reprodução, pressione o botão STOP (PARAR).
Observação:
REPETIR REPRODUÇÃO (no controle remoto)
- CD
1. Pressionando o botão REPEAT (REPETIR) uma vez, REPEAT (REPETIR) será exibido. O equipamento principal irá
2. Pressionando o botão REPEAT (REPETIR) duas vezes, REPEAT ALL (REPETIR TODOS) será exibido. O equipamento
3. Pressionando o botão REPEAT (REPETIR) três vezes, a função RE PEAT (REPETIR) desligará.
1. O equipamento principal pode reproduzir MP3 e WMA apenas neste modo.
2. Este equipamento pode suportar a maioria dos dispositivos USB e cartões SD/MMC/SDHC. A capacidade de
memória é de até 32 GB. Não pode acessar (ou acessar por um longo período) a memória com capacidade
superior a 32 GB. De outra forma, crie outros para acessá-lo.
3. Pode suportar USB versão 1.1 e 2.0.
4. Não suporta todos os tipos de cartão “dual voltage-MMC" ou cartão "MMC-Plus".
5. O equipamento principal não suporta arquivos WMA protegidos por “DRM FILE” (arquivos DRM).
F9
reprodução inicia com a primeira faixa. A tela exibe o número da faixa atual e o tempo decorrido. (F10)
decorrido piscará. (F11)
F1 0
Em todos os mome ntos , o DISPOSITIVO USB o u o CARTÃO SD deve estar bem fixado no modo
STANDBY (RESERVA) para evitar que o equipamento e o DISPOSITIVO USB OU CARTÃO SD sejam
danificados.
reproduzir a faixa atual repetidamente. (F12)
principal irá reproduzir todas as faixa repetidamente. (F13)
F11
F1 2
-
MP 3/ WMA
1. Pressionando o botão REPEAT (REPETIR) uma vez, REPEAT (REPETIR) será exibido. Ir á reproduzir a faixa atual
repetidamente. (F14)
2. Pressionando o botão REPEAT (REPETIR) duas vezes, REPEAT ALL (REPETIR TODOS) será exibido. Irá reproduzir
todas as faixas repeti da me nte. (F15)
3. Pressionando o botão REPEAT (REPETIR) três vezes, REPEAT ALBUM (REPETIR ÁLBUM) será exibido. Irá reproduzir
repetidamente o álbum atual. (F16)
4. Pressionando o botão REPEAT (REPETIR) quatro vezes, a função REPEAT (REPETIR) desligará.
F14
F16
F1 3
F15
PR-6
Page 49
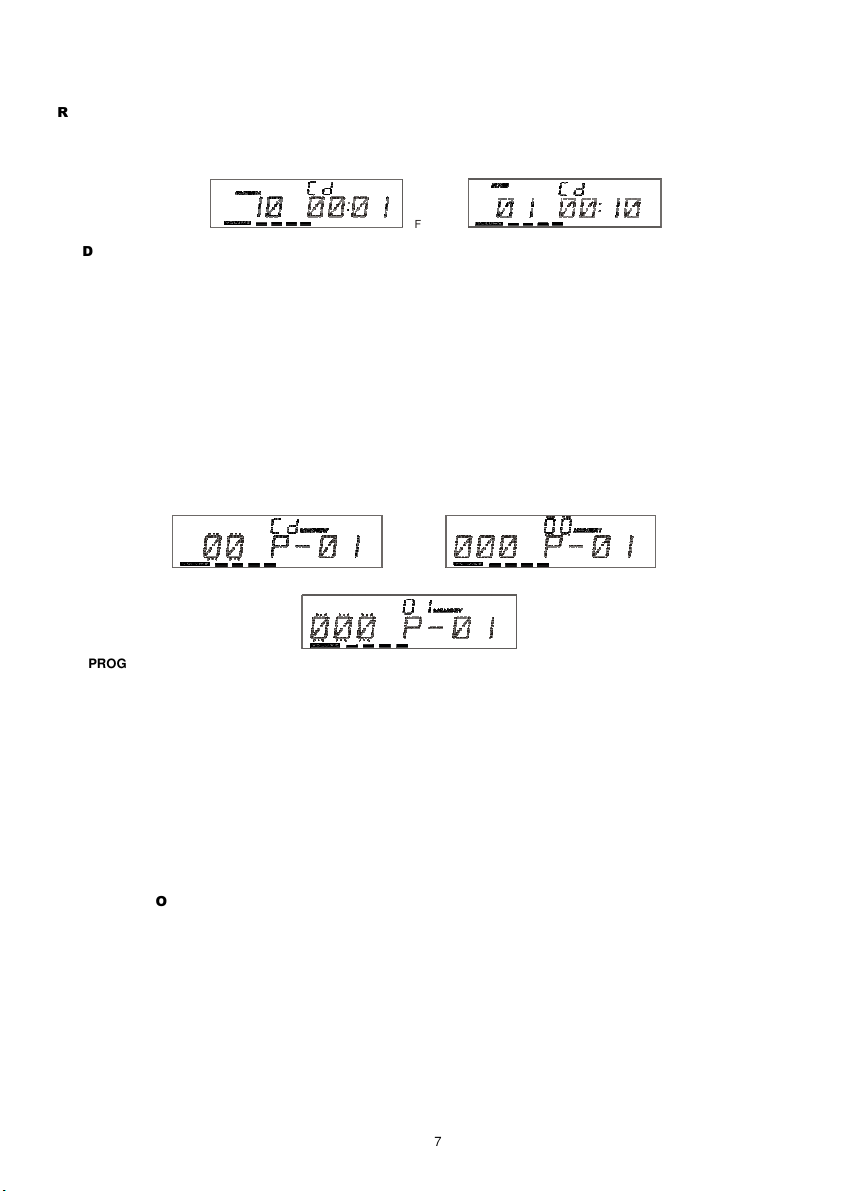
REPRODUÇÃO ALEATÓRIA (no controle remoto)
1. Pressionando o botão RANDOM (ALEATÓRIO) uma vez, RANDOM (ALEATÓRIO) é exibido. (F17)
2. Pressionando o botão RANDOM (ALEATÓRIO) novamente, a reprodução retornará ao normal.
REPRODUZIR INTRODUÇÃO (no controle remoto)
1. Pressionando o botão INTRO (INTRODUÇÃO) uma vez, INTRO (INTRODUÇÃO) é exibida. O equipamento principal
reproduzirá os primeiros 10 segundos de cada faixa. (F18)
2. Pressionando o botão INTRO (INTRODUÇÃO) novamente, a reprodução retornará ao normal.
MODO PROGRAMA
O usuár io pode cri ar um programa de at é 32 f ai xa s no m od o CD o u 64 faixas no modo MP3/W MA/USB/CARTÃO
SD em qua lque r ordem desejada. O modo programa é ativado enquanto estiver no modo parar.
1.
Como reproduzir o programa
- CD
1) Pressione o botão MEM/C-ADJ., mudando para o modo PROGRAM (PROGRAMA) . (F 19)
2) Pressione o botão SKIP/TUNER S EA RCH(UP or DOWN) (PULAR/BUSCAR SINTONIZAÇÃO (PARA CIMA ou PARA
BAIXO)) e o número da faixa será mudado.
3) Pressione o botão MEM/C-ADJ. para confirmar o número da faixa.
- MP 3/ WMA/U SB/C ART ÃO SD
1) Pressione o botão MEM/C-ADJ., mudando para o modo PROGRAM (PROGRAMA) . O número do álbum piscará.
(F20)
2) Pressionando o botão PRESET/FOL DE R (PRÉ-AJUSTE/PASTA), o número do álbum será mudado.
3) Pressionando o botão MEM/C-ADJ., o número da faixa piscará. (F21)
4) Pressionando o botão SKIP/TUNER S EA RC H (PULAR/BUSCAR SINTONIZAÇÃO), o número da faixa será mudado.
5) Pressione o botão MEM/C-ADJ. para confirmar o número da faixa.
F17
F18
F1 9
F 20
2.
PROGRAMAR
REPRODUÇÃO
Pressione o botão PLAY/PAUSE (REPRODUZIR/PAUSAR) no equipamento (ou controle remoto) e a reprodução iniciará com a
primeira faixa do programa. Quando todas as faixas forem reproduzidas, o a tela do equipamento exibirá o número de faixas e
o tempo de reprodução das faixas do CD /M P3/W MA.
3.
CANCELAR PROGRAMA
1. Pressionando o botão STOP (PARAR) uma vez ou abrindo e fechando a porta da bandeja de CD apagará a memória.
2. Ajustando um novo programa, o anteriormente existente será apagado.
Observação: Durante o modo programa.
1. Pressionando o botão "REPEAT" (REPETIR) uma vez, o indicador "REPEAT" (REPETIR) acenderá na tela. Então o
equipamento principal repetirá a faixa atual.
2. Pressionando o botão "REPEAT" (REPETIR) duas vezes, "REPEAT A LL " (REPETIR TUDO) acenderá na tela. Então o
equipamento principal repetirá todas as faixas.
3. Pressione o botão “REPEAT” (REPETIR) mais uma vez. O equipamento principal retornará a programação normal.
REPRODUÇÃO AUX IN
A entrada AUX está localizada no lado esquerdo do equipamento. Use um cabo de conexão estéreo de 3,5 mm para conectar
o equipamento de áudio através da entrada LINE IN.
1. Para selecionar a função de entrada AUX, pressione repetidamente o botão FUNCTION (FUNÇÃO) no equipamento (ou
controle remoto) até que AUX seja indicado na tela.
2. Pressione o botão VOLU ME (+ ou -) para ajustar o nível de saída do som.
Observação:
Cabo LINE IN não incluído.
PR-7
F2 1
Page 50

AJUSTE MUDO (no controle remoto)
1. Quando você pressionar o botão MUTE (MUDO) uma vez no controle remoto, o nível de volume piscará e a saída de áudio
será encerrada temporariamente. (F22)
2. Pressionando o botão MUTE (MUDO) novamente, o nível de volume e saída de áudio retornarão ao normal.
F22
OUVINDO MÚSICA COM FONES DE OUVIDO
Insira seus fones de ouvido (fone de ouvido estéreo mini 3,5 mm) na entrada de fones de ouvido no lado direito do equipamento.
O som será ouvido através dos fones de ouvido ao invés do alto-falante.
ESPECIFICAÇÃO
FORNECIMENTO DE ENERGIA: CA 230V ~ 5 0Hz
VOLTAGEM DE SAÍDA: 4,5 Watts x 2
DIMENSÃO DO EQUIPAMENTO: 232 ( L) x 89,5 (D) x 186 ( A) mm
DIMENSÕES DA CAIXA DO ALTO-FALANTE: 120 (L ) x 80 (D) x 186 (A) mm
Pes o Líquido: 2 kg
SEÇÃO DO RÁDIO
TAXA DE FREQUÊNCIA: FM 87,5-108 MHz
SEÇÃO DE DISCO COMPACTO
LEI TU RA ÓPTICA: 3 – FEIXES DE LAS ER
RESPOSTA DA FREQUÊNCIA: 100 Hz - 16kHz
ESPECIFICAÇÕES SUJEITAS A ALTERAÇÃO SEM AVISO PRÉVIO.
Advertências de ventilação: “ A ventilação normal do produto não deve ser obstruída para o uso pretendido.”
Para obter mais informações, visite nosso website: www.mpmaneurope.com
PR-8
 Loading...