

Page 1

TK1
MP3/MP4/FM player
Instruction manual
www.mpmaneurope.com
Page 2

Always Keep a Copy of Your Original Data
Before you deliver your product for warranty services please backup all
data, including all software programs. You will be responsible for
reinstalling all data. Data recovery is not included in the warranty
service and our company is not responsible for data that may be lost or
damaged during transit or a repair.
Safety Instructions
* Do not expose to extreme temperatures.
* Do not allow any liquid form into the device.
* Do not apply or subject the player to excessive pressure.
* Do not expose to direct sunlight or heat sources.
* Do not try to disassemble and repair the device yourself.
* Do not expose device to chemicals such as benzene or thinner.
* Do not store device in dusty or damp area.
* our company will claim no responsibility for any damage on data loss due
to breakdown, repair or other causes.
Contents
Important Notice................................................................................ ..1
Before Using the Player.......................................................................5
Key & Function...................................................................................8
Main Menu Display.............................................................................9
Charging the Battery..........................................................................11
Get Started..............................................................................................17
Power ON / Power OFF......................................................................20
Set Key Lock........................................................................................20
Music Playback....................................................................................21
Video Playback....................................................................................25
FM Mode..............................................................................................27
Photo Mode..........................................................................................31
Text Mode.............................................................................................33
Record Mode........................................................................................38
Explorer Mode.....................................................................................39
Game Mode..........................................................................................40
Settings Mode.......................................................................................41
Using the AVI Converter Software.....................................................48
Troubleshooting....................................................................................53
Page 3
Before Using the Player
Product Features
* Sleek and lightweight design.
* 1.8'' TFT 262K Color LCD display (128x160).
* Graphic user interface.
* Playback MP3, WMA and WAV audio format.
* Supports AVI video format (comes with AVI Converter Software)
* Built-In FM radio tuner with stations preset and FM recording in
WAV format.
* Supports photo browsing in JPEG format.
* Digital voice recording.
* Text viewer in TXT format with bookmark function.
* Synchronous lyrics display in LRC format.
* Personal data file storage.
* USB 2.0.
* Built-in rechargeable li-polymer battery.
- Audio Playback (Maximum up 8 hours).
- Video Playback (Maximum up 4 hours).
* Supports Windows 2000 / XP / VISTA.
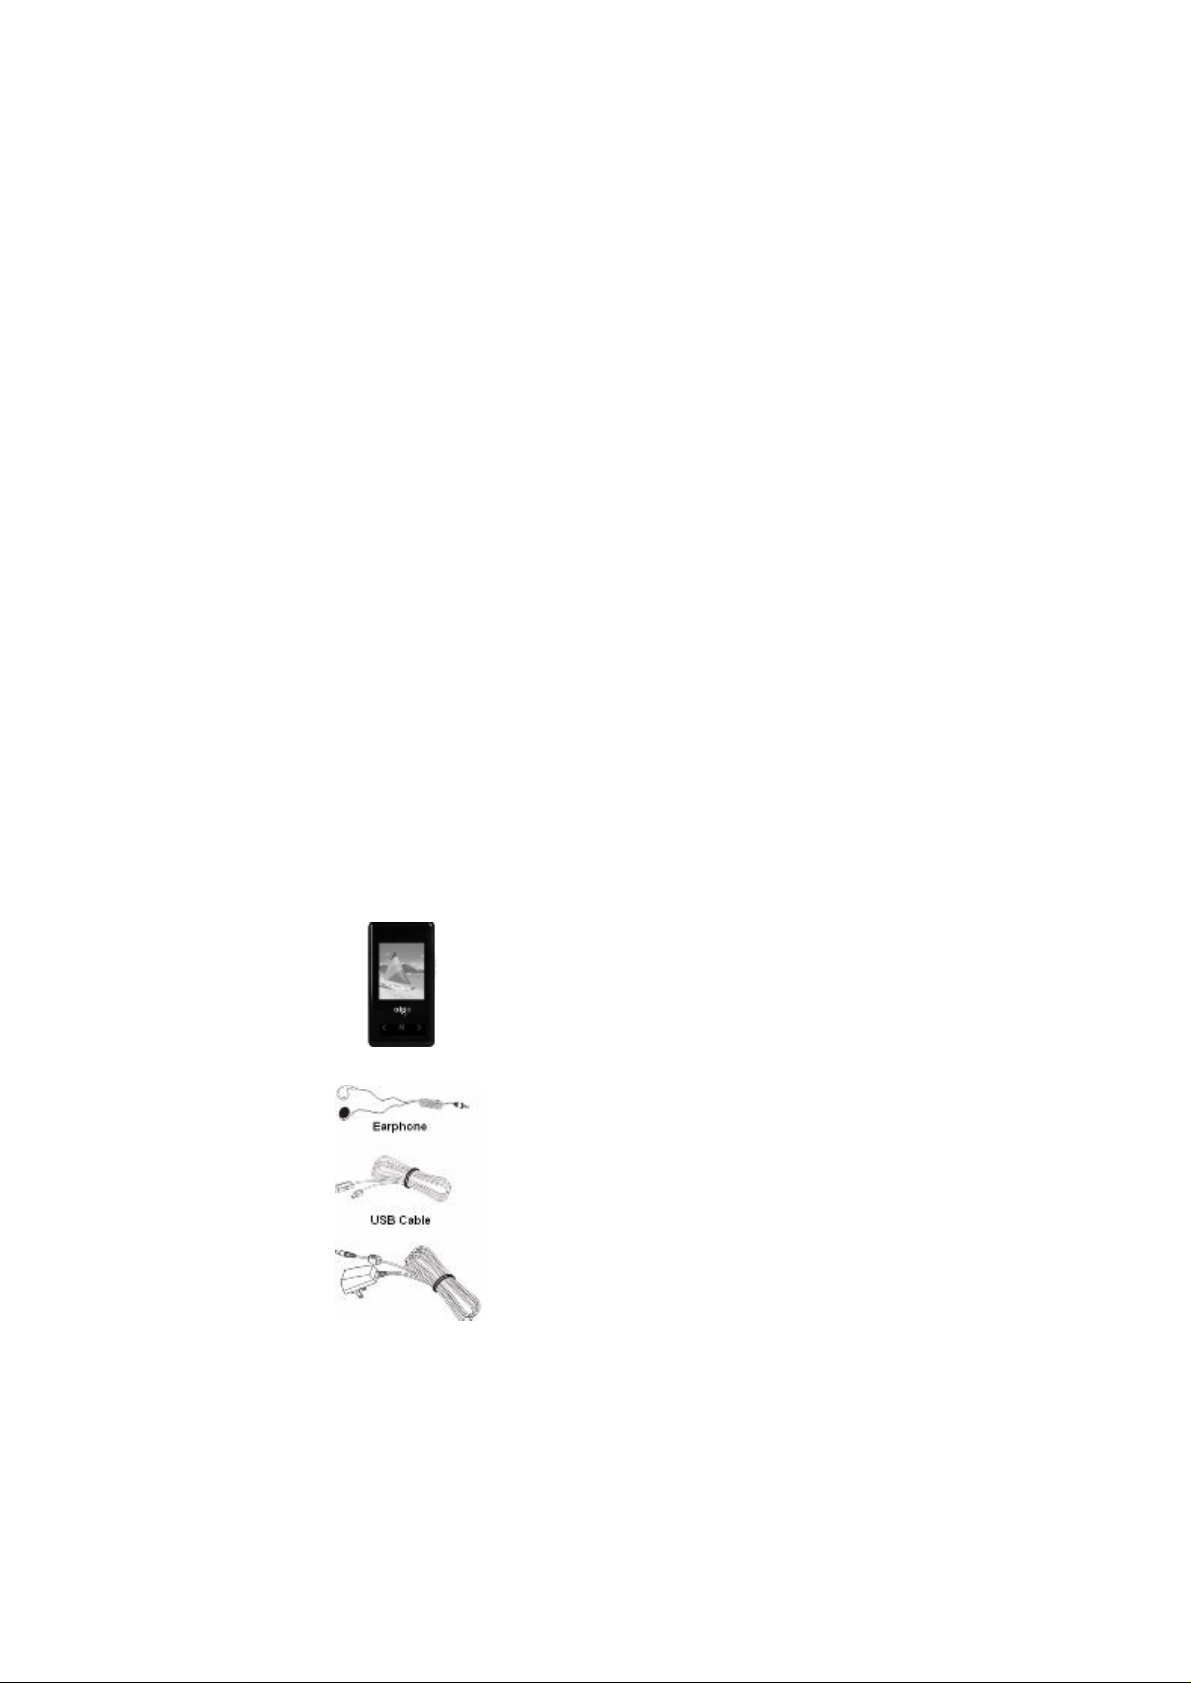
Package Contents
TK1player
AC Power Adapter
(Optional)
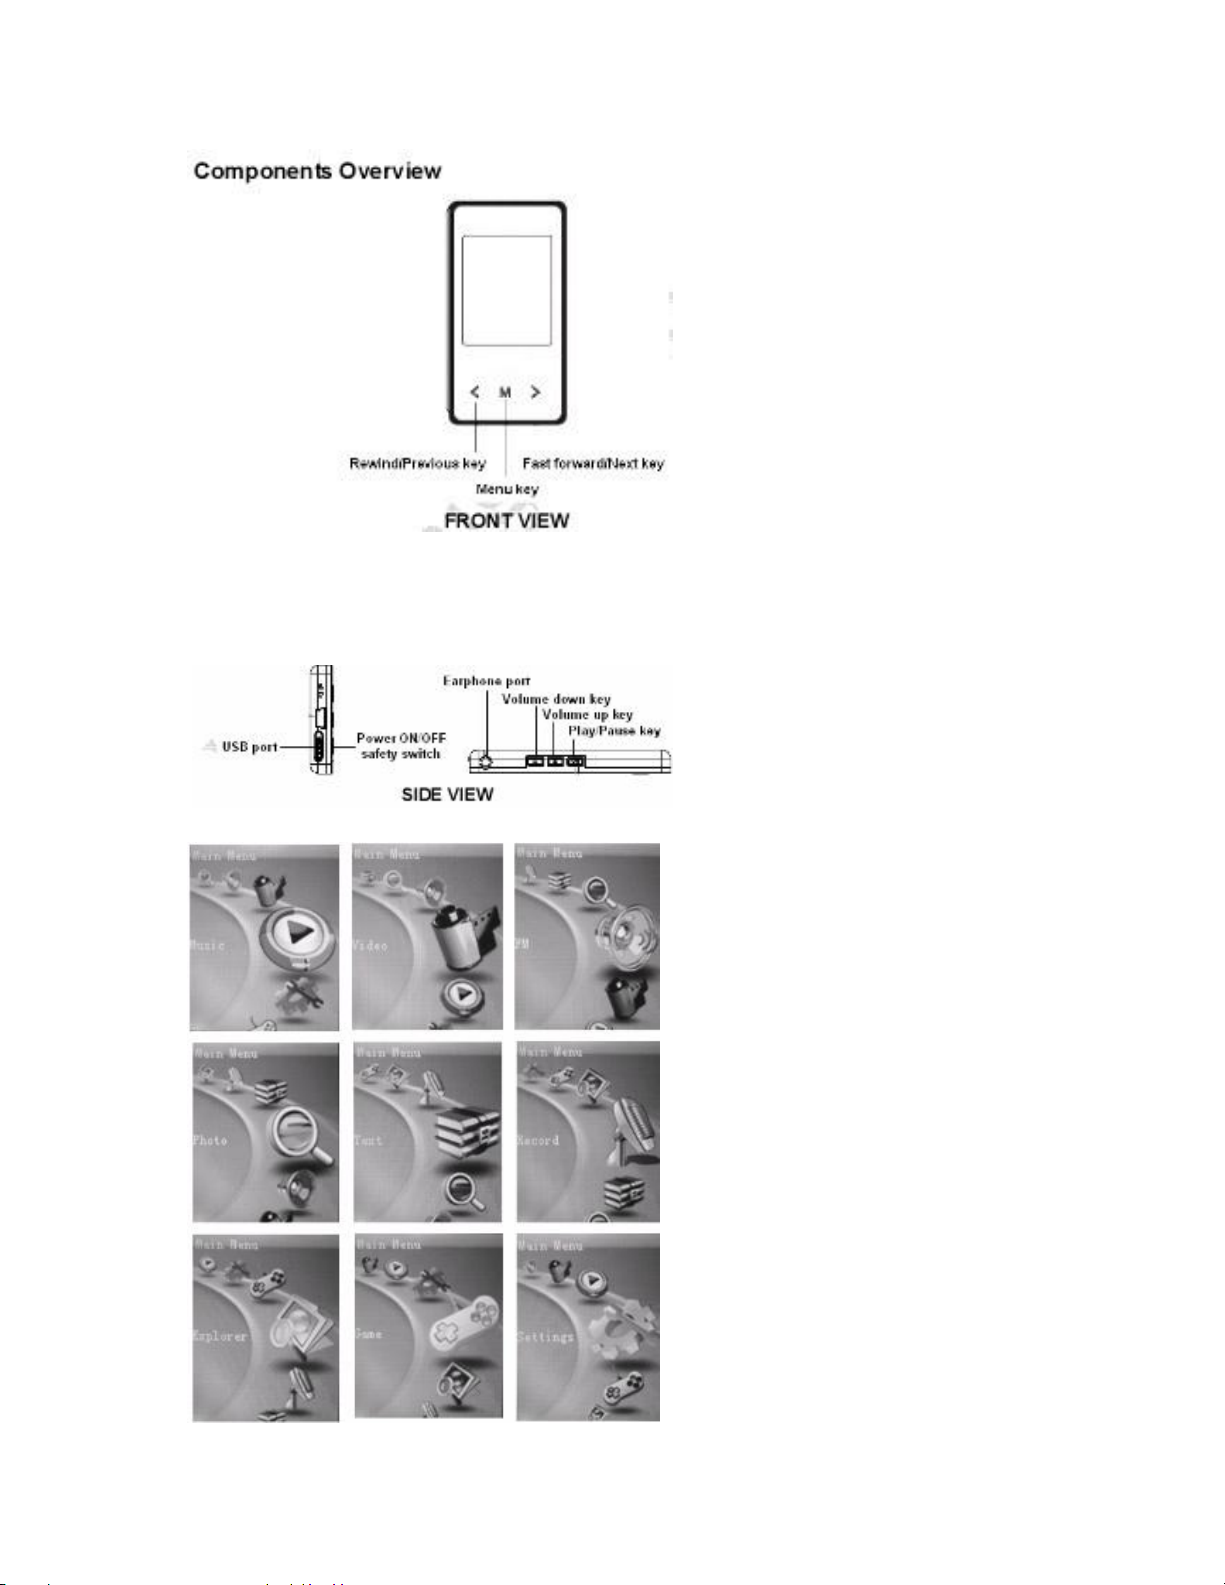
Page 4
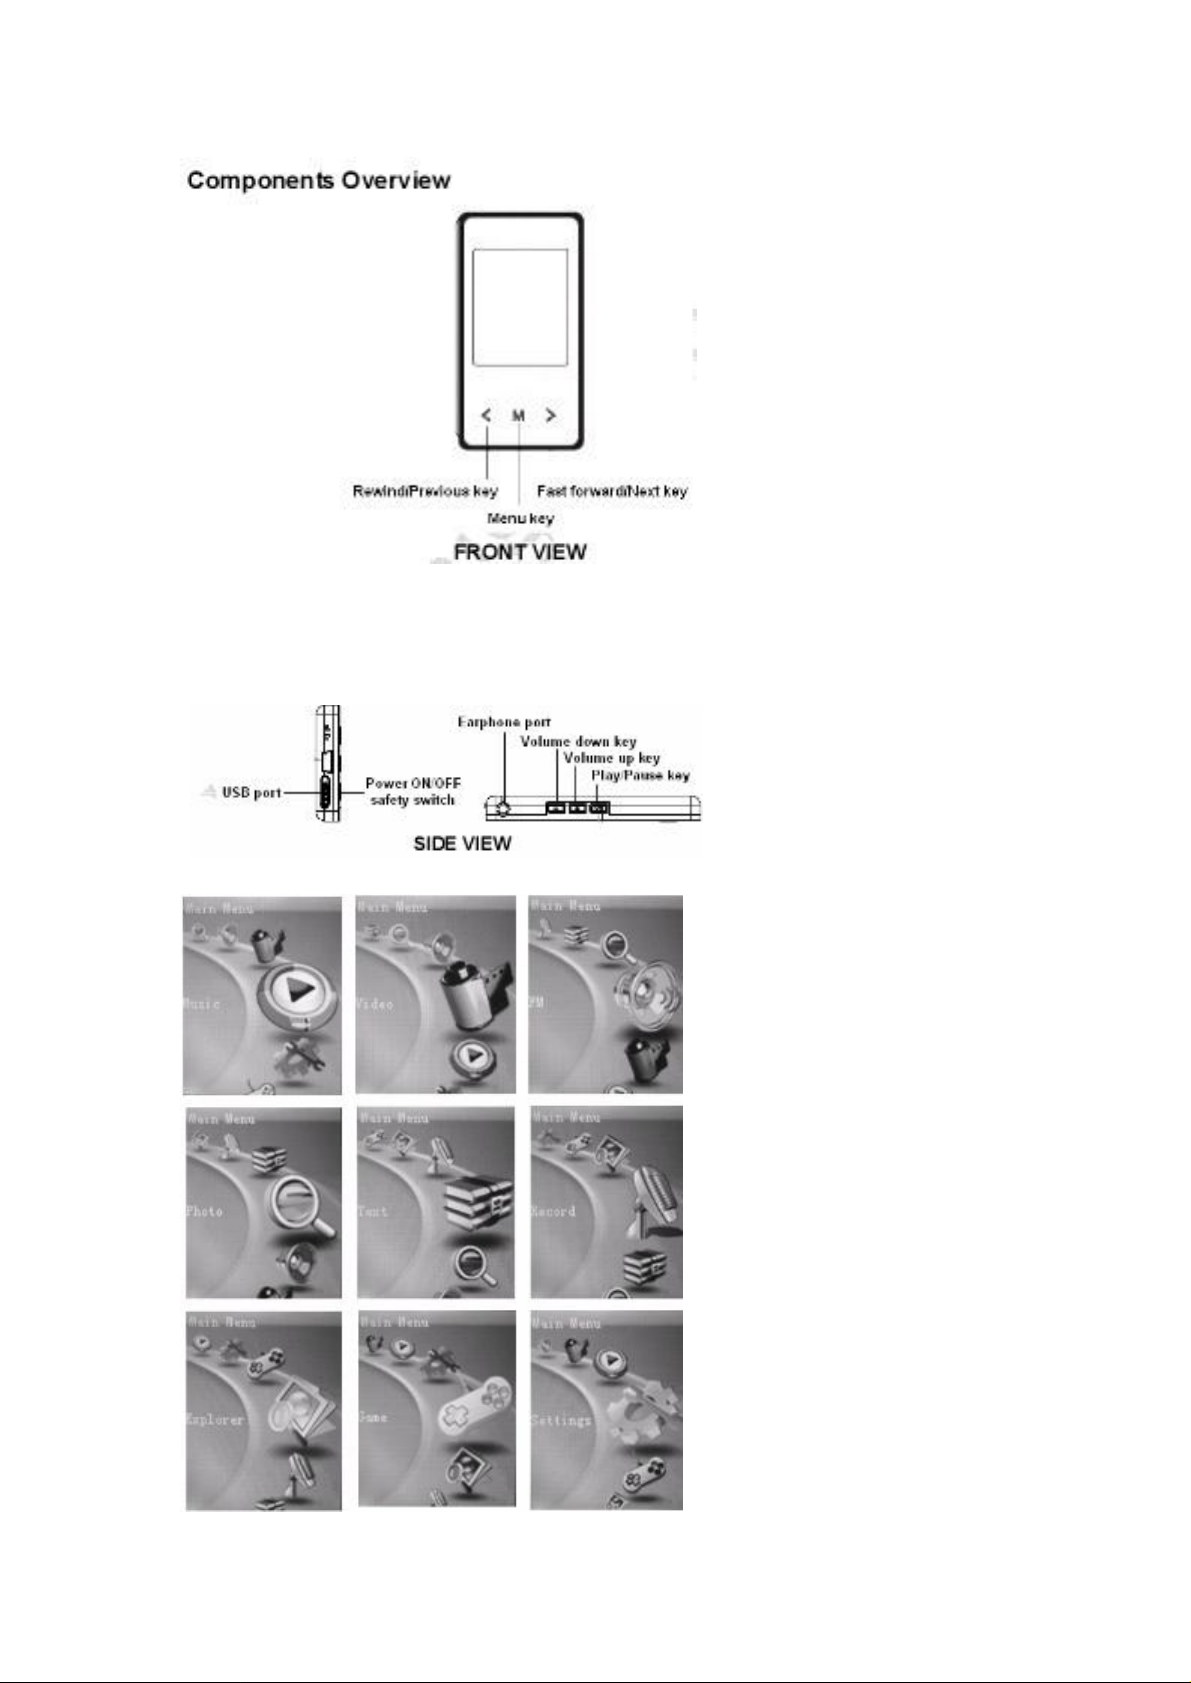
FRONT VIEW
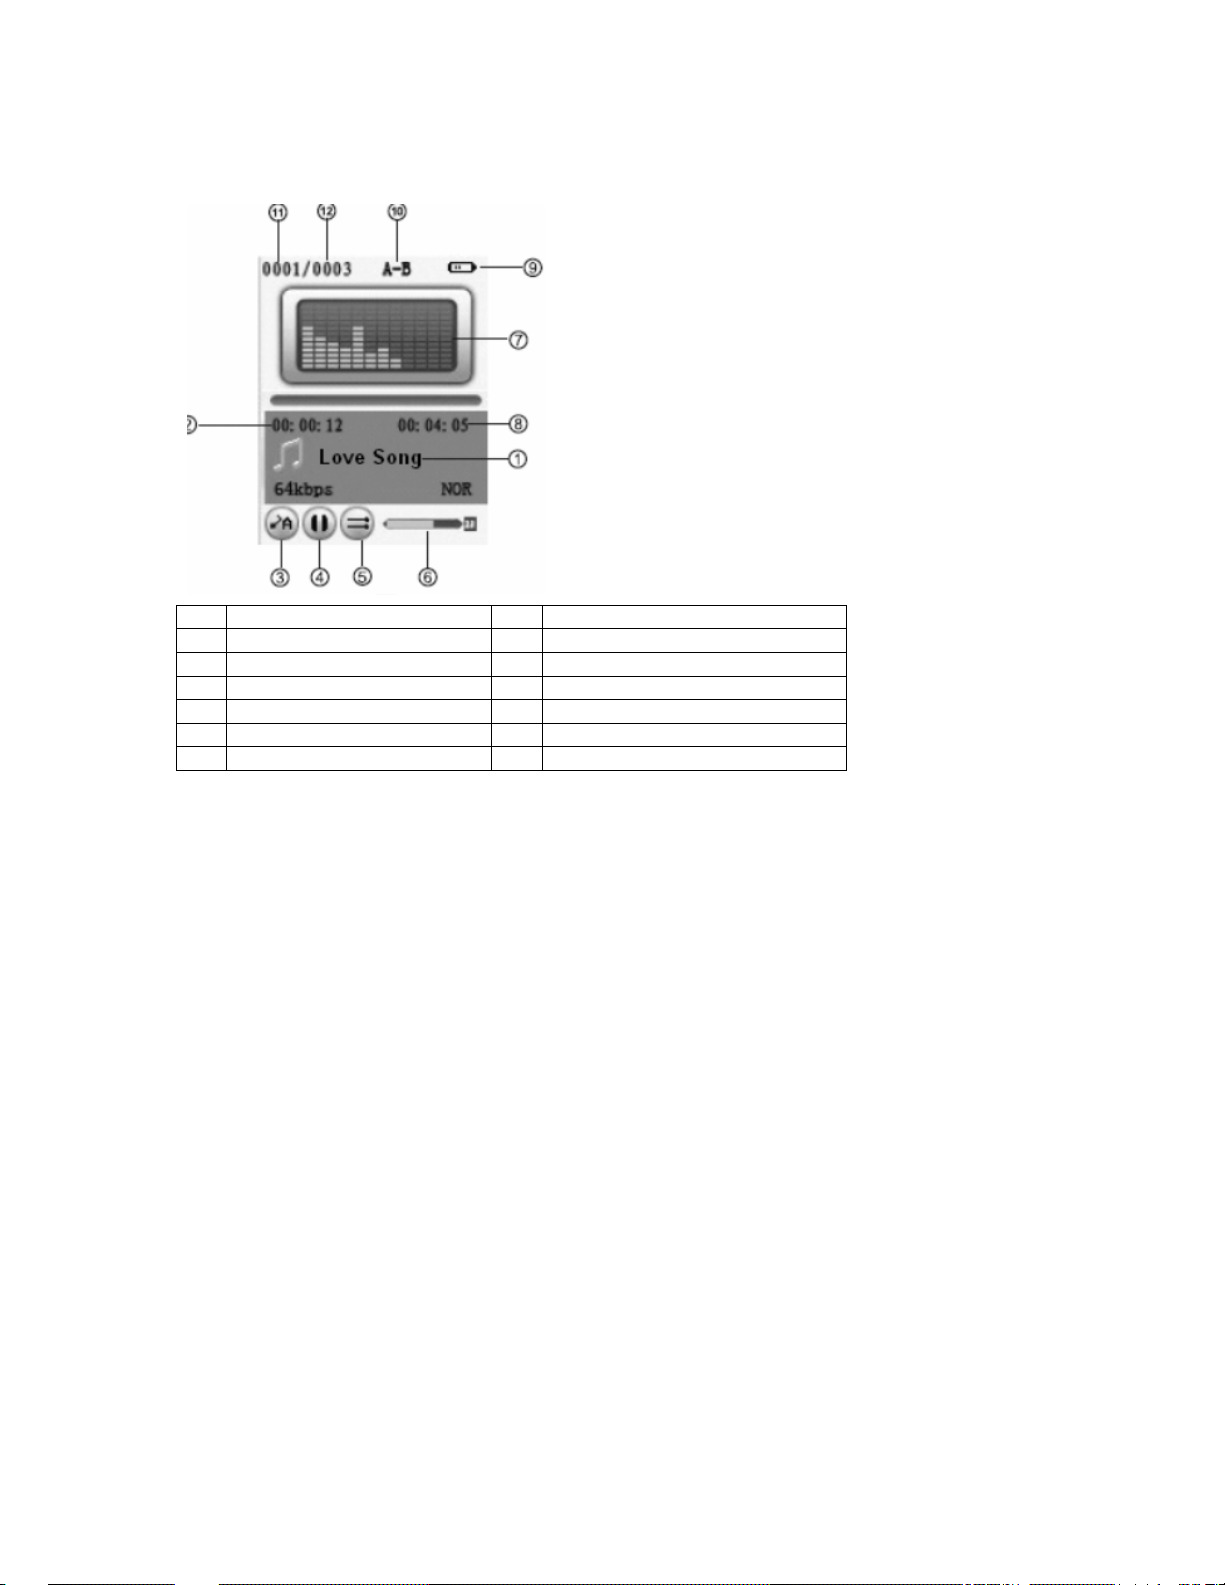
Main Menu Display
Page 5
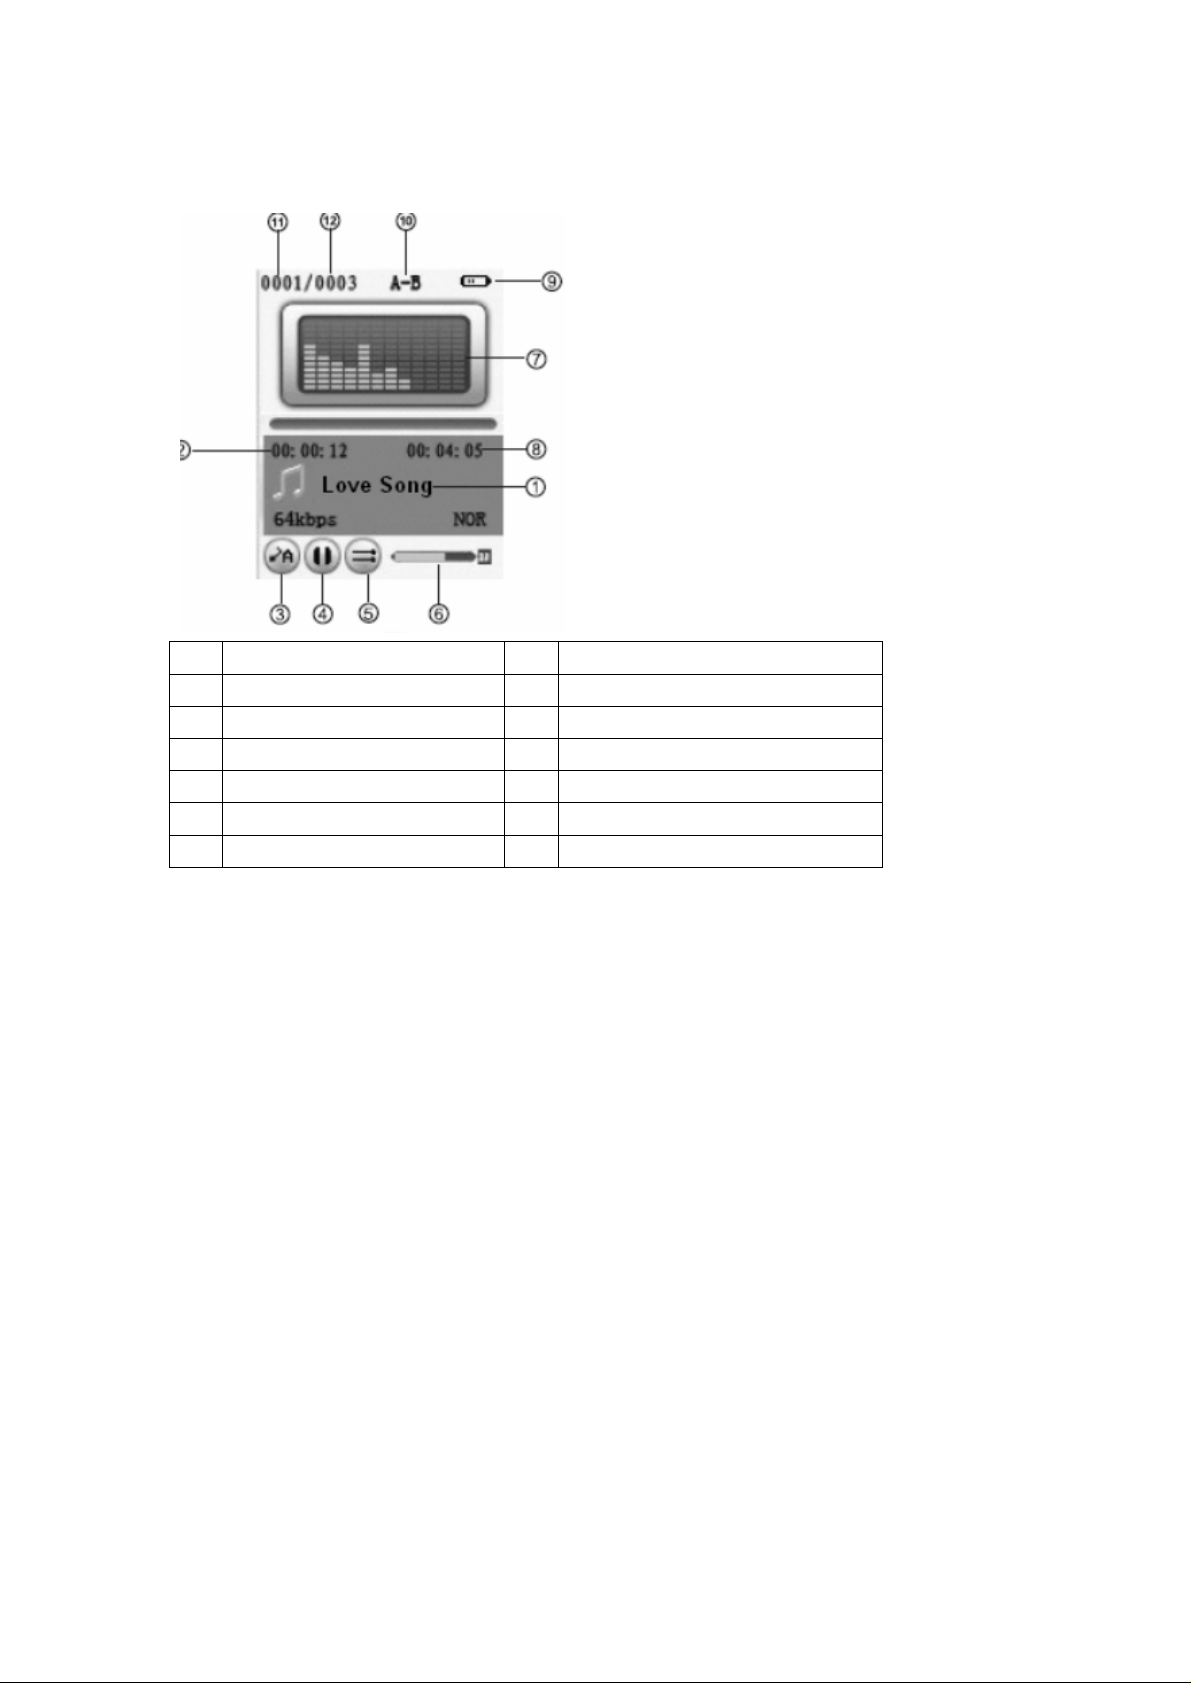
NO Function NO
1 Song Title & ID3 Display 7 Equalizer / Song Lyrics Display
2 Playback Timer 8 Track Duration
3 Playback Mode 9 Battery Indicator
4 Play / Pause Status 10 A-B Repeat
5 Playback Setting 11 Current Track Number
6 Volume Level 12 Total Track
Function
Charging the Battery
* Always charge up battery fully before initial use. (Approximately 8
hours).
* Switch on your player before starting the charging mode
* If the battery level is low, please charge it immediately. Otherwise
the player will shut down automatically or unable to power ON.
* The battery life varies depending on the music volume level
settings and backlight display.
* In order to protect the battery condition, we recommend that you
charge it every 4 months if you are not using it for a very long time.
* You may charge the player via AC Power Adapter (Optional) or via
USB cable connection with the computer.
Page 6
Charging the Battery Using Computer
* Connect one end of the supplied mini USB cable to the player.
* Connect the other end of the mini USB cable to the computer.
* Charging process begins automatically.
* To view battery charging process on the player, stop the USB
device in the computer system tray by using the “Safely Remove
Hardware” procedure. (Please refer to “Disconnecting the USB
Disk from the computer”).
* When it is fully charged, the battery indicator turns green color and
charging stops automatically.
* Fully charged time: Approximately up to 4 hours.
Charging the Battery Using AC Power Adapter (Optional)
* Connect one end of the AC Power Adapter (mini USB) to the
player via the supplied USB cable.
* Connect the other end of the AC Power Adapter to the wall outlet
and turn on the power supply.
Page 7

* Charging process begins automatically.
* The battery indicator on the player will start flashing during
charging process.
* When it is fully charged, the battery indicator turns green color and
charging stops automatically.
* Fully charged time: Approximately up to 3 hours.
Note
Please use ONLY the original AC Power Adapter (optional) or USB cable
supplied. DO NOT use any third-party AC Power Adapter as it might cause
severe damage to the player.
Minimum System Requirements
* Intel Pentium processor 200MHz and above.
* Windows 2000 and Windows XP.
* 32MB of RAM (128MB recommended)
* Up to 100MB of available hard-disk space
* Standard USB Port
Note:
1. Log in the computer as Administrator account to perform any software
installation or firmware upgrade (if any). Otherwise the installation process
might not be completed successful.
Get Started
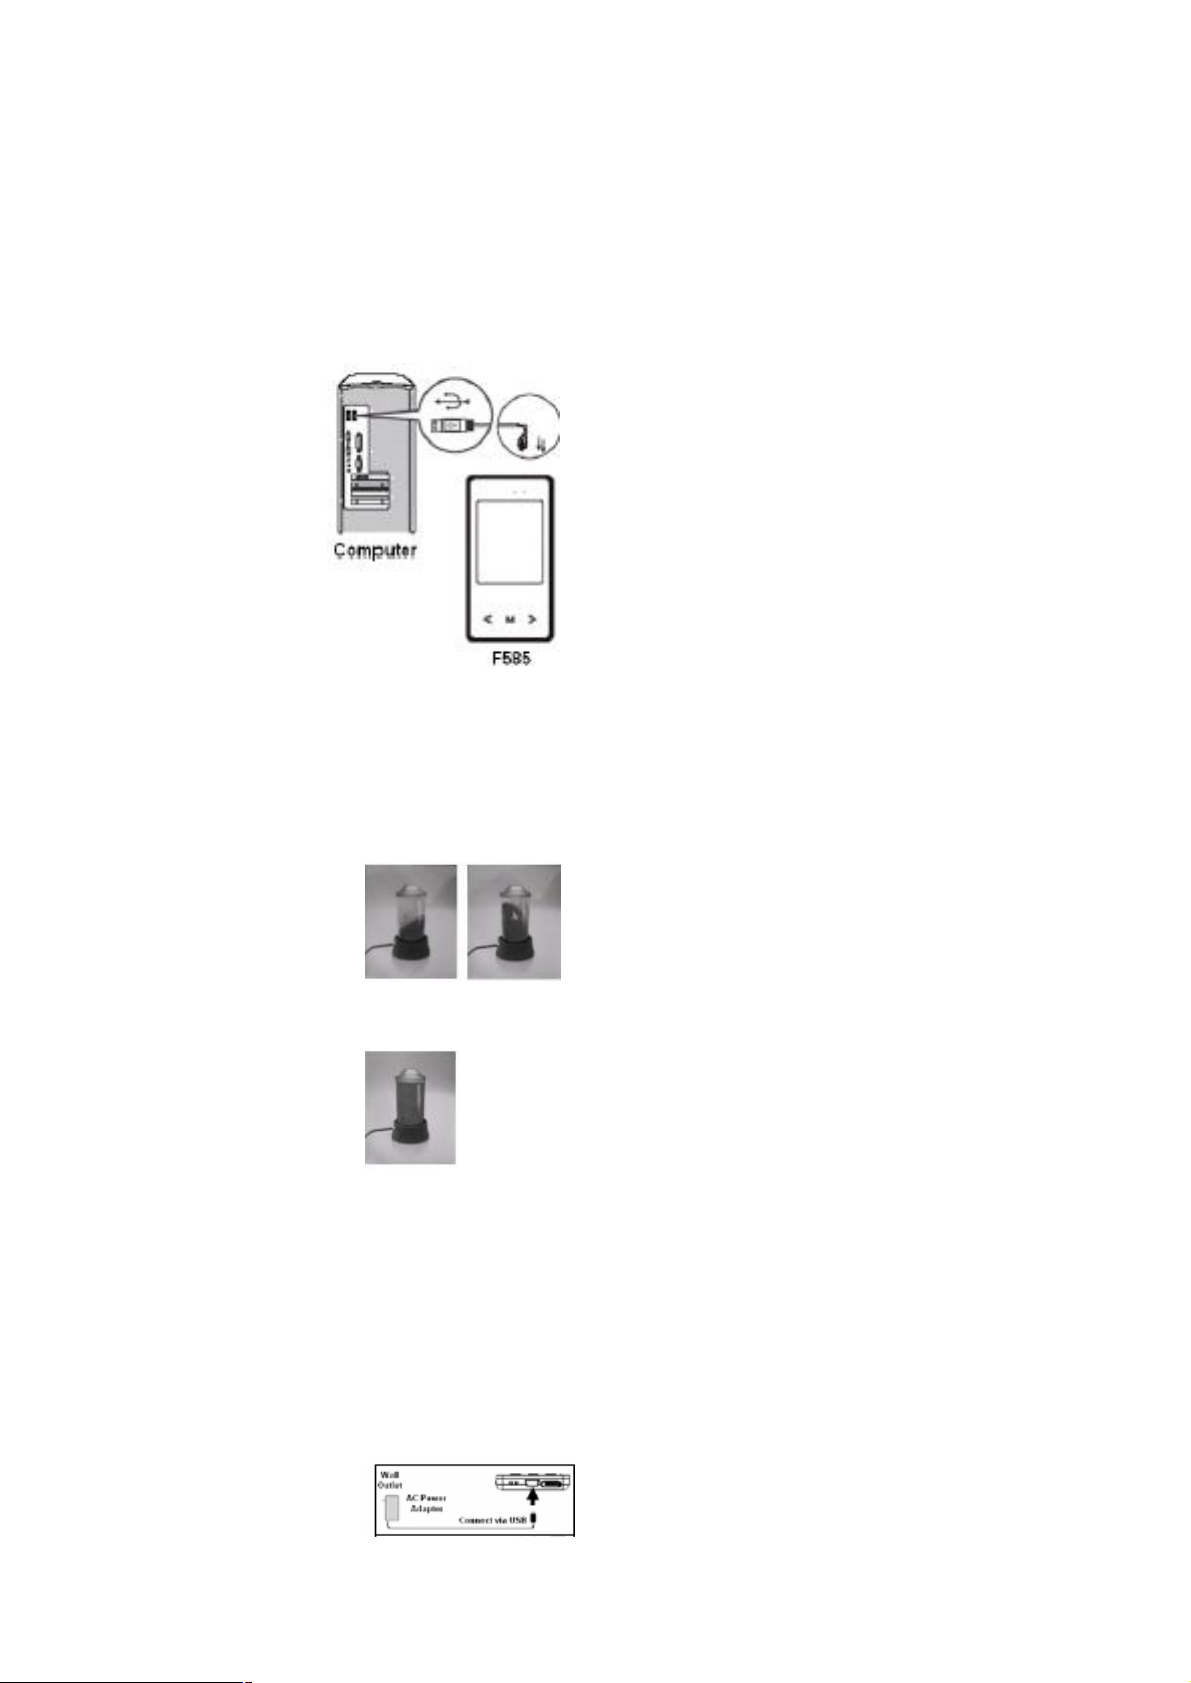
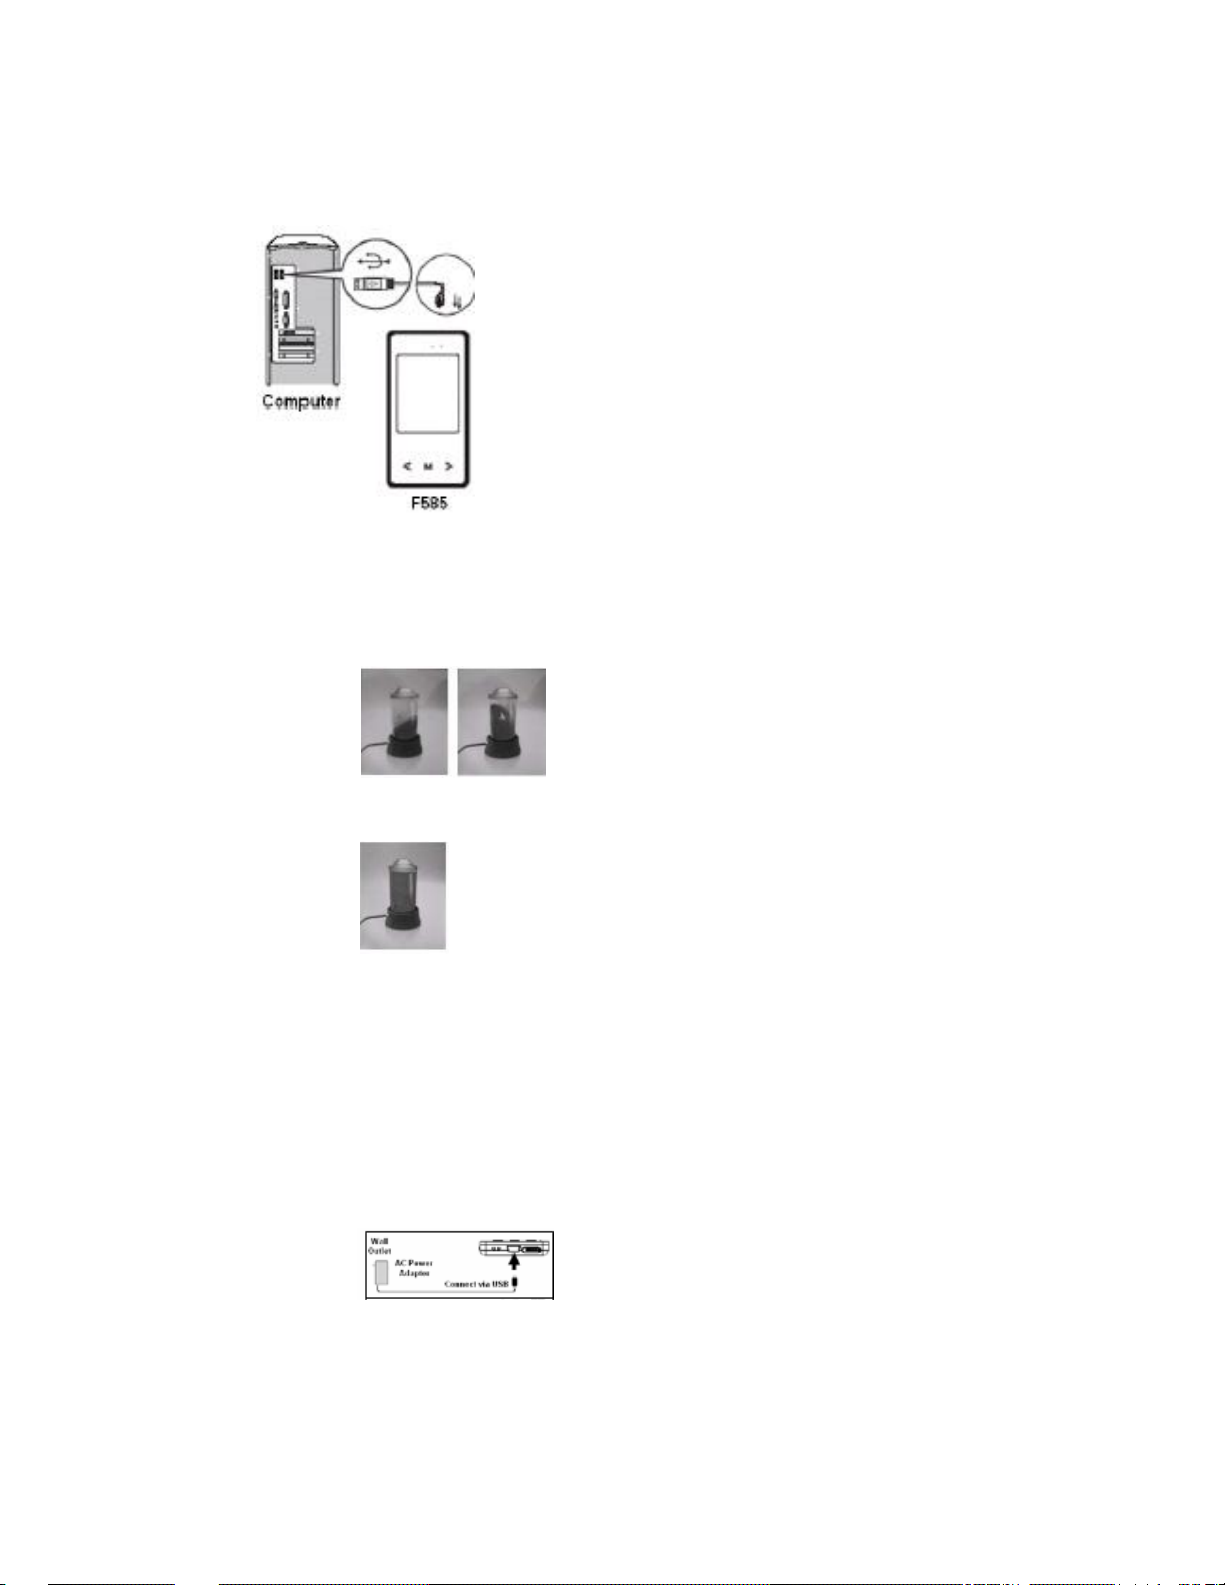
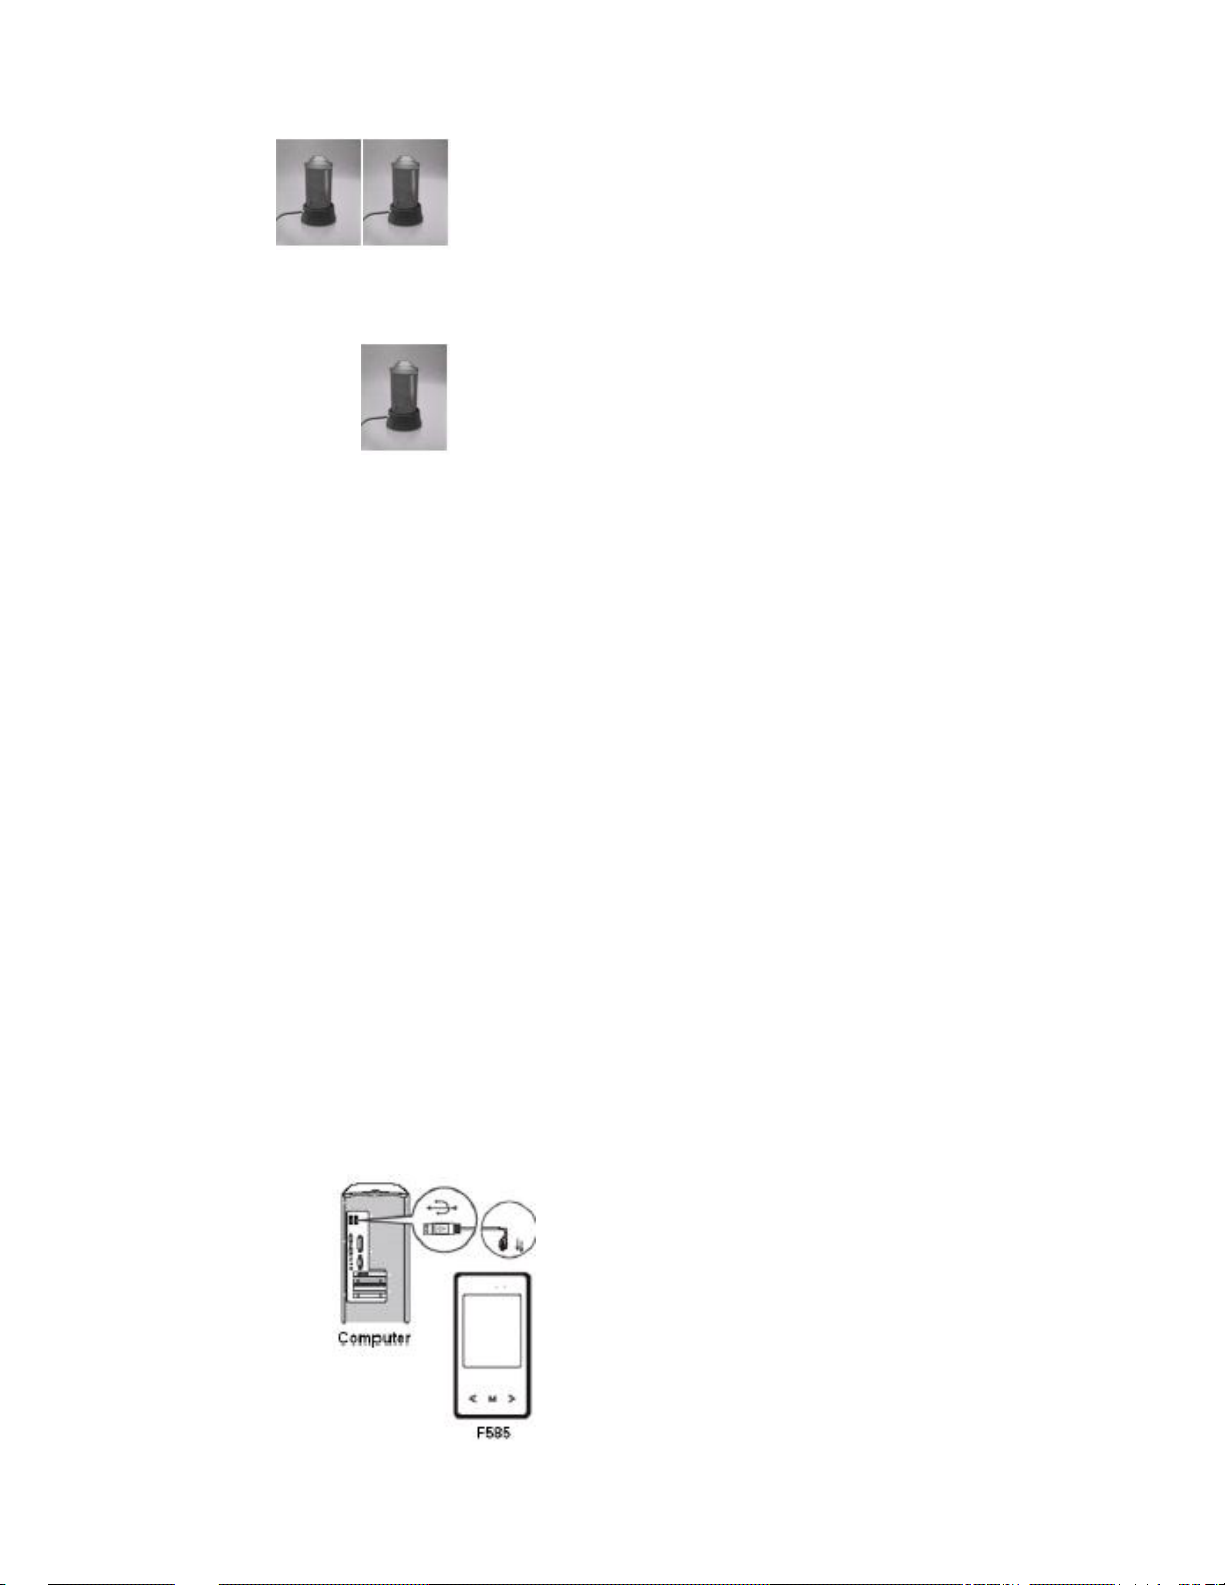
Connecting the USB Disk to the computer
* Connect one end of the supplied mini USB cable to the player.
* Connect the other end of the mini USB cable to the computer.
Page 8
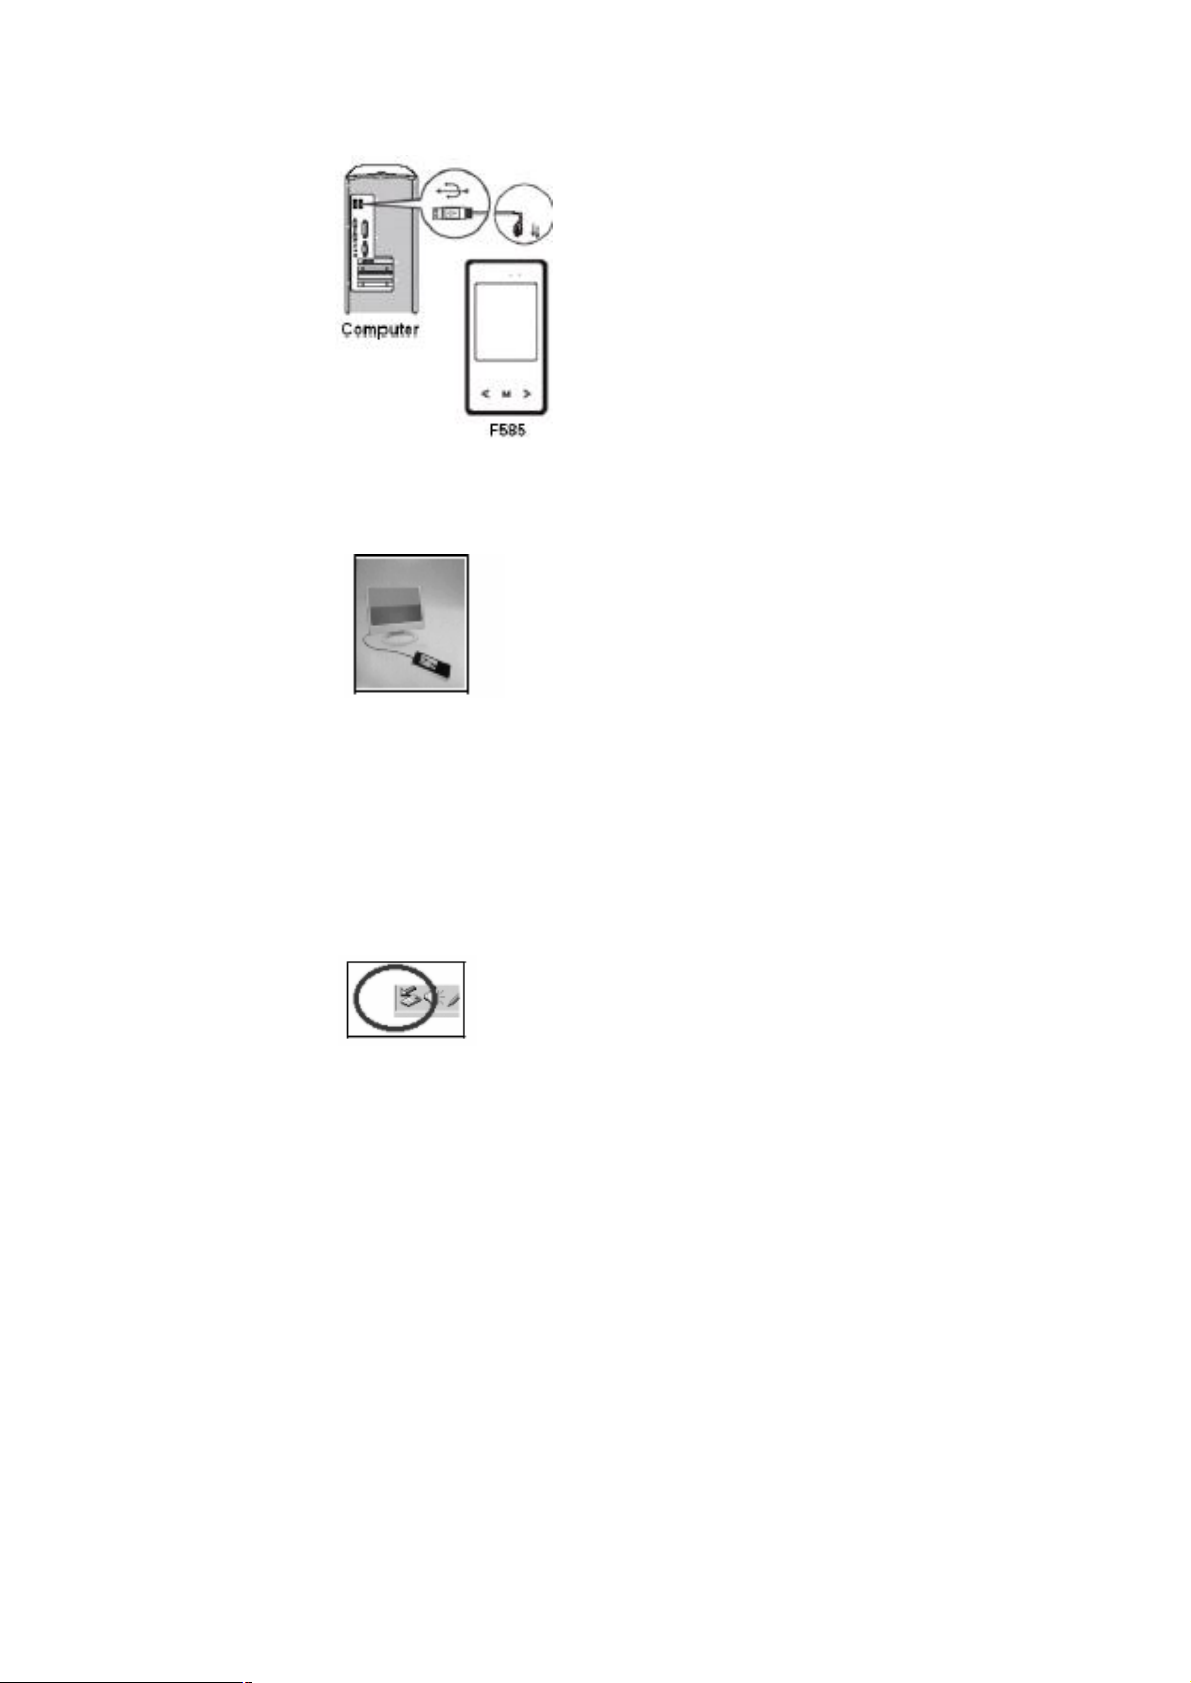
* When the connection is successful, the player will display the
connection icon. Begin to transfer any audio and video files into
the player via the computer.
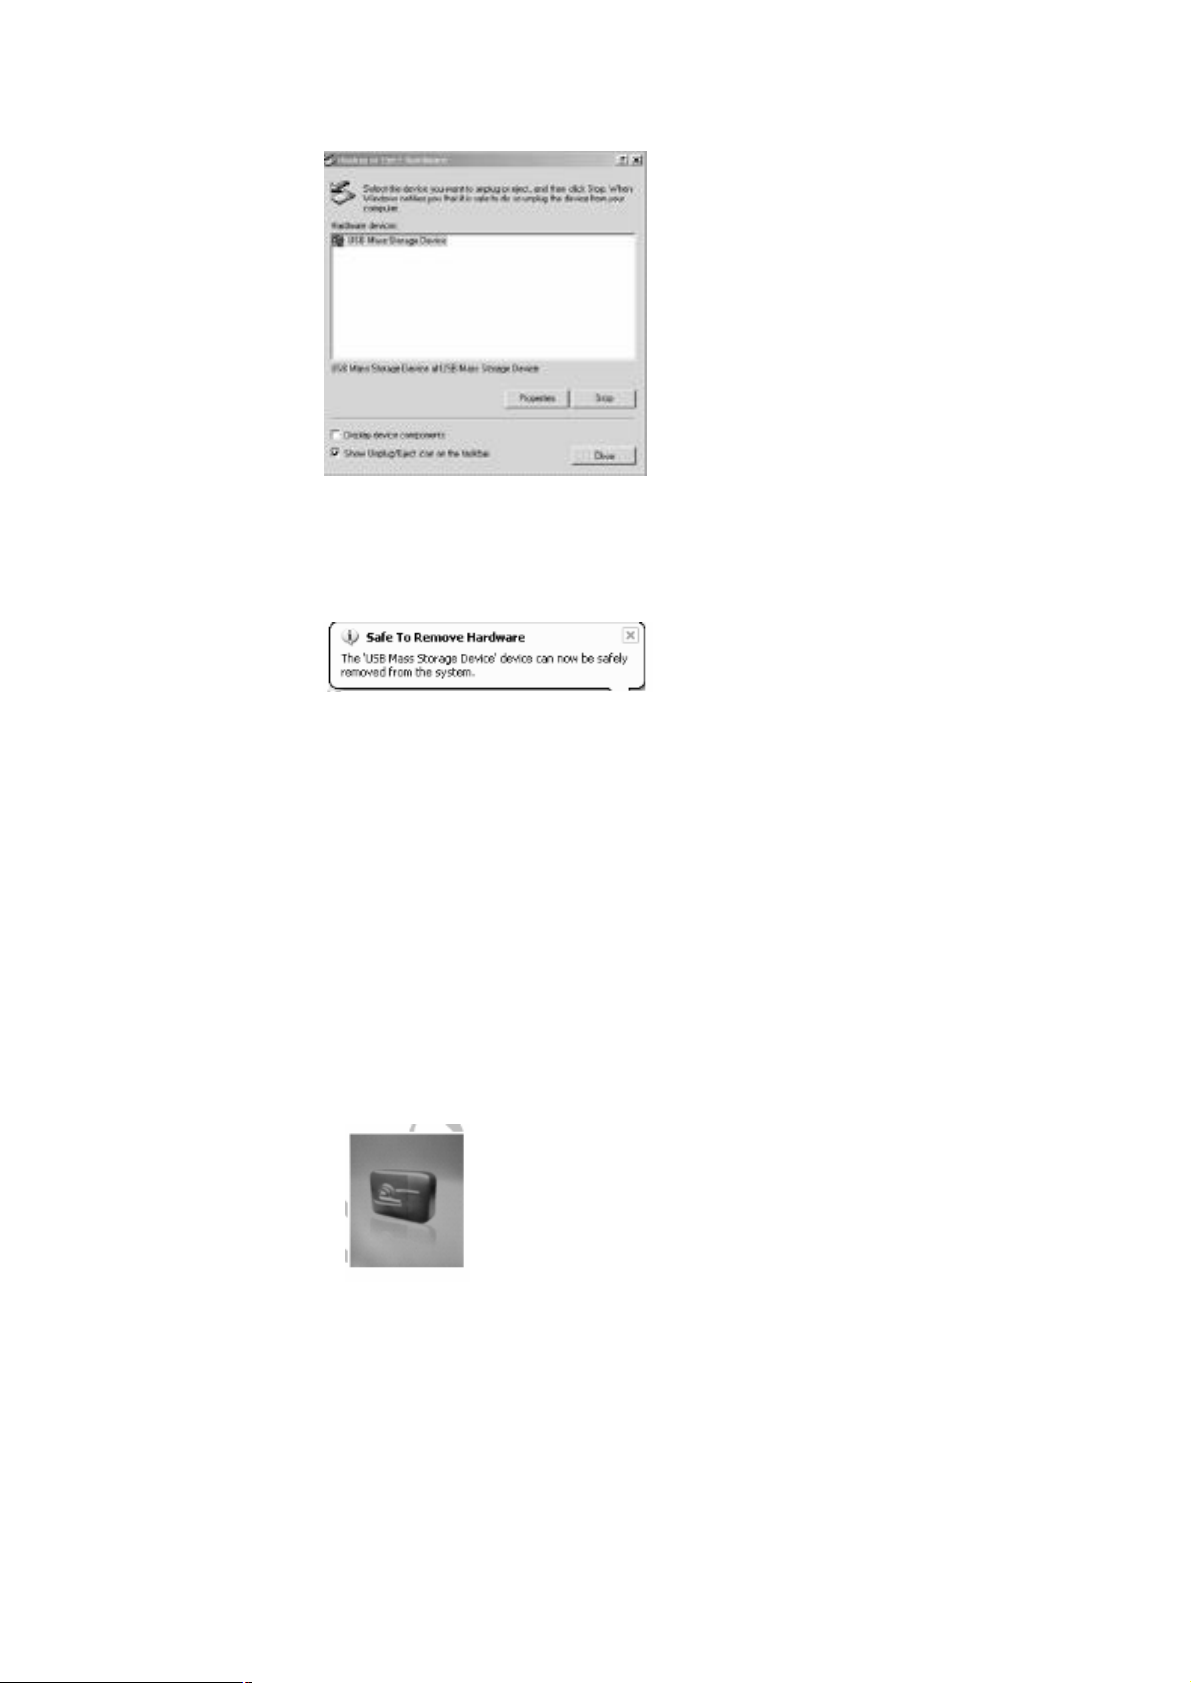
Disconnecting the USB Disk from the computer
For Windows 2000 or Windows XP, please follow the “Safe Remove
Hardware” procedure on the computer. A “Safely Remove Hardware”
icon will be displayed in the computer’s system tray as shown in
diagram below.
- Move the mouse over the icon, the “Safely Remove Hardware”
prompt appears.
- Double click on “Safely Remove Hardware” icon and the “Safely
Remove Hardware” windows will be displayed. Select the device to be
disconnected and click on “Stop” button to end the connection between
the computer and the device.
Page 9
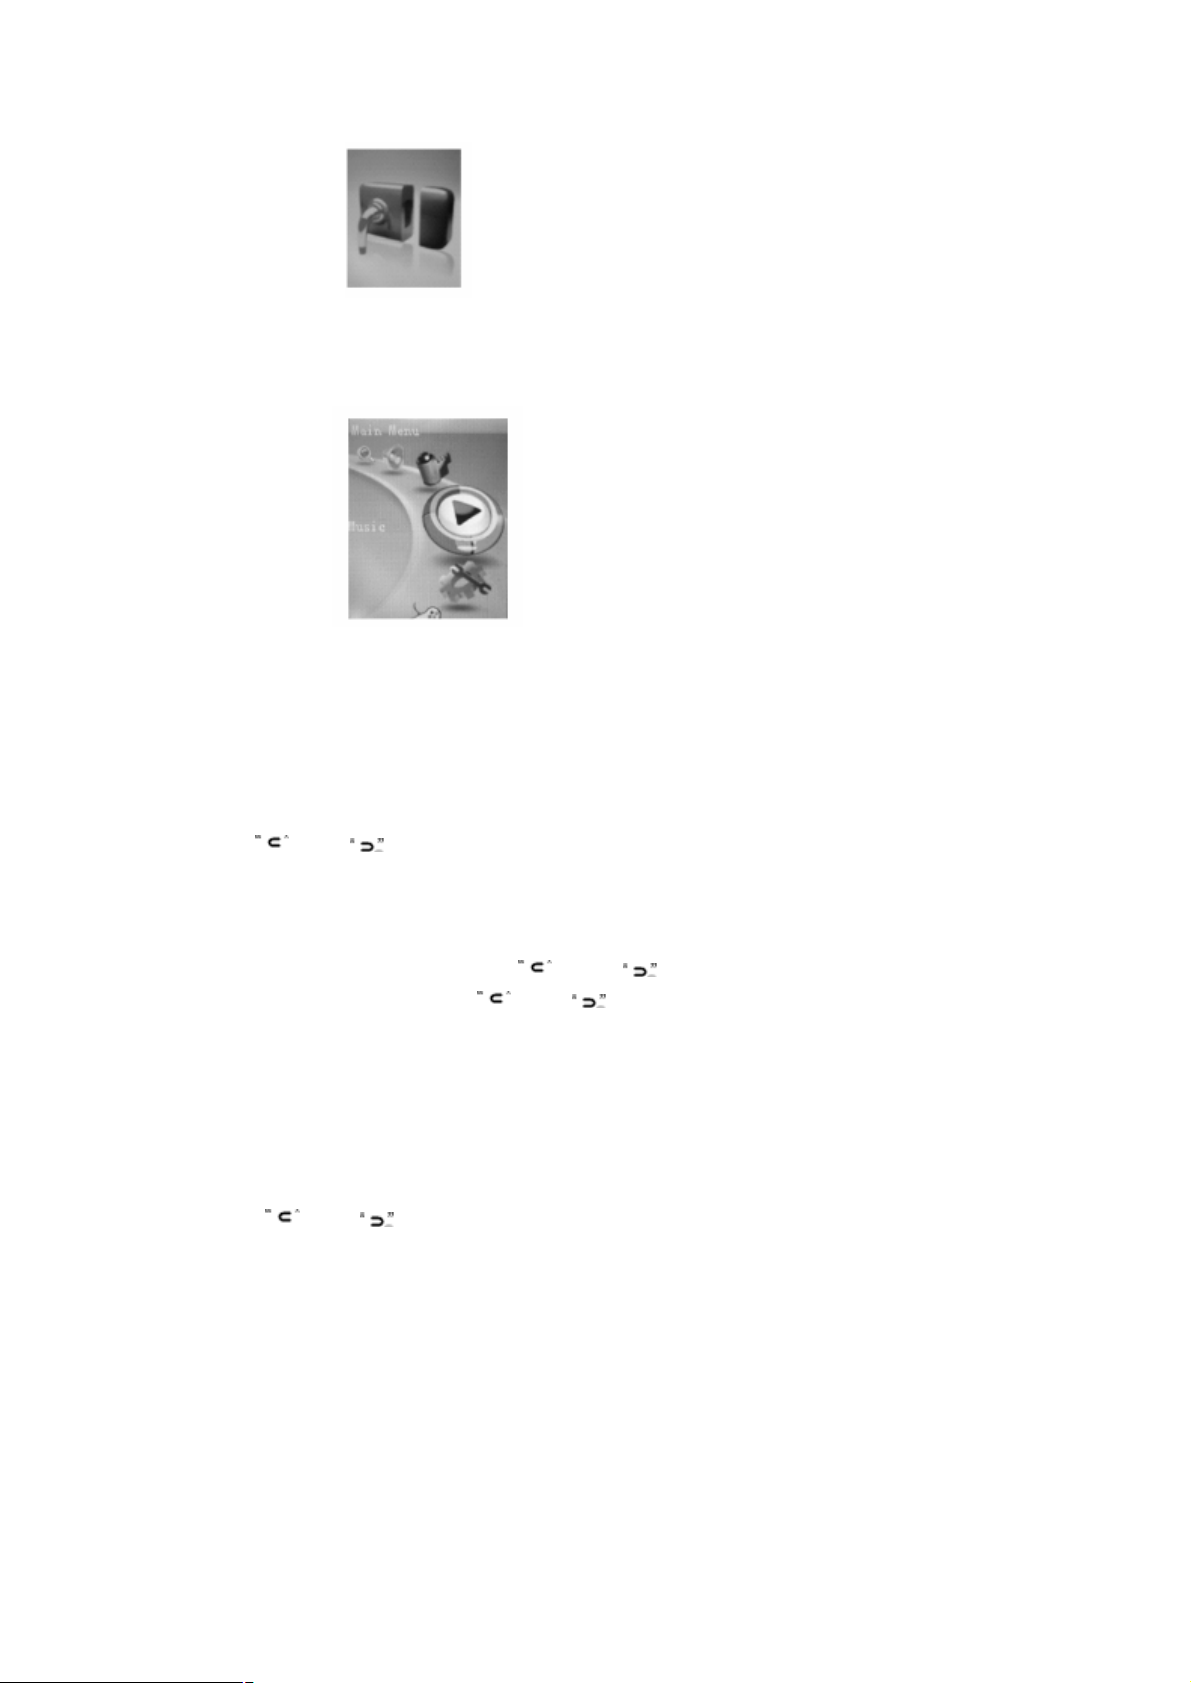
- Next, “The USB Mass Storage Device can now be safely removed
from the system” will be displayed.
- Finally, disconnect and safely unplug the device from the USB port on
your computer.
Power ON / Power OFF
- Turn Power ON/OFF switch to ON position, press & hold / key to
power ON.
- In any mode, press & hold / key to power OFF.
- Press to start or pause playback.
Set Key Lock
- Press & hold “VOL+” key and “VOL–“ key (for 2 seconds) at the same
time to set Key Lock.
Note: All keys on the player will be locked.
- In Lock mode, press & hold “VOL+” key and “VOL–“ key (for 2
seconds) at the same time again to unlock.
Note: All keys on the player will be unlocked.
Page 10
Music Playback
- In Main menu, select Music menu and press “ ∩∩ ” key to enter Music
mode.
- Music playback begins automatically.
- During Music playback, press “ ∩∩ ” key to enter Music playlist.
Note: If a folder is displayed, press key to return to the previous menu
- Press “ ” or “ ” key to select a Music file.
- Press “ ∩∩ ” key and Music playback begins automatically.
- During Music playback, press key to pause.
- While in Pause mode, press key again to resume playback.
Note: During Music playback, press “ ” or “ ” key to skip to the previous
or next Music file. Press & hold “ ” or “ ” key to rewind or fast forward
playback.
Music Playback in a Folder
- During Music playback, press “ ∩∩ ” key to enter submenu.
Note: If a folder is displayed, press key to return to the previous menu
- Press “ ” or “ ” key to select a folder or a Music file.
- When a folder is selected, press “ ∩∩ ” key to enter folder.
- When a Music file is selected, press “ ∩∩ ” key and playback begins
automatically.
Adjusting Volume
- During Music playback, press “VOL+” key or “VOL–“ key to adjust
volume level.
Page 11

Note: Press & hold “VOL+“ key or “VOL–“ key can also make adjustment to
volume level (value settings from 00 to 40).
Skipping to Previous / Next Music File
- During Music playback, press “ ? ” or “ ? ” key to skip to Previous or
Next track.
Deleting a Music File
- During Music playback, press “ ∩∩ ” key to enter submenu.
- Press “ ” or “ ” key to select a folder or a Music file.
- When a folder is selected, press “ ∩∩ ” key to enter folder.
- When a Music file is selected, press “VOL –” key to delete.
- At the “Delete File” prompt “YES / NO”, scroll to “YES” option and
press “ ∩∩ ” key to confirm deletion.
- When the file is deleted, the player returns to previous submenu
options.
Note: Press & hold “∩∩ ” key or key to return to Main menu.
A-B Repeat
- During Music playback, press & hold “ ∩∩ ” key.
- “A-B Repeat” indicator displays “A”.
- Press & hold “ ∩∩ ” key again, “A-B” is displayed.
- Music will now repeat “A-B” playback in a loop.
- To cancel “A-B” repeat playback, press & hold “ ∩∩ ” key to resume.
Synchronous Song Lyrics Display
When a Music file in the player has a song lyrics file with same file
name, song lyrics will be displayed automatically during Music
playback.
Note: The player supports song lyrics file in .LRC format.
Both the Music file (MP3 or WMA) name and song Lyrics file (LRC) name
must both be identical. (Example: LoveSong.MP3 + LoveSong.LRC).
To Return to Main Menu
- During Music playback, press “ ∩∩ ” key to enter submenu.
- Press & hold “ ∩∩ ” key to return to Main menu.
Page 12

Video Playback
- In Main menu, select Video menu and press “ ∩∩ ” key to enter Video
mode.
- When Video playlist is displayed, press “ ” or “ ” key to select a
Video file.
- When a folder is selected, press “ ∩∩ ” key to enter folder.
- When a Video file is selected, press “ ∩∩ ” key and playback begins
automatically.
Rewinding / Fast Forwarding a Video file
- During Video playback, press & hold “ ” or “ ” key to Rewind or Fast
Forward playback.
Adjusting Volume
- During Video playback, press “VOL+” key or “VOL–“ key to adjust
volume level.
Note: Press & hold “VOL+” key or “VOL–“ key can also make adjustment to
volume level (value settings from 00 to 40).
To Return to Playlist
- During Video playback, press “ ∩∩ ” key to return to playlist
Note: Press & hold “ ∩∩ ” key to return to Main menu.
Deleting a Video File
- In Video submenu, press “ ” or “ ” key to select a folder or a Video
file.
- When a folder is selected, press “ ∩∩ ” key to enter folder.
- When a Video file is selected, press “VOL –” key to delete.
- At the “Delete File” prompt “YES / NO”, scroll to “YES” option and
press “ ∩∩ ” key to confirm deletion.
- When the file is deleted, the player returns to the submenu options.
Note: Press & hold “∩∩ ” key or key to return to Main menu.
Page 13

FM Mode
Before we begin, the earphone must be connected to the player when using
FM mode. It acts as an antenna for radio frequency reception.
The FM range goes from 87.5Mhz to 108Mhz.
- In Main menu, select FM menu and press “ ∩∩ ” key to enter FM mode.
Manual Search a Frequency
- In FM mode, press “ ∩∩ ” key to enter submenu.
Note: Press “ ∩∩ ” key to return to FM mode or press & hold “ ∩∩ ” key to
return to Main menu.
- Scroll to “Manual” option and press “ ∩∩ ” key.
- Press “ ” or “ ” key to manually select a favorite frequency.
- To manually preset the selected frequency, press “ ∩∩ ” key and scroll
to “MEM” option followed by “ ∩∩ ”.
- When the preset station list is displayed, press “ ? ” or “ ? ” key to
scroll to a desire station shown in red color, followed by “ ∩∩ ” key to
save the frequency.
- At the “Save Channel” prompt, select “YES” option and press “ ∩∩ ”
key to confirm changes.
Note: The preset frequency will now be displayed in the preset station list (in
red color).
- Press “ ∩∩ ” key to return to FM mode.
Auto Search for a Frequency
- In FM mode, press “ ∩∩ ” key to enter submenu.
- Scroll to “Auto” option and press “ ∩∩ ” key.
- The player will automatically scan and save any available frequencies
in sequential order.
Page 14

Playback a Preset Frequency
- In FM mode, press “ ∩∩ ” key to enter submenu.
- Scroll to “Preset” option and press “ ∩∩ ” key to enter preset mode.
- Press “ ” or “ ” key to scroll to the previous or next preset frequency.
(Example: CH:01, CH02 ….)
- Press & hold “ ∩∩ ” key to return to Main menu.
Deleting a Preset Frequency
- In FM mode, press “ ∩∩ ” key to enter submenu.
- Scroll to “DEL” option followed by the “ ∩∩ ” key.
Note: The preset station list will be displayed.
- Press “ ” or “ ” key to select a preset frequency to be deleted
followed by “ ∩∩ ” key.
- At the “Del Channel” prompt, select “YES” option and press key to
confirm deletion.
Note: The preset frequency that has just been deleted will now display
“Empty” temporarily. The deleted preset frequency will be replaced by the
next available preset frequency. To refresh the preset list, press key exit
the preset list and enter again to see the new preset play list.
FM Recording
- During FM playback, press & hold “VOL+” key to enter FM recording
mode.
- Press key and recording begins automatically.
Note: During recording, press /key to pause. Press key again to
resume.
- To end and save the recording, press & hold “ ∩∩ ” key.
Note:
- The FM recording will be saved as filename “FM00001.WAV” in the player
root directory when connected to the computer.
- FM recording can be playback in Music mode.
- In areas where the signal is weak, some channels may be unavailable, or
reception may be poor.
Photo Mode
Page 15
- In Main menu, select Photo menu and press “ ∩∩ ” key to enter Photo
mode.
- When Photo playlist is displayed, press “ ”or “ ”key to select a
Photo file.
- When a folder is selected, press “ ∩∩ ” key to enter folder.
- When a Photo file is selected, press “ ∩∩ ” key and Photo playback
begins automatically.
- Press “ ” or “ ” key to view previous or next photo file.
- During Photo playback, press “ ∩∩ ” key to return to Photo playlist or
press & hold “ ∩∩ ” key to return to Main menu.
Deleting a Photo File
- In Photo playlist, when a photo file is selected, press “VOL–” key to
delete.
- At the “Delete File” prompt, select “YES” option and press “ ∩∩ ” key to
confirm deletion.
Text Mode
- In Main menu, select Text menu and press “ ∩∩ ” key to enter Text
mode.
- When Text playlist is displayed, press “ ” or “ ” key to select a Text
file.
- When a folder is selected, press “ ∩∩ ” key to enter folder.
- When a Text file is selected, press “ ∩∩ ” key and playback begins
automatically.
Page 16
- Press “ ” or “ ” key to scroll backward or forward to view text.
- During Text playback, press “ ∩∩ ” key to return to Text playlist or press
& hold “ ∩∩ ” key to return to Main menu.
Deleting a Text File
- In Text playlist, when a Text file is selected, press “VOL–” key to
delete.
- At the “Delete File” prompt, select “YES” option and press “ ∩∩ ” key to
confirm deletion.
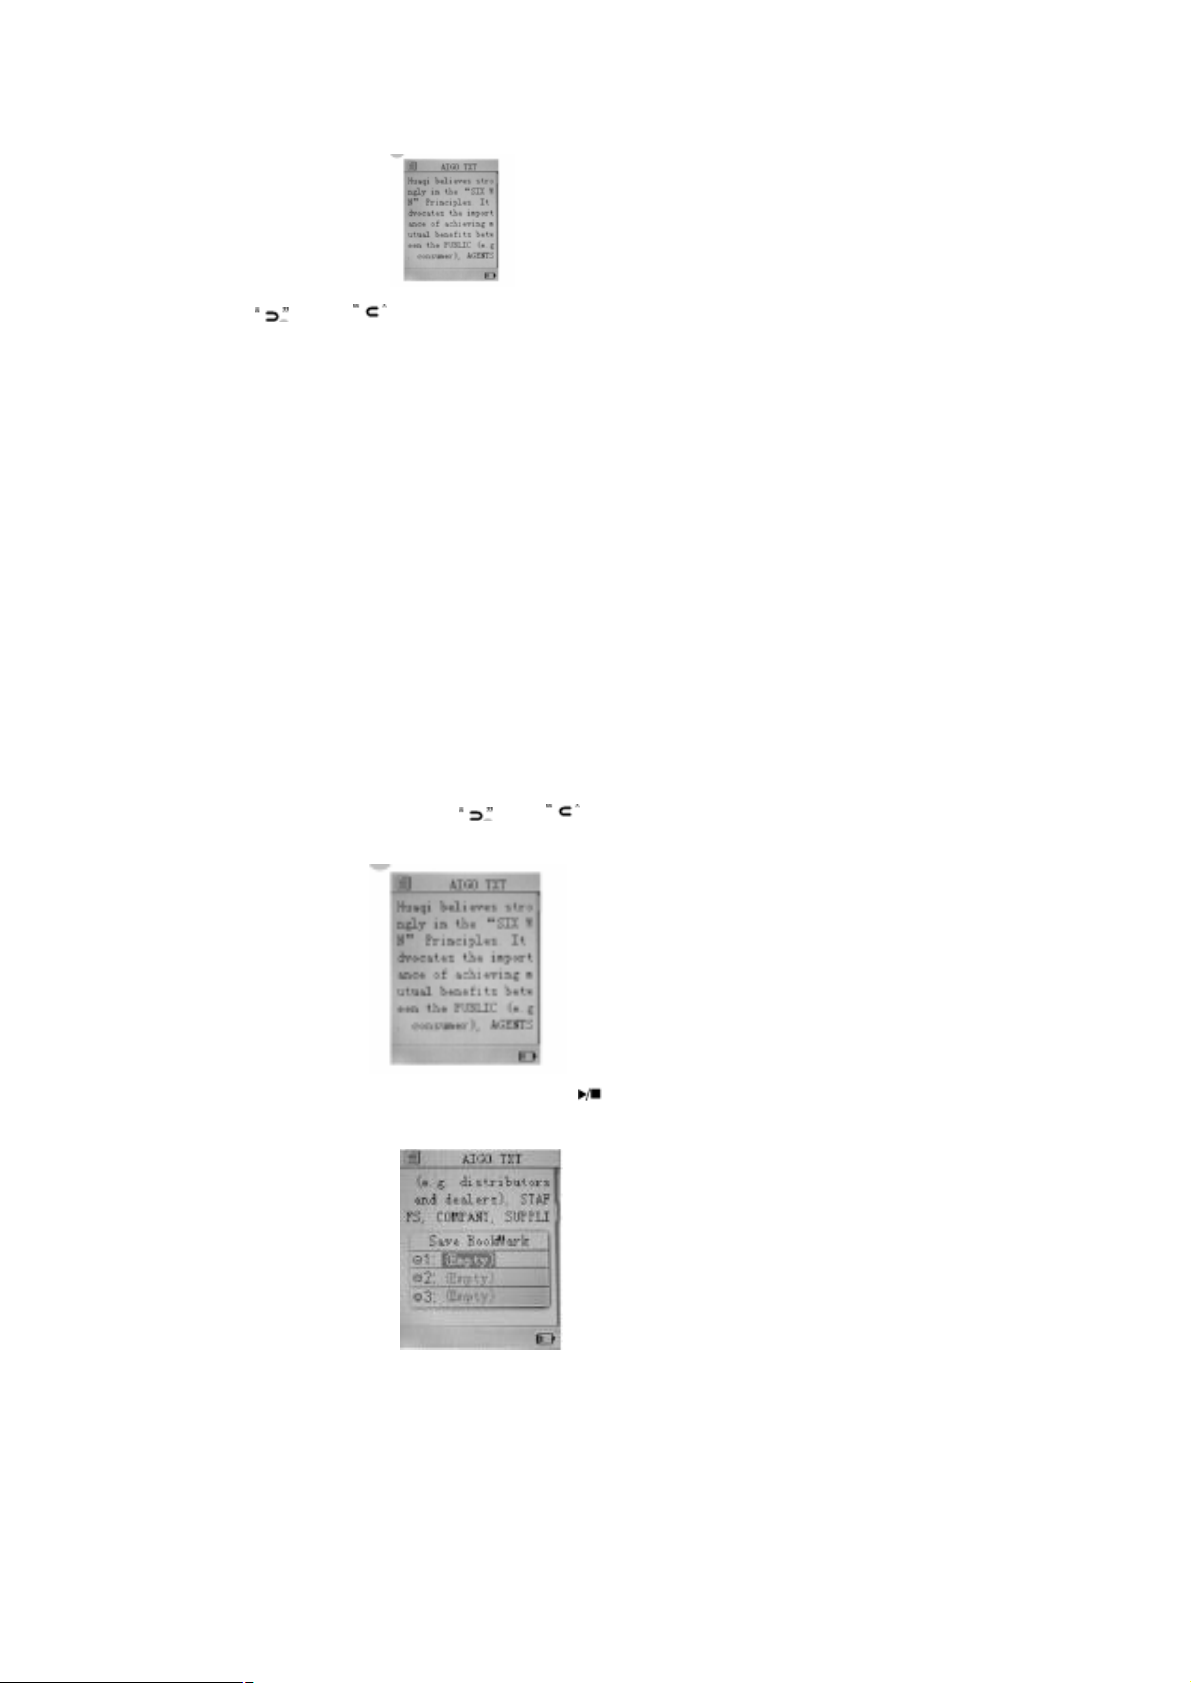
To Bookmark a Page
The Text function supports up to 3 bookmark pages for quick search
purpose.
- During Text playback, press “ ” or “ ” key to scroll backward or
forward to view Text.
- At the desire page to create a bookmark, press key and the 3
bookmark will be displayed.
Min - Scroll to any of the 3 following bookmarks and press “ ∩∩ ” key to
confirm settings.
To View a Bookmark Page
Page 17
- During Text playback, press “VOL + ” key to view the 3 bookmarks.
- Press “ ” or “ ” key to select a bookmark followed by “ ∩∩ ” key and
the bookmark page will be displayed automatically.
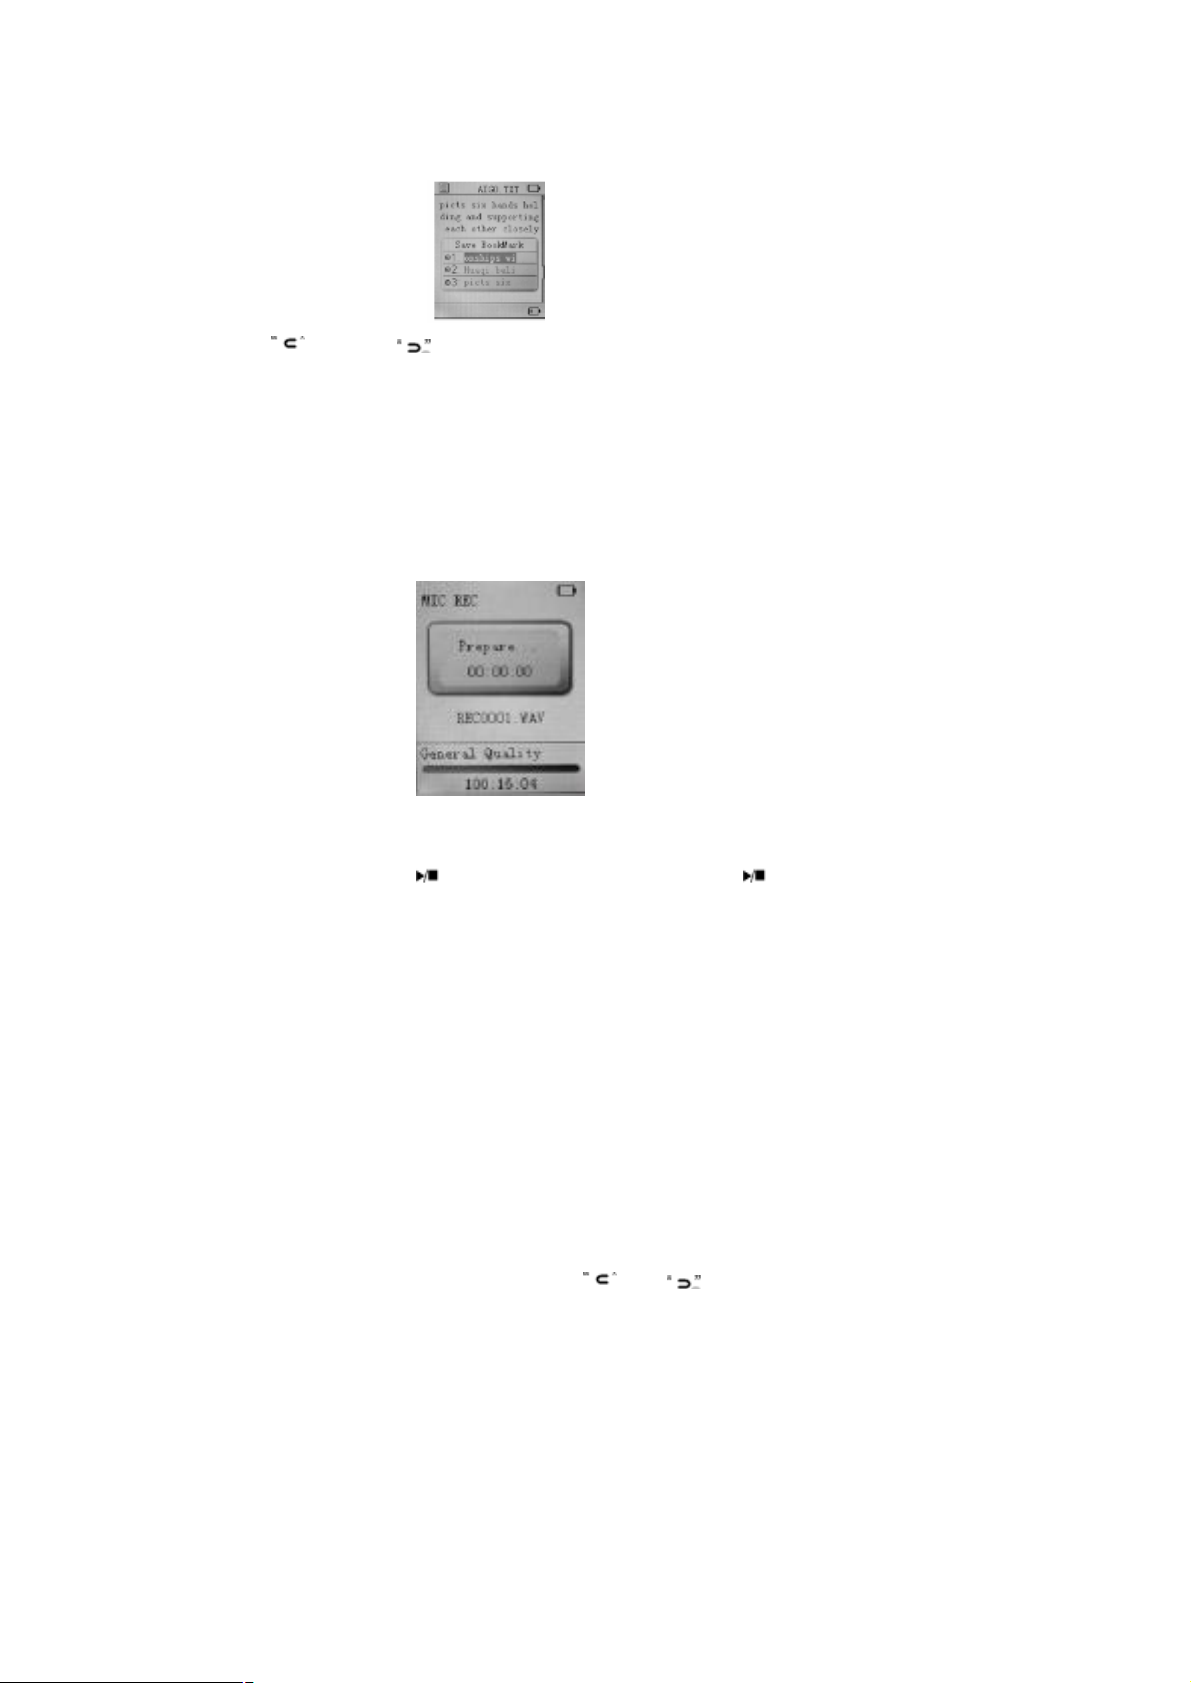
Record Mode
- In Main menu, select Record menu and press “ ∩∩ ” key to enter
Record mode.
- In Record mode, press / key and recording begins automatically.
- During recording, press key to pause recording and press k
again to resume.
- To end recording, press & hold “ ∩∩ ” key to save the recording a
return to Main menu.
Note: Recording files (WAV format) can be playback in Music menu.
- Explorer Mode
The Explorer mode displays all the folders and files stored in the
player.
- In Main menu, select Explorer menu and press “ ∩∩ ” key to enter
Explorer mode.
- When Explorer playlist is displayed, press “ ” or “ ” key to select a
file.
- When a folder is selected, press “ ∩∩ ” key to enter folder.
- When a file is selected, press “ ∩∩ ” key and playback begins
automatically.
Note: During playback, press & hold “ ∩∩ ” key to return to Main menu.
Deleting a File
Page 18
- In Explorer playlist, selected and press “ VOL – ” key to delete.
- At the “Delete File” prompt, select “YES” option and press “ ∩∩ ” key to
confirm deletion.
Note: Deletion of folder is NOT supported.
Game Mode
The player comes with a free built-in Brick Game.
- In Main menu, select Game menu and press “ ∩∩ ” key to enter Game
mode.
Game Control Keys
- To begin / pause, press / key.
- To move to left or right, press “ ” or “ ” key.
- To rotate the “Falling Brick”, press “VOL+” key.
- To accelerate the “Falling Brick” speed, press “VOL–” key.
Note: In Game mode, press & hold “ ∩∩ ” key to return to Main me
*
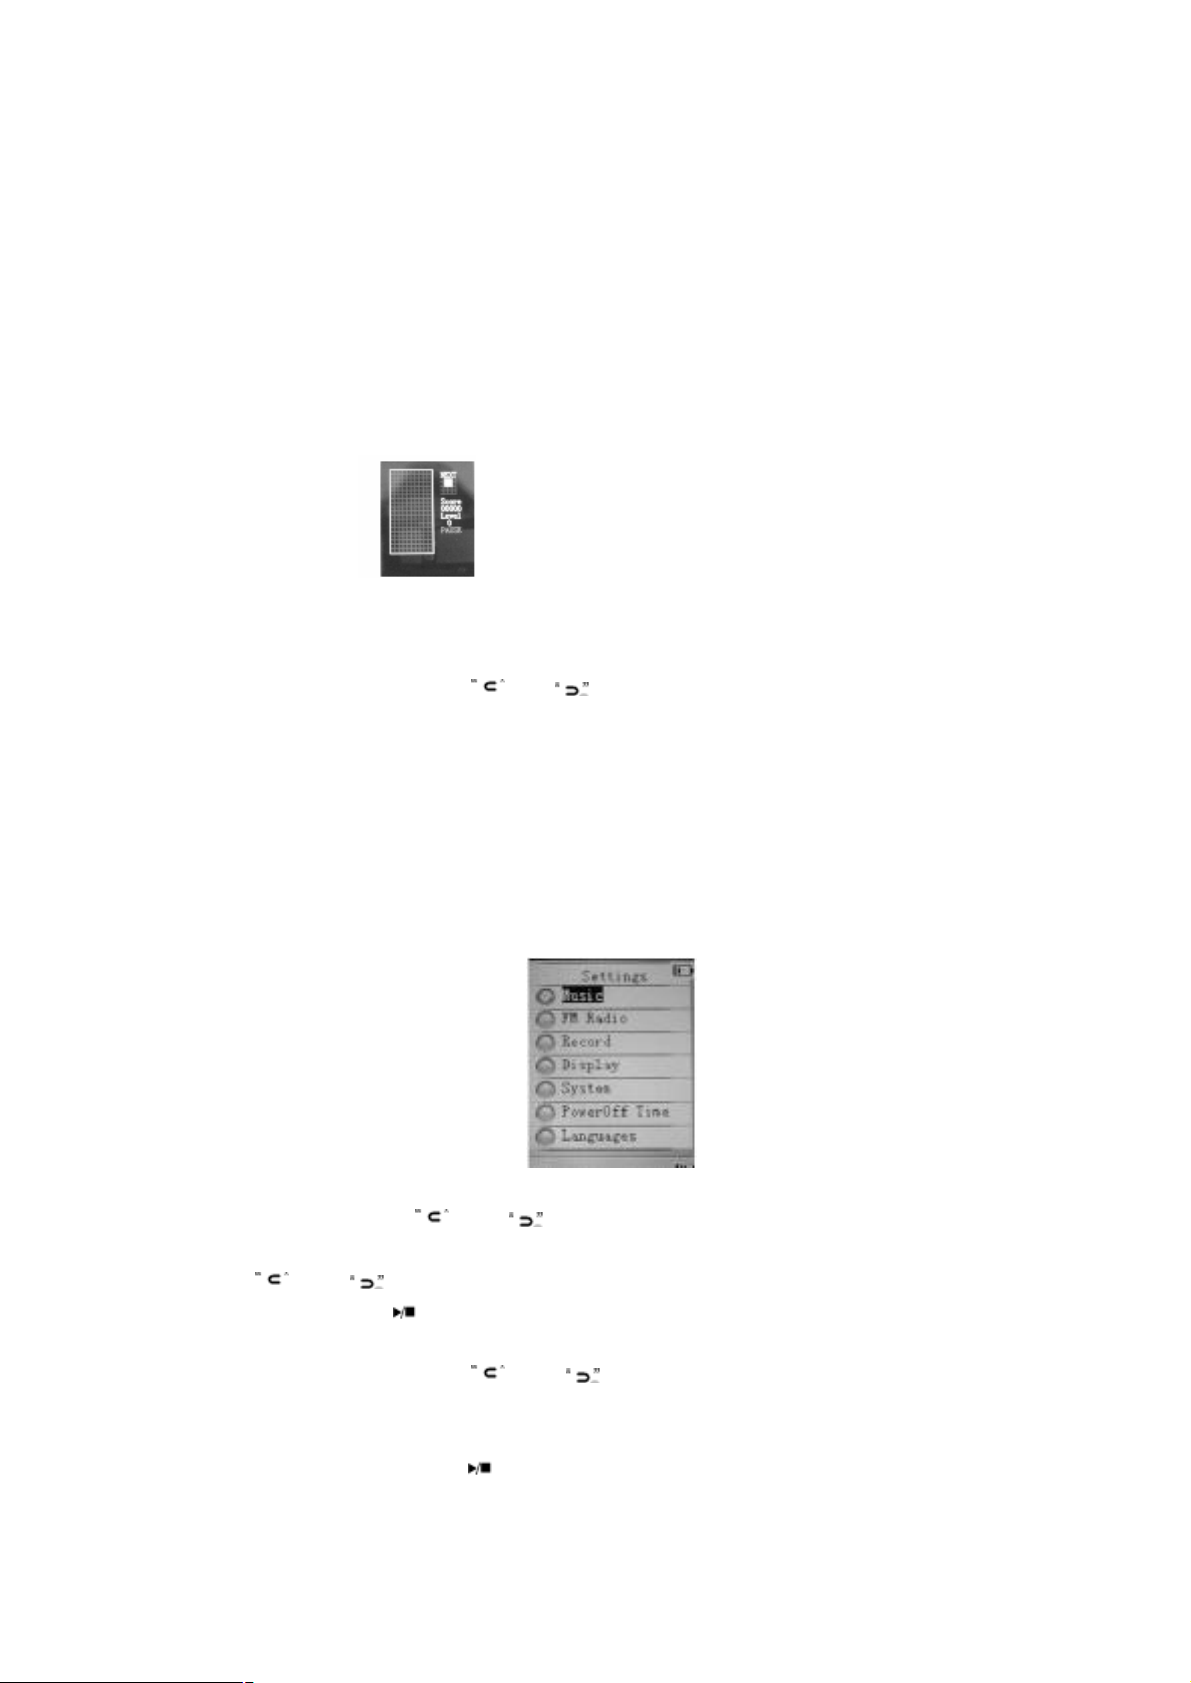
Settings Mode
There are 7 settings available in the Settings mode.
In Main menu, select Settings menu and press “ ∩∩ ” key to enter Settings mode.
- In Settings mode, press “ ” or “ ” key to scroll to any of the 7
Game Control Keys options and press “ ∩∩ ” key to enter individual submenu options.
- Press “ ” or “ ” key to select the desired settings in each options
- To begin / pause, press key.
and press “ ∩∩ ” key to confirm changes.
- To move to left or right, press “ ” or “ ” key.
To rotate the “Falling Brick”, press “VOL+” key.
Note: In submenu options, press key to return to previous menu or press
- To accelerate the “Falling Brick” speed, press “VOL–” key. & hold “ ∩∩ ” to return
Page 19

to Main menu.
Music Settings
Repeat Mode
- Once: To play all the files once.
- Repeat 1: To repeat one file.
- Folder Once: To play all the files in the folder once.
- Folder Repeat: To repeat all files in the folder.
- All Once: To repeat all files once.
- All Repeat: To repeat all files.
- Intro: To play the first 10 seconds of each music file.
Play Mode
- Order: Music playback in sequence.
- Shuffle: Music playback randomly.
EQ Select
- Normal / 3D / Rock / Pop / Classic/ Bass / Jazz / User EQ
(User EQ must be customized in User EQ Mode before you use select option)
User EQ Mode (User can customize their favorite EQ settings)
- In the User EQ settings, press “VOL +” or “VOL –” key to
adjust on each individual frequency segment. (60Hz、300 Hz、
1KHz、3KHz、6KHz)
- Frequency settings are adjusted in -6dB~+6dB interval.
- Press “ ” or “ ” key to skip to adjust the next frequency
segment. (activated segment will be indicated in red color)
- Press “ ” or “ ” key to skip to “YES” option and press “ ∩∩ ”
key to save changes and exit.
FM Radio Settings
Stereo SW: Set FM stereo mode ON/OFF
- ON
- OFF
FM Region: Configure FM for your region.
- China
- Europe
- Japan
- USA
Record Settings
Page 20

REC Quality: Recording quality & file size settings
- High Quality: Better recording quality with larger file size.
- General Quality: Normal recording quality with smaller file
size.
REC Volume: The highest settings +5 will produce the loudest
recording quality.
- +1 / - +2 / - +3 / - +4 / - +5
Display Settings
Blight Time: To set the backlight ON timer (unit in seconds). This function will be disabled
when the time is set to Always On.
- 5s/ 10s / 15s / 20s / 30s / Always On
Lum: To set the backlight brightness. (1 is the brightest setting)
- 1 / 2 / 3 / 4 / 5
Blight Mode: When set to Power Saver, the screen will turn OFF
according to the Blight Time settings (Press any key to resume).
Normal / Power Saver
System Settings
About: To display information on firmware version, date and
memory status.
Upgrade: For firmware upgrade (if any).
Default Set: To restore the player to original default settings.
PowerOff Time Settings
When no key is pressed within the time set, player will be turned
OFF. (This function will be disabled when time is set to OFF)
- OFF/10 Minutes/15 Minutes/30 Minutes/60 Minutes/120 Minutes
Languages Settings
To change the desire language settings on the player.
Using the AVI Converter Software
This player supports AVI format video files and can transform other
video formats to the supported AVI format by using the bundled AVI
Converter Software.
The software fully support fast speed video conversion of multi-video
Page 21
format into high quality AVI format.
System Requirements to Install AVI Converter Software
- Intel or AMD processor (Intel Pentium 3 and above, including Intel
Celeron series)
- Windows 2000 / Windows XP / VISTA
Installation the AVI Converter Software
- Connect the player to PC and execute the preloaded AVI Converter
setup program (EXE file) bundled in the player to begin.
- Follow the on-screen instructions to complete the installation.
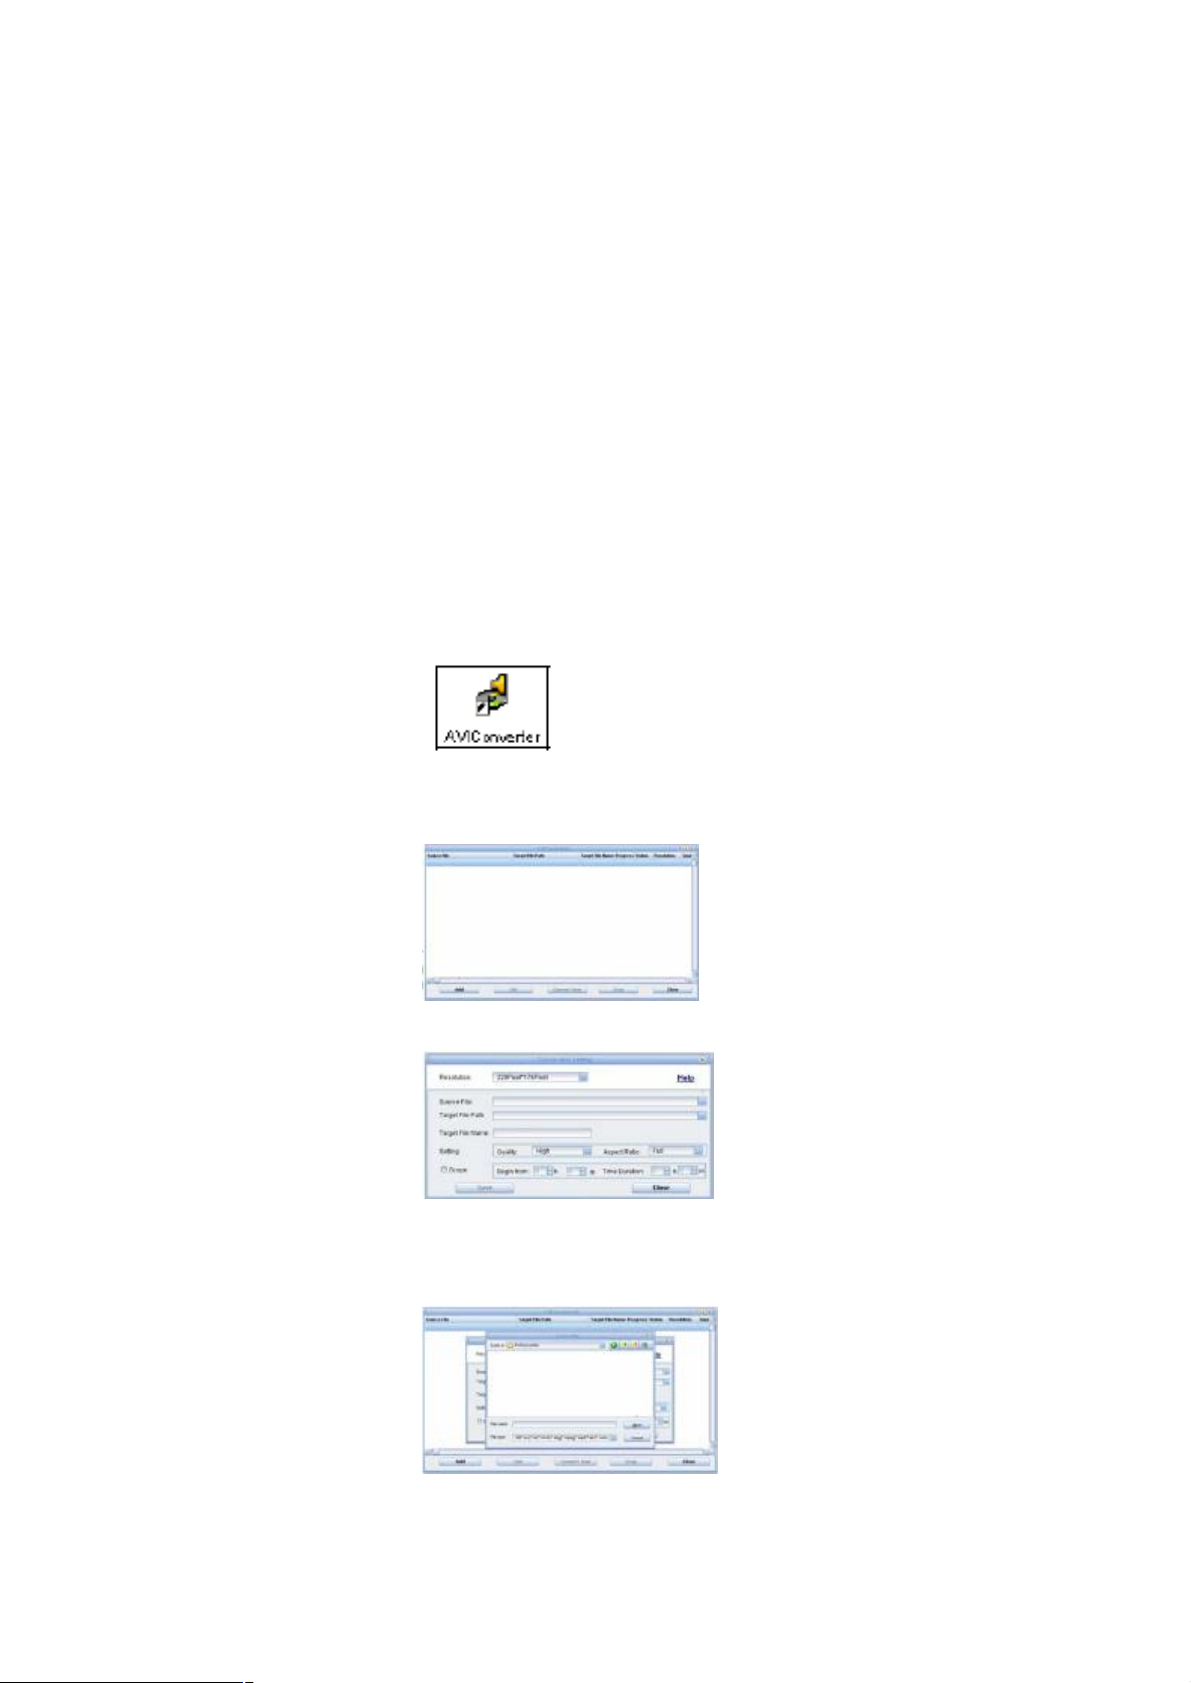
- Upon a successful installation, an AVI Converter program icon will be
created on the computer desktop.
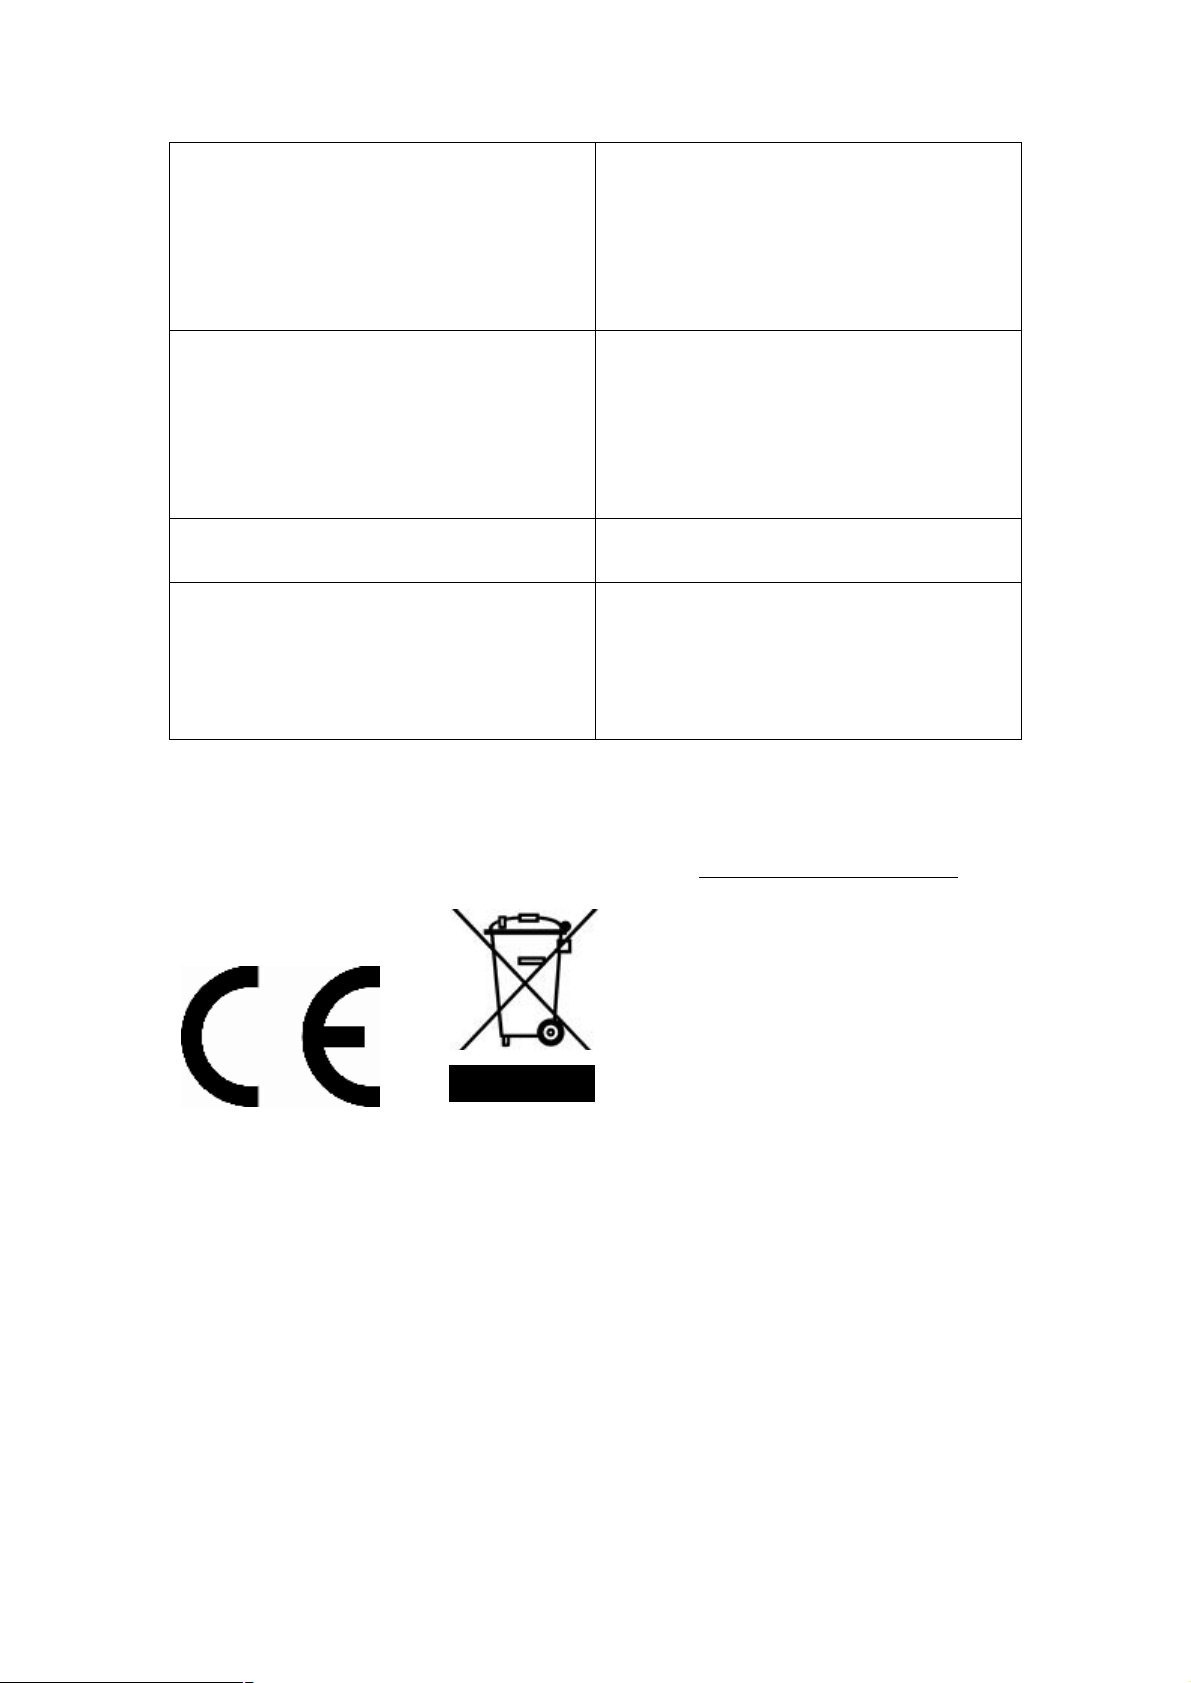
Double click on the AVI Converter icon to begin.
1. Click on Add button to select a video file to convert.
2. Click on Source File button.
3. Browse for the video file in the computer that you wish to convert
and click on Open button.
Page 22
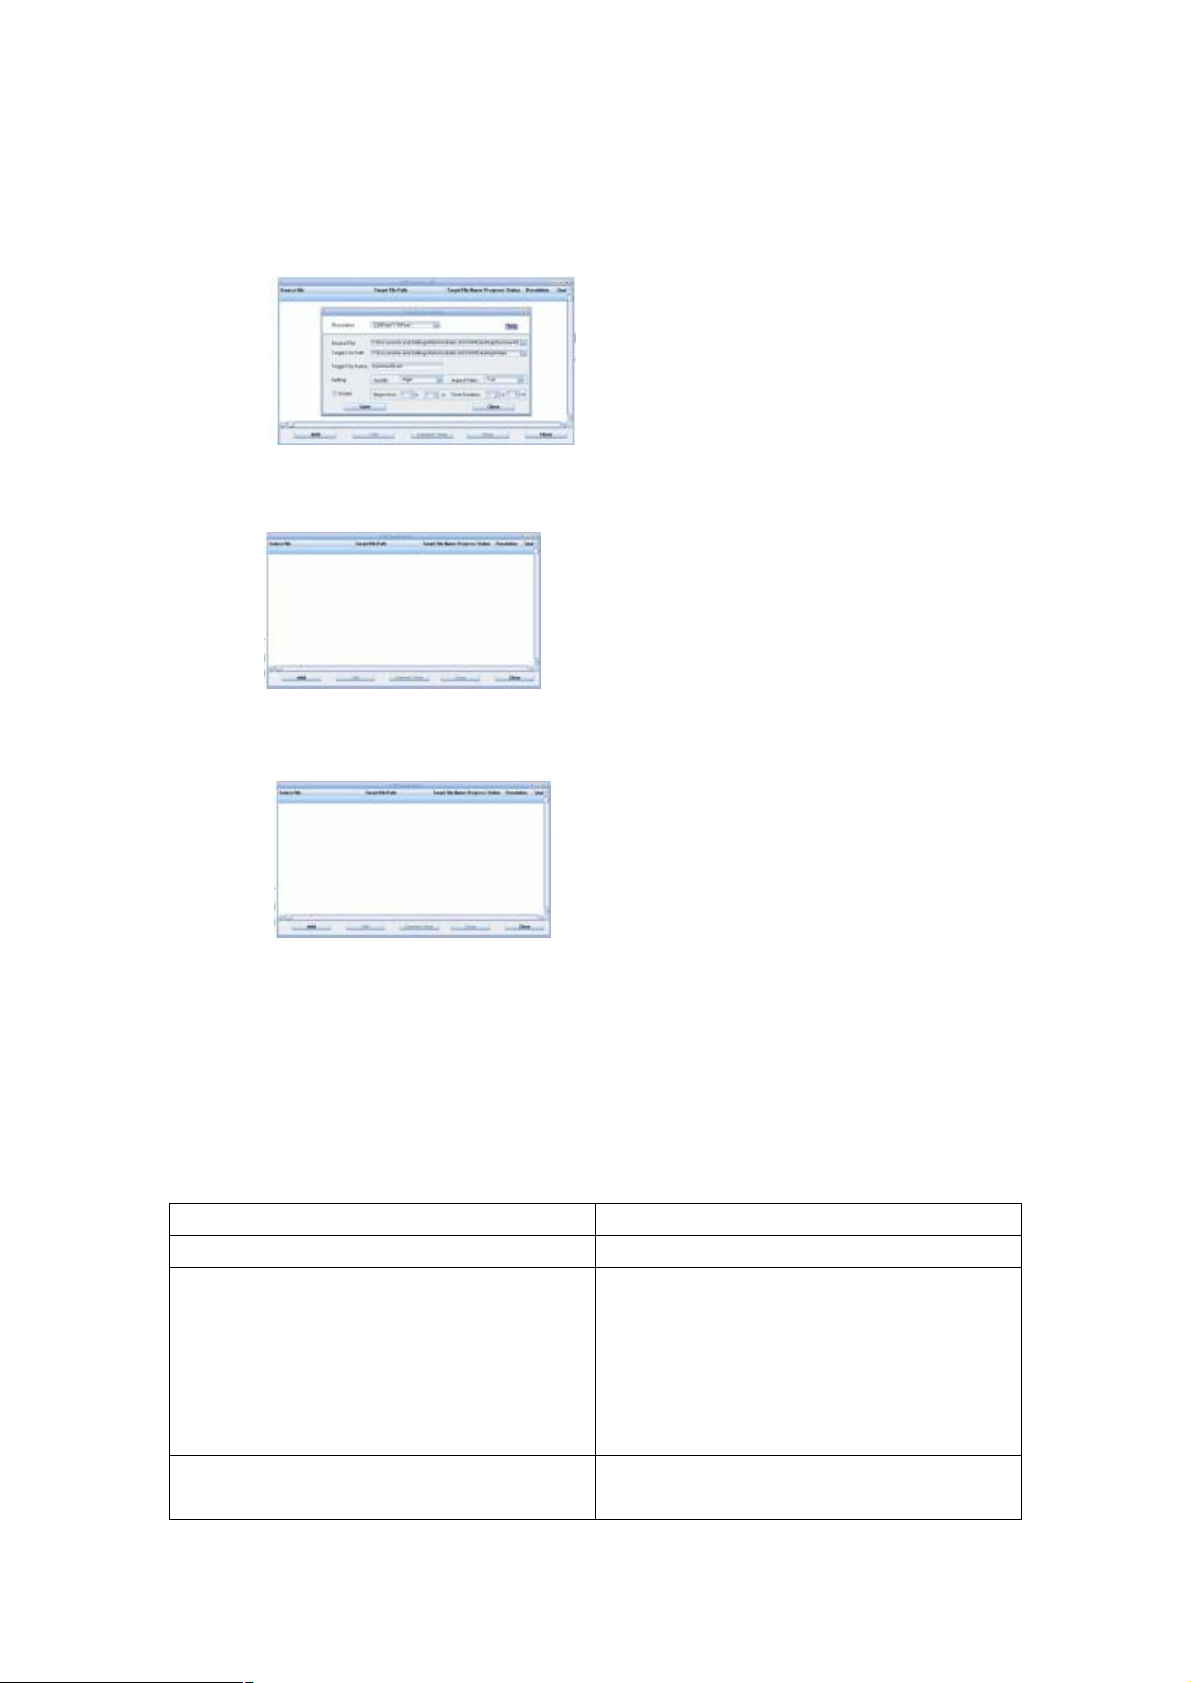
4. Select the Target File Path button to save the converted video file.
(Keep the rest of the settings as default and click on Save button,
followed by Close button)
-
5. Finally, click on Convert Now button to start video conversion
process.
Conversion is complete when the status information shows 100% and
OK. Click on Close button to quit.
Finally, transfer (using copy & paste) the converted video file (AVI
format) into the player and you are now ready for video playback.
Note: Please use only the bundled AVI Converter Software in this player for
video conversion. Video files converted using third party software might
not be able to work properly with this player.
Troubleshooting
Problem Action
No power Please check if it is power ON
No sound from the earphone 1. Make sure the volume level is not set to
“0”.
2. Check if the earphone is properly
connected to the player.
3. Check if the music file is corrupted. Try
again with other music files.
Error message: “Warning File Format Error Please try the following:
- Turn the Power ON/OFF safety switch to
Page 23
OFF.
- Connect the player to the PC and remove
the file that is corrupted or non-standard au
video file on the player.
- Disconnect the player from the computer
and try again.
What is the common file type that is causing
the “Warning File Format Error” error?
Display unidentified characters on LCD
screen
Cannot transfer music 1. Check if the USB cable is working properly.
When any file type is not supported by the
player is detected, the error message will
occur. If this error occurred on a video file,
try
to convert the video file by using the AVI
Converter and try again.
Make sure the correct language is selected.
2. Make sure the product drivers has been
installed correctly (if require).
3. Check if the computer USB port is working
properly. Restart the computer and try again.
For more information please visit our website www.mpmaneurope.co
Page 24

TK1
MP3/MP4/FM-Player
Bedienungshandbuch
www.mpmaneurope.com
Page 25

Bewahren Sie stets eine Kopie Ihrer Originaldaten auf.
Bevor Sie Ihr Gerät zum Kundendienst oder in Reparatur geben, machen Sie bitte eine
Sicherungskopie aller Daten und Softwareprogramme. Sie müssen diese später selbst wieder
installieren. Die Wiederherstellung von Daten ist in der Kundendienstgarantie nicht einbegriffen, und
unsere Firma haftet nicht für Daten, die bei Transport oder Reparatur verloren gehen.
Sicherheitsanweisungen
* Nicht bei extremen Temperaturen benutzen.
* Darauf achten, dass keine Flüssigkeit in das Gerät gelangt.
* Den Player keinem starken Druck aussetzen.
* Keinem direkten Sonnenlicht und keinen Wärmequellen aussetzen.
* Nicht versuchen, das Gerät selbst zu auseinanderzubauen oder zu reparieren.
* Das Gerät keinen Chemikalien wie Benzen oder Verdünner aussetzen.
* Das Gerät nicht an einem staubigen oder feuchten Ort lagern.
* Unsere Firma haftet nicht für Schäden oder Datenverlust aufgrund von Reparatur oder sonstigen
Ursachen.
Inhalt
Wichtiger Hinweis.............................................................................. ..1
Vor Inbetriebnahme des Players.......................................................5
Taste & Funktion...................................................................................8
Hauptmenü-Anzeige............................................................................9
Laden der Batterie.................................................................................11
Erste Schritte...........................................................................................17
Ein-/Ausschalten....................................................................................20
Schlüsselverriegelung einstellen..........................................................20
Musikwiedergabe...................................................................................21
Videowiedergabe...................................................................................25
FM-Modus............................................................................................27
Fotomodus..........................................................................................31
Textmodus.............................................................................................33
Aufzeichnungsmodus...........................................................................38
Explorer-Modus....................................................................................39
Game-Modus.........................................................................................40
Einstellungsmodus................................................................................41
Verwendung der AVI-Convertersoftware...........................................48
Fehlersuche...........................................................................................53
Page 26
Vor der Inbetriebnahme des Players
Leistungsmerkmale
* Elegante, leichte Bauweise.
* 1.8'' TFT 262K LCD-Farbdisplay (128x160).
* Grafische Benutzeroberfläche.
* Wiedergabe von MP3-, WMA- und WAV Audioformat.
* Unterstützt das AVI-Videoformat (zusammen mit AVI-Convertersoftware geliefert)
* Eingebauter FM-Radiotuner mit eingestellten Sendern und FM-Aufzeichnung im WAV-Format.
* Unterstützt Fotobrowsen im JPEG-Format.
* Digitale Stimmaufzeichnung.
* Textanzeigen im TXT-Format, mit Lesezeichenfunktion.
* Synchrone Songtextanzeige im LRC-Format.
* Speicherung eigener Datendateien.
* USB 2.0.
* Eingebaute aufladbare Li-Polymerbatterie.
- Audiowiedergabe (maximal 8 Stunden).
- Videowiedergabe (maximal 4 Stunden).
* Unterstützt Windows 2000 / XP / VISTA.
Inhalt der Verpackung
TK1-Player
AC-Netzadapter
(Optional)
Page 27
VORDERANSICHT
Hauptmenüanzeige
Page 28
Nr. Funktion Nr.
1 Songtitel & ID3-Anzeige 7 Equalizer / Songtextanzeige
2 Wiedergabe-Timer 8 Spieldauer der Spur
3 Wiedergabemodus 9 Batterieanzeige
4 Status Wiedergabe/Pause 10 A-B-Wiederholung
5 Wiedergabeeinstellung 11 Nummer der aktuellen Spur
6 Lautstärke 12 Spur insgesamt
Funktion
Laden der Batterie
* Vor der ersten Inbetriebnahme die Batterie immer voll aufladen. (ca. 8 Stunden).
* Player zum Laden einschalten.
* Eine schwache Batterie immer sofort aufladen. Sonst schaltet der Player automatisch ab oder kann
nicht eingeschaltet werden.
* Die Lebensdauer der Batterie variiert je nach der eingestellten Musiklautstärke und
Hintergrundanzeige.
* Um die Batterie zu schützen, empfehlen wir, sie alle 4 Monate zu laden, wenn der Player längere Zeit
nicht benutzt wird.
* Sie können den Player über den AC-Netzadapter (optional) oder eine USB-Kabelverbindung mit
dem Computer aufladen.
Laden der Batterie über den Computer
Page 29
* Eines der Enden des mitgelieferten USB-Minikabels an den Player anschließen.
* Das andere Ende des USB-Minikabels an den Computer anschließen.
* Der Ladevorgang beginnt automatisch.
* Um den Batterieladevorgang auf dem Player anzuzeigen, schließen Sie das USB-Gerät in der
Systemleiste des Computers mithilfe des Verfahrens “Safely Remove Hardware” an. (Beziehen Sie
sich bitte auf “Disconnecting the USB Disk from the computer”.)
* Wenn die Batterie voll aufgeladen ist, wechselt die Batterieanzeige zu Grün, und der Ladevorgang
stoppt automatisch.
* Zeit für vollständiges Laden: Maximal 4 Stunden.
Laden der Batterie mit dem AC-Netzadapter (optional)
* Schließen Sie ein Ende des Netzadapters (Mini USB) über das mitgelieferte USB-Kabel an den
Player an.
* Schließen Sie das andere Ende des AC-Netzadapters an die Wandsteckdose an, und schalten Sie die
Stromversorgung ein.
* Der Ladevorgang beginnt automatisch.
* Während des Ladevorgangs blinkt die Batterieanzeige auf dem Player.
Page 30
* Wenn die Batterie voll aufgeladen ist, wechselt die Batterieanzeige zu Grün, und der Ladevorgang
stoppt automatisch.
* Zeit für vollständiges Laden: Maximal 3 Stunden.
Hinweis:
Benutzen sie bitte NUR den mitgelieferten AC-Netzadapter (optional) oder das mitgelieferte
USB-Kabel. Benutzen Sie KEINEN AC-Netzadapter eines Fremdanbieters. Dieser könnte den Player
schwer beschädigen.
Minimale Systemvoraussetzungen
* Intel Pentium-Prozessor 200 MHz und höher.
* Windows 2000 und Windows XP.
* 32 MB RAM (128MB empfohlen)
* Bis zu 100 MB freien Festplattenspeicher.
* USB-Standardanschluss
Hinweis:
1. Melden Sie sich als Administrator auf dem Computer an, um Software zu installieren oder ein
Upgrade der Firmware (falls vorhanden) durchzuführen. Andernfalls wird die Installation
möglicherweise nicht erfolgreich ausgeführt.
Erste Schritte
Anschluss der USB-Disk an den Computer
* Schließen Sie eines der Enden des mitgelieferten USB-Minikabels an den Player an.
* Schließen Sie das andere Ende des USB-Minikabels an den Computer an.
Page 31

* Wenn der Anschluss korrekt erfolgt ist, zeigt der Player das Verbindungssymbol an. Sie können nun
beginnen, Audio- und Videodateien über den Computer in den Player zu übertragen.
Trennen der USB-Disk vom Computer
Für Windows 2000 oder Windows XP führen Sie bitte das Verfahren “Safe Remove Hardware” auf
dem Computer aus. Ein Symbol “Safely Remove Hardware” wird in der Systemleiste des Computers
angezeigt (siehe Diagramm unten).
- Bewegen Sie die Maus über das Symbol, um die Eingabeaufforderung “Safely Remove Hardware”
anzuzeigen.
- Doppelklicken Sie auf das Symbol “Safely Remove Hardware”, und das Fenster “Safely Remove
Hardware” wird angezeigt. Wählen Sie das Gerät, das getrennt werden soll, und klicken Sie auf die
Schaltfläche “Stop”, um die Verbindung zwischen dem Computer und dem Gerät zu beenden.
- Nun wird eine Meldung angezeigt, dass das USB-Speichergerät sicher entfernt werden kann.
- Trennen Sie dann das Gerät sicher vom USB-Anschluss auf Ihrem Computer.
Ein-/Ausschalten
- Bringen Sie den Ein-/Aus-Schalter in die Position ON, drücken und halten Sie die Taste, zum
Page 32

Einschalten.
- Zum Abschalten drücken und halten Sie die Taste in einem beliebigen Modus.
- Drücken Sie; um die Wiedergabe zu starten oder zu unterbrechen.
Tastensperre einstellen
- Drücken und halten Sie die Taste “VOL+” und “VOL–“ (2 Sekunden) gleichzeitig, um die
Tastensperre zu aktivieren.
Hinweis: Alle Tasten auf dem Player werden gesperrt.
- Drücken und halten Sie im Sperrmodus die Taste “VOL+” und “VOL–“ (2 Sekunden) gleichzeitig,
um die Sperre wieder aufzuheben.
Hinweis: Alle Tasten auf dem Player werden entsperrt.
Musikwiedergabe
- Wählen Sie im Hauptmenü das Musikmenü, und drücken Sie die Taste “ ∩∩ ” , um den Musikmodus
zu aktivieren.
- Die Musikwiedergabe beginnt automatisch.
- Drücken Sie während der Musikwiedergabe die Taste “ ∩∩ ” , um die Musikwiedergabeliste
aufzurufen.
Hinweis: Wenn ein Ordner angezeigt ist, drücken Sie die Taste , um zum vorherigen Menü
zurückzukehren.
- Drücken Sie die Taste “ ” oder “ ” , um eine Musikdatei auszuwählen.
- Drücken Sie die Taste “ ∩∩ ” , und die Musikwiedergabe beginnt automatisch.
Page 33

- Drücken Sie während der Musikwiedergabe die Taste für Pause.
- Drücken Sie im Pausemodus nochmals die Taste , um die Wiedergabe fortzusetzen.
Hinweis: Drücken Sie während der Musikwiedergabe die Taste “ ” oder “ ” , um zur
vorherigen bzw. nächsten Musikdatei zu springen. Drücken und Halten Sie die Taste “ ” oder
“ ” für Rücklauf oder schnellen Vorlauf der Wiedergabe.
Musikwiedergabe in einem Ordner
- Drücken Sie während der Musikwiedergabe die Taste “ ∩∩ ” , um das Untermenü zu öffnen.
Hinweis: Wenn ein Ordner angezeigt ist, drücken Sie die Taste , um zum vorherigen Menü
zurückzukehren - Drücken Sie die Taste “ ” oder “ ” , um einen Ordner oder eine Musikdatei
auszuwählen.
- Wenn ein Ordner ausgewählt ist, drücken Sie die Taste “ ∩∩ ” , um den Ordner aufzurufen.
- Wenn eine Musikdatei ausgewählt ist, drücken Sie die Taste “ ∩∩ ” , und die Wiedergabe beginnt
automatisch.
Lautstärkeregelung
- Drücken Sie während der Musikwiedergabe die Taste “VOL+” oder “VOL–“ , um die Lautstärke zu
regeln.
Hinweis: Drücken und Halten der Taste “VOL+“ oder “VOL–“ ermöglicht auch die
Lautstärkeregelung (Werte einstellbar von 00 bis 40).
Zur vorherigen/nächsten Musikdatei springen
- Drücken Sie während der Musikwiedergabe die Taste “ ? ” oder “ ? ” , um zur vorherigen oder
nächsten Spur zu springen.
Eine Musikdatei löschen
- Drücken Sie während der Musikwiedergabe die Taste “ ∩∩ ” , um das Untermenü zu öffnen.
- Drücken Sie die Taste “ ” oder “ ” , um einen Ordner oder eine Musikdatei auszuwählen.
- Wenn ein Ordner ausgewählt ist, drücken Sie die Taste “ ∩∩ ” , um den Ordner aufzurufen.
- Wenn eine Musikdatei ausgewählt ist, drücken Sie die Taste “VOL –” , um sie zu löschen.
- Scrollen Sie an der Eingabeaufforderung “Delete File” zu “YES / NO”, scrollen Sie zur Option
“YES” , und drücken Sie die Taste “ ∩∩ ” , um den Löschbefehl zu bestätigen.
- Wenn die Datei gelöscht wurde, kehrt der Player zu den Untermenüoptionen zurück.
Hinweis: Drücken und halten Sie die Taste “∩∩ ” , um zum Hauptmenü zurückzukehren.
A-B-Wiederholung
Page 34

- Drücken Sie während der Musikwiedergabe die Taste “ ∩∩ ” .
- “A-B Repeat” zeigt “A” an.
- Drücken und halten Sie nochmals die Taste “ ∩∩ ” . “A-B” wird angezeigt.
- Die Musikwiedergabe “A-B” wird nun in einer Schleife wiederholt.
- Um die “A-B”-Wiederholung abzubrechen, drücken und halten Sie die Taste “ ∩∩ ” , um die
Wiedergabe normal fortzusetzen.
Synchrone Songtextanzeige
Wenn eine Musikdatei im Player eine Songtextdatei mit gleichem Dateinamen hat, werden während
der Musikwiedergabe automatisch die Songtexte angezeigt.
Hinweis: Der Player unterstützt Songtextdateien im .LRC-Format.
Der Name der Musikdatei (MP3 oder WMA) und der Songtextdatei (LRC) muss identisch sein.
(Beispiel: LoveSong.MP3 + LoveSong.LRC).
Rückkehr zum Hauptmenü
- Drücken Sie während der Musikwiedergabe die Taste “ ∩∩ ” , um das Untermenü zu öffnen.
Drücken und halten Sie die Taste “∩∩ ” , um zum Hauptmenü zurückzukehren.
Videowiedergabe
- Wählen Sie im Hauptmenü das Videomenü, und drücken Sie die Taste “ ∩∩ ” , um den Videomodus
zu aktivieren.
- Wenn die Video-Wiedergabeliste angezeigt ist, drücken Sie die Taste “ ” oder “ ” , um eine
Videodatei auszuwählen.
- Wenn ein Ordner ausgewählt ist, drücken Sie die Taste “ ∩∩ ” , um den Ordner aufzurufen.
- Wenn eine Videodatei ausgewählt ist, drücken Sie die Taste “ ∩∩ ” , und die Wiedergabe beginnt
automatisch.
Rücklauf / schneller Vorlauf einer Videodatei
Drücken und halten Sie während der Videowiedergabe die Taste “ ” oder “ ” für Rücklauf
oder schnellen Vorlauf der Wiedergabe.
Lautstärkeregelung
Page 35

- Drücken Sie während der Videowiedergabe die Taste “VOL+” oder “VOL–“ , um die Lautstärke zu
regeln.
Hinweis: Drücken und Halten der Taste “VOL+“ oder “VOL–“ ermöglicht auch die
Lautstärkeregelung (Werte einstellbar von 00 bis 40).
Rückkehr zur Wiedergabeliste
- Drücken Sie während der Videowiedergabe die Taste “ ∩∩ ” , um zur Wiedergabeliste
zurückzukehren.
Hinweis: Drücken und halten Sie die Taste “∩∩ ” , um zum Hauptmenü zurückzukehren.
Eine Videodatei löschen
- Drücken Sie im Video-Untermenü die Taste “ ” oder “” , um einen Ordner oder eine Videodatei
auszuwählen.
- Wenn ein Ordner ausgewählt ist, drücken Sie die Taste “ ∩∩ ” , um den Ordner aufzurufen.
- Wenn eine Videodatei ausgewählt ist, drücken Sie die Taste “VOL –” , um sie zu löschen.
- Scrollen Sie an der Eingabeaufforderung “Delete File” zu “YES / NO”, scrollen Sie zur Option
“YES” , und drücken Sie die Taste “ ∩∩ ” , um den Löschbefehl zu bestätigen.
- Wenn die Datei gelöscht wurde, kehrt der Player zu den Untermenüoptionen zurück.
Hinweis: Drücken und halten Sie die Taste “∩∩ ” , um zum Hauptmenü zurückzukehren.
FM-Modus
Bevor wir anfangen, muss die Ohrkapsel bei Verwendung des FM-Modus an den Player angeschlossen
werden. Sie dient als Antenne für den Radiofrequenzempfang.
Der FM-Bereich reicht von 87,5 Mhz bis 108 Mhz.
- Wählen Sie im Hauptmenü das FM-Menü, und drücken Sie die Taste “ ∩∩ ” , um den FM-Modus zu
aktivieren.
Manuelle Frequenzsuche
- Drücken Sie im FM-Modus die Taste “ ∩∩ ” , um das Untermenü zu öffnen.
Hinweis: Drücken Sie die Taste “ ∩∩ ” , um zum FM-Modus zurückzukehren; oder drücken und
halten Sie die Taste “ ∩∩ ” , um zum Hauptmenü zurückzukehren.
- Scrollen Sie zur Option “Manual” , und drücken Sie die Taste “ ∩∩ ” .
- Drücken Sie die Taste “ ” oder “ ” , um manuell eine Frequenz auszuwählen.
Page 36

- Um die gewählte Frequenz manuell einzustellen, drücken Sie die Taste “ ∩∩ ” und scrollen Sie zur
Option “MEM” gefolgt von “ ∩∩ ”.
- Wenn die Liste der eingestellten Sender angezeigt wird, drücken Sie die Taste “ ? ” oder “ ? ” , um zu
einem rot angezeigten Sender zu gehen, gefolgt von der Taste “ ∩∩ ” , um die Frequenz zu speichern.
- An der Eingabeaufforderung “Save Channel” wählen Sie die Option “YES” und drücken Sie die
Taste “ ∩∩ ” , um die Änderungen zu bestätigen.
Hinweis: Die eingestellte Frequenz wird nun in der Liste der eingestellten Sender (rot) angezeigt.
- Drücken Sie die Taste “∩∩ ” , um zum FM-Modus zurückzukehren.
Automatische Frequenzsuche
- Drücken Sie im FM-Modus die Taste “ ∩∩ ” , um das Untermenü zu öffnen.
- Scrollen Sie zur Option “Auto” , und drücken Sie die Taste “ ∩∩ ” .
- Der Player scannt und speichert automatisch verfügbare Frequenzen der Reihe nach.
Wiedergabe einer eingestellten Frequenz
- Drücken Sie im FM-Modus die Taste “ ∩∩ ” , um das Untermenü zu öffnen.
- Scrollen Sie zur Option “Preset” , und drücken Sie die Taste “ ∩∩ ” , um den Einstellungsmodus
aufzurufen.
- Drücken Sie die Taste “ ” oder “ ” , um zur vorherigen oder nächsten gespeicherten Frequenz
zu gehen.
(Beispiel: CH:01, CH02 ….)
Drücken und halten Sie die Taste “∩∩ ” , um zum Hauptmenü zurückzukehren.
Löschen einer eingestellten Frequenz
- Drücken Sie im FM-Modus die Taste “ ∩∩ ” , um das Untermenü zu öffnen.
- Scrollen Sie zur Option “DEL” , und drücken Sie die Taste “ ∩∩ ” .
Hinweis: Die Liste gespeicherter Sender wird angezeigt.
- Drücken Sie die Taste “ ” oder “ ” , um eine gespeicherte Frequenz zum Löschen
auszuwählen, gefolgt von der Taste “ ∩∩ ” .
- An der Eingabeaufforderung “Del Channel” wählen Sie die Option “YES” und drücken Sie die Taste
, um den Löschbefehl zu bestätigen.
Hinweis: Die soeben gelöschte gespeicherte Frequenz wird nun vorübergehend als “Empty” angezeigt.
Die gelöschte gespeicherte Frequenz wird durch die nächste verfügbare gespeicherte Frequenz ersetzt.
Um die Liste zu aktualisieren, drücken Sie die Taste , um die Liste zu verlassen, und öffnen Sie sie
erneut, um die neue Wiedergabeliste anzuzeigen.
Page 37

FM-Aufzeichnung
- Drücken und halten Sie während der FM-Wiedergabe die Taste “VOL+” , um den
FM-Aufzeichnungsmodus zu aktivieren.
- Drücken Sie die Taste , und die Aufzeichnung beginnt automatisch.
Hinweis: Drücken Sie während der Aufzeichnung die Taste , um auf Pause zu schalten. Um
fortzufahren, drücken Sie nochmals die Taste .
- Um die Aufzeichnung zu beenden und zu speichern, drücken und halten Sie die Taste “ ∩∩ ” .
Hinweis:
- Die FM-Aufzeichung wird, wenn eine Verbindung zum Computer besteht, unter dem Dateinamen
“FM00001.WAV” im Root-Verzeichnis des gespeichert.
- Die FM-Aufzeichnung kann im Musikmodus wiedergegeben werden.
- In Regionen mit einem schwachen Signal sind einige Kanäle eventuell nicht verfügbar oder der
Empfang ist schlecht.
Fotomodus
- Wählen Sie im Hauptmenü das Fotomenü, und drücken Sie die Taste “ ∩∩ ” , um den Fotomodus zu
aktivieren.
- Wenn die Foto-Wiedergabeliste angezeigt ist, drücken Sie die Taste “” oder “ ” , um eine Fotodatei
auszuwählen.
- Wenn ein Ordner ausgewählt ist, drücken Sie die Taste “ ∩∩ ” , um den Ordner aufzurufen.
- Wenn eine Fotodatei ausgewählt ist, drücken Sie die Taste “ ∩∩ ” , und die Fotowiedergabe beginnt
automatisch.
- Drücken Sie die Taste “ ” oder “ ” , um die vorherige oder nächste Fotodatei anzuzeigen.
- Drücken Sie während der Fotowiedergabe die Taste “ ∩∩ ” , um zur Fotowiedergabeliste
zurückzukehren; oder drücken und halten Sie die Taste “ ∩∩ ” , um zum Hauptmenü
zurückzukehren.
Eine Fotodatei löschen
- Drücken Sie in der Fotowiedergabeliste, wenn eine Fotodatei ausgewählt ist, die Taste “VOL–” , um
Page 38

sie zu löschen.
- An der Eingabeaufforderung “Delete file” wählen Sie die Option “YES” und drücken Sie die Taste
“ ∩∩ ” , um den Löschbefehl zu bestätigen.
Textmodus
- Wählen Sie im Hauptmenü das Textmenü, und drücken Sie die Taste “ ∩∩ ” , um den Textmodus zu
aktivieren.
- Wenn die Textwiedergabeliste angezeigt ist, drücken Sie die Taste “ ” oder “ ” , um eine
Textdatei auszuwählen.
- Wenn ein Ordner ausgewählt ist, drücken Sie die Taste “ ∩∩ ” , um den Ordner aufzurufen.
- Wenn eine Textdatei ausgewählt ist, drücken Sie die Taste “ ∩∩ ” , und die Wiedergabe beginnt
automatisch.
- Drücken Sie die Taste “ ” oder “ ” , um den Text vor oder zurück zu scrollen.
- Drücken Sie während der Textwiedergabe die Taste “ ∩∩ ” , um zur Textwiedergabeliste
zurückzukehren, oder drücken und halten Sie die Taste “ ∩∩ ” , um zum Hauptmenü
zurückzukehren.
Eine Textdatei löschen
- Drücken Sie in der Textwiedergabeliste, wenn eine Textdatei ausgewählt ist, die Taste “VOL–” , um
sie zu löschen.
- An der Eingabeaufforderung “Delete file” wählen Sie die Option “YES” und drücken Sie die Taste
“ ∩∩ ” , um den Löschbefehl zu bestätigen.
Ein Lesezeichen in einer Seite anbringen
Die Textfunktion unterstützt bis zu 3 Lesezeichen für schnelles Suchen.
- Drücken Sie während der Textwiedergabe die Taste “ ” oder “ ” , um den Text vor oder zurück zu
scrollen.
Page 39

- Erstellen Sie an der gewünschten Seite ein Lesezeichen, indem Sie die Taste drücken. Das Lesezeichen
wird dann angezeigt.
Min – Scrollen Sie zu einem der 3 Lesezeichen, und drücken Sie die Taste “ ∩∩ ” , um die Einstellung
zu bestätigen.
Eine Lesezeichen-Seite anzeigen
- Drücken Sie während der Textwiedergabe die Taste der Textwiedergabe die Taste “VOL + ” , um die
3 Lesezeichen anzuzeigen.
- Drücken Sie die Taste “ ” oder “ ” , um ein Lesezeichen auszuwählen, gefolgt von der Taste
“ ∩∩ ” . Die Lesezeichen-Seite wird automatisch angezeigt.
Aufzeichnungsmodus
- Wählen Sie im Hauptmenü das Aufzeichnungsmenü, und drücken Sie die Taste “ ∩∩ ” , um den
Aufzeichnungsmodus zu aktivieren.
Page 40

- Drücken Sie im Aufzeichnungsmodus die / Taste, und die Aufzeichnung beginnt automatisch.
- Drücken Sie während der Aufzeichnung die Taste , um die Aufzeichnung zu unterbrechen, und
drücken Sie nochmals die Taste , um fortzufahren.
- Um die Aufzeichnung zu beenden, drücken und halten Sie die Taste “∩∩ ” , um die Aufzeichnung zu
speichern und zum Hauptmenü zurückzukehren.
Hinweis: Aufgezeichnete Dateien (WAV-Format) können im Musikmodus wiedergegeben werden.
- Explorer-Modus
Im Explorer-Modus werden alle Ordner und Dateien angezeigt, die im Player gespeichert sind.
- Wählen Sie im Hauptmenü das Explorer-Menü, und drücken Sie die Taste “ ∩∩ ” , um den Modus zu
aktivieren.
Explorer-Modus
- Wenn die Explorer-Wiedergabeliste angezeigt ist, drücken Sie die Taste “ ” oder “ ” , um eine
Datei auszuwählen.
- Wenn ein Ordner ausgewählt ist, drücken Sie die Taste “ ∩∩ ” , um den Ordner aufzurufen.
- Wenn eine Datei ausgewählt ist, drücken Sie die Taste “ ∩∩ ” , und die Wiedergabe beginnt
automatisch.
Hinweis: Drücken und halten Sie während der Wiedergabe die Taste “∩∩ ” , um zum Hauptmenü
zurückzukehren.
Eine Datei löschen
- In der Explorer-Wiedergabeliste, wählen Sie eine Datei aus, und drücken Sie die Taste “ VOL – ” ,
um sie zu löschen.
- An der Eingabeaufforderung “Delete file” wählen Sie die Option “YES” und drücken Sie die Taste
“ ∩∩ ” , um den Löschbefehl zu bestätigen.
Hinweis: Ein Ordner kann NICHT gelöscht werden.
Game-Modus
Im Lieferumfang des Players ist ein Tetris-Spiel enthalten.
- Wählen Sie im Hauptmenü das Game-Menü, und drücken Sie die Taste “ ∩∩ ” , um den
Game-Modus zu aktivieren.
Game-Steuertasten
- Für Beginn/Pause, die / Taste drücken.
- Um nach links oder rechts zu gehen, die Taste “ ” oder “ ” drücken.
- Um den fallenden Block zu drehen, die Taste “VOL+” drücken.
Page 41

- Um das Fallen des Blocks zu beschleunigen, die Taste “VOL+” drücken.
Hinweis: Drücken und halten Sie im Game-Modus die Taste “∩∩ ” , um zum Hauptmenü
zurückzukehren.
*
Einstellungsmodus
7 Einstellungen sind in diesem Modus verfügbar.
Wählen Sie im Hauptmenü das Einstellungsmenü, und drücken Sie die Taste “ ∩∩ ” , um den
Einstellungsmodus zu aktivieren.
- Drücken Sie im Einstellungsmodus die Taste “ ” oder “ ” , um zu einer der 7
Game-Steuertastenoptionen zu gehen, und drücken Sie die Taste “ ∩∩ ” , um die einzelnen Optionen
des Untermenüs aufzurufen.
- Drücken Sie die Taste “ ” oder “ ” , um die gewünschten Einstellungen in jeder Option
auszuwählen.
- Für Beginn/Pause, die Taste drücken.
Die Taste “ ∩∩ ” drücken, um die Änderungen zu bestätigen.
- Um nach links oder rechts zu gehen, die Taste “ ” oder “ ” drücken.
Um den fallenden Block zu drehen, die Taste “VOL+” drücken.
Hinweis: In den Untermenüoptionen die Taste drücken, um zum vorherigen Menü
zurückzukehren.
- Um das Fallen des Blocks zu beschleunigen, die Taste “VOL–” drücken und die Taste “∩∩ ”
drücken und halten, um zum Hauptmenü zurückzukehren.
Musikeinstellungen
Wiederholungsmodus
- Once: Alle Dateien auf einmal wiedergeben.
- Repeat 1: Eine Datei wiederholen.
- Folder Once: Alle Dateien im Ordner auf einmal wiedergeben.
- Folder Repeat: Alle Dateien im Ordner wiederholen.
- All Once: Alle Dateien einmal wiederholen.
- All Repeat: Alle Dateien wiederholen.
- Intro: Die ersten 10 Sekunden jeder Musikdatei wiedergeben.
Page 42

Wiedergabemodus
- Order: Musikwiedergabe der Reihe nach.
- Shuffle: Musikwiedergabe in Zufallsreihenfolge.
EQ Select
- Normal / 3D / Rock / Pop / Classic/ Bass / Jazz / User EQ
(User EQ muss im Modus User EQ Mode angepasst werden, bevor Sie die Option benutzen).
User EQ Mode (Benutzer kann EQ-Einstellungen anpassen)
- In den User EQ-Einstellungen, die Taste “VOL +” oder “VOL –” drücken, um jedes einzelne
Frequenzsegment anzupassen. (60Hz、300 Hz、1KHz、3KHz、6KHz)
- Frequenzeinstellungen sind in Schritten von -6dB~+6dB einstellbar.
- Drücken Sie die Taste “ ” oder “ ” , um zur Anpassung des nächsten Frequenzsegments zu
springen. (aktiviertes Segment wird rot angezeigt)
- Drücken Sie die Taste “ ” oder “ ” , um zur Option “YES” zu gehen, und drücken Sie die
Taste “ ∩∩ ” , um die Änderungen zu speichern und den Modus zu beenden.
FM-Radioeinstellungen
Stereo SW: Einstellen des FM-Stereomodus EIN/AUS
- ON
- OFF
FM Region: FM für Ihre Region konfigurieren.
- China
- Europa
- Japan
- USA
Aufzeichnungseinstellungen
REC Quality: Einstellung der Aufzeichnungsqualität und Dateigröße
- High Quality: Bessere Aufzeichnungsqualität mit größerer Dateigröße.
- General Quality: Normale Aufzeichnungsqualität mit kleiner
Dateigröße.
REC Volume: Die höchste Einstellung +5 erzeugt die lauteste Aufzeichnungsqualität.
- +1 / - +2 / - +3 / - +4 / - +5
Display-Einstellungen
Blight Time: Einstellung der Hindergrundbeleuchtungszeit ON (in Sekunden) Diese Funktion wird
deaktiviert, wenn die Zeiteinstellung Always On gewählt ist.
- 5s/ 10s / 15s / 20s / 30s / Always On
Lum: Einstellung der Helligkeit. (1 ist die hellste Einstellung)
- 1 / 2 / 3 / 4 / 5
Blight Mode: Bei der Einstellung Power Saver schaltet der Bildschirm nach der eingestellten Zeit
für Hintergrundbeleuchtung ab (beliebige Taste drücken, um fortzufahren).
Page 43

Normal / Power Saver
Systemeinstellungen
About: Zeigt Informationen zu Firmware-Version und Memory-Status an.
Upgrade: Für Firmware-Upgrade (falls vorhanden).
Default Set: Stellt die Vorgabeeinstellungen des Players wieder her.
Einstellung der Abschaltzeit
Wird innerhalb der eingestellten Zeit keine Taste gedrückt, schaltet der Player ab. (Diese Funktion
wird deaktiviert, wenn die Zeiteinstellung OFF gewählt ist.)
- OFF/10 Minutes/15 Minutes/30 Minutes/60 Minutes/120 Minutes
Spracheinstellungen
Zum die Spracheinstellung auf dem Player zu ändern.
Verwendung der AVI-Convertersoftware
Dieser Player unterstützt Videodateien im AVI-Format und kann andere
Videoformate in das AVI-Format umsetzen. Dazu wird gebündelte AVIConverter Software benutzt.
Die Software unterstützt schnelle Videokonvertierung vom Multi-video-Format
in hochqualitatives AVI-Format.
Systemvoraussetzungen für die Installation der AVI-Convertersoftware
- Intel oder AMD Prozessor (Intel Pentium 3 und höher, einschließlich Intel
Celeron-Serie)
- Windows 2000 / Windows XP / VISTA
Installation der AVI-Convertersoftware
- Player an den PC anschließen, und das im Player gebündelte vorgeladene Setupprogramm
(EXE-Datei) ausführen, um die Installation zu starten.
- Den Anweisungen am Bildschirm folgen, um die Installation zu beenden.
- Nach erfolgreicher Installation wird ein AVI Converter-Programmsymbol auf dem
Computerdesktop erstellt.
Page 44

Auf das AVI Converter-Symbol doppelklicken, um zu beginnen.
1. Auf die Schaltfläche Add klicken, um eine zu konvertierende Datei auszuwählen.
2. Auf die Schaltfläche Source File klicken.
3. Die zu konvertierende Videodatei im Computer suchen und auf die Schaltfläche Öffnen klicken.
4. Die Schaltfläche Pfad Target File Path wählen, um die konvertierte Videodatei zu speichern.
(Die restlichen Einstellungen als Vorgaben übernehmen und auf die Schaltfläche Save und Close
klicken.)
-
5. Schließlich auf die Schaltfläche Convert Now klicken, um den Konvertierungsvorgang
zu starten.
Page 45

Die Konvertierung ist beendet, wenn die Statusinformation 100 % und OK anzeigt. Zum Beenden auf
konvertieren, und versuchen Sie es nochmals.
die Schaltfläche Close klicken.
Schließlich (mit Kopieren und Einfügen) die konvertierte Videodatei (AVI-Format) zum Player
übertragen. Sie sind dann bereit zur Videowiedergabe.
Hinweis: Bitte nur die im Player gebündelte AVI Convertersoftware für die Dateikonvertierung
benutzen. Videodateien, die mit Drittsoftware konvertiert wurden, funktionieren eventuell nicht
korrekt auf diesem Player.
Fehlersuche
Problem Lösung
Kein Strom. Prüfen, ob das Gerät eingeschaltet ist.
Kein Ton aus Ohrkapsel. 1. Prüfen, ob Lautstärke auf “0” ist.
2. Prüfen, ob Ohrkapsel korrekt an den
Player angeschlossen ist.
3. Prüfen, ob vielleicht die Musikdatei
korrupt ist. Mit anderer Musikdatei
nochmals versuchen.
Fehlermeldung: “Warning File Format
Error
Welcher Dateityp verursacht die
Fehlermeldung “Warning File Format
Error“?
Folgendes versuchen:
- Ein/AUS-Schalter auf
OFF.
- Player an den PC anschließen und die
beschädigte Datei oder
Nicht-Standard-Videodatei vom Player
entfernen.
- Player vom Computer trennen
und nochmals versuchen.
Wenn ein nicht unterstützter Dateityp
gefunden wird, erfolgt die Fehlermeldung.
Kommt der Fehler bei einer Videodatei vor,
versuchen Sie,
die Videodatei mit dem AVI Converter zu
Anzeige unbekannter Zeichen am
LCD-Schirm.
Musikübertragung nicht möglich. 1. Prüfen, ob das USB-Kabel korrekt
Sicherstellen, dass die korrekte Sprache
gewählt ist.
funktioniert.
2. Sicherstellen, dass der Produkttreiber
Korrekt installiert (falls erforderlich).
3. Prüfen, ob der USB-Anschluss korrekt
funktioniert. Computer neu starten und
nochmals versuchen.
Page 46

Für mehr Informationen, besuchen Sie unsere Website www.mpmaneurope.com
Page 47

TK1
Reproductor MP3/MP4/FM
Manual de instrucciones
www.mpmaneurope.com
1
Page 48

Conserve siempre una copia de sus datos originales
Antes de entregar su producto para que se le realicen los servicios de garantía, haga copia de
seguridad de todos los datos, incluidos los programas de software. Ser á responsable de su
reinstalación. La recuperación de datos no se incluye en el servicio de garantía y nuestra
empresa no será responsable de la pérdida o deterioro de los datos durante el tránsito o
reparación.
Instrucciones de seguridad
* No exponga el reproductor a temperaturas extremas.
* No deje que penetre ningún líquido en él.
* No le aplique o someta a una presión excesiva.
* No lo exponga a la luz solar directa o a fuentes de calor.
* No lo intente desmontar ni reparar por sí sólo.
* No lo exponga a elementos químicos como benceno o disolvente.
* No lo almacene en lugares con mucho polvo ni excesiva humedad.
* Nuestra empresa declina toda responsabilidad por cualquier daño por pérdida de datos
debido a avería, reparación u otras causas.
Índice
Aviso importante....................................................................................................................... ..2
Antes de usar el reproductor....................................................................................................3
Teclas y funciones.......................................................................................................................5
Pantalla del menú principal......................................................................................................5
Carga de la batería..…...............................................................................................................6
Inicio.…….....................................................................................................................................8
Encendido y apagado..…...........................................................................................................9
Ajuste del bloqueo de teclas.......................................................................................................9
Reproducción de música..........................................................................................................10
Reproducción de vídeo.............................................................................................................11
Modo FM...................................................................................................................................12
Modo Fotografía......................................................................................................................14
ModoTexto................................................................................................................................15
Modo Grabación......................................................................................................................16
Modo Explorador...…............................................................................................................17
Modo Juego...............................................................................................................................17
Modo Configuración................................................................................................................18
Uso del software AVI Converter.… .........................................................................................20
Solución de problemas.............................................................................................................23
2
Page 49

Antes de usar el reproductor
Características del producto
* Diseño elegante y ligero.
* Pantalla LCD TFT en color, 262.000 colores, de 1,8'' (128 x 160 píxeles).
* Interfaz gráfica del usuario.
* Reproduce los formatos de audio MP3, WMA y WAV.
* Compatible con el formato de vídeo AVI (incluye el software AVI Converter).
* Sintonizador de radio FM integrado con presintonización de emisoras y grabación FM en
formato WAV.
* Compatible con navegación fotográfica en formato JPEG.
* Grabación digital de voz.
* Visor de texto en formato TXT con función de marcador.
* Presentación sincronizada de la letra de la canción en formato LRC.
* Almacenamiento de archivos de datos personales.
* Interfaz USB 2.0.
* Batería recargable de polímeros de litio.
- Reproducción de audio (hasta 8 horas).
- Reproducción de vídeo (hasta 4 horas).
* Compatible con Windows 2000 / XP / VISTA.
Contenido de la caja
Reproductor TK1
Adaptador de corriente
(Opcional)
Auriculares
Cable USB
3
Page 50

VISTA FRONTAL
Descripción de los componentes
Tecla Rebobinar/Anterior
Tecla Avance/Siguiente
Tecla Menú
VISTA FRONTAL
Puerto de auriculares
Tecla Bajar volumen
Tecla Subir volumen
Tecla Pausa en reproducción
Puerto USB
Interruptor de seguridad de
encendido/apagado
VISTA LATERAL
4
Page 51

Pantalla del menú principal
Nº Función Nº Función
1 Título de la canción e
7 Ecualizador / Letra de la canción
indicación ID3
2 Temporizador de
8 Duración de la pista de audio
reproducción
3 Modo Reproducción 9 Indicador de batería
4 Estado Reproducción/Pausa 10 Repetición A-B
5 Ajuste de reproducción 11 Número de la pista actual
6 Nivel de volumen 12 Nº total de pistas
5
Page 52

Carga de la batería
* Cargue siempre la batería por completo antes de utilizar el reproductor por primera vez.
(8 horas aproximadamente).
* Encienda el reproductor antes de iniciar el modo de carga.
* Si el nivel de la batería es bajo, cárguela inmediatamente ya que, de lo contrario, el
reproductor se apagará automáticamente o no se podrá encender.
* La autonomía de la batería varía según los ajustes de nivel de volumen de la música y de
la retroiluminación de la pantalla.
* Para proteger el estado de la batería, recomendamos que la cargue cada 4 meses si no
utiliza el reproductor durante un periodo de tiempo prolongado.
* Puede cargar el reproductor mediante el adaptador de corriente (CA) (opcional) o a través
de la conexión por cable USB con el ordenador.
Carga de la batería mediante el ordenador
* Conecte un extremo del cable USB mini suministrado al reproductor.
* Conecte el otro extremo del cable USB mini al ordenador.
* El proceso de carga se inicia automáticamente.
* Para ver el proceso de carga de la batería en el reproductor, detenga el dispositivo en la
bandeja del sistema del ordenador con el procedimiento “Quitar hardware con
seguridad”. (Consulte la sección “Desconexión del disco USB del ordenador”).
* Cuando está totalmente cargada, el indicador de batería pasa a color verde y la carga se
detiene automáticamente.
* Tiempo de carga completa: Hasta 4 horas aproximadamente.
6
Page 53

Carga de la batería con el adaptador de corriente (Opcional)
* Conecte un extremo del adaptador de corriente (USB mini) al reproductor a través del
cable USB suministrado.
* Conecte el otro extremo del adaptador de corriente al enchufe de red y encienda la fuente
de alimentación.
* El proceso de carga se inicia automáticamente.
* El indicador de batería del reproductor empezará a parpadear durante el proceso de
carga.
* Cuando está totalmente cargada, el indicador de batería pasa a color verde y la carga se
detiene automáticamente.
* Tiempo de carga completa: Hasta 3 horas aproximadamente.
Nota:
Utilice SÓLO el adaptador de corriente (opcional) o el cable USB original que se suministra
con el producto. NO use ningún adaptador de corriente de otro fabricante, ya que podría
causar graves daños al reproductor.
Requisitos mínimos del sistema
* Procesador Intel Pentium a 200 MHz y superior.
* Windows 2000 y Windows XP.
* 32 MB de RAM (se recomiendan 128 MB).
* Hasta 100 MB de espacio libre en el disco duro.
* Puerto USB estándar.
Nota:
1. Inicie sesión en el ordenador con la cuenta de Administrador para realizar la instalación
de cualquier software o actualización de firmware (si existe). De lo contrario, el proceso
de instalación podría no completarse satisfactoriamente.
7
Page 54

Inicio
Conexión del disco USB al ordenador
* Conecte un extremo del cable USB mini suministrado al reproductor.
* Conecte el otro extremo del cable USB mini al ordenador.
Ordenador
F585
* Cuando la conexión es satisfactoria, el reproductor mostrará el icono de conexión. Empiece
a transferir archivos de audio y vídeo al reproductor a través del ordenador.
Desconexión del disco USB del ordenador
En los sistemas operativos Windows 2000 o Windows XP, siga el procedimiento “Quitar
hardware con seguridad” en el ordenador. Se mostrará el icono “Quitar hardware con
seguridad” en la bandeja del sistema del ordenador, como se muestra en el diagrama
siguiente.
- Desplace el ratón sobre el icono; aparecerá el indicador “Quitar hardware con seguridad”.
- Haga doble clic en el icono “Quitar hardware con seguridad”; aparecerá la ventana
“Quitar hardware con seguridad”. Seleccione el dispositivo que desea desconectar o retirar
y haga clic en el botón “Detener” para finalizar la conexión entre el ordenador y el
dispositivo.
8
Page 55

- A continuación, se visualizará “Es seguro retirar el hardware. Ahora se puede quitar con
toda seguridad el Dispositivo de almacenamiento masivo USB del sistema”.
- Por último, desconecte y desenchufe con toda seguridad el dispositivo del puerto USB de su
ordenador.
Encendido y apagado
- Ponga el interruptor de encendido y apagado en la posición ON, pulse y mantenga pulsada
la tecla para encender el reproductor.
- En cualquier modo, pulse y mantenga pulsada la tecla para apagar el reproductor.
- Pulse para iniciar o hacer una pausa en la reproducción.
Ajuste del bloqueo de teclas
- Pulse y mantenga pulsadas al mismo tiempo las teclas “VOL+” y “VOL–“ (durante 2
segundos) para ajustar el bloqueo de teclas.
Nota: Se bloquearán todas las teclas del reproductor.
- En el modo de Bloqueo, vuelva a pulsar y a mantener pulsadas al mismo tiempo las teclas
“VOL+” y “VOL–“ (durante 2 segundos) para desbloquear.
Nota: Se desbloquearán todas las teclas del reproductor.
9
Page 56

Reproducción de música
- En el menú Principal, seleccione el menú Music (Música) y pulse la tecla “∩∩” para
acceder al modo Música.
- Se iniciará automáticamente la reproducción de música.
- Durante la reproducción de música, pulse la tecla “∩∩” para acceder a la lista de
reproducción de música.
Nota: Si se muestra una carpeta, pulse la tecla para volver al menú anterior.
- Pulse la tecla “ ” o “ ” para seleccionar un archivo de música.
- Pulse la tecla“∩∩”; se iniciará automáticamente la reproducción de música.
- Durante la reproducción de música, pulse la tecla para hacer una pausa.
- En el modo Pausa, pulse de nuevo la tecla para reanudar la reproducción.
Nota: Durante la reproducción de música, pulse la tecla “ ” o “ ” para pasar al archivo
de música anterior o siguiente. Pulse y mantenga pulsada la tecla “ ” o “ ” para
rebobinar o avanzar rápidamente la reproducción.
Reproducción de música de una carpeta
- Durante la reproducción de música, pulse la tecla “∩∩” para acceder al submenú.
Nota: Si se muestra una carpeta, pulse la tecla para volver al menú anterior.
- Pulse la tecla “ ” o “ ” para seleccionar una carpeta o un archivo de música.
- Si selecciona una carpeta, pulse la tecla “∩∩” para acceder a ella.
- Si selecciona un archivo de música, pulse la tecla “∩∩” para que se inicie automáticamente
la reproducción.
Ajuste del volumen
- Durante la reproducción de música, pulse la tecla “VOL+” o “VOL–“ para ajustar el nivel
de volumen.
Nota: También puede pulsar y mantener pulsada la tecla “VOL+“ o “VOL–“ para ajustar el
nivel de volumen (entre 00 y 40).
Pasar al archivo de música anterior/siguiente
- Durante la reproducción de música, pulse la tecla “?” o “?” para pasar a la pista anterior o
siguiente.
10
Page 57

Borrado de un archivo de música
- Durante la reproducción de música, pulse la tecla “∩∩” para acceder al submenú.
- Pulse la tecla “ ” o “ ” para seleccionar una carpeta o un archivo de música.
- Si selecciona una carpeta, pulse la tecla “∩∩” para acceder a ella.
- Si selecciona un archivo de música, pulse la tecla “VOL –” para borrarlo.
- Cuando aparezca el indicador “Delete File” (“Borrar archivo”) “YES / NO” (SÍ/NO),
vaya a la opción “YES” (SÍ) y pulse la tecla “∩∩” para confirmar el borrado.
- Una vez borrado el archivo, el reproductor vuelve a las opciones del submenú anterior.
Nota: Pulse y mantenga pulsada la tecla “∩∩” o la tecla para volver al menú principal.
Repetición A-B
- Durante la reproducción de música, pulse y mantenga pulsada la tecla “∩∩”.
- El indicador “A-B Repeat” (Repetición A-B) muestra “A”.
- Pulse y mantenga pulsada de nuevo la tecla “∩∩”; se muestra“A-B”.
- Ahora, el modo Música repetirá la reproducción “A-B” en un bucle.
- Para cancelar la reproducción de repetición “A-B”, pulse y mantenga pulsada la tecla
“∩∩”para reanudar la reproducción.
Presentación sincronizada de la letra de la canción
Cuando un archivo de música del reproductor tiene un archivo con la letra de la canción con
el mismo nombre de archivo, se visualizará automáticamente la letra de la canción durante
su reproducción.
Nota: El reproductor es compatible con archivos de letra de canción en formato .LRC.
El nombre del archivo de música (MP3 o WMA) y del archivo de letra de canción (LRC)
tiene que ser idéntico. (Ejemplo: Canción de amor.MP3 + Canción de amor.LRC).
Para volver al menú principal
- Durante la reproducción de música, pulse la tecla “∩∩” para acceder al submenú.
- Pulse y mantenga pulsada la tecla “∩∩” para volver al menú principal.
Reproducción de vídeo
- En el menú principal, seleccione el menú Video (Vídeo) y pulse la tecla “∩∩” para acceder
al modo Vídeo.
11
Page 58

- Cuando aparezca la lista de reproducción de vídeo, pulse la tecla “ ” o “ ” para
seleccionar un archivo de vídeo.
- Si selecciona una carpeta, pulse la tecla “∩∩” para acceder a ella.
- Si selecciona un archivo de vídeo, pulse la tecla “∩∩” para que se inicie automáticamente
la reproducción del vídeo.
Rebobinado/avance rápido de un archivo de vídeo
- Durante la reproducción de vídeo, pulse y mantenga pulsada la tecla “ ” o “ ” para
rebobinar o avanzar rápidamente la reproducción.
Ajuste del volumen
- Durante la reproducción de vídeo, pulse la tecla “VOL+” o “VOL–“ para ajustar el nivel
de volumen.
Nota: También puede pulsar y mantener pulsada la tecla “VOL+“ o “VOL–“ para ajustar el
nivel de volumen (entre 00 y 40).
Para volver a la lista de reproducción
- Durante la reproducción de vídeo, pulse la tecla “∩∩” para volver a la lista de
reproducción.
Nota: Pulse y mantenga pulsada la tecla “∩∩” para volver al menú principal.
Borrado de un archivo de vídeo
- En el submenú Video (Vídeo), pulse la tecla “ ” o “ ” para seleccionar una carpeta o
un archivo de vídeo.
- Si selecciona una carpeta, pulse la tecla “∩∩” para acceder a ella.
- Si selecciona un archivo de vídeo, pulse la tecla “VOL –” para borrarlo.
- Cuando aparezca el indicador “Delete File” (“Borrar archivo”) “YES / NO” (SÍ/NO),
vaya a la opción “YES” (SÍ) y pulse la tecla “∩∩” para confirmar el borrado.
- Una vez borrado el archivo, el reproductor vuelve a las opciones del submenú anterior.
Nota: Pulse y mantenga pulsada la tecla “∩∩” o la tecla para volver al menú principal.
Modo FM
Para empezar, cuando se usa el modo FM hay que conectar los auriculares al reproductor.
12
Page 59

Actúan como una antena para la recepción de las frecuencias de radio.
El rango de FM es de 87,5 MHz a 108 MHz.
- En el menú principal, seleccione el menú FM y pulse la tecla “∩∩” para acceder al modo
FM.
Búsqueda manual de una frecuencia
- En el modo FM, pulse la tecla “∩∩” para acceder al submenú.
Nota: Pulse la tecla “∩∩” para volver al modo FM o pulse y mantenga pulsada la tecla “∩∩”
para volver al menú principal.
- Vaya a la opción“Manual” y pulse la tecla“∩∩”.
- Pulse la tecla “ ” o “ ” para seleccionar manualmente su frecuencia favorita.
- Para predefinir manualmente la frecuencia seleccionada, pulse la tecla “∩∩”, vaya a la
opción“MEM” y pulse la tecla “∩∩”.
- Cuando aparezca la emisora predefinida, pulse la tecla “?” o “?” para ir a la emisora que
desea, en rojo, y pulse la tecla “∩∩” para almacenar la frecuencia.
- Cuando aparezca el indicador “Save Channel” (Guardar canal), seleccione la opción
“YES” (SÍ) y pulse la tecla “∩∩” para confirmar los cambios.
Nota: La frecuencia predefinida aparecerá ahora en la lista de emisoras predefinidas (en
color rojo).
- Pulse la tecla “∩∩” para volver al modo FM.
Búsqueda automática de una frecuencia
- En el modo FM, pulse la tecla “∩∩” para acceder al submenú.
- Vaya a la opción “Auto” y pulse la tecla “∩∩”.
- El reproductor realizará una búsqueda automática y almacenará las frecuencias
disponibles en orden secuencial.
Reproducción de una frecuencia predefinida
- En el modo FM, pulse la tecla “∩∩” para acceder al submenú.
- Vaya a la opción “Preset” (Predefinidas) y pulse la tecla “∩∩” para acceder al modo
Frecuencias predefinidas.
- Pulse la tecla “ ” o “ ” para pasar a la frecuencia predefinida anterior o siguiente.
(Ejemplo: CH:01, CH02 ….)
- Pulse y mantenga pulsada la tecla “∩∩” para volver al menú principal.
Borrado de una frecuencia predefinida
- En el modo FM, pulse la tecla “∩∩” para acceder al submenú.
- Vaya a la opción “DEL” (Supr) y pulse la tecla “∩∩”.
Nota: Se mostrará la lista de emisoras predefinidas.
13
Page 60

- Pulse la tecla “ ” o “ ” para seleccionar la frecuencia predefinida que desea borrar y
pulse la tecla “∩∩”.
- Cuando aparezca el indicador “Del Channel” (Borrar canal), seleccione la opción “YES”
(SÍ) y pulse la tecla para confirmar el borrado.
Nota: La frecuencia predefinida que acaba de borrar mostrará temporalmente el mensaje
“Empty” (Vacía). La frecuencia predefinida borrada será sustituida por la siguiente
frecuencia predefinida disponible. Para actualizar la lista de frecuencias predefinidas, pulse
la tecla para salir de la lista de frecuencias predefinidas y volver a entrar en ella para
ver la nueva lista.
Grabación FM
- Durante la reproducción de FM, pulse y mantenga pulsada la tecla “VOL+” para acceder
al modo de grabación FM.
- Pulse la tecla para iniciar automáticamente la grabación.
Nota: Durante la grabación, pulse la tecla para hacer una pausa y vuelva a pulsarla
para reanudar la reproducción.
- Para terminar y guardar la grabación, pulse y mantenga pulsada la tecla “∩∩”.
Nota:
- La grabación FM se guardará con el nombre de archivo “FM00001.WAV” en el directorio
raíz del reproductor cuando se conecte al ordenador.
- La grabación FM se puede reproducir en el modo Música.
- En zonas con mala recepción de la señal, quizá algunos canales no estén disponibles o la
recepción sea mala.
Modo Fotografía
- En el menú principal, seleccione el menú Photo (Fotografía) y pulse la tecla “∩∩” para
acceder al modo Fotografía.
- Cuando aparezca la lista de reproducción de fotografías, pulse la tecla “ ” o “ ” para
seleccionar un archivo fotográfico.
- Si selecciona una carpeta, pulse la tecla “∩∩” para acceder a ella.
- Si selecciona un archivo fotográfico, pulse la tecla “∩∩” para que se inicie
automáticamente la reproducción de la fotografía.
- Pulse la tecla “ ” o “ ” para ver el archivo fotográfico anterior o siguiente.
- Durante la reproducción de Fotografías, pulse la tecla “∩∩” para acceder a la lista de
14
Page 61

reproducción de fotografías o pulse y mantenga pulsada la tecla “∩∩” para volver al menú
principal.
Borrado de un archivo fotográfico
- En la lista de reproducción de fotografías, con el archivo fotográfico seleccionado, pulse la
tecla “VOL–” para borrarlo.
- Cuando aparezca el indicador “Delete File” (Borrar archivo), seleccione la opción “YES”
(SÍ) y pulse la tecla “∩∩” para confirmar el borrado.
Modo Texto
- En el menú principal, seleccione el menú Text (Texto) y pulse la tecla “∩∩” para acceder al
modo Texto.
- Cuando aparezca la lista de reproducción de texto, pulse la tecla “ ” o “ ” para
seleccionar un archivo de texto.
- Si selecciona una carpeta, pulse la tecla “∩∩” para acceder a ella.
- Si selecciona un archivo de texto, pulse la tecla “∩∩” para que se inicie automáticamente la
reproducción.
- Pulse la tecla “ ” o “ ” para desplazarse hacia atrás o hacia delante en el texto.
- Durante la reproducción de texto, pulse la tecla “∩∩” para volver a la lista de reproducción
de texto o pulse y mantenga pulsada la tecla “∩∩” para volver al menú principal.
Borrado de un archivo de texto
- En la lista de reproducción de texto, con el archivo de texto seleccionado, pulse la tecla
“VOL–” para borrarlo.
- Cuando aparezca el indicador “Delete File” (Borrar archivo), seleccione la opción “YES”
(SÍ) y pulse la tecla “∩∩” para confirmar el borrado.
Para crear un marcador en una página
La función Texto admite hasta 3 marcadores de página para facilitar su búsqueda rápida.
- Durante la reproducción de texto, pulse la tecla “ ” o “ ” para desplazarse hacia
15
Page 62

atrás o hacia delante en el texto.
- En la página en la que desea crear un marcador, pulse la tecla ; aparecerán los 3
marcadores.
Desplácese a cualquiera de los 3 marcadores siguientes y pulse la tecla “∩∩” para confirmar
la configuración.
Para ver una página con marcador
- Durante la reproducción de texto, pulse la tecla “VOL + ” para ver los 3 marcadores.
- Pulse la tecla “ ” o “ ” para seleccionar un marcador y pulse la tecla “∩∩” para que
aparezca automáticamente la página con marcador.
Modo Grabación
- En el menú principal, seleccione el elemento de menú Record (Grabación) y pulse la
tecla “∩∩” para acceder al modo de Grabación.
16
Page 63

- En el modo de Grabación, pulse la tecla / para que se inicie automáticamente la grabación.
- Durante la grabación, pulse la tecla para hacer una pausa y vuelva a pulsarla para
reanudar la grabación.
- Para terminar la grabación, pulse y mantenga pulsada la tecla “∩∩” para guardar la
grabación y volver al menú principal.
Nota: Los archivos grabados (formato WAV) se pueden reproducir en el menú Music
(Música).
- Modo Explorador
El modo Explorador muestra todas las carpetas y archivos almacenados en el reproductor.
- En el menú principal, seleccione el menú Explorer (Explorador) y pulse la tecla “∩∩” para
acceder a él.
Modo Explorador
- Cuando aparezca la lista de reproducción del Explorador, pulse la tecla “ ” o “ ”
para seleccionar una carpeta o archivo.
- Si selecciona una carpeta, pulse la tecla “∩∩” para acceder a ella.
- Si selecciona un archivo, pulse la tecla “∩∩” para iniciar automáticamente la
reproducción.
Nota: Durante la reproducción, pulse y mantenga pulsada la tecla “∩∩” para volver al menú
principal.
Borrado de un archivo
- En la lista de reproducción del Explorador, con el archivo seleccionado, pulse la tecla “VOL
–” para borrarlo.
- Cuando aparezca el indicador “Delete File” (Borrar archivo), seleccione “YES” (Sí) y pulse
la tecla“∩∩” para confirmar el borrado.
Nota: NO se admite el borrado de carpetas.
Modo Juego
El reproductor incluye un juego tipo Tetrix gratuito.
- En el menú principal, seleccione el menú Game (Juego) y pulse la tecla “∩∩” para acceder
al modo Juego.
Teclas de control del juego
- Para empezar/hacer una pausa, pulse la tecla /.
- Para desplazarse a izquierda o derecha, pulse la tecla “ ” o “ ”.
- Para girar la “pieza que cae”, pulse la tecla “VOL+”.
- Para acelerar la velocidad de la “pieza que cae”, pulse la tecla “VOL–”.
17
Page 64

Nota: En el modo Juego, pulse y mantenga pulsada la tecla “∩∩” para volver al menú
principal
Modo Configuración
En el modo Configuración hay 7 opciones disponibles.
En el menú principal, seleccione el menú Settings (Configuración) y pulse la tecla “∩∩” para
acceder al modo de Configuración.
- En el modo de Configuración, pulse la tecla “ ” o “ ” para desplazarse a cualquiera
de las 7 opciones de Teclas de control del juego y pulse “∩∩” para acceder a las opciones
individuales del submenú.
- Pulse la tecla “ ” o “ ” para seleccionar la configuración precisa de cada una de las
opciones.
- Para empezar/hacer una pausa, pulse la tecla y pulse la tecla “∩∩” para confirmar los
cambios.
- Para desplazarse a izquierda o derecha, pulse la tecla “ ” o “ ”.
Para girar la “pieza que cae”, pulse la tecla “VOL+”.
Nota: En las opciones del submenú, pulse la tecla para volver al menú anterior o pulse
- Para acelerar la velocidad de la “pieza que cae”, pulse la tecla “VOL–”. Pulse y mantenga
pulsada la tecla “∩∩” para volver al menú principal.
Configuración de Música
Modo Repeat (Repetición)
- Once: Para reproducir todos los archivos una vez.
- Repeat 1: Para repetir 1 archivo.
- Folder Once: Para reproducir una vez todos los archivos de la carpeta.
- Folder Repeat: Para repetir todos los archivos de la carpeta.
- All Once: Para repetir una vez todos los archivos.
- All Repeat: Para repetir todos los archivos.
- Intro: Para reproducir los primeros 10 segundos de cada archivo de música.
Modo Play (Reproducción)
- Order: Reproducción de los archivos de música en orden secuencial.
- Shuffle: Reproducción de los archivos de música en orden aleatorio.
18
Page 65

EQ Select (Selección de ecualizador)
- Normal / 3D / Rock / Pop / Classic/ Bass / Jazz / User EQ
(Para poder usar la opción User EQ (Ecualización del usuario), tiene que personalizarla
en el modo User EQ)
Modo User EQ (el usuario puede personalizar sus ajustes favoritos de ecualización)
- En el modo de configuración User EQ, pulse la tecla “VOL +” o “VOL –” para ajustar
cada segmento de frecuencia individual (60 Hz, 300 Hz, 1 KHz, 3 KHz y 6 KHz)
- Los valores de frecuencia se ajustan en el intervalo de - 6 dB a + 6 dB.
- Pulse la tecla “ ” o “ ” para ajustar el segmento de frecuencia siguiente (el
segmento activado aparecerá en color rojo).
- Pulse la tecla “ ” o “ ” para pasar a la opción “YES” (SÍ) y pulse la tecla “∩∩”
para guardar los cambios y salir.
Configuración de radio FM
Stereo SW: Active/desactive el modo de FM estéreo
- ON (activar)
- OFF (desactivar)
FM Region: Configure la FM de su región.
- China
- Europa
- Japón
- EE UU
Configuración de grabación
REC Quality: Calidad de grabación y configuración del tamaño de archivo
- High Quality: Mejor calidad de grabación con tamaño de archivo más grande
- General Quality: Calidad de grabación normal con tamaño de archivo más pequeño.
REC Volume: El nivel de volumen más alto +5 producirá la calidad de grabación más
alta.
- +1 / - +2 / - +3 / - +4 / - +5
Configuración de visualización
Blight Time: Para activar el temporizador de retroiluminación (unidad en segundos). Esta
función se desactivará si el tiempo se establece en Always On (Siempre activado).
- 5s/ 10s / 15s / 20s / 30s / Always On
Lum: Para definir el brillo de retroiluminación. (1 es la opción más brillante)
- 1 / 2 / 3 / 4 / 5
Blight Mode: Cundo se configura el modo de ahorro de energía (Power Saver), la pantalla se
apagará de acuerdo con la configuración de Blight Time (pulse cualquier tecla para
reanudar).
Normal / Power Saver
19
Page 66

Configuración del sistema
About: Para visualizar información acerca de la versión del firmware, fecha y estado de la
memoria.
Upgrade: Para actualizar el firmware (si existe alguna actualización).
Default Set: Para restablecer el reproductor a la configuración predeterminada original.
Configuración del tiempo de apagado
Si no se pulsa una tecla en el intervalo de tiempo establecido, se apagará el reproductor.
(Esta función se desactivará si el tiempo se configura en OFF (desactivado)).
- OFF/10 Minutes/15 Minutes/30 Minutes/60 Minutes/120 Minutes
Configuración del Idioma
Para cambiar el idioma en el reproductor.
Uso del software AVI Converter
Este reproductor es compatible con el formato de archivo de vídeo AVI y puede transformar
los demás formatos de vídeo al formato AVI compatible utilizando el software integrado AVI
Converter.
El software es compatible totalmente con la conversión de vídeo a rápida velocidad de
múltiples formatos de vídeo al formato de alta calidad AVI.
Requisitos del sistema para instalar el software AVI Converter
- Procesador Intel o AMD (Intel Pentium 3 y superior, incluida la serie Celeron de Intel)
- Windows 2000 / Windows XP / VISTA
Instalación del software AVI Converter
- Para empezar, conecte el reproductor al ordenador y ejecute el programa de instalación de
AVI Converter (archivo EXE) precargado en el reproductor.
- Siga las instrucciones que aparecen en la pantalla para completar la instalación.
- Si la instalación es satisfactoria, se creará un icono del programa AVI Converter en el
escritorio del ordenador.
Haga doble clic en el icono de AVI Converter para empezar.
1. Haga clic en el botón Add (Agregar) para seleccionar el archivo de vídeo que desea
convertir.
20
Page 67

2. Haga clic en el botón Source File (Archivo fuente).
3. Busque el archivo de vídeo que desea convertir y haga clic en el botón Open (Abrir).
4. Seleccione el botón Target File Path (Ruta del archivo destino) para guardar el archivo
de vídeo convertido.
(Mantenga el resto de las opciones en su configuración predeterminada y haga clic en el
botón Save (Guardar) y Close (Cerrar)).
-
5. Por último, haga clic en el botón Convert Now (Convertir ahora) para iniciar el proceso
de conversión.
La conversión está completa cuando la información de estado muestra 100% y OK.
Haga clic en el botón Close (Cerrar) para salir.
21
Page 68

Por último, transfiera (mediante copiar y pegar) el archivo de vídeo convertido (formato
AVI) al reproductor; ahora ya está preparado para reproducir el vídeo.
Nota: Para el proceso de conversión de vídeo, utilice sólo el software AVI Converter que
se incluye en este reproductor. Los archivos de vídeo convertidos mediante software de
terceros podrían no funcionar correctamente en este reproductor.
22
Page 69

Solución de problemas
Problemas Acción
No hay energía Compruebe si está encendido
No se oye ningún sonido por los
auriculares
Mensaje de error: “Warning File
Format Error” (Aviso: error de formato
de archivo)
¿Cuál es el tipo de archivo común que
genera el error “Warning File Format
Error”?
Aparecen caracteres no identificados en
la pantalla LCD
No se puede transferir música 1. Compruebe que el cable USB funciona
1. Asegúrese de que el nivel de volumen no está
ajustado en “0”.
2. Compruebe que los auriculares están
conectado correctamente al reproductor.
3. Verifique que el archivo de música no está
dañado. Pruebe con otros archivos de música.
Pruebe lo siguiente:
- Ponga el interruptor de seguridad de
encendido/apagado en la posición OFF.
- Conecte el reproductor al PC y borre el archivo
que está dañado o cualquier archivo de vídeo que
no sea estándar del reproductor.
- Desconecte el reproductor del ordenador e
inténtelo de nuevo.
El mensaje de error se genera cuando el
reproductor detecta un formato de archivo que
no es compatible. Si este error se produce en un
archivo de vídeo, pruebe a convertirlo al formato
AVI con el software AVI Converter e inténtelo de
nuevo.
Asegúrese de que está seleccionado el idioma
correcto.
correctamente.
2. Asegúrese de que los controladores del
reproductor se han instalado correctamente (si es
preciso).
3. Compruebe que el puerto USB del ordenador
funciona correctamente. Reinicie el ordenador e
inténtelo de nuevo.
Si desea más información, visite nuestro sitio Web en
www.mpmaneurope.com
23
Page 70

24
Page 71

TK1
MP3/MP4/FM -soitin
Ohjekirja
www.mpmaneurope.com
Page 72

Pidä aina kopio alkuperäisestä datastasi
Ennen kuin toimitat laitteesi takuupalveluun, tee varmuuskopio kaikista tiedoista, mukaan
lukien kaikki ohjelmistot. Vastaat itse kaikesta datan takaisin asennuksesta. Datan elvytys
ei sisälly takuupalveluun ja yhtiömme ei vastaa tiedoista, jotka ehkä katoavat tai vioittuvat
siirron tai korjauksen aikana.
Turvallisuusohjeet
* Älä altista äärimmäisille lämpötiloille.
* Älä anna minkään nesteen päästä laitteeseen.
* Älä kohdista soittimeen liikaa painetta.
* Älä altista suoralle auringonpaisteelle tai lämpölähteille.
* Älä yritä purkaa osiin tai korjata laitetta itse.
* Älä altista laitetta kemikaaleille kuten bensiinille tai tinnerille.
* Älä säilytä laitetta pölyisessä tai kosteassa paikassa.
* Yhtiömme ei vastaa mistään datan katoamisesta johtuvista vahingoista, jotka
johtuvat särkymisestä, korjauksesta tai muista syistä.
Sisältö
Tärkeä huomautus................................................................................ ..1
Ennen soittimen käyttöä.......................................................................5
Näppäimet & Toiminto...........................................................................8
Päävalikon näyttö.............................................................................9
Akun lataaminen..........................................................................11
Aloitus..............................................................................................17
Virta päällä / Virta pois......................................................................20
Aseta näppäinlukitus.................................................................................20
Musiikin toisto....................................................................................21
Videon toisto....................................................................................25
FM-toimitila..............................................................................................27
Valokuva-toimitila..........................................................................................31
Teksti-toimitila.............................................................................................33
Äänitys-toimitila........................................................................................38
Explorer-toimitila.....................................................................................39
Peli-toimitila..........................................................................................40
Asetukset-toimitila.......................................................................................41
AVI-muunnosohjelmiston käyttö.....................................................48
Vianetsintä....................................................................................53
Page 73

Ennen soittimen käyttöä
Tuotteen ominaisuudet
* Litteä ja kevyt muotoilu.
* 1.8'' TFT 262K LCD-värinäyttö (128x160).
* Graafinen käyttäjäliittymä.
* Toisto MP3, WMA ja WAV audioformaatissa.
* Tukee AVI-videoformaattia (mukana tulee AVI-muunnosohjelmisto)
* Sisäänrakennettu FM-radioviritin asemien esiasetuksella ja FM-tallennus
WAV-formaatissa.
* Tukee valokuvan selausta JPEG-formaatissa.
* Digitaalinen äänen tallennus.
* Tekstin katselin TXT-formaatissa kirjanmerkkitoiminnolla.
* Synkroninen lyriikkanäyttö LRC-formaatissa.
* Henkilökohtaisen datatiedoston säilyttäminen.
* USB 2.0.
* Sisäänrakennettu uudelleen ladattava li-polymeri akku.
- Audio toisto (Korkeintaan 8 tuntia).
- Video toisto (Korkeintaan 4 tuntia).
* Tukee Windows 2000 / XP / VISTA.
Pakkauksen sisältö
TK1soitin
AC-adapteri
(Lisävaruste)
Page 74

NÄKYMÄ EDESTÄ
Päävalikon näyttö
Page 75

NRO Toiminto NRO
1 Laulun nimi & ID3 näyttö 7 Taajuuskorjain/Laulun
2 Toiston ajastin 8 Raidan kesto
3 Toiston toimitila 9 Akun merkkivalo
4 Toisto / Keskeytystila 10 A-B Toisto
5 Toiston asetus 11 Nykyinen raitanumero
6 Äänenvoimakkuustaso 12 Koko raita
Toiminto
lyriikkanäyttö
Akun lataaminen
* Lataa akku aina täysin ennen ensimmäistä käyttöä. (Noin 8
tuntia).
* Kytke soitin päälle ennen kuin aloitat latauksen
* Jos akun lataustaso on alhainen, lataa se välittömästi. Muuten soittimen
toiminta katkeaa automaattisesti tai virtaa ei voi kytkeä päälle.
* Akun ikä riippuu musiikin voimakkuustason
asetuksista ja näytön taustavalosta.
* Akun suojelemiseksi suosittelemme, että lataat sen
joka neljäs kuukausi, ellet käytä sitä hyvin pitkään aikaan.
* Voit ladata soittimen AC-adapterin (lisävaruste) kautta tai
tietokoneella USB-kaapeliliitännän kautta.
Page 76

Akun lataus tietokoneella
* Liitä mukana tulevan mini-USB kaapelin toinen pää soittimeen.
* Liitä mini USB kaapelin toinen pää tietokoneeseen.
* Lataus alkaa automaattisesti.
* Voidaksesi katsella akun latausprosessia soittimen päällä, pysäytä USB
laite tietokoneen tehtäväpalkilla “Safely Remove
Hardware” (Poista laite turvallisesti) toiminnolla. (Katso kohta “USB-levyn irrottaminen
tietokoneesta”).
* Kun se on täysin latautunut, akun merkkivalo muuttuu vihreäksi ja lataus loppuu
automaattisesti.
* Täyden latauksen aika: noin 4 tuntia.
Akun lataus AC-adapterilla (Lisävaruste)
* Liitä AC-adapterin (mini-USB) toinen pää
soittimeen mukana tulevalla USB-kaapelilla.
* Liitä AC-adapterin toinen pää seinäkoskettimeen
ja kytke virta päälle.
Page 77

* Lataus alkaa automaattisesti.
* Akun merkkivalo soittimen päällä alkaa vilkkua latauksen aikana.
* Kun se on täysin latautunut, akun merkkivalo muuttuu vihreäksi ja lataus loppuu
automaattisesti.
* Täyden latauksen aika: noin 3 tuntia.
Huom.
Käytä VAIN alkuperäistä AC-adapteria (lisävaruste) tai mukana tulevaa USB-kaapelia.
ÄLÄ käytä minkään muunmerkkistä AC-adapteria, koska se voi vaurioittaa vakavasti
soitinta.
Minimi järjestelmävaatimukset
* Intel Pentium prosessori 200MHz tai suurempi.
* Windows 2000 ja Windows XP.
* 32MB RAM (128MB suositeltava)
* 100MB kiintolevytilaa
* Vakio USB-portti
Huom.:
1. Kirjaudu sisään käyttäjänä voidaksesi suorittaa jonkun ohjelmiston asennuksen tai
valmisohjelmiston päivityksen (tarvittaessa). Muussa tapauksessa asennusprosessia ei ehkä
voi viedä loppuun onnistuneesti.
Aloitus
USB-levyn liittäminen tietokoneeseen
* Liitä mukana tulevan mini-USB kaapelin toinen pää soittimeen.
* Liitä mini-USB kaapelin toinen pää tietokoneeseen.
Page 78

* Kun liitäntä on onnistunut, soittimessa näkyy liitännän kuvake. Aloita audio- ja
videotiedostojen siirtäminen soittimeen tietokoneen kautta.
USB-levyn irrottaminen tietokoneesta
Windows 2000 tai Windows XP järjestelmissä noudata “Poista laite turvallisesti”
menetelmää tietokoneellasi. “Poista laite turvallisesti”
kuvake näkyy tietokoneen tehtäväpalkilla alla olevan kuvan
osoittamalla tavalla.
- Siirrä hiiri kuvakkeen päälle “Poista laite turvallisesti”
kehote ilmestyy.
- Kaksoisnapsauta “Poista laite turvallisesti” kuvaketta ja “
Poista laite turvallisesti” ikkuna näkyy. Valitse irrotettava laite ja
katkaise liitäntä tietokoneen ja laitteen välillä
napsauttamalla “Stop” painiketta.
Page 79

- Seuraavaksi näkyy: “The USB Mass Storage Device can now be safely removed
from the system” (USB-tallennuslaitteen voi poistaa turvallisesti) .
- Ota laite sitten turvallisesti pois tietokoneesi USB-portista.
Virta PÄÄLLÄ (ON) / Virta POIS (OFF)
- Käännä virtakatkaisin ON-asentoon, kytke virta päälle painamalla ja pitämällä painettuna
/ näppäintä.
- Missä tahansa toimitilassa katkaise virta painamalla ja pitämällä painettuna / näppäintä.
- Paina, kun aloitat tai keskeytät toiston.
Aseta näppäinlukitus
- Aseta näppäinlukitus painamalla ja pitämällä painettuna “VOL+” ja “VOL–“ näppäintä (2
sekuntia) samanaikaisesti.
Huom.: Kaikki näppäimet soittimen päällä lukkiutuvat.
- Lukitustilassa avaa lukitus taas painamalla ja pitämällä painettuna “VOL+” ja
“VOL–“ näppäintä (2 sekuntia) samanaikaisesti.
Huom.: Kaikki näppäimet soittimen päällä avautuvat.
Page 80

Musiikin toisto
- Päävalikossa valitse Musiikki-valikko ja valitse Musiikki-toimitila painamalla ∩∩ ”
näppäintä.
- Musiikin toisto alkaa automaattisesti.
- Musiikin toiston aikana valitse Musiikki-soittolista painamalla “ ∩∩ ” näppäintä.
Huom.: Jos kansio näkyy, palaa edelliseen valikkoon painamalla näppäintä
- Valitse Musiikki-tiedosto painamalla “ ” tai “ ” näppäintä.
- Paina “ ∩∩ ” näppäintä ja musiikin toisto alkaa automaattisesti.
- Musiikin toiston aikana, keskeytä painamalla näppäintä.
- Taukovalinnassa aloita toisto uudelleen painamalla näppäintä uudelleen.
Huom.: Musiikin toiston aikana, siirry edelliseen tai seuraavaan Musiikki-tiedostoon
painamalla “ ” tai “ ” näppäintä. Pikakelaa taakse tai eteenpäin painamalla ja
pitämällä painettuna “ ” tai “ ” näppäintä.
Musiikin toisto kansiossa
- Musiikin toiston aikana, siirry alivalikkoon painamalla “ ∩∩ ” näppäintä.
Huom.: Jos kansio näkyy, palaa edelliseen valikkoon painamalla näppäintä
- Valitse kansio tai Musiikki-tiedosto painamalla “ ” tai “ ” näppäintä.
- Kun kansio on valittu, siirry kansioon painamalla “ ∩∩ ” näppäintä.
- Kun Musiikki-tiedosto on valittu, paina “ ∩∩ ” näppäintä, jolloin toisto alkaa
automaattisesti.
Äänenvoimakkuuden säätö
- Musiikin toiston aikana, säädä äänenvoimakkuustaso painamalla “VOL+” tai
“VOL–“ näppäintä.
Huom.: Painamalla ja pitämällä painettuna “VOL+“ tai “VOL–“ näppäintä voidaan myös
säätää äänenvoimakkuustasoa (asetukset välillä 00 - 40).
Hyppääminen edelliseen / seuraavaan Musiikki-tiedostoon
Page 81

- Musiikin toiston aikana, siirry Edelliseen tai Seuraavaan raitaan painamalla “ ? ” tai “ ? ”
näppäintä.
Musiikki-tiedoston poistaminen
- Musiikin toiston aikana, hae alivalikko painamalla “ ∩∩ ” näppäintä.
- Valitse kansio tai Musiikki-tiedosto painamalla “ ” tai “ ” näppäintä.
- Kun kansio on valittu, siirry kansioon painamalla “ ∩∩ ” näppäintä.
- Kun Musiikki-tiedosto on valittu, poista painamalla “VOL –” näppäintä.
- “Poista tiedosto” kehotteen kohdalla on “KYLLÄ / EI”, vieritä “KYLLÄ” valintaan ja
vahvista poisto painamalla “ ∩∩ ” näppäintä.
- Kun tiedosto on poistettu, soitin palaa edellisiin alivalikkovalintoihin.
Huom.: Palaa päävalikkoon painamalla ja pitämällä painettuna ”∩∩ ” näppäintä.
A-B toisto
- Musiikin toiston aikana, paina ja pidä painettuna “ ∩∩ ” näppäintä.
- “A-B Toisto” ilmaisimella näkyy “A”.
- Paina ja pidä painettuna “ ∩∩ ” näppäintä uudelleen, “A-B” näkyy.
- Musiikkia toistetaan nyt “A-B” loop-toistolla.
- Peruuta “A-B” toistamalla soitto, aloita uudelleen painamalla ja pitämällä painettuna
“ ∩∩ ” näppäintä.
Synkroninen laulun lyriikkanäyttö
Kun soittimen Musiikki-tiedostossa on laulun lyriikkatiedosto samalla tiedostonimellä,
lyriikka näkyy automaattisesti musiikin toiston aikana.
Huom.: Soitin tukee laulun lyriikkatiedostoa .LRC formaatissa.
Sekä Musiikki-tiedoston (MP3 tai WMA) nimen ja Lyriikka-tiedoston (LRC) nimen on
oltava täysin sama. (Esim.: LoveSong.MP3 + LoveSong.LRC).
Paluu päävalikkoon
- Musiikin toiston aikana, siirry alivalikkoon painamalla “ ∩∩ ” näppäintä.
- Palaa päävalikkoon painamalla ja pitämällä painettuna “ ∩∩ ” näppäintä.
Video-toisto
Page 82

- Päävalikossa valitse Video-valikko ja siirry Video-toimitilaan painamalla “ ∩∩ ”
näppäintä.
- Kun Video-soittolista näkyy, valitse Video-tiedosto painamalla “ ” tai “ ”
näppäintä.
- Kun kansio on valittu, siirry kansioon painamalla “ ∩∩ ” näppäintä. Kun
Video-tiedosto on valittu, paina “ ∩∩ ” näppäintä ja toisto alkaa automaattisesti.
Video-tiedoston pikakelaus taakse / eteen
- Video-toiston aikana pikakelaa taakse/eteen painamalla ja pitämällä painettuna “ ” tai
“ ” näppäintä.
Äänenvoimakkuuden säätö
- Video-toiston aikana säädä äänenvoimakkuustaso painamalla “VOL+” tai
“VOL–“ näppäintä.
Huom.: Painamalla ja pitämällä painettuna “VOL+“ tai “VOL–“ näppäintä voidaan myös
säätää äänenvoimakkuustasoa (asetukset välillä 00 - 40).
Paluu soittolistalle
- Video-toiston aikana palaa soittolistalle painamalla “ ∩∩ ” näppäintä.
Huom.: Palaa päävalikkoon painamalla ja pitämällä painettuna “ ∩∩ ” näppäintä.
Video-tiedoston poistaminen
- Video-alavalikossa, valitse kansio tai Video-tiedosto painamalla “ ” tai “ ”
näppäintä.
- Kun kansio on valittu, siirry kansioon painamalla “ ∩∩ ” näppäintä.
- Kun Video-tiedosto on valittu, poista painamalla “VOL –” näppäintä.
- “Poista tiedosto” kehotteen kohdalla valitse “KYLLÄ / EI”, vieritä “KYLLÄ” valintaan ja
vahvista poisto painamalla “ ∩∩ ” näppäintä.
- Kun tiedosto on poistettu, soitin palaa alivalikon valintoihin.
Huom.: Palaa päävalikkoon painamalla ja pitämällä painettuna “∩∩ ” näppäintä.
FM-toimitila
Page 83

Ennen alkamista kuuloke on liitettävä soittimeen FM-toimitilaa käytettäessä. Se toimii
antennina radiotaajuuden vastaanotossa.
FM-alue on välillä 87.5Mhz - 108Mhz.
- Valitse päävalikossa FM-valikko ja siirry FM-toimitilaan painamalla “ ∩∩ ” näppäintä.
Taajuuden haku manuaalisesti
- FM-toimitilassa siirry alivalikkoon painamalla “ ∩∩ ” näppäintä.
Huom.: Palaa FM-toimitilaan painamalla “ ∩∩ ” näppäintä tai palaa päävalikkoon
painamalla ja pitämällä painettuna “ ∩∩ ” näppäintä.
- Vieritä “Manuaalinen” valintaan ja paina “ ∩∩ ” näppäintä.
- Valitse manuaalisesti suosikkitaajuus painamalla “ ” tai “ ” näppäintä.
- Esiaseta manuaalisesti valittu taajuus painamalla “ ∩∩ ” näppäintä ja vieritä “MEM”
valintaan ja sen jälkeen paina “ ∩∩ ”.
- Kun esiasetettu asemalista näkyy, vieritä haluamallesi asemalle, joka näkyy punaisena
painamalla “ ? ” tai “ ? ” näppäintä ja tallenna taajuus sen jälkeen painamalla “ ∩∩ ”
näppäintä.
- “ Tallenna kanava” kehotteen kohdalla, valitse “ KYLLÄ” ja vahvista muutokset
painamalla “ ∩∩ ” näppäintä.
Huom.: Esiasetettu taajuus näkyy nyt esiasetetulla kanavalistalla (punaisena).
- Palaa FM-toimitilaan painamalla “ ∩∩ ” näppäintä.
Taajuuden automaattihaku
- FM toimitilassa, siirry alivalikkoon painamalla “ ∩∩ ” näppäintä.
- Vieritä “Auto” valintaan ja paina “ ∩∩ ” näppäintä.
- Soitin skannaa automaattisesti ja tallentaa saatavissa olevat taajuudet järjestyksessä.
Toista esiasetettu taajuus
- FM-toimitilassa siirry alivalikkoon painamalla “ ∩∩ ” näppäintä.
Page 84

- Vieritä ”Esiasetus” valintaan ja siirry esiasetettuun toimitilaan painamalla “ ∩∩ ”
näppäintä.
- Vieritä edelliseen tai seuraavaan esiasetettuun taajuuteen painamalla “ ” tai “ ”
näppäintä.
(Esim.: CH:01, CH02 ….)
- Palaa päävalikkoon painamalla ja pitämällä painettuna “ ∩∩ ” näppäintä.
Esiasetetun taajuuden poistaminen
- FM-toimitilassa, siirry alivalikkoon painamalla “ ∩∩ ” näppäintä.
- Vieritä “DEL” valintaan ja paina sen jälkeen“ ∩∩ ” näppäintä.
Huom.: Esiasetettu asemalista näkyy.
- Valitse poistettava esiasetettu taajuus painamalla “ ” tai “ ” näppäintä
ja paina sen jälkeen “ ∩∩ ” näppäintä.
- “Poista kanava” kehotteen kohdalla valitse “KYLLÄ” ja vahvista poisto painamalla
näppäintä.
Huom.: Juuri poistettu esiasetettu taajuus näkyy nyt tilapäisesti
“Tyhjä”. Poistettu esiasetettu taajuus korvataan seuraavalla saatavissa olevalla esiasetetulla
taajuudella. Uudista esiasetettu lista painamalla näppäintä, poista esiasetettu lista ja hae
se uudelleen voidaksesi nähdä uuden esiasetetun soittolistan.
FM-äänitys
- FM-toiston aikana siirry FM-äänitystoimitilaan painamalla ja pitämällä painettuna
“VOL+” näppäintä.
- Paina näppäintä ja äänitys alkaa automaattisesti.
Huom.: Keskeytä äänityksen aikana painamalla /näppäintä. Aloita taas painamalla
näppäintä uudelleen.
- Lopeta ja aloita äänitys painamalla ja pitämällä painettuna “ ∩∩ ” näppäintä.
Huom.:
- FM-äänitys tallennetaan tiedostonimellä “FM00001.WAV” soittimen juurihakemistoon,
kun laite liitetään tietokoneeseen.
- FM-äänitys voidaan soittaa Musiikki-toimitilassa.
- Alueilla joilla signaali on heikko, joitakin kanavia ei voi vastaanottaa tai vastaanotto voi
olla huono.
Valokuva-toimitila
Page 85

- Päävalikossa, valitse Valokuva-valikko ja siirry Valokuva-toimitilaan painamalla “ ∩∩ ”
näppäintä.
- Kun Valokuva-lista näkyy, valitse Valokuva-tiedosto painamalla “ ” tai “ ”näppäintä.
- Kun kansio on valittu, siirry kansioon painamalla “ ∩∩ ” näppäintä.
- Kun Valokuva-tiedosto on valittu, paina “ ∩∩ ” näppäintä ja Valokuva-toisto alkaa
automaattisesti.
- Katsele edellistä tai seuraavaa valokuvatiedostoa painamalla “ ” tai “ ” näppäintä.
- Valokuva-toiston aikana palaa valokuva listalle painamalla “ ∩∩ ” näppäintä tai
palaa päävalikkoon painamalla ja pitämällä painettuna “ ∩∩ ” näppäintä.
Valokuva-tiedoston poistaminen
- Poista Valokuva-listalla, kun valokuvatiedosto on valittu, tiedosto painamalla “VOL–”
näppäintä.
- “Poista tiedosto” kehotteen kohdalla valitse“KYLLÄ” ja vahvista poisto painamalla “ ∩
∩ ” näppäintä.
Teksti-toimitila
- Päävalikossa, valitse Teksti-valikko ja siirry Teksti-toimitilaan painamalla “ ∩∩ ”
näppäintä.
- Kun Teksti-lista näkyy, valitse Teksti-tiedosto painamalla “ ” tai “ ” näppäintä.
- Kun kansio on valittu, siirry kansioon painamalla“ ∩∩ ” näppäintä.
- Kun Teksti-tiedosto valitaan, paina “ ∩∩ ” näppäintä ja toisto alkaa
automaattisesti.
Page 86

- Vieritä taakse tai eteenpäin katsellaksesi tekstiä painamalla “ ” tai “ ” näppäintä.
- Tekstin toiston aikana palaa Teksti-listalle painamalla “ ∩∩ ” näppäintä tai palaa
päävalikkoon painamalla ja pitämällä painettuna “ ∩∩ ” näppäintä.
Teksti-tiedoston poistaminen
- Teksti-listalla kun Teksti-tiedosto on valittu, poista tiedosto painamalla “VOL–” näppäintä.
- “Poista tiedosto” kehotteen kohdalla valitse “KYLLÄ” valinta ja vahvista poisto
painamalla “ ∩∩ ” näppäintä.
Sivun kirjainmerkki
Teksti-toiminto tukee 3 kirjainmerkkisivua pikahaussa.
- Tekstin toiston aikana, vieritä taakse- tai eteenpäin katsellaksesi tekstiä painamalla “ ”
tai “ ” näppäintä.
- Luo kirjainmerkki haluamallesi sivulle painamalla näppäintä, jolloin 3
kirjainmerkkiä näkyy.
Min - Vieritä johonkin 3 seuraavasta kirjainmerkistä ja vahvista asetukset painamalla “ ∩
∩ ” näppäintä.
Kirjainmerkkisivun katselu
- Tekstin toiston aikana katsele 3 kirjainmerkkiä painamalla “VOL + ” näppäintä.
- Valitse kirjainmerkki painamalla “ ” tai “ ” näppäintä ja paina sen jälkeen
Page 87

“ ∩∩ ” näppäintä ja kirjainmerkkisivu näkyy automaattisesti.
Äänitys-toimitila
- Päävalikossa, valitse Äänitys-valikko ja siirry Äänitys-toimitilaan painamalla “ ∩∩ ”
näppäintä.
- Äänitys-toimitilassa paina / näppäintä ja tallennus alkaa automaattisesti.
- Äänityksen aikana keskeytä äänitys painamalla näppäintä ja aloita uudelleen
painamalla .
- Lopeta äänitys painamalla ja pitämällä painettuna “ ∩∩ ” näppäintä, tallenna äänitys
palaamalla päävalikkoon.
Huom.: Äänitetyt tiedostot (WAV formaatti) voidaan toistaa Musiikki-valikossa.
- Explorer toimitila
Explorer-toimitila näyttää kaikki soittimeen tallennetut kansiot ja tiedostot.
- Päävalikossa, valitse Explorer-valikko ja siirry siihen painamalla “ ∩∩ ” näppäintä
Explorer-toimitila
- Kun Explorer soittolista näkyy, valitse tiedosto painamalla “ ” tai “ ” näppäintä.
- Kun kansio on valittu, siirry kansioon painamalla “ ∩∩ ” näppäintä.
- Kun tiedosto on valittu, paina“ ∩∩ ” näppäintä ja toisto alkaa automaattisesti.
Huom.: Toiston aikana palaa päävalikkoon painamalla ja pitämällä painettuna “ ∩∩ ”
näppäintä.
Tiedoston poistaminen
- Poista Explorer-soittolistalta valittu tiedosto painamalla “ VOL – ” näppäintä.
- “Poista tiedosto” kehotteen kohdalla valitse“KYLLÄ” ja vahvista poisto painamalla “ ∩
∩ ” näppäintä.
Huom.: Kansion poisto EI ole tuettu.
Peli-toimitila
Soittimen mukana tulee ilmainen sisäänrakennettu Brick Game-peli.
Page 88

- Valitse päävalikossa Game-valikko ja siirry Peli-toimitilaan painamalla “ ∩∩ ”
näppäintä.
Pelin säätimet
- Aloita/keskeytä painamalla / näppäintä.
- Siirry vasemmalle tai oikealle painamalla “ ” tai “ ” näppäintä.
- Pyöritä “Falling Brick”, painamalla “VOL+” näppäintä.
- Kiihdytä “Falling Brick” nopeutta painamalla “VOL–” näppäintä.
Huom.: Peli-toimitilassa palaa päävalikkoon painamalla ja pitämällä painettuna“ ∩∩ ”
näppäintä.
*
Asetukset-toimitila
Asetukset-toimitilassa on 7 asetusta.
Päävalikossa, valitse Asetukset-valikko ja siirry Asetukset-toimitilaan painamalla“ ∩∩ ”
näppäintä.
- Asetukset-toimitilassa paina “ ” tai “ ” näppäintä ja vieritä johonkin 7
Pelin säätimet-valinnasta ja siirry alivalikkovalintoihin painamalla“ ∩∩ ” näppäintä.
- Valitse haluamasi asetukset painamalla “ ” tai “ ” näppäintä jokaisessa valinnassa.
- Aloita / keskeytä painamalla näppäintä ja vahvista muutokset painamalla “ ∩∩ ”
näppäintä.
- Siirry vasemmalle tai oikealle painamalla “ ” tai “ ” näppäintä.
Pyöritä “Falling Brick”, painamalla “VOL+” näppäintä.
Huom.: Alivalikon valintojen kohdalla paina näppäintä voidaksesi palata edelliseen
valikkoon tai paina
- Kiihdytä ”Falling Brick” nopeutta painamalla “VOL–” näppäintä. Palaa päävalikkoon
painamalla ja pitämällä painettuna “ ∩∩ ” näppäintä.
Musiikkiasetukset
Page 89

Toisto-toimitila
- Kerran: Soittaa kaikki tiedostot kerran.
- Toisto 1: Toistaa yhden tiedoston.
- Kansio kerran: Toistaa kaikki kansion tiedostot kerran.
- Kansion toisto: Toistaa kaikki tiedostot kansiossa.
- Kaikki kerran: Toistaa kaikki tiedostot kerran.
- Kaikkien toisto: Toistaa kaikki tiedostot.
- Intro: Toistaa ensimmäiset 10 sekuntia jokaisesta musiikkitiedostosta.
Soitto-toimitila
- Järjestys: Musiikin toisto järjestyksessä.
- Satunnaisesti: Musiikin toisto satunnaisesti.
EQ-valinta
- Normal / 3D / Rock / Pop / Classic/ Bass / Jazz / User EQ
(User EQ on mukautettava User EQ toimitilassa ennen kuin käytät valintaa)
User EQ toimitila (Käyttäjä voi mukauttaa EQ mieliasetuksensa)
- User EQ asetuksissa säädä jokainen yksittäinen taajuussegmentti painamalla “VOL +”
tai “VOL –” näppäintä. (60Hz、300 Hz、1KHz、3KHz、6KHz)
- Taajuusasetukset säädetään -6dB~+6dB välein.
- Paina “ ” tai “ ” näppäintä voidaksesi säätää seuraavan taajuussegmentin.
(aktivoitu segmentti ilmaistaan punaisella värillä)
- Paina “ ” tai “ ” näppäintä voidaksesi siirtyä “KYLLÄ” valintaan ja tallenna
muutokset ja poistu painamalla “ ∩∩ ”näppäintä.
FM Radioasetukset
Stereo SW: Aseta FM stereo toimitila ON/OFF
- ON
- OFF
FM-alue: Kokoonpane FM alueellesi.
- Kiina
- Eurooppa
- Japani
- USA
Äänitysasetukset
REC Quality: Äänityslaatu & tiedoston kokoasetukset
- High Quality: Parempi äänityslaatu suuremmalla tiedostokoolla.
- General Quality: Normaali äänityslaatu pienemmällä tiedostokoolla.
REC Volume: Suurimmat asetukset +5 saa aikaan voimakkaimman äänityslaadun.
- +1 / - +2 / - +3 / - +4 / - +5
Page 90

Näytön asetukset
Blight aika: Taustavalon ON ajastimen asettaminen (yksikkö sekunteina). Tämä toiminto
ei toimi, kun aika on asetettu Aina päällä (Always On).
- 5s/ 10s / 15s / 20s / 30s / Always On
Lum: Taustavalon kirkkauden asetus. (1 on kirkkain asetus)
- 1 / 2 / 3 / 4 / 5
Blight toimitila: Kun se on asetettu energiansäästön toimitilaan (Power Saver),
näyttöruutu kytkeytyy pois
Blight Time asetusten mukaisesti (Aloita uudelleen painamalla näppäintä).
Normal / Power Saver
Järjestelmäasetukset
Mistä: Näyttää tiedot valmisohjelmistoversiosta, päivämäärästä ja
muistin tilasta.
Päivitys: Valmisohjelmiston päivitys (mikäli on).
Oletusasetus: Palauttaa soittimen alkuperäisiin oletusasetuksiin.
Virran katkaisuajan asetukset
Kun mitään näppäintä ei paineta asetetun ajan sisällä, soitin kytkeytyy pois.
(Tämä toiminto ei ole käytössä, jos aika on asetettu OFF)
- OFF/10 Minuuttia/15 Minuuttia/30 Minuuttia/60 Minuuttia/120 Minuuttia
Kielen asetukset
Vaihdetaan valitun kielen asetukset soittimessa.
AVI-muunnosohjelmiston käyttö
Tämä soitin tukee AVI-formaatin videotiedostoja ja voi muuttaa muut
videoformaatit tuettuun AVI-formaattiin käyttämällä niputettua AVI-
muunnosohjelmistoa.
Ohjelmisto tukee täysin multi-videoformaatin videon pikamuunnosta
korkealaatuiseen AVI-formaattiin.
Järjestelmävaatimukset AVI-muunnosohjelmiston asentamista
varten
Page 91

- Intel tai AMD prosessori (Intel Pentium 3 tai suurempi, mukaan lukien Intel
Celeron serjat)
- Windows 2000 / Windows XP / VISTA
AVI-muunnosohjelmiston asentaminen
- Liitä soitin tietokoneeseen ja suorita esiladattu AVI-muunnosohjelma (EXE tiedosto), joka
on soittimessa.
- Vie asennus loppuun noudattamalla ruudulla olevia ohjeita.
- Kun asennus on suoritettu onnistuneesti, AVI-muunnosohjelman kuvake ilmestyy
tietokoneen ruudulle.
Aloita kaksoisnapsauttamalla AVI muuntimen kuvaketta.
1. Napsauta Lisää-painiketta ja valitse muunnettava videotiedosto.
2. Napsauta Lähdetiedosto-painiketta.
3. Selaa siihen videotiedostoon tietokoneessa, jonka haluat muuntaa ja napsauta
Avaa-painiketta.
4. Valitse Kohdetiedostopolku -painike voidaksesi tallentaa muunnetun videotiedoston.
(Pidä muut asetukset oletuksina ja napsauta Tallenna-painiketta,
ja sen jälkeen Sulje-painiketta)
Page 92

-
5. Napsauta lopuksi Muunna nyt -painiketta ja aloita videon muunnosprosessi.
Muunnos on täydellinen, kun tilatiedoissa näkyy 100% ja
OK. Lopeta napsauttamalla Sulje-painiketta.
Siirrä lopuksi (käyttämällä kopioi & liitä) muunnettu videotiedosto (AVI
formaatti) soittimeen ja sitten olet valmis videotoistoon.
Huom.: Käytä vain AVI-muunnosohjelmistoa tässä soittimessa
videomuunnokseen. Video-tiedostot jotka muunnetaan muiden tekemällä ohjelmistolla
eivät toimi ehkä oikein tässä soittimessa.
Vianetsintä
Vika Toimenpide
Ei virtaa Tarkasta onko virta päällä
Kuulokkeesta ei kuulu ääntä 1. Varmista että äänenvoimakkuustaso ei ole
asetettu “0”.
2. Tarkasta että kuuloke on liitetty oikein
soittimeen.
3. Tarkasta onko musiikkitiedosto
korruptoitunut. Yritä uudelleen toisilla
musiikkitiedostoilla.
Virheviesti: “Varoitus
Tiedostoformaattivirhe”
Kokeile seuraavaa:
- Käännä virtakytkin OFF-asentoon.
- Liitä soitin PC:hen ja poista tiedosto, joka
on vaurioitunut tai ei ole vakio
audio/videotiedosto soittimessa.
- Irrota soitin tietokoneesta ja yritä
Page 93

uudelleen.
Mikä on yleinen tiedostotyyppi, joka saa
aikaan “Varoitus tiedostoformaattivirhe”
virheen?
LCD-ruudulla näkyy tunnistamattomia
merkkejä
Ei voi siirtää musiikkia 1. Tarkasta että USB-kaapeli toimii oikein.
Kun havaitaan, että soitin ei tue mitään
tiedostotyyppiä, virheviesti ilmaantuu. Jos
tämä virhe tapahtui videotiedostossa, yritä
muuntaa videotiedosto käyttämällä
AVI-muunninta ja yritä uudelleen.
Varmista, että on valittu oikea kieli.
2. Varmista että laiteohjaimet on asennettu
oikein (tarvittaessa).
3. Tarkasta että tietokoneen USB-portti toimii
oikein. Käynnistä tietokone ja yritä uudelleen.
Lisätietoja löydä t verkkosivustoltamme: www.mpmaneurope.com
Page 94

TK1
Lecteur MP3/MP4/FM
Mode d’emploi
www.mpmaneurope.com
Page 95

Conservez toujours une copie de vos données originales
Avant de renvoyer votre produit pour des services sous garantie, sauvegardez toutes vos
données, y compris tous les programmes logiciels. Vous serez responsable de la réinstallation
de toutes les données. Le service de garantie ne comprend pas la récupération de données et
notre société n’est pas responsable des données pouvant être perdue ou endommagées durant
le transit ou une réparation.
Instructions de sécurité
* N’exposez pas le lecteur à des températures extrêmes.
* Évitez que tout liquide pénètre dans le lecteur.
* N’appliquez pas au lecteur ou ne le soumettez pas à une pression excessive.
* N’exposez pas le lecteur à la lumière directe du soleil ou à des sources de chaleur.
* N’essayez pas de démonter et de réparer le lecteur vous-même.
* N’exposez pas le lecteur à des produits chimiques comme du benzène ou du diluant.
* Ne rangez pas le lecteur dans des endroits poussiéreux ou humides.
* Notre société rejette toute responsabilité pour toute demande de dommages et intérêts
résultant de la perte de données due à une panne, une réparation ou d’autres causes.
Table des matières
Notice importante................................................................................ ..1
Avant d’utiliser le lecteur.....................................................................5
Touches & fonctions..............................................................................8
Affichage menu principal.....................................................................9
Chargement de la batterie..................................................................11
Premiers pas............................................................................................17
Activation/désactivation.....................................................................20
Verrouillage des touches.....................................................................20
Lecture de musique.............................................................................21
Lecture de vidéo...................................................................................25
Mode FM..............................................................................................27
Mode Photo..........................................................................................31
Mode Text (texte).................................................................................33
Mode Record (enregistrement)...........................................................38
Mode Explorer (explorateur)..............................................................39
Mode Game (jeux)................................................................................40
Mode Settings (paramètres).................................................................41
Utilisation du logiciel AVI Converter..................................................48
Résolution des problèmes.....................................................................53
Page 96

Avant d’utiliser le lecteur
Caractéristiques du produit
* Design élégant et léger.
* Ecran LCD 1.8'' TFT 262 000 couleurs (128x160).
* Interface utilisateur graphique.
* Lecture des formats audio MP3, WMA et WAV.
* Prend en charge le format vidéo AVI (fourni avec le logiciel VI Converter)
* Tuner radio FM intégré avec stations prédéfinies et enregistrement FM en format WAV.
* Prend en charge la navigation photos en format JPEG.
* Enregistrement vocal numérique.
* Visualiseur de texte en format TXT avec fonction de signets.
* Affichage des paroles synchrone en format LRC.
* Sauvegarde de fichiers de données personnelles.
* USB 2.0.
* Batterie li-polymère rechargeable intégrée.
- Lecture audio (jusqu’à 8 heures max.).
- Lecture vidéo (jusqu’à 4 heures max.).
* Prend en charge Windows 2000 / XP / VISTA.
Contenu de l’emballage
Lecteur TK1
Ecouteurs
Câble USB
Adaptateur CA
(Facultatif)
Page 97

VUE AVANT
Affichage menu principal
Page 98

N° Fonction N° Fonction
1 Titre de la chanson &
Affichage ID3
2 Compteur lecture 8 Durée de la piste
3 Mode de lecture 9 Indicateur de batterie
4 Statut Lecture/Pause 10 Répétition A-B
5 Paramètre de lecture 11 Numéro de piste actuelle
6 Niveau de volume 12 Total pistes
7 Égaliseur / Affichage des paroles
de chanson
Page 99

Chargement de la batterie
* Chargez toujours la batterie entièrement avant utilisation initiale. (Environ 8
heures).
* Activez votre lecteur avant de lancer le mode de chargement
* Si le niveau de batterie est faible, rechargez-la immédiatement. Sinon,
le lecteur s’éteindra automatiquement ou ne pourra pas être rallumé.
* La durée de vie de la batterie varie selon les paramètres de niveau de
volume et l’affichage rétroéclairé.
* Afin de protéger l’état de la batterie, nous vous recommandons
de la charger tous les 4 mois si vous ne l’utilisez pas pendant très longtemps.
* Vous pouvez charger le lecteur grâce à l’adaptateur CA (facultatif) ou par
connexion du câble USB à l’ordinateur.
Chargement de la batterie à l’aide de l’ordinateur
* Connectez une extrémité du mini-câble USB fourni au lecteur.
* Connectez l'autre extrémité du mini-câble USB à l’ordinateur.
* Le processus de chargement commence automatiquement.
* Pour afficher le processus de chargement de la batterie sur le lecteur, arrêtez le dispositif
USB dans la zone de notification de l’ordinateur en utilisant la procédure « Safely Remove
Hardware » (Supprimer le périphérique en toute sécurité). (Consultez « Déconnexion du
disque USB de l’ordinateur »).
Page 100

* Lorsqu’elle est entièrement chargée, l’indicateur de batterie devient vert et
le chargement s’arrête automatiquement.
* Temps de chargement complet : Environ 4 heures ma.
Chargement de la batterie à l’aide de l’adaptateur CA (facultatif)
* Connectez une extrémité de l’adaptateur CA (mini USB) au
lecteur par le câble USB fourni.
* Connectez l’autre extrémité de l’adaptateur CA à une prise murale
et activez l’alimentation.
* Le processus de chargement commence automatiquement.
* L’indicateur de batterie sur le lecteur commencera à clignoter durant
le processus de chargement.
* Lorsqu’elle est entièrement chargée, l’indicateur de batterie devient vert et
le chargement s’arrête automatiquement.
* Temps de chargement complet : Environ 3 heures max.
Remarque
Utilisez UNIQUEMENT l’adaptateur CA original (facultatif) ou le câble USB
fourni. N’utilisez PAS d’adaptateur CA tiers car cela pourrait
endommager gravement le lecteur.
Configuration minimale
 Loading...