

Page 1
MP3 & Video Player
For Model No.
EN
MP135
Instruction Manual
Please read this instruction carefully before the operation
Page 2

2
Introduction
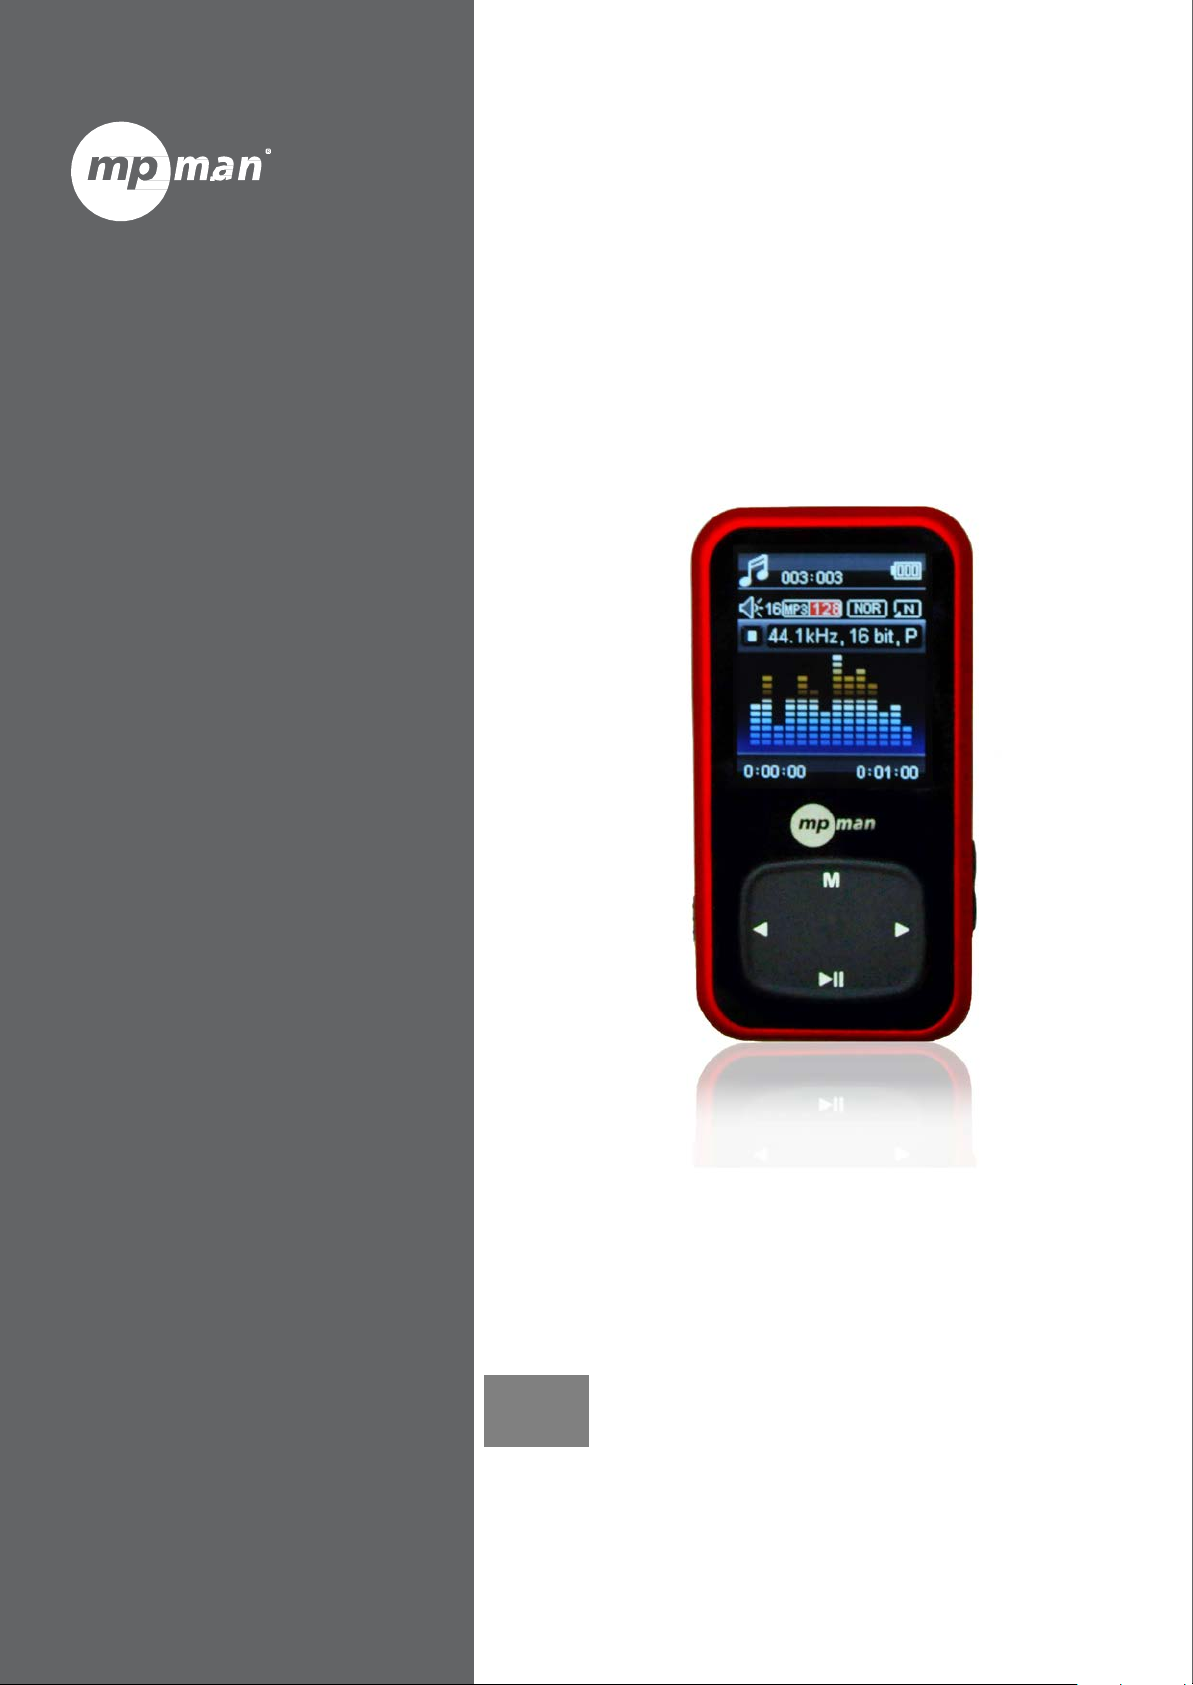
Congratulation for the purc hasin g of the MP4 Player. The high integration red uces the dev ice we ight and t he
dimensions and the use is comfortable. The big display with TFT technology offers clear and sharp
information and the USB 2.0 High Speed interface make easier the data transfer operation from/to the
computer. The EM825 MP3 Player has bu ilt-in a Li-Polymer battery rec hargeabl e by c omputer U SB port. By
the microphone ins ide it is possible t o record voice m essages and play them directly with the d evice or by
computer.
Before using this product, please read this manual and retain the instruction for future reference.
Page 3
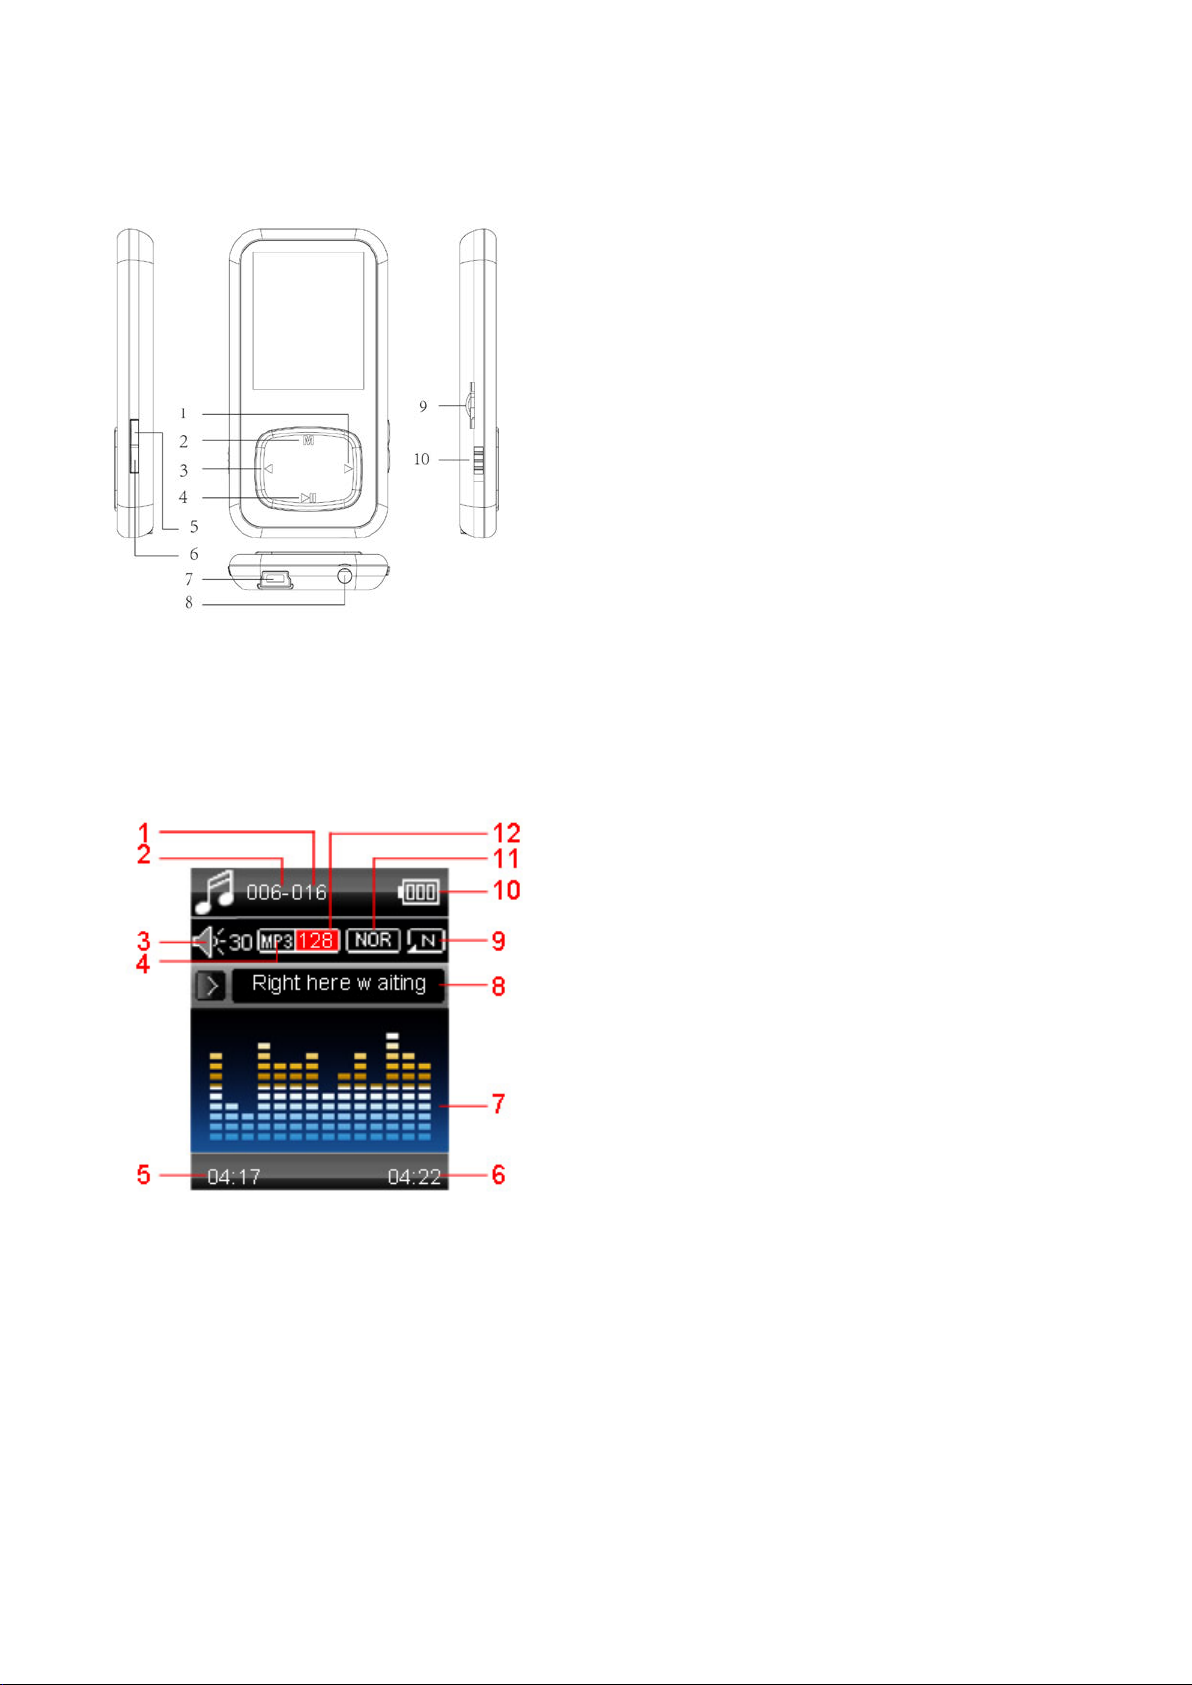
Description
1. Next [] / Forward []
1. Total Number of Songs
Here below you will find a product description
1. Display
2. Menu
3. Previous [] / Backward []
4. Play [] / Pause []
5. VOL +(Increase the Volume)
6. VOL – (Decrease the Volume)
7. USB Connector
8. Earphone Connector
9. MICRO SD Card Slot
10. Power ON/OFF
Here below you will find a display description
2. Current Song Location
3. Volume
4. File Format
5. Elapse d T i me
6. T ot al T ime
7. EQ Animation
8. Song Name
9. Repeat Mode
10. Battery Life
11. EQ Mode
12. Play Rate
Page 4
2. Use
The player can be rechar ged by the provided USB cable b y connec ting to t he PC.
2.1 Power ON/OFF
The MP3 player has bui lt-in a rechar geable batter y. At the first use we suggest to rechar ge the batter y for a
long period (around 8 hours). To recharge the battery please connect the MP3 player to USB computer port.
Powering On:.
1. Turn on On/Off button to On position
Powering Off:
1. Hold the Play [] / Pause [ ] key until the power-off animation begins
2. Then, turn the On/Off button to Off position.
2.2 Recharge the Player
During charging, an ic on on the right will show. You should first turn o n you PC,
and then connect the pla yer to the PC throught th e USB cabl e. The player should
be fully charged in 2 to 3 hours.
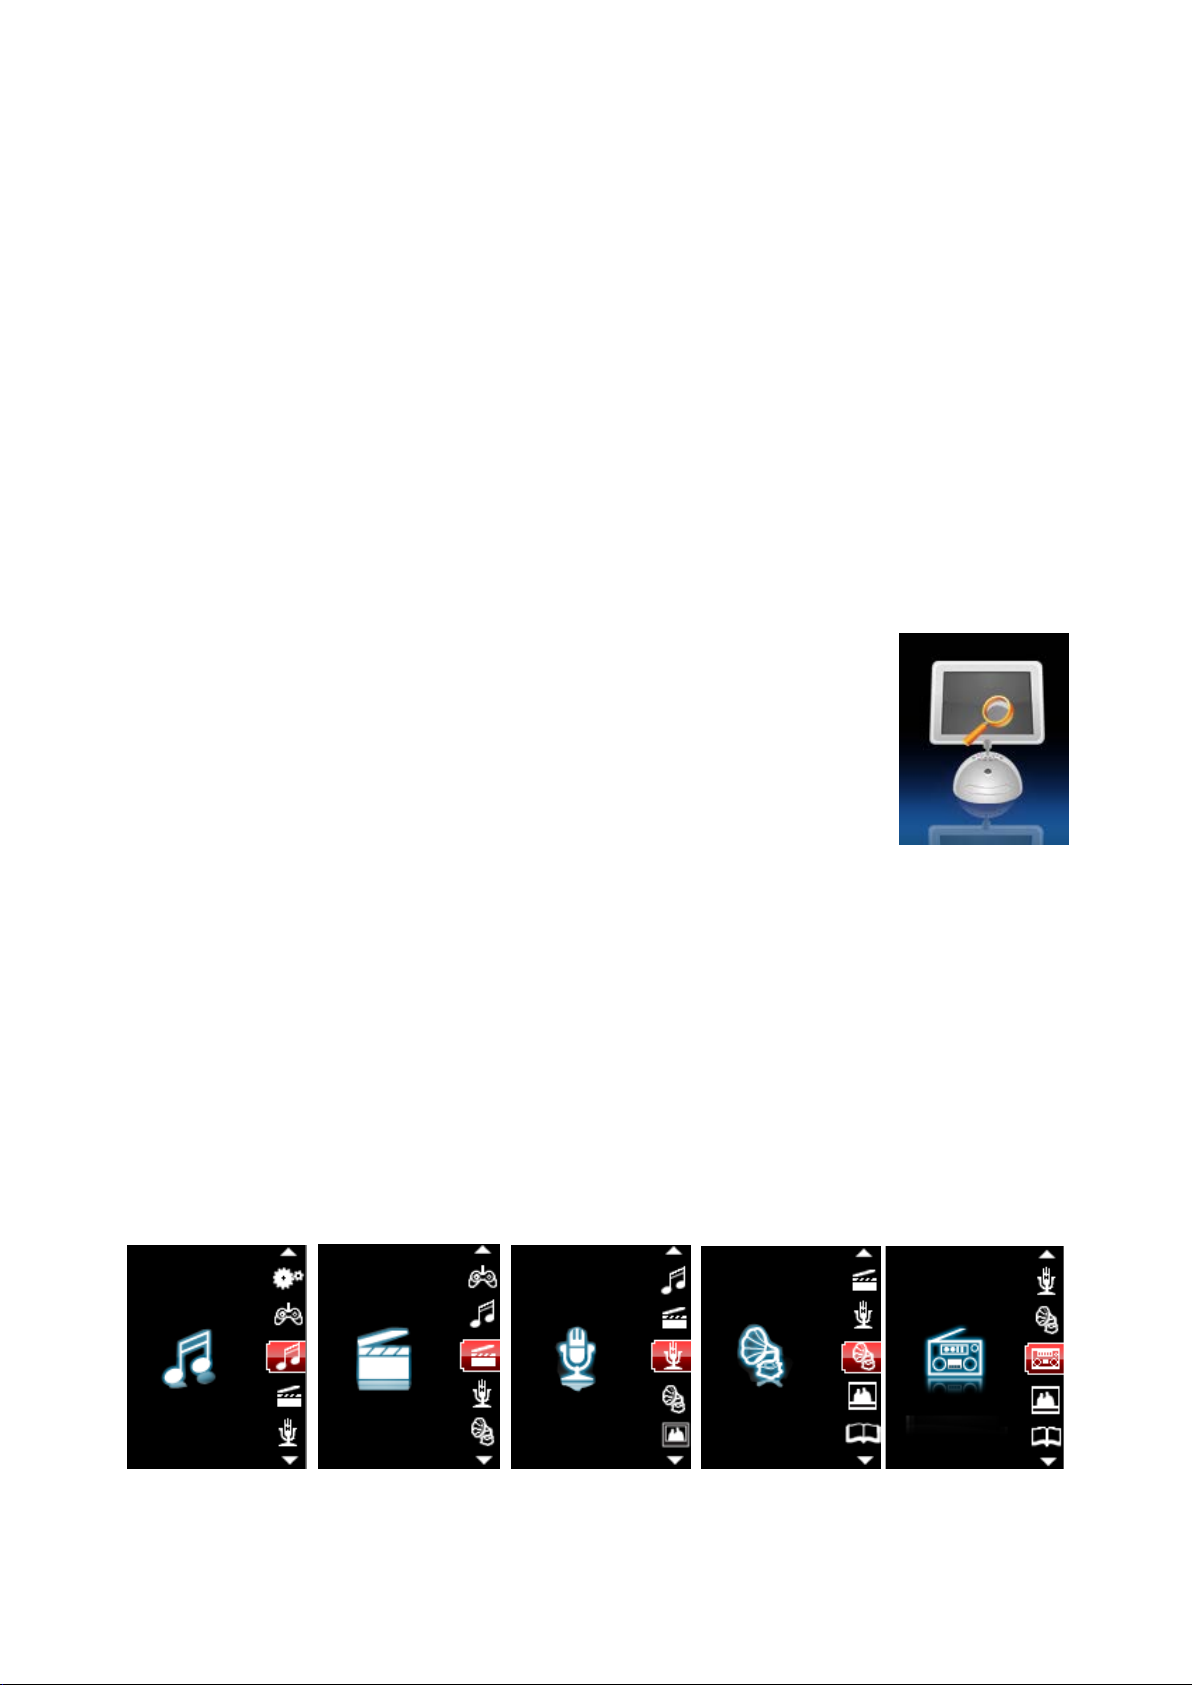
3. Main Menu
After powering on the MP3 player, you can see the main menu wit h 8 submenus (optio nal), which allo w you
to select different functions and options.
By using the [] or [] buttons, you can select the desire option, and then press MENU [M] button to
confirm the selection.
To access at the main m enu while you are inside any of these submenus, press and ho ld MENU [M] switch
for a few seconds. (Short pressing the MENU [M] switch usually opens the submenu option of each
submenus)
Page 5
Music:
Select this option to play song.
Movie:
Select this option to play AMV video.
Record:
Select this option to record voice messages by the microphone inside.
Play:
Select this option to play recorded voice message.
Radio:
Select this option to use the FM radio.
Text:
Select this option to read text.
Picture:
Select this option to browse and see photos.
Setting:
Select this option to access at system setup.
P L AY [ ►]:
Press the play [
] to start to play a song. Press the play button again to
REW & FFWD []
Press [] or [] to select the previous or the next song.
Volume (VOL+ and VOL-):
Press [VOL+] button to increase the volume and press [VOL-] button to
1. Power ON the MP3 Player, the screen will display the main menu
The available options are:
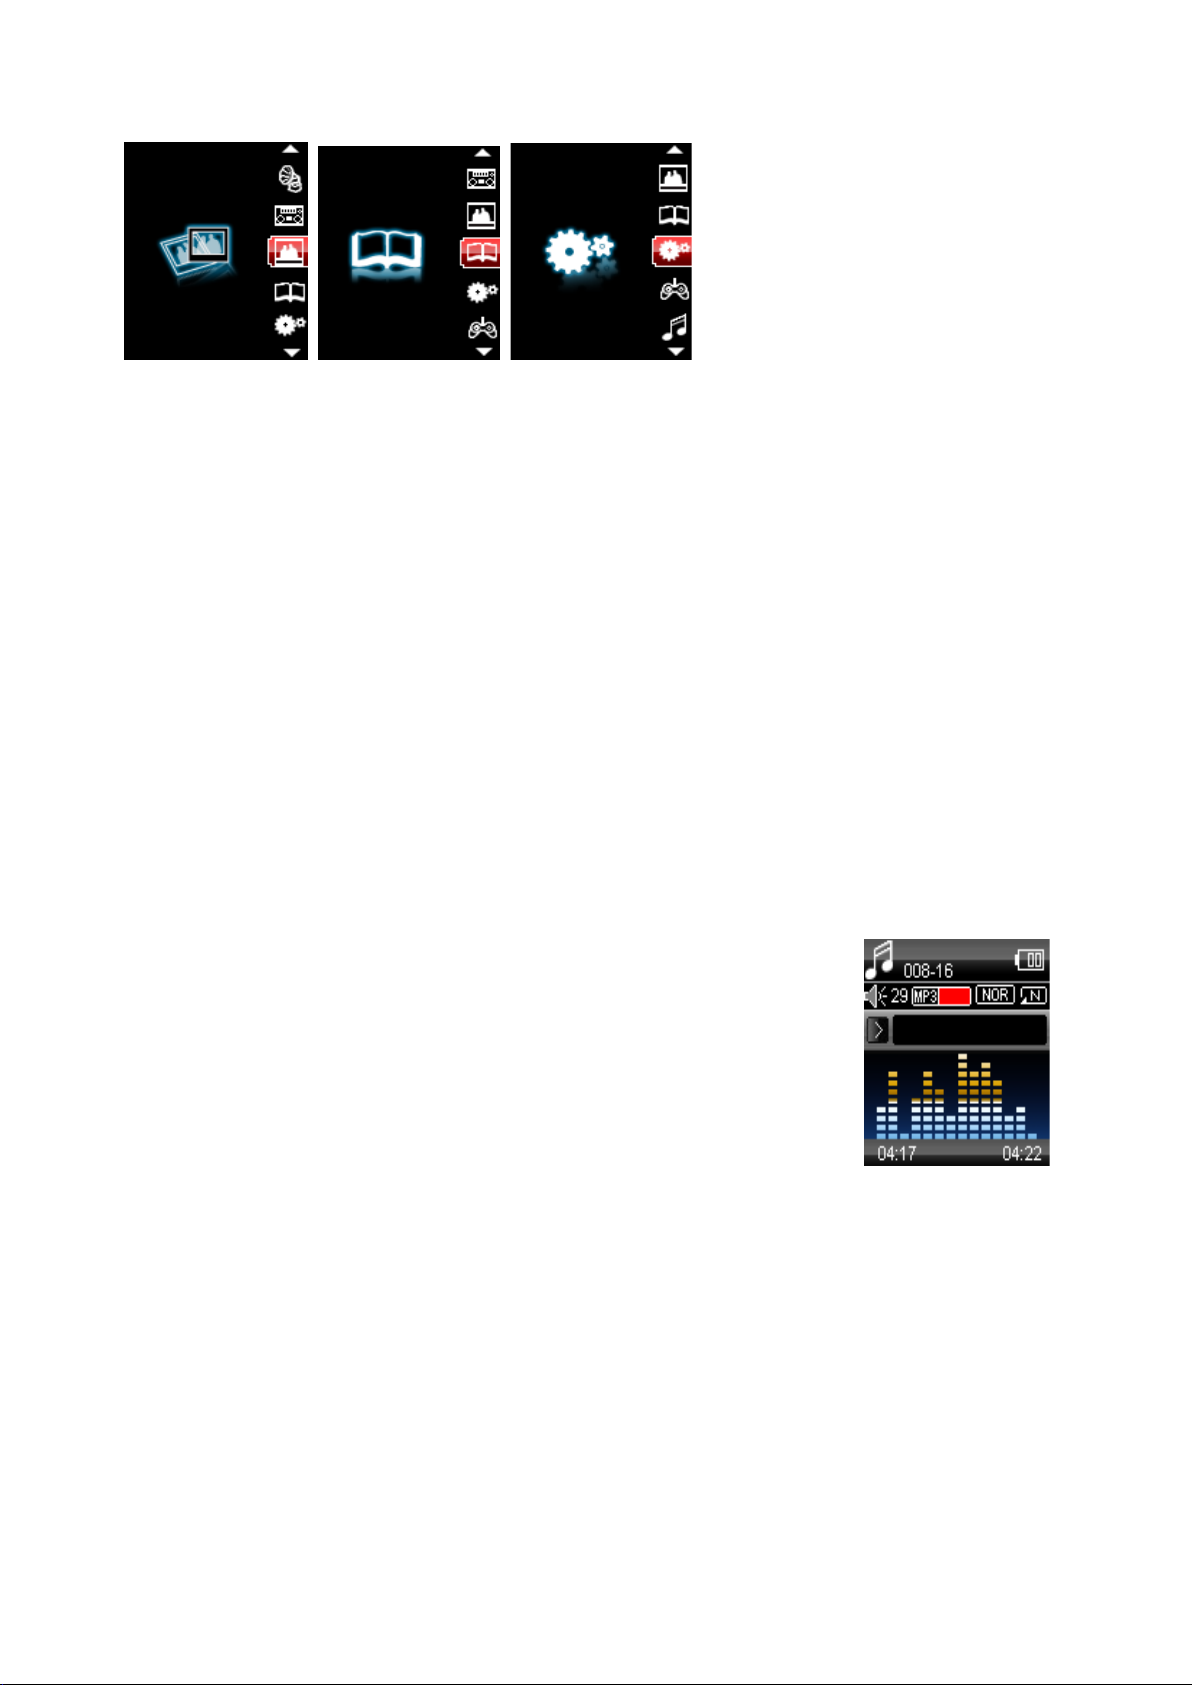
3.1 Music Mode
The music player option allows playing songs. To activate this option please follow here below instruction:
2. By using [] or [ ] buttons, select MUSIC PLAY option then press [M]
button.
3. Press PLAY [] button to start to play the first song available.
3.1.1 Key Function at Music Mode
During the song play it is possible to activate the following controls.
pause the song. To restart to play the song press play button again.
Hold the play button for longer time will eventually turn off the player
Press and Hold the [] or [] buttons to rewind or fast forward the song.
decrease the volume.
Page 6

3.1.2 Music Submenu
Status
Submenu Options
Status
Submenu Options
Local Folder
Repeat
Delete File
Equalizer
Delete All
Replay Mode
instruction:
By short pressing th e MENU [M] button, you can find the following music s ubmenus. Press [] or [] to
choose, and then press MENU [M] key to confirm each submenus. Use the same technique to navigate
inside each of the submenus.
Whil e M usic is paused
Whil e music is on
Local Folder:
Under this directory, you can choose to go up a f older level by pressing MENU [M] to conf irm. And
then you can choose the folder you want to play
Delete File:
Delete specific song you want.
Delete All:
Delete all music files using this option.
Repeat:
Seven repeat modes are listed including Normal, Repeat One, Folder, Repeat Folder, Repeat All,
Random and Intro.
Equalizer
With preset 7 equalizers including Natural, Rock, Pop, Classic, Soft, Jazz and DBB
3.1.3 A-B Repeat Function
The player can loop-pl aying a specified music interv al of a song. While Playing Mus ic, Press [M] button to
select replay mode ,then press the [M] button .set repeat start point A, and then pr es s []button to set repeat
end point B. The player will then loop-play the content between point A and B.
3.1.4 Lyric Display
The Player supports Lyrics Displa y, in which the lyrics would be sho wn synchroni zing with the actually lyrics
of the song. The fil e f or mat should be “.Irc”, an d t he f il e name should be exact l y th e same with the song ’s fil e
name and place within the same folder with the song. To activate this option, please follow here below
instruction:
3.2 AMV Mode
The AMV MODE allows to play movies in AMV Format. To activate this option please follow here below
1. While playing song, press and hold MENU [M] to activate lyrics display
2. Shor t press MENU [M] button again to de-activate the lyrics display and return to music play menu.
1. Power ON the MP3 Player, the screen will display the main menu.
2. By using [] or [] buttons, select AMV MODE option then press [M]
button.
3. Press PLAY [] button to start to play the first movie available.
Page 7

The Movie Player only plays AMV files, you need conversion from other fil e format in order to watch the movie
P L AY [ ►]:
Press the P LAY [
] to start to pla y a movie. Press t he pla y button ag ain to
REW & FFWD []
Press [] or [] to select the previous or the next movie.
Volume (VOL+ and VOL-):
Press [VOL+] button to increase the volume and press [VOL-] button to
Status
Submenu Options
Local Folder
Delete File
Delete All
Repeat
you like.
Note
3.2.1 Key Function at AMV Mode
During the song play it is possible to activate the following controls.
pause the movie. To restart to play the movie press play button again.
Hold the play button for longer time will eventually turn off the player
Press and Hold the [] or [] buttons to rewind or fast forward the movie.
decrease the volume.
3.2.2 AMV Submenu
By short pressing the MENU [M] button, you can find the following AMV submenus. Press [] or []to
choose, and then press MENU [M] key to confirm each submenus. Use the same technique to navigate
inside each of the submenus.
While Video is paused
Local Folder:
Under this director y, you can choose to go up a folder level by pressing MENU [M] to conf irm. And
then you can choose the folder you want to play
Delete File:
Delete specific video you want.
Delete All:
Delete all videos using this option.
Repea
t:
Seven repeat modes are listed including Normal, Repeat One, Folder, Repeat Folder, Repeat All,
Random and Intro.
3.3 Record (Voice messages recorder)
This option allows to record voice messages by using the microphone inside. To record voice message,
please follow here below instruction:
Page 8

P L AY [ ►]:
Press the PLAY [
] to start to pla y a rec or d ing. Press the play butto n a gai n t o
REW & FFWD []
Press [] or [] to select the previous or the next recording.
Volume (VOL+ and VOL-):
Press [VOL+] button to increase the volume and press [VOL-] button to
1. Power ON the MP3 Player, the screen will display the main menu.
2. By using [] or [] buttons, select RECORD option then press [M] button.
1. Power ON the MP3 Player, the screen will display the main menu.
3. Press PLAY [] button to start to recording.
4. You can listen to your wav file under the Play submenu.
During recording, Press the PL AY [ ] to start reco rding. Pres s the pla y button agai n to pause recor ding.
Hold the PLAY [] / M button for longer time will eventually stop recording.
By short pressing the M EN U [M] button, you ca n f ind the LOCAL FOLDER and REC T YP E. Press [] or []
to choose, and th en press MENU [M] key to conf irm each subm enus. Use the sam e technique to navigat e
inside each of the submenus.
1. Under the LOCAL FOLDER submenu, you can choose to go up a folder level by pressing [M] to
confirm. And then you can choose the folder you want to play
2. Under the REC TYPE submenu, you can choose the recording format including 32K BPS/128K BPS .
3.4 Play (Voice Messages Player)
The voice option allows to play the voice messages recorded by the MP3 Player. To activate this option,
please follow here below instruction:
2. By using [] or [] buttons, select Play option then press [M] button.
3. Press PLAY [] button to start to play the first recording available.
3.4.1 Key Function at VOICE Mode
During the recording play it is possible to activate the following controls.
pause the recording. To restart to play the recording press play button again.
Hold the play button for longer time will eventually turn off the player
Press and Hold the [] or [] buttons to rewind or fast forward the recording.
decrease the volume.
Page 9

3.4.2 VOICE Submenu
Status
Submenu Options
Status
Submenu Options
Local Folder
While music is on
Repeat
Delete File
Replay Mode
Delete All
Here below you will find the FM radio option list.
AUTO SERACH:
Select this option to start auto-searching for radio channels.
SAVE:
Select this option to save radio channels
DELETE:
Select this option to delete radio channels.
DELETE ALL:
Select this option to delete all radio channels.
NORMAL BAND:
Select this option to activate normal FM band.
JAPAN BAND:
Select this option to activate Japan FM band.
REC:
Select this option to start FM recording.
By short pressing the MEN U [M] button, you c an find the following music submenus. Press [] and [] to
choose, and then press MENU [M] key to confirm each submenus. Use the same technique to navigate
inside each of the submenus.
While Music is paused
Local Folder:
Under this director y, you can choose t o go up a folder level by pressing MENU [M] to confirm. And
then you can choose the folder you want to play
Delete File:
Delete specific voice file you want.
Delete All:
Delete all voice files using this option.
Repeat:
Seven repeat modes are listed including Normal, Repeat One, Folder, Repeat Folder, Repeat All,
Random and Intro.
Replay Mode:
You can loop-playing a specified music interval of a song.
3.5 FM (FM Radio)
When the FM Radio mode is activated it is possible to hear radio programs.
This option allows us to enjoy FM radio programs. To use it, please follow here below instruction:
1. Power ON the MP3 Player, the screen will display the main menu
2. By using [] or [] buttons, select FM option then press [M] button to confirm.
3. If there are preset channe ls, press PLAY [] button to play the first channel, press again for the
next channel.
3.5.1 FM Submenu
By short pressing the MENU [M] button, you can find the following FM submenus. Press [] and [] to
choose, and then press MENU [M]key to confirm each submenus. Use the same technique to navigate
inside each of the submenus.
Page 10

3.5.2 Automatic Search
Status
Submenu Options
paused
Local Folder
1. Power ON the MP3 Player, the screen will display the main
To scan automatically all the available channels, please follow here below instruction:
1. When the FM Mode is activated, press MENU [M] button to select AUTO SEARCH option.
2. Press [M] button to s tart th e a utomatic search. T he M P3 P layer will store the f ir st 20 radio pro gr ams
available.
3.5.3 Manual Search and Storing Channels
To scan manually the frequencies please follow here below instruction:
1. When the FM Mode is activated, long pressing the [] or [] buttons to start auto scanning.
Scanning stops as an available channel is found.
2. By short pressing the [] or [] buttons to step-up scanning.
3. Press MENU [M] but ton to select SAVE option.
4. Press PLAY [] and this specific channel will be saved as the last channel
5. Repeat the step from 1 to 4 for each desired radio pr ogram by keeping i n mind that the MP3 P layer
has 20 memory positions.
3.5.4 FM Radio Record (REC)
To record FM radio program please follow here below instruction:
1. When the FM Radio Mode is activated, press MENU [M] button to select REC option.
2. Press PLAY [] button to start the recording.
3. Press PLAY [] button to pause the recording and press it again to restart the recording.
4. To stop and save the recording, long press [M] button, will return to FM mode.
3.6 E-BooK
The Ebook option allows reading text file. To activate this option please follow here below instruction:
menu.
2. By using the [] or [] buttons se lect E-book, an d then press
[M] button to confirm
3. Use [] or [] buttons to choose the file
4. Press PLAY [] button to start reading the file
3.6.1 E-Book Submenu
By short pressing th e MENU [M] button, you can find the f ollowing music submenus. Press [] or [] to
choose, and the n press [M] k e y to conf irm each submenus. Us e th e sam e techni que to navig ate ins ide eac h
of the submenus.
Page 11

Playback Set
Delete File
Delete All
Local Folder:
Status
Submenu Options
Local Folder
Playback Set
Delete File
Delete All
1. Power ON the MP3 Player, the screen will display the main
Under this director y, you can choose to go up a folder level by pressing MENU [M] to conf irm. And
then you can choose to folder you want to play
Play Set:
You can choose between manual pla y and auto pla y. For auto play, you can set the playing tim e fr om
1 to 10 seconds for each page of the E-book.
Delete File:
Delete specific text file you want.
Delete All:
Delete all text files using this option.
PHOTO
The Photo option allows browsing JPG file. To activate this option please follow here below instruction:
menu.
2. By using the [] or [] but tons select PHOTO, and then press
[M] button to confirm
3. Use [] or [] buttons to choose the file
4. Press PLAY [] button to start browsing the file
3.6.2 PHOTO Submenu
By short pressing th e MENU [M] button, you can find the following music submenus. Press [] or [] to
choose, and the n press [M] k e y to conf irm each submenus. Us e th e sam e techni que to navig ate ins ide eac h
of the submenus.
While Video is pause d
Local Folder:
Under this director y, you can choose to go up a f older level by pressing PL AY [ ] to confirm . And
then you can choose to folder you want to play
Play Set:
You can choose between manual pla y and auto pla y. For auto play, you can set the playing tim e from
1 to 10 seconds for each picture.
Delete File:
Delete specific photo file you want.
Delete All:
Delete all Photos using this option.
Page 12

3.7 System Set (Setup)
Clock:
This option allows setting of the system date and time.
LCD set:
This option allows setting the brightness, darkly and black screen of the LCD panel.
Language:
This option allows setting the Language of the User Interface.
Power Off:
This option allows setting the off time and sleep time.
Memory Info:
This option allows checking the memory usage.
Firmware Ver:
This option allows checking the firmware version.
Firmware Upg:
This option allows to upgrade the firmware.
1. Power ON the MP3 player, button, the screen will display the main menu.
The SETTING option allo ws to access to MP3 P layer setup system . To access at system setup please follow
here below instruction:
2. By using the [] or [] select SYSTEM option then press [M] button to
enter the SYSTEM MENU.
3. By using the [] or [] select the system setup parameter and press
MENU [M] button.
The parameters available in the setup system are:
3.7.1 System Time Set
This option allows setting of the system date and time. The upper case display the date in Year : Month : Day
Format, and the lower case display the Time in Hour : Minute : Second format. To change the Date and time,
please follow here below instruction:
1. Under the SYSTEM MENU, choose SYSTEM TIME by pressing [] or [] and press [M] to confirm
2. Press [] or [] to choose the parameter you want to adjust
3. press [VOL+] and [VOL-] to change the value. Press MENU [M] to confirm.
3.7.2 Power Off Set
This option allows set ting the off time and s leep time. B y setting Off Time, it is poss ible to enable (10s, 20s,
30s, 40s, 50s, 60s, 70s, 80s, 90s, 100s, 110s, 120s, 130s, 140s, 150s, 160s, 170s, 180s, 190s and 200s) or
disable the power managem ent features to autom atically shut down your pla yer if it is not used. B y setting
Sleep Time, it is possible to set p ower off the unit after a specifie d time (10s, 20s , 30s, 40s, 50s, 60s, 70s ,
80s, 90s, 100s, 110s, 120s) from the moment you confirm about this selection.
To modify this parameter please follow here below instruction:
1. Under the SYSTEM MENU, choose POWER OFF by pressing [] or [] and press PLAY [].
2. By using the [] or [] buttons, select OFF TIME or SLEEP TIME and press [M] button.
3. Choose the desired OFF TIME or SLEEP TIME and press [M] to confirm.
Page 13

Memory info
The figure presents the tota l volume of the disc, th e p e r centage pres ent th e p er c e ntage be t ween us ed s pace
and total space.
Page 14

MPMANAGER
For movie and music synchronisation and conversion, please use MPMANAGER software supplied
in the
CD ROM.
This software can be used also for UPDATE of your player.
MPMANAGER manual is included in your CDROM.
Page 15

Specification
Size
80*41*9.5MM
Weight
Screen
Full color display, 1.8 inch screen, 262K color
Computer
Build-in memory
512MB.1GB , 2GB,4GB ,8GB
Supply power
The longest playing time is 10hours
Sample ratio
32KHz
Recording format
32K bps/128K bps
Recording time
8hours(32 K bps)
The biggest outputting ratio
10mW
10mW(32Ohm)
MP3 bit rate
8K bps – 320K bps
Frequency corresponding
20Hz-20KHz
SNR
85dB
Lack fidelity
<+_0.05
Frequency scope
76 MHz-90MHz/87MHz-108MHz
Radio stations
20
The biggest output rate of earphone
(L) 10mW +(R) 10mW (320)
SNR
45dB
MP1、MP2、MP3、WMA、WAV,
Temperature
-5 to 40 degree centigrade
Multi languages
Traditional Chinese, English, s imple Chinese, German, French, Italian and Spanish
Operation system
Windows98/SE/ME/2K/XP、Mac OS 10、Linux 2.4.2
38g
connection
REC
MP3、WMA、ASF
FM radio
WMA、ASF bit rate
High-speed USB 2.0 (FS)Flash disk
(L)
5K bps – 384K bps
+(R)
Music format
etc
Notice: You will not informed if the production design and the specification.
Page 16

For more information please check our website
www.mpmaneurope.com
 Loading...