

Page 1
Wireless Radios
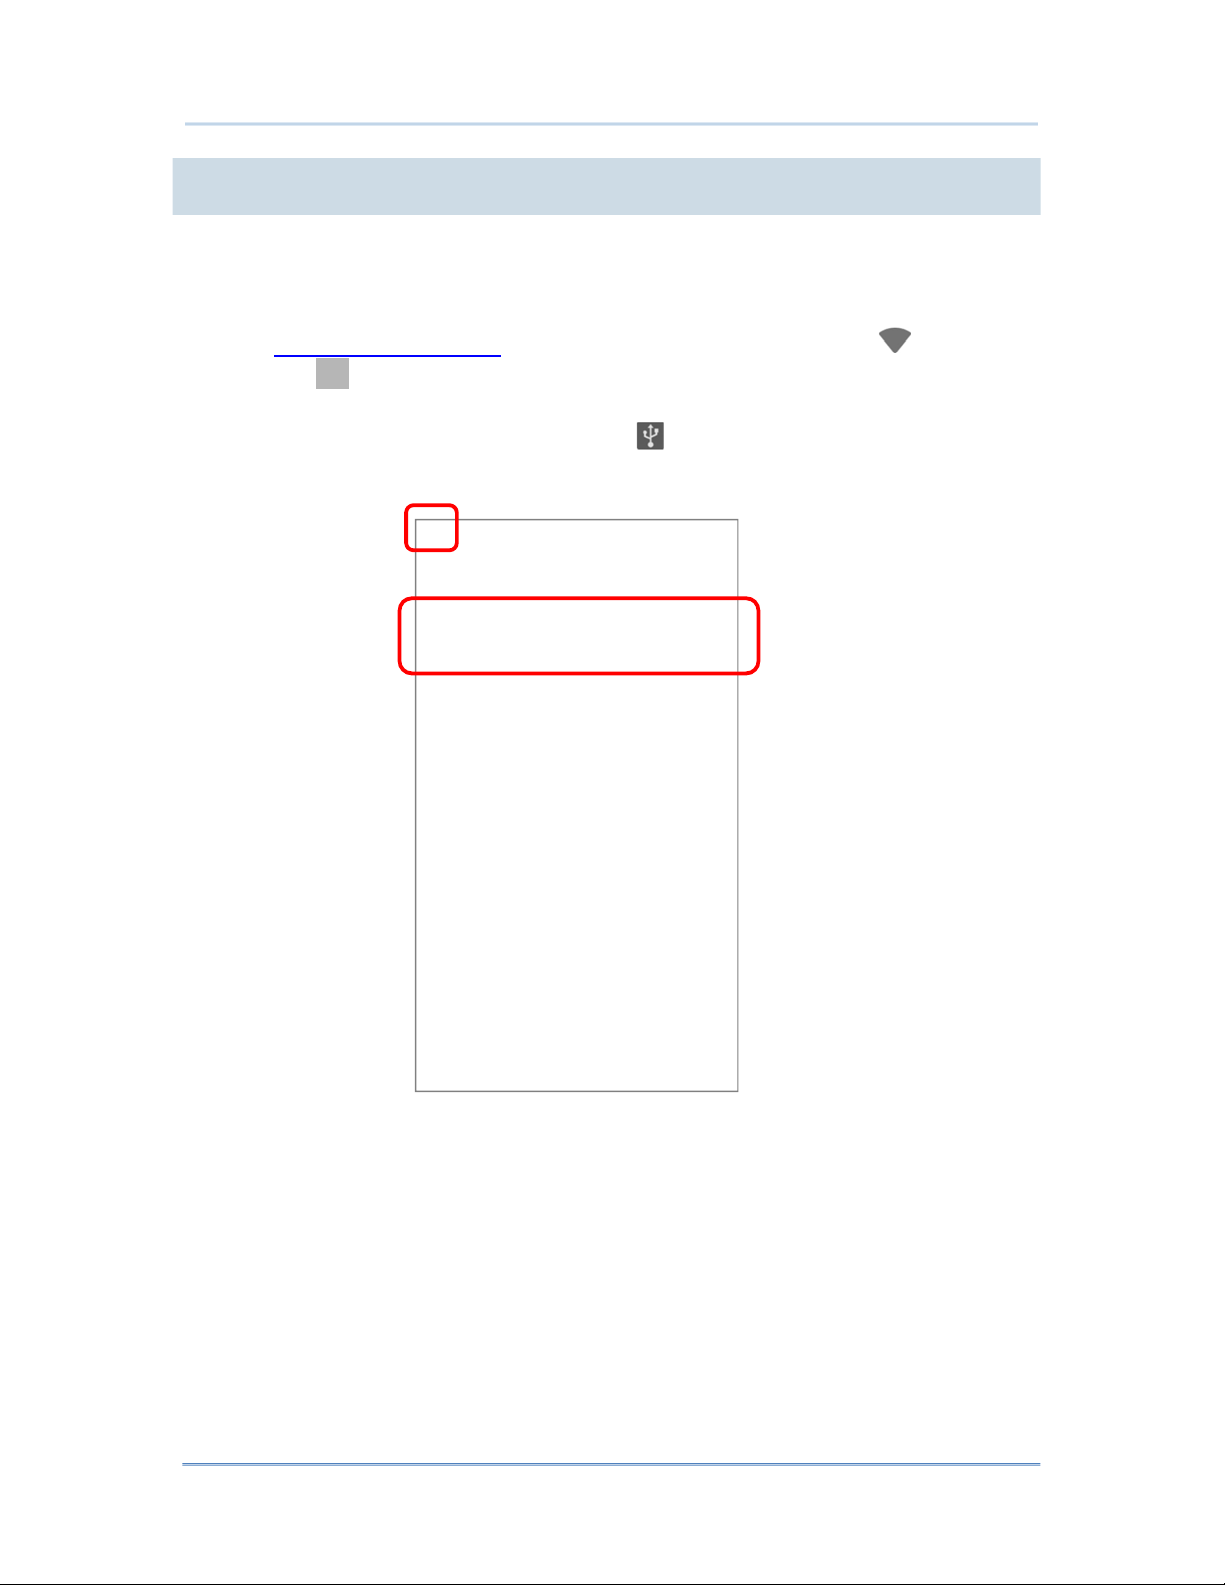
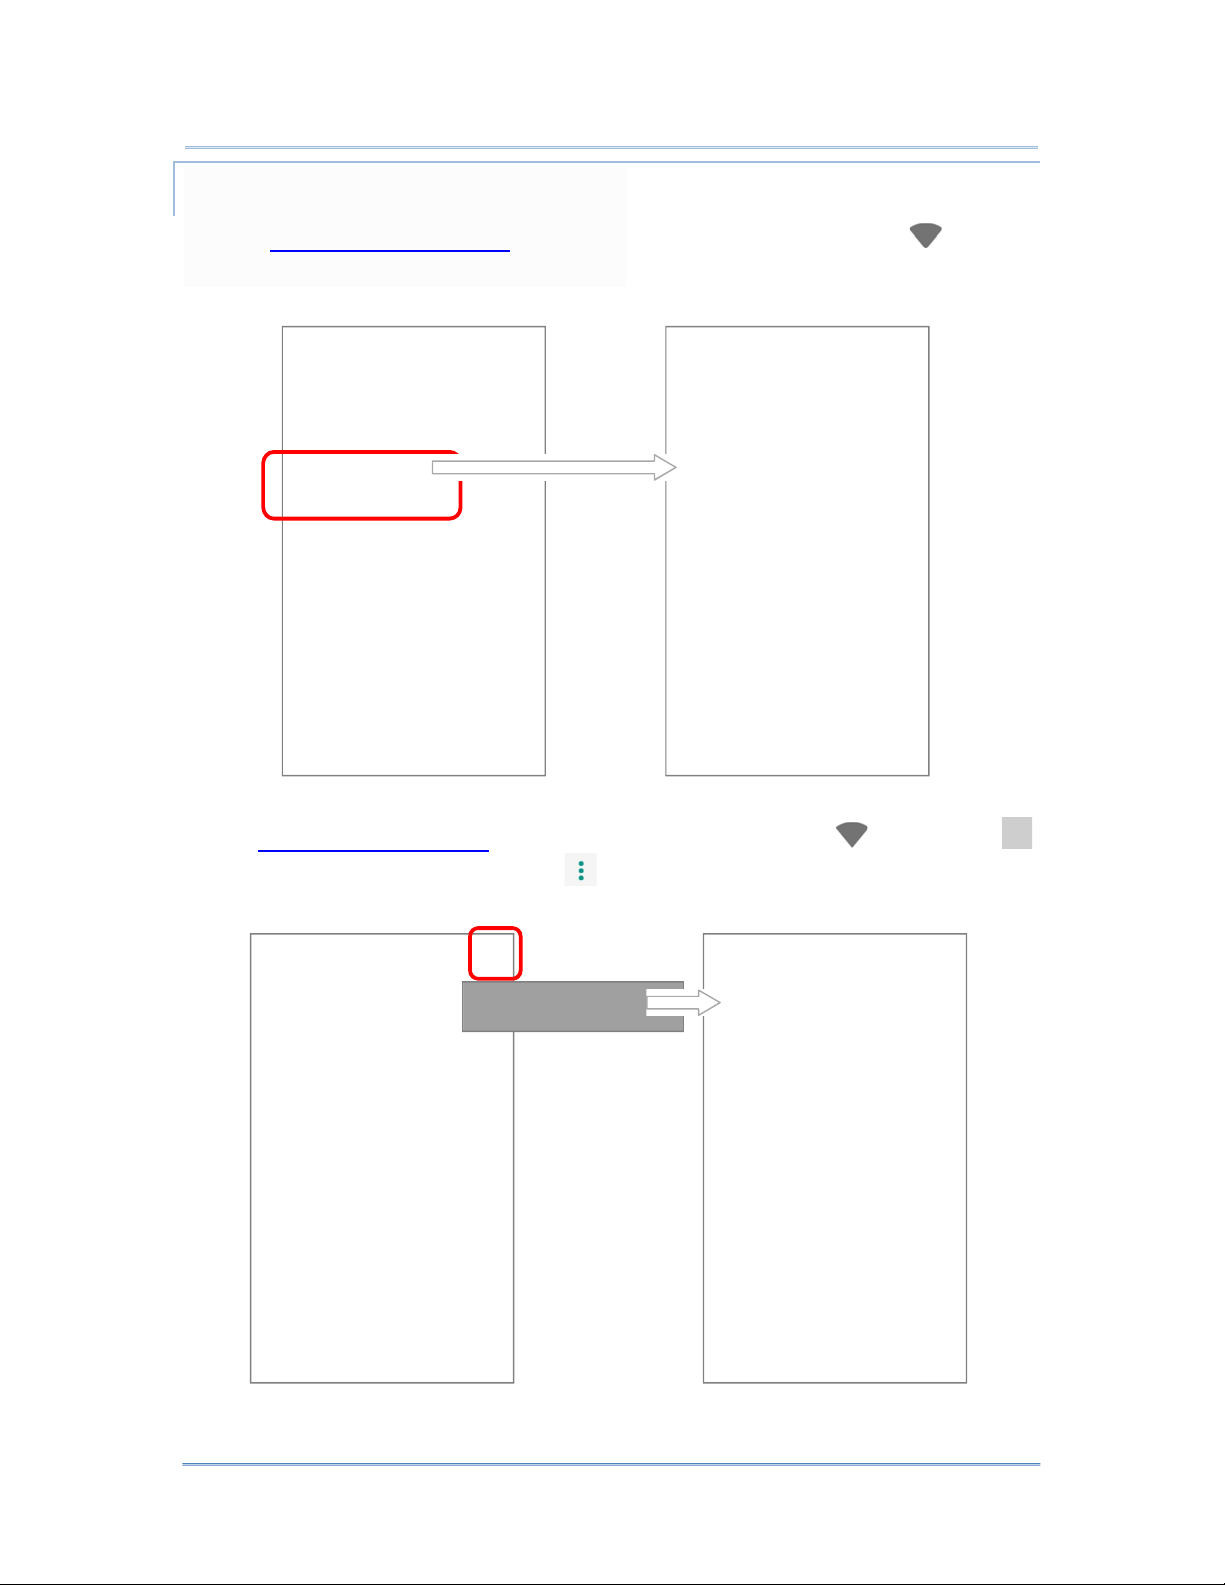
USB TETHERING
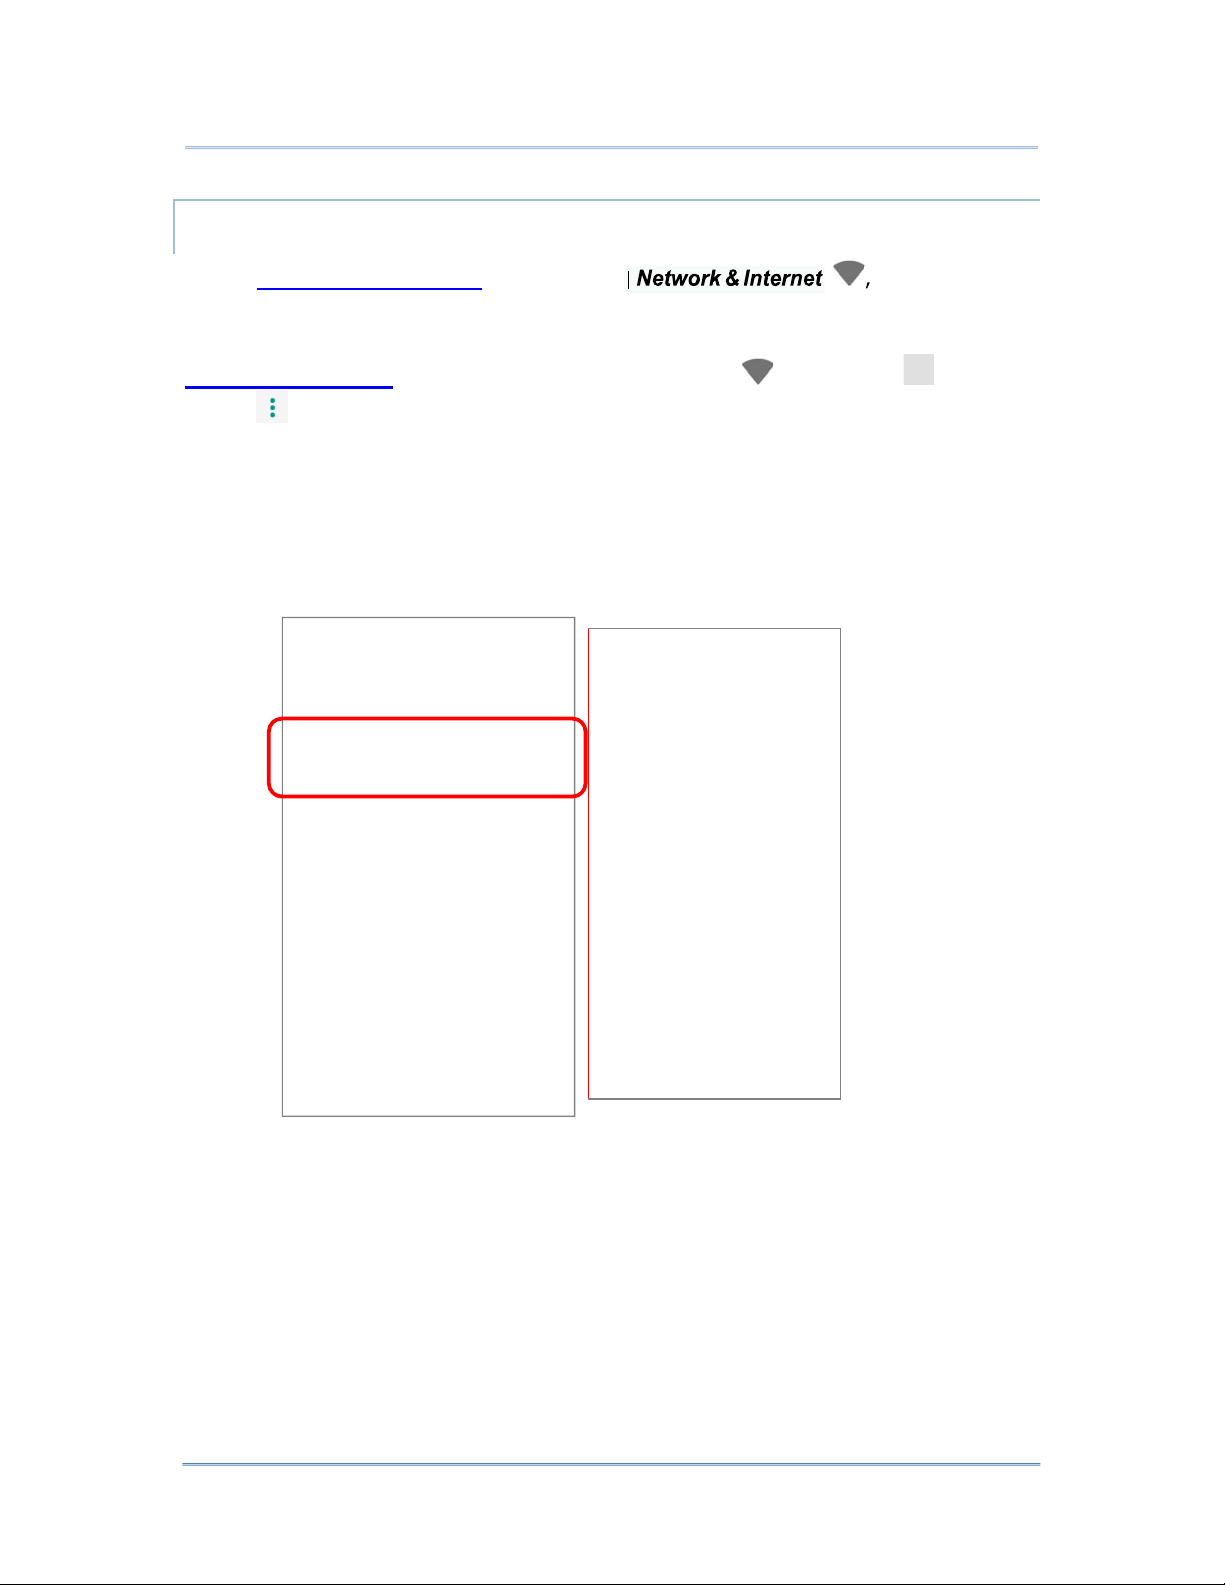
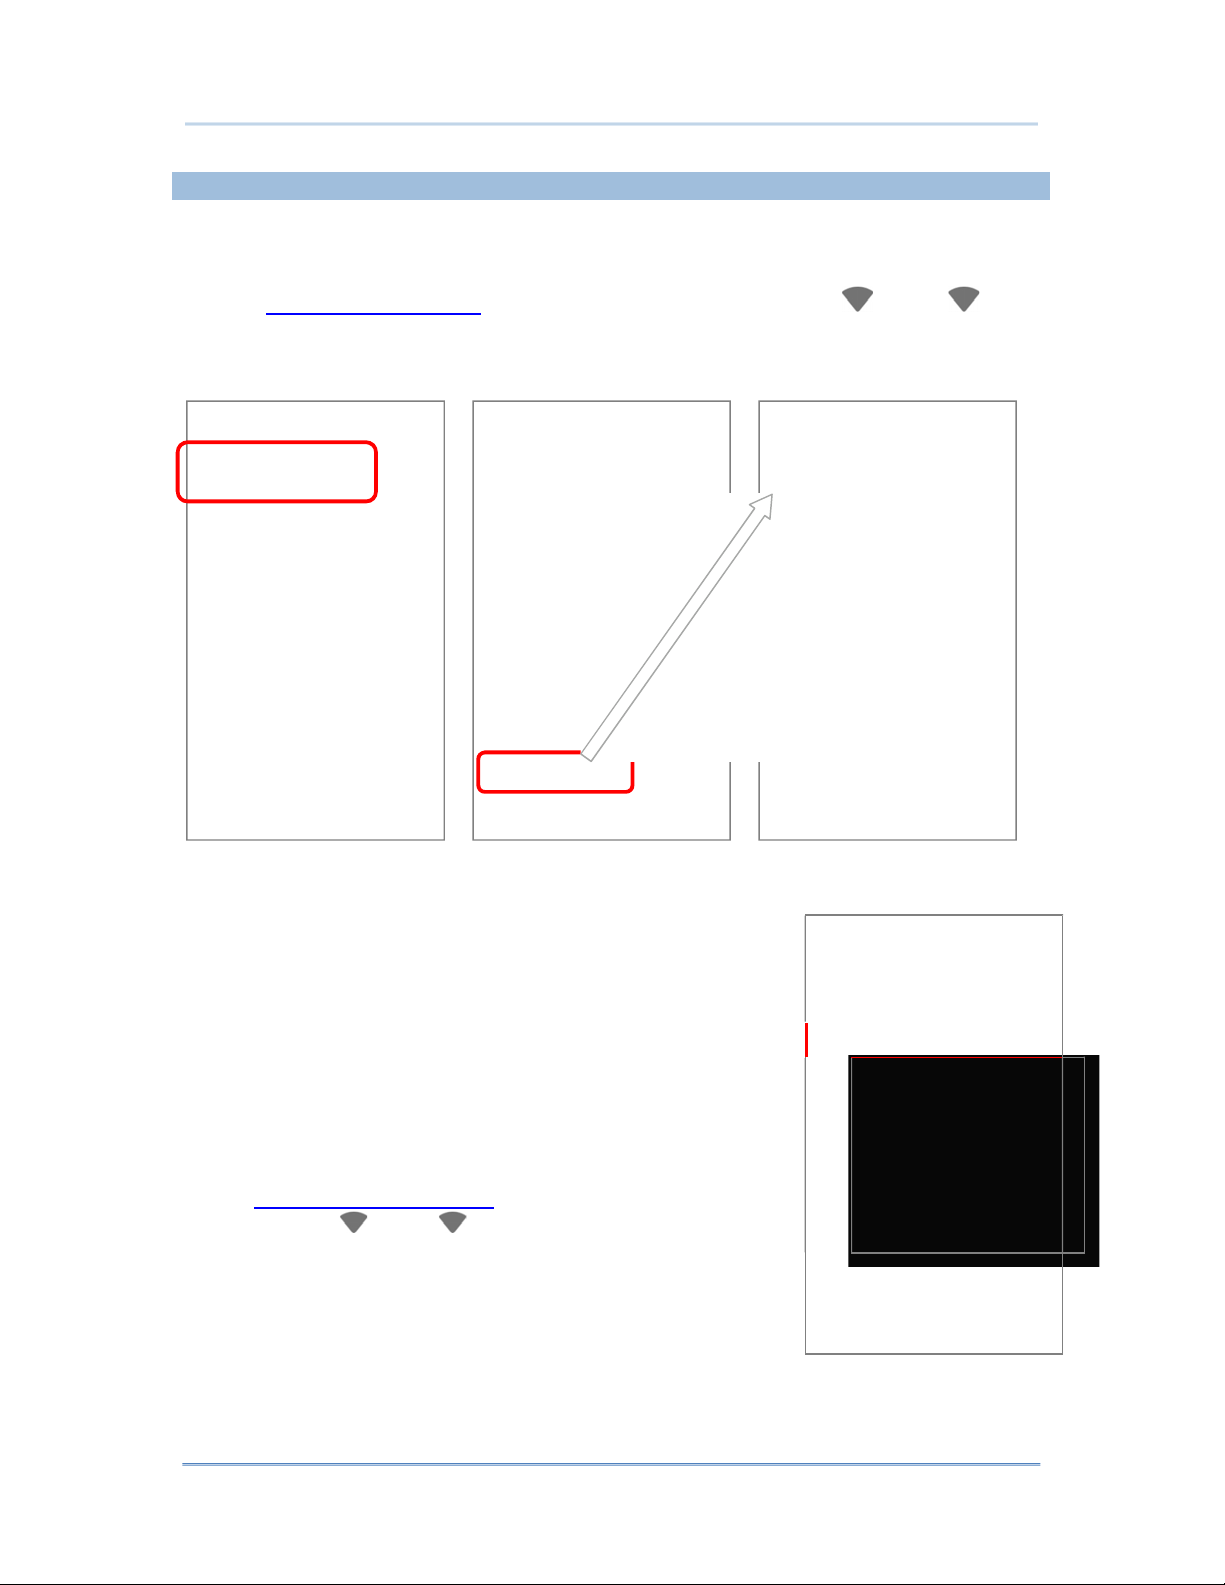
To share data connection through USB tethering:
Connect the mobile POS with PC by the supplied snap-on cable.
1)
2) Go to
3)
App Drawer (All Apps) | Settings
tethering
Tap to switch on USB tethering, and the icon shows up on the status bar. The mobile
POS will share its WWAN network with the connected host computer.
.
| Network & Internet | Hotspot &
121
Page 2

HERA51 Mobile POS
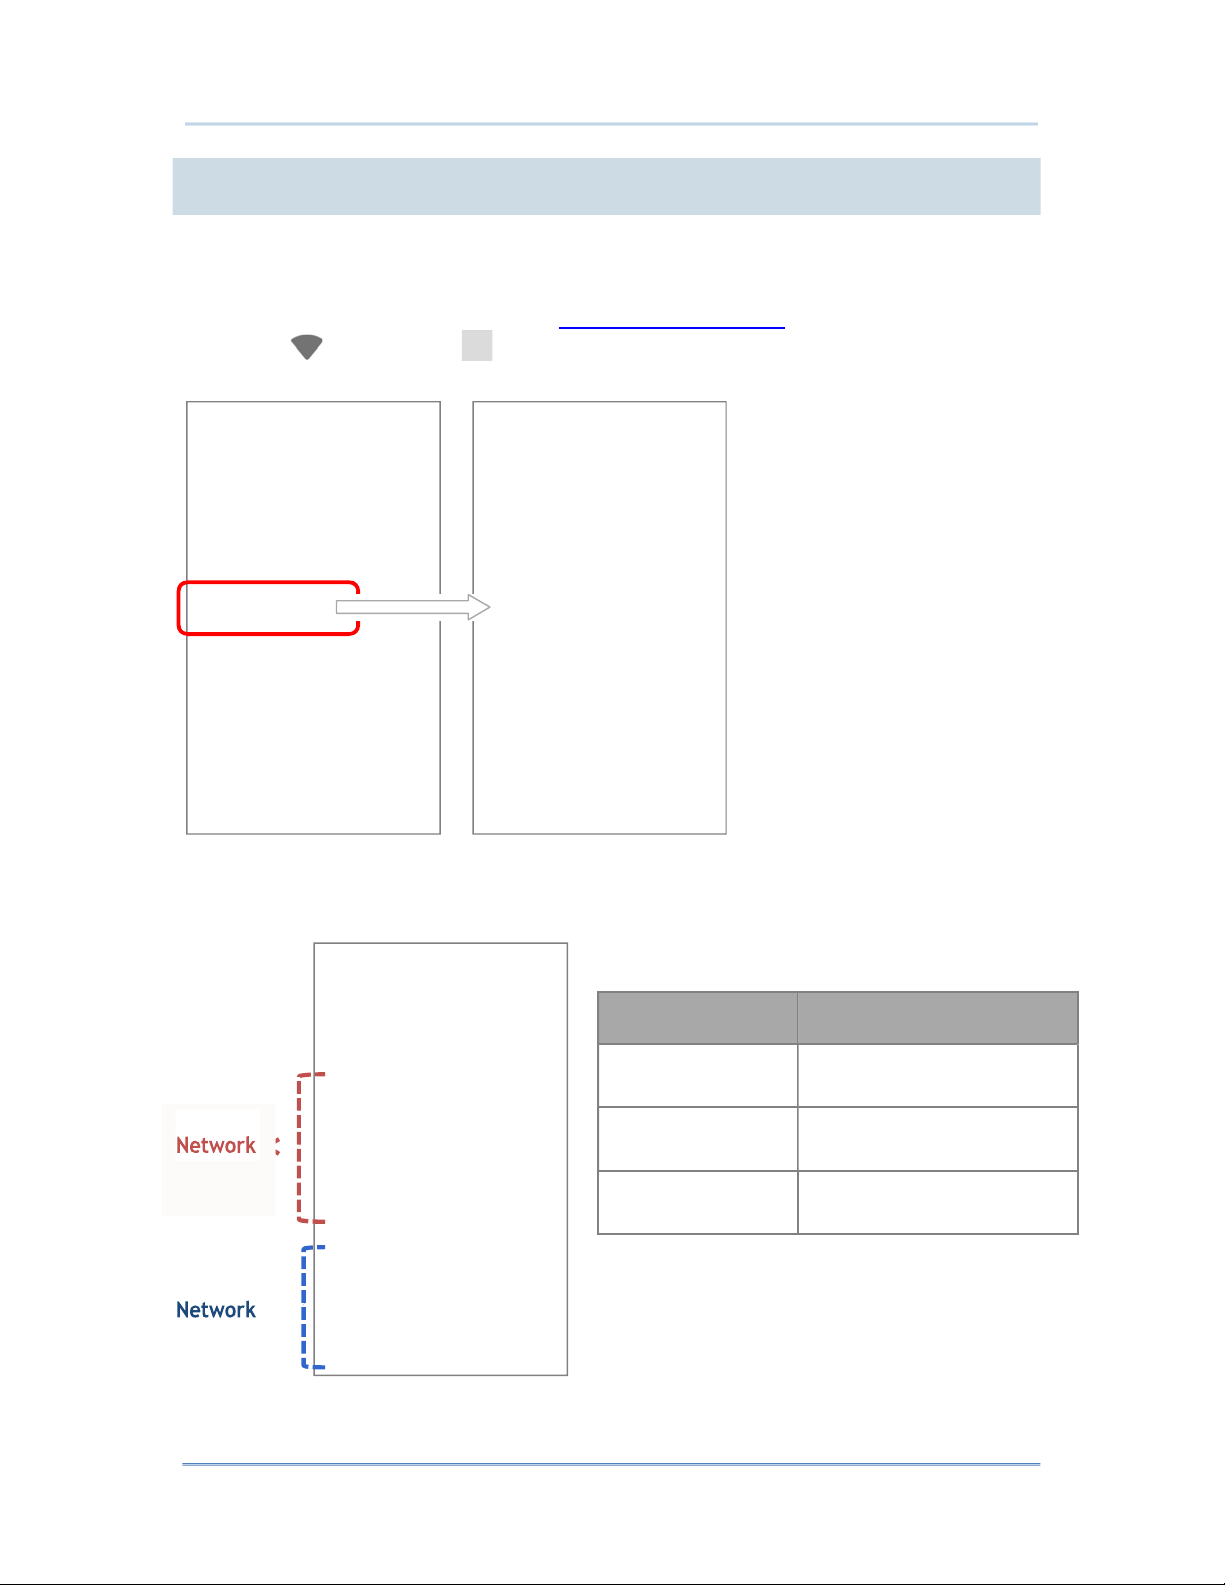
WI-FI HOTSPOT
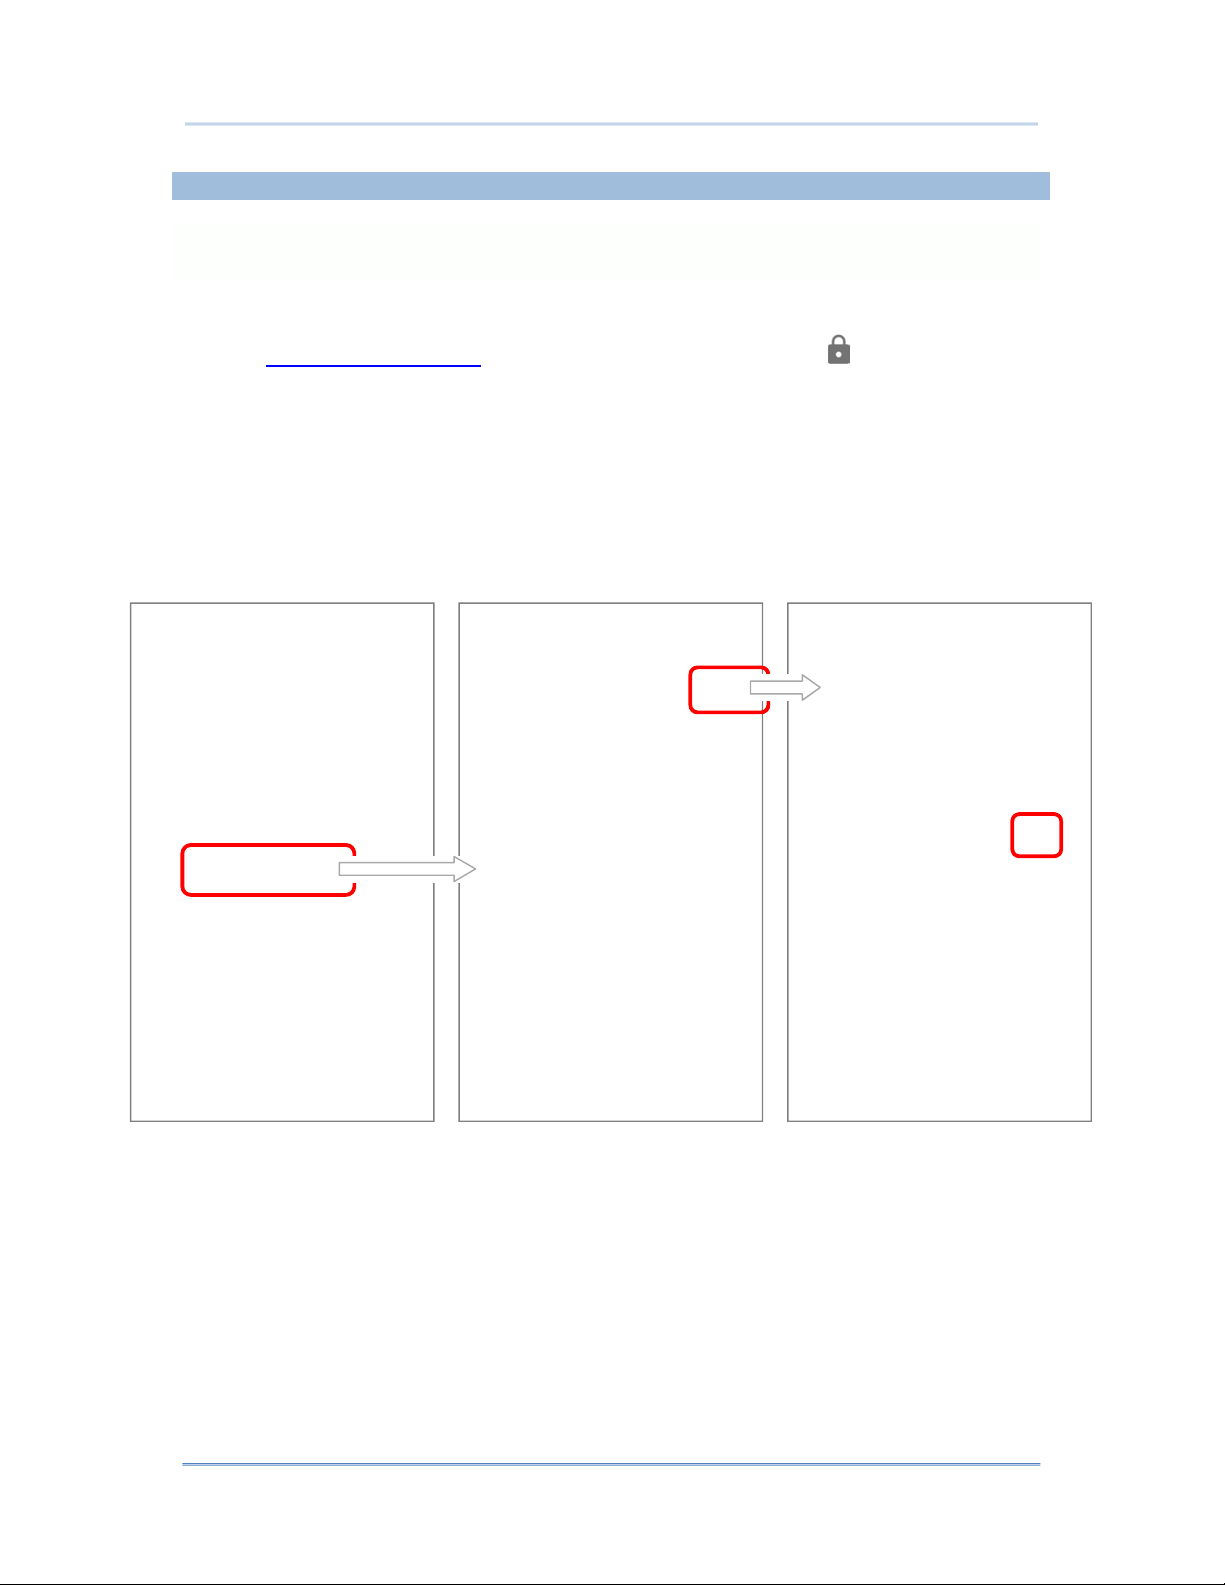
To share data connection in the form of a Wi-Fi hotspot:
1) Go to
2)
App Drawer (All Apps) | Settings
tethering
Tap the Wi-Fi hotspot switch to enable data sharing through Wi-Fi. The mobile POS will
start broadcasting its SSID for other devices to connect.
.
| Network & Internet | Hotspot &
Tap Set up Wi-Fi hotspot to manage Wi-Fi hotspot settings.
3)
122
Page 3
Mobile
Wi-Fi
Mobile data
Mobile data usage
Billing cycle
Wireless Radios
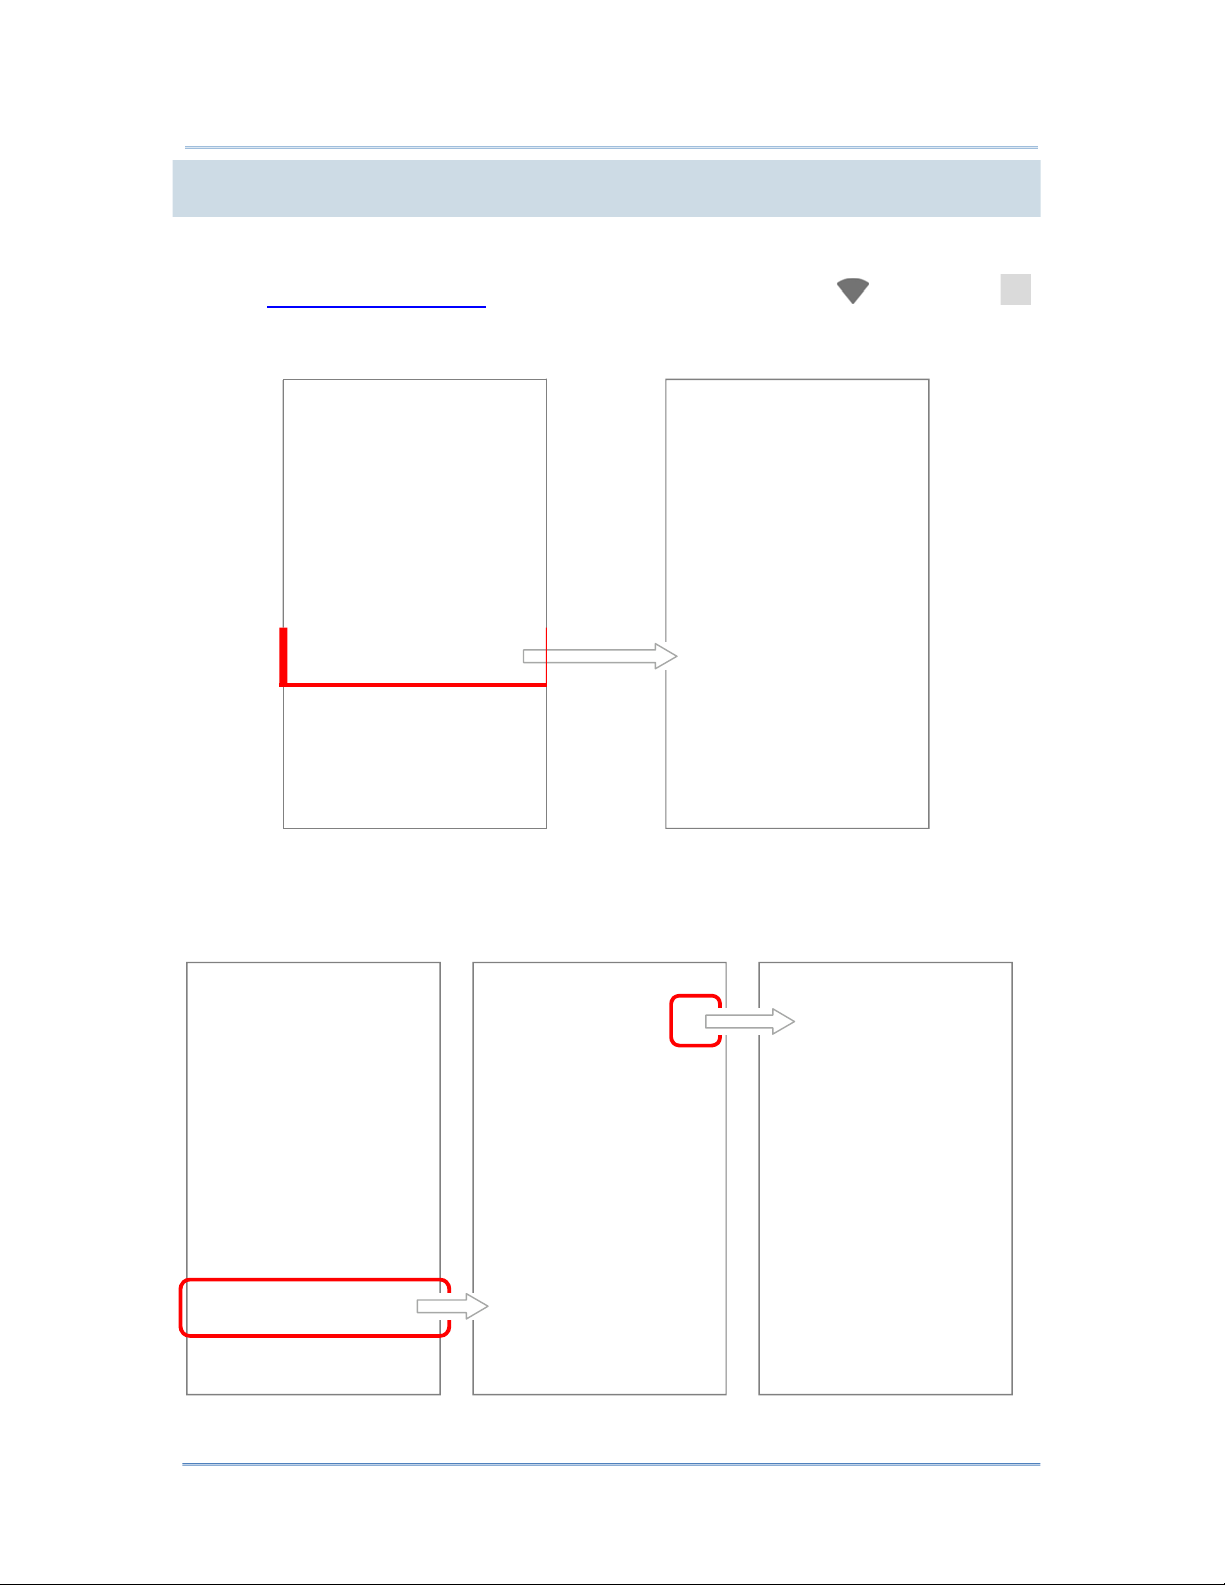
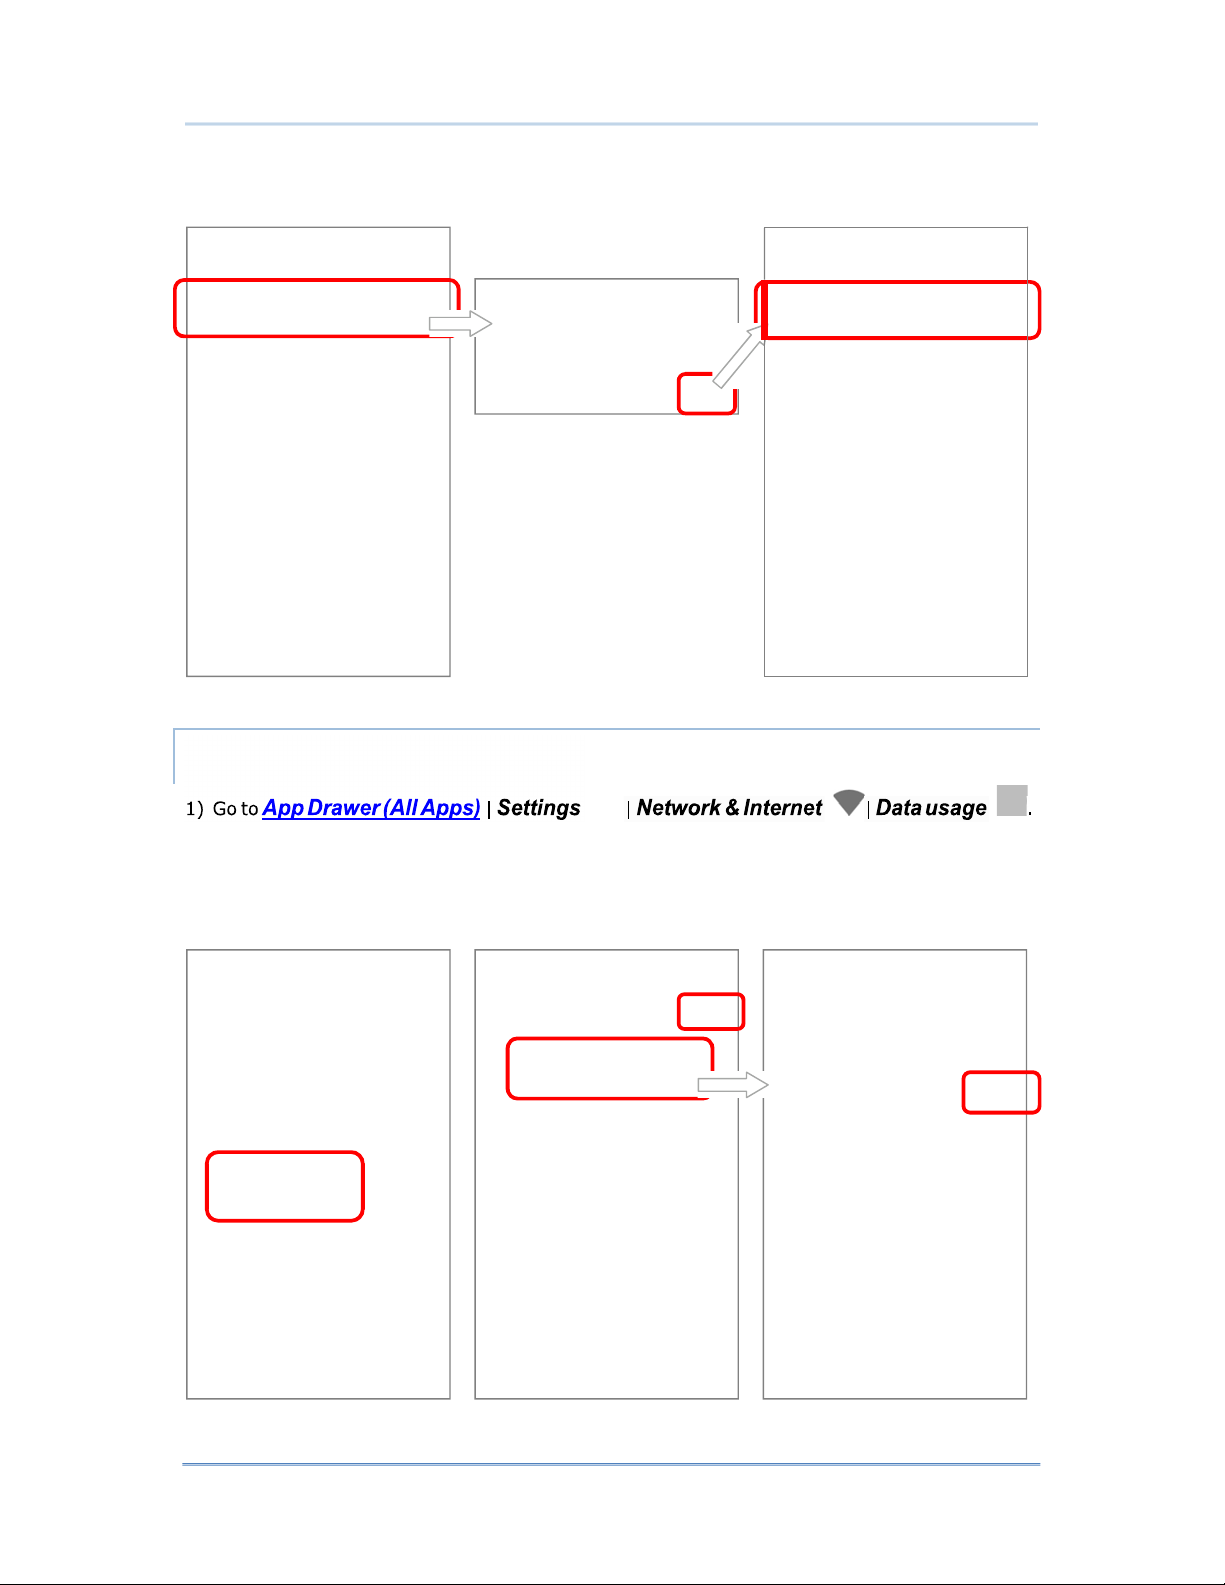
DATA USAGE
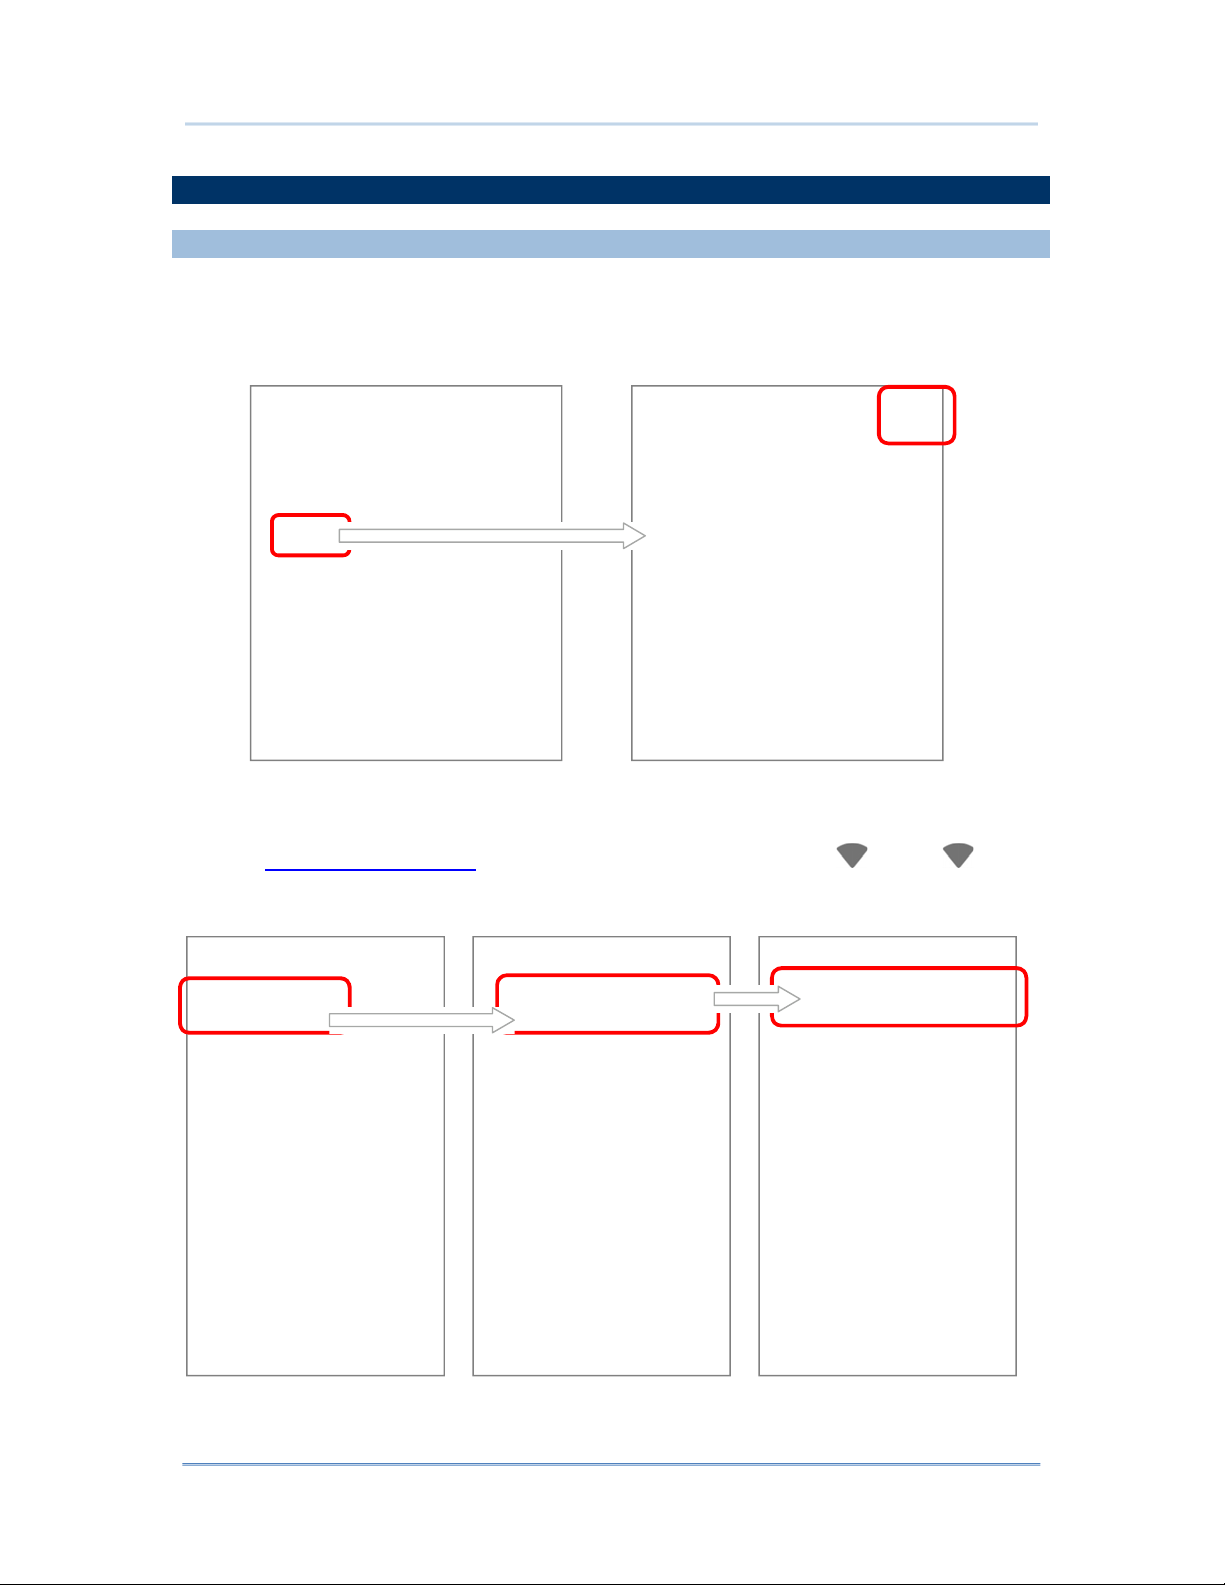
Data usage is the amount of data uploaded or downloaded on the mobile POS. Managing the
data usage amount within a certain period of time is a recommended task, as an excess
amount of data usage might incur additional fees from your service provider.
To check wireless data usage, please go to App Drawer (All Apps) | Settings | Network
& Internet
Data usage
|
.
Scroll to “Mobile” for further settings:
123
Item Description
Switch on or off the mobile
data.
Tap to view a chart of data
usage
Tap to set the billing cycle,
data warning, and data limit.
Page 4
HERA51 Mobile POS
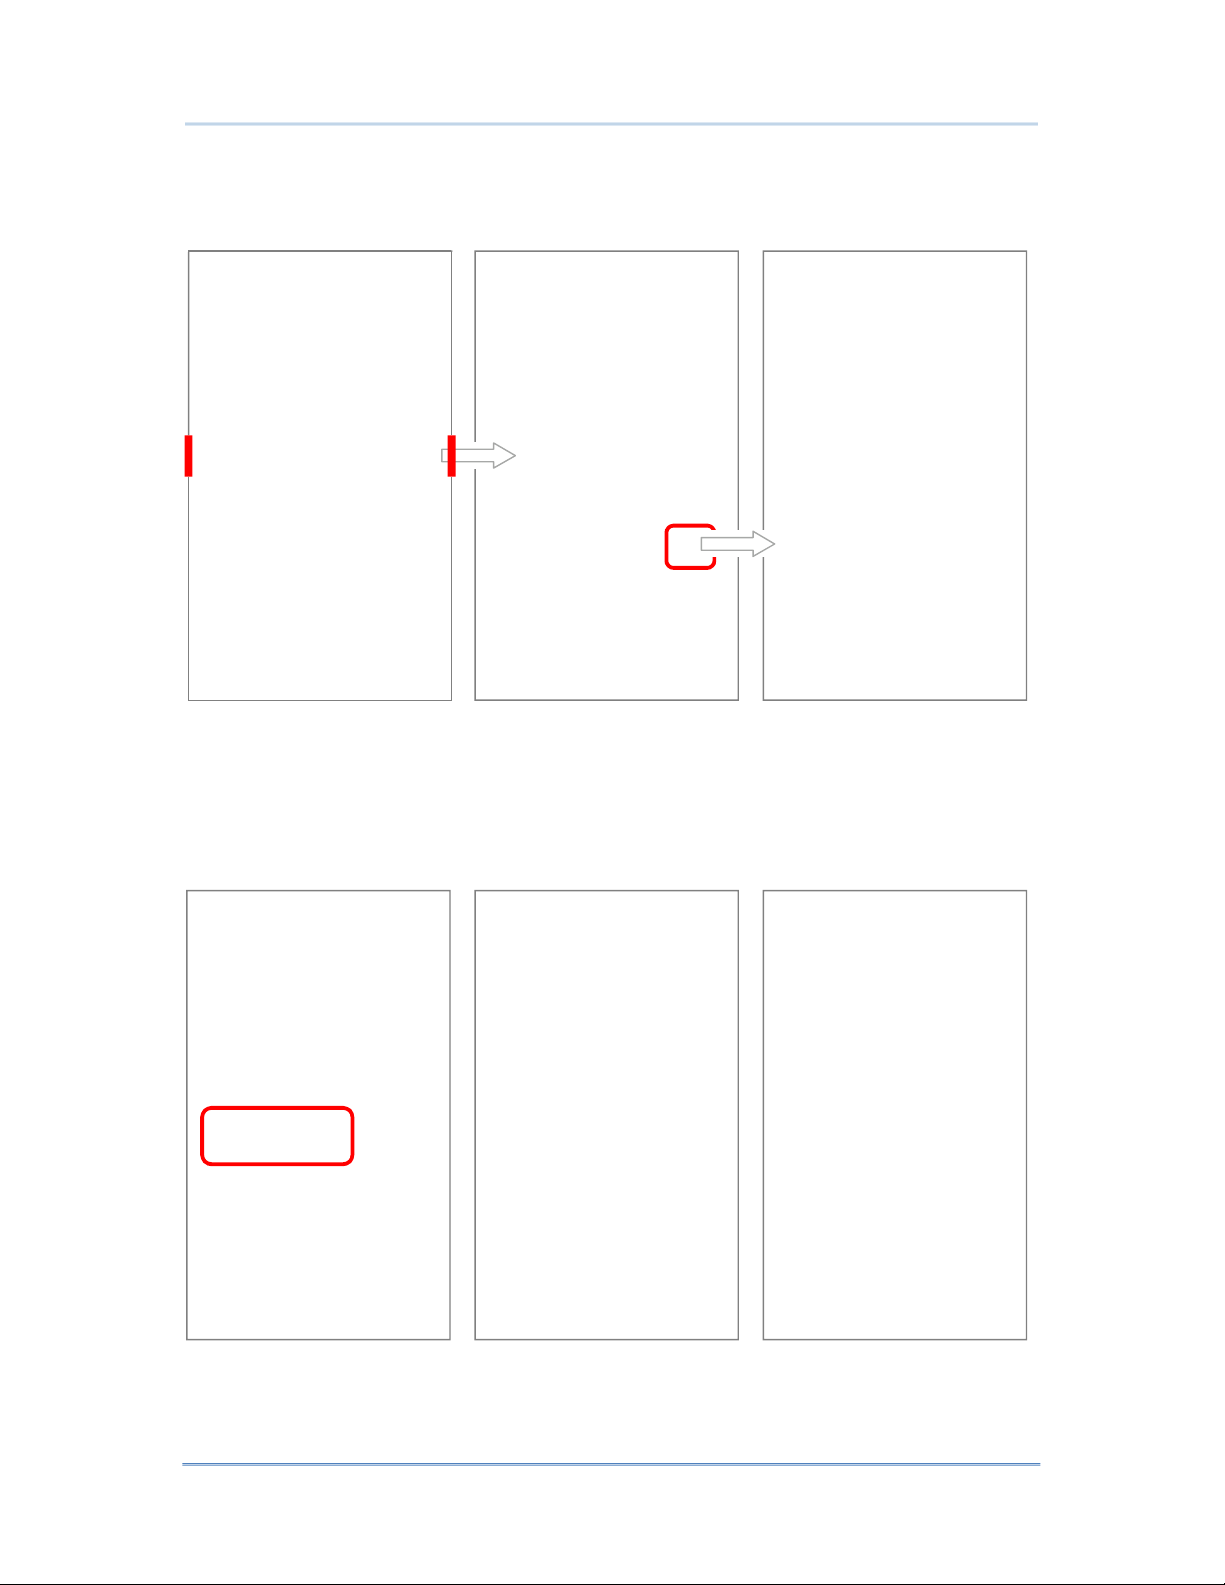
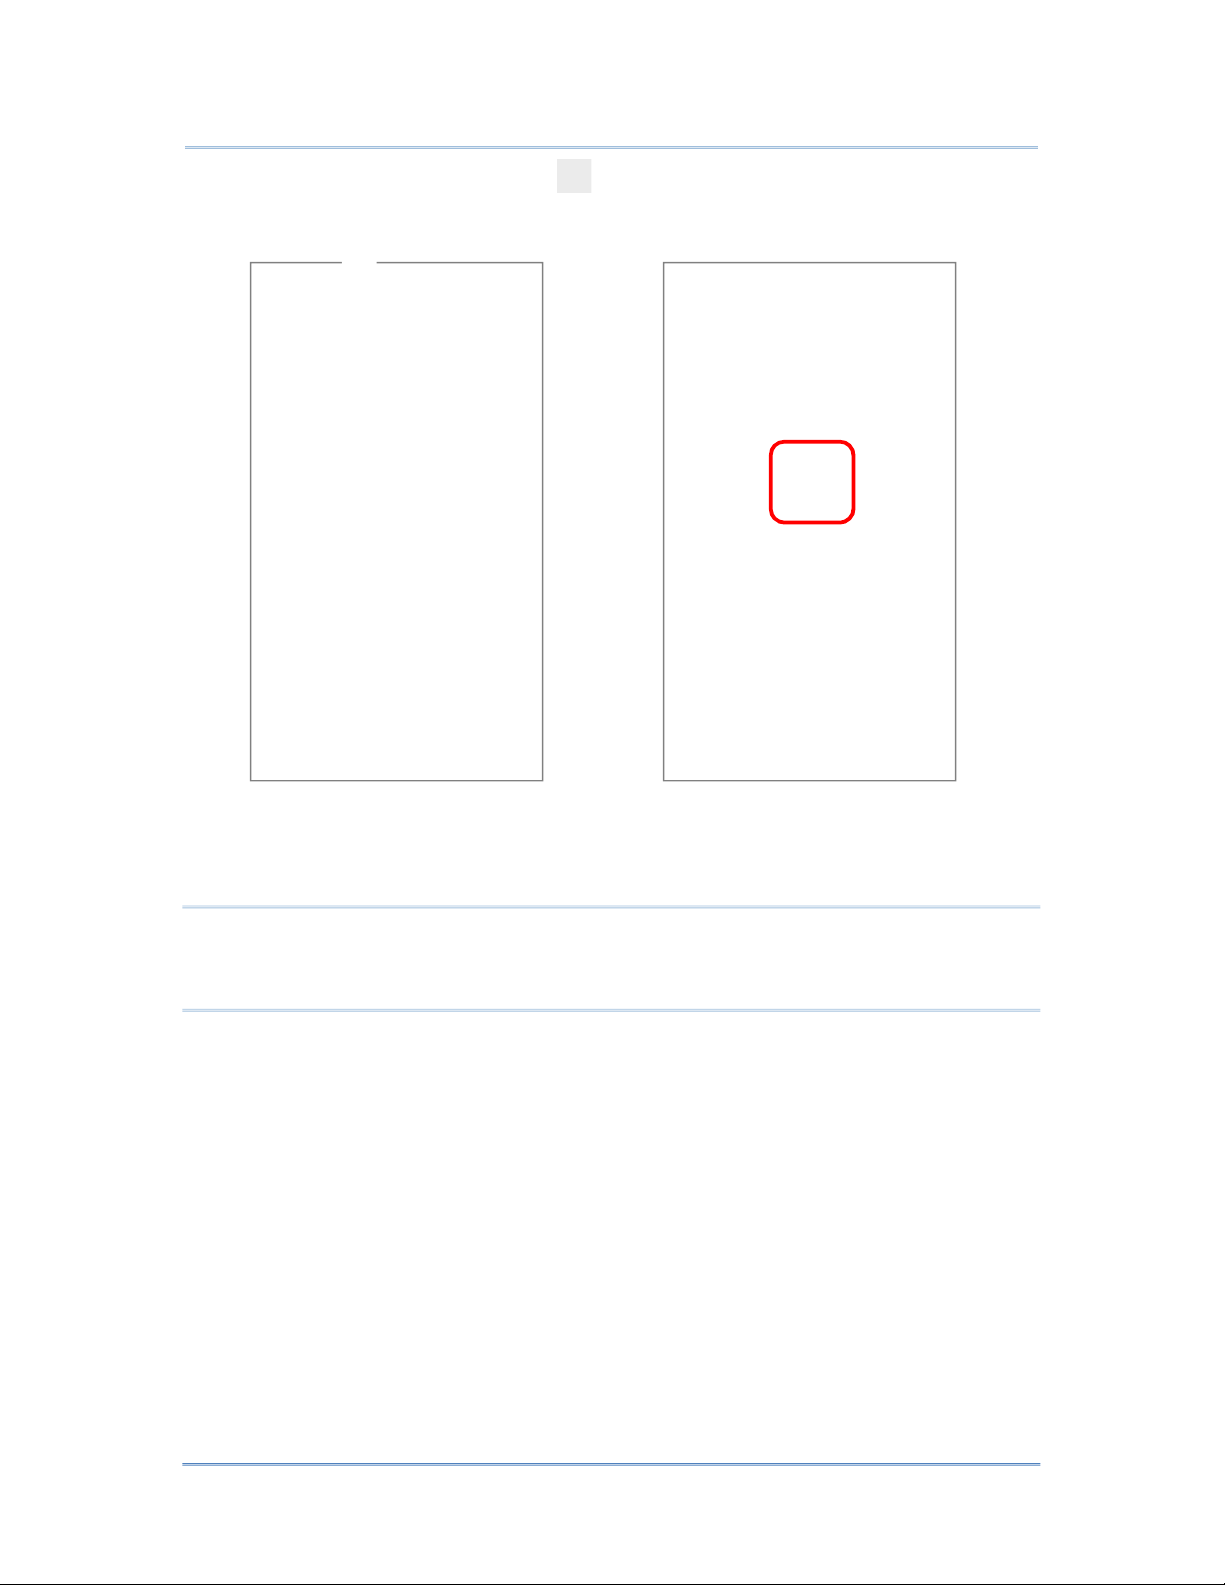
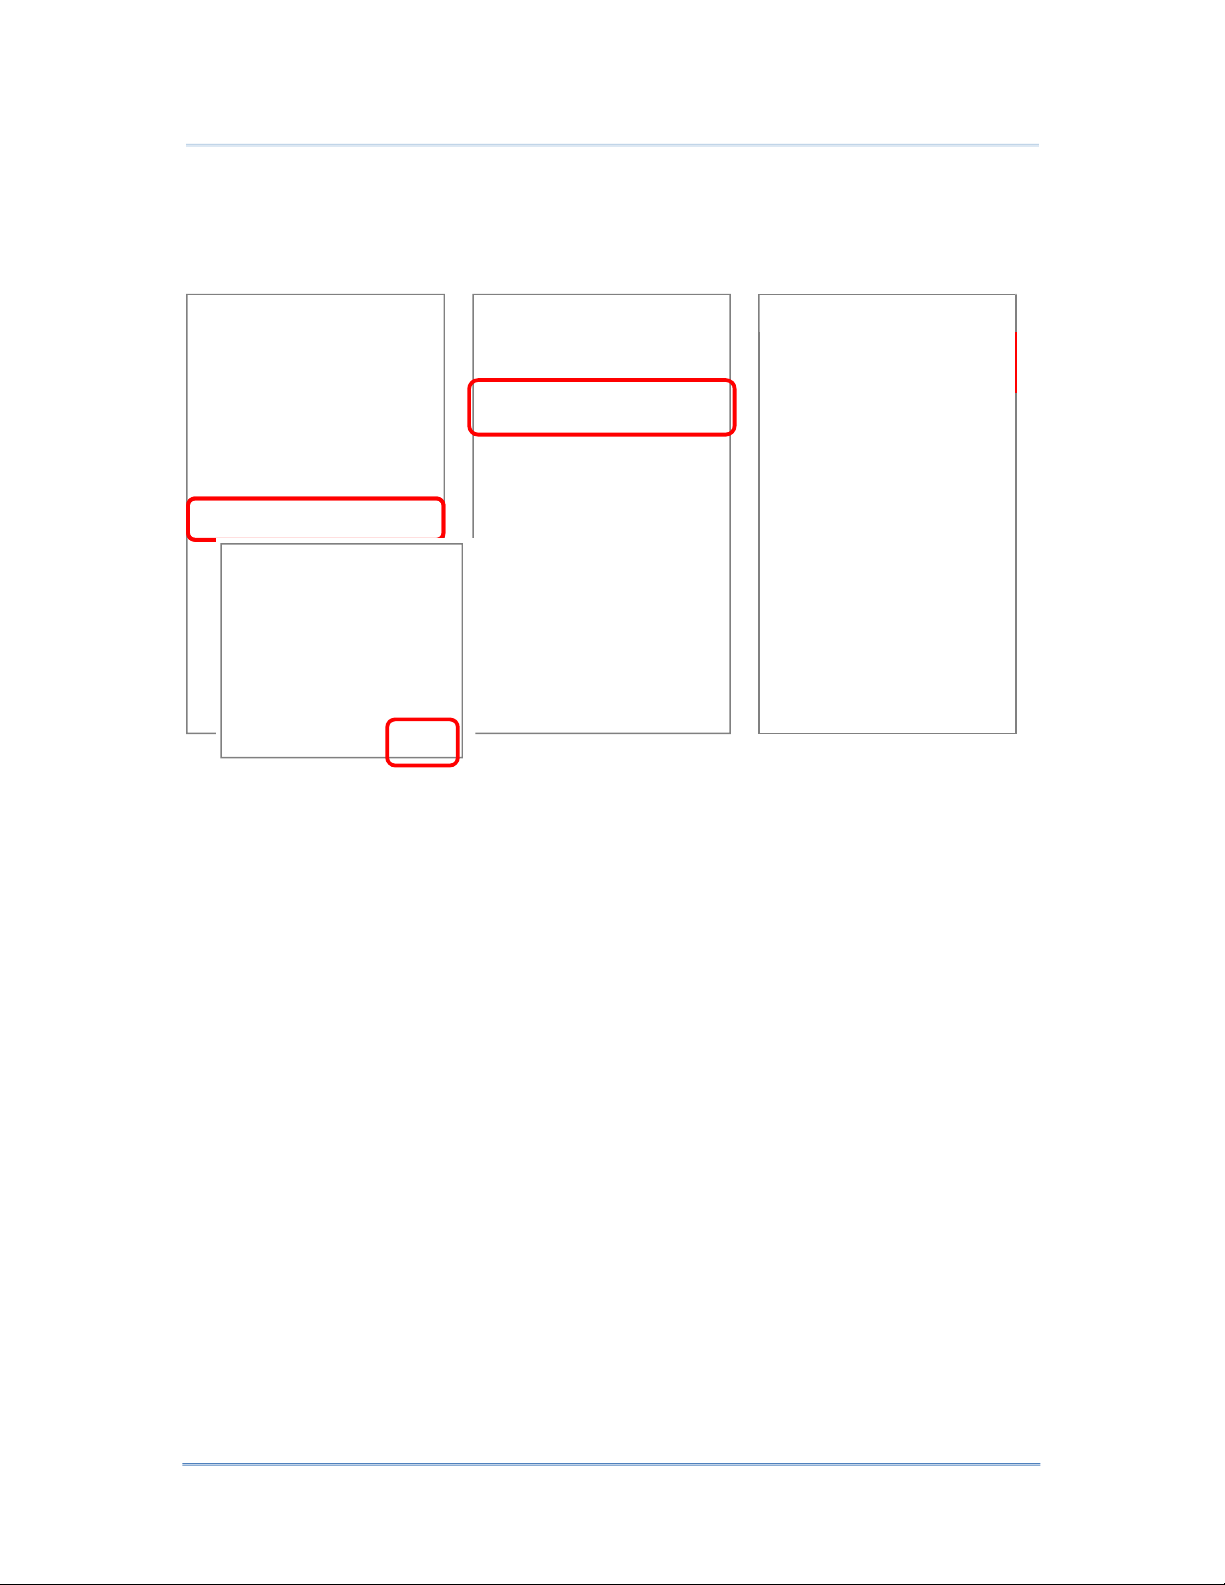
SET DATA USAGE LIMIT
To set the data usage limit, please:
1) Go to
App Drawer (All Apps) | Settings
On the Data usage page, scroll to “Mobile” and tap “Billing cycle”.
| Network & Internet
Data usage
|
.
Or tap “Mobile data usage” and the setting button to enter “Billing cycle” page.
124
Page 5
Wireless Radios
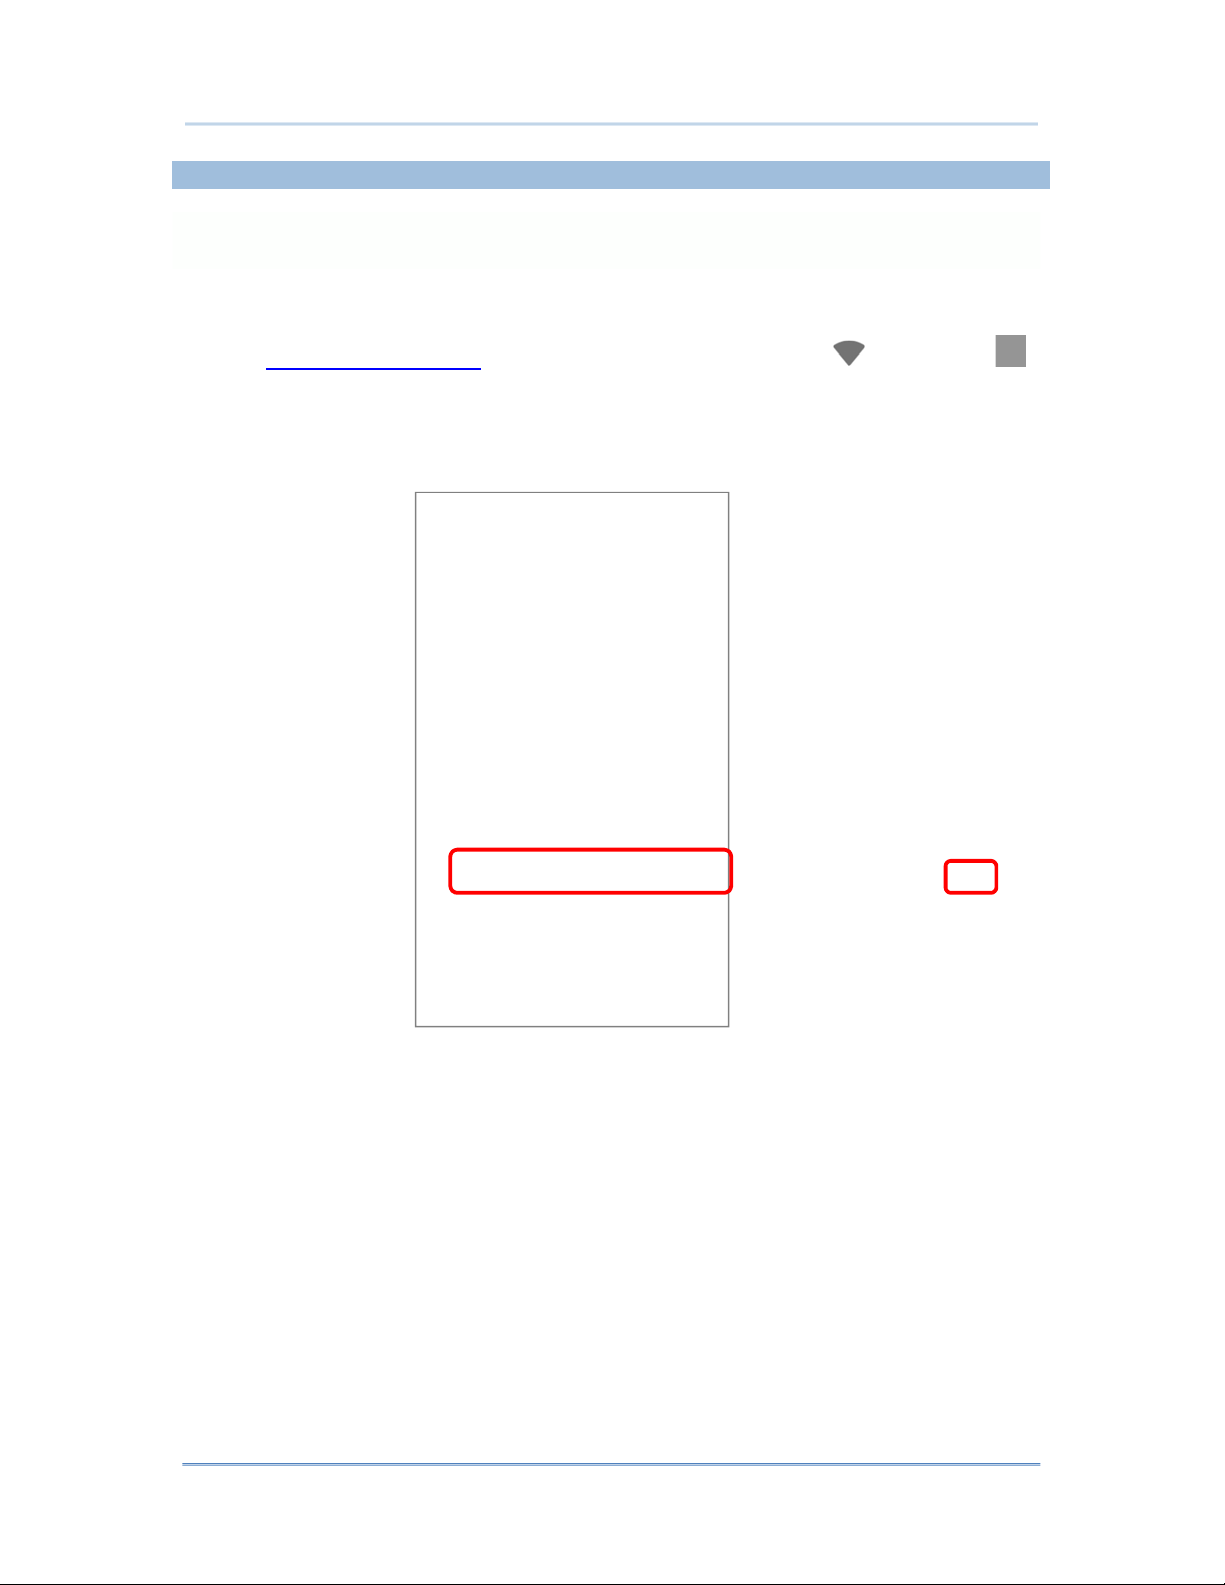
Enable Set mobile data limit.
2)
Tap “Data limit”, and input your required limit in “Set data usage limit” window, and tap
3)
“SET”. If a limit is set, when the data usage amount reaches the limit, mobile data
connection will be automatically disabled.
125
Page 6
ENABLE DATA USAGE DURING ROAMING
Settings
Network & Internet
| Mobile
HERA51 Mobile POS
1) Go to
App Drawer (All Apps)
Network
.
|
|
Or go to App Drawer (All Apps) | Settings
and on the Data usage page, tap More on the action bar and then “Mobile network”.
Network & Internet
|
| Data usage ,
126
Page 7
RESTRICT BACKGROUND DATA
Wireless Radios
2) Enable “Roaming”, and a dialog box appears confirming whether you would like to
enable data roaming. Tap OK to confirm.
Tap “Data saver” and switch data saver to On, to restrict background data.
2)
If there’s any applications you would like to keep them actived on background when
3)
“Data saver” is on, tap “Unrestrict data access” to switch them on.
127
Page 8
HERA51 Mobile POS
Once “Data saver” is on, an status icon will be shown in the status bar as well as in the
Quick Setting menu:
Note:
The mobile POS conserves data usage by restricting background mobile data. Certain applications
and services will be disabled unless the mobile POS is connected to a Wi-Fi network.
128
Page 9
Wireless Radios
4.1.2. DATA CONNECTION SETTINGS
TURN ON/OFF DATA CONNECTION
To manually turn on/off mobile data connection:
1) Go to
2)
App Drawer (All Apps) | Settings
Scroll to “Mobile” and tap on “Mobile data” to switch it on/off.
| Network & Internet
Data usage
|
.
129
Page 10
SELECT DATA CONNECTION
TYPE
HERA51 Mobile POS
1) Go to
OR
App Drawer (All Apps) | Settings
App Drawer (All Apps) | Settings
More
| Mobile network
| Network & Internet
|
Data usage
|
Tap “Mobile”.
2)
Tap Preferred network type to select the setting.
3)
130
Page 11
Wireless Radios
4.1.3. SIM CARD SETTINGS
LOCK SIM CARD
To lock the SIM card:
1)
Go to
App Drawer (All Apps) | Settings
Security & Location
|
.
Scroll down and tap on “SIM card lock”.
2)
Tap “Lock SIM card” to switch it on.
3)
Enter the PIN to enable SIM card lock. Once enabled, you are required to enter the PIN
4)
code in order to use the phone.
131
Page 12

HERA51 Mobile POS
CHANGE PIN CODE
To change the PIN code:
1) Go to
2)
3)
App Drawer (All Apps) | Settings
Scroll down and tap on “SIM card lock”.
Tap on “Change SIM PIN”.
Security & Location
|
.
Enter your old PIN code to confirm your identity, and then input a new PIN code.
4)
132
Page 13
Wireless Radios
4.2. USE WIRELESS LOCAL AREA NETWORK (WI-FI)
4.2.1. CONNECT TO WI-FI NETWORK
To power on Wi-Fi:
Swipe down from the top of the screen to open Quick Settings Menu.
1)
Tap Wi-Fi to scan for available networks. Select a network to connect.
2)
OR
1)
App Drawer (All Apps) | Settings
Tap
Tap the Wi-Fi switch to scan for available networks.
| Network & Internet | Wi-Fi .
133
Page 14
HERA51 Mobile POS
2) Select a network to connect. If the network is an open one, the mobile POS will attempt
to connect to it directly. When connected, the status will change to show “Connected”.
If the network is a secured one, the mobile POS prompts a dialog to enter the password
for the connection.
134
Page 15
Wireless Radios
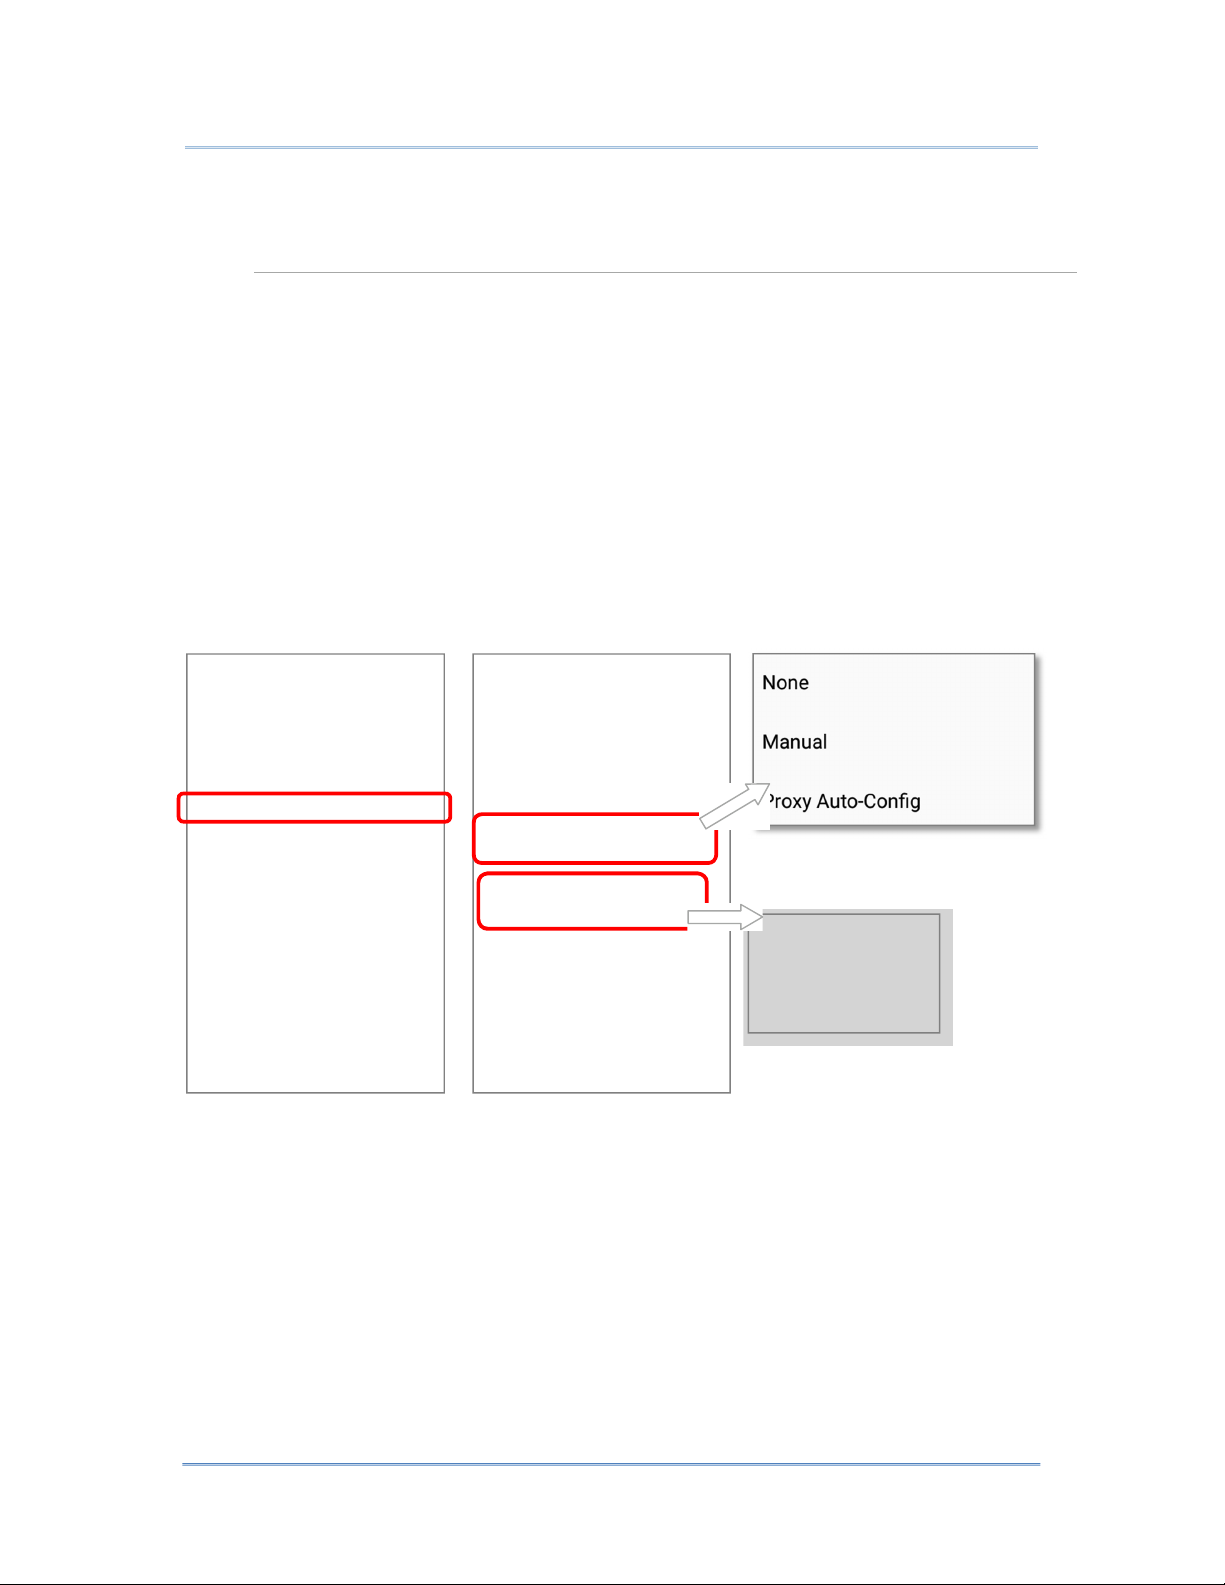
4.2.2. MANUALLY ADD WI-FI NETWORK
If the network you would like to connect to does not broadcast its SSID, or if the network is
out of range, you may add it manually.
1) Go to
2)
3)
App Drawer (All Apps) | Settings
Tap the Wi-Fi switch to turn it on.
Scroll down to the bottom of the page, and select “Add network”.
On “Add network” page, enter the name of the network in the Network name field, and
select a security method (None, WEP, WPA/WPA2 PSK, 802.1x EAP).
| Network & Internet | Wi-Fi .
For WEP/WPA/WPA2 PSK connections:
Enter the required password and tap Save.
For 802.1x EAP connections:
Select the EAP method in the drop-down box (PEAP, TLS,
TTLS, PWD, SIM, AKA), and the Phase 2 authentication
in the drop-down box (None, MSCHAPV2, GTC). Select a
CA certificate and User certificate if required.
(certificates may be installed under:
App Drawer (All Apps) | Settings | Network &
Internet | Wi-Fi
Wi-Fi preferences | Advanced
|
Install certificates.)
Enter your username in the Identity box and the
password in the Password box if required.
135
|
Page 16
File Extension Type
Standard Certificate
Key Stored
HERA51 Mobile POS
The mobile POS supports the following certificate file extensions:
Description
DER-encoded X.509 certificates
saved in .crt or .cer files.
X.509 certificates saved in PKCS#12
key store files with a .p12 or .pfx
extension.
How to install
change the extension to
Change the extension to .p12 or .pfx.
.crt or .cer.
If necessary, select the Proxy server and IPv4 settings. By default, no proxy is set and
4)
IP settings are set to DHCP.
136
Page 17
Item
Description
Wireless Radios
4.2.3. WI-FI PREFERENCES
To access advanced Wi-Fi settings:
1) Go to
2)
3)
App Drawer (All Apps) | Settings
Scroll down to the bottom of the page, and tap on “Wi-Fi preferences”.
Tap “Advanced” to expand more settings. Available settings are as below:
| Network & Internet | Wi-Fi |
Open network notification
Keep Wi-Fi on during sleep
Install certificates
Notify when an open network is available.
Set when to turn Wi-Fi on during sleep.
Installs certificates recently downloaded or
placed on the internal storage.
Network rating provider
The selected network scorers will label the the
quality of the open Wi-Fi networks you are
connecting to between very fast and slow.
Set Country Code
Select the Wi-Fi country code for your device.
The default country code setting is set by your
SIM card automatically.
Background scan interval
The frequency of background scan when the
device does not connect the internet. The
shorter time means the scanning frequency is
higher.
Wi-Fi frequency band
Select
Automatic, 5 GHz
, or
2.4 GHz
for your
Wi-Fi frequency band. The default setting is
Automatic.
137
Page 18

Item
Description
HERA51 Mobile POS
Roaming Enable
Roaming trigger
Roaming delta
Wi-Fi Direct
WPS Push Button
WPS Pin Entry
MAC address
IP address
Select whether to enable Wi-Fi roaming or not.
The signal strength when triggering Wi-Fi
roaming. The higher value means the sensitivity
of triggering roaming is higher.
The qualification for roam candidates. The
higher value means the signal strength of
candidate APs should be higher than the
current connected AP.
Enables your device to connect with a Wi-Fi
Direct-capable device.
Initialize the Wi-Fi protected setup (WPS) for a
WPS-capable network. You will also have to
press down the WPS button on your router.
Enter the personal identification number (PIN)
for Wi-Fi protected setup (WPS) process.
Displays the MAC address of the device when
connecting to Wi-Fi networks.
Displays the IP address of the device.
138
Page 19

Wireless Radios
4.2.4. CONFIGURE PROXY SERVER
A proxy server acts as an intermediary between an endpoint device and another server from
which the device is requesting a service.
To change the proxy settings for a connection:
Long press on a network in the available Wi-Fi hotspot list, and then tap on “Modify
1)
network”.
Tap on “Advanced options” to expand the detailed settings.
2)
Tap Proxy and select Manual.
3)
Enter the address of the proxy server in the Proxy hostname field. Enter the port number
4)
for the proxy server in the Proxy port. Enter the addresses of websites which are allowed
to bypass the proxy server in the Bypass proxy for field. (Use the separator | between
addresses.)
Tap SAVE.
5)
4.2.5. USE STATIC IP ADDRESS
By default, the device gets an IP address from DHCP when connecting to a wireless network.
You may set for the device to connect to a network using a static IP address.
Long press on a network in the available Wi-Fi hotspot list, and then tap on “Modify
1)
network”.
Tap on “Advanced options” to expand the detailed settings.
2)
Tap IP settings and select Static.
3)
Enter the IP address, gateway, network prefix length, DNS 1 address and DNS 2 address
4)
in the fields provided.
Tap SAVE.
5)
139
Page 20

HERA51 Mobile POS
4.2.6. CONNECT WITH WI-FI PROTECTED SETUP (WPS)
Wi-Fi Protected Setup (WPS) allows easy establishment of a secure wireless network. The
mobile POS supports WPS Push Button configuration.
1)
App Drawer (All Apps) | Settings
Go to
Wi-Fi preferences
| Network & Internet | Wi-Fi |
Tap on Advanced to expand and then WPS Push Button.
2)
3)
A dialog will pop-up on the screen showing the remaining time allowed for pressing the
WPS button on the router.
4)
On your wireless router, press the WPS button. The device will connect to your router.
140
Page 21
Wireless Radios
4.2.7. MODIFY WI-FI NETWORK
To change the settings for a connected network:
Tap and hold a connected network in the Wi-Fi hotspot list.
1)
Tap Modify network in the pop-up menu.
2)
3)
In the dialog box that opens, modify the network settings, and tap Save.
4.2.8. DISCONNECT WI-FI NETWORK
To disconnect a connected network:
1)
Tap and hold a connected network in the Wi-Fi hotspot list.
2)
Tap Forget network in the pop-up menu.
141
Page 22

Bluetooth Profiles Supported
HERA51 Mobile POS
4.3.
You can configure Bluetooth settings and manage Bluetooth services provided on remote
devices.
4.3.1. BLUETOOTH PROFILES
USE BLUETOOTH
Generic Access Profile
Service Discovery Access Profile (SDAP)
Headset Profile
For device discovery and authentication.
(GAP)
Discovers services on remote devices.
(HSP)
Describes how a Bluetooth enabled headset should
communicate with a Bluetooth enabled device
Hands-Free Profile (HFP 1.6) Allows using a hands-free device to place and receive calls.
Serial Port Profile
Generic Object Exchange Profile
Object Push Profile
Hands Free Profile
Personal Area Networking Profile (PAN)
Sets up a virtual serial port to connect two Bluetooth devices.
(SPP)
(GOEP)
(OPP)
(HFP)
Provides a basis for other data profiles.
Pushes and pulls objects to and from a push server.
Connects the Audio Gateway device to the Hands Free device.
Uses Bluetooth Network Encapsulation Protocol for Bluetooth
transmission.
Advanced Audio Distribution
Profile
Audio Video Remote Control
(A2DP)
(AVRCP)
Streams stereo-quality audio to a wireless headset or
speaker.
Allows controlling of television and Hi-Fi equipment.
Profile
General Audio/Video
(GAVDP)
Provides a basis for A2DP and VDP.
Distribution Profile
Human Interface Device Profile (HID)
Provides a low latency Bluetooth connection with keyboards,
pointing devices, etc.
Phone Book Access profile
Out of band and Near Field
Communications
Symbol Serial Interface Profile
Human Interface Device Profile (HID)
Dial-up Networking Profile (DUN)
(PBAP)
Transfers Phone Book Objects to a car kit to display the
information of an incoming call received on the mobile POS,
or initiate a call.
(OOB, NFC)
Supports additional scanner.
(SSI)
Manages the pairing process by using NFC.
Provides a low latency Bluetooth connection with keyboards,
pointing devices, etc.
Provides a standard to access the Internet and other dial-up
services over Bluetooth.
142
Page 23

OFF
ON
Wireless Radios
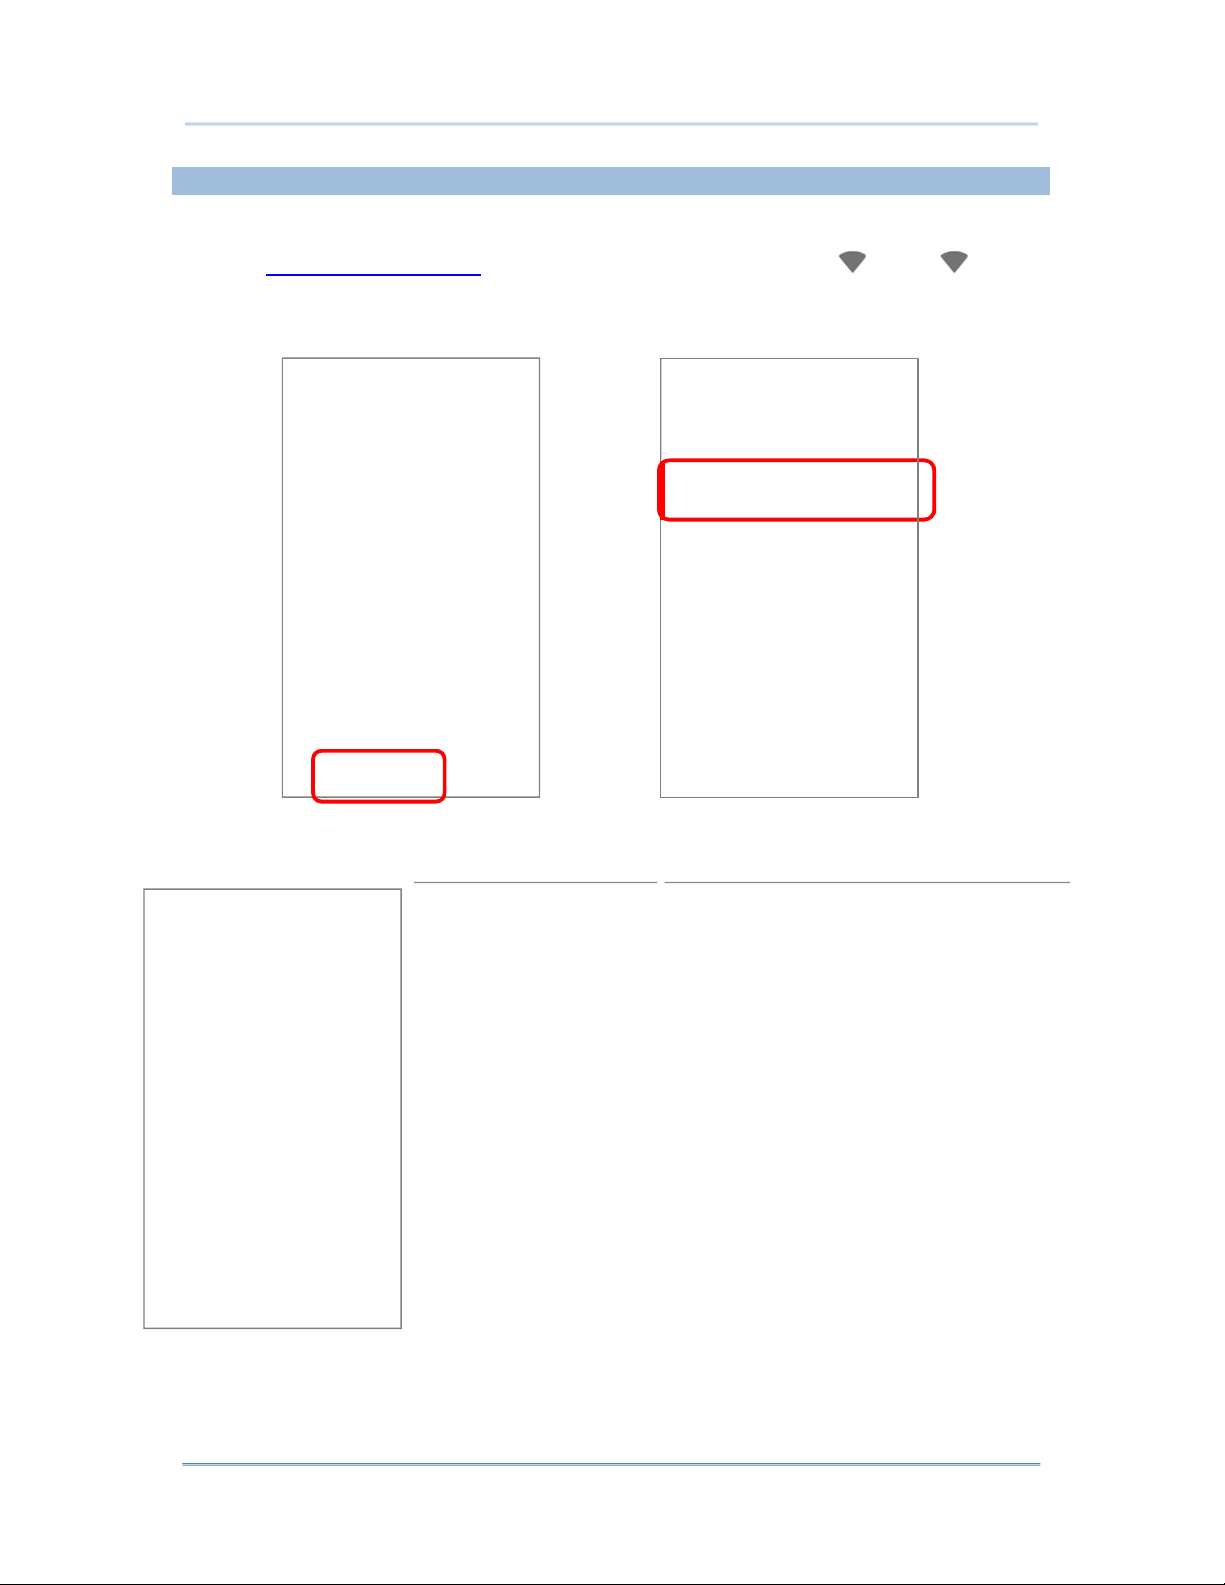
4.3.2. TURN ON BLUETOOTH
By default, Bluetooth is turned off, to turn it on:
Via Quick Settings Panel:
Swipe down from the top of the screen to open Quick Settings Panel.
1)
2)
Tap on Bluetooth icon to turn it on or off.
Via Quick Settings Menu:
Swipe down to open Quick Settings Menu.
1)
Tap Bluetooth icon to turn it on while enabling the Bluetooth visibility of this device.
2)
OR
Bluetooth
Tap “
Tap “More Settings” for detailed settings.
” under to enter “Bluetooth” page to switch this function on/off.
143
Page 24

HERA51 Mobile POS
Via Settings page:
1) Go to
2)
App Drawer (All Apps) | Settings
Tap the switch to turn on this function while enabling the Bluetooth visibility of this
|
Connected devices
|
Bluetooth
.
device.
OR simply switch Bluetooth on/off in App Drawer (All Apps) | Settings
devices
.
|
Connected
Note: Having been turned on, Bluetooth is active even when the mobile POS is suspended.
However, if the power mode is switched to Airplane Mode, Bluetooth power will be turned off
regardless of the settings.
144
Page 25

Wireless Radios
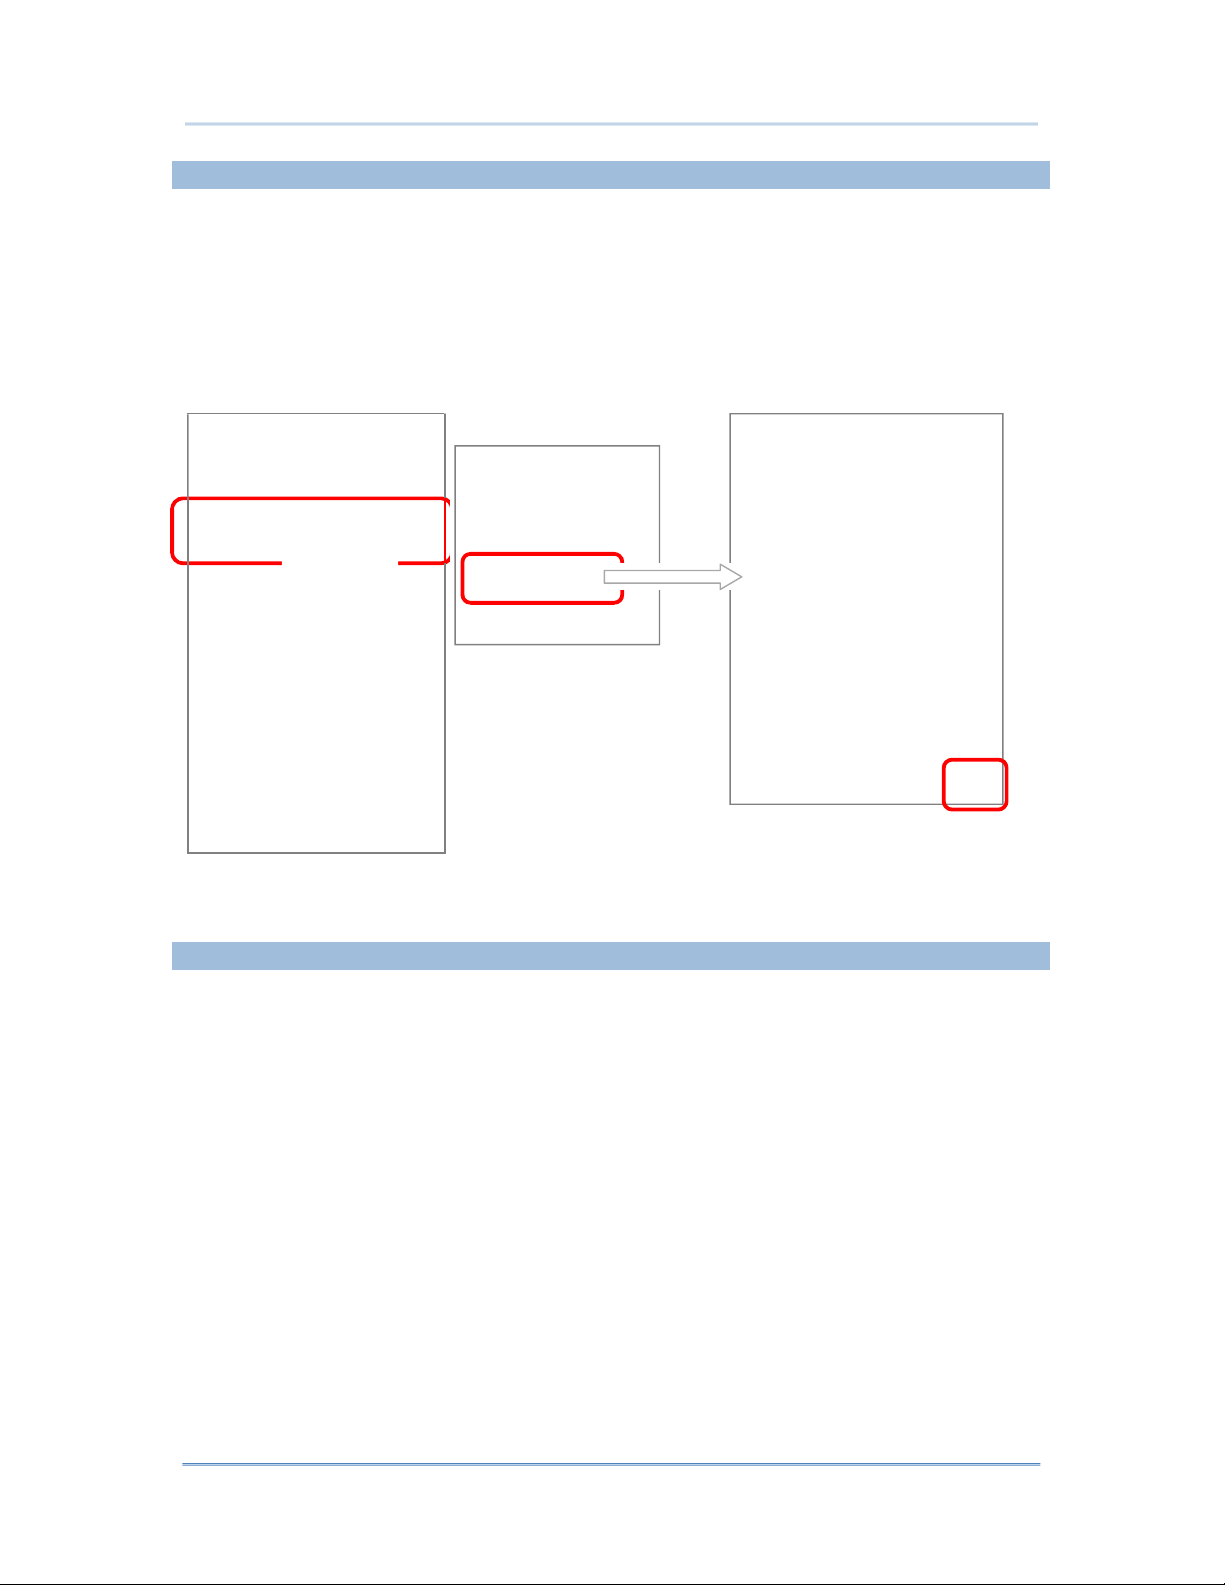
4.3.3. CHANGE BLUETOOTH NAME
To change the Bluetooth name of this mobile POS:
1) Go to
2)
3)
App Drawer (All Apps) | Settings
Turn Bluetooth on and tap on “Device name”.
On the pop-up dialog “Rename this device”, type a new name in the field and tap
RENAME
.
|
Connected devices
|
Bluetooth
.
145
Page 26

HERA51 Mobile POS
4.3.4. PAIR BLUETOOTH DEVICES
1) Go to
2)
App Drawer (All Apps) | Settings
Switch Bluetooth to On and tap “Pair new device” to scan for available Bluetooth
devices nearby. Scroll through the list and tap the device you would like to pair.
Connected devices
|
| Bluetooth .
The Bluetooth pairing request window opens. Depending on the pairing settings of the
3)
Bluetooth device, you may need to enter a passkey, or confirm the assigned passkey on
the device to pair if a smart pairing method is applied. Enter/confirm the passkey on the
device to pair.
Once pairing is done, the Bluetooth device will be listed in the Paired Devices list.
4)
Note: If the device you would like to pair with is not listed, make sure Bluetooth visibility is
enabled on the device.
146
Page 27

Wireless Radios
4.3.5. UNPAIR BLUETOOTH DEVICE
To unpair a paired device:
In the Paired Devices list, tap the settings button next to the paired device.
1)
On the Paired device screen, tap FORGET.
2)
147
Page 28

HERA51 Mobile POS
4.4. USE NEAR FIELD COMMUNICATIONS
Near field communications (NFC) uses close proximity (4 cm or less) to establish radio
communication through electromagnetic fields. With NFC enabled, the mobile POS can
collect information from NFC tags, exchange information with other NFC supported devices,
and even change information on the NFC tag if authorized.
Before starting to communicate through NFC, perform the following:
1) Go to
2) On “
3) On “
App Drawer (All Apps) | Settings
Connected devices
tapping on “Adjust NFC power”.
Connected devices
” page, tap to switch on “
” page, tap
Android Beam
Connected devices
|
NFC
. NFC power is adjustable by
”
and enable it.
.
148
Page 29

Wireless Radios
4.4.1. PAIR WITH NFC ENABLED BLUETOOTH DEVICES
On the device you would like to pair with, make sure NFC is enabled and Bluetooth
1)
discovery is enabled.
Hold the mobile POS without covering the antenna area at the lower end of the battery.
2)
Move the mobile POS in proximity with the device. A screen notification will appear to
3)
indicate that pairing is successful.
4.4.2. SHARE INFORMATION
1)
Open the web page, video, photo or contact info page you would like to transfer.
2)
Place the back of the mobile POS in close proximity with the other device you would like
to share data with.
When the two devices connect, a “Touch to beam” notification will appear on the screen.
3)
4)
Touch the screen to initiate data transfer.
Note:
Once the data begins to transfer, just keep the two devices in the distance within 10 m (32.8 ft.);
they no longer have to be held within close range in order to transfer successfully.
4.4.3. COMMUNICATION WITH NFC
1)
On the mobile POS, launch an NFC enabled application.
2)
Hold the mobile POS without covering the antenna area at the lower end of the battery.
Place the mobile POS close to the NFC tag or device until the application indicates data
3)
transfer is complete.
149
Page 30

HERA51 Mobile POS
Chapter 5
USING THE PHONE
The HERA51 mobile POS allows making phone calls and connecting to the network over
Wideband Code Division Multiple Access (WCDMA). Insert the SIM card before turning
on the power. Refer to Installing SIM Card, SAM Card and Memory Card.
Note:
If the SIM card is not in position, you may make emergency calls if the service is supported.
IN THIS CHAPTER
SIM Card Management .............................................. 151
5.1
Phone Application ...................................................... 153
5.2
Audio Modes ............................................................. 162
5.3
In-call Volume .......................................................... 163
5.4
150
Page 31

Using the PHONE
5.1. SIM CARD MANAGEMENT
The default setting for celluar networks is “Automatically select network”. To manually
select the cellular network, please:
Go to App Drawer (All Apps) | Settings | Network & Internet | Mobile
1)
Network
Disable “Automatically select network”, and tap on “Network”. Available networks will
2)
be listed after searching.
Select your preferred network from the list.
3)
.
A notification appears if the selected network is unavailable. Please repeat the aforesaid
4)
steps to select the network again.
151
Page 32

HERA51 Mobile POS
EMERGENCY CALLS
Depending on your service provider, the mobile POS might support making emergency
phone call when the SIM card is locked, or even when no SIM card is inserted. Emergency
phone numbers will vary by country.
152
Page 33

Using the PHONE
5.2. PHONE APPLICATION
5.2.1. PHONE INTERFACE
When a SIM card is installed on the mobile POS, a signal icon appears on the status bar. The
filled part of the signal icon indicates the strength of the connection.
To make phone calls:
1) Go to
2)
3)
App Drawer (All Apps) | Phone
Tap the settings button to open the phone settings menu for more setting options.
Tap to open the dial pad.
. The Phone application opens.
153
Page 34

HERA51 Mobile POS
In tab page, it displays your favorite contacts & your frequent calls:
To add a favorite contact, please tap the contact in tab page and tap the star mark
to add.
To clear the frequent calls, please tap and select “Clear frequents”.
154
Page 35

Using the PHONE
5.2.2. PLACE CALL
Tap to expand the dial pad, and enter the phone number in the dial pad and tap
to initiate the call. If you need to frequently make calls to an interactive voice system, you
may tap next to the number and select Add 2-sec pause for soft pause (a pause of 2
seconds to the buttons) or a hard pause (a pause that will wait for your confirmation to send
the following digits).
155
Page 36

Button
Description
HERA51 Mobile POS
5.2.3. DURING A CALL
When a call is connected, the phone keypad features the following buttons:
Mute: Mutes the call.
Keypad: Opens the keypad.
Speaker: Turns on the speaker.
Add call: Adds another person to the call.
Hold: Places the call on hold.
156
Page 37

Using the PHONE
PLACE CALL USING CONTACTS
To make a call using contacts:
1)
In the phone application page, tap .
Tap a contact to initiate a call.
2)
157
Page 38

HERA51 Mobile POS
5.2.4. RECEIVE INCOMING CALL
When a call is incoming on the mobile POS, tap to pick it up.
Incoming calls will be logged in the Phone application; in the case of a missed call, a
notification will be displayed. See Check Miss Calls.
To mute the ringtone of an incoming call, press the volume down button
5.2.5. CHECK MISSED CALLS
If you have a missed call, a notification icon will appear on the status bar. The missed
calls notification will also be displayed on:
The Phone app icon
1)
The Lock Screen
2)
(Turning on/off this function on:
App Drawer (All Apps) | Settings
lock screen)
Unlock the screen and use the Notification Drawer to manage the missed call.
Apps & notifications
|
| Notification | On the
158
Page 39

Button
Description
Using the PHONE
5.2.6. CALL HISTORY
On the Phone application page, tap the History button to open a list of history calls.
1)
Or you can tap the settings button and then Call History.
Connected calls.
Missed calls.
Tap the phone icon next to a call record to place back the call.
2)
159
Page 40

HERA51 Mobile POS
5.2.7. CALL SETTINGS
Tap and select “Settings” to enter the settings page:
Tap each setting for more setting options.
160
Page 41

Using the PHONE
5.2.8. MAKE MULTI-PARTY CALLS
To make multi-party conference calls:
1)
On the Phone application page, enter the first number to call and tap to initiate the
call.
After the call has begun, tap and then Add call to add another member. The first
2)
call will be put on hold.
Enter the second number to call and tap to initiate the call.
3)
When the second call is connected, the first call will continue to be on hold. Tap the
4)
merge call button to add the first call to the conversation. A three-party conference
call is initiated.
To add a fourth member, tap . The three-party call will be put on hold. Enter another
number to call and tap to initiate the call. When the call is connected, the
three-party call will continue to be on hold. Tap the merge call button to add the
three-party call to the conversation. A four-party conference call is then initiated.
Tap Manage Conference to view all members of the call.
To remove a member, tap next to the member.
To speak with a member in private, tap the member, and the conference call will be put
on hold. Tap to return back to the conference call.
161
Page 42

HERA51 Mobile POS
5.3. AUDIO MODES
The mobile POS offers three different audio modes for phone calls:
HANDSET MODE
This is the default audio mode which uses the receiver above the touchscreen for audio
output during calls.
This mode uses the built-in speaker for audio output during calls.
HEADSET MODE
Connect a Bluetooth headset the mobile POS for audio output during calls.
USE BLUETOOTH HEADSET
See Pair Bluetooth Devices to connect the mobile POS to a Bluetooth device. The speaker
phone becomes muted when a Bluetooth headset is connected.
162
Page 43

Using the PHONE
5.4. IN-CALL VOLUME
Use the volume buttons to adjust the ringer volume and system sound level. When in the
middle of a call, use the volume buttons to adjust in-call conversation volume.
163
Page 44

HERA51 Mobile POS
Chapter 6
USING READER CONFIGURATION UTILITY
The Reader Configuration utility allows you to manage the barcode reader integrated on
the mobile POS.
IN THIS CHAPTER
Configuring Reader ................................................... 165
6.1
Read Printed Barcodes ............................................... 183
6.2
164
Page 45

HERA51 Mobile POS
6.1. CONFIGURING READER
The mobile POS is capable of reading printed barcodes. The reader module can be either a
(laser) 1D reader or a 2D imager. The mobile POS is installed with a Reader Config to
configure the scan engine built inside. Use it to create a profile of settings that best suits
your needs.
LAUNCH READERCONFIG
To launch ReaderConfig:
1)
Go to
utility.
App Drawer (All Apps) | ReaderConfig
to open the reader configuration
ReaderConfig launches in context with the reader module(s) on board the mobile POS.
2)
On the main settings page are three sections: General Settings, Symbology and
Miscellaneous.
165
Page 46

HERA51 Mobile POS
6.1.1. GENERAL SETTINGS
General Settings is where all reader settings are accessed from. Tap each item to enter its
sub-menu.
The functions under General Settings include:
Scanner Preferences
Data Output
Enable Reader (enabled by default)
Notification Settings
166
Page 47

Using Reader Configuration Utility
Options on the Scanner Preferences page differ according to the type of scan engine built
within the mobile POS.
To open Scanner Preferences page:
1)
Open Reader Config as described in Launch Reader Config.
Tap Scanner Preferences.
2)
167
Page 48

HERA51 Mobile POS
2D IMAGER SETTINGS
Setting
Decode Timeout Sets the maximum time for the decoding process during a scan. Configurable
Redundancy Level Sets how many successful readings should be done before linear barcodes
Security Level Sets the security level to ensure decoding accuracy considering the printed
Description
between 1 sec to 9 sec.
such as Codabar, MSI, and Interleaved 2 of 5 can be decoded. Levels 1 to 4
available.
quality of barcodes such as Code 128, Code 93, and UPC/EAN. The higher the
level is, the more security is ensured. Options are:
Level
0
Description
With this default, the scan engine is aggressive enough to decode
most “in-spec” barcodes.
1
Select this level if misdecodes have occurred. It fixes most
misdecodes.
2
Select this level if Security Level 2 should fail to prevent
3
Select this level if Level 1 should fail to eliminate misdecodes.
misdecodes. However, as this level actually impairs the decoding
ability of the decoder, a safer solution would be to improve the
quality of the bar codes to read.
Inter-Char Gap
Size
Scan Mode Sets the reader’s scanning behavior.
Presentation Usage
Time
Decoding
Illumination
Decode Aiming
Pattern
Picklist Mode When selected, only barcodes aligned at the crosshair of the laser light beam
Display Mode Enable improved performance for reading barcodes on electronic displays
Inverse Type Decide whether to disable or enable decoding inverse barcodes, or set as
Addon Redundancy Functions when “auto-discriminate” is applied for UPC/EAN addons. Decides
Sets the intercharacter gap size for Code 39 and Codabar. This option is to
allow the digital scanner to adjust its decoding standard so as to tolerate
out-of-specification bar codes that are improperly printed out (which may
cause the intercharacter size to become larger). Switch between Normal and
Large.
Level: The decoding process is activated by a trigger event, and continues
until the trigger event ends, a valid decode happens or decode session timeout is reached.
Presentation Mode: When this device is executing Barcode reader service
under this mode, the reader module will stay active and automatically turn
off after the user-defined period of time (Presentation Usage Time).
This option is available when Presentation is selected as the scan mode.
This defines the duration of how long Presentation mode stays active, after
which the laser light beam will automatically be disabled.
Enables an LED light beam to aid barcode reading. Selected
Projects a crosshair at the center of the laser light beam to facilitate barcode
reading.
will be decoded.
and mobile phones.
auto.
the number of times of supplemental decoding of the same barcode in order
to count as a valid read. Configurable between 2 and 30.
Default
3 sec.
Level 1
Level 0
Normal
Level
15 Minutes
(Enabled)
Selected
(Enabled)
Deselected
(Disabled)
Deselected
(Disabled)
Regular
only
10
168
Page 49

Illumination Power
Level
Using Reader Configuration Utility
Users can adjust the illumination brightness of the LED light source. Move the
slider to specify a value ranging from 1 to 10 to set the brightness level which
is set to 10 by default meaning 100% illuminated.
DATA OUTPUT
Data Output allows users to set the way to output decoded data.
To open Data Output settings page:
1)
Open Reader Config as described in Launch Reader Config.
Tap Data Output.
2)
10
WHERE TO OUTPUT
Keyboard Emulation setting controls where the decoded data is to be output.
Setting
Keyboard Emulation
Descriptions
Tap the switch to enable. When enabled, the reader module
treats decoded data as typed text and outputs it to the active
application on the mobile POS. Options are:
None
InputMethod
KeyEvent
169
Default
InputMethod
Page 50

HERA51 Mobile POS
HOW TO OUTPUT
After the output destination is set, configure how to output decoded data, i.e. the “format”
to present decoded data.
Setting
Description
Default
Auto Enter
Adds an ENTER character before or after each string of decoded
data. The ENTER character can be defined in the “Auto Enter
character” field below. This function saves the trouble of pressing
a confirmation key to accept each string of decoded data. Options
are:
Disable
Decoded data + Enter char
Enter char + Decoded data
Auto Enter character Adds a key code before or after the decoded data. If [Auto Enter]
is enabled, select the ENTER character to send. Options are:
None
Carriage Return
Tab
Space
Comma
Semicolon
Display Code Type Prefixes the output data with code type information.
Display Code Length Suffixes the output data with code length information.
Decoded data +
Enter char
Carriage Return
Deselected
(Disabled)
Deselected
(Disabled)
Prefix Affixes 0 to 10 characters to the left of the output data. Tap the
--
label to open a character table for entering the prefix.
Prefixes containing invisible characters are supported.
Suffix Affixes 0 to 10 characters to the right of the output data. Tap the
label to open a character table for entering the suffix.
--
Suffixes containing invisible characters are supported.
Field Delimiter Sets the delimiter to separate the output barcode data to the
following pieces: code type, decoded barcode data, and code
length (if applicable). Options are:
None
None
Comma
Semicolon
Full stop
Barcode charset Specifies the current decoding for barcode data.
Clear Previous Data By enabling this option, only the last scanned data entry will be
output.
170
Windows-1252:W
estern European
Deselected
(Disabled)
Page 51

Selects to enable/disable LED light (left) for scanning
Enables/disables tactile feedback (vibration) for good
Using Reader Configuration Utility
ENABLE READER
Features a switch to enable or disable reader scanning ability. When enabled, a light beam
will be sent out from the scanning window each time the trigger (scan key) is pressed.
NOTIFICATION SETTINGS
Notification Settings enables audible, visible and tactile feedback for scanning good read,
which helps notify the user of a successful decoding.
To open Notification Settings page:
Open Reader Config as described in Launch Reader Config.
1)
Tap Notification Settings.
2)
Setting
LED
Vibrator
Beeper
Enable
good read
Vibrate when
read
Beep
read
LED
when
when
good
good
Description
good read. See Status LED for details.
read and sets the duration to vibrate.
Sets the beeper sound for scanning good read. Users can
choose to mute the beeper sound, or configure the
beeper between sounds 1 to 9.
171
Default
Deselected
(Disabled)
0 second
(Disabled)
Sound 1
Page 52

HERA51 Mobile POS
6.1.2. SYMBOLOGY
The Symbology page sets the symbologies to read, and also enables/disables some
feature(s) for a symbology to read, such as:
Customize and transmit start/stop characters
Verify/transmit check digits
Enable/disable addon digits
Convert to another symbology
Transmit symbology ID
172
Page 53

1D Symbologies
2D Symbologies
Using Reader Configuration Utility
To open Symbology settings page:
Open Reader Config as described in Launch Reader Config.
1)
2)
Tap 1D Symbologies or 2D Symbologies (in case of a 2D imager) to list all symbologies
which can be decoded.
ENABLE/DISABLE SYMBOLOGY
Tap the label of each symbology to enable or disable it.
173
Page 54

HERA51 Mobile POS
SYMBOLOGY SETTINGS
Tap the Detail label below each symbology to access detailed settings for the specific
symbology.
For details about the featured settings:
See 2D Imager Symbology Settings.
174
Page 55

Setting
Description
Default
Using Reader Configuration Utility
6.1.3. MISCELLANEOUS
This section allows enabling code ID transmission for easy identification of the scanned
barcode.
Transmit AIM Code ID
Sets whether to include AIM code ID character in the
decoded data. For AIM code ID, see the following:
Deselected
(Disabled)
2D Imager Symbology Settings.
175
Page 56

HERA51 Mobile POS
6.1.4. READER CONFIG OPTION MENU
Reader Config provides an option menu which is accessible on the menu bar of the main
settings page. This menu allows you to test scan barcodes, import/export all settings
(except of the setting of “Enable Reader”) in a re-usable format, reset all settings back to
factory default, and view copyright and version information.
176
Page 57

SCAN
TEST
Using Reader Configuration Utility
To test scan a barcode:
Open Reader Config as described in Launch Reader Config.
1)
Tap the settings button on the menu bar to open the option menu.
2)
Tap Scan Test in the option menu. A page opens for test scanning.
3)
177
Page 58

HERA51 Mobile POS
IMPORT AND EXPORT
Reader Config supports saving the settings (except of the setting of “Enable Reader”) and
exporting them as a .json file.
Previously exported symbology and scanner settings can be imported again on the mobile
POS. This can also be used to implement identical Reader Config settings on multiple
devices.
To import settings:
Open Reader Config as described in Launch Reader Config.
1)
Tap the settings button on the menu bar to open the option menu.
2)
Tap Import in the option menu.
3)
A page opens allowing you to select a previously saved profile.
Tap OK. In a few seconds a prompt will appear on the mobile POS to indicate settings
4)
have been imported successfully.
178
Page 59

Using Reader Configuration Utility
To export settings:
Open Reader Config as described in Launch Reader Config.
1)
Tap the settings button on the menu bar to open the option menu.
2)
Tap Export.
3)
An export page opens allowing you to enter the name and location of the profile to save.
4)
Tap OK to export. A prompt will appear on-screen to notify that settings have been
5)
exported.
179
Page 60

HERA51 Mobile POS
RESET TO FACTORY DEFAULTS
This function restores all settings in the Reader Config application to default.
To enable Factory Reset:
Open Reader Config as described in Launch Reader Config.
1)
Tap the settings button on the menu bar to open the option menu.
2)
Tap Reset to Factory defaults.
3)
A warning dialog appears confirming whether to restore all application settings back to
4)
default. Tap OK to reset or Cancel to close the dialog.
180
Page 61

Using Reader Configuration Utility
You can set a password to restrict other users of this mobile POS from changing certain
configurations or accessing certain functions in Reader Config.
Open Reader Config as described in Launch Reader Config.
1)
Tap the settings button on the menu bar to open the option menu.
2)
Tap Security.
3)
Enter and confirm a password (up to 32 characters, containing at least 1 digit or 1
4)
alphabetic letter).
Check the items that will be protected by this password.
5)
181
Page 62

HERA51 Mobile POS
Tap About in the Reader Config option menu to display software version and copyright
information.
182
Page 63

Using Reader Configuration Utility
6.2. READ PRINTED BARCODES
Aside from output to destinations as per Keyboard Emulation settings, Reader Config
provides a Scan Test feature for quick viewing of decoded data.
To perform test scanning of barcodes:
Open Reader Config as described in Launch ReaderConfig.
1)
Tap the settings button on the menu bar to open the option menu.
2)
3)
Tap Scan Test on the menu bar.
A Test Scan Form opens for displaying the scanned data.
4)
Aim the scanning window at the barcode to read
and press any of the two side triggers. The
scanning light beams to read the printed barcodes.
The scanning light goes off once the data is
decoded, or when the decode timeout period has
passed
183
Page 64

HERA51 Mobile POS
The decoded data will appear on the page. When finished viewing, tap to leave the
test scan page; or tap the settings button and then “Save” to save the decoded data as
a .txt file, or “Clear All” to clear all data on the screen.
184
Page 65

HERA51 Mobile POS
Operating System & CPU
SPECIFICATIONS
PLATFORM, PROCESSOR & MEMORY
OS Version Android 8.1 Oreo with GMS Certified
CPU Qualcomm SDM450
Memory
ROM 16GB
RAM 2GB
Expansion Slot One Micro SD card slot (up to 32GB for SDHC; up to 64GB for SDXC)
185
Page 66

Communication
HERA51 Mobile POS
COMMUNICATION & DATA CAPTURE
USB Client USB 2.0 OTG
WPAN Bluetooth 2.1EDR/4.0 BLE/V4.1
WLAN 802.11 b/g/n and 802.11 a/ac/n networking
WWAN Built-in WWAN modem for Quadband GSM, UMTS, LTE functions:
GPS GPS, GLONASS, BeiDou, AGPS
Data & Image Capture
Digital Camera Autofocus 13 megapixels with user-controllable LED flash
Barcode Reader 2D Imager
HF RFID Reader Supports NFC (Peer-to-Peer, Card Reader, Card Emulation)
(2412~2472 MHz: 18.34dBm
5180~5240MHz: 17.04dBm,
5260~5320MHz: 17.04dBm,
5500~5700MHz: 17.01dBm)
GSM/GPRS/EDGE/WCDMA/UMTS/HSDPA/HSUPA/HSPA+/LTE
Worldwide
Frequency bands:
GSM/GPRS/EDGE
880~915, 925~960MHz: 33dBm
1710~1785, 1805~1880MHz: 30dBm
WCDMA/UMTS/HSDPA/HSUPA:B1(2100),B8(900)
1920~1980, 2110~2170: 24dBm
880~915, 925~960: 24dBm
LTE
FDD:B1(2100),B3(1800),B7(2600),B8(900),B20(800),B38(2600)
1920~1980, 2110~2170MHz: 23dBm
1710~1785, 1805~1880MHz: 23dBm
2500~2570, 2620~2690MHz: 23dBm
880~915, 925~960MHz: 23dBm
832~862, 791~821MHz: 23dBm
2570~2620MHz: 23dBm
Americas
GSM : 850/900/1800/1900
UMTS : 850/900/AWS(1700)/1900/2100
FDD LTE : 700/850/1700/1900/2600 (FDD 13,17,5,4,2,7)
186
Page 67

Batteries
at
least 8 to 12 hours. The allowed battery charging ambient
charge
the battery at room temperature (18°C to 25°C) for optimal
temperature
Color Touch Screen Display
4.7” LCD, Corning Gorilla Glass 3, touch supports bare/wet/gloved
indicators signaling charging
Specifications
ELECTRICAL CHARACTERISTICS
Main Battery Pack Replaceable and rechargeable
Backup Battery Rechargeable Li-ion battery: 3.7V, 60 mAh, full charging 4.2V.
Power Adaptor
Power Supply Cord with
Universal Power Adaptor
Working Time
Supports working time for up to 12 hours at 25 degrees
3.8V 4000mAh, full charging 4.35V
Minimum charging time: 4 hours @25°C
For the first time charging the main battery, please charge it for
temperature is between 0°C to 40°C. It is recommended to
performance.
Please note that battery charging stops when ambient
drops below 0°C or exceeds 40°C.
Capable of Data retention for 30 minutes
Charging time: 4 hours
Input AC 100~240 V, 50/60 Hz
Output DC 5V, 2A
CE, CB, BSMI, FCC, CCC, PSE, KC, CU, INMETRO
(AC plug only), BIS
PHYSICAL CHARACTERISTICS
Display
finger and stylus inputs
Resolution HD (720x 1280 pixels)
Notifications
Status LED A Ttri-color (white, green, & red) LED
Audio Integrated with one speaker playing sounds for events
Vibrator Integrated with one vibrator for tactile feedback
Dimensions & Weight
Dimensions 162 mm (L) x 80mm (W) x 26mm-40mm (H)
Weight 440g (equipped with 4000mAh battery)
and data capturing status
187
Page 68

Temperature
Multiple drops onto concrete at 1.2 m (3.9 ft.) on all six sides
Multiple drops onto concrete at 1.5 m (4.9 ft.) on all six sides for
HERA51 Mobile POS
ENVIRONMENTAL CHARACTERISTICS
Operating 0°C to 50°C (32°F to 122°F)
Storage -20°C to 60°C (-4°F to 140°F)
Charging 0°C to 40°C (32°F to 104°F)
Humidity
Relative humidity 5% to 95%
Resistance
Impact Resistance
Electrostatic Discharge ±12 kV air discharge, ±8 kV contact discharge
(Sharp temperature change, dewing, or freezing not allowed)
HERA51 mobile POS with rubber boot
188
Page 69

Development Environment & Tools
Specifications
PROGRAMMING SUPPORT
JAVA Environment Android studio
Software Development Kit: JAR
C# Environment: Visual Studio
Software Development Kit: DLL (Xamarin Library)
Software & Utilities
Software Package Reader Config
Software Trigger
Mobile Deployment Suite for Android
App Lock
Xamarin Binding
HF RFID Configuration
Signature Capture
Terminal Emulation
189
 Loading...