

MP Lighting LED92 Rough In Installation Instructions
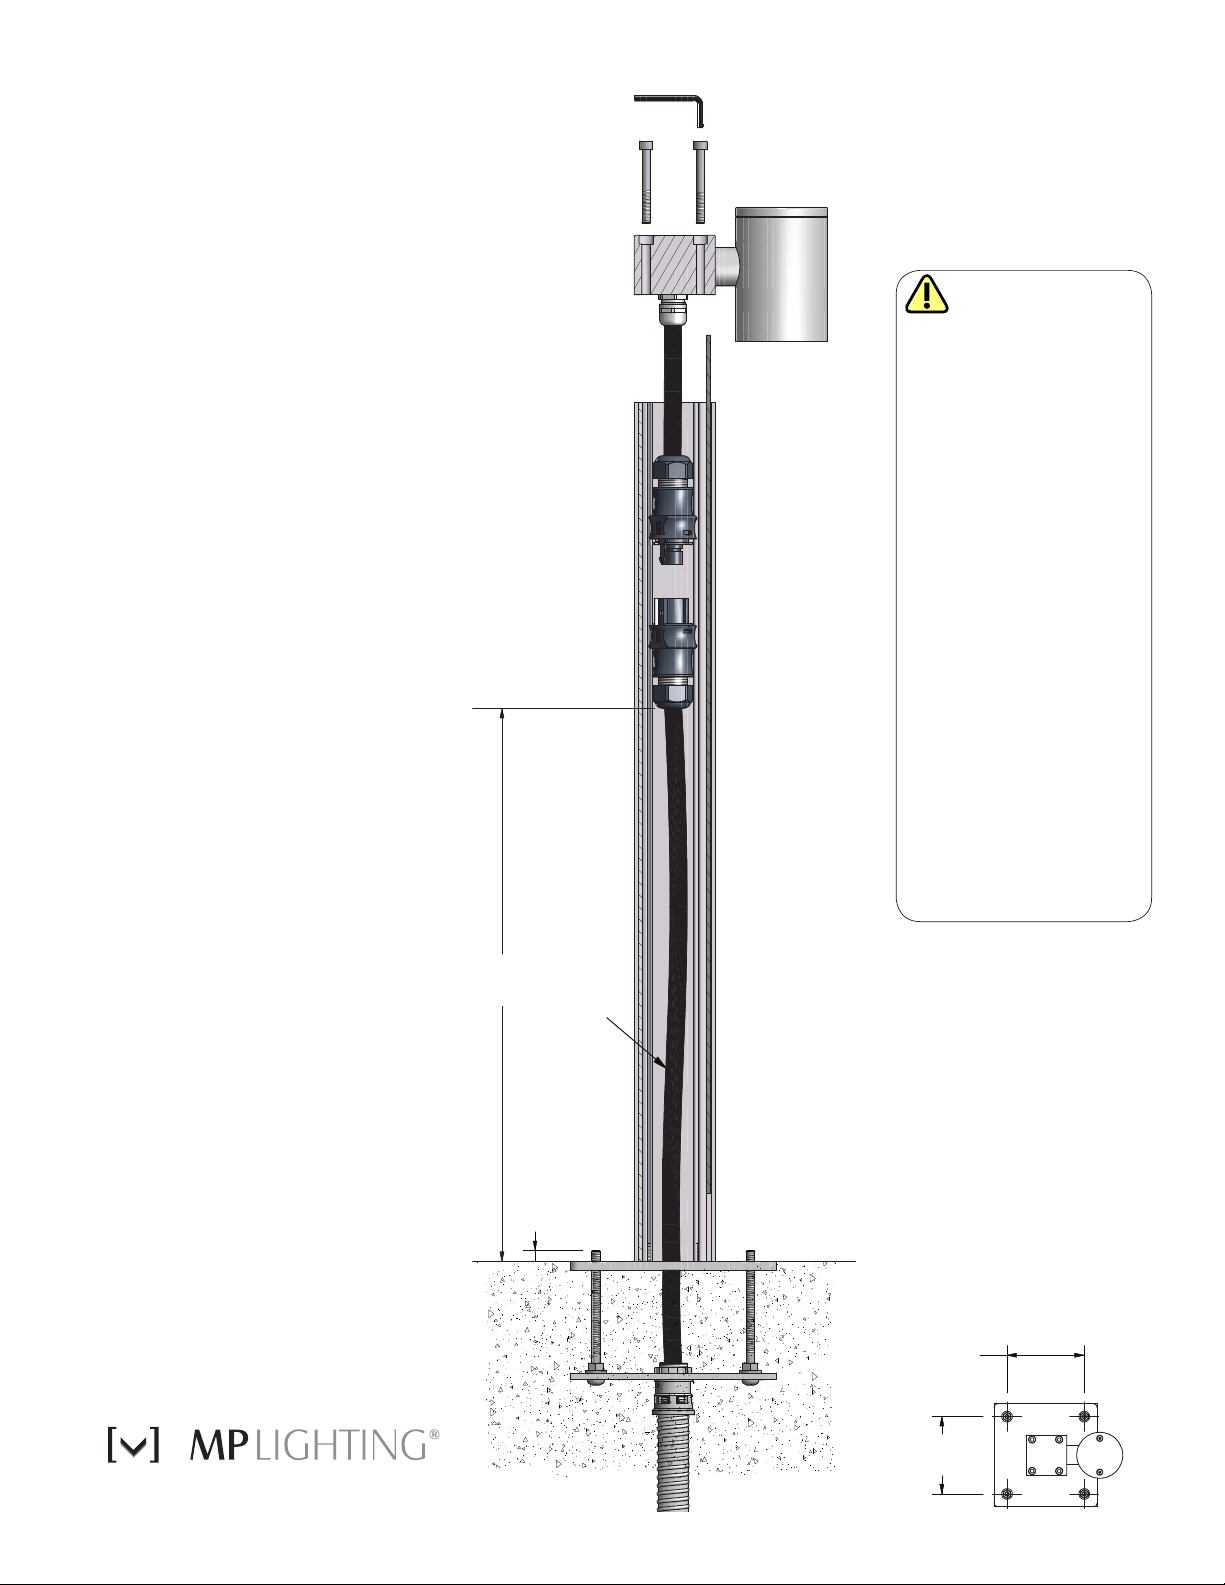
1/2 to 3/8” (13 to 10mm)
114mm
4-1/2”
114mm
4-1/2”
of hex bolt screws should
1
remain above finished
concrete when positioning
mounting plate.
Attach conduit.
2
Pull cabtire cable so
approximately 36”
3
(915mm) of cable
remains above
concrete.
LED92
Rough In
Installation
Instructions
CAUTION
• Read all instructions.
• WARNING: RISK OF FIRE OR
ELECTRICAL SHOCK: Do not
make or alter any openings in the
compartment of wiring or electrical
components during installation.
Do not alter or add ballasts, or any
other electrical components.
• Installation and use of this fixture
mounting assembly requires a
person familiar with the construction
and operation of luminaire electrical
systems and the hazards involved,
if not qualified, do not attempt
installation.
• Turn off power before installation.
• Connect to 700mA constant current
driver only.
• Avoid using detergents
with hand softeners, anti-bacterial
agents, glass cleaners or acrylic
cleaning products.
• KEEP THESE INSTALLATION
INSTRUCTIONS.
Parts Qty.
• LED unit
• Mounting plate 1
• Hex countersunk screw
• 1/4” x 3” Hex bolt screw
• 1/4” Hex cap nut
• Washers 4
• RST waterproof connectors
• Conduit strain
relief connector
1
4
4
4
1
not
included
Tools
• Allen key
included
Maintenance
Clean using a soft cloth.
t 1.877.708.1184 f 604.708.1185 www.mplighting.com
16 West 4th Avenue, Vancouver BC V5Y 1G3, Canada
915mm
36”
Cabtire
Cable
13 - 10mm
1/2 - 3/8”
114mm
4-1/2”
114mm
4-1/2”
Copyright © MP Lighting. All technical information in this document is subject to change. 06-2011
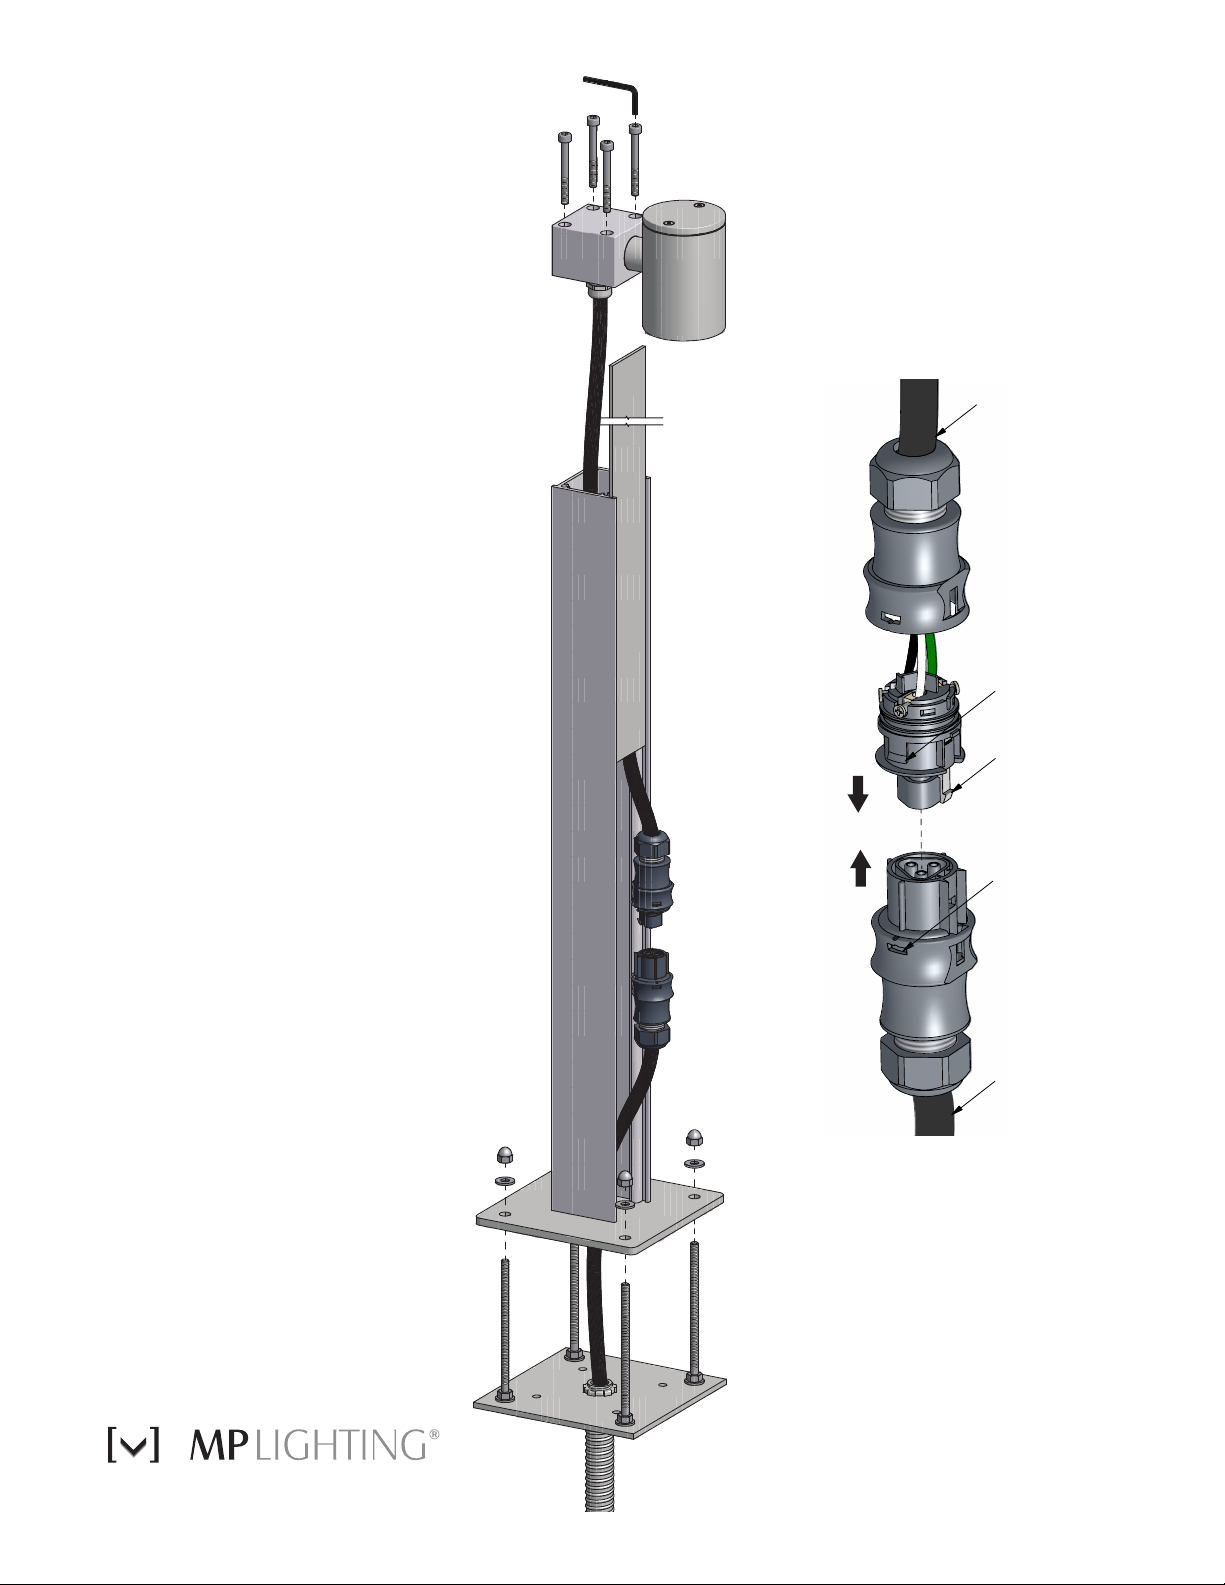
Remove side cover
plate on fixture.
1
Pull cabtire cable
through base plate.
2
Remove protective
sleeves from studs
3
and fasten base to
mounting studs.
Separate RST
waterproof connectors
4
and connect wires.
Reconnect both halves
of waterproof connector.
5
Replace cover plate and
mount fixture head by
6
tightening hex screws with
Allen key.
LED92
Fixture
Installation
Instructions
Cabtire Cable
Black
Locking Tabs
Grey
Locking Tab
t 1.877.708.1184 f 604.708.1185 www.mplighting.com
16 West 4th Avenue, Vancouver BC V5Y 1G3, Canada
Black
Locking
Tabs
Cabtire Cable
RST Connector Instructions
•
Separate RST connectors by
depressing grey locking tab
and pulling apart.
Next open connector half
•
way by depressing two black
locking tabs.
Connect line, neutral and
•
ground wires to screw terminals
then tighten gland nut firmly.
Copyright © MP Lighting. All technical information in this document is subject to change. 06-2011
 Loading...