

MPI Technologies EasyCom 5 Quick Manual
Quick Guide
EasyCom 5
English | Français
D10602-001
MPI Tech is a global vendor of workflow and output management
solutions with distribution worldwide. MPI Tech develops and
markets a world-leading portfolio of technologies and products
for unique Document Management and Printing solutions.
MPI Tech operates in most of the world through sales and
support offices and partners.

ENGLISH
The EasyCom 5 PrintServer services a single matrix printer. The
EasyCom 5 connects to the printer via a) USB to USB, b)
Centronics via an adapter cable, or c) via the printer networked
port.
This Quick Guide explains how to install your PrintServer. Please
consult the EasyCom 5 User Guide for more information.
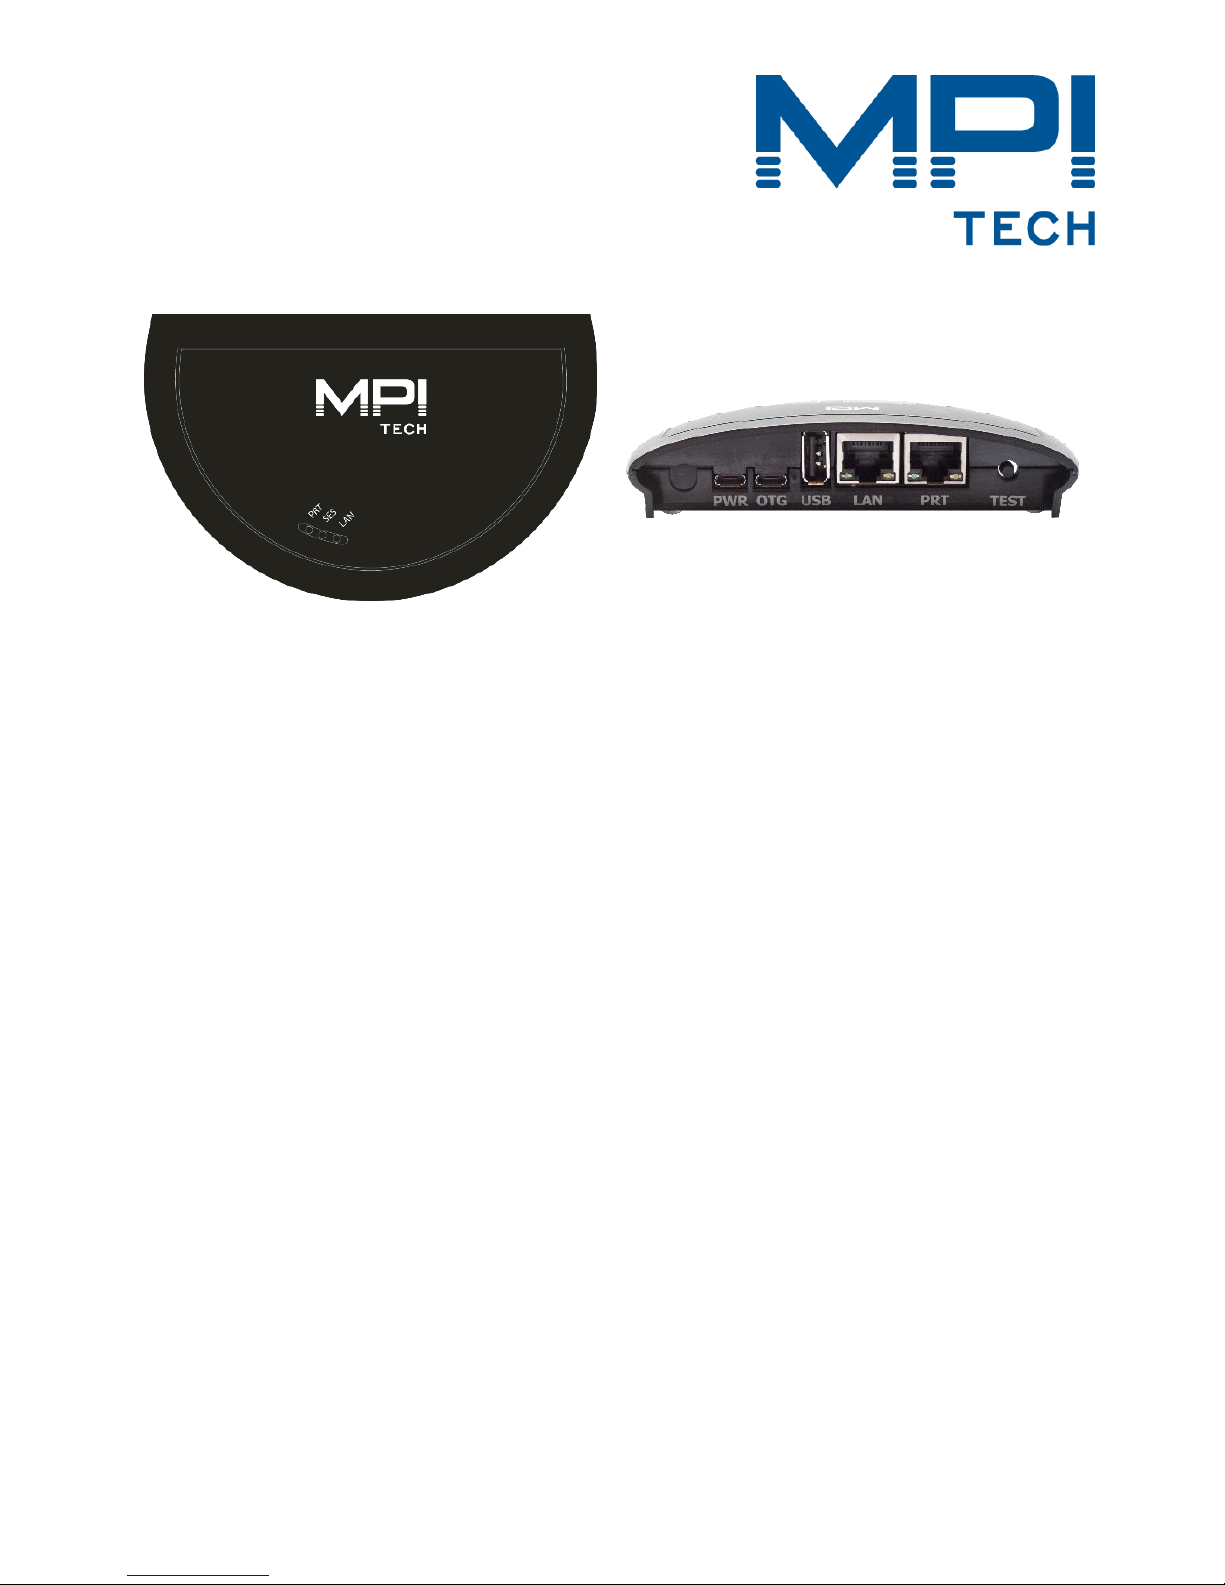
Connections and buttons
The PWR plug is for the 5V 1A power supply.
The OTG plug is for configuration via ethernet over USB.
The USB plug connects a printer via USB cable.
The LAN port connects the EasyCom 5 to the network.
The PRT port connects a printer via network cable.
The TEST button is for printing a test and configuration page
of the PrintServer. Press the TEST button between 8 and 60
seconds to reset settings to factory defaults. The box will
reset upon releasing the TEST button.
Installation
1. Make sure no power cord is connected to the PrintServer
2. Connect the PrintServer’s “LAN” port to the network.
Connect the printer to the “USB” port. Use standard USB
printer cable or USB Centronics adapter cable.
Please consult the EasyCom 5 User Guide if you wish to
connect the printer via network connection.
3. Power on the printer.
4. Locate the USB cable with micro USB/USB A. Attach the
USB A plug into the supplied power adapter. Carefully
slide in the Power PIN micro USB plug into the “PWR”
socket on the PrintServer. Please observe correct
orientation.
5. Insert the power adapter to the power outlet and power
up the PrintServer.
6. The green LED’s on the PrintServer front will blink during
the power on and self-test cycle. Only use the power
supply provided with the product. The output is rated
5vDC, 1A.

7. Install, start and use PrintGuide to configure additional
settings of the PrintServer. PrintGuide can be downloaded
from https://www.mpitech.com/ under “Support”,
“Software downloads”) Please consult the EasyCom 5 User
Guide.
Generate Settings Printout
Make sure that both the PrintServer and the printer are
powered on. After power on, allow 1 minute for the
PrintServer to complete initial setup.
Press the test button once to print out test page(s), of the
EasyCom 5 configuration, on the USB connected printer. The
test button is located on the PrintServer’s rear panel.
Please note that the printer must support Ascii in order for the
test page(s) to be printed.
Please consult the user guide for detailed additional setup and
trouble shooting. Documentation can be downloaded from the
MPI Tech website: https://www.mpitech.com under “Support”,
“Manuals & Quick Guides”.
If the test button is pressed during PrintServer start up (within
the first 1 minute), the test page(s) will either be skipped or
delayed in printing.
If PrintGuide or web browser has been used to configure a
printer, test page(s) are printed on this printer by pressing the
test button.
If the PrintServer discovers a USB connected printer during
PrintServer power up test page(s) will be printed on this USB
printer. Even if the PrintServer has been configured to use a
different printer. (This is only relevant for test page(s). All other
Print jobs sent via the EasyCom 5 PrintServer will be printed on
the assigned printer).
 Loading...