

Page 1

HMC-1000 QUICK
SETUP GUIDE
Page 2

Page 3

1. Creating and distributing copyrighted materials using this product is illegal.
2. The apparatus should not be exposed to dripping or splashing and no objects filled with liquids,
such as vases, should be placed on the apparatus.
3. To prevent fire or shock hazard do not expose the set to rain or moisture.
4. The apparatus should be set in a well ventilated area.
1. Read these instructions.
2. Keep these instructions.
3. Heed all warnings.
4. Follow all instructions.
5. Do not use this apparatus near water.
6. Clean only with a dry cloth.
7. Do not block any of the ventilation openings. Install in accordance with the manufacturer's instructions.
8. Do not install near any heat sources such as radiators, heat registers, stoves, or other apparatus (including
amplifiers) that produce heat.
9. Do not defeat the safety purpose of the polarized or grounding type plug. A polarized plug has two blades
with one wider than the other. A grounding type plug has two blades and a third grounding prong. The wide
blade or the third prong is provided for your safety. When the provided plug does not fit into your outlet,
consult an electrician for replacement of the obsolete outlet.
10. Protect the power cord from being walked on or pinched particularly at plugs, convenience receptacles, and
the point where they exit from the apparatus.
11. Use only the attachments/accessories specified by the manufacturer.
12. Use only with a cart, stand, tripod, bracket, or table specified by the manufacturer, or sold with the
apparatus. When a cart is used, use caution when moving the cart/apparatus combination to avoid injury
from tip-over.
-4--3 -
Page 4

-5 -
13. Unplug this apparatus during lightning storms or when unused for long periods of time.
14. Refer all servicing to qualified service personnel. Servicing is required when the apparatus has been
damaged in any way, such as power supply cord or plug is damaged, liquid has been spilled or objects have
fallen into the apparatus, the apparatus has been exposed to rain or moisture, does not operate normally, or
has been dropped.
This symbol is intended to alert the user to the
presence of uninsulated "dangerous voltage" within
the product's enclosure that may be of sufficient
magnitude to constitute a risk of electric shock to
persons.
-1-
I. QUICK SETUP
II. PLAY WITH YOUR HMC-1000
III. REMOTE CONTROLLER
IV. PLAY VIDEO FILES
V. PLAY AUDIO FILES
VI. VIEW PICTURE FILES
VII. ACQUIRING MULTIMEDIA FILES FOR YOUR HMC-1000
SCENARIO 1:
TRANS-CODING
VIII. ADVANCED FILE MANAGEMENT: SELECTING MULTIPLE FILES
Service Locator
This symbol is intended to alert the user to the
presence of important operating and maintenance
(servicing) instructions in the literature accompanying
the appliance.
CAUTION
RISK OF ELECTRICSHOCK
DO NOT OPEN
CAUTION : TO REDUCE THE RISK OF
ELECTRIC SHOCK, DO NOT REMOVE COVER (OR BACK).
NO USER-SERVICEABLE PARTS
INSIDE. REFER SERVICING TO
QUALIFIED SERVICE PERSONNEL.
Page 5

-3-
1. Starting your HMC-1000 for the first time
A. Now that you’re all connected, turn on your TV and turn on HMC-1000, either by pressing the POWER
button in the front, or by pressing POWER button on your remote controller.
B. Wait for about 30-40 seconds. Your HMC-1000 is starting up for the first time. You think it takes too long to
start the machine? It takes this long only when you plug in your machine and start it up for the first time.
After that, under normal condition, it takes about 15 seconds for HMC-1000 to wake up.
C. Depending on where you live, your TV screen might not look normal. This is because your TV is NTSC and
HMC-1000 is PAL; or your TV is PAL and HMC-1000 is NTSC.
i. It’s simple to correct this problem. Look for the NTSC/PAL button on your remote controller.
ii. Press it once to switch your HMC-1000 to a different setting.
2. You will see the blue screen with six menu items. They are: LIVE, PLAY LIST, PROGRAM, TOOLS,
SETTINGS, and MESSAGES.
-2 -
Connect your player to your television using the RCA cable that comes with your player. The RCA cable is the
cable with yellow, white, and red cords bundled together. Connect one end of the RCA cable to “CVBS” above
“AV / OUTPUT” on your player. Connect the other end to the RCA (some TV might have this labeled
“composite” or “CVBS”) input on your television. Connect the power cable to the power connector.
For connecting video, you have the following options:
VIDEO (composite video)
S-VIDEO (or “super-VHS”, provides a better quality than VIDEO)
COMPONENT VIDEO (provides an even better quality than the above)
After connecting the video, you will have to connect the audio. You can connect the audio to either the television
or your HiFi set. HMC-1000 outputs both analog and digital audio. Analog audio is the most common format, and
is supported by most devices. Digital audio is more common on high-end equipment and surround amplifiers.
For connecting the audio, you have the following options:
Connect AV OUT to your television using phono (RCA) jacks
Connect AV OUT to your HiFi stereo using phono (RCA) jacks
Connect COAXIAL or OPTICAL digital audio to your HiFi stereo
Video connection
Connecting your HMC-1000 player to your TV can be done using any of the cables below. (Only one cable can be
connected at a time)
1. S-Video (the cable is an extra accessory)
2. Composite
3. Component
Audio connection
Connecting your HMC-1000 player to your amplifier can be done using any of the cables below. (Only one
cablecan be connected at a time)
1. Analog Stereo
2. Coaxial Output (the cable is an extra accessory)
3. Optical Output (the cable is an extra accessory)
Page 6

-5--4 -
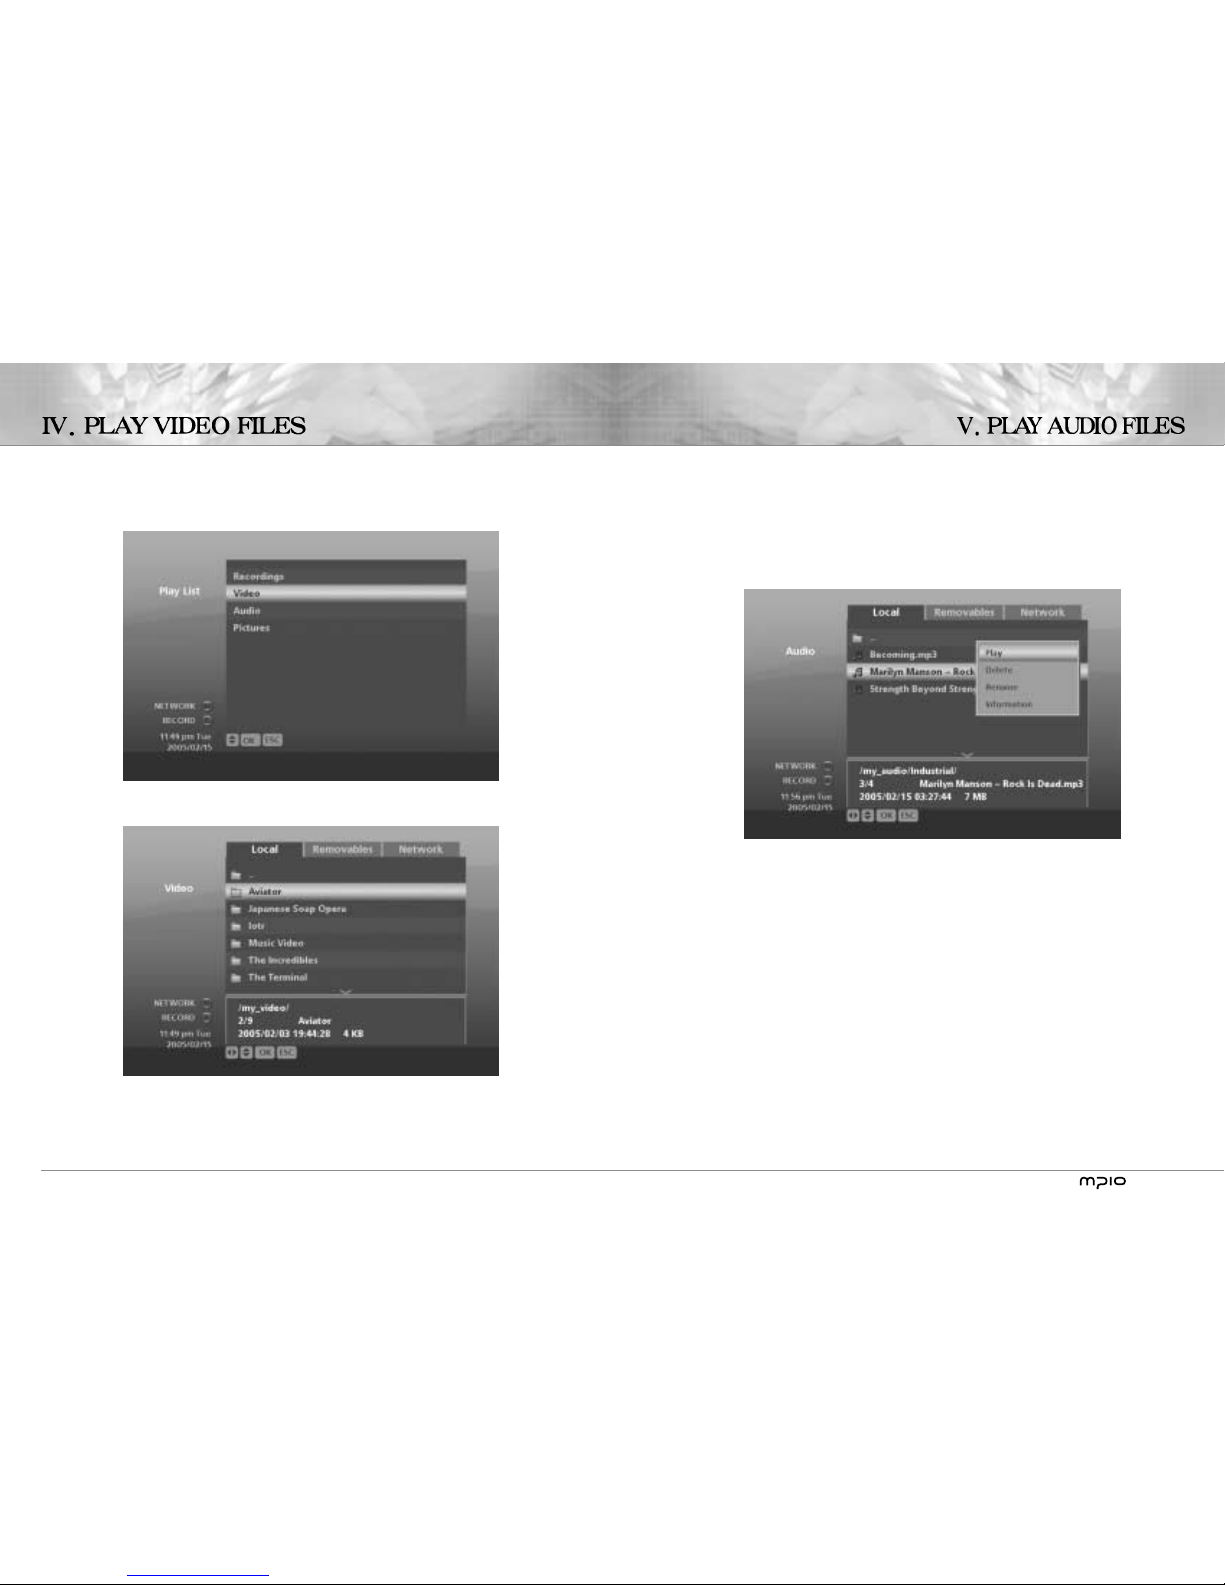
1. Now try navigating the main menu using the [NAVIGATION BUTTONS].
2. Highlight [PLAY] on the screen and press [OK] button.
3. You will see four items. They are: [Recordings], [Audio], [Video], and [Pictures].
A. Recordings: whatever HMC-1000 records, it will go in here and you will find in here.
B. Audio: MP3 files go in here.
C. Video: DivX, XviD, and other MPEG-4 or MPEG-2 movies you have acquired go in here.
D. Pictures: JPEG-format pictures go in here.
1. First, let’s study your remote controller.
A. Look for the [OK] button in the middle of your remote controller.
This button is, well, the [OK] button.
B. There are four thin buttons surrounding the [OK] button.
These buttons are called the
“NAVIGATION BUTTONS”.
C. Underneath the [NAVIGATION BUTTONS],
and to the left, look for a small button that says “ESC”.
This button is the escape button-this button is used to cancel an order,
or to get back out of certain point in the menu.
D. Right above your [NAVIGATION BUTTONS] you will see the red
button which says [REC].
This is the recording button. Whenever you’re watching live TV,
pressing this button will instantly start your HMC-1000 to record the
show you’re watching. Just like your grandma’s VCR.
* These four buttons are all you need to know to use HMC-1000.
Page 7
-7-
1. Go in to the [Audio] in the PLAY menu.
2. Select and play any file.
3. Enjoy.
* Playing a folder causes every file within the folder to be played.
-6 -
4. Select [Video] and press [OK]
5. You will see the list of movie files in it. Press [OK] on one of them and again choose “Play”.
The file starts to play.
6. Pressing STOP button which is the top navigation button stops playback.
* Playing a folder causes every file within the folder to be played.
Page 8

-9-
1. There are several ways to acquire, store, and play multimedia files on your HMC-1000. Some
of these are:
A. Using removable devices:
i. Removable hard disk
ii. Removable CD-ROM, CDRW, DVD, and other ODD devices
iii. Card readers
1. SD cards
2. CF (compact flash) cards
iv. USB memory sticks
B. Via network
i. Please refer to the Network Setup Guide.
2. Copying files into HMC-1000 from a removable device
A. Turn off the system. Wait for the blue light to change into red.
B. Plug in your USB device. Make sure your USB device is on.
C. Turn on HMC-1000.
D. Go to the [TOOLS] menu.
-8 -
1. Go in the [Pictures] in PLAY menu.
2. Select and play any file.
3. Enjoy.
* Playing a folder causes every file within the folder to be played. If you play a folder with many pictures in it,
you can use [HOME] and [END] buttons on the remote controller to nagivate.
Page 9

-11-
H. Now using your remote controller, select any file and press [OK].
I. A pop-up menu shows up. From here choose “Copy”.
J. Press LEFT navigation button to go to the LOCAL tab.
K. Go to the appropriate directory and once within the directory by pressing [OK] and selecting
“Change directory”.
-10 -
E. Select [File Management].
F. Within the File Management, use your navigation buttons to go to the [REMOVABLES] tab. You will see
your device in the list. This mostly like will be “disk_a_1”.
G. Go into [disk_a_1] by pressing [OK] and selecting “Change directory”.
Page 10

-13-
SCENARIO 1: “I have a picture I have taken with my digital camera. I want to store
them and view them with on my TV”.
1. If you’re using a digital camera, it’s likely that you already have an SD card or a CF card for the camera.
Turn off HMC-1000 and plug in your card reader to HMC-1000 with the memory card in it. Turn back on
HMC-1000. Once the memory card is connected and HMC-1000 is on, you can view its contents directly from
the memory card without even copying them.
2. Go to the TOOLS, then File Management.
3. Navigate to REMOVABLES tab and go into [disk_a_1].
4. To copy all files on the memory card,
A. Press [FUNC] button.
B. Choose “Select all”.
C. Press [FUNC] again.
D. Choose “Copy”.
E. Navigate to LOCAL by pressing left navigation button once.
F. Go to my_pictures folder and press [OK]; then select “Change Directory”.
G. Now you’re in the “pictures” directory. Press [FUNC] button.
H. Choose “Paste” and file copy process begins.
5. View those pictures
A. From the main menu, go into PLAY.
B. Go to “Pictures”.
C. Select any of the picture file you’ve just copied, and press [OK], then press PLAY. The picture shows.
D. If you want to see all pictures like a slide show, press [FUNC] and choose “Select All”.
E. Press [OK] to bring up the pop-up menu and choose PLAY.
F. Pictures are shown. View your next picture by pressing [END] button on your remote controller, or [HOME]
button to view the previous picture.
* Instead of copying and pasting, which literally “copies” a file, you can cut and paste, which will “move” a file.
-12 -
L. Press [FUNC] button on the remote controller. This is the “function” key.
Press the function key and select “Paste” from the menu.
M. The file copies to your HMC-1000.
Page 11
-15-
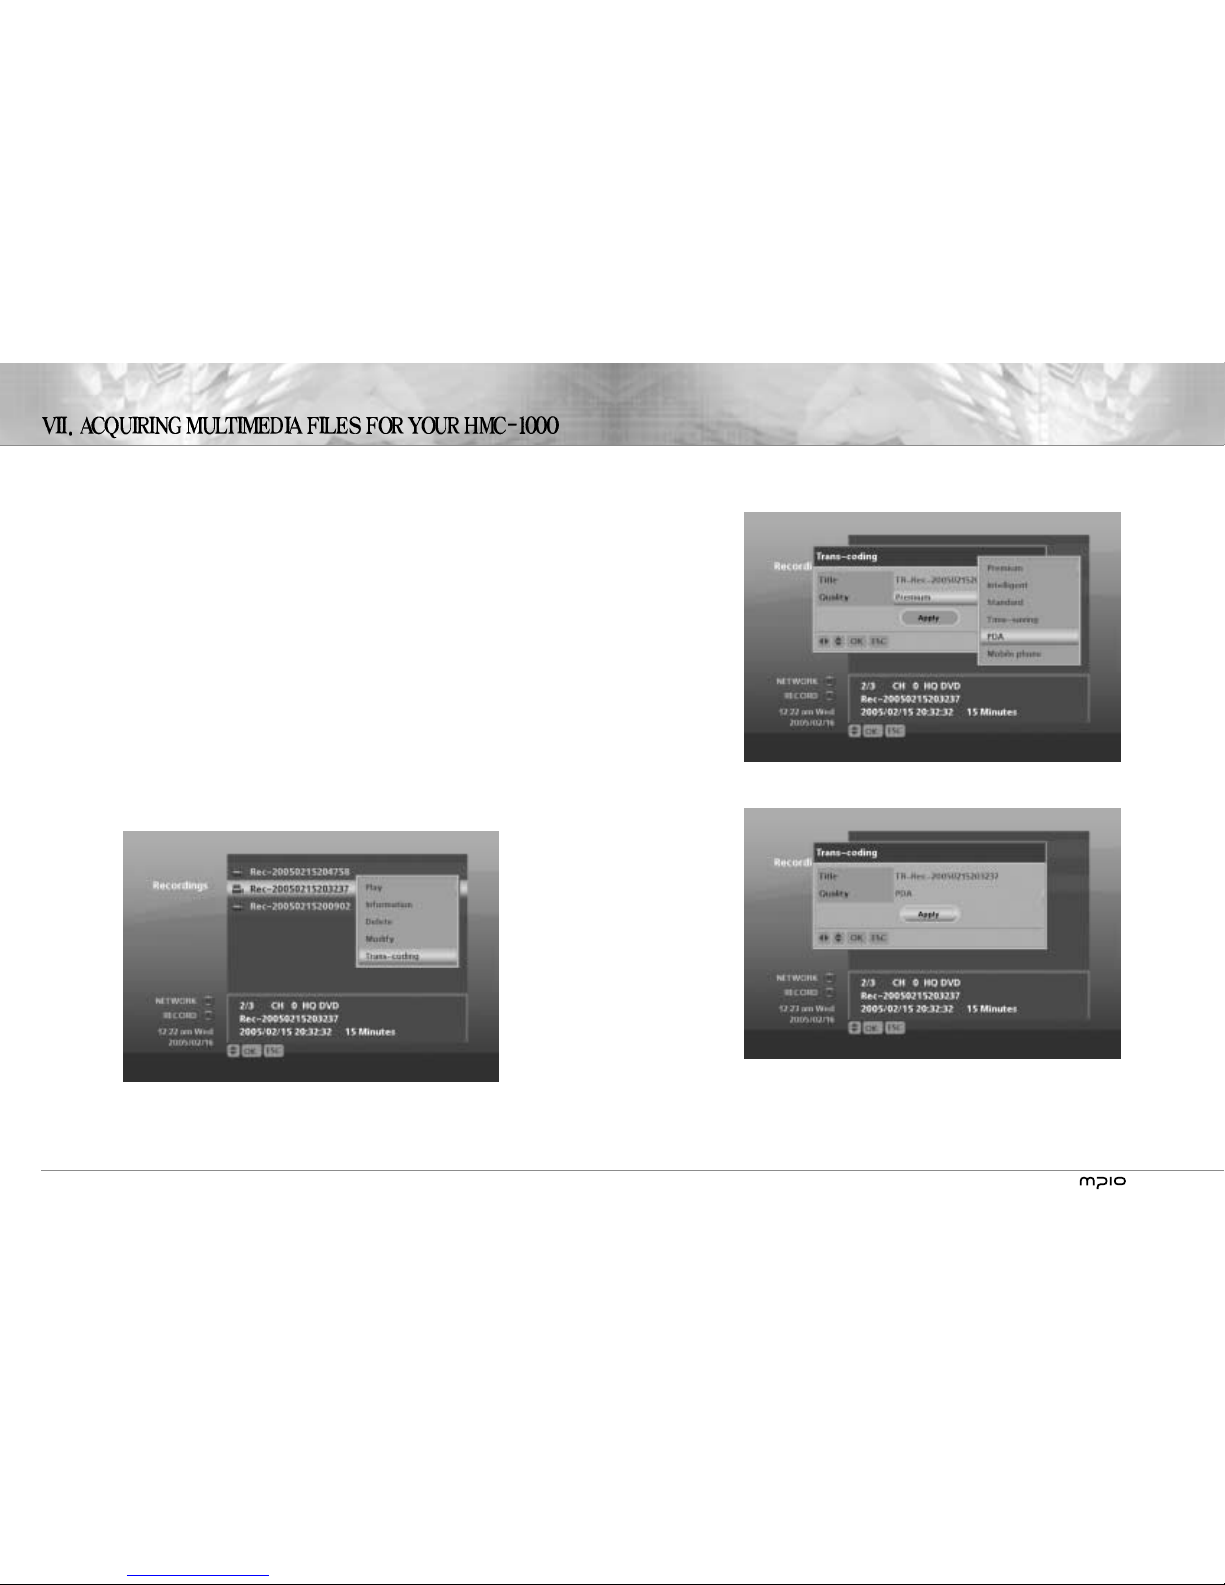
ii. Press OK on Apply at the bottom of this menu.
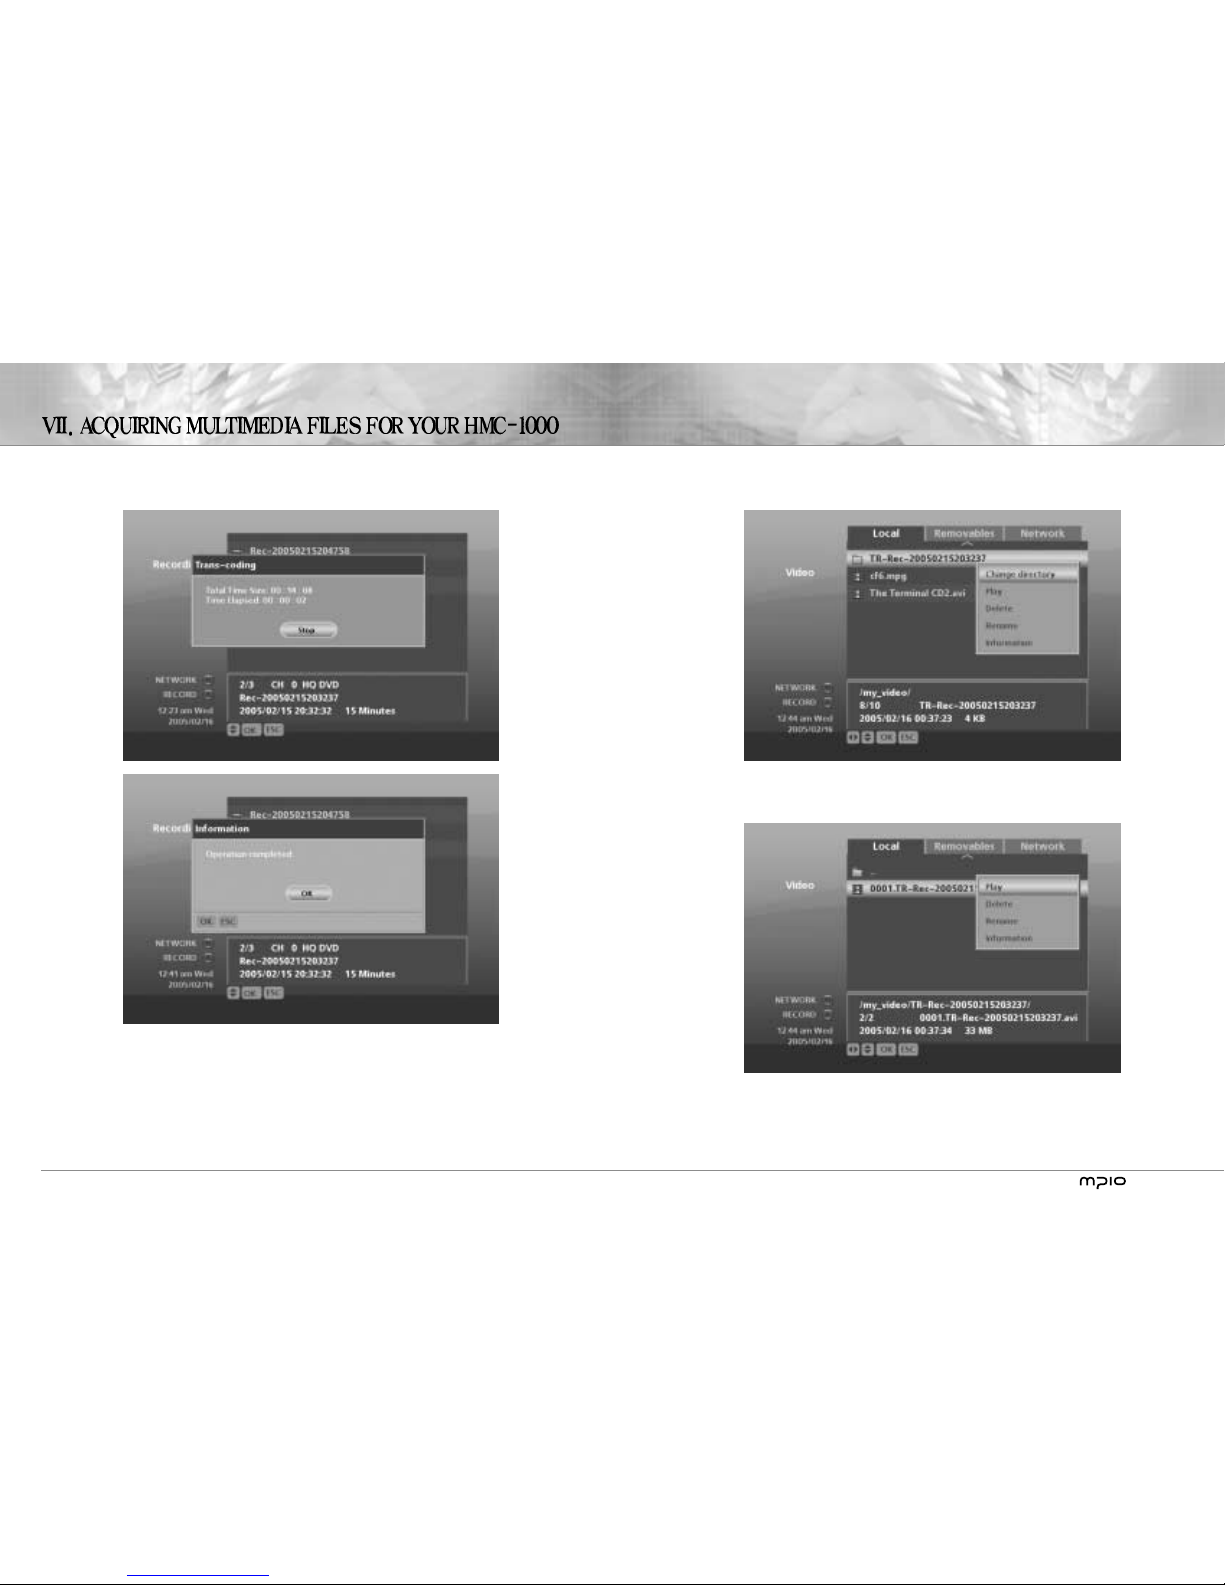
iii. Trans-coding starts and soon after you will be prompted with a success message.
-14 -
TRANS-CODING
1. Watch live TV show and record it.
A. From the main menu, select LIVE. Live TV show starts.
B. As you’re watching live TV, press [REC] to start recording.
i. Press [REC] and a pop-up menu shows up.
ii. On this menu you can set for the recording’s quality, how long HMC-1000 will keep the recorded
material, and other things; but here, we will just proceed using default configuration. Press [OK] on
Apply to start recording immediately.
iii. A red
appears on the top right part of the TV screen indicating the machine is recording.
iv. After about three minutes press [REC] again to stop recording. A confirmation prompt will follow.
C. Go to PLAY in the main menu.
D. Go into [Recordings].
E. You will see a just-recorded file with the date it was recorded as its file name.
F. Select the file, press [OK], and play the file to see if it recorded correctly.
2. Trans-code the recorded material.
A. Select the recorded file, press [OK], and choose “Trans-coding” from the pop-up menu.
B. Another menu pops up and here you can configure the target file’s characteristics. You can convert it to fit
and play on a PDA or PPC, a PMP, or a mobile phone among many options.
C. Let’s convert the recording to play on a PDA.
i. Navigate through the menu, select PDA.
Page 12
-17-
vi. Play the file. You will notice that the quality of this result isn’t as good as the original recording file. This is
because the file has been shrunk and made to fit and play on a PDA. This is perfectly normal.
-16 -
iv. Get out of the [Recordings] by pressing ESC.
v. Go into the [Video], and find a folder with “TR-” prefix in front. This is the folder which contains the
trans-coded file just generated. Go into the folder by selecting “Change directory” after pressing [OK] on
the folder.
Page 13

-19-
4. After pressing “Copy selected”, you can navigate to the destination folder, and press FUNC to paste the files.
-18 -
When using HMC-1000, you might want to play multiple files, copy multiple files, and delete
multiple files. If you look at the remote controller, you will see SLOW/SELECT button below the
navigation buttons. While playing a file this button plays the file in slow-motion, but while you’re
manipulating files, this button toggles select and unselect.
1. Let’s say you want to copy multiple files from your portable hard disk to HMC-1000. If you don’t know how to
copy and move files, please refer to VII-2.
2. You can select more than one file by placing the indicator bar on top of a file and by pressing SLOW/SELECT
button.
3. When you copy just a single file, you could press [OK] on the file and select Copy, and then Paste, etc., but
when you have chosen more than one file with SLOW/SELECT button, you have to use the FUNC button.
Pressing FUNC button will bring up a menu which will give you many choices. You can “Select all”, “Unselect
all”, “Copy selected”, “Cut selected”, and others. In the picture below, “Copy selected” is highlighted.
Page 14

Service Locator
USA
ADDRESS 6440 Lusk Blvd. Suite D105 San Diego, CA 92121, U.S.A.
E-MAIL customerservice@mpio.com (non technical questions)
support@mpio.com (technical questions)
PHONE Customer Service & Tech Support: +1-858-455-6775 +1-866-DMP-MPIO (Toll Free)
Sales: +1-858-554-1300
FAX +1-858-554-1300
HOMEPAGE http://www.mpio.com
Head Office
ADDRESS 10F POLARIS II, 15-1 Jeongja-dong, Bundang-gu, Seongnam city, Kyonggido 463-010
Korea
E-MAIL networker@digitalway.co.kr
TEL +82-31-788-7230
FAX +82-31-788-7240
HOMEPAGE http://www.mpio.co.kr
EUROPE
ADDRESS MPIO BV, Planetenweg 11-41, unit 23A, 2132 HN Hoofddorp, The Netherlands
E-MAIL jwseo@mpio.com (Switzerland, France, Benelux(Belgium, Netherlands, Luxembourg))
paperbag@mpio.com (Germany, Portugal, Eastern Europe)
tony@mpio.com (United Kingdom, Spain, Scandinavia(Norway, Sweden, Denmark))
daizina@mpio.com (other European countries)
PHONE 001-31-23-557-7889
FAX 001-31-23-562-5752
HOMEPAGE http://www.mpio.com
CHINA
ADDRESS E-23F Huadu Mantion, No838 Zhang Yang Road Pudong, Shanghai, China P.C.: 200122
E-MAIL zjq@mpio-digitalway.com.cn
PHONE +86-21-5058-6018
FAX +86-21-5058-6017
HOMEPAGE http://www.mpio.cn
 Loading...