

Page 1

C360
SuperPort System
A Super Professional
Intelligent Multiport Board
for IBM PC/AT and
Compatible System
Dec. 1996 (1st Edition)
All Rights Reserved
Page 2

Copyright Notice
This documentation is copyrighted by Moxa Technologies Co., Ltd. All
rights are reserved. Moxa Technologies reserves the right to make
improvements to the products described in this manual at any time without
notice.
Information provided in this manual is intended to be accurate and reliable.
However, Moxa Technologies assumes no responsibility for its use, nor for
any infringements of rights of the fourth parties which may result from its
use.
MOXA is a registered trademark of Moxa Technologies Co. Ltd. The other
trademarks in this manual belong to their manufacturers individually.
Moxa Technologies Co., Ltd. Moxa Tech USA (CA)
Tel: +866-2-8665-6373 Tel: (408)734-2224
Fax: +886-2-8665-6372 Fax: (408)734-4442
www.moxa.com.tw support @moxa.com.tw
Page 3

MoxaInternetService
s
Customer’s satisfaction is always our number one concern. To ensure
customers get the full benefit of our services, Moxa Internet Services (MIS)
have been built for technical support, product inquiry, new driver upgrade,
etc.
The followings are the services we provide.
E-mail for technical support
address: support@moxa.com.tw
Ftp site for free driver upgrade
address: ftp.moxa.com or ftp.moxa.com.tw
user ID: ftp
password: your_email_address
World Wide Web (WWW) for product info.
address: www.moxa.com or www.moxa.com.tw
Page 4

Table of Contents
. Chapter 1 Introduction 13 ~ 16
1.1 Overview 1
1.2 Features and Specifications 2
1.3 Check list 4
. Chapter 2 Hardware Installation¡@ 71 ~ 12
2.1 Installation of C360 7
2.2 Rack Mount Kit 9
2.3 Serial Number of the Async Concentrator 10
2.4 LED Indicators 10
2.5 Diagnostics 11
. Chapter 3 For DOS Users¡@ 13 ~ 18
3.1 Software Driver Installation and Setup 13
3.2 MOXA Serial Port Naming Convention 16
3.3 Dos API-232 Library and Programming Languages 17
3.4 Administrations 17
3.5 Data Scope 18
. Chapter 4 For UNIX Users¡@ 19 ~ 36
4.1 Driver Installation 19
4.2 MOXA TTY and Non-TTY Ports 21
4.3 Administrations 23
4.4 Programming the MOXA TTY Ports Using Standard UNIX API 27
4.5 Programming the MOXA Non-TTY Ports Using MOXA UNIX API-232 30
Page 5

Appendix A Troubleshooting 37 ~ 42
Problem Report Form 42
Appendix B Technical Reference 43 ~ 48
B.1 Ethernet Cabling 43
B.2 Async Concentrator and Serial Number 44
B.3 RS-232 Cable Wiring 45
Appendix C Example Program 49 ~ 52
Page 6

Page 7

hapter 1
C
Introduction
1.1 Overview
The C360 SuperPort System is a newly-designed 16 to 256 port serial
communication solution, which features high speed, large scale, distributed, and
easy layout. It is designed for industrial and office applications where an
AT/386/486/Pentium system needs to communicate with multiple terminals or
devices through serial interfaces. One C360 provides 16 to 256 full duplex
serial ports. Up to four C360 can be used in the same system and provide up to
1024 ports in total. However, each C360 Control Board must has its unique
IRQ.
The C360 SuperPort System consists of a Control Board, and Async
Concentrator(s). The switchless, jumperless and half-size Control Board links
from one up to 16 Async Concentrators via 10BASE-2 or 10BASE-T cable.
Each Async Concentrator contains 16 serial ports with RJ-45 connectors for
easier connection. Each serial port supports complete set of modem control
signals including RTS, CTS, DSR, DTR, and DCD.
The supported drivers are SCO UNIX and DOS initially. It is our commitment
to support more operating system platforms. Please call Moxa dealer for more
information about our newly available device drivers.
For DOS application programming, DOS API-232 library is provided which
supports most popular languages such as Microsoft C, Turbo C, QuickBasic,
Turbo Pascal, Assembly, and Clipper. For UNIX application programming,
UNIX standard API and MOXA UNIX API-232 are provided for controlling
standard TTY ports and MOXA specific non-TTY ports, respectively.
~1~
Page 8

Chapter 1 • • Introduction
1.2 Features and Specifications
Features
v ASIC-designed control board, compact size
v No switch, no jumper - easy configurable by software
v I/O mapped architecture - no shared memory wasted
v Low host CPU overhead
v RISC-based Async Concentrator
v Rack mountable - industry standard 19" rack
v High speed - up to 460.8K bps each port
v Reliable - 16550C UART with on-chip flow control, no data loss
v More serial ports - 256 ports per board, 1024 per system
v Longer distance - terminals/devices can be located 1000m away
v Suitable for large-scale or distributed application - terminals/devices can
be located at different places or buildings
v Ease of use - menu-driven utilities help ease the configuration, monitoring
and diagnostics
v Easy upgrade - firmware downloading
v Supports popular OSs - DOS and SCO UNIX/OpenServer
Specifications
The C360 SuperPort System consists of a PC Control Board and 1 to 16 Async
Concentrator(s). The Control Board and Async Concentrator(s) are linked
with Ethernet cable. The default shipment of Ethernet cable is 10BASE-2 with
T-type connectors and Terminators. If 10BASE-T cabling is desired, a Hub
and necessary 10BASE-T cables are required and should be prepared by the
user.
System
v 16 to 256 serial ports per Control Board
v Up to four Control Boards per PC system
~2~
Page 9
Introduction • • Chapter 1
AAAA
AAAA
AAAA
AAAA
AAAA
AAAA
AAAA
AAAA
AAAA
AAAA
AAAA
AAAA
AAAA
AAAA
AAAA
Control Board
v 16-bit ISA bus (EISA compatible)
v I/O mapped address: 200H, 220H, 240H,260H, 280H, 2A0H,2C0H,2E0H,
300H, 320H, 340H, 360H 380H, 3A0H, 3C0H, 3E0H. (needs 32 bytes)
v IRQ: 2, 3, 4, 5, 10, 11, 12, 15
v Ethernet interface: BNC (for 10BASE-2/Coaxial) and UTP (for 10BASE-
T/Twisted pair), selectable by software IO-IRQ.EXE
v Transmission rate: 10M bps
v Dimensions: 15.8 cm x 6.3 cm
v Operating temperature: 0 °C ~ 55 °C
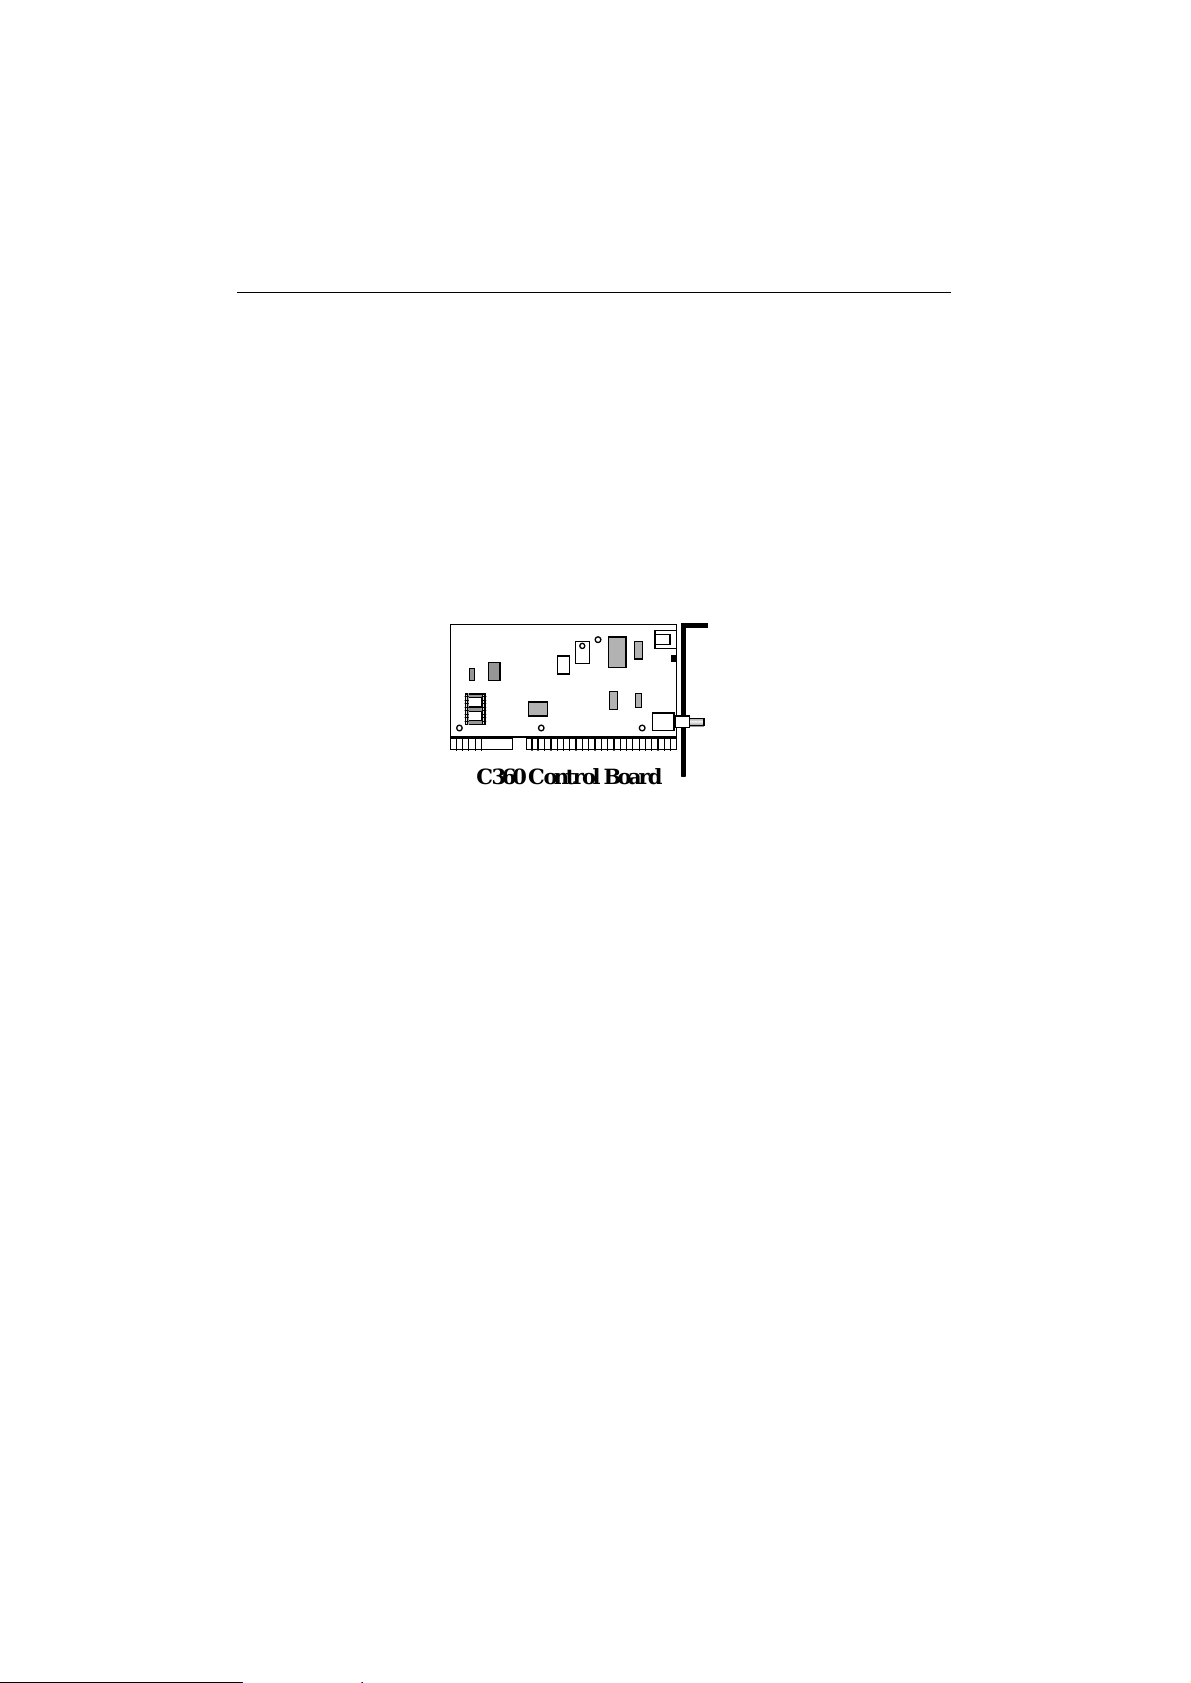
C360 Control Board
Async Concentrator
v Processor: RISC i80960CA-25 50 MIPS
v RAM: 1MB
v Ethernet interface: BNC (for 10BASE-2/Coaxial) and UTP (for 10BASE-
T/Twisted pair), auto-detection
v Transmission rate: 10M bps
v No. of serial ports: 16 RS-232 ports
v Serial connectors: RJ-45
v Serial port: Data bits - 5, 6, 7, 8
Stop bits - 1, 1.5, 2
Parity - none, even, odd, space, mark
UART - high speed 16550C, 16 byte FIFO
Speed (bps) - 50 ~ 460.8K
Signals - TxD, RxD, DTR, DSR, RTS, CTS, DCD, GND
v Serial number: Used by the driver for identification
v Rack Mount Kit: 2 L-type plates and 8 screws
v Dimension: 27 cm x 16 cm x 4.4 cm
3
Page 10

Chapter 1 • • Introduction
AAAA
AAAA
AAAA
AAAA
AAAA
AAAA
AAAA
AAAA
AAAA
AAAA
AAAA
AAAA
AAAA
AAAA
AAAA
AAAA
AAAA
AAAA
AAAA
AAAA
AAAA
AAAA
AAAA
AAAA
AAAA
AAAA
AAAA
AAAA
AAAA
AAAA
AAAA
AAAA
AAAA
AAAA
AAAA
AAAA
AAAA
AAAA
AAAA
AAAA
AAAA
AAAA
AAAA
AAAA
AAAA
AAAA
AAAA
AAAA
AAAA
AAAA
AAAA
AAAA
AAAA
AAAA
AAAA
AAAA
AAAA
AAAA
AAAA
AAAA
AAAA
AAAA
AAAA
AAAA
AAAA
AAAA
AAAA
AAAA
AAAA
AAAA
AAAA
AAAA
AAAA
AAAA
AAAA
AAAA
AAAA
AAAA
AAAA
AAAA
AAAA
AAAA
AAAA
AAAA
AAAA
AAAA
AAAA
AAAA
AAAA
AAAA
AAAA
AAAA
AAAA
AAAA
AAAA
AAAA
AAAA
AAAA
AAAA
AAAA
AAAA
AAAA
AAAA
AAAA
AAAA
AAAA
AAAA
AAAA
AAAA
AAAA
AAAA
AAAA
AAAA
AAAA
AAAA
AAAA
AAAA
AAAA
AAAA
AAAA
AAAA
AAAA
AAAA
AAAA
AAAA
AAAA
AAAA
AAAA
AAAA
AAAA
AAAA
AAAA
AAAA
AAAA
AAAA
AAAA
AAAA
AAAA
AAAA
AAAA
AAAA
AAAA
AAAA
AAAA
AAAA
AAAA
AAAA
v Operating temperature: 0 °C ~ 55 °C
v 110V or 220V AC, auto-select
L-type Plate
Async
Async
Concentrator
Concentrator
BNC
UTP
S0 S1 Tx RX
P1
P8
P16
L-type Plate
Async Concentrator with Rack Mount Kit installed ( Front View )
L-type Plate
Serial NO :
100
Caution:No user serviceable
partsinside.Refer servicing
to qualified personnel.
AC POWER
90-260 V
47-63HZ
0.6Amp/110V
L-type Plate
Async Concentrator with Rack Mount Kit installed ( Rear View )
1.3 Check list
Upon unpacking the C360 SuperPort System, user should find the following
items included in the package:
C360 Control Board
v MOXA C360 Control Board
v 2 Ethernet terminators with a T-type connector
v Device driver diskettes for DOS and SCO UNIX
v C360 User's Manual
v API-232 Manual
Async Concentrator
v Async Concentrator with 16 serial ports
v Female RJ-45 to Male DB-25 RS-232 cable
v 1 meter 10BASE-2 Ethernet cable with a T-type connector
v Power cord
~4~
Page 11

Introduction • • Chapter 1
v Rack Mount Kit
5
Page 12

hapter 2
C
Hardware Installation
2.1 Installation of C360
Step 1: Choose a PC that has DOS system inside.
NOTE: No matter what OS used, user has to configure the C360
Control Board via IO-IRQ.EXE under DOS.
Step 2: Power off the PC.
Step 3: Install the C360 Control Board(s) into a 16-bit slot(s).
NOTE: If installing more than one C360 Control Boards, insert ONE
AT A TIME and configure it using the IO-IRQ.EXE
program before inserting the next board. Each C360
Control Board must have unique base I/O address and IRQ.
The C360 Control Board has the following default (factory) settings:
BASE I/O address : 300H
IRQ : 2/9
Interface : BNC (10BASE-2)
Check if any existing board has the same I/O address or IRQ. If so,
user must try to avoid the conflict by doing either one of the
following:
a. Unplug the conflicting board temporarily if possible. Then
restore the board after changing the I/O address or IRQ of C360.
b. Change or disable the existing board's I/O address or IRQ in
advance.
~6~
Page 13

Hardware Installation • • Chapter 2
AAAA
AAAA
AAAA
AAAA
AAAA
AAAA
AAAA
AAAA
AAAA
AAAA
AAAA
AAAA
AAAA
AAAA
AAAA
AAAA
AAAA
AAAA
AAAA
AAAA
AAAA
AAAA
AAAA
AAAA
AAAA
AAAA
AAAA
AAAA
AAAA
AAAA
AAAA
AAAA
AAAA
AAAA
AAAA
AAAA
AAAA
AAAA
AAAA
AAAA
AAAA
AAAA
AAAA
AAAA
AAAA
AAAA
AAAA
AAAA
AAAA
AAAA
AAAA
AAAA
AAAA
AAAA
AAAA
AAAA
AAAA
AAAA
AAAA
AAAA
AAAA
AAAA
AAAA
AAAA
AAAA
AAAA
AAAA
AAAA
AAAA
AAAA
AAAA
AAAA
AAAA
AAAA
AAAA
AAAA
AAAA
Step 4: Power on the PC and enter DOS system.
Step 5: Execute IO-IRQ.EXE which is included in the DOS API-232 software
driver diskette, and follow the on-line help to configure the C360.
Be careful not to conflict the I/O address and IRQ of the C360 Control
Board with any existing board's.
Step 6: After completing the configuration, the board is ready for use under
DOS or SCO UNIX.
Step 7: Connect the C360 Control Board and Async Concentrator(s) with the
shipped 10BASE-2 cables. Do not forget to put Terminators in place.
Please refer to Appendix B.1 Ethernet Cabling for more details.
Async
Async
Concentrator
Concentrator
Async
Async
Concentrator
Concentrator
BNC
S0 S1 Tx RX
P1
BNC
UTP
S0 S1 Tx RX
P1
UTP
P8
P16
P8
P16
C360 SuperPort System with 10BASE-2 Cabling
If 10BASE-T cabling is desired, remember to select UTP interface for
Control Board via executing IO-IRQ.EXE under DOS. Connect
Control Board and Async Concentrator(s) to the Hub with 10BASE-T
cables. Please refer to Appendix B.1 Ethernet Cabling for more
details.
7
Page 14

Chapter 2 • • Hardware Installation
AAAA
AAAA
AAAA
AAAA
AAAA
AAAA
AAAA
AAAA
AAAA
AAAA
AAAA
AAAA
AAAA
AAAA
AAAA
AAAA
AAAA
AAAA
AAAA
AAAA
AAAA
AAAA
AAAA
AAAA
AAAA
AAAA
AAAA
AAAA
AAAA
AAAA
AAAA
AAAA
AAAA
AAAA
AAAA
AAAA
AAAA
AAAA
AAAA
AAAA
AAAA
AAAA
AAAA
AAAA
AAAA
AAAA
AAAA
AAAA
AAAA
AAAA
AAAA
AAAA
AAAA
AAAA
AAAA
AAAA
AAAA
AAAA
AAAA
AAAA
AAAA
AAAA
AAAA
AAAA
AAAA
AAAA
AAAA
AAAA
AAAA
AAAA
AAAA
AAAA
AAAA
AAAA
AAAA
AAAA
AAAA
AAAA
AAAA
AAAA
AAAA
AAAA
AAAA
AAAA
AAAA
AAAA
AAAA
AAAA
AAAA
AAAA
AAAA
AAAA
AAAA
AAAA
AAAA
AAAA
AAAA
AAAA
AAAA
AAAA
AAAA
AAAA
AAAA
AAAA
AAAA
AAAA
AAAA
AAAA
AAAA
AAAA
AAAA
AAAA
AAAA
AAAA
AAAA
AAAA
AAAA
AAAA
AAAA
AAAA
AAAA
AAAA
AAAA
AAAA
AAAA
AAAA
AAAA
AAAA
AAAA
AAAA
AAAA
AAAA
AAAA
AAAA
AAAA
AAAA
AAAA
AAAA
AAAA
AAAA
AAAA
AAAA
AAAA
AAAA
AAAA
AAAA
AAAA
AAAA
AAAA
AAAA
AAAA
AAAA
AAAA
AAAA
AAAA
AAAA
AAAA
AAAA
AAAA
AAAA
AAAA
AAAA
AAAA
AAAA
AAAA
AAAA
AAAA
AAAA
AAAA
AAAA
AAAA
AAAA
AAAA
AAAA
Hub
Async
Async
Concentrator
Concentrator
Async
Async
Concentrator
Concentrator
BNC
S0 S1 Tx RX
P1
BNC
UTP
S0 S1 Tx RX
P1
UTP
P8
P16
P8
P16
C360 SuperPort System with 10BASE-T Cabling
2.2 Rack Mount Kit
To mount the Async Concentrator on the industry standard 19" rack, Rack
Mount Kit, including two L-type plates and eight screws, should be applied.
Async
Async
Concentrator
Concentrator
BNC
UTP
S0 S1 Tx RX
P1
L-type Plate
Async Concentrator with Rack Mount Kit installed ( Front View )
P8
P16
L-type Plate
L-Type Plate
AC POWER
90-260V
47-63HZ
0.6Amp/110V
Caution:Nouser serviceable
Serial NO :
100
Async Concentrator with Rack Mount Kit Installed ( Rear View )
partsinside.Refer servicing
to qualifiedpersonnel.
Screw
~8~
Page 15

Hardware Installation • • Chapter 2
2.3 Serial Number of the Async Concentrator
It is the unique number identifying an Async Concentrator and written on a
sticker which can be found at the left side of the rear panel of each Async
Concentrator.
User has to type in the serial number when setup the driver in the system.
Under DOS, user can use "Auto-Search Serial No." function of the setup
program to detect the serial number(s) of all the existing Async Concentrator(s)
for convenience without typing the serial number(s) one by one.
Under UNIX, "Auto-Search" function is not available at the time of driver
installation due to that the C360 driver is not in the UNIX system at that time.
2.4 LED Indicators
C360 Control Board
The green link LED labeled Lk lights up to indicate that a valid 10BASE-T link
beat is established. It should be ON under normal operating condition. If the
LED remains off after power is applied, check for a proper RJ-45 connection.
Async Concentrator
After powering on the Async Concentrator, red indicator S0 "ON" and S1
"OFF" means normal initialization status of the Async Concentrator. And
green indicator Tx and red indicator Rx will flash periodically and either more
frequently if C360 driver is not started or less frequently if C360 driver is
started.
Indicator Tx and Rx show the status of transmitting and receiving data. If the
indicator Tx is ON, then some data is transmitted from the Async Concentrator.
If the indicator Rx is ON, then some data is received by the Async Concentrator.
On the other hand, if indicators Tx and Rx are all OFF, then no data is
transferring at that time.
As to the signals' status of each serial port, please use "mini tester" to monitor.
2.5 Diagnostics
9
Page 16

Chapter 2 • • Hardware Installation
When hardware installation is complete, it is highly recommended to run
diagnostic program, SP-ADM.EXE, under DOS to check the Control Board, the
Ethernet cabling and Async Concentrator(s) as well as the compatibility
between the PC and C360 Control Board. Before running SP-ADM.EXE, user
has to run IO-IRQ.EXE to setup the Control Board, then run SETUP.EXE to
setup the DOS driver, then run SP-DRV.EXE to install the DOS driver.
For more information about SP-ADM.EXE, please refer to Section 3.5.
~10~
Page 17

Hardware Installation • • Chapter 2
11
Page 18

hapter 3
C
For DOS Users
The C360 is useful for office automation and industrial control as well as data
acquisition and communication. Because many users need to implement an
industrial control system or data acquisition system in the DOS environment,
but DOS did not has any better communication API, thus Moxa have developed
a device driver and library functions under DOS which are called API-232 for
DOS. User should find the API-232 driver diskette along with shipment in
addition to API-232 User's Manual.
See the README file on the API-232 driver diskette for the latest release notes
and other last-minute information.
3.1 Software Driver Installation and Setup
MOXA API-232 for DOS is a software package that assists users to develop
and/or debug programs for serial communications. It supports device drivers
for the MOXA boards such as C102/C104/C168 Service, standard PC COM
ports, and C360 SuperPort System.
Driver Installation
Insert the API-232 software diskette into the floppy drive, change directory (cd)
to the drive then type DOSINST.EXE to run the installation program. User
has to choose the C360 SuperPort Board and specify the target API-232
directory (e.g. C:\MOXA) to be installed.
Control Board Configuration
If have not executed IO-IRQ.EXE after installing C360 into the PC, please
change to API-232 directory and run the configuration program, IO-IRQ.EXE,
then choose C360 and specify the base I/O address, IRQ, and Interface for C360
Control Board. The settings of base I/O address and IRQ will be used when
~12~
Page 19

For DOS Users • • Chapter 3
running driver setup program, BIN\SETUP.EXE.
Driver Setup
Change to API-232 and run the setup program, BIN\SETUP.EXE, then choose
C360 and specify the base I/O address, IRQ, number of Async Concentrators,
port numbers range in board and system level, serial numbers in concentrator
level, and communication parameters in port level.
Noticeable fields and functions in "MOXA C360" dialog are explained below:
Async Concentrators: The number of Async Concentrators linked with
each C360 Control Board.
Port number: The range of port numbers for all ports of Async
Concentrators linked with each C360 Control Board.
Interrupt number: The IRQ number of C360 Control Board. Each
Control Board must use its own IRQ, not conflicting with others.
F3: Setup the serial numbers and range of port numbers for all Async
Concentrators linked with each C360 Control Board.
PgDn: Setup the initial values of communication parameters for all
ports of Async Concentrators linked with each C360 Control Board.
These values are used when driver is loaded.
Driver Loading
Having completed the setup, load the TSR driver, BIN\SP-DRV.EXE, at the
DOS prompt (or from within AUTOEXEC.BAT batch file). The driver will
detect the C360 automatically. If all the Control Board(s) and Async
Concentrator(s) are detected, a message similar to below will show:
13
Page 20

Chapter 3 • • For DOS Users
MOXA C360 SuperPort System Communication Driver (Ver. x.xx)
Setup driver ...
C360 Control Board 1: base I/O address [200] IRQ 10
Async Concentrator's serial no. : 101 102
Device Driver Setup O.K.
, which means the C360 driver is installed properly. At this point, user is ready
to execute application that supports API-232 functions, or start developing
applications.
If at least a pair of Control Board and Async Concentrator is detected, a
message similar to below will show:
MOXA C360 SuperPort System Communication Driver (Ver. x.xx)
Setup driver ...
C360 Control Board 1: base I/O address [200] IRQ 10
Async Concentrator's serial no. : 101
C360 Control Board 2: base I/O address [220] not found!!
C360 Control Board 3: base I/O address [240] found no concentrator!!
Device Driver Setup O.K.
Even though the C360 driver is installed, only the ports of the found pair(s) of
Control Board and Async Concentrator will work properly. Please refer to
Appendix A Troubleshooting for possible reasons and solutions.
If not a pair of Control Board and Async Concentrator is detected, one of the
error messages similar to below will show:
C360 Control Board 1: base I/O address [200] not found!!
C360 Control Board 2: base I/O address [220] found no concentrator!!
, which means the C360 driver is not installed properly. Please refer to
Appendix A Troubleshooting for possible reasons and solutions.
~14~
Page 21

For DOS Users • • Chapter 3
AAAA
AAAA
AAAA
AAAA
AAAA
AAAA
AAAA
AAAA
AAAA
AAAA
AAAA
AAAA
AAAA
AAAA
AAAA
AAAA
AAAA
AAAA
AAAA
AAAA
AAAA
AAAA
AAAA
AAAA
AAAA
AAAA
AAAA
AAAA
AAAA
AAAA
AAAA
AAAA
AAAA
AAAA
AAAA
AAAA
AAAA
AAAA
AAAA
AAAA
AAAA
AAAA
AAAA
AAAA
AAAA
AAAA
AAAA
AAAA
AAAA
AAAA
AAAA
AAAA
AAAA
AAAA
AAAA
AAAA
AAAA
AAAA
AAAA
AAAA
AAAA
AAAA
AAAA
AAAA
AAAA
AAAA
AAAA
AAAA
AAAA
AAAA
AAAA
AAAA
AAAA
AAAA
AAAA
AAAA
AAAA
AAAA
AAAA
AAAA
AAAA
AAAA
AAAA
AAAA
AAAA
AAAA
AAAA
AAAA
AAAA
AAAA
AAAA
AAAA
AAAA
AAAA
AAAA
AAAA
AAAA
AAAA
AAAA
AAAA
AAAA
AAAA
AAAA
AAAA
AAAA
AAAA
AAAA
AAAA
AAAA
AAAA
AAAA
AAAA
AAAA
AAAA
AAAA
AAAA
AAAA
AAAA
AAAA
AAAA
AAAA
AAAA
AAAA
AAAA
AAAA
AAAA
AAAA
AAAA
AAAA
AAAA
AAAA
AAAA
AAAA
AAAA
AAAA
AAAA
AAAA
AAAA
AAAA
AAAA
AAAA
AAAA
AAAA
AAAA
AAAA
AAAA
AAAA
AAAA
AAAA
AAAA
AAAA
AAAA
AAAA
AAAA
AAAA
AAAA
AAAA
AAAA
AAAA
AAAA
AAAA
AAAA
AAAA
AAAA
AAAA
AAAA
AAAA
AAAA
AAAA
AAAA
AAAA
AAAA
AAAA
AAAA
AAAA
AAAA
AAAA
AAAA
AAAA
AAAA
AAAA
AAAA
AAAA
AAAA
AAAA
AAAA
AAAA
AAAA
AAAA
AAAA
AAAA
AAAA
AAAA
AAAA
AAAA
AAAA
AAAA
AAAA
AAAA
AAAA
AAAA
AAAA
AAAA
AAAA
AAAA
AAAA
AAAA
AAAA
AAAA
AAAA
AAAA
AAAA
AAAA
AAAA
AAAA
AAAA
AAAA
AAAA
AAAA
AAAA
AAAA
AAAA
AAAA
AAAA
AAAA
AAAA
AAAA
AAAA
AAAA
AAAA
AAAA
AAAA
AAAA
AAAA
AAAA
AAAA
AAAA
AAAA
AAAA
AAAA
AAAA
AAAA
AAAA
AAAA
AAAA
AAAA
AAAA
AAAA
AAAA
AAAA
AAAA
AAAA
AAAA
AAAA
AAAA
AAAA
AAAA
AAAA
AAAA
AAAA
AAAA
AAAA
AAAA
AAAA
AAAA
AAAA
AAAA
AAAA
AAAA
AAAA
AAAA
AAAA
AAAA
AAAA
AAAA
AAAA
AAAA
AAAA
AAAA
AAAA
AAAA
AAAA
AAAA
AAAA
AAAA
AAAA
AAAA
AAAA
AAAA
AAAA
AAAA
AAAA
AAAA
AAAA
AAAA
AAAA
AAAA
AAAA
AAAA
AAAA
AAAA
AAAA
AAAA
AAAA
AAAA
AAAA
AAAA
AAAA
AAAA
AAAA
AAAA
AAAA
AAAA
AAAA
AAAA
AAAA
AAAA
AAAA
AAAA
AAAA
Driver Removal
To remove the C360 driver from memory, type SP-DRV/Q at the DOS prompt.
3.2 MOXA Serial Port Naming Convention
Each MOXA serial port are referenced as port number in terms of programming.
The port number is automatically assigned once the starting port number is
decided by user when configuring the Async Concentrators.
For example, if there is only one Async Concentrator configured and the
starting port number is 1, then the mapping of serial port numbers will be as
depicted.
8
7
6
5
4
3
2
1
Async
Async
Concentrator
Concentrator
9
10
11
12
13
14
15
16
BNC
UTP
S0 S1 Tx RX
15
P1
P8
P16
Page 22

Chapter 3 • • For DOS Users
3.3 DOS API-232 Library and Programming Languages
For DOS programming, API-232 includes powerful libraries supporting
languages like Microsoft C, Turbo C, Macro Assembly, QuickBasic, Turbo
Pascal, Clipper, etc. Sample programs for each supported language are
included. See the files in the sub-directory EXAMPLE\language of the API-232
directory.
For complete API-232 function description, see API-232 User's Manual or file
API-232.TXT in the API-232 directory for more details. The following
functions illustrated in C are for C360 only. Some language may vary in
function name and some does not support sio_getACs( ) due to its restriction.
1. sio_getACs( ) : Get C360 Async Concentrators' serial numbers
2. sio_ACstate ( ) : Get C360 Async Concentrator's status
3. sio_ACdiag ( ) : C360 Async Concentrator’s diagnostics
Function, sio_loopback(), is not available for C360. Function, sio_ACdiag( )
is recommended instead.
3.4 Administrations
The utility, BIN\SP-ADM.EXE, is for C360's status monitoring and hardware
diagnostics.
Async Concentrator Status Monitoring
This utility gives user a quick view about the status of all the Async
Concentrators linked with each Control Board. Status "Running" means the
Async Concentrator with corresponding serial number is working. Status "No
response" means the Async Concentrator is powered off or defective or the
Ethernet cabling goes wrong somewhere.
~16~
Page 23

For DOS Users • • Chapter 3
Async Concentrator Diagnostics
This utility gives user a quick view about all the Async Concentrators' and ports'
status. It will diagnose the C360 in the system and report the hardware status,
Good/Bad/No Response, of each port. It is strongly recommended to run this
for verifying hardware condition, especially as soon as received C360 package.
3.5 Data Scope
The Data Scope, BIN\SCOPE.EXE, is a set of utility programs that can help
user with system troubleshooting and serial communication debugging. There
are three major functions:
1. The Data Scope utility offers transparent monitoring of serial
communication lines and allows data to be streamed to disk storage for
later analysis.
2. The TTY terminal emulation utility allows user to view the signal
status and transfer data interactively or files using ASCII, XMODEM,
YMODEM, ZMODEM and KERMIT protocols.
3. The diagnostic test utility provides port connection test with two
MOXA ports connected via a properly-wired cable.
Please see on-line help as running BIN\SCOPE.EXE for more usage and
capability information.
17
Page 24

hapter 4
C
For UNIX Users
The C360 UNIX driver supports at most 256 TTY terminal ports in the UNIX
system which are called MOXA TTY ports. The rest of the ports are called
MOXA non-TTY ports. The differences between MOXA TTY and non-TTY
ports are described below.
In addition, C218/C320 Series can not co-exist with C360 in the UNIX system.
Please remove C218/C320 UNIX driver before installing C360 UNIX driver.
4.1 Driver Installation
Step 1. Boot the system and login from the console as a super user (root).
Step 2. Insert driver diskette into a 1.44MB floppy driver, A: or B:. If driver
files are obtained from MOXA FTP service, put them under
/tmp/moxa directory and skip the following “ tar ”command .
Step 3. Change to root directory by entering the following command:
# cd /
Step 4. Enter the following command to extract the install script file first.
# tar xvf /dev/fd0135ds18 /tmp/moxa/install (if 1.44MB A:)
# /tmp/moxa/install
Copyright (C) 199x Moxa Technologies Co., Ltd. All Rights Reserved.
MOXA C360 Device Driver Installation
( Ver. x.x )
Please select one of the devices where the driver diskette/files puts:
~18~
Page 25

For UNIX Users • • Chapter 4
1. /dev/fd0135ds18 (A: 1.44MB)
2. /dev/fd096ds15 (A: 1.2 MB )
3. /dev/fd1135ds18 (B: 1.44MB)
4. /dev/fd196ds15 (B: 1.2 MB )
5. /tmp/moxa (Hard Disk )
Select :
For ...
Tar files from driver diskette, please wait ...
Then the MOXA Multiport Board Installation Utility will show for
board installation.
Follow the instructions prompted to install.
Step 5. Now user may shutdown the system and reboot. If user has trouble
in booting the new UNIX kernel, use the backup kernel (/unix.moxa)
to boot the system. The system will work as before. Refer to
Appendix A Troubleshooting.
After the system starts up again, enter into the multiuser mode. The
following message will show:
MOXA C360 SuperPort System Communication Driver (Ver. x.xx)
Setup driver ...
C360 Control Board 1: base I/O address [200] IRQ 10
Async Concentrator's serial no. : 101
Device Driver Setup O.K.
If the following error message appears
C360 Control Board 1: base I/O address [220] not found!
C360 Control Board 2: base I/O address [240] found no concentrator!
Please see Appendix A Troubleshooting.
19
Page 26

Chapter 4 • • For UNIX Users
Step 6. Enable the "Terminal" port for login purpose.
Taking ttya11 as an example,
for SCO UNIX/OpenServer/Open Desktop,
# enable ttya11
Or refer to the UNIX system manuals for how to activate a tty port.
4.2 MOXA TTY and Non-TTY Ports
Even though C360 can provide up to 1024 serial port in a system, only 256
ports among 1024 ports can be configured as TTY ports, the rest ports as nonTTY ports.
MOXA TTY ports follow the standard of UNIX tty ports. But MOXA nonTTY ports do not. Instead, they follow the Moxa-defined rule which will be
stated below. In other word, the naming convention of MOXA TTY ports is
different from that of MOXA non-TTY ports. So is the programming rule.
MOXA TTY Ports
If the TTY ports of C360 are successfully configured, there will be two tty
devices created for each TTY port at /dev directory: one is non-MODEM tty
(e.g. ttya11), and the other is MODEM tty (e.g. ttyA11). The two devices are
actually accessing the same physical port except that the MODEM tty has to
check the ON status of DCD signal from remote site to be able to open device
and will close device automatically as DCD signal is OFF.
To be able to use speeds higher than 38400 bps in the UNIX system, the 50
baud rate will no longer stand for 50 bps instead it means 57600 bps, 75 baud
rate for 115.2K bps, 110 baud rate for 230.4K bps, and 134 baud rate for
460.8K bps.
The convention of the MOXA TTY device name is:
~20~
Page 27
For UNIX Users • • Chapter 4
AAAA
AAAA
AAAA
AAAA
AAAA
AAAA
AAAA
AAAA
AAAA
AAAA
AAAA
AAAA
AAAA
AAAA
AAAA
AAAA
AAAA
AAAA
AAAA
AAAA
AAAA
AAAA
AAAA
AAAA
AAAA
AAAA
AAAA
AAAA
AAAA
AAAA
AAAA
AAAA
AAAA
AAAA
AAAA
AAAA
AAAA
AAAA
AAAA
AAAA
AAAA
AAAA
AAAA
AAAA
AAAA
AAAA
AAAA
AAAA
AAAA
AAAA
AAAA
AAAA
AAAA
AAAA
AAAA
AAAA
AAAA
AAAA
AAAA
AAAA
AAAA
AAAA
AAAA
AAAA
AAAA
AAAA
AAAA
AAAA
AAAA
AAAA
AAAA
AAAA
AAAA
AAAA
AAAA
AAAA
AAAA
AAAA
AAAA
AAAA
AAAA
AAAA
AAAA
AAAA
AAAA
AAAA
AAAA
AAAA
AAAA
AAAA
AAAA
AAAA
AAAA
AAAA
AAAA
AAAA
AAAA
AAAA
AAAA
AAAA
AAAA
AAAA
AAAA
AAAA
AAAA
AAAA
AAAA
AAAA
AAAA
AAAA
AAAA
AAAA
AAAA
AAAA
AAAA
AAAA
AAAA
AAAA
AAAA
AAAA
AAAA
AAAA
AAAA
AAAA
AAAA
AAAA
AAAA
AAAA
AAAA
AAAA
AAAA
AAAA
AAAA
AAAA
AAAA
AAAA
AAAA
AAAA
AAAA
AAAA
AAAA
AAAA
AAAA
AAAA
AAAA
AAAA
AAAA
AAAA
AAAA
AAAA
AAAA
AAAA
AAAA
AAAA
AAAA
AAAA
AAAA
AAAA
AAAA
AAAA
AAAA
AAAA
AAAA
AAAA
AAAA
AAAA
AAAA
AAAA
AAAA
AAAA
AAAA
AAAA
AAAA
AAAA
AAAA
AAAA
AAAA
AAAA
AAAA
AAAA
AAAA
AAAA
AAAA
AAAA
AAAA
AAAA
AAAA
AAAA
AAAA
AAAA
AAAA
AAAA
AAAA
AAAA
AAAA
AAAA
AAAA
AAAA
AAAA
AAAA
AAAA
AAAA
AAAA
AAAA
AAAA
AAAA
AAAA
AAAA
AAAA
AAAA
AAAA
AAAA
AAAA
AAAA
AAAA
AAAA
AAAA
AAAA
AAAA
AAAA
AAAA
AAAA
AAAA
AAAA
AAAA
"tty" + "A" + "B" + "C"
port ordinal number in an Async Concentrator
(from 1 to g)
Async Concentrator ordinal number1111111
(from 1 to g)
board ordinal number
"a" or "A" : 1st MOXA board
"b" or "B" : 2nd MOXA board
"c" or "C" : 3rd MOXA board
"d" or "D" : 4th MOXA board
Capitals indicate a MODEM port
Standard tty device prefix
For example, if there is only one Async Concentrator configured, then the
mapping of device names will be as depicted.
/dev/ttya18
/dev/ttya17
/dev/ttya16
/dev/ttya15
/dev/ttya14
/dev/ttya13
/dev/ttya12
/dev/ttya11
Async
Async
Concentrator
Concentrator
MOXA Non-TTY Ports
/dev/ttya19
/dev/ttya1a
/dev/ttya1b
/dev/ttya1c
/dev/ttya1d
/dev/ttya1e
/dev/ttya1f
/dev/ttya1g
BNC
UTP
S0 S1 Tx RX
21
P1
P8
P16
Page 28

Chapter 4 • • For UNIX Users
AAAA
AAAA
AAAA
AAAA
AAAA
AAAA
AAAA
AAAA
AAAA
AAAA
AAAA
AAAA
AAAA
AAAA
AAAA
AAAA
AAAA
AAAA
AAAA
AAAA
AAAA
AAAA
AAAA
AAAA
AAAA
AAAA
AAAA
AAAA
AAAA
AAAA
AAAA
AAAA
AAAA
AAAA
AAAA
AAAA
AAAA
AAAA
AAAA
AAAA
AAAA
AAAA
AAAA
AAAA
AAAA
AAAA
AAAA
AAAA
AAAA
AAAA
AAAA
AAAA
AAAA
AAAA
AAAA
AAAA
AAAA
AAAA
AAAA
AAAA
AAAA
AAAA
AAAA
AAAA
AAAA
AAAA
AAAA
AAAA
AAAA
AAAA
AAAA
AAAA
AAAA
AAAA
AAAA
AAAA
AAAA
AAAA
AAAA
AAAA
AAAA
AAAA
AAAA
AAAA
AAAA
AAAA
AAAA
AAAA
AAAA
AAAA
AAAA
AAAA
AAAA
AAAA
AAAA
AAAA
AAAA
AAAA
AAAA
AAAA
AAAA
AAAA
AAAA
AAAA
AAAA
AAAA
AAAA
AAAA
AAAA
AAAA
AAAA
AAAA
AAAA
AAAA
AAAA
AAAA
AAAA
AAAA
AAAA
AAAA
AAAA
AAAA
AAAA
AAAA
AAAA
AAAA
AAAA
AAAA
AAAA
AAAA
AAAA
AAAA
AAAA
AAAA
AAAA
AAAA
AAAA
AAAA
AAAA
AAAA
AAAA
AAAA
AAAA
AAAA
AAAA
AAAA
AAAA
AAAA
AAAA
AAAA
AAAA
AAAA
AAAA
AAAA
AAAA
AAAA
AAAA
AAAA
AAAA
AAAA
AAAA
AAAA
AAAA
AAAA
AAAA
AAAA
AAAA
AAAA
AAAA
AAAA
AAAA
AAAA
AAAA
AAAA
AAAA
AAAA
AAAA
AAAA
AAAA
AAAA
AAAA
AAAA
AAAA
AAAA
AAAA
AAAA
AAAA
AAAA
AAAA
AAAA
AAAA
AAAA
AAAA
AAAA
AAAA
AAAA
AAAA
AAAA
AAAA
AAAA
AAAA
AAAA
AAAA
AAAA
AAAA
AAAA
AAAA
AAAA
AAAA
AAAA
AAAA
AAAA
AAAA
AAAA
AAAA
AAAA
AAAA
AAAA
AAAA
AAAA
AAAA
AAAA
AAAA
AAAA
AAAA
AAAA
AAAA
AAAA
AAAA
AAAA
AAAA
AAAA
AAAA
AAAA
AAAA
AAAA
AAAA
AAAA
AAAA
AAAA
AAAA
AAAA
AAAA
AAAA
AAAA
AAAA
AAAA
AAAA
AAAA
AAAA
AAAA
AAAA
AAAA
AAAA
AAAA
AAAA
AAAA
AAAA
AAAA
AAAA
AAAA
AAAA
AAAA
AAAA
AAAA
AAAA
AAAA
AAAA
AAAA
AAAA
The MOXA non-TTY ports are simply referenced as port number in terms of
programming. The port number is automatically assigned when configuring
the Async Concentrators.
For example, if there is only one Async Concentrator configured, then the
mapping of device names will be as depicted.
8
7
6
5
4
3
2
1
Async
Async
Concentrator
Concentrator
9
10
11
12
13
14
15
16
BNC
UTP
S0 S1 Tx RX
P1
P8
P16
4.3 Administrations
User can use the administration utility, c360adm, to change the C360
configuration, to monitor the ports' activity, to diagnose the C360, to reset the
C360 driver, to restart the specified Async Concentrator or to remove the
installed MOXA driver from the UNIX system.
Configuration
~22~
Page 29

For UNIX Users • • Chapter 4
User can select base I/O address and interrupt at will as long as no conflict will
occurs. In [Concentrator Setting] dialog, there are several features that need
explanation which is as follows:
Async Concentrator Serial Number:
This is the unique number identifying an Async Concentrator. User has to
type in the serial number when installing the driver into the system at the very
first time. Otherwise, user can use "Auto Search Serial No." to detect the serial
number(s) of all the existing Async Concentrator(s) for convenience without
typing the serial number(s) one by one.
The unique serial number written on a sticker can be found at the left of the rear
panel of each Async Concentrator.
TTY or Non-TTY:
Specify TTY the for the Async Concentrator if all the 16 serial ports are to be
used for login or standard UNIX tty purpose. Otherwise, specify non-TTY for
MOXA port usage.
If TTY is specified for an Async Concentrator, user may enter [H/W Flow
Control Settings] dialog to specify "H/W Flow Control" feature: ON or OFF
(OFF is set as default).
This feature is for more flexible driver behavior. If set to OFF (default),
RTS/CTS hardware flow control function in driver will be disabled and CTS
signal from remote site is not needed for tty port to transfer data. On contrary,
if set to ON, RTS/CTS hardware flow control function in driver will be enabled
and CTS signal from remote site is needed for tty port to transfer data.
Any change of configuration, such as adding or deleting Async Concentrator(s),
changing from TTY to non-TTY or non-TTY to TTY, will cause kernel
rebuilding. Note that changing only the serial number will not cause kernel
rebuilding but "Concentrator Restart" or "Driver Reset" should be called for to
enable the newly configured Async Concentrator.
23
Page 30

Chapter 4 • • For UNIX Users
Monitoring
This utility gives user a quick view about all the Async Concentrators' and ports'
status. One can easily learn each port's total received/transmitted (Rx/Tx)
character count since the time when the monitoring is started. Rx/Tx
throughputs per second are also reported in interval basis (e.g. the last 5 seconds)
and in average basis (since the time the monitoring is started). User can reset
all ports' count by <HOME> key. <+> <-> (plus/minus) keys to change the
displaying time interval. Press <ENTER> on the port, that cursor stay, to view
the port's communication parameters, signal status, and input/output queue.
Besides, as entering [Port Status] dialog for highlighted port, parameters like
baud rate, parity, data bits, stop bits, CTS, DSR, DCD, input queue, and output
queue, are reported.
Diagnostics
The utility will diagnose the C360 in the system and report the hardware status
of each port of C360. However, user must make sure that
All MOXA TTY and non-TTY ports on the specified Async
Concentrator(s) must not be used by any applications (processes),
including getty or tty monitor, which should be stopped before the
utility is executed.
Driver Reset
The utility eliminates the need to shut down the UNIX system to re-initialize the
C360 with new configuration. However, user must make sure that
All MOXA TTY and non-TTY ports must not be used by any
applications (processes), including getty or tty monitor, which should
be stopped before the utility is executed.
Concentrator Restart
~24~
Page 31

For UNIX Users • • Chapter 4
The utility restarts the Async Concentrator(s) specified without shutting down
the UNIX system. This is especially useful for replacing a defective Async
Concentrator with a new Async Concentrator when any port of the original
Async Concentrator is mal-functional. In this case, even though the serial
numbers are different, "Driver Reset" is not suitable. However, user must
make sure that
All MOXA TTY and non-TTY ports on the specified Async
Concentrator(s) must not be used by any applications (processes),
including getty or tty monitor, which should be stopped before the
utility is executed.
Terminal Emulation
This utility provides data sending and receiving ability of all tty ports, including
MOXA TTY ports (but not MOXA non-TTY ports). It is quite useful for
testing, for example, sending AT command to a modem connected to the port or
used as a terminal for login purpose. Note that this is only a dumb terminal
emulation without handling full screen operation. In addition, pattern/file
transfer function is provided.
Driver Removal
If user wants to remove the MOXA C360 device driver and return to the
original system configuration, just press Enter in this function entry and answer
"y" to confirm. Then the system will be rebuild. This may take some time.
If user answers "n", no action will be taken.
4.4 Programming the MOXA TTY Ports Using Standard UNIX API
The system services that apply to standard tty port can also be applied to
MOXA TTY port since they conforms to UNIX tty standard. For example,
25
Page 32

Chapter 4 • • For UNIX Users
open( ), ioctl( ) , read( ), write( ), close( ), etc. Please refer to the UNIX
Programmer's Reference manual. However, these system services only
provide a limited functions and thus may not satisfy the sophisticated
programmers' need. In order to meet the user's special needs, MOXA supports
extended services through ioctl( ) command which are listed below.
Note that UNIX system services can not be applied to MOXA Non-TTY ports
and please refer to the next Section for more details.
Extended Function List for MOXA TTY Ports :
1.MIBUFED (=0x401) To get byte count in input buffer.
2.MOBUFED (=0x402) To get byte count in output buffer.
3.MTCRTS (=0x403) To control RTS output signal.
4.MTCDTR (=0x404) To control DTR output signal.
5.MSTATUS (=0x407) To read modem line status (CTS/DSR/DCD).
6.MHWFLOW (=0x40e) To enable/disable the hardware flow control.
Function Description :
The following lists the syntax of MOXA extended functions for SCO UNIX.
The variable moxa_fd is the returned file descriptor by open( ) a specific
MOXA TTY port. For example,
int moxa_fd;
moxa_fd = open("/dev/ttya11",O_RDWR);
1. MIBUFED
This function let user know how many bytes queued in input buffer
when this function is issued.
#define MIBUFED 0x401
int count; /*number of bytes queued in the input buffer*/
ioctl(moxa_fd, MIBUFED, &count);
~26~
Page 33

For UNIX Users • • Chapter 4
2. MOBUFED
This function let user know the byte count queued in output buffer
when this function is issued.
#define MOBUFED 0x402
int count; /* number of bytes queued in the output buffer */
ioctl(moxa_fd, MOBUFED, &count);
3. MTCRTS
This function, only valid when hardware flow control is turned off
(see MHWFLOW), is used to drive RTS on or off.
#define MTCRTS 0x403
#define TurnON 1
#define TurnOFF 0
ioctl(moxa_fd, MTCRTS, TurnON);
ioctl(moxa_fd, MTCRTS, TurnOFF);
4. MTCDTR
This function is used to DTR on or off.
#define MTCDTR 0x404
#define TurnON 1
#define TurnOFF 0
ioctl(moxa_fd, MTCDTR, TurnON);
ioctl(moxa_fd, MTCDTR, TurnOFF);
5. MSTATUS
This function is used to know the RS-232 line status(CTS/DSR/DCD).
27
Page 34

Chapter 4 • • For UNIX Users
#define MSTATUS 0x407
int status; /* status = RS-232 line status */
/* bit0 - CTS (1:on, 0:off) */
/* bit1 - DSR (1:on, 0:off) */
/* bit2 - DCD (1:on, 0:off) */
ioctl(moxa_fd, MSTATUS, &status);
6. MHWFLOW
This function is used to enable/disable hardware flow control. The
first open() function of a port will set the MHWFLOW to
configuration setting. However, user might want to control the DTR
or RTS signal on their will, thus the RTS flow control bit should be
turned off in order to take over the control of DTR or RTS signal via
function MTCRTS or MTCDTR. MTCRTS and MTCDTR can be
effective only after the RTS flow control bit of MHWFLOW is turned
off.
#define MHWFLOW 0x40e
#define HWFlowControlOff 0x00
#define CTSFlowControlBitOn 0x01
#define RTSFlowControlBitOn 0x02
#define HWFlowControlOn 0x03
ioctl(moxa_fd, MHWFLOW, CTSFlowControlBitOn);
ioctl(moxa_fd, MHWFLOW, RTSFlowControlBitOn);
ioctl(moxa_fd, MHWFLOW, CTSFlowControlBitOn |
RTSFlowControlBitOn);
~28~
Page 35

For UNIX Users • • Chapter 4
4.5 Programming the MOXA Non-TTY Ports Using MOXA UNIX API-232
Even though C360 SuperPort system provides up to 1024 serial ports, maximum
of 256 ports can serve as standard UNIX TTY devices while the rest of the ports,
up to 768, can only be used as MOXA non-TTY devices.
To control MOXA non-TTY ports, MOXA proprietary functions in the MOXA
UNIX API-232 library should be used, which are listed below. Note that
UNIX system services, such as open( ), close( ), read( ), write( ), and ioctl( ),
can not be applied to MOXA non-TTY ports.
The MOXA UNIX API-232 functions are almost the same as those in MOXA
DOS API-232 library. Hence it is easier for porting applications from DOS
platform to UNIX one. One thing to notice is that all the MOXA non-TTY
ports can only be accessed in one UNIX application (process). In other word,
two or more applications accessing any MOXA non-TTY ports are not allowed.
Remember to include the header file, mxapi232.h, in the application program
and link with the library, mxapi232.o. User can use the example program
(example.c), header file (mxapi232.h), library (mxapi232.o) and makefile in the
directory, /usr/lib/moxa to shorten the learning curve.
Function List:
1. sio_open( ) Open a non-TTY port.
2. sio_close( ) Close a non-TTY port.
3. sio_read( ) Read data from a non-TTY port.
4. sio_write( ) Write a string of data to Rx buffer.
5. sio_putb( ) Put a block of data to Tx buffer.
6. sio_ioctl( ) Non-TTY port parameter setting.
7. sio_break( ) Send break signal.
8. sio_flush( ) Flush Tx/Rx buffer data.
9. sio_iqueue( ) Read the length of data queued in Rx buffer.
10. sio_oqueue( ) Read the length of data queued in Tx buffer.
11. sio_lstatus( ) Get modem line status.
12. sio_lctrl( ) Set modem line control.
13. sio_DTR( ) Set modem line control signal DTR.
29
Page 36

Chapter 4 • • For UNIX Users
14. sio_RTS( ) Set modem line control signal RTS.
15. sio_flowctrl( ) Setting CTS/RTS and XON/XOFF flow control.
16. sio_disableTx( ) Disable transmitting data.
17. sio_enableTx( ) Enable transmitting data.
Function Description:
The following lists the syntax of MOXA non-TTY port functions. The
variable port is the port number of a specific MOXA non-TTY port to be
controlled.
The return value -2 stands for Ethernet cabling problem or Async Concentrator
problem which may causes time out in function execution.
1. Open a non-TTY port.
int sio_open(int port)
return = 0 ok
-1 bad port
-2 time out
port = port number
2. Close a non-TTY port.
int sio_close(int port)
return = >=0 ok : bit 0 ON means Rx queue has data
bit 1 ON means Tx queue has data
-1 bad port
-2 time out
port = port number
3. Read data from a non-TTY port.
~30~
Page 37

For UNIX Users • • Chapter 4
int sio_read(int port, char *buf, int len)
return = >0 length of data received
0 no data received
-1 bad port
-2 time out
-5 port is not open
port = port number
buf = receive buffer pointer with required space
len = buffer length
4. Write a string of data to Tx buffer.
int sio_write(int port, char *buf, int len)
return = >0 length of data transmitted to Tx buffer
=0 buffer full
-1 bad port
-2 time out
-5 port is not open
port = port number
buf = transmit string pointer
len = transmit string length
5. Put a block of data to Tx buffer. If the Tx buffer free space is
smaller than block length, it will return zero.
int sio_putb(int port, char *buf, int len)
return = >0 length of data transmitted to Tx buffer
0 free buffer not enough
-1 bad port
-2 time out
-5 port is not open
-6 len > Tx buffer size
port = port number
buf = transmit string pointer
len = transmit string length
6. Non-TTY port parameter setting.
31
Page 38

Chapter 4 • • For UNIX Users
int sio_ioctl(int port, int baud, int mode)
return = 0 ok
-1 bad port
-2 time out
-4 bad baud rate
port = port number
baud = 0 = 50 1 = 75 2 = 110
3 = 134.5 4 = 150 5 = 300
6 = 600 7 = 1200 8 = 1800
9 = 2400 10 = 4800 11 = 7200
12 = 9600 13 = 19200 14 = 38400
15 = 57600 16 = 115200 17 = 230400
18 = 460800
mode = bit_cnt OR stop_bit OR parity
bit_cnt ( bit 0, 1, 2 )
0x00 = bit_5 0x01 = bit_6 0x02 = bit_7
0x03 = bit_8
stop_bit ( bit 3 )
0x00 = stop_1 0x04 = stop_2
parity ( bit 4, 5 )
0x00 = none 0x08 = odd 0x18 = even
0x28 = mark 0x38 = space
7. Send break signal.
int sio_break(int port, int time)
return = 0 ok
-1 bad port
-2 time out
-4 xmit disable
-5 port is not open
port = port number
time = break time in tic ( 1/18.2 second )
8. Flush Tx/Rx buffer data.
~32~
Page 39

For UNIX Users • • Chapter 4
int sio_flush(int port, int func)
return = 0 ok
-1 bad port
-2 time out
-5 port is not open
port = port number
func = flush function (clear the assigned queue)
0 for input queue
1 for output queue
2 for input & output queue
9. Read the length of data queued in Rx buffer.
long sio_iqueue(int port)
return = >0 input queue size(bytes)
-1 bad port
-2 time out
-5 port is not open
port = port number
10. Read the length of data queued in Tx buffer.
long sio_oqueue(int port)
return = >=0 length of transmitted data which still
queued in Tx buffer
-1 bad port
-2 time out
-5 port is not open
port = port number
11. Get modem line status.
int sio_lstatus(int port)
return = >0 line status : bit 0 -- S_CTS
bit 1 -- S_DSR
33
Page 40

Chapter 4 • • For UNIX Users
bit 2 -- S_RI
bit 3 -- S_CD
-1 bad port
-2 time out
port = port number
12. Set modem line control.
int sio_lctrl(int port, int mode)
return = 0 ok
-1 bad port
-2 time out
port = port number
mode = C_DTR(bit 0), C_RTS(bit 1)
13. Set modem line control signal DTR.
int sio_DTR(int port, int mode)
return = 0 ok
-1 bad port
-2 time out
port = port number
mode = 0 set DTR off
1 set DTR on
14. Set modem line control signal RTS.
int sio_RTS(int port, int mode)
return = 0 ok
-1 bad port
-2 time out
-6 H/W flow control setting
port = port number
mode = 0 set RTS off
1 set RTS on
15. Setting CTS/RTS and XON/XOFF flow control.
~34~
Page 41

For UNIX Users • • Chapter 4
int sio_flowctrl(int port, int mode)
return = 0 ok
-1 bad port
-2 time out
port = port number
mode = bit 0 CTS flow control (0/1-off/on)
bit 1 RTS flow control (0/1-off/on)
bit 2 Tx XON/XOFF flow control (0/1-off/on)
bit 3 Rx XON/XOFF flow control (0/1-off/on)
16. Disable transmitting data.
int sio_disableTx(int port)
return = 0 ok
-1 bad port
-2 time out
-5 port is not open
port = port number
17. Enable transmitting data.
int sio_enableTx(int port)
return = 0 ok
-1 bad port
-2 time out
-5 port is not open
port = port number
35
Page 42
Appendix A Troubleshooting
Basically, to have data communication work, many things are involved. The
following picture will help user to inspect where the problem is.
AP 1
API
OS
Driver
PC 1
With
Serial Board
Serial Port
or
MDMMDM
AP 2
API
OS
Driver
PC 2
With
Serial Board
Serial Port
The philosophy for quickly solving a communication problem lies in isolation
of the real question point. Communications would fail if any point on the way
from AP 1 to AP 2 went wrong. The error (messages) could only be the clue
to the solution but may not be the final answer. Even same error symptom
may result from totally different cause(s).
Common problems and possible solutions are listed below. If user still has
problems, contact the dealer or Moxa for help. Or report it using "Problem
Report Form" to the dealer at once for technical support.
~36~
Page 43

Technical Reference • • Appendix B
1 MOXA board not found.
Hardware causes and solutions:
a The I/O address user has selected for MOXA board conflicts with
that of other interface boards such as SCSI, LAN, or Sound boards.
If so, adjust the I/O address to forestall the conflict.
b The MOXA board is not properly plugged in the system. If that is
the case, then re-install the board and make sure that it fits well in a
16-bit slot this time. Sometimes the slot for plugging MOXA
board is bad. In this case, please try other slots until a good one is
found.
c The MOXA board is not installed or missing (absent). Please
install it.
d The MOXA board is defective. Please check the MOXA board(s)
ONE AT A TIME in the system and find out the defective one. It
is also recommended to check it under DOS with F3 Diagnostics
function of utility "SETUP" to verify the hardware conditions.
Software Cause and Solution:
a The I/O address setting on board is not the same as the setting in
configuration software.
2 "Can not find any C360 Async Concentrator" error message.
This message shows that none of the configured Async Concentrator(s)
is found. The message will not show if AT LEAST ONE of the
configured Async Concentrator(s) is found.
37
Page 44

Appendix B • • Technical Reference
Hardware Causes and Solutions:
a Check if the Ethernet cable between the Async Concentrator and
the Control Board is working segment by segment and firmly
plugged and properly terminated.
b Run the board configuration program to check the board
configuration. Connect proper number of Async Concentrators as
configured in configuration program.
c If all the possible methods fail, the Async Concentrator might be
defective. It is recommended to check it under DOS with utility
"SETUP" to verify the hardware conditions one by one.
3 MOXA board found but can not transfer (transmitting/receiving)
data.
Hardware Causes and Solutions:
a Check if wrong cable wiring.
Refer to Appendix B.3 for precise pin assignment of the connector
type user is using and make sure the cable wiring is right.
b Cable or Async Concentrator is defective. Or only certain port of
the Async Concentrator is broken. Pleas check all the
components mentioned physically or using diagnostics utility
available.
c IRQ setting of the board does not match the setting in configuration
software and device driver. Please make sure they do match.
Software Causes and Solutions :
~38~
Page 45

Technical Reference • • Appendix B
a In the UNIX system, C360 will check line status (CTS/DSR)
before it sends data out if RTS/CTS flow control feature is set to
ON. In this case, if user is using 3-pin (TxD, RxD, GND) cable,
please run "moxaadm" and use configuration program to set the
RTS/CTS flow control feature to OFF (strongly recommended).
Or loopback (or short) the RTS with CTS and DTR with DSR on
MOXA port site as follows.
RTS DSR
CTS DTR
DCD
If RTS/CTS flow control feature is set to OFF, then leaving the
pins mentioned above open is fine.
b Perhaps the application controlling MOXA board is not correctly
written according to the corresponding API of the operating system.
To verify, please run existed and known good application or Moxaprovided utility.
For example, under UNIX, "stty", "cat", or "getty" is existed
program for testing tty port.
4 During operation, the host system with C360 is powered off but
the Async Concentrator(s) is(are) still on.
Solution:
Simply restart the host system, and normal C360 startup procedure
will be executed.
5 Under UNIX, MOXA port responds too slowly or abnormal key
operation.
39
Page 46

Appendix B • • Technical Reference
Hardware Cause and Solution:
a Wrong IRQ setting. If the hardware and software IRQ setting do
not match. MOXA driver will use a polling scheme and thus
causes slow operation. Try to match the IRQ settings.
6 Under UNIX, when respawning quite a few number of tty ports,
the following error messages appear: "Time out table overflow",
"File table overflow", "Region table overflow".
Software Cause and Solution:
The above error messages imply that the system resources are
exhausted. User should tune the kernel parameters to a larger value
and rebuild the kernel to be able to accommodate the new
configuration. Refer to UNIX system manual about how to tune the
parameters and rebuild kernel.
"Time out table overflow" : NCALL parameter too small.
"File table overflow" : NFILE or NINODE parameter too small.
"Region table overflow" : NREGION or NPROC parameter too small.
7 Under UNIX, the newly rebuilt kernel could not boot.
Software Causes and Solutions:
The C360 driver might not be built into the new kernel correctly.
a Please use the last good kernel backup to boot again. The kernel
backup in UNIX is /unix.moxa or /stand/unix.moxa.
b Then remove the C360 driver. Refer to Section 4.3 for driver
removal.
c Re-install the C360 driver once more.
~40~
Page 47
Technical Reference • • Appendix B
Appendix B Technical Reference
B.1 Ethernet Cabling
Async Concentrators' layout for C360 could be 10BASE-2 (BNC) and/or
10BASE-T (UTP) which conforming to Ethernet cabling rule.
For 10BASE-T with HUBs, the longest distance from C360 Control Board to
the last Async Concentrator is 500 meters which is depicted as follows:
100 meters
C360
Hub #1
100 meters
Hub #2
100 meters
Hub #3
100 meters
Hub #4
100 meters
Async
Concentrator
Specifications for 10BASE-T thin coaxial cable are as follows:
v Cable characteristics: 0.4 - 0.6 mm (22 -26 AWG) 8-wire (Only 4 wires are
used for 10BASE-T)
v Max. segment length: 100 meters
41
Page 48

Appendix B • • Technical Reference
For 10BASE-2 with repeaters, the longest distance from C360 Control Board to
the last Async Concentrator is about 1000 meters which is depicted as follows:
200 m
AC
C360
200 m
200 m
AC
AC
: Repeater AC : Async Concentrator
200 m
AC
200 m
AC
Specifications for 10BASE-2 thin coaxial cable are as follows:
v Cable characteristics: 0.2 inch diameter RG-58A/U 50 ohm
v Max. segment length: 185 meters
v Min. distance between two nodes: 0.5 meter
v Max. number of nodes per segment: 30
B.2 Async Concentrator and Serial Number
Inside Async Concentrator, each 16550C chip controls one port. The 16550C
is an advanced asynchronous controller capable of on-chip hardware flow
control and higher speed up to 460.8K bps.
Each Async Concentrator has its own unique serial number for identification.
Serial Number is the only way to locate the Async Concentrator and then serial
ports.
~42~
Page 49

Technical Reference • • Appendix B
B.3 RS-232 Cable Wiring
Only RS-232 interface with RJ-45 female connector is supported.
RJ-45 Female Connector
1
10
C360 RJ-45 Female
Connector Pinouts Signals
1 DCD
2 DSR
3 RTS
4 GND
5 TxD
6 RxD
7 GND
8 CTS
9 DTR
10 _
43
Page 50

Appendix B • • Technical Reference
Type 1: To connect C360 to a DTE, e.g. terminal or PC COM1/2. (Please
check the precise DTE pinouts, the following DTE pinouts is just an
example)
C360 DTE C360 DTE
RJ-45 Female DB-25 Male RJ-45 Female DB-9 Male
1 DCD 8 DCD 1 DCD 1 DCD
2 DSR 20 DTR 2 DSR 4 DTR
3 RTS 5 CTS 3 RTS 8 CTS
5 TxD 3 RxD 5 TxD 2 RxD
6 RxD 2 TxD 6 RxD 3 TxD
7 GND 7 GND 7 GND 5 GND
8 CTS 4 RTS 8 CTS 7 RTS
9 DTR 6 DSR 9 DTR 6 DSR
Type 2: To connect C360 to a DCE, e.g. modem.
C360 DCE
RJ-45 Female DB-25 Female
1 DCD 8 DCD
2 DSR 6 DTR
3 RTS 4 CTS
5 TxD 2 RxD
6 RxD 3 TxD
7 GND 7 GND
8 CTS 5 RTS
9 DTR 20 DSR
~44~
Page 51

Technical Reference • • Appendix B
Type 3: To connect C360 to a DTE, e.g. terminal or PC COM1/2, with 3-pin
wiring if [Hardware flow control] feature is set to "ON".
C360 DTE C360 DTE
RJ-45 Female DB-25 Male RJ-45 Female DB-9 Male
5 TxD 3 RxD 5 TxD 2 RxD
6 RxD 2 TxD 6 RxD 3 TxD
7 GND 7 GND 7 GND 5 GND
3 RTS 5 CTS 3 RTS 8 CTS
8 CTS 4 RTS 8 CTS 7 RTS
2 DSR 20 DTR 2 DSR 4 DTR
9 DTR 6 DSR 9 DTR 6 DSR
1 DCD 8 DCD 1 DCD 1 DCD
User must loopback (or short) the RTS with CTS and DSR with DTR, DCD on
MOXA site if [Hardware flow control] feature is set to "ON".
Type 4: To connect C360 to a DTE, e.g. terminal or PC COM1/2, with 3-pin
wiring if [Hardware flow control] feature is set to "OFF".
C360 DTE C360DTE
RJ-45 Female DB-25 Male RJ-45 Female DB-9 Male
5 TxD 3 RxD 5 TxD 2 RxD
6 RxD 2 TxD 6 RxD 3 TxD
7 GND 7 GND 7 GND 5 GND
3 RTS 5 CTS 3 RTS 8 CTS
8 CTS 4 RTS 8 CTS 7 RTS
2 DSR 20 DTR 2 DSR 4 DTR
9 DTR 6 DSR 9 DTR 6 DSR
1 DCD 8 DCD 1 DCD 1 DCD
Users could just leave RTS, CTS, DSR, DTR, DCD open if [Hardware flow
control] feature is set to "OFF".
45
Page 52

Appendix C Example Program
/ *
* Example C program for controlling MOXA serial/Non-TTY ports
* using MOXA DOS/UNIX API-232 library
* /
#include "mxapi232.h"
void main()
{
int port_no, count, i;
char data[81];
/* Setting the port 9600, N, 8, 1, ... */
port_no = 1;
if (sio_ioctl(port_no, B9600, BIT_8 | P_NONE | STOP_1) != 0) {
printf("Port #%d sio_ioctl() error !\n", port_no);
exit;
}
sio_lctrl(port_no, 3); /* set DTR RTS on */
sio_flowctrl(port_no, 0); /* set NO flow control */
sio_open(port_no); /* Open Port */
/* Get line status from port. If CTS and DSR are ON, continue */
while (1) {
if ( sio_lstatus(port_no) & 3 )
break;
}
/* Read input queue status from port. If any input data, read it */
i = 5; /* execute for 5 times */
while (i) {
if ((count = sio_iqueue(port_no)) > 0) {
~46~
Page 53

Appendix C • • Example Program
if (count > 80)
count = 80;
/* Read data from port */
if ((count = sio_read(port_no, data, count)) < 0) {
printf("Port #%2d sio_read() error !\n", port_no);
exit;
} else if (count > 0) {
data[count] = 0;
printf("%s", data);
}
/* Write data ABCDEFGHIJ to port */
sio_putb(port_no, "ABCDEFGHIJ", 10 );
i--;
}
}
sio_flush(port_no, 2); /* Flush port's input & output queues */
sio_close(port_no); /* Close port */
}
47
Page 54

Problem Report Form
Customer name:
Company:
Email: Date:
Tel: Fax:
Moxa product: o C320 series o C218 series o C360
o C102 family o C104 family o C168 family
Moxa device driver version: _____________
Moxa hardware settings: memory (I/O) base address ____________ IRQ _________
Operating System: o DOS o Windows 3.x o Windows 95
(with version) o Windows NT o OS/2
o SCO UNIX 3.2.4 o SCO OpenServer Rel. 5 o SCO Xenix
o SVR4.2 UNIX o UnixWare o Solaris x86
o Linux o QNX o FreeBSD
o Others ______________
Which BIOS Shadow RAM Enabled: o C8000 o CC000 o D0000
o D4000 o D8000 o DC000
Memory management software under DOS CONFIG.SYS: o EMM386 o QEMM386
o None
PC Host CPU: o Pentium o 80486 o 80386
Speed: _____ MHz
LAN card: o None o Yes, memory base addr. _______ I/O base addr.___ IRQ ____
SCSI card: o None o Yes, memory base addr. _______ I/O base addr. ___ IRQ ____
SOUND card: o None o Yes, memory base addr. _______ I/O base addr. ___ IRQ ____
Others : o None o Yes, memory base addr. _______ I/O base addr. ___ IRQ ____
Problem description:
o Board not found. o Board found, but can't transfer data.
o Can transfer data, but lose data o Can transfer data but with garbled data.
o Others. Detailed error message description is recommended:
Page 55

WARRANTY
Moxa guarantees its products against defective materials and workmanship for a
period of one year from the day the original buyer receives the product. In the
event that this product fails to be in good working order during this twelvemonth warranty period, the Dealer and the manufacturer will repair or replace
this product at no additional cost to the customer.
This guarantee does not apply to products which have been repaired or altered
by other manufacturers. Moxa neither assumes nor authorizes any liability in
connection with the sale, installation or use of its products.
RETURN PROCEDURE
For product repair, exchange or refund, the customer must:
v Provide evidence of original purchase.
v Obtain a Product Return Agreement (PRA) from the sales representative or
dealer.
v Fill out the Problem Report Form (PRF) as detailed as possible for shorter
product repair time.
v Carefully pack the product in anti-static package, and send it, pre-paid, to
the dealer. The PRA should show on the outside of the package. Include a
description of the problem along with the return address and telephone
number of a technical contact.
 Loading...