

Page 1

Copyright © 2021 Moxa Inc.
Released on March 26, 2021
About Moxa
Moxa is a leading provider of edge connectivity, industrial computing, and network
infrastructure solutions for enabling connectivity for the Industrial Internet of Things
(IIoT). With over 30 years of industry experience, Moxa has connected more than 57
m
customers in more than 70 countries. Moxa delivers lasting business value by
empowering industries with reliable networks and sincere service. Information about
Moxa’s solutions is available at www.moxa.com.
How to Contact Moxa
Tel : +886-2-8919-1230
The Security Hardening Guide for the NPort 6000 Series
Moxa Technical Support Team
support@moxa.com
Contents
1. Introduction .................................................................................... 2
2. General System Information ........................................................... 3
2.1. Basic Information About the Device ............................................................ 3
2.2. Deployment of the Device ......................................................................... 3
3. Configuration and Hardening Information ...................................... 4
3.1. TCP/UDP Ports and Recommended Services ................................................. 5
3.2. HTTPS and SSL Certificates ......................................................................10
3.3. Account Management ..............................................................................13
3.4. Accessible IP List .....................................................................................16
3.5. Logging and Auditing ...............................................................................17
4. Patching/Upgrades ....................................................................... 18
4.1. Patch Management ..................................................................................18
4.2. Firmware Upgrades .................................................................................18
5. Security Information and Vulnerability Feedback ......................... 19
illion devices worldwide and has a distribution and service network that reaches
Page 2

Moxa Tech Note
The Security Hardening Guide for the NPort 6000
Series
Copyright © 2021 Moxa Inc.
Page 2 of 19
1. Introduction
This document provides guidelines on how to configure and secure the NPort 6000 Series. The
recommended steps in this document should be considered as best practices for security in
most applications. It is highly recommended that you review and test the configurations
thoroughly before implementing them in your production system in order to ensure that your
application is not negatively impacted.
Page 3
Moxa Tech Note
The Security Hardening Guide for the NPort 6000
Series
Copyright © 2021 Moxa Inc.
Page 3 of 19
the NPort devices and/or the system fulfill
2. General System InformationBasic Information About the
Device
Model Function Operating System Firmware Version
NPort 6000 Series Device server Moxa Operating System Version 1.20
The NPort 6000 Series is a device server specifically designed to allow industrial
devices to be directly accessible from a network. Thus, legacy devices can be
transformed into Ethernet devices, which then can be monitored and controlled from
any network location or even the Internet. Different configurations and features are
available for specific applications, such as protocol conversion, Real COM drivers, and
TCP operation modes, to name a few. The series uses TLS protocols to transmit
encrypted serial data over Ethernet.
Moxa Operating System (MOS) is an embedded proprietary operating system that is
only used in Moxa edge devices. Because the MOS operating system is not freely
available, the chances of malware attacks are significantly reduced.
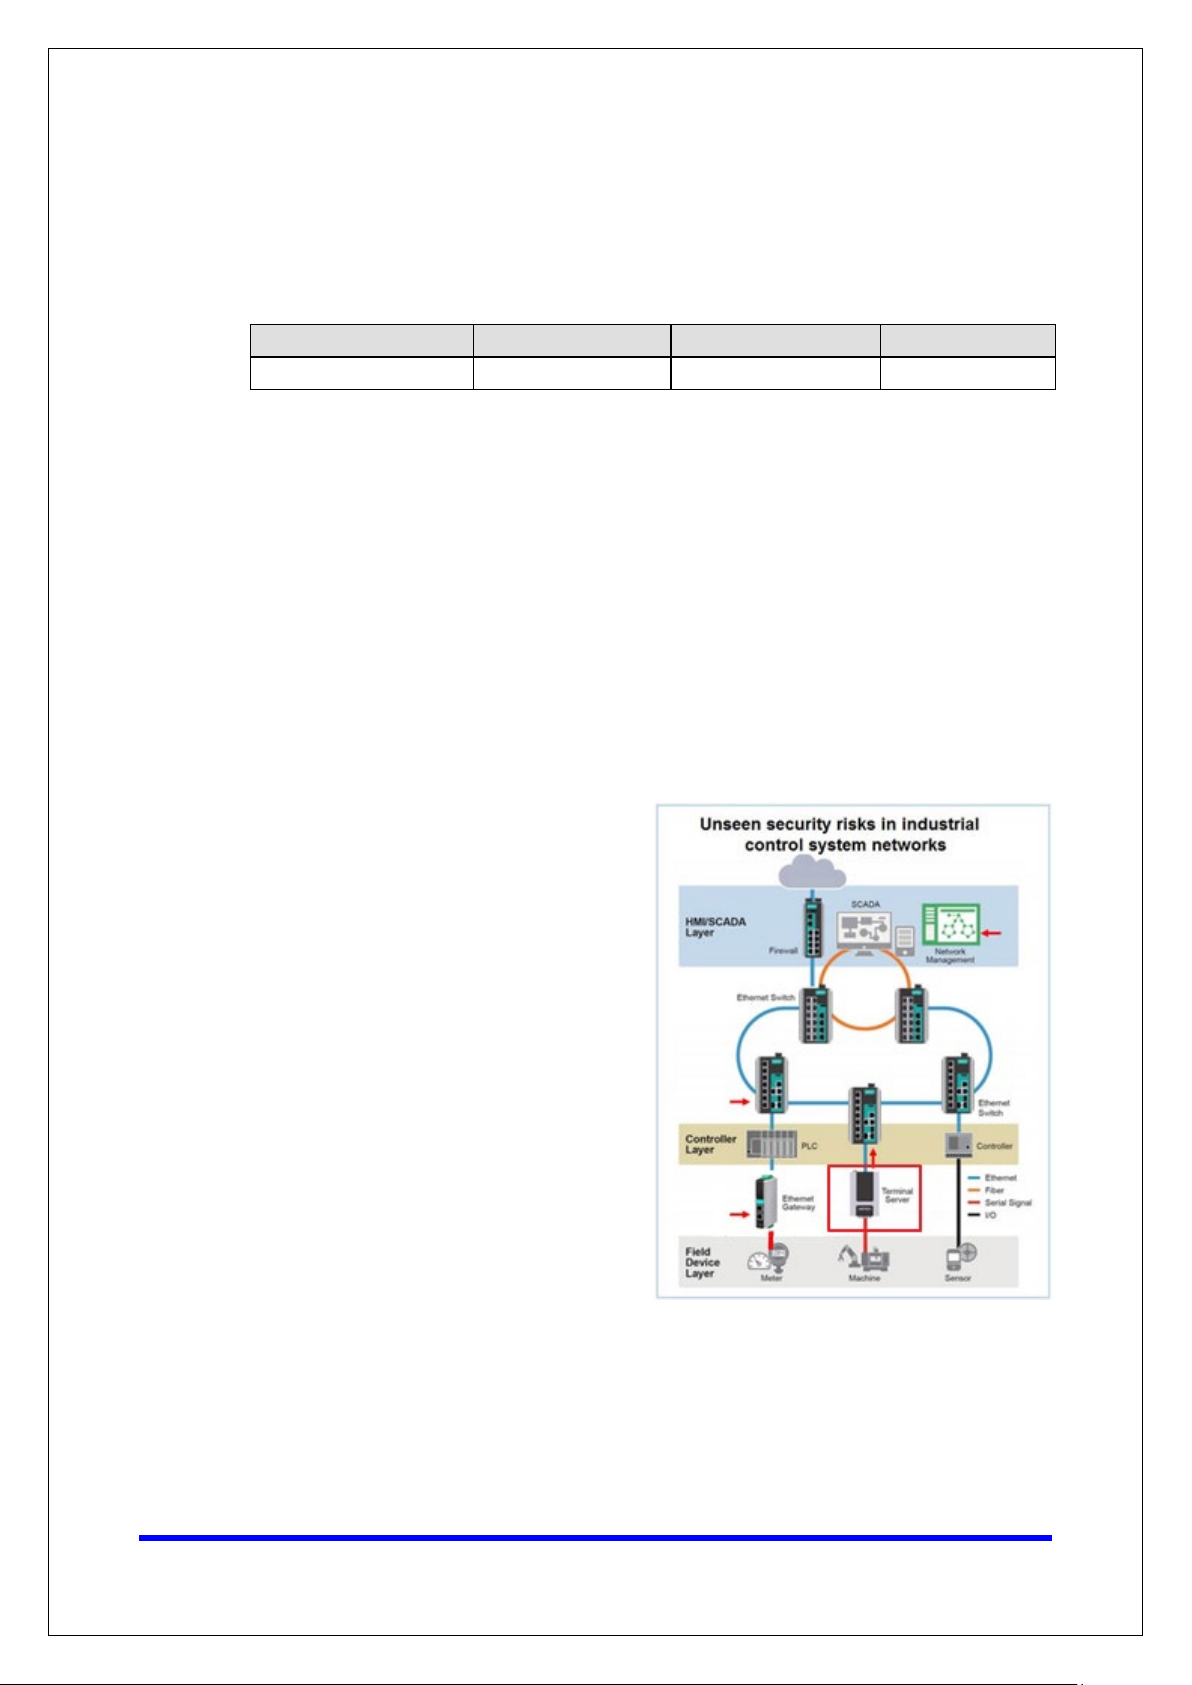
2.2. Deployment of the Device
You should deploy the NPort 6000 Series
behind a secure firewall network that has
sufficient security features in place to
ensures that networks are safe from
internal and external threats.
Make sure that the physical protection of
meet the security needs of your
application. Depending on the
environment and the threat situation, the
form of protection can vary significantly.
Page 4
Moxa Tech Note
The Security Hardening Guide for the NPort 6000
Series
Copyright © 2021 Moxa Inc.
Page 4 of 19
3. Configuration and Hardening Information
For security reasons, account and password protection is enabled by default, so you must
provide the correct account and password to unlock the device before entering the web
console of the gateway.
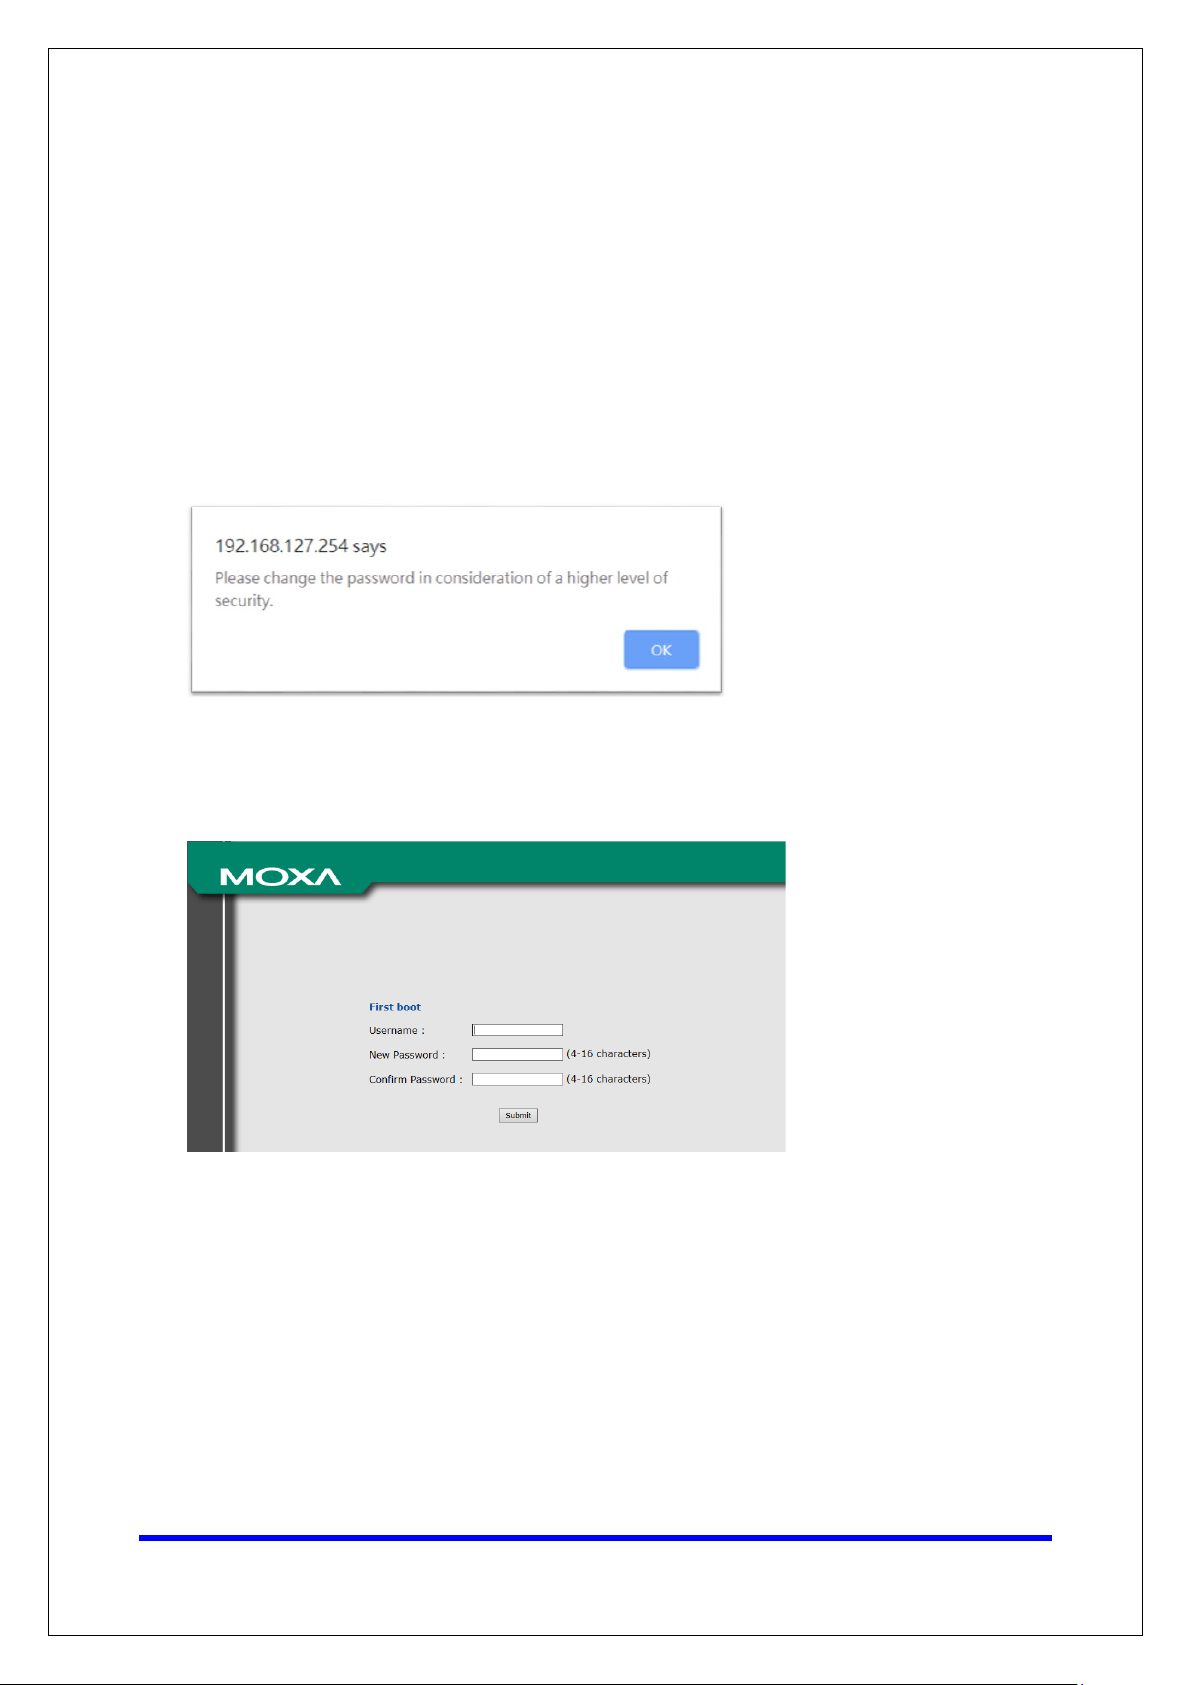
The default account and password are admin and moxa (both in lowercase letters),
respectively. Once you are successfully logged in, a pop-up notification will appear to remind
you to change the password in order to ensure a higher level of security.
From firmware version 1.20, there is no default username or password. You should
immediately create a username and password after logging in for the first time to enhance the
security of your device.
Page 5

Moxa Tech Note
The Security Hardening Guide for the NPort 6000
Series
Copyright © 2021 Moxa Inc.
Page 5 of 19
Setting
(Client) data
address from the server
Log
remote log server
3.1. TCP/UDP Ports and Recommended Services
Refer to the table below for all the ports, protocols, and services that are used to
communicate between the NPort 6000 Series and other devices.
Service Name Option
Moxa Command
(DSCI)
DNS_wins Enable Enable UDP 53, 137, 949
SNMP agent Enable/Disable Enable UDP 161 SNMP handling routine
RIPD_PORT Enable/Disable Disable UDP 520, 521 Processing RIP routing data
HTTP server
HTTPS server Enable/Disable Enable TCP 443 Secured web console
SSH Enable/Disable Enable TCP 22 SSH console
Telnet server Enable/Disable Disable TCP 23 Telnet console
RADIUS Enable/Disable Disable UDP
TACACS+ Enable/Disable Disable TCP 49 Authentication server
DHCP client Enable/Disable Disable UDP 68
Enable/Disable Enable
Redirect to
HTTPS/Disable
Default
Disable TCP 80 Web console
Type Port Number Description
TCP 14900, 4900
UDP 4800
User-defined
(1645 as
default or 1812)
For Moxa utility
communication
Processing DNS and WINS
Authentication server
The DHCP client needs to
acquire the system IP
SNTP Enable/Disable Disable UDP Random port
Remote System
Enable/Disable Disable UDP Random port
Synchronize time settings
with a time server
Send the event log to a
Operation Mode Option
Real COM Mode Enable/Disable Enable TCP
RFC2217 Mode Enable/Disable Disable TCP
TCP Server Mode Enable/Disable Disable TCP
UDP Mode Enable/Disable Disable UDP
Default
Setting
Type Port Number Description
950+ (Serial port No. -1)
966+ (Serial port No. -1)
User-defined (default:
4000+Serial port No.)
User-defined (default:
4000+Serial Port No.)
User-defined (default:
966+Serial Port No.)
User-defined (default:
4000+Serial Port No.)
Page 6

Moxa Tech Note
The Security Hardening Guide for the NPort 6000
Series
Copyright © 2021 Moxa Inc.
Page 6 of 19
Operation Mode Option
Pair Connection
Slave Mode
Ethernet Modem
Mode
Reverse Telnet
Mode
Reverse SSH
Mode
Printer RAW Mode Enable/Disable Disable TCP 2048+(Group No. -1)
Printer LPD Mode Enable/Disable Disable TCP 515
Disabled Mode Enable/Disable Disable N/A N/A
Enable/Disable Disable TCP
Enable/Disable Disable TCP
Enable/Disable Disable TCP
Enable/Disable Disable TCP User-defined (default:
Default
Setting
Type Port Number Description
User-defined (default:
4000+Serial Port No.)
User-defined (default:
4000+Serial Port No.)
User-defined (default:
4000+Serial Port No.)
4000+Serial Port No.)
For security reasons, you should consider disabling unused services. After initial setup,
use services with stronger security for data communication. Refer to the table below for
the suggested settings.
Service Name
Moxa Command
(DSCI)
DNS_wins Enable UDP 53, 137, 949
SNMP Disable UDP 161
RIPD_PORT Disable UDP 520, 521 Since the NPort is not a router or layer 3
HTTP Server Disable TCP 80
HTTPS Server Enable TCP 443
SSH Enable TCP 22 If you prefer the console mode to
Telnet Server Disable TCP 23
Suggested
Setting
Disable
Type Port Number Security Remark
TCP 14900, 4900
UDP 4800
Disable this service as it is not commonly
used
A necessary service to get IP; cannot be
disabled
Suggest to manage the NPort via HTTPS
console
switch, you may not need this service
Disable HTTP to prevent plain text
transmission
Encrypted data channel with trusted
certificate for NPort configurations
configure the device, you can enable the
SSH service. If you prefer the GUI, then
disable it.
Disable this service as it is not commonly
used
Page 7

Moxa Tech Note
The Security Hardening Guide for the NPort 6000
Series
Copyright © 2021 Moxa Inc.
Page 7 of 19
Service Name
RADIUS Enable UDP User Define
TACACS+ Enable TCP 49 If you are using the central account
DHCP Client Disable UDP 67, 68
SNTP Client Disable UDP Random Port
Remote System
Log
Suggested
Setting
Enable UDP Random port
Type Port Number Security Remark
(1645 as
default or
1812
If you are using central account
management feature (has a RADIUS
server), you may enable this service.
management feature (has a TACACS+
server), you may enable this service.
Select either RADIUS or TACACS+ to be
the central account management service,
and disable the other one.
Assign an IP address manually for the
device
Suggest to use the SNTP server for
secure time synchronization
Suggest using a system log server to
store all the logs from all the devices in
the network
For console services, we recommend the following:
HTTP Disable
HTTPS Enable
Telnet Disable
Moxa Command Disable
To enable or disable these services, log in to the HTTP/HTTPS console and select Basic
Settings
Console Settings.
Page 8

Moxa Tech Note
The Security Hardening Guide for the NPort 6000
Series
Copyright © 2021 Moxa Inc.
Page 8 of 19
To disable the SNMP agent service, log in to the HTTPS console and select System
Management SNMP Agent, then select Disable fo r S N M P.
For the RADIUS server, log in to the HTTPS/SSH/Telnet console and select System
Management
IP setting empty as Disable for the RADIUS server.
To disable the SNTP service, log in to the HTTP/HTTPS/SSH/Telnet console and select
Basic Settings, and keep the Time server setting empty. This will disable the SNTP
service.
Mics. Network Settings Authentication Server. Then, keep the
Page 9

Moxa Tech Note
The Security Hardening Guide for the NPort 6000
Series
Copyright © 2021 Moxa Inc.
Page 9 of 19
Note:
For
the
For the remote system log server, it depends on your network architecture. We
recommend your network administrator to have a Log Server to receive the log
messages from the device. In this case, log in to the HTTP/HTTPS/SSH/Telnet console,
select Remote Log Server, and input the IP address of the Log Server in the SYSLOG
server field. If your network doesn't have one, keep it empty (disable Remote
System Log Server).
For the operation mode services, it depends on how you bring your serial device to the
Ethernet network. For example, if your host PC uses a legacy software to open a COM
port to communicate with the serial device, then the NPort will enable the Real COM
mode for this application. If you don't want the NPort to provide such a service, log in
to the HTTP/HTTPS/SSH/Telnet console, select Serial Port Settings
Operation Modes, and then select Disable.
Port #
each instruction above, click the Submit button to save your changes, then restart
NPort device so the new settings will take effect.
Page 10

Moxa Tech Note
The Security Hardening Guide for the NPort 6000
Series
Copyright © 2021 Moxa Inc.
Page 10 of 19
3.2. HTTPS and SSL Certificates
HTTPS is an encrypted communication channel.
As TLS v1.1 or lower has severe vulnerabilities
that can easily be hacked, the NPort 6000
Series uses TLS v1.2 for HTTPS to ensure data
transmissions are secured. Make sure your
browser has TLS v1.2 enabled.
In order to use the HTTPS console without a certificate warning appearing, you need to
import a trusted certificate issued by a third-party certificate authority.
Log in to the HTTP/HTTPS console and select System Management Certificate.
You can generate an up-to-date valid certificate by importing a third-party trusted SSL
certificate or generating the “NPort self-signed” certificate.
• Behavior of the SSL certificate on an NPort device
− NPort devices can auto-generate a self-signed SSL certificate. It is recommended
that you import SSL certificates that are either certified by a trusted third-party
Certificate Authority (CA) or by an organization's CA.
− The length of the NPort device’s self-signed private keys is 1,024 bits, which
should be compatible with most applications. Some applications may need a
longer key, such as 2,048 bits, which would require importing a third-party
certificate. Please note that longer keys will mean browsing the web console will
be slower due to the increased complexity of encrypting and decrypting
communicated data.
Page 11

Moxa Tech Note
The Security Hardening Guide for the NPort 6000
Series
Copyright © 2021 Moxa Inc.
Page 11 of 19
Note:
The maximum supported key length for NPort devices is 2,048 bits.
• For the NPort self-signed certificate:
If a certificate has expired, you can regenerate the NPort self-signed certificate with
the following steps.
− Step 1. Delete the current SSL certificate issued by the NPort device.
− Step 2. Enable the NTP server and set up the time zone and local time.
− Step 3. After restarting the device, the NPort self-signed certificate will be
regenerated with a new expiration date.
• Importing a third-party trusted SSL certificate:
Importing the third-party trusted SSL certificate can improve security. To generate
the SSL certificate through a third party, follow these steps:
− Step 1. Create a certification authority (Root CA), such as Microsoft AD
Certificate Service (
step-installing-certificate-authority-on-windows-server-2012-r2/)
− Step 2. Find a tool to issue a certificate signing request (CSR) file. You can get
one from a third-party CA company such as DigiCert
(https://www.digicert.com/easy-csr/openssl.htm).
https://mizitechinfo.wordpress.com/2014/07/19/step-by-
− Step 3. Submit the CSR file to a public certification authority to get a signed
certificate.
− Step 4. Import the certificate to the NPort device. Please note that NPort devices
only accept certificates using a “.pem” format.
Page 12

Moxa Tech Note
The Security Hardening Guide for the NPort 6000
Series
Copyright © 2021 Moxa Inc.
Page 12 of 19
• Here are some well-known third-party CA (Certificate Authority) companies for your
reference (https://en.wikipedia.org/wiki/Certificate_authority
− IdenTrust (https://www.identrust.com/)
− DigiCert (https://www.digicert.com/)
− Comodo Cybersecurity (https://www.comodo.com/)
− GoDaddy (https://www.godaddy.com/)
− Verisign (https://www.verisign.com/)
):
Page 13

Moxa Tech Note
The Security Hardening Guide for the NPort 6000
Series
Copyright © 2021 Moxa Inc.
Page 13 of 19
3.3. Account Management
• The NPort 6000 Series provides two different user levels, administrator and user.
With a Read Write account, you can access and modify all settings through the web
console. With a user account, you can only view settings.
• The default administrator account is admin, and the default password is blank. To
manage accounts, log in to the web console and select Administration
Management
click on the account name and select Edit in the top toolbar. Input the old password
in the Password field and the new password in Confirm Password field to change
the password.
• Through the administration account, admin, log in to NPort 6000 Series and perform
the configuration settings. To change the default password (empty), log in to the
HTTPS/SSH/Telnet console and select System Management
Management
old password and the new password twice (at least 4 characters) to change the
password.
User Account. To change the password of an existing account,
User Account. When it comes to the Password part, input the
Account
Account
Page 14

Moxa Tech Note
The Security Hardening Guide for the NPort 6000
Series
Copyright © 2021 Moxa Inc.
Page 14 of 19
Note:
We suggest you
level” account instead of
using the default “admin” account, as it is commonly used by embedded systems. Once
the new
“admin” account should be monitored for security
• To add new general users, log in to the HTTPS/SSH/Telnet console and select
System Management
Management part, input the username, old password, and the new password twice
to Add a new user, Change the password, or Delete an old user.
Maintenance Change Password. At the User
administrator level account has been created, it is suggested that the original
manage your device with another “administrator
reasons to prevent brute-force attacks.
Page 15

Moxa Tech Note
The Security Hardening Guide for the NPort 6000
Series
Copyright © 2021 Moxa Inc.
Page 15 of 19
• To improve security, the login password policy and account login failure lockout can
be configured. To configure them, log in to the HTTP/HTTPS console and select
System Management Misc. Settings Login Password Policy.
You should adjust the password policy to require more complex passwords. For
example, set the Minimum length to 16, enable all password complexity strength
checks, and enable the Password lifetime options. Also, to avoid brute-force
attack, it’s suggested that you enable the Account login failure lockout feature.
• For some system security requirements, a warning message may need to be
displayed to all users attempting to log in to the device. To add a login message, log
in to the HTTPS console and select System Management
Notification Message, and enter a Login Message to use.
Misc. Settings
Page 16

Moxa Tech Note
The Security Hardening Guide for the NPort 6000
Series
Copyright © 2021 Moxa Inc.
Page 16 of 19
Ensure that the IP address of the PC you are using to access the web console is in the
Accessible IP List
3.4. Accessible IP List
• The NPort 6000 Series has a feature that can limit access to specific remote host IP
addresses to prevent unauthorized access. If a host’s IP address is in the accessible
IP table, then the host will be allowed to access the NPort 6000 Series. To configure
it, log in to the HTTPS console and select System Management
List.
Accessible IP
• You may add a specific address or range of addresses by using a combination of an
IP address and a netmask as follows:
− To allow access to a specific IP address: Enter the IP address in the
corresponding field, then enter 255.255.255.255 for the netmask.
− To allow access to hosts on a specific subnet: For both the IP address and
netmask, use 0 for the last digit (e.g., “192.168.1.0” and “255.255.255.0”).
− To allow access to all IP addresses: Make sure that the Enable checkbox for
the Accessible IP List is not checked.
Additional configuration examples are shown in the following table:
Desired IP Range IP Address Field Netmask Field
Any host Disable Enable
192.168.1.120 192.168.1.120 255.255.255.255
192.168.1.1 to 192.168.1.254 192.168.1.0 255.255.255.0
192.168.1.1 to 192.168.255.254 192.168.0.0 255.255.0.0
192.168.1.1 to 192.168.1.126 192.168.1.0 255.255.255.128
Warning
.
Page 17

Moxa Tech Note
The Security Hardening Guide for the NPort 6000
Series
Copyright © 2021 Moxa Inc.
Page 17 of 19
3.5. Logging and Auditing
• These are the events that will be recorded by the NPort 6000 Series:
Event Group Summary
System System cold start, System warm start
Network
Configuration
OpMode Connect, Disconnect, Authentication Fail, Restart
• To configure this setting, log in to the HTTPS console and select System
Management
on the NPort 6000 device and/or Syslog for keeping records on a server. You
should enable system log settings to record all important system events to monitor
device status and check for security issues.
DHCP/BOOTP gets IP/renew, NTP connect failed, IP conflict, Network link
down
Login failed, IP changed, Password changed, Firmware upgraded, Certificate
imported, Configuration imported or exported, Configuration changed, Clear
event logged
System Log Settings. Then, enable the Local Log for recording
• To view events in the system log, log in to the HTTP/HTTPS console and select
System Monitoring
System Log.
Page 18

Moxa Tech Note
The Security Hardening Guide for the NPort 6000
Series
Copyright © 2021 Moxa Inc.
Page 18 of 19
4. Patching/Upgrades
4.1. Patch Management
With regards to patch management, Moxa releases version enhancements annually
with detailed release notes.
4.2. Firmware Upgrades
The process for upgrading firmware is as follows:
• Download the latest firmware for your MGate device from the Moxa website:
− Firmware for the NPort 6100/6200 Series:
https://www.moxa.com/en/products/industrial-edge-connectivity/serial-device-
servers/terminal-servers/nport-6100-6200-series#resources
− Firmware for the NPort 6400/6600 Series:
https://www.moxa.com/en/products/industrial-edge-connectivity/serial-device-
servers/terminal-servers/nport-6400-6600-series#resources
• Log in to the HTTPS console and select System Management Maintenance
Firmware Upgrade. Click the Choose File button to select the proper firmware
and click Submit to upgrade the firmware.
Page 19

Moxa Tech Note
The Security Hardening Guide for the NPort 6000
Series
Copyright © 2021 Moxa Inc.
Page 19 of 19
• If you want to upgrade the firmware for multiple units, download the Device Search
Utility (DSU) or MXconfig for a GUI interface, or the Moxa CLI Configuration Tool for
a CLI interface.
• If you need instructions on using the Moxa CLI Configuration Tool, download the
manual.
− Manual for the NPort 6100/6200 Series:
https://www.moxa.com/en/products/industrial-edge-connectivity/serial-device-
servers/terminal-servers/nport-6100-6200-series#resources
− Manual for the NPort 6400/6600 Series:
https://www.moxa.com/en/products/industrial-edge-connectivity/serial-device-
servers/terminal-servers/nport-6400-6600-series#resources
5. Security Information and Vulnerability Feedback
As the adoption of the Industrial IoT (IIoT) continues to grow rapidly, security has become
one of the top priorities. The Moxa Cyber Security Response Team (CSRT) is taking a proactive
approach to protect our products from security vulnerabilities and help our customers better
manage security risks.
You can find the latest Moxa security information here:
https://www.moxa.com/en/support/product-support/security-advisory
 Loading...