

Page 1
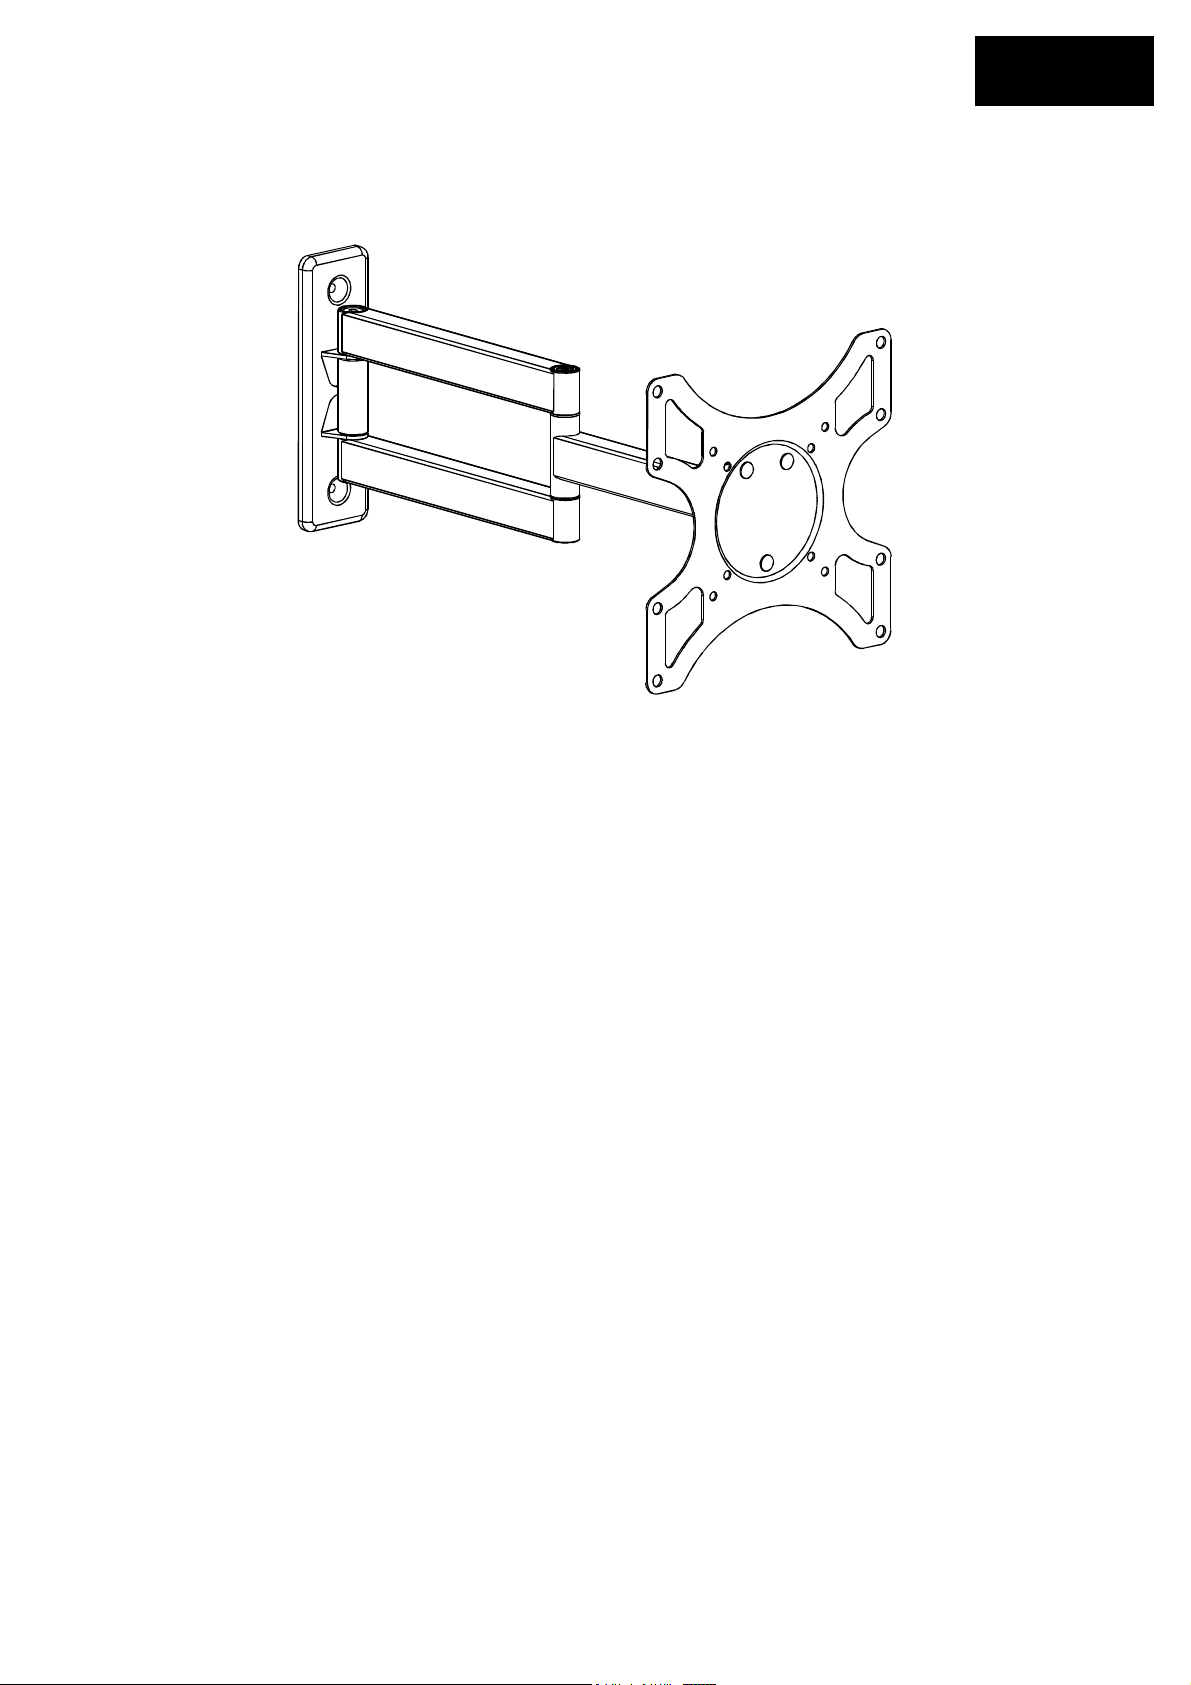
English
Installation Instruction
UNPACKIN G INSTRUCTIONS
!
Carefully open the carton, remove contents and lay out on cardboard or other
protective surface to avoid damage.
Check package contents against the Supplied Parts List in the next page to assure
!
that all components were received undamaged . Do not use damaged or defect ive
parts.
Carefully read all instructions before attempting installatio n.
!
IMPORTANT SAFETY INFORMATION
Install and operate this device with care. Please read this instruction before
beginning the installation, and carefully follow all instructions contained herein. U se
proper safety eq uipment during installation.
Please call a qualified installation contractor for help if you:
If you don'
!
installation.
t underst
and these directions or have any doubts about the safety of the
If you are uncertain about the nature of your wall, consult a qualified installation
!
contractor.
Do not use this product for any purpose or in any configuration not explicitly specified
in this instruction. We hereby disclaims any and all liability for injury or damage
arising from incorrect assembly, incorrect mounting, or incorrect use of this product.
1
Page 2
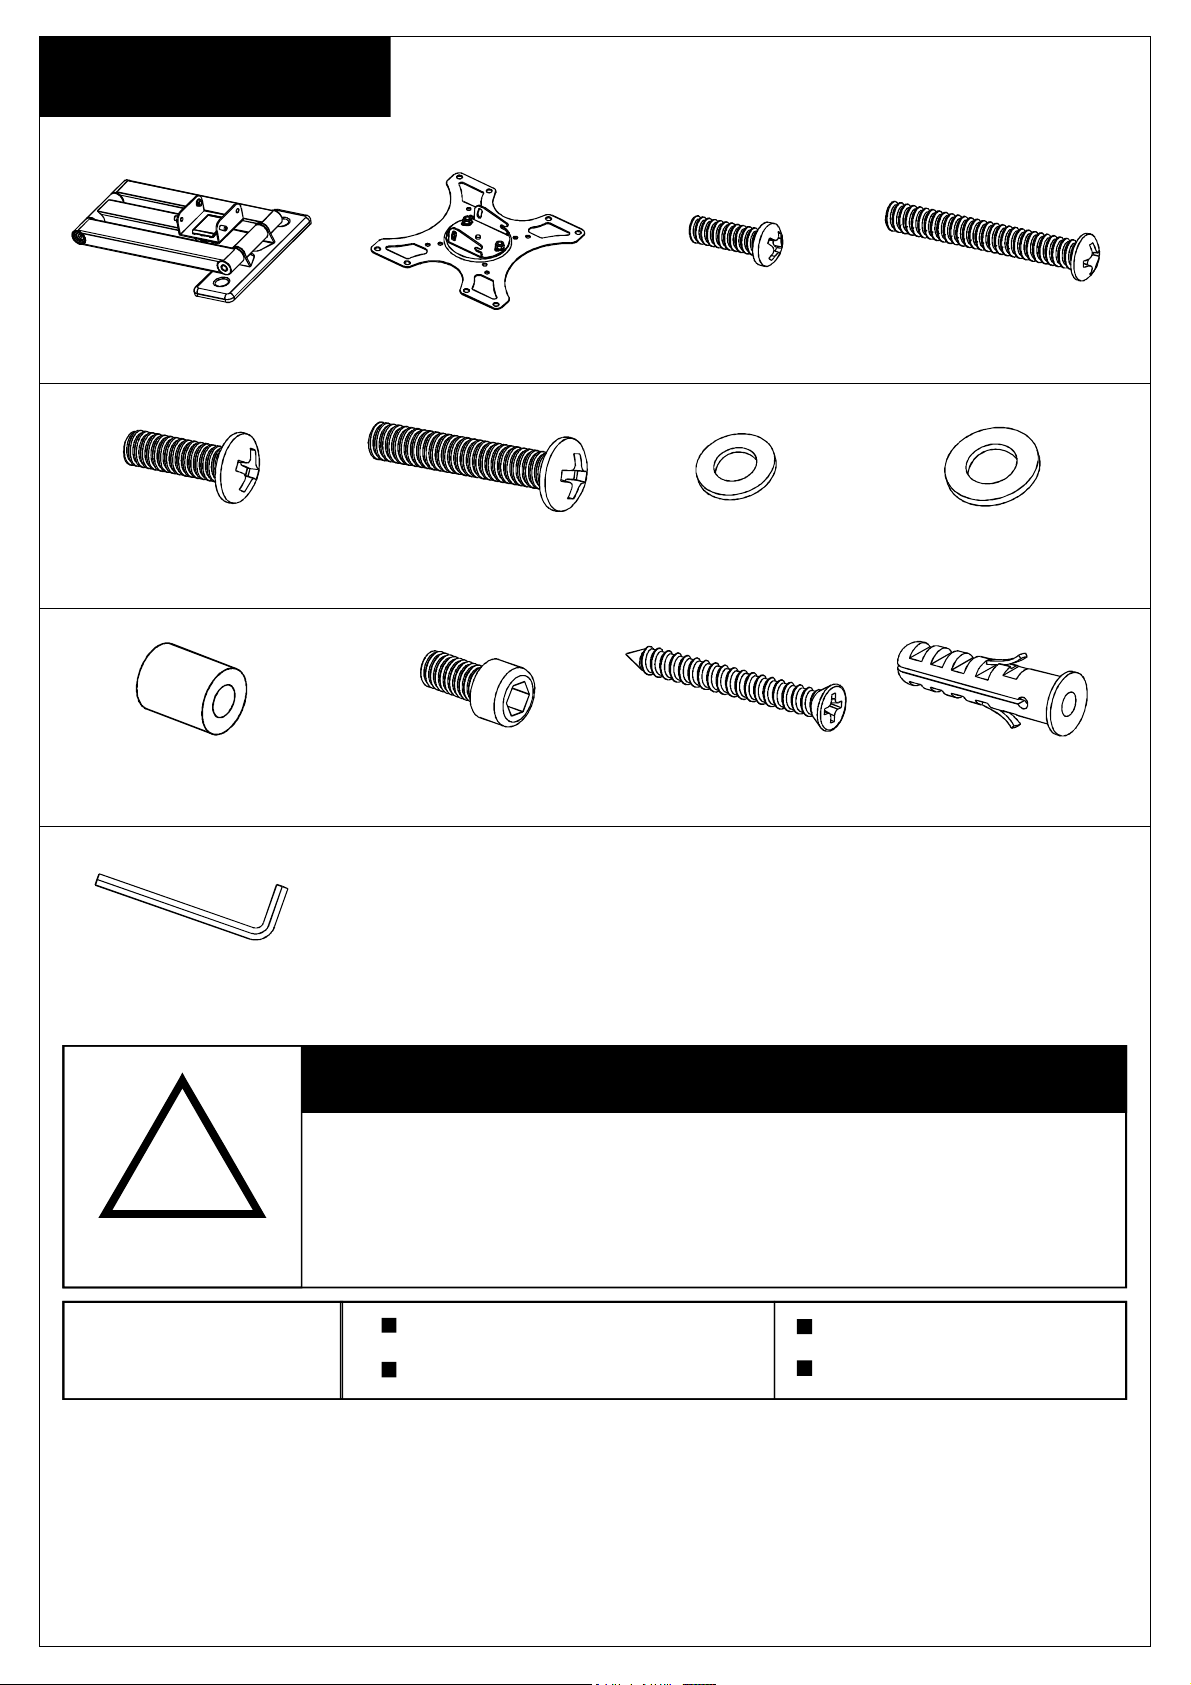
Supplied Parts List
(1)Wall Plate-a (1)VESA 200 Plate-b (4)M4x12 Bolt-c (4)M4x30 Bolt-d
(4)M6x12 Bolt-e (4)M6x35 Bolt-f
(4)M4/M6 Space-i (2)Allen Bolt-j
(1)Allen Key
This TV mount must be securely attached to the
(8)M4 Washer-g (6)M6 Washer-h
(2)Lag Bolt-k (2)Concrete Anchor-l
CAUTION!
!
WARNING
Tools Required
vertical wall. If the mount is not properly
installed it may fall, resulting in possible injury
and/or damage.
3.8mm Drill Bit
Phillips Screwdriver
8mm Masonry Bit
Carpenter's Level
Note: The mounting components and hardware supplied in this package are
not designed for installations to walls with steel studs or to cinder block walls.
If the hardware you need for your installation is not included, please consult
your local hardware store for proper mounting hardware for the application.
2
Page 3
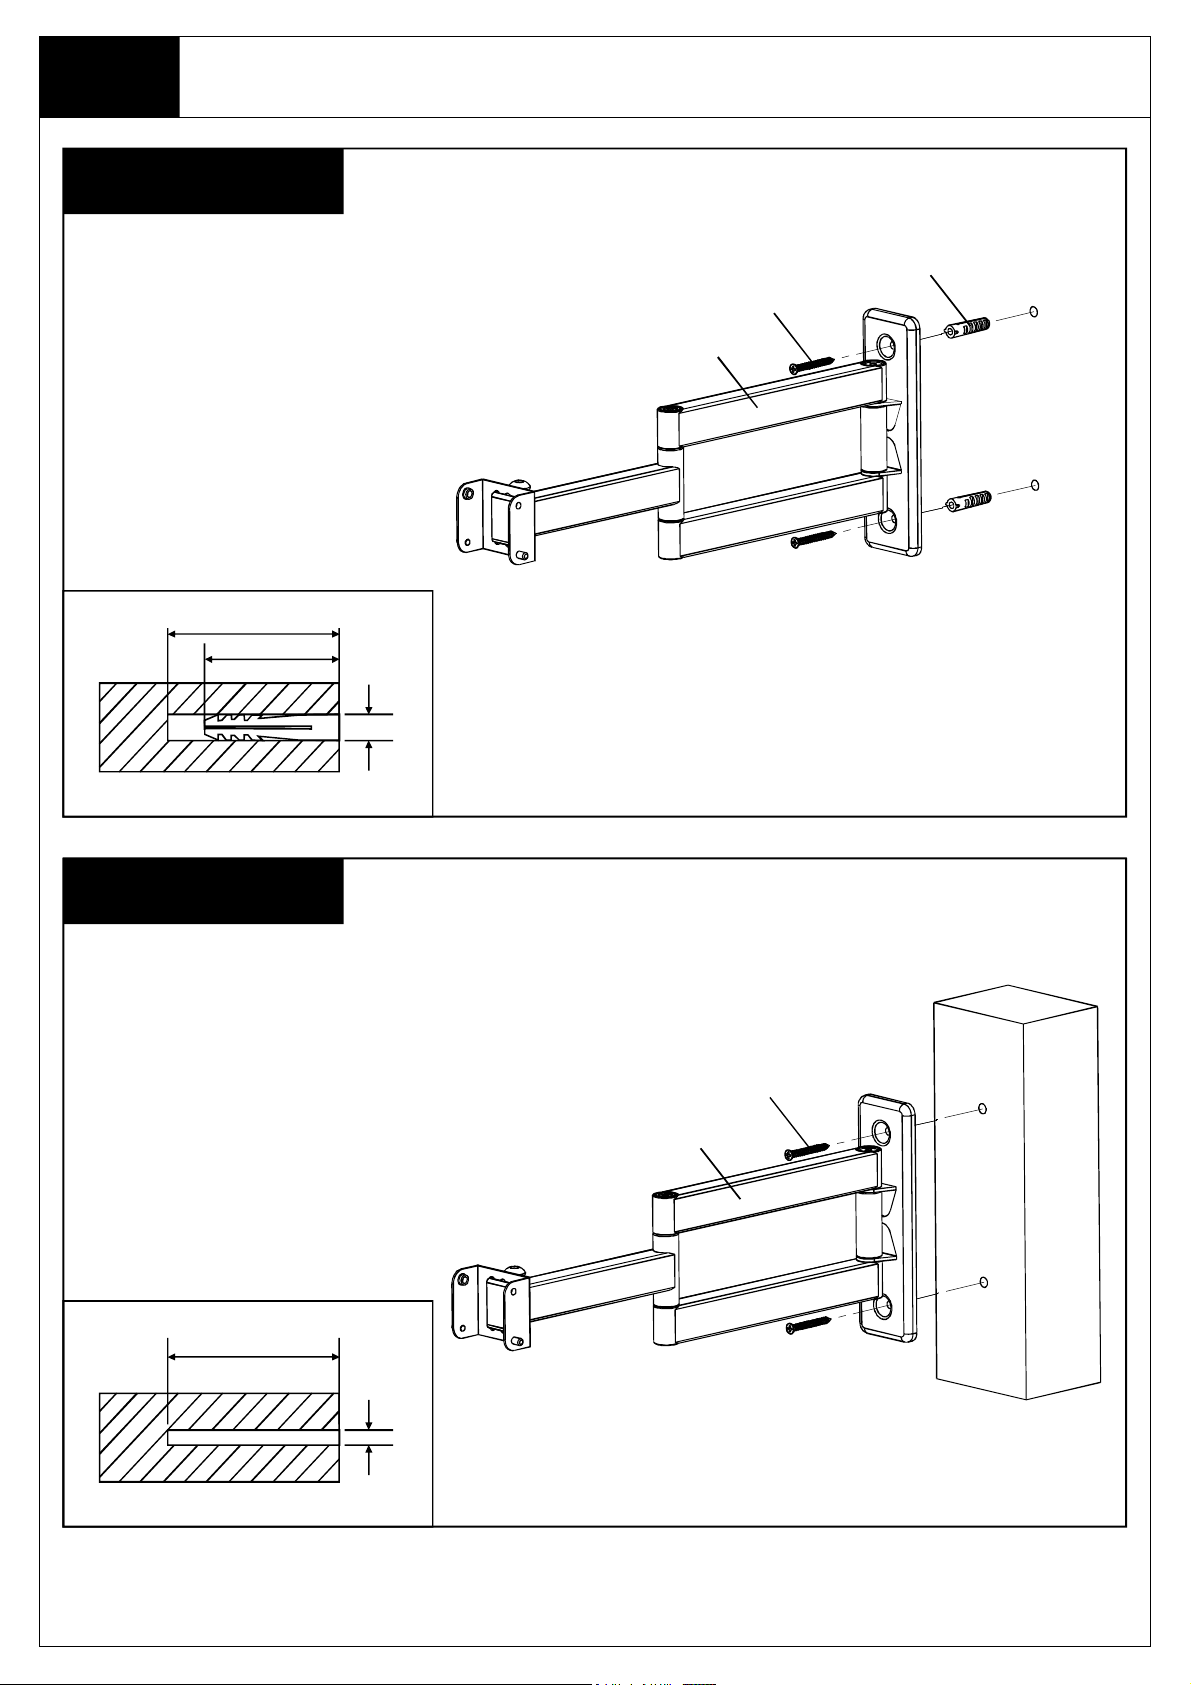
Step 1
Mounting the Wall Plate to the Wall
Brick Mount
50mm
40mm
l
k
a
Wood Mount
50mm
8mm
k
a
3.8mm
3
Page 4
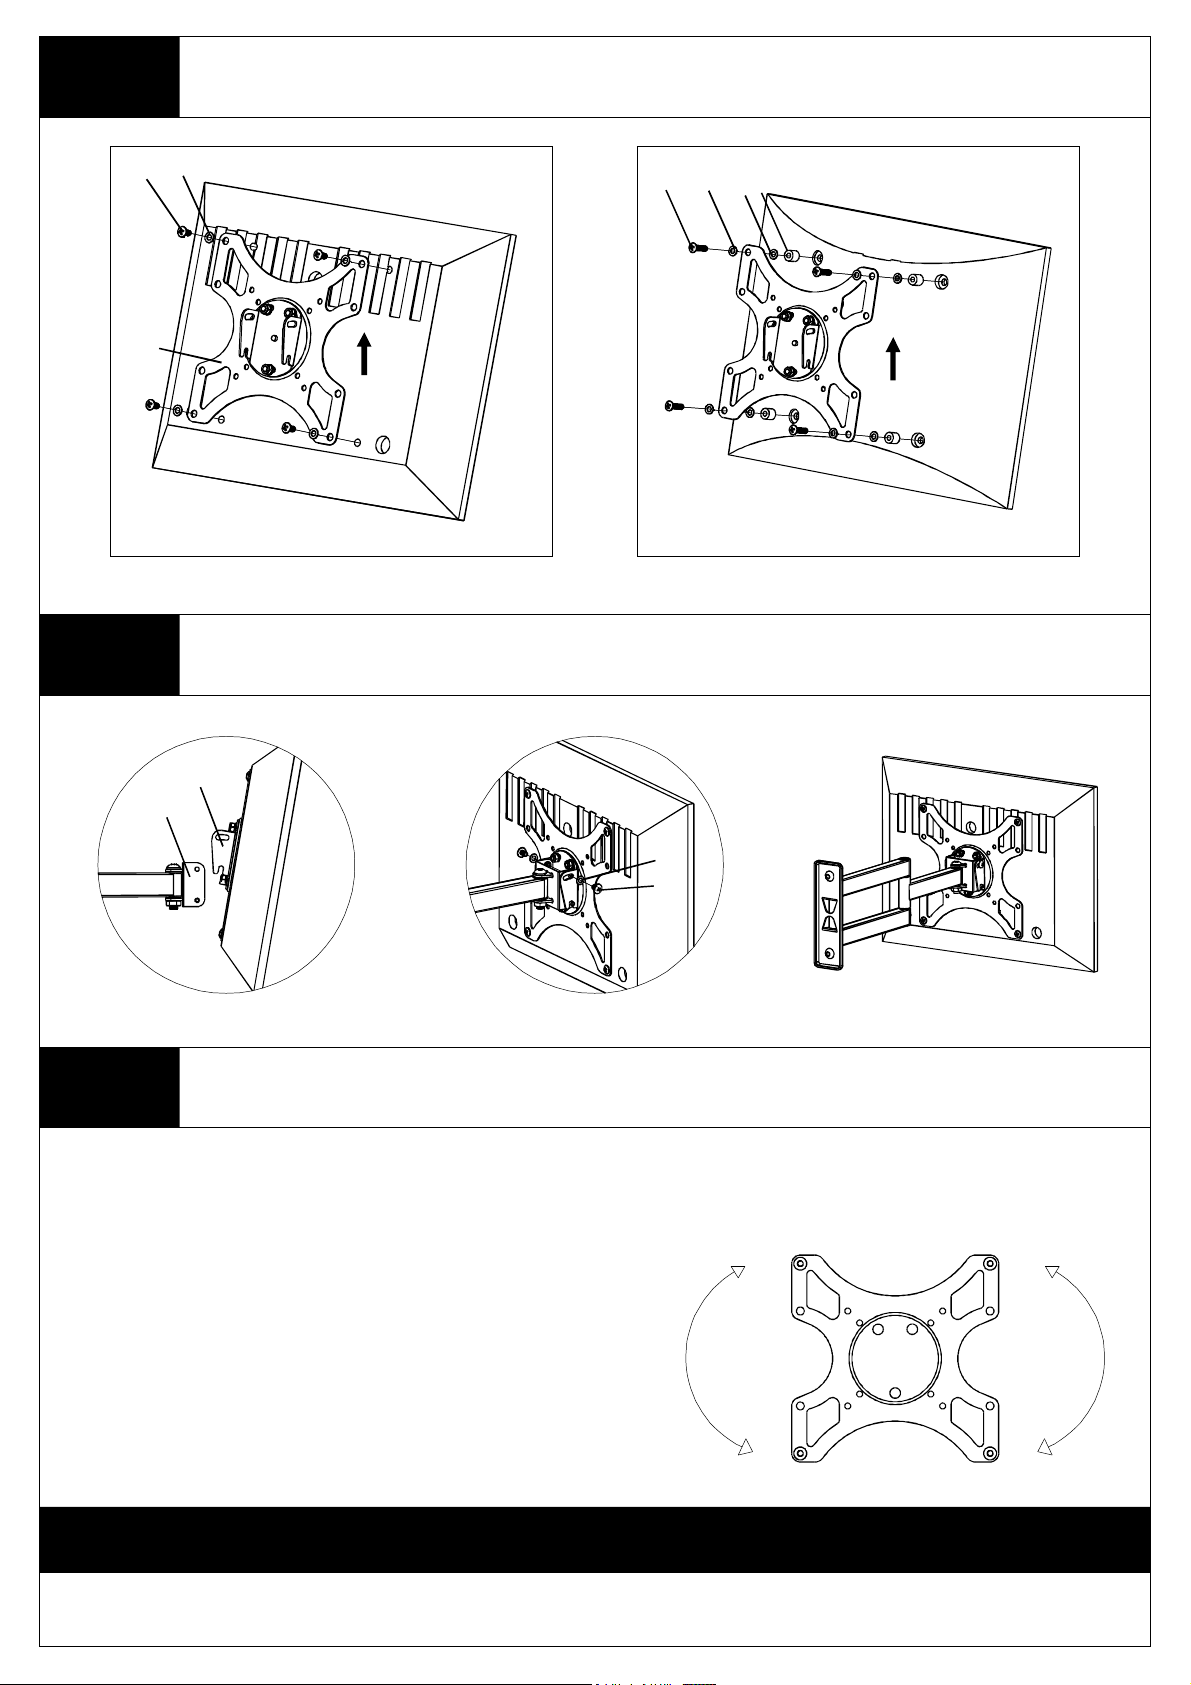
Step 2
c,e
Mounting the VESA 200 Plate to a TV
g,h
d,f g,h
g
i
Step 3
b
For Flat Back TV For Curved Back TV
This way up!
Attaching TV to Wall Plate
b
a
This way up!
h
j
Step 4
Levelling Mount
You can re-level the mount after the mount has
been installed on the wall. Leveling is achieved by
rotating the front plate the TV sits on, just hold the
TV and do the adjustment.
Thanks for choosing our products, enjoy the using.
4
 Loading...