

Page 1
En glish
Installation Instruction
UNPACKING INSTRUCTIONS
! Carefully open the carton, remove contents and lay out on cardboard or other
protective s urface to avoid damage.
! Check package c ontents again st the Suppli ed Pa rts List in t he next page to assure
that al l com ponents we re receive d und amage d. Do not use damaged or de fective
parts.
! Care fully read all inst ructi ons before attemp ting installation.
IMPORTANT SAFETY INFORMATION
! Install a nd operate this device with c are. Please read this inst ruction befo re
installati on, and carefully follow all instruc tions contained herein . Use proper safety
equipment du ring in stallation.
! Pl ease call a qualifie d ins tallation contractor for help if you don't understand thes e
directions o r have an y doubts about the sa fety of the install ation .
Do not use this produc t for any p urpose or in any configuration not expli citly specified
in this in struction. We hereby discla ims any and all liabi lity for inju ry or da mage
arising from i ncorr ect assembly, incorre ct moun ting, or incorrec t use of this product.
1
Page 2
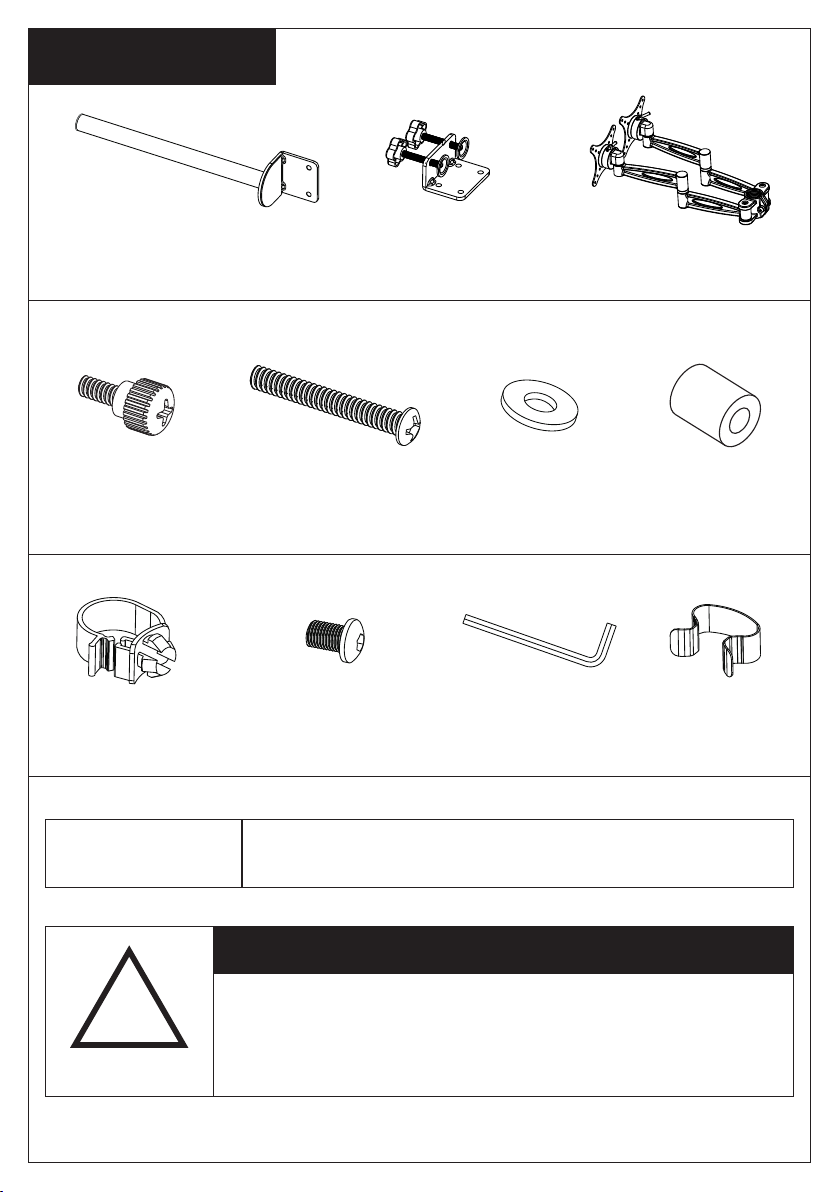
Su pp li ed Par ts List
(1) 35mm Tube Support-a
(8)M4x12
Thumb Bolt-d
(2)Tube Wire Clip-h (2)M10x15 Bolt-i (1)Allen Key-j
(8)M4x30 Bolt-e (16)M4 Washer-f
(1) Disconnected
“C” Clamp-b
(1) VESA Plate with
Arm Assembled-c
(8)M4 Space-g
(4)Arm Wire Cl ip-k
Tools Required
!
WARNING
Phillips Screwdriver
CAUTION!
This monitor desktop mount must be securely
attached to the horizontal desk. If the mount is
not properly installed it may fall, resulting in
possible injury and/or damage.
2
Page 3
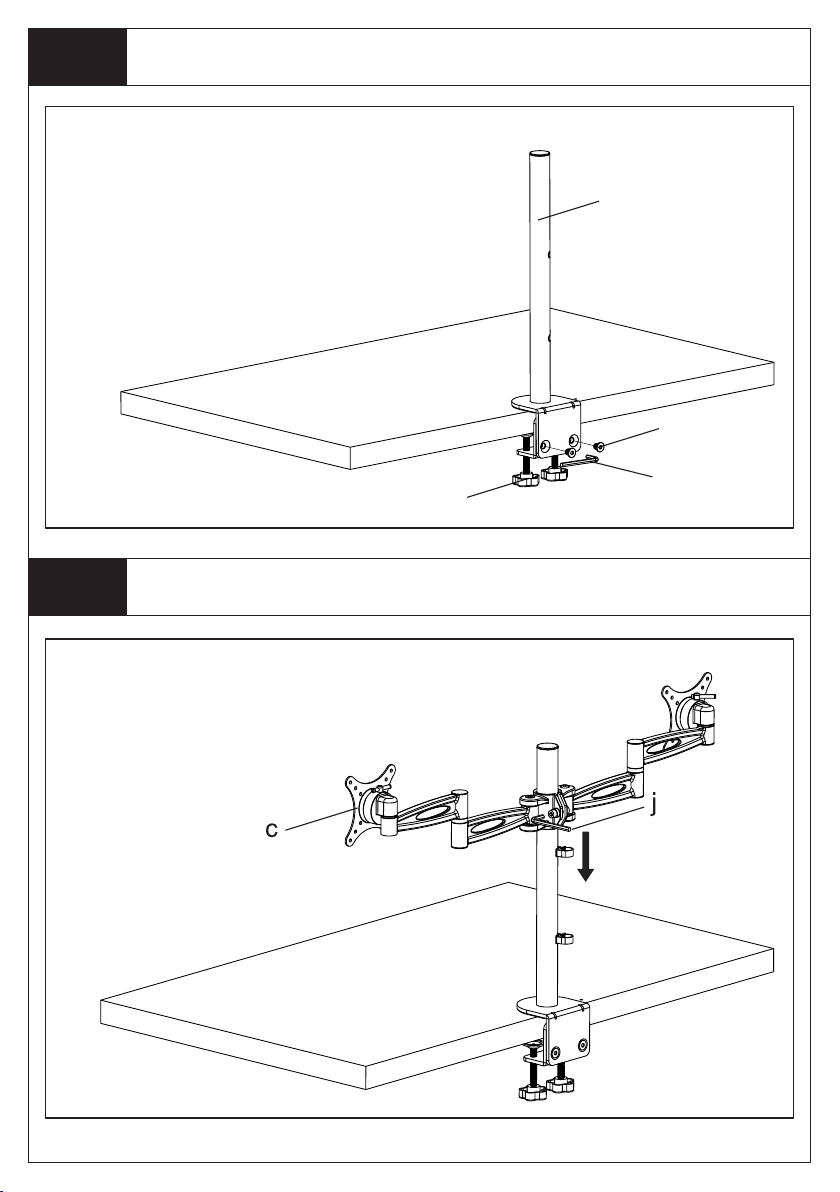
St ep 1
The depth of “C” clamp can be changed in
three positi ons. Choose the proper dep th
acco rdin g t o t he thi c kne s s of you r
de sk top. Co nn ect i t by 2p cs M10x15
bolts(i), us ing the supplied Allen Key( j).
Install the “C” Clamp According to the Desktop Thickness
a
i
St ep 2
Install arm to the tub e s upport,
Fasten t he bolt by supplied
Allen Key(j) .
Install Arm to the Tube Support
b
j
3
Page 4
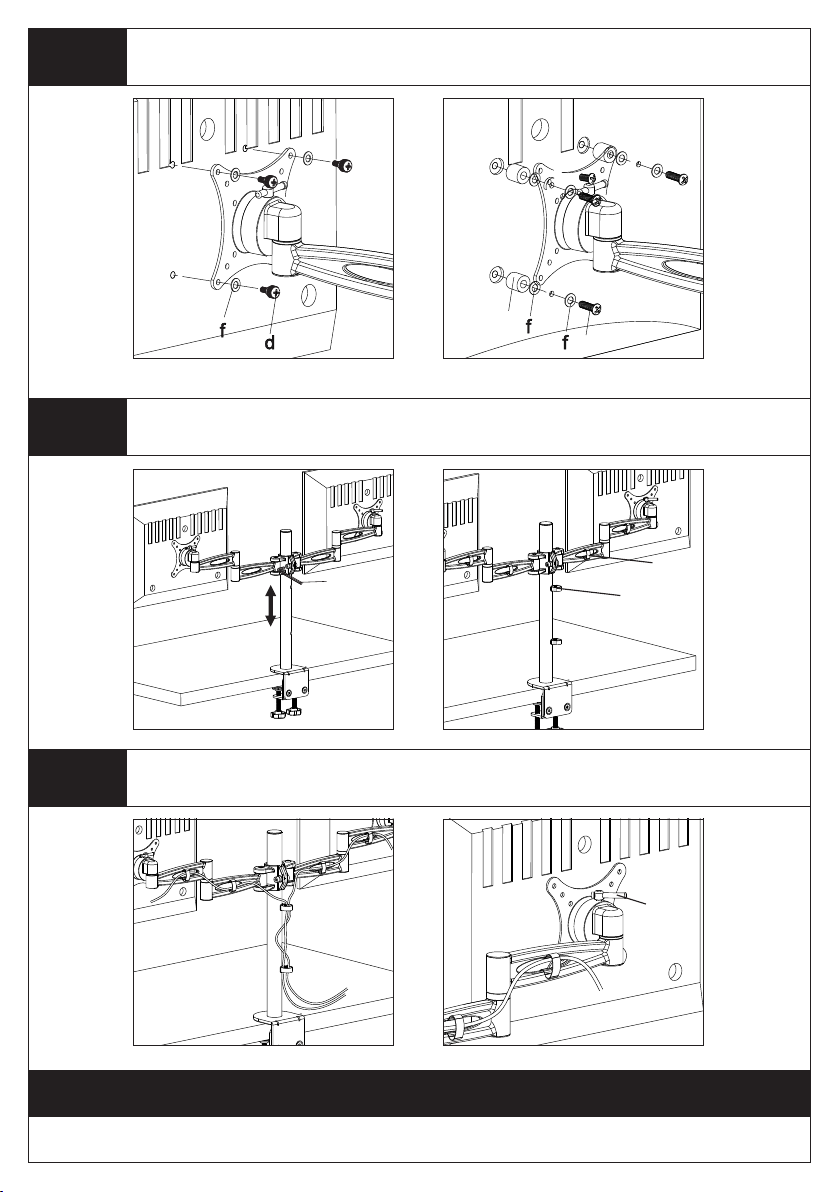
St ep 3
h
k
j
Mount the Monitor to VESA Plate
For Flat Bac k Mon ito r
For Curved B ack M oni tor
g
e
St ep 4
St ep 5
Adjust the Height and Install the Wire Clips
Manage the Wires by Wire Clips and Adjust the View Angle
Fasten t he
knob aft er
adjust
Thank you for choosing our products!
4
 Loading...