

Mountain Models Dandy Sport Builder Manual
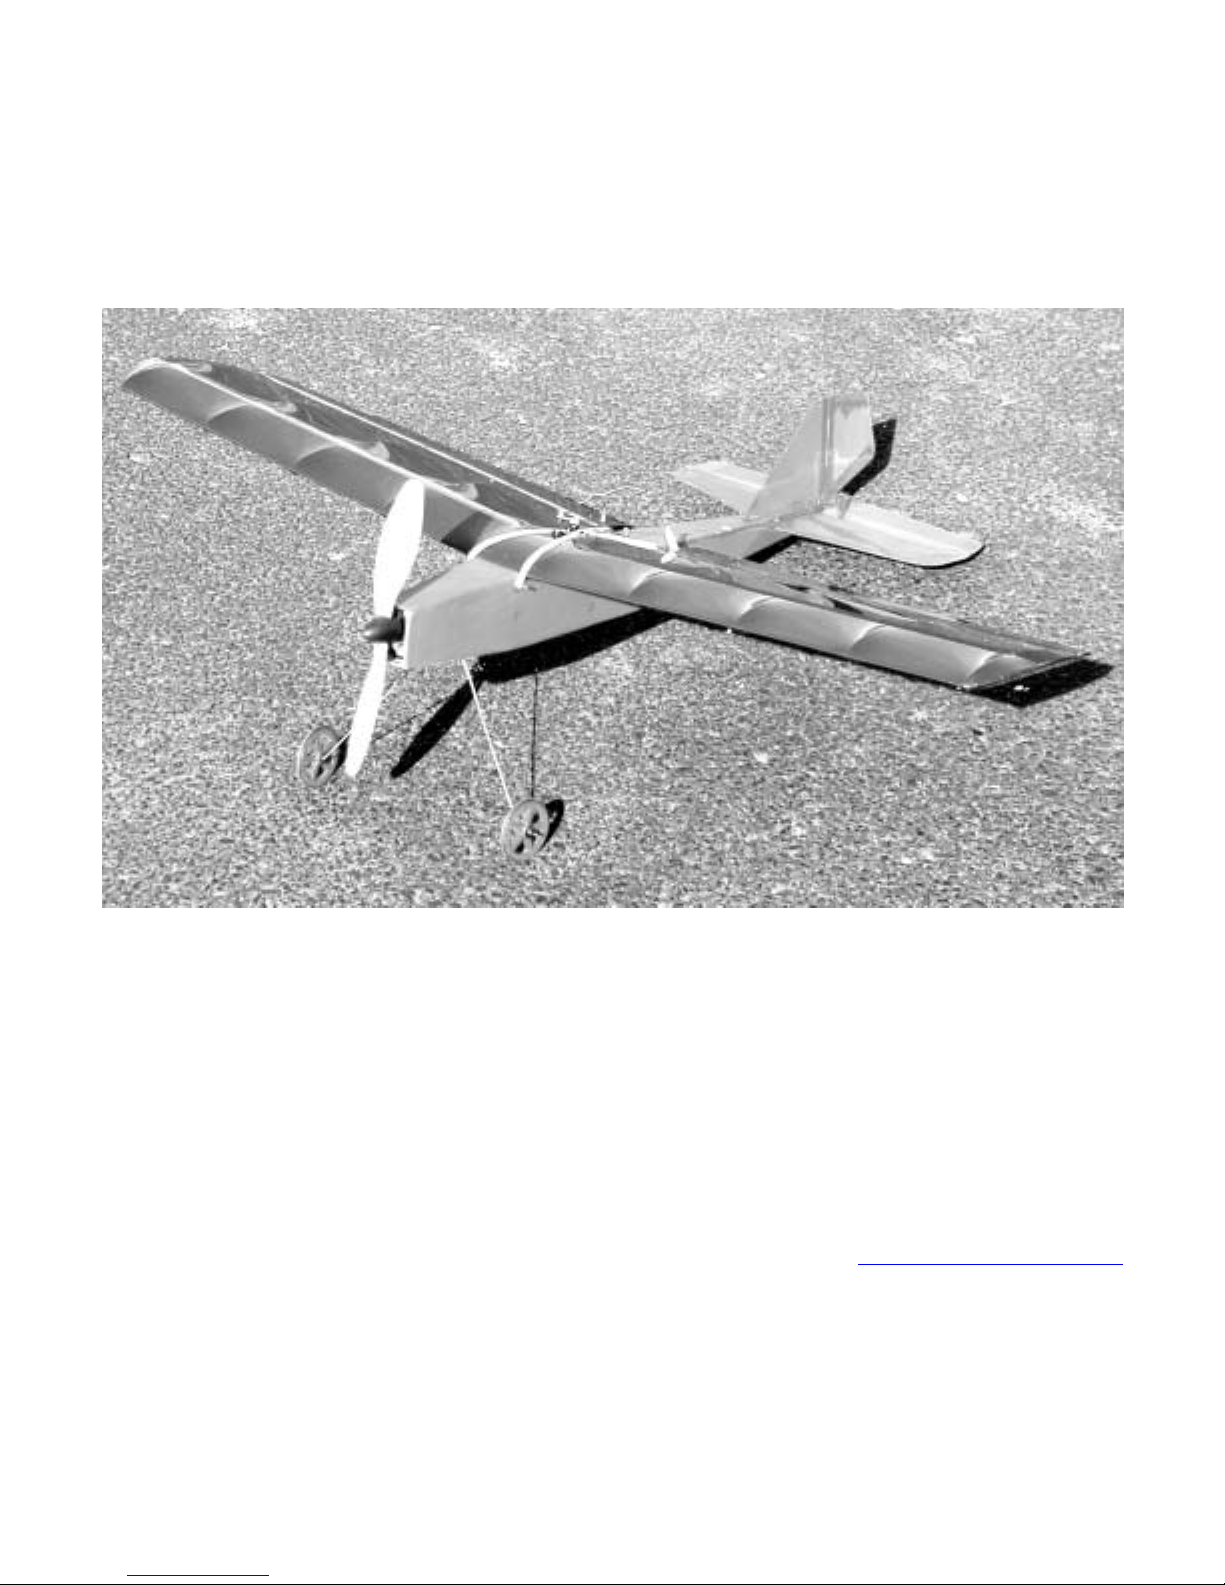
Dandy Sport
Builder’s Manual
Thank you for purchasing the Dandy Sport. The Dandy Sport has been designed as an easy to build
aileron trainer. Take your time and enjoy building this plane.
March 10, 2003
Last revised March 24, 2003
Copyright 2002 Douglas Binder, Mountain Models
www.mountainmodels.com
(719) 592-1387
(719) 528-6125 fax
Specifications:
Wingspan: 35”
Wing Area: 300 sq. in.
Weight with 8x720 NiMH batteries: 12 ounces
1

Required Equipment
To build:
! Xacto with #11 blades
! Thin and Thick CA – Cyanoacrylate glue (Super Glue)
! Sanding block with 200 grit sandpaper
! Smooth, flat work table
! Wax paper to protect plans
! Needle nose pliers
! Wire cutters
! Hobby Iron for applying covering – also called a sealing iron
To fly:
! Four channel radio (The Berg5*dsp is highly recommended, second is the GWS-R4P micro
receiver. Three micro servos: Hitec HS50s, HS55s, or GWS Pico servos recommended
! GWS EPS100-A motor with 10x8 propeller
! Motor Speed Control: GWS GS100 suggested
! Battery pack: 8 cell 370mAH or 720mAH Nickel Metal Hydride recommended.
Parts List
1 ea – 1/8” laser cut balsa sheet
1 ea – 3/32” laser cut balsa sheet
6 ea – 1/16” laser cut balsa rib sheet
1 ea – 1/64” laser cut plywood sheet
1 ea – 1/32” laser cut plywood sheet
1 ea – 1/16” laser cut plywood sheet
1 ea – 1/8"round x 19” hard wood leading edge
1 ea – 1/8"round x 17” hard wood leading edge
3 ea – .032” music wire pushrods
1 ea – 1/16” x 13.5” landing gear wire
1 ea – 6” Heat shrink tubing for pushrods
1 ea – ½” heatshrink tubing for wheel retainers
1 ea – Velcro strip for mounting the battery
2 ea – 1/8” dowel wing hold downs
1 ea – 4-40 landing gear bolt and blind nut
1 ea – Battery compartment magnet and tack
1 ea – Tire Rubber
2 ea – 1/2” long aluminum tube wheel axle bearings
1 ea – Tyvek battery compartment hinge strip
1 ea – 1/16” x .75” x 4.25” plywood battery mount
1 ea – Roll of covering material
2
Notes and Hints
• The Dandy has been designed with weight in mind. Parts and reinforcements were chosen so as to
keep the plane light. Special care must be taken when making glue joints to ensure that the Dandy
can survive rough landings.
• There is very little that is critical when building the Dandy. The only thing that requires special
attention is to make sure the wings are not twisted. If the wings are straight, the Dandy should fly
hands-off without any trim.
• Heat shrink can be heated with a soldering iron or, if you dare, with a lighter. Pay close attention
to what is near the heat shrink when you are heating it.
• You really need the sealing iron (Also called a hobby iron). You will find putting on the covering
so much easier. They are reasonably inexpensive and invaluable.
• The parts are held into the sheets by retaining gaps. When you break a part loose, you should
lightly sand the nubs left by the gaps down.
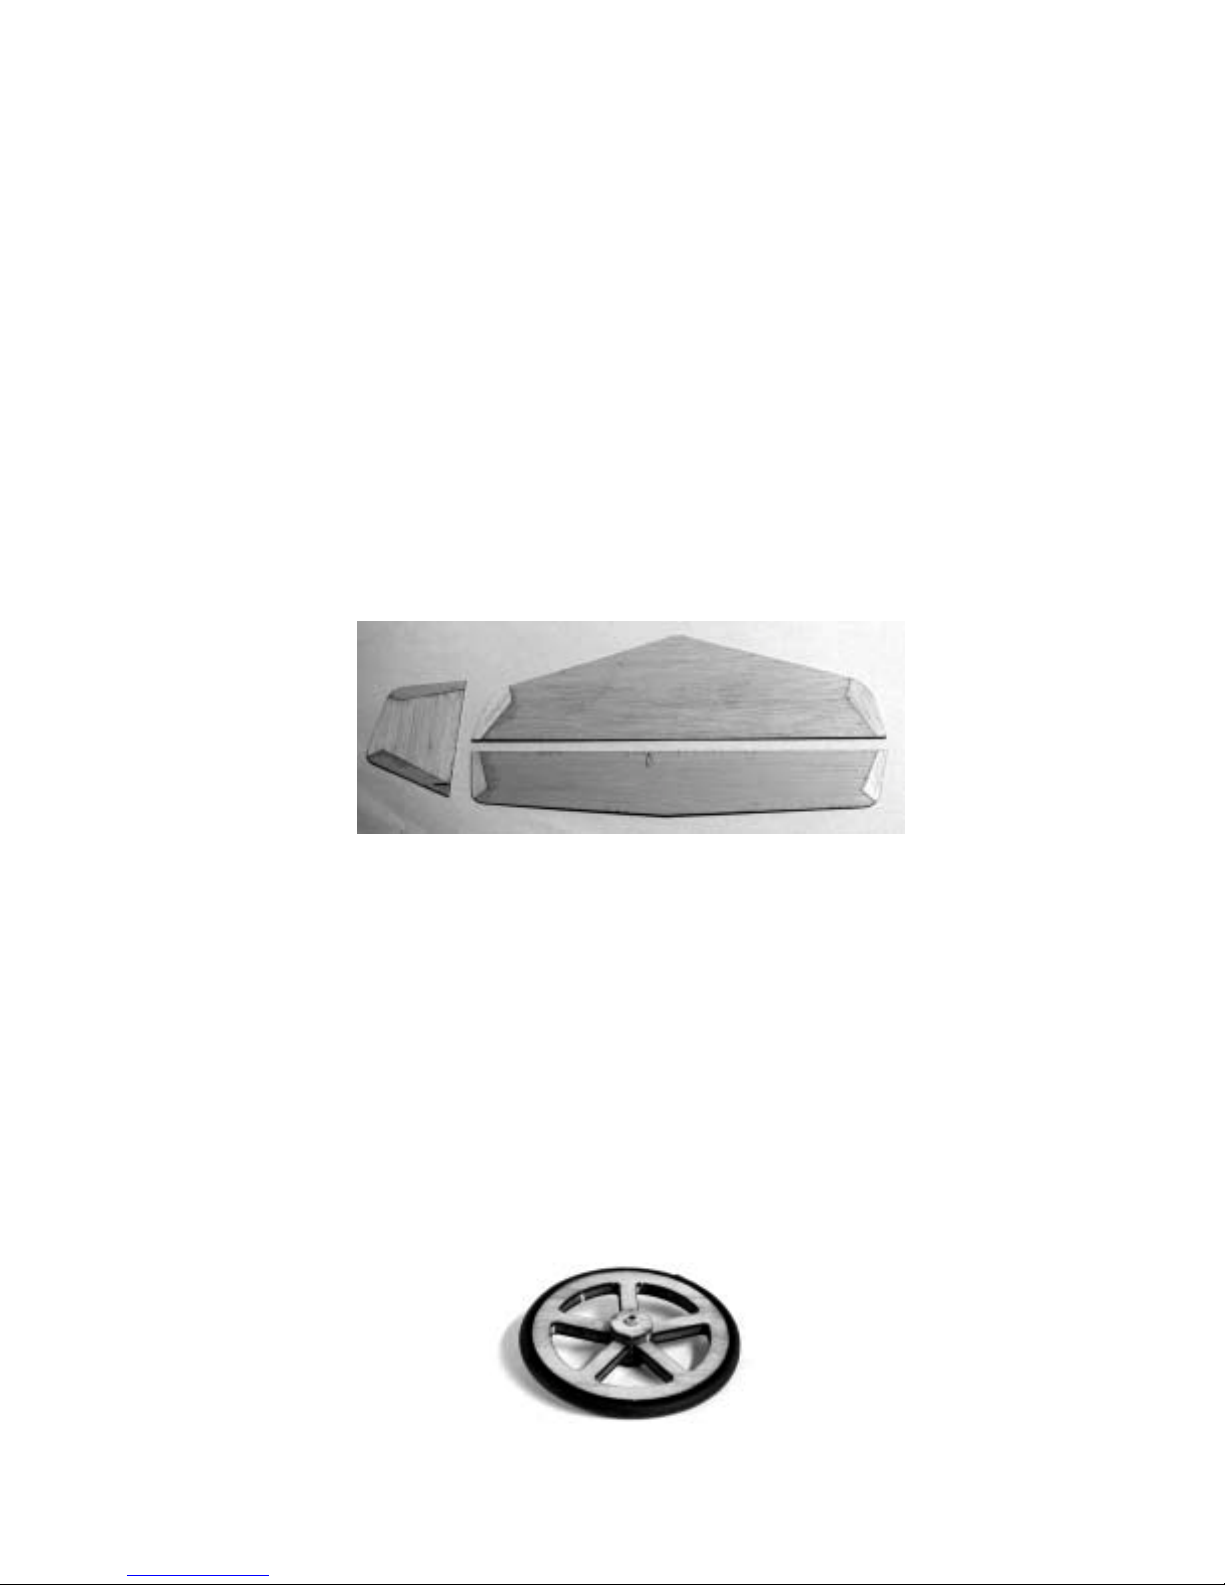
Assembling the tail
1. Lay down some wax paper on a flat work area.
2. Remove the tail parts from the 1/16” balsa sheets.
3. Carefully holding the pieces together so that you don’t glue yourself to the model, flow some thin
CA into the joints.
4. Sand a 45-degree bevel into the leading edge of the elevator and the rudder.
5. Sand the tail surfaces smooth and round the edges except for the bevel you sanded in previously.
Leave the trailing edge of the horizontal and vertical stabilizers square, not rounded.
6. Paint the tail surfaces but try to use as little paint as possible as paint is heavy.
7. Attach the rudder and elevator to the stabilizers using tape as a hinge. Packing tape cut down to
¾” strips works quite well. Leave the slightest gap, maybe .010”, to allow free movement of the
surfaces.
8. Build the wheels by assembling the parts over the aluminum axle. You will sandwich the plywood
hub, balsa hub, plywood wheel, balsa wheel, plywood wheel, balsa hub, plywood hub. Slide the
parts over the aluminum tube and get everything aligned. The smaller round punch-out with the
axle hole is the wheel hub. Flow thin CA over the wheel to glue it taking care to not get CA in the
aluminum tube. Wrap the tire rubber around your wheel to measure it and cut it 1/16" too short.
Glue the ends together with CA. You now have a ring. Slip the ring over the wheel, center it then
glue it to the wheel with thin CA.
3
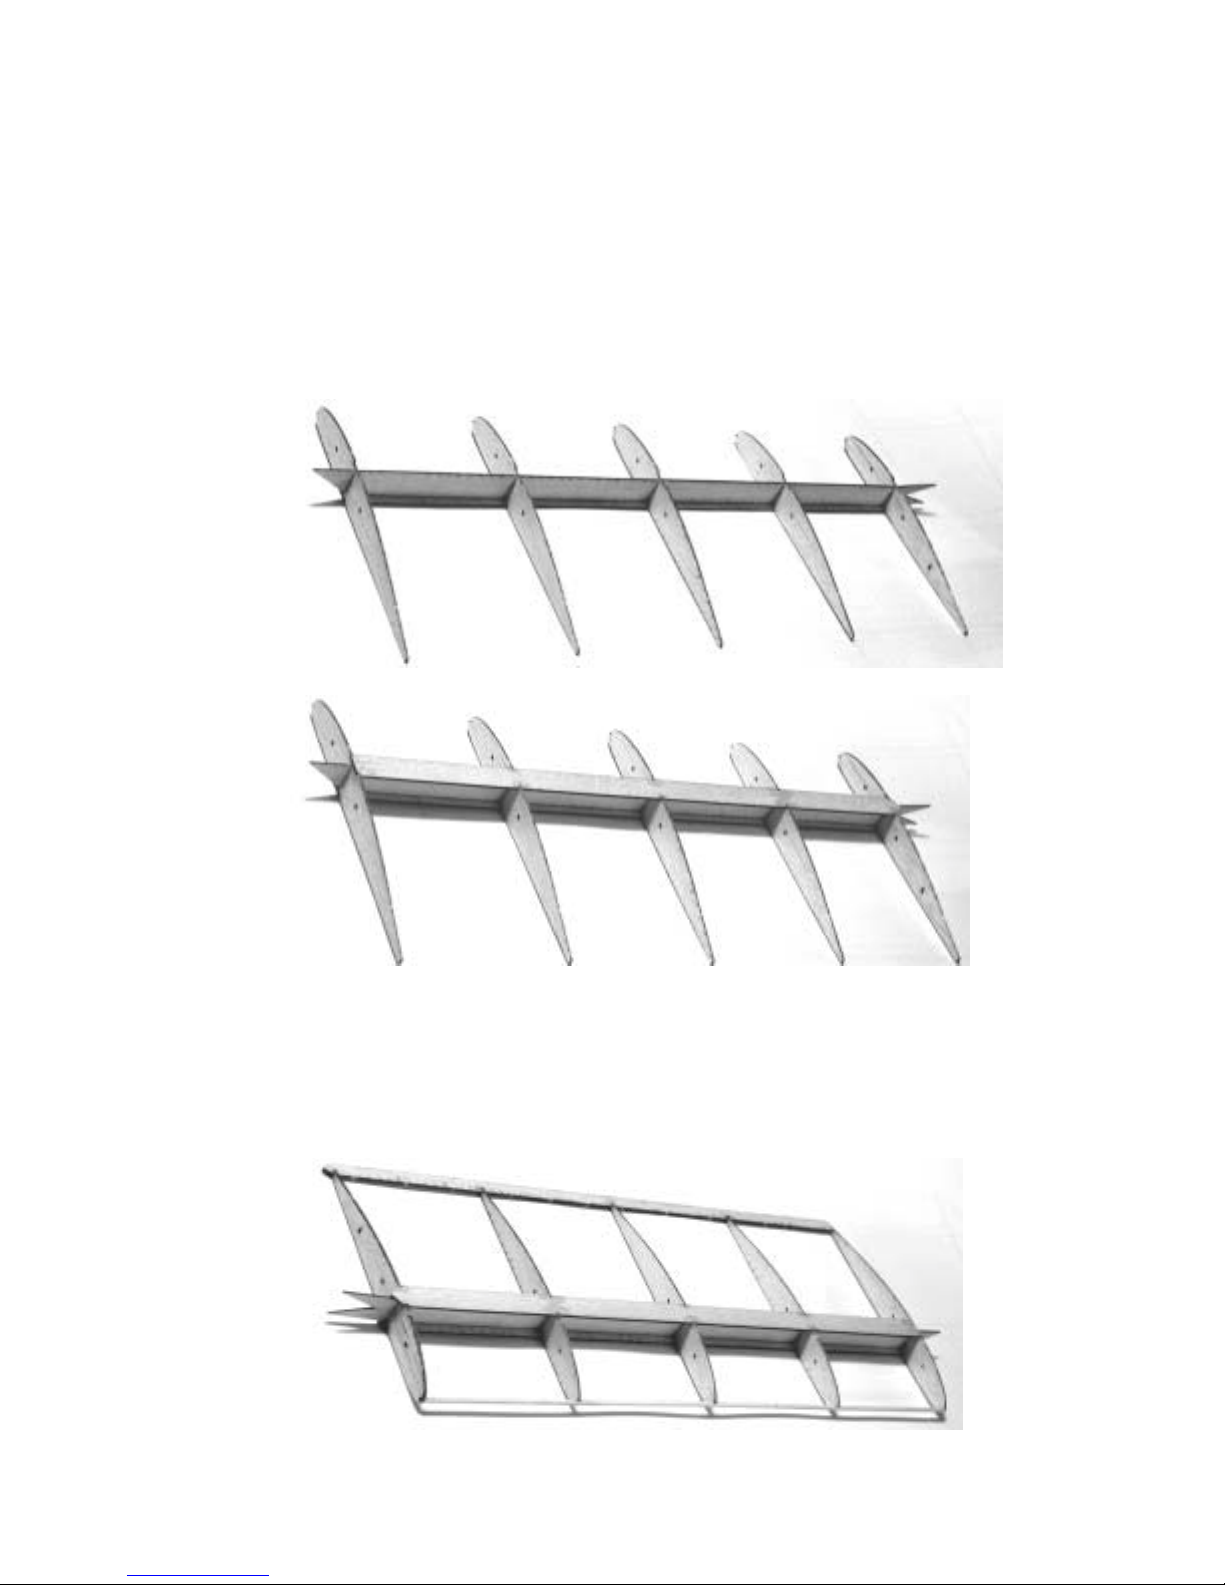
Wing Assembly
Note: It is very easy to make two wings of one side, i.e., two right wings. This is a bad thing.
! Tape a sheet of wax paper over the plans to protect the plans and to prevent glue from sticking to
them.
! Remove the two vertical spars from the 1/16” balsa sheet. You will note that they fit together with
a V joint to form the center wing. Be very careful to make a left and a right wing. It doesn’t
matter which vertical spar forms the left or right side.
! Slide the ribs into the vertical spars. The 3/32” rib goes in the innermost position. Do not glue yet.
! Position the lower spar caps (the narrower ones) so that they line up with the notches in the ribs.
Ensure that the end of the bottom spar with the arrow shape is towards the center of the wing, that
everything is tight, that the ribs fit fully into the lower spar and that the vertical spar is touching
the lower spar. Once everything is aligned, flow some thin CA into all the joints.
! Position the top spar caps over the ribs. Position as before and glue with thin CA.
! Position the 1/8” trailing edge so that it is flush with the bottom of the ribs and that it is pushed as
far forward as possible. The end that is shaped like an arrow goes towards the center of the wing.
Glue with thin CA.
! Measure and cut the 1/8” hardwood leading edge dowel so that it is flush with the outer edge of
the outermost rib and only goes halfway through the innermost rib. We only go halfway through
the innermost rib to leave room for the short center leading edge dowel. Glue in place with thin
CA.
4
 Loading...