

Mountain Buggy B1204, T2204, U3204, U2204, T1204 User Manual
...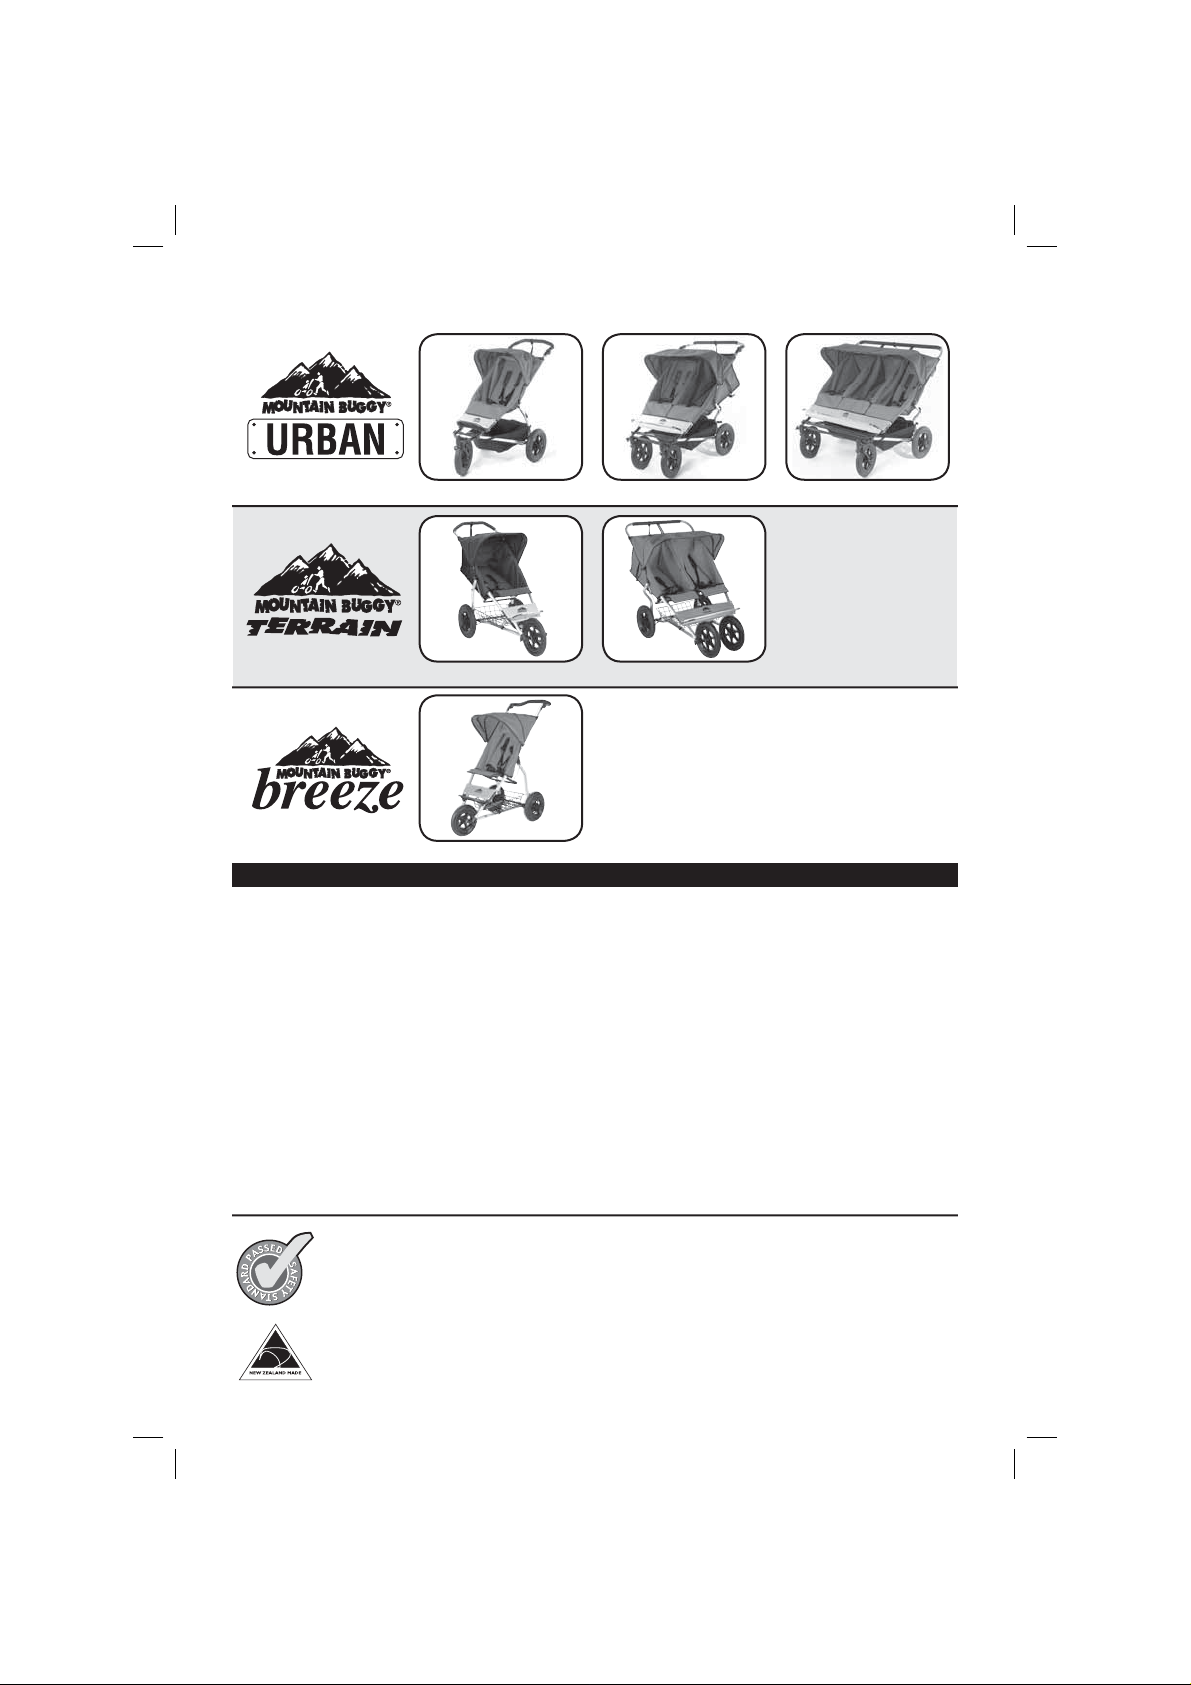
INSTRUCTIONS: For the following model Mountain Buggy® strollers:
Urban Single - U1204
Terrain Single - T1204 Terrain Double - T2204
Breeze Single - B1204
Urban Double - U2204 Urban Triple - U3204
Note: Model and accessory availability may vary from country to country.
Contents Pg
Safety Instructions .................................................................................. 3
Operation (Wheel Assembly etc) .............................................................4
Operation (Folding, Brake, Wrist Strap) .................................................. 5
Operation (Safety Harness, Seat Adjustment) ........................................ 6
Operation (Seat, Sunhood, Storm Cover, Sun Cover) ............................. 7
Care and Maintenance ............................................................................8
Parts of Stroller Frame ............................................................................ 9
Accessories ...........................................................................................10
Warranty Conditions ................................................................................11
Warranty Registration Card .................................................................... 12
We take safety seriously. Compliance with safety standards for baby strollers is
NOT compulsory in all countries.
All Mountain Buggy® models, including when a Carrycot and Carseat Clip are attached,
have passed the Australian/New Zealand Safety Standard AS/NZS 2088, and the British
Standard BS 7409. Models sold in North America have also passed American Standard
ASTM F833.
Designed and made in New Zealand for Mountain Buggy
Manufactured by Tritec Manufacturing Ltd, an ISO9002 credited supplier.
®
Ltd.

IMPORTANT KEEP FOR FUTURE REFERENCE
Read these instructions carefully before use and keep for future reference.
Your child’s safety may be affected if you do not follow these instructions.
Safety Instructions
WARNING: Never
leave your child unattended
.
WARNING: Avoid
serious injury from falling or
sliding out. Use the harness
at all times. Always use the
crotch strap in combination
with the waist belt.
WARNING: A CHILD’S SAFETY IS
YOUR RESPONSIBILITY.
WARNING: FOLLOW THE MANUFA CTURER’S INSTR UCTIONS.
WARNING: DO NOT CARRY EXTRA
CHILDREN OR BAGS ON THIS
STROLLER/ PRAM.
WARNING: MAKE SURE CHILDREN
ARE CLEAR OF ANY MOVING PAR TS
IF YOU ADJUST THIS STROLLER/
PRAM, OTHERWISE THEY MAY BE
INJURED.
WARNING: CARE MUST BE TAKEN
WHEN FOLDING AND UNFOLDING
THE STROLLER TO PREVENT FINGER
ENTRAPMENT.
Ensure freedom of movement of
locking devices.
For all models, the seat is suitable for
newborn up to 4 years old (3 years for the
Breeze) or maximum of 35kg/77lb. For
use with a newborn (0-6mths) the seat
should be reclined fully . It is recommended
that a newborn headrest or similar is
used for babies 0-3 months.
Other newborn options include:
1. Mountain Buggy® Carrycot (available
for all models except Breeze)
2. Mountain Buggy® Carseat Clip
(available for all single models,
except Breeze)
Overloading, incorrect folding and the
use of non-approved accessories may
damage or break this stroller.
Please note it is unsafe to use accessories
other than those approved by the
manufacturer or distributor.
This stroller is designed for one child
in each seat.
WARNING: Any load attached to
the handle affects the sta bility of the
stroller.
T o pr event the str oller fr om becoming
unstable, do not place parcels or
accessory items anywhere except in
storage basket and pock ets provided.
Maximum seat loading for all model
strollers (including Double & Triple
models) is 35kg/77lb.
Maximum seat height capacity is
100cm.
Maximum loading for the storage
basket is 5k gs/11lb.
Maximum loading for the pocket is
300gms/10.5oz (i.e. small items such
as keys, w allets only).
Excessive weight may cause a hazar dous
unstable condition to exist.
Do not use near an open fi re or exposed
fl ame.
Cover the stroller if it is exposed to
sunlight through glass, for example in
a car to avoid over heating.
Remove plastic wrapping and discard
to avoid a child suffocating.
3
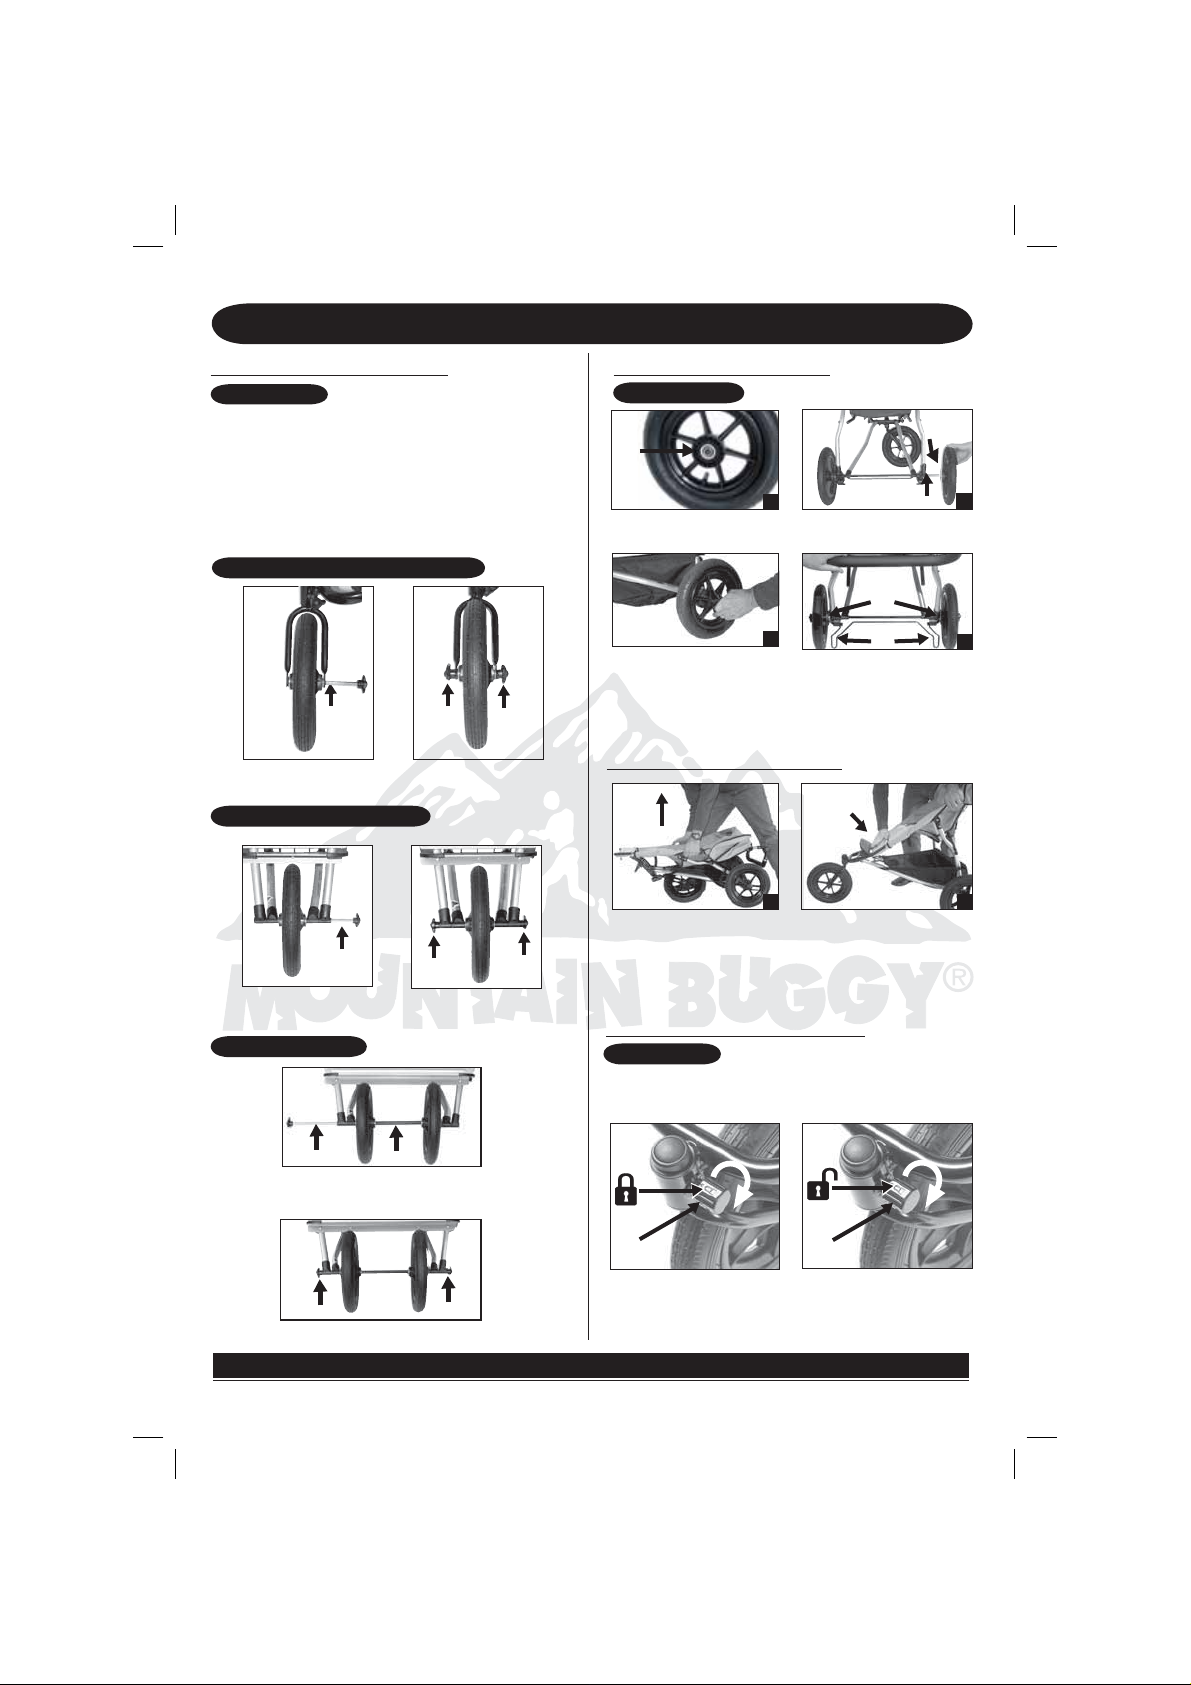
Operation
FRONT WHEEL ASSEMBLY
ALL MODELS
1. Holding both knobs at the same time , unscrew
and pull out front axle.
2. Insert front wheel(s). FRONT WHEELS HAVE
NO BRAKE COG.
3. Re-insert axle and fi nger tighten both knobs.
URBAN SINGLE, DOUBLE & TRIPLE
axle
INSERT AXLE TIGHTEN KNOBS
TERRAIN & BREEZE SINGLE
axle
INSERT AXLE TIGHTEN KNOBS
TERRAIN DOUBLE
knob
knob
knob
knob
REAR WHEEL ASSEMBLY
ALL MODELS
brake
brake
cog
brake
lever
axle
cog
2
4
brake
cog
2
1
Check that brake cog is on the
inside next to stroller frame.
3
Push each wheel on until it clicks
into place. Pull wheels to check
they are secure.
Slide wheels onto each end of
the axle.
Finished assembly. Push down on
brake lever to apply brakes. Check
brake le ver inserts into brake cog on
both sides. DO NOT use stroller if
brakes are not functioning.
ERECTING THE STROLLER
Grip stroller near sunhood
joints, and lift.
1
Place pressure on heel rest
to ensure sliding locks are
2
fully engaged.
WARNING: Ensure that all locking
devices are engaged before use.
SWIVELLING FRONT WHEELS
URBAN
Locking the front wheel swivel(s) is recommended for use
on uneven ground. There is still a small amount of left
and right movement when in the locked position.
axle
INSERT AXLE. Also insert spacer
between front wheels.
knob
TIGHTEN KNOBS
spacer
knob
Knob
TO LOCK: Turn knob so locked
symbol is at the top. Then
swivel wheel under stroller until
it locks into place.
Knob
TO UNLOCK: Turn knob
1/4 of a turn so ‘Unlocked’
symbol is at the top.
WARNING: TIGHTEN ALL KNOBS AND REGULARLY CHECK THEY REMAIN FIRM.
4
Operation
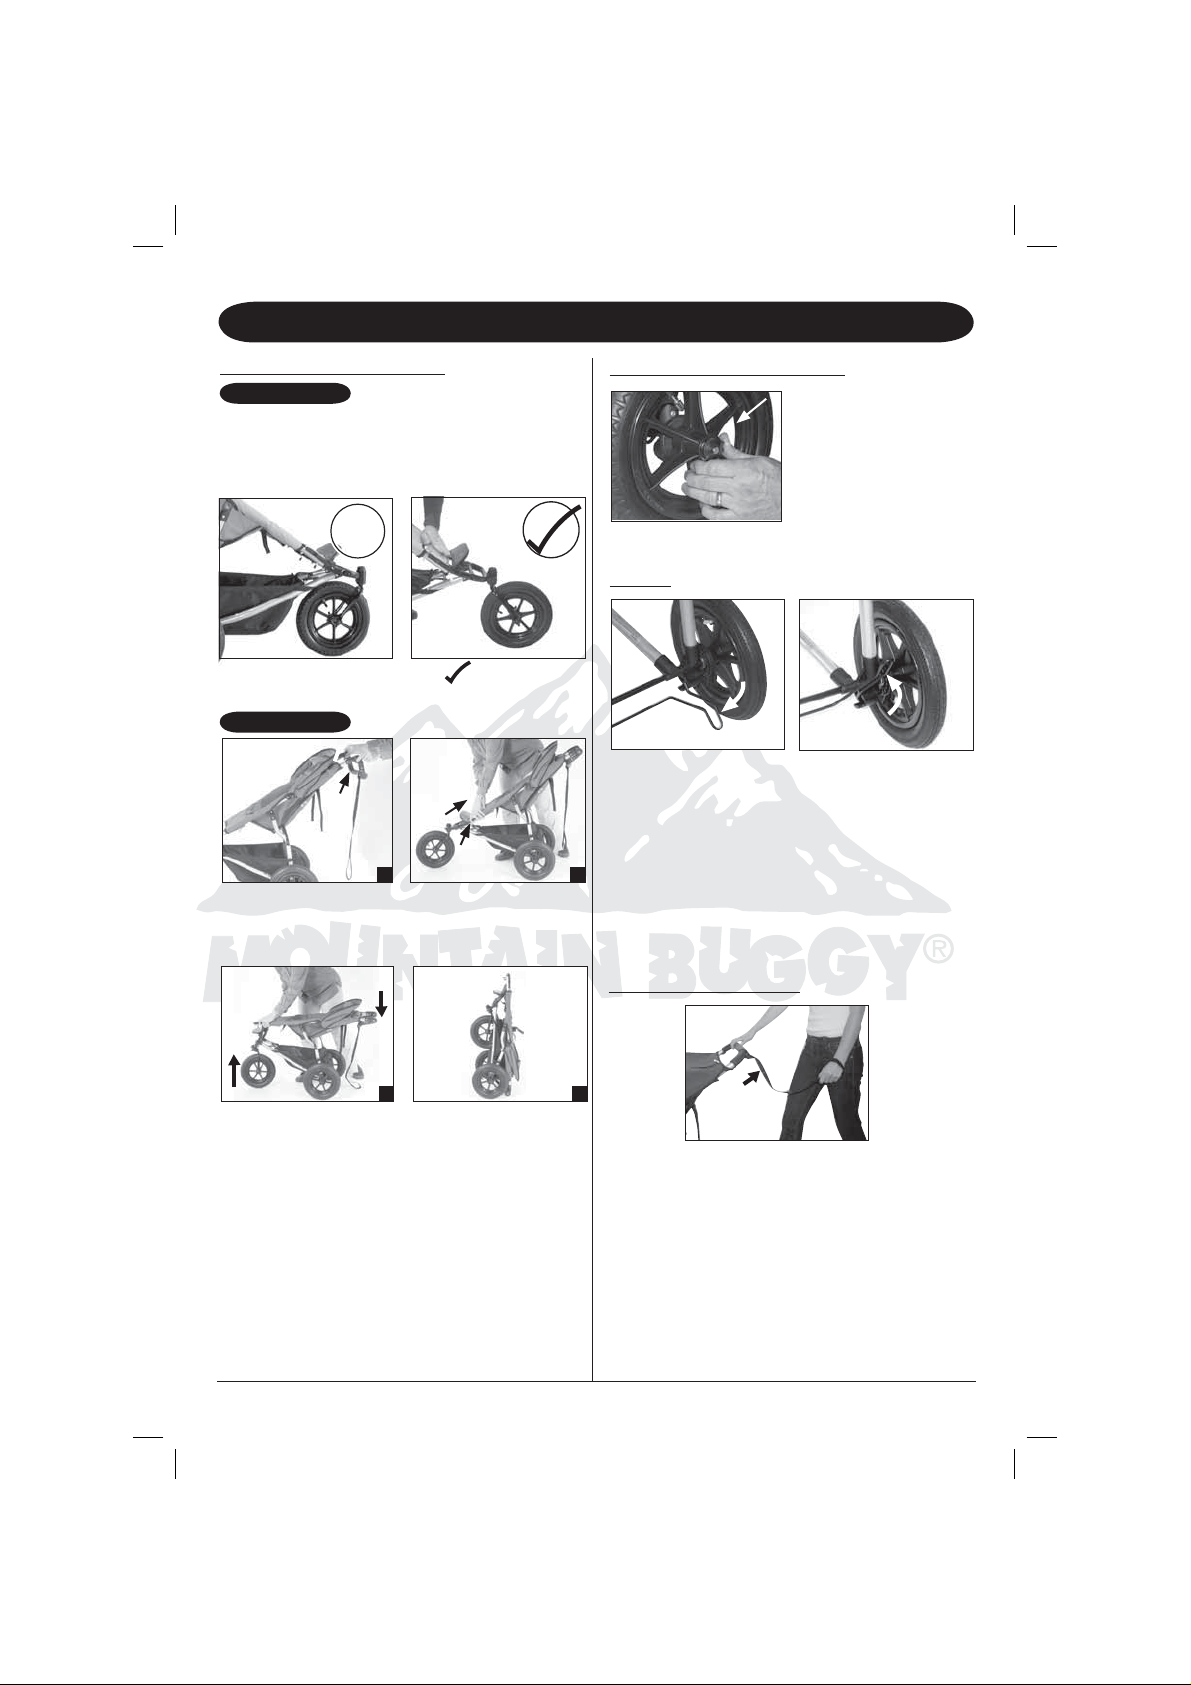
FOLDING THE STROLLER
URBAN
NOTE: On Urban model strollers, ensure front wheels
are unlocked and rotated forward before folding.
X
WRONG
X
ALL MODELS
Adjustable
Handle
1
Fold adjustable handle
(if applicable).
CORRECT
Sliding
Lock
Pull up sliding lock on both
sides of heel rest.
2
REMOVING REAR WHEELS
De-press quick release clip
and slide wheel off axle.
BRAKE
brake
lever
brake
lever
T o apply brak e, push brak e
lever completely down.
To release brake, lift brake
lever completely up.
WARNING: PUT ON THE BRAKE
WHENEVER YOU PARK THE
STROLLER/PRAM. ENSURE THE
BRAKE IS ON WHEN LOADING AND
UNLOADING CHILDREN.
3
Lift at heel rest so the handle
bar end goes down.
NOTE: Sliding lock on the left side has a secondary
safety catch.
Fully folded. For an even
fl atter fold, remove wheels
(see wheel removal).
4
WARNING: MAKE SURE CHILDREN
ARE CLEAR OF ANY MOVING P ARTS
WHEN FOLDING OR ERECTING
THE STROLLER.
SAFETY WRIST STRAP
wrist
strap
Care should be taken if the str oller is
used on stairs, escalators, down hills
or in strong winds.
Hold the safety wrist strap fi rmly in
all these situations.
Regularly check that the wrist strap
is securely attached to the stroller
handlebar and stitching is secure and
strong.
5
 Loading...