

Mountain Buggy Everest Single, Everest Single Pram, Everest Twin Pram User Manual
1
ABC Adventure Buggy Company
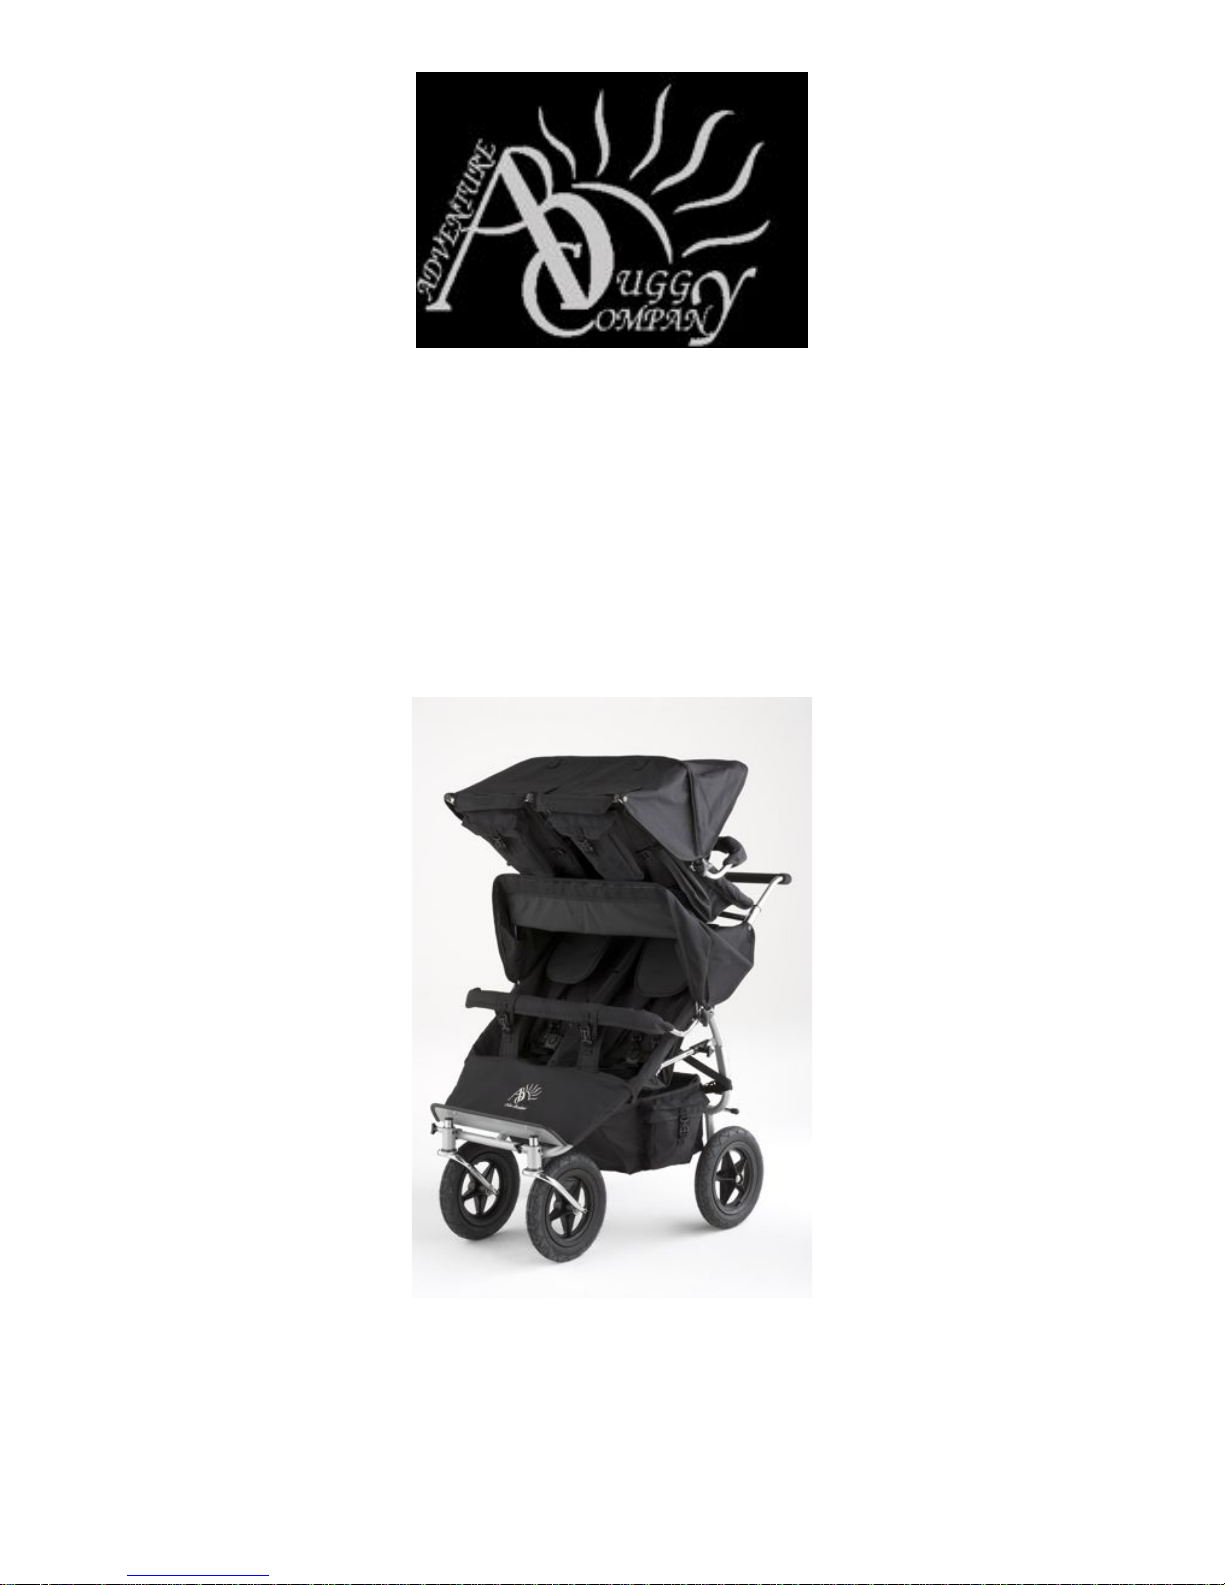
Everest Model Single/Twin Pram
Instructions for Correct Use
Read these instructions carefully before use and keep for future
reference.
Your child’s safety may be affected if you do not follow these
instructions.
2
SAFETY INSTRUCTIONS
WARNING: Never leave your child unattended
WARNING: Avoid serious injury from falling or
sliding out by using the harness at all times. Always use the
crotch strap in combination with the waist belt
WARNING: A CHILDS SAFETY IS YOUR RESPONSIBILITY
WARNING: FOLLOW THE MANUFACTURERS INSTRUCTIONS
WARNING: DO NOT CARRY EXTRA CHILDREN OR BAGS ON THIS PRAM
WARNING: MAKE SURE CHILDREN ARE CLEAR OF ANY MOVING PARTS
WHEN ADJUSTING THIS STROLLER/PRAM, OTHERWISE THEY MAY BE
SERIOUSLY INJURED.
For all models, the seat is suitable for newborn up to 4 years old (maximum of 35kg/77lb).
For use with a newborn (0-6 months) the seat should be reclined fully. It is recommended
that a newborn headrest or similar is used for babies 0-3 months.
Overloading, incorrect folding and the non-approved accessories may damage or break
this stroller. This stroller is designed for one child in each seat.
WARNING: Any load attached to the handle affects the stability of the stroller.
To prevent the stroller from becoming unstable, do not place parcels or accessory items
anywhere except in the storage basket and pockets provided.
Maximum seat loading capacity for Twin Buggy is 35kg per seat - Single Buggy is 45kg.
Maximum loading for the storage basket is 5kgs.
Maximum loading for the pocket is 300gms (i.e. small items such as keys, wallets etc.)
Excessive weight may cause a hazardous unstable condition to exist. Do not use near an
open fire or exposed flame.
Cover the stroller if exposed to direct sunlight through glass to avoid any fading to fabric.
REMOVE PLASTIC WRAPPINGS AND DISCARD TO AVOID CHILD FROM SUFFOCATING

3
ASSEMBLY INSTRUCTIONS
ATTACHING THE WHEELS
Rear Wheels: Depress the spring button-springs on the axles of the two rear wheels and push
into the openings situated at the end of the buggy frame (when folded these are situated at the
front of the buggy beside the footplate). When the wheel has been firmly placed the button-spring
will spring back preventing the wheel from involuntarily pulling away the frame.
Note: If a spring-button should stick, exert light pressure and it will “pop” up.
Front swivel wheel – the same process as for the rear wheels. However, before inserting front
wheel, withdraw the tri-knob and rotate the locking pin vertically so that it rests on the boss of the
locking chamber.
Insert the front wheel shaft into the opening at the front of the buggy, rotating the shaft as you
push and the wheel will become secure into position.
Important:
Check that all the spring buttons located on the 3/4 wheels are “popped”
out before using your buggy
FIXING THE SWIVEL FRONT WHEELS
Align the front wheel so that it sits directly under the footplate and is pointing directly ahead.
Rotate the black tri-knob at the front swivel chamber so that the pin locks into the notch which
secures the swivel wheel.
ASSEMBLING THE BUGGY INTO AN UPRIGHT POSITION
Simply lift the buggy by the handle and pull the rear frame backwards. You may need to use your
foot to assist with pulling the frame back. The frame will lock automatically with an audible “click”.
The rear wheels and frame will fall into position without manual assistance.
SAFETY LOCKING DEVICES (PRIMARY AND SECONDARY)
The Everest Twin buggy has 2 sliding braces, which operate on either side of the buggy. The
Everest Twin buggy has 3 locking devices;
1) When the buggy is opened out into the working position, the Buggy’s locking device on the
RHS and LHS lock automatically.
2) The secondary lock is situated at the rear of the automatic lock, on the right hand side (RHS)
of the buggy (standing behind the buggy). To securely activate the lock, push the lock down into
place, fitting over the rear of the sliding brace lock, so that the brace cannot move backwards.

4
ASSEMBLING THE BUMPER/SAFETY BAR
1) Pivot the padded Safety bar into the horizontal position so that the bar is sitting in front of the
harnessed child.
2) Secure the padded Safety bar into position by connecting the buckles of the flap which folds
over and around the centre of the bar, between the child’s legs.
WARNING: Ensure your child is harnessed in at all times. Do not use the safety bar as a
safety mechanism to substitute for the 5-point safety harness.
FOLDING THE BUGGY
Standing in front of the Buggy, reach around the two chrome sliding arms (that joins the
frame sections) and pull out the two small black tri-knobs simultaneously. When both triknobs are released simply start to push the Buggy away from you. Move your hands to the
top of the frame and continue folding until fully collapsed.
Warning:
Once the tri-knobs are released and the Buggy has begun to fold, move hands well away
to prevent any injury occurring.
Place your hands at the top of the main frame before folding the frame completely.
To prevent possible injuries always keep your children clear when folding your Buggy.
STROLLER ADJUSTMENTS
TO FASTEN, ADJUST AND RELEASE SAFETY HARNESS
The Everest Twin buggy provides a 5-point safety harness for each child;
1) To fasten the waist strap push both buckle ends into the crotch buckle.
2) Clip the shoulder straps to the centre buckle
3) Adjust the sliding buckles so that the harness straps are a firm fit
4) To release press the centre buckle.
Remember to adjust the shoulder and waist straps as your child grows.
Baby mattresses used with this product should conform to BS 1877

APPLYING THE BRAKE
Apply upward pressure with your foot to the brake lever, situated at the rear of the buggy and
located between the rear wheels. The brake will apply firm pressure to the rear wheels and
secure immediate immobility of the buggy.
DISENGAGING THE BRAKE
Apply downward pressure with your foot to disengage the brake lever, so that the brake
returns to the disengaged position, away from the mobile action of the wheels.
BRAKE WARNING:
DO NOT ALLOW CHILDREN TO PLAY NEAR THE BUGGY BRAKE
PUT ON THE BRAKE WHENEVER YOU PARK THE STROLLER/PRAM
ENSURE THE BRAKE IS ON WHEN LOADING AND UNLOADING CHILDREN
When applying your brake keep children well clear of the buggy because injury could
occur. DO NOT use stroller if brakes are not functioning. Always wear appropriate
footwear when applying or disengaging the brake.
USEFUL INFORMATION
ADJUSTING THE HANDLE HEIGHT
The telescoping handle can be adjusted to various heights with the assistance of two
securing bolts situated under the top of the buggy frame;
1) Apply the brakes.
2) Slide the handle to your desired height and tighten both tri-knobs.
3) Do not over-tighten the securing bolts.
BABY SEAT ANGLE
The Everest seat back can be reclined to any point between upright and fully reclined
position.
1) To adjust and recline the sling simply pull on the buckles at the rear of the baby sling, to
permit the webbing straps to slide through and recline the seat.
2) To adjust and incline the sling apply even force, pull on both the webbing straps, and the
seat will incline into the upright/toddler sitting position.
 Loading...