

Motus ECG-FIT User Manual
User Manual
ENGLISH
OVERVIEW
FUNCTI ONS AND SUMMA RY
CONTENTS
OVERVIEW
Functions and summary
KEYS AND FUNCTIONS
QUICK START
Wearing the chest belt
Session start
TIME
HEART RATE MONITOR
Excercise data
User settings
Heart rate zone chart
DATA
ALARM
BATTERY
TROUBLESHOOTING
CARE & MAINTENANCE
SPECIFICATIONS
WARRANTY
3
3
4
5
5
6
7
8
9
10
11
12
13
14
15
16
17
18
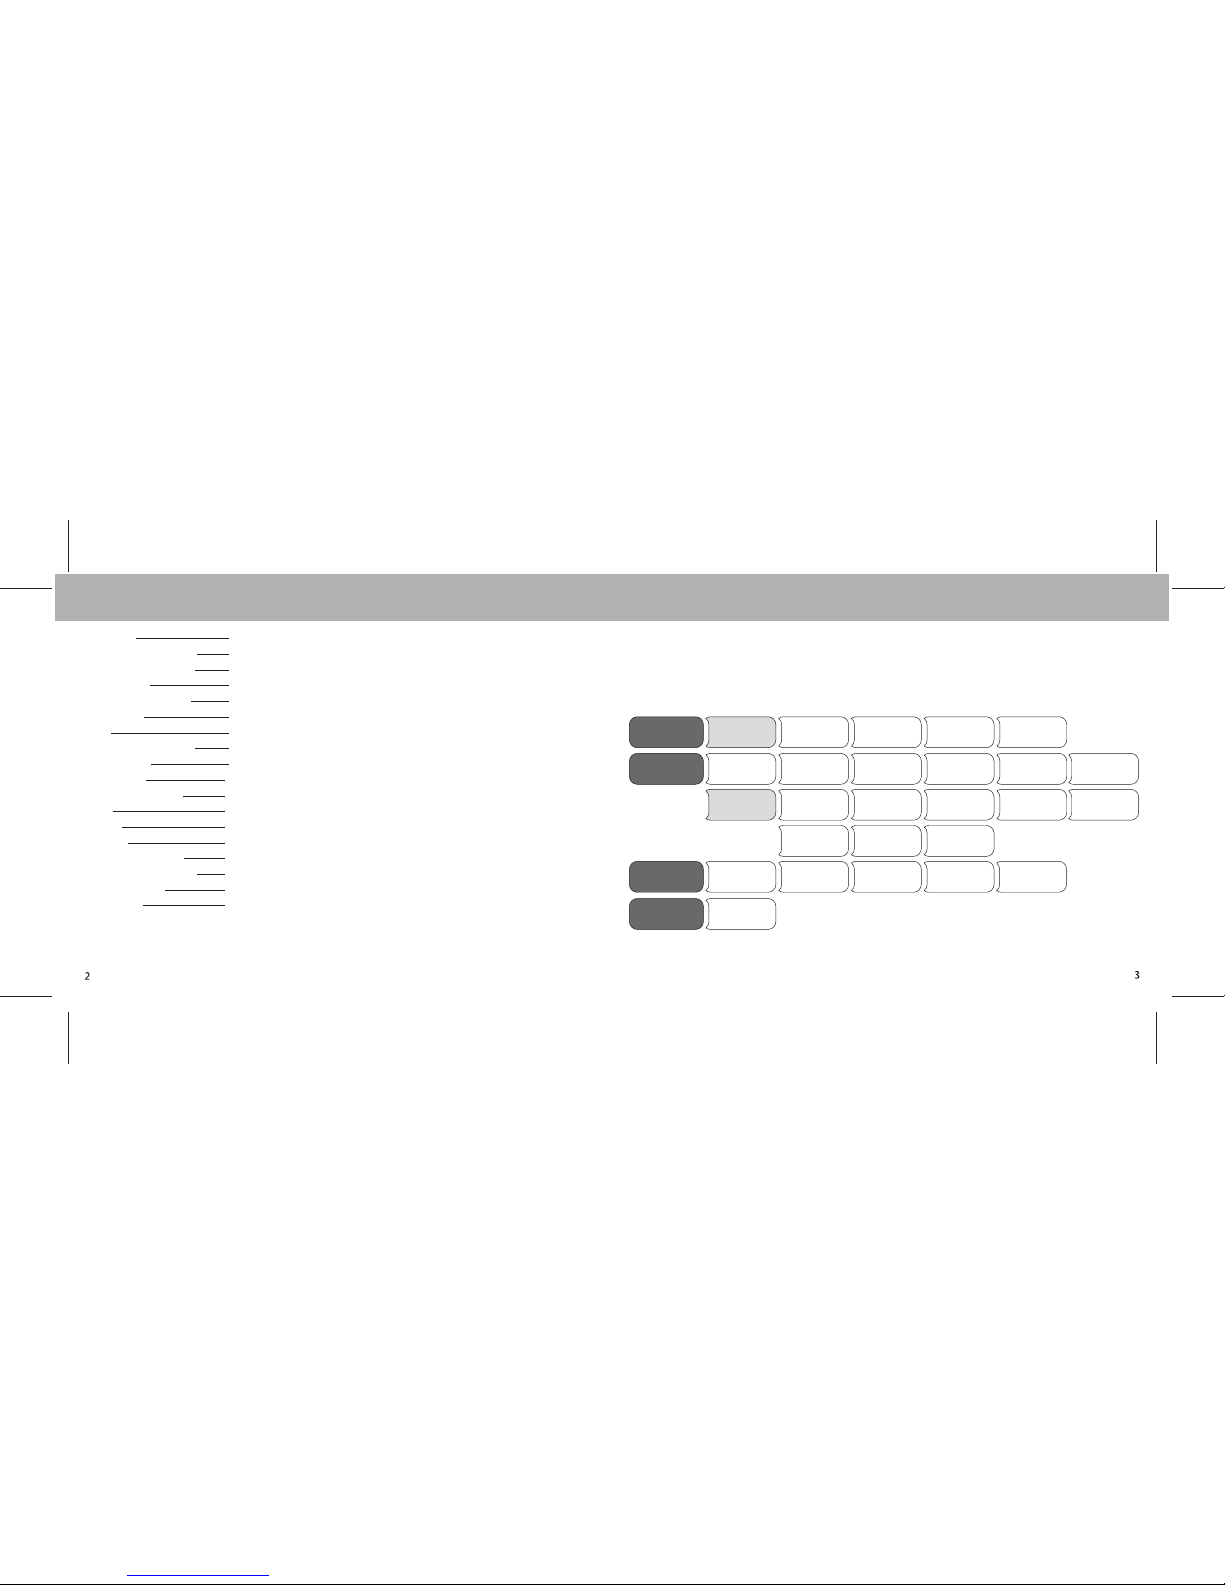
TimeAdjust
TIME Year Date
AgeAdjust Gender Upper HR
zone limit
Lower HR
zone limit
Heart rate
zone level
In zone
time
Exercise
time
ON/OFF
Calories Average
heart rate
Highest
heart rate
Unit Weight Heart rate
zone alarm
12/24 hour
format
Max heart
rate %
Excercise
time
Calories In zone
time
Highest
heart rate
Current
time
HRM
DATA
ALARM
Thanks for choosing this high-performance heart rate monitor. Your new Motus ECG-FIT is a user-friendly tness
tool to track your personal tness level. To get the most out of your heart rate monitor read this manual carefully
and keep it on hand for later reference.
We wish you an enjoyable workout with your new ECG-FIT.
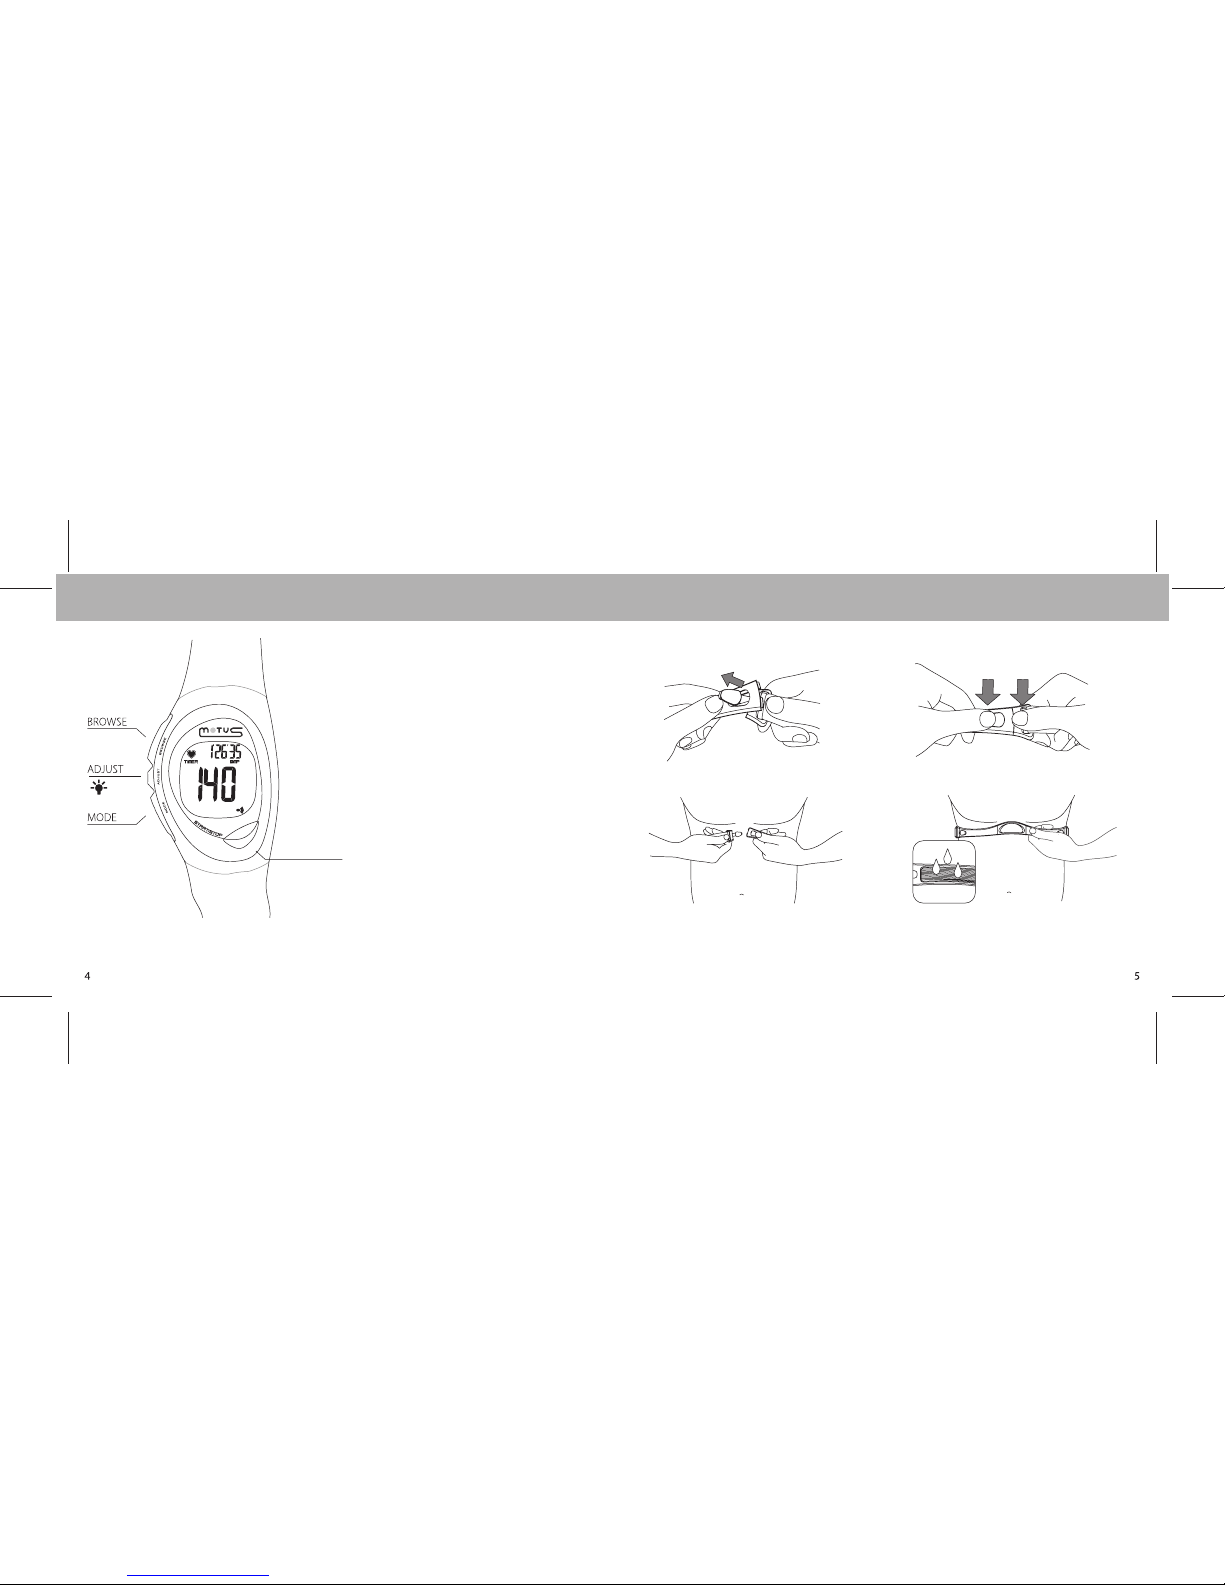
MODE
- Scroll through modes
- Advance to next variable in setting sequence
ADJUST
- Activate light
- Enter the setting sequence for each mode
- Save session data
START/STOP
- Start/Pause session
- Activate key tones
- Increase/change variables in setting sequence
BROWSE
- Decrease/change variables in setting sequence
- Browse sub modes
- Browse stored excercise data
KEYS and FUNCTIONS
QUICK START Wearing the chest belt
Follow steps from 1 to 7 to wear the chest belt and start your tra ining session.
1. Insert the tab through the slot on one side of the
chest belt.
3.
2. Press down until the tabs are xed.
4. Lift the belt slightly a nd wet both
grooved areas on the bac k to ensure strong
connection between your pulse and the
chest belt.
START / STOP *
(VIEW / RESET)
* NOTE: “START/STOP” key mentioned on this manual is indicated
on the HRM case as “VIEW/RESET”
Attach the o ther tab wearing the b elt around your
chest. Make sure t hat the che st belt is positioned in
the right direction and in contact with the skin.

QUICK START Session start
TIME Time and date setting
In TIME mode you can set Time, Date, and Hour Format. Follow steps from 1 to 5
Three ashing lines indicate that
the HRM is waiting to receive the
signal from the chest belt.
5.
Enter
HRM mode
7.
Choose exercise
data
6.
Start session
LEVEL 1 (55 - 70%)
Sustain a healthy heart and lose weight.
LEVEL 2 (70 - 80%)
Develop endurance and increase stamina.
LEVEL 3 (80 - 100%)
Sustain excellent tness condition and
increase muscle strength.
See page 10 to set Zone levels.
Decrease
variable
Increase
variable
Hold for 2 sec.
Enter TIME
mode
Exit
Select next
variable
Set
hour
Set
minutes
Set
seconds
Set
year
Set
month
Set
day
Choose 12/24
hour format
Heart Rate Zone selection
You can choose the Heart Rate Zone level
(1-2-3) before starting the training:
- Enter HRM mode and hold ADJUST for 2
seconds.
- Press MODE and reach LEVEL option.
- Select the Heart Rate Zone using BROWSE or
START/STOP.
- Press ADJUST to conrm and return to HRM
mode (step 5)
Heart Rate Zone
Percentages are referred to personal maximum
heart rate
Use BROWSE button to display Month/Date or Day/Date format.
Use START/STOP button to activate/deactivate key tones. If activated, the display will show this icon
 Loading...