

Mottura POWER 571 Maintance Manual
POWER 571
Manuale di istruzione, uso e manutenzione
Instruction and maintenance manual
Notice d’instructions, d’utilisation et d’entretien
Manual de instrucciones, uso y mantenimiento
Betriebsanleitung
Handleiding voor bediening, gebruik en onderhoud
ɂɧɫɬɪɭɤɰɢɹ ɩɨ ɩɪɢɦɟɧɟɧɢɸ. ɗɤɫɩɥɭɚɬɚɰɢɹ ɢ ɫɨɞɟɪɠɚɧɢɟ
Z 258 rev. C
MOTTURA S.p.A.
Via XXV Luglio, 1 - 10090 - San Giusto Canavese (To) - Italia
Tel. (0039) 0124.49.49.49 - Fax (0039) 0124.49.49.18
Internet: www.mottura.com
– E-mail: mottura@mottura.com
1
Contents
Introduction ........................................................................................................................................................ 1
Technical description ......................................................................................................................................... 1
Intended use ...................................................................................................................................................... 2
Conditions of use ............................................................................................................................................... 2
Important safety instructions for installation and use ........................................................................................ 2
Assembly and installation .................................................................................................................................. 2
Electrical connections ........................................................................................................................................ 3
Power 571/1 ....................................................................................................................................................... 3
Automatic limit switch setting ........................................................................................................................ 3
Setting the limit switches manually ............................................................................................................... 4
Setting intermediate stopping points ............................................................................................................. 4
Assigning an R. F. radio receiver .................................................................................................................. 5
Power 571/2 ....................................................................................................................................................... 5
Setting limit switches manually ..................................................................................................................... 5
Removing the motor .......................................................................................................................................... 6
Troubleshooting ................................................................................................................................................. 6
Technical Characteristics .................................................................................................................................. 6
Introduction
This manual is an integral part of the product and must be kept for future reference
after installation. It contains instructions for the correct installation and use of the
system.
Follow these instructions carefully to prevent injury to people and damage to property.
The Power 571 system for motor-driven draped curtains is designed for indoor use.
The Mottura S.p.A. Quality System is certified under UNI EN ISO 9001:2008 by certification authority
DNV, and guarantees the manufacturing process control.
Technical description
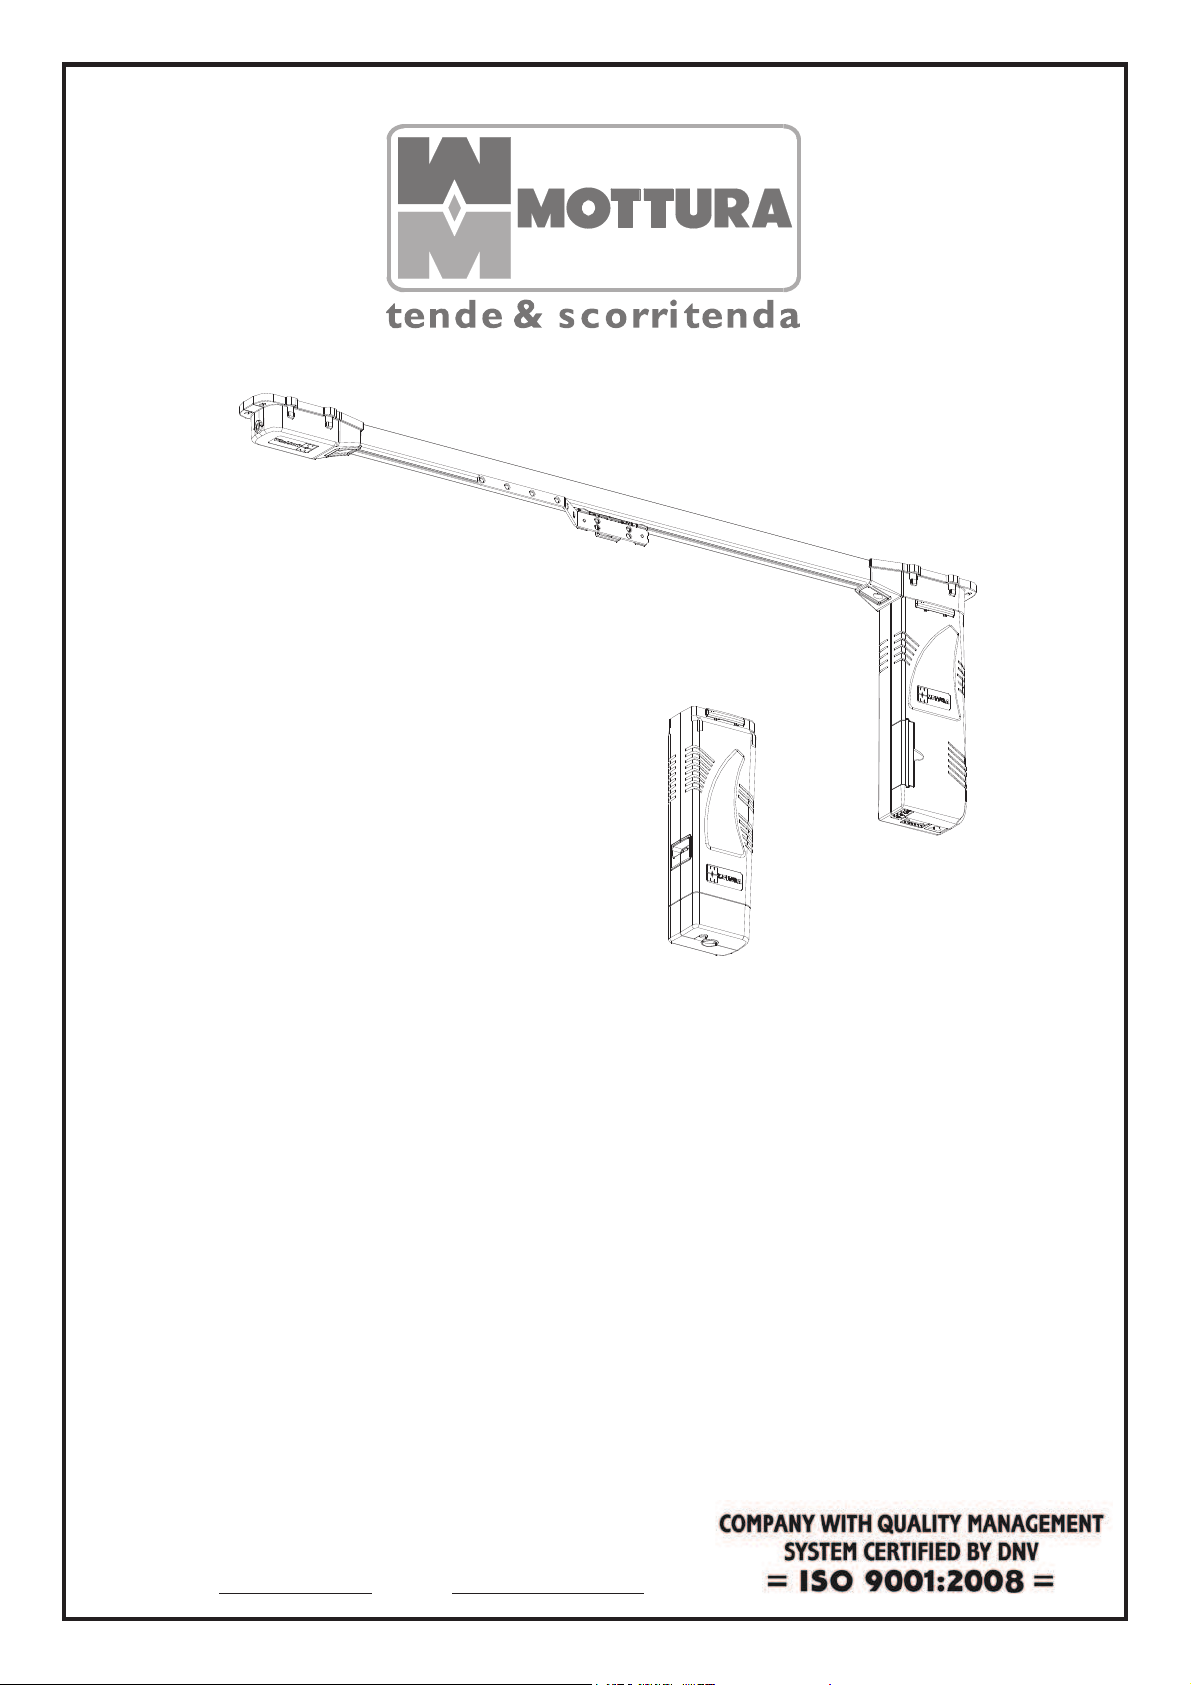
The Power 571 is an electromechanical system whose mechanical part consists of:
¾ 6060 T6 UNI 8278 extruded aluminium alloy
¾ polyurethane drive belt with steel strands and antifriction coating
¾ thermoplastic motor pulley with steel weight-bearing structure
¾ thermoplastic transmission pulley with steel weight-bearing structure and drive belt tensioning
device
¾ toothed pulleys on ball bearings for the drive belt loop
¾ slides on ball bearings to support and translate the fabric
The Power 571/1 is operated by a 24 Vdc gear motor with encoder, controlled by a circuit board
equipped with switching power supply, control logic and integrated two-way R. F. receiver.
The Power 571/2 is operated by a 230 Vac, 50 Hz gear motor (on request 110 Vac, 60 Hz) with
electromechanical limit switch.
English
8

2
Intended use
The Power 571 system is designed for internal use in homes, businesses, and public buildings as a
protection against solar radiation. It is designed for horizontal installation only. Therefore, any other use is
considered as not conforming to technical specifications, and in such cases the manufacturer will not be
liable for any malfunction, injury to people, or damage to property.
Conditions of use
The Power 571 system motor group is not suitable for use in rooms with risk of explosion and in
situations requiring a protection level higher than IP30.
For correct operation, the Power 571 system requires an adequate power supply
(Power 571/1 = tension 110 - 230 Vac and frequency 50 - 60 Hz; Power 571/2 = tension 230 Vac and
frequency 50 Hz; see “Electrical connections” section), a structure that is strong enough to support the weight
of the system and the stress to which it is subjected and room temperature between + 10° C and + 50° C.
Important safety instructions for installation and use
The installation and electrical connections must only be carried out by qualified technicians, with
suitable equipment and under safety conditions, following the instructions given in this manual.
The system must be installed so that the motor unit is at a minimum height of 2.5 m above ground (or
from the nearest access surface).
The button that operates the system must be installed outside operating area, at a minimum height of
1.5 m above ground (or from the nearest access surface) and within sight of the system.
All routine or extraordinary maintenance must be performed solely by qualified technicians after
disconnecting the system from the electrical power supply.
If any work needs to be done occupying the system operating space (e.g. cleaning glass, removing
fabric, etc.) prevent all possible activation of the system operating devices or disconnect the system from the
electrical power supply.
Only original parts must be used if any parts need to be replaced. Any use of non-original parts and
any adaptation or tampering will relieve Mottura S.p.A. of all liability for injury to persons or damage to
property.
Do not let children play with the operating devices. Keep the devices out of their reach.
Make periodic checks of all mechanical and electrical parts. Take steps to prevent the system from
being used if maintenance has to be done.
During normal system use, monitor its movement. Prevent anyone from entering the system operating
space until it is completely stopped.
Assembly and installation
Attachments “A” – “B” – “C” – “D” provide instructions for correct assembly and installation of the
Power 571 system.
To fasten the supports, use anchors or screws suitable for the type of structure
on which the system will be installed.
Make certain that the structure is adequately sized for the weight of the system.
Note: given the possible difficulties with precise adjustment of the Power 571/2 limit switch, the manual
procedure for setting the limit switches can be carried out “on the workbench” before installing the system.
English
9
3
Electrical connections
Attachments “E” – “F” provide instructions for correct connection of the Power 571/1 system with the
“2+3 wires” method (power supply and controls in separate systems). In this case, you can create single and
simultaneous controls via wire.
Attachment “G” provide instructions for correct connection of the Power 571/2 system with the
“3 wires” method (power supply and controls in the same system).
Note: two or more Power 571/2 cannot be connected to the same button.
Power 571/1
The motor group on the Power 571/1 system is factory set. Before it can be used, the limit stop setting
procedure has to be run (when switched on, LEDs 1 and 2 on the motor control panel start flashing).
During the limit switch setting procedure the motor rotation speed is lower than
the nominal value.
Since no limits stops are set, pay attention to the position that the system
reaches.
Any impact or sticking may permanently damage the system.
Periodically check that the limit stops are in the correct position.
1. Engage the motor shaft (see attachment “B”)
2. Attach the motor group to the motor pulley (see attachment “C”)
3. Install the fabric on the slides (recommended)
4. Connect the motor group to the electrical grid and to the drive devices (see attachments “E” - “F”)
Automatic limit switch setting
The movement commands can be given by wire or via radio.
1. LEDs “1” and “2” flash at the same time
2. Give a movement command (by wire or via radio)
3. The system opens until it forces slightly to find the “Fully Open” limit switch position
4. The system closes until it forces slightly to find the “Fully Closed” limit switch position
5. After a few seconds LEDs “1” and “2” flash once in synchronisation, to indicate that the
automatic limit switch setting procedure has completed successfully
Note: if any command is given (either by wire or via radio) during the automatic limit switch setting
procedure, this is interrupted and no settings are memorised. To set the limit switch it will then be necessary
to repeat the procedure from point “1”.
During normal operation, the system stops a short distance before the “Fully Open” limit switch
(approx. 5% of the overall length) in order to protect the fabric and the mechanical parts.
Safety rules
¾ The motor must be connected to the electrical grid, to the drive devices, and to
any outside units by trained personnel only.
¾ DO NOT work on the motor when it is powered. Before doing any work,
disconnect the system from the electrical grid in such a way that it stays
disconnected until all work is finished.
English
10

4
If it is found necessary to reverse the positions of the “Fully Open” and “Fully Closed” limit switches,
proceeds as follows.
1. Press the RESET button and, within 5 seconds, press simultaneously buttons 1 and 2.
2. After 5 seconds a double flash of the RESET, 1 and 2 Leds will signal that reversal has taken
place.
Setting the limit switches manually
If for any reason it is not possible to complete the automatic limit switch setting procedure or if you
wish to set different stopping positions to those set automatically, then the manual limit switch setting
procedure can be performed (see attachment “H” fig. “2H”).
The movement commands can be given from the motor keypad or by wire. The radio receiver is
inactive during the limit stop setting procedure.
1. Leds “1” and “2” flash simultaneously
2. Keep the RESET button pressed for 5 seconds
3. LED “1” lights up
4. Run the motor with the start button or with buttons “1” and “2” on the motor control panel until it
reaches the setting point for the first limit stop
5. Press the RESET button or the stop button (art. 5361)
6. LED “1” goes out and LED 2 lights up
7. Run the motor with the start button or with buttons “1” and “2” on the motor control panel until it
reaches the setting point for the second limit stop
8. Press the RESET button or the stop button (art. 5361)
9. LED “2” goes out
10. After a few seconds, LEDs “1” and “2” will flash together once to indicate that the setting
procedure has ended successfully
The motor control electronics will maintain the previous settings if a blackout occurs during the limit
stop setting procedure. Therefore, if you want to abort the limit stop setting procedure, just switch off the
power to reset the previously saved data.
Setting intermediate stopping points
After the limit stops have been set, you can also set up to two intermediate stopping points (see
attachment “I”).
1. Run the system until reaching the position for the first intermediate stopping point
2. Press button “1” on the motor control panel for 5 seconds
3. The corresponding LED will flash to indicate that the control has been received
If you want to set a second intermediate stopping point (not mandatory)
4. Activate the system up to the position where you wish to set the second intermediate stopping
point
5. Press button “2” on the motor control panel for 5 seconds
6. The corresponding LED will flash to indicate that the control has been received
If the intermediate stopping points are set, when the system is run it will reach the first stopping point
in sequence. If you want to open or close the curtain completely, the control (whether from the button or from
the radio control) must be held for 4 seconds (the “RESET” Led on the motor control panel goes out for a
fraction of a second to signal that the command has been received).
By following the above-described procedure, you can change the intermediate stopping points at any
time without having to change the limit stops. To eliminate the intermediate stopping points, simultaneously
press buttons “1” and “2” on the motor control panel for 4 seconds (the corresponding LEDs will flash once to
indicate that the intermediate stopping points have been cancelled).
English
11
 Loading...